HTML5, 20 Lessons to Successful Web Development (2015)
PART I Basic HTML
LESSON 5 Creating Lists and Tables

To view the accompanying video for this lesson, please visit mhprofessional.com/nixonhtml5/.
By now you should be really appreciating the power of HTML, and we’ve only covered a subsection of HTML 4.01, but bear with me if you are new to HTML, because you need this background in order to prepare you for all the goodies that have been added in HTML5.
And even if you are experienced with HTML, it may still be a good idea to continue browsing through these early lessons to give yourself a quick refresher on the subject.
Building Lists
HTML supports a wide variety of different list types, including bulleted, numbered, and definition lists. Numbered lists are known as ordered lists, and list items can be denoted with letters of the alphabet or roman numerals as well as with numbers, and bulleted lists can use squares, or filled or outlined circles.
Figure 5-1 shows every possible type of list, all on a single web page, including both the upper- and lowercase forms that are available.
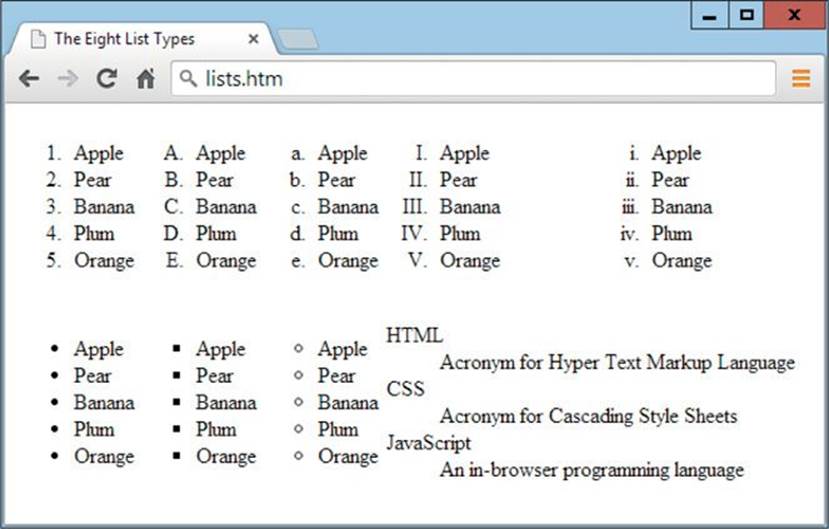
FIGURE 5-1 The eight different HTML list types
A typical ordered list can be created with HTML, such as the following:

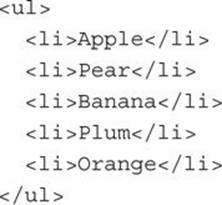
As you can see, lists are a little more complex than the tags we’ve used so far because they consist of more than one tag. To start with there are the enclosing <ol> and </ol> tags, which indicate that the content between the tags is a list. Then each item of the list is itself enclosed in <li>and </li> tags. The preceding example displays as the first list in row one of Figure 5-1.
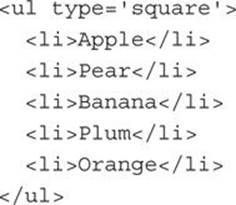
An unordered (or bulleted list) using the default of filled circles could be created like this (which displays as the first list in row two of Figure 5-1):
Lists may also contain sublists (and so on), like this:
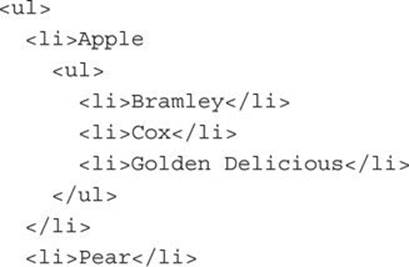
In this example the sublist of Bramley, Cox, and Golden Delicious will appear with an open circle symbol. This is because the default order of rotation between bullets is filled circle (the outer list level), open circle, filled square, and then back to filled circle, and so on. In HTML these three shapes are referred to using the values disc, circle, and square.
Overriding the Defaults
You can obtain greater control over your lists by overriding the default values and specifying values of your own, out of the following attributes:
• start By default ordered lists start with the number 1 and each additional item in the list is prefaced by the next number in sequence, but you can choose any other starting value, both positive and negative, or zero. This attribute is not used by unordered lists, which always display the same character before each item.
• type Ordered lists preface digits before each list item by default, but you can change this behavior to displaying upper- or lowercase letters, or upper- or lowercase roman numerals by giving this attribute a value of one of the following: 1, A, a, I, or i, respectively. Unordered lists require any of three words as values for this attribute, out of disc, square, and circle, the default being the same as specifying disc. The type attribute for <ul> lists (but not for <ol> lists) is obsolete in HTML5.
So, for example, to use the square bullet (in place of the default disc) in a list, you can use HTML such as this (which displays as the second list in the bottom row of Figure 5-1):
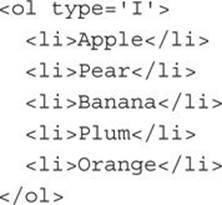
Or, for example, to use uppercase roman numerals, you could use code such as this (which displays as the fourth list in the top row of Figure 5-1):
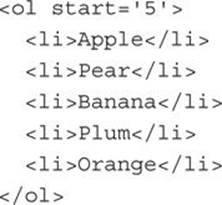
Or, to begin an ordered list at a specified number, you could use code like this (which will commence numbering from the digit 5, instead of 1):
Definition Lists
HTML also supports another kind of list known as a definition list. This type of list is used in places where it is not appropriate to use either ordered or bulleted lists, for example, when giving definitions of words, which look better if the word being defined is used as the bullet.
In definition lists the first part of each list element is referred to as the term, and the second as the definition, which gives rise to the HTML tags of <dl> and </dl> for enclosing a definition list, <dt> and </dt> for denoting a term, and <dd> and </dd> for denoting the term’s definition, as shown in the following example:
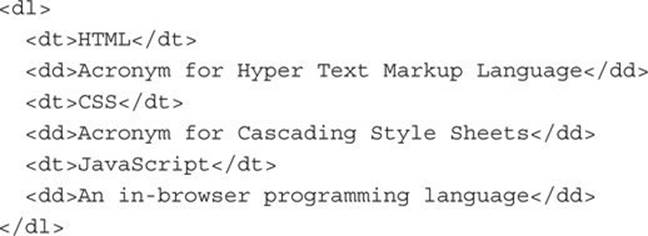
This HTML will display as follows:
Creating Tables
HTML tables are great for presenting tabular data in a clear and concise way and have also been used for many years as an aid to layout, even though there are more efficient ways of creating good layouts using CSS. However, for knocking together a quick and dirty example, or for laying out rows and columns of data, tables are great.
You create a table using the <table> and </table> tags, which support the following attributes:
• align This attribute supports values of left, right, or center to align the table according to the surrounding text, although the attribute is now deprecated and use of CSS is recommended instead.
• bgcolor Using this attribute you can set the background color of a table. However, CSS is recommended for this as the attribute is now deprecated.
• border With this attribute you can specify a border around the table of 0 or any positive number of pixels.
• bordercolor With this attribute you can specify the color of the border using standard color names or hexadecimal number values.
• cellpadding This attribute specifies the number of pixels space between cell walls and their content, which can be a value of 0 or any higher number.
• cellspacing This attribute specifies the number of pixels space between cells and the outer table border, which can be a value of 0 or any higher number.
• height and / or width With these attributes you can specify the width and height of a table. When these attributes are unspecified, the browser will resize the table to the best fit for its contents.

In HTML5 all of these attributes are obsolete, and should be avoided in new documents—use CSS instead.
For example, the following HTML creates a table that is 450 pixels wide, 200 pixels deep, has a 1-pixel border, 5 pixels of padding inside each cell, 5 pixels of spacing outside the cells, and a background color of cyan:

Table Rows and Columns
Within each table there must be at least one row and one column. These are created using the <tr> (for table row) and <td> (for table data) tags. In the following example, two rows of three columns each are created:
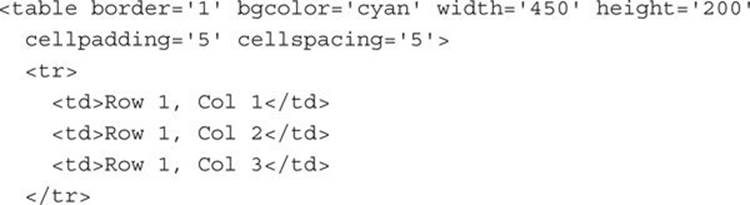
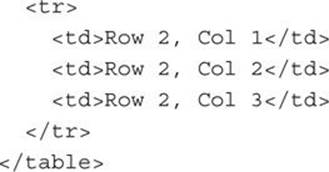
The <tr> and </tr> tags are used twice for the two rows, while there are six instances of <td> and </td> for the six cells (two rows of three). Both these types of tags also accept the bgcolor, height, and width attributes that <table> itself does (with the exceptions noted below).
The <tr> tag accepts bgcolor in HTML4, but not height and width, while the <td> tag accepts all three attributes (but only in HTML4).
Therefore, the following HTML creates the same table but sets the top row of the table to green and the bottom to yellow. It also sets the first column width to exactly 200 pixels and then the remaining two columns to 25 percent each (by using the % symbol) of whatever width remains (in this case 250 pixels, leaving 125 pixels each), as shown in Figure 5-2.
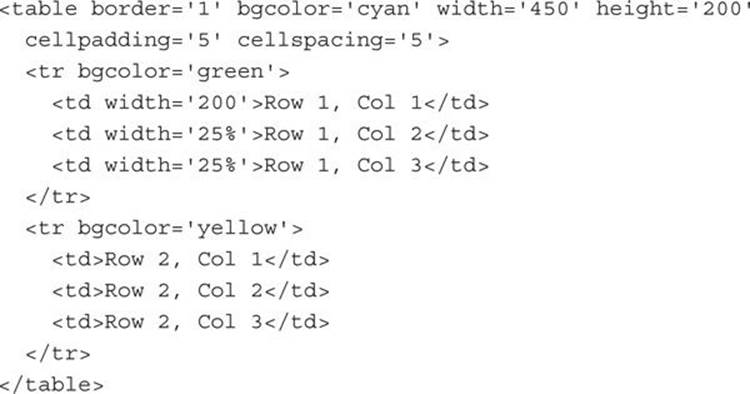
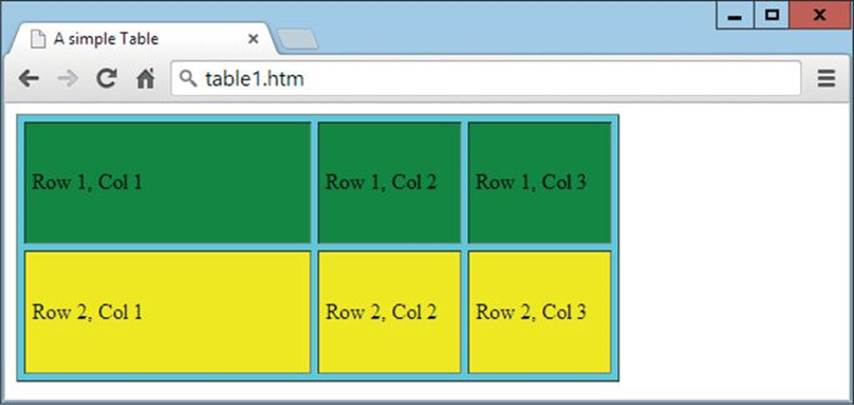
FIGURE 5-2 A simple table with two rows and three columns
Because the widths have already been specified in the first row, there is no need to do so again for the second.
If you want the top row of your table to be a header, you can use CSS styling or HTML tags to format the headings in bold and otherwise change them, or you can use the <th> and </th> tags (for table heading), in a similar fashion to the <td> and </td> tags, like this:

As you can see from Figure 5-3 (in which this additional HTML has been inserted before the green and yellow rows), the use of these tags is identical to <td> and </td>, with the only exception being in the way the cell content is displayed; it is bold and centered.
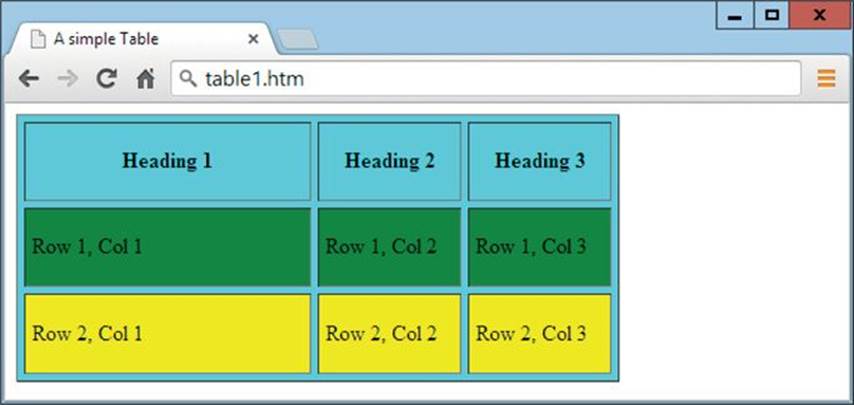
FIGURE 5-3 A heading row of cells has been added to the table.
To further enhance the way tables display, you can also use the <caption> tag to properly caption them. So let’s bring this tag and all the others together into a real-world example of a useful table, as shown in Figure 5-4, which was created with the following HTML from data at wikipedia.org:
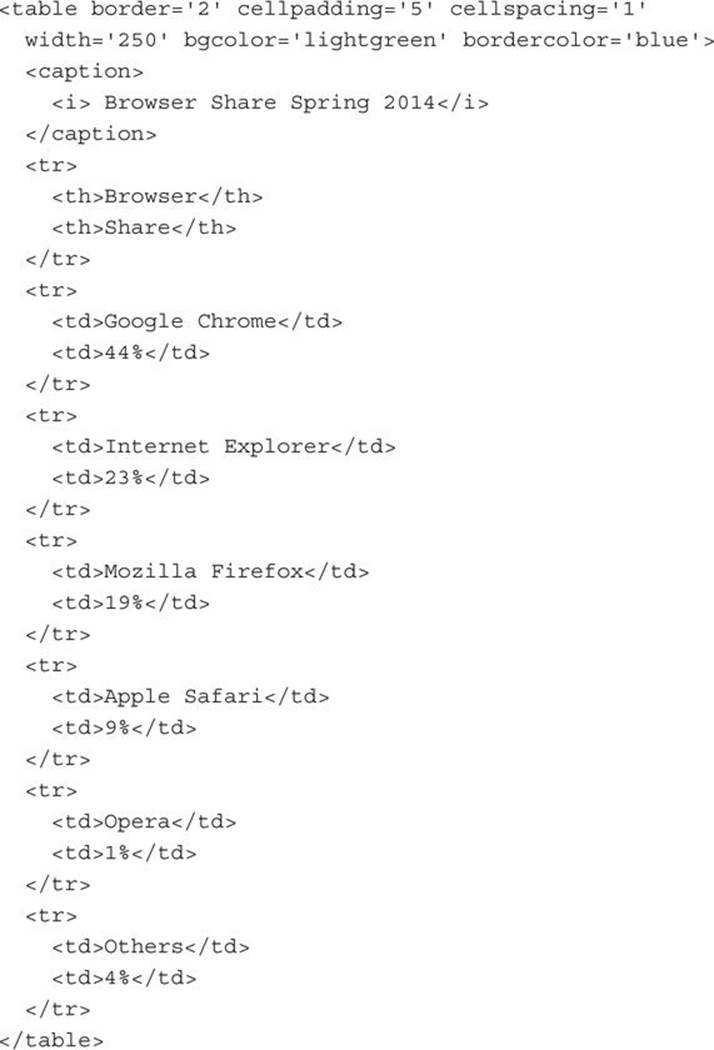
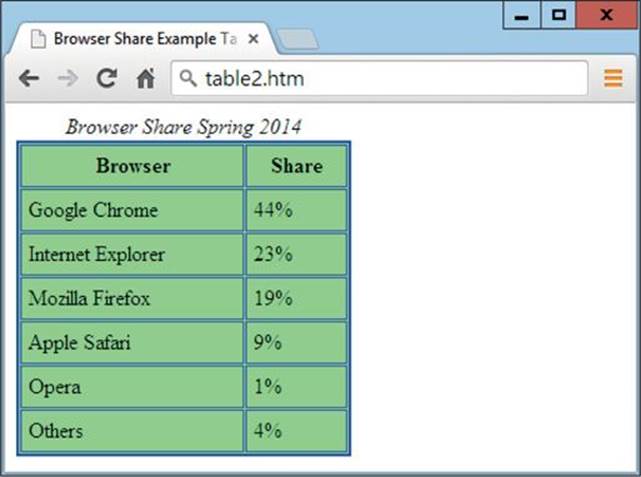
FIGURE 5-4 A table detailing browser market share for March 2014
Extending Rows and Columns
With HTML tables, you are not limited to a fixed number of rows and columns because you can make some cells extend over more than one column and/or more than one row using the colspan and rowspan attributes. For example, in the following very simple table, the numbers 1 through 10 are displayed in a table of three rows by four columns, as shown in Figure 5-5. This means that there are two extra cells that are not used and which are therefore merged into one and grayed out:
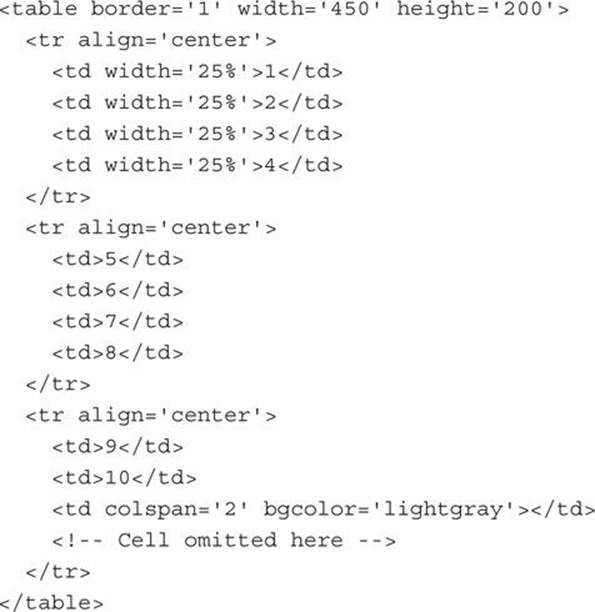
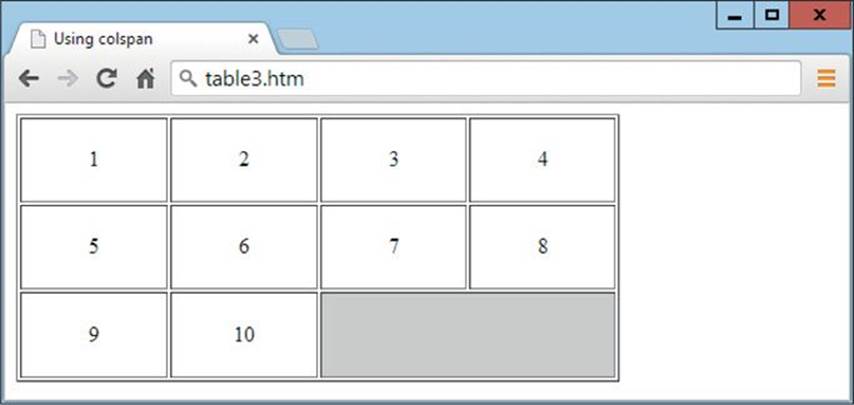
FIGURE 5-5 Two cells have been merged using the colspan attribute.
I have employed a few other interesting features in this table including setting its width to 450 pixels and the width of each column to 25 percent of that, the height of the table to 200 pixels, and using the align attribute with a value of center to center the contents of each table row. I have also used comment tags to show where the omitted cell would have been.
Because the third cell on the third row is now two cells wide, there is no fourth cell to define in that row, and so none is defined.
You can also extend a cell over two rows, as in the following example, which is modified from the previous one using the rowspan attribute (the result of which is shown in Figure 5-6):
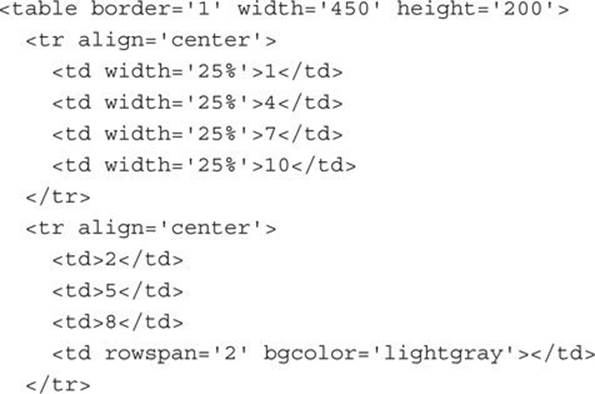
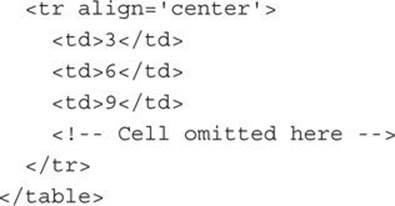
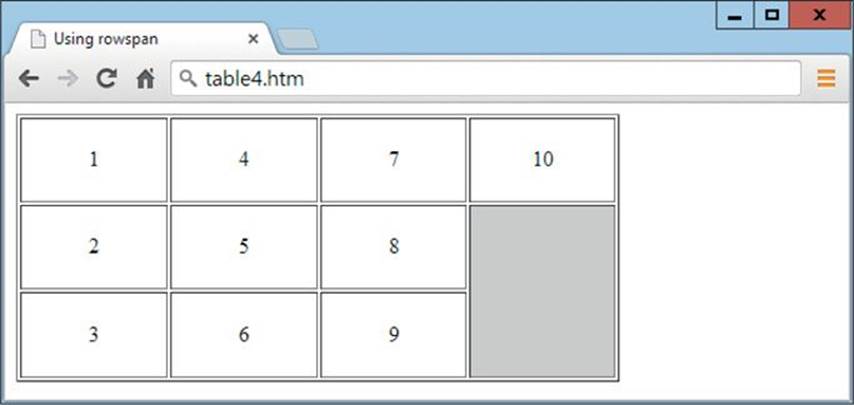
FIGURE 5-6 Two cells have been merged using the rowspan attribute.
Because the fourth cell on the second row is now two cells deep, there is no fourth cell to define in the bottom row and so, again, the final cell is not defined.
Following is an example of a table that’s four rows by four columns that could be used as the basis for a simple board game. It combines both the rowspan and colspan attributes by displaying the numbers 1 through 12 clockwise in small cells, around a larger central cell of double width and height, as shown in Figure 5-7:
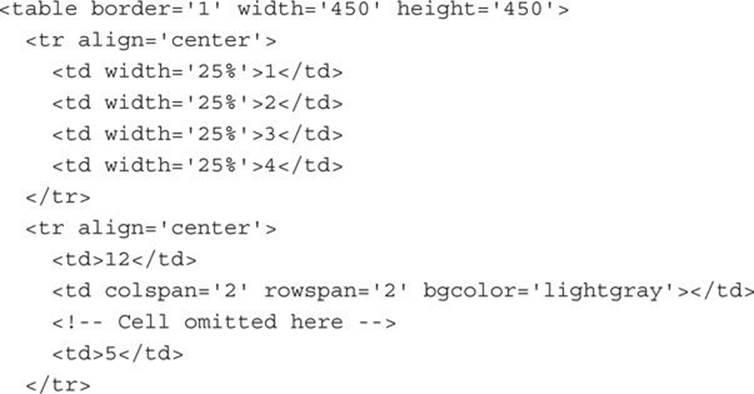
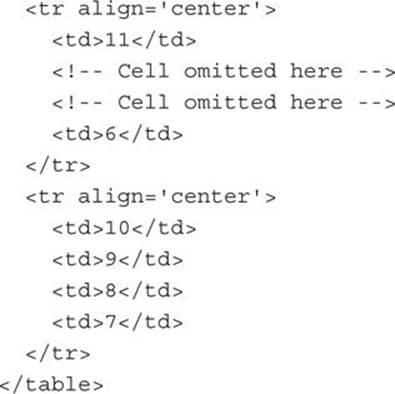
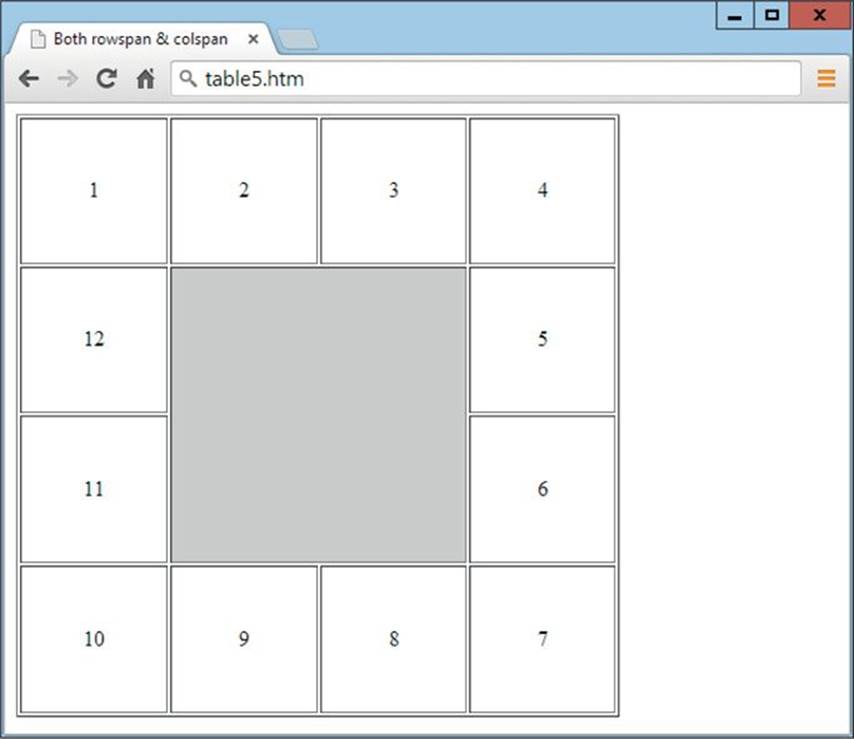
FIGURE 5-7 The four central cells have been merged using rowspan and colspan.
Summary
Now that you have lists and tables added to your HTML toolkit, you have the ability to really make your web pages stand out. In the next lesson I will show you how to add interactivity to your pages using hyperlinks, forms, and frames.
Self-Test Questions
Test how much you have learned in this lesson with these questions. If you don’t know an answer, go back and reread the relevant section until your knowledge is complete. You can find the answers in the appendix.
1. Which HTML tag do you use to begin an ordered list?
2. What tag is used to denote a list item?
3. How do you specify an unordered list in HTML?
4. How can you change the start value of an ordered list?
5. How can you change the bullet type of an unordered list or the case of an alphabetic or roman ordered list?
6. Which three tags are used by definition lists?
7. Which tag is used to create an HTML table?
8. What tags are used for table rows, table cells, and table headings?
9. How can you add a caption to an HTML table?
10. Which two attributes allow cells to spread out over more than one row or column?