HTML5, JavaScript and jQuery (Programmer to Programmer) - 2015
Part I HTML and CSS
1. Lesson 1: Introduction to HTML5
2. Lesson 2: Basic HTML
3. Lesson 3: Lists and Tables
4. Lesson 4: Introduction to CSS
5. Lesson 5: Structuring Pages with CSS
6. Lesson 6: HTML Forms
7. Lesson 7: Semantic Tags
8. Lesson 8: HTML5 Validation
9. Lesson 9: Drag and Drop
10.Lesson 10: Dynamic Elements
Lesson 1 Introduction to HTML5
This lesson is an introduction to the HTML5 markup language. The HTML5 markup language is a language for structuring and expressing the content of a web page in a manner that can be consistently interpreted by a web browser.
If you are already familiar with HTML, much of this chapter will look very familiar. It is still important that you read through this lesson, however, because there are a number of important changes in HTML5, and many of these are very subtle.
If you are not familiar with HTML, or have only a passing familiarity, this lesson will provide you with the background you need to understand the basics of an HTML web page. This lesson is only an introduction, however; the material in this lesson will be enhanced in the remainder of this section.
What Is a Markup Language?
A markup language is a language for annotating a document with a set of tags. These tags are used to provide additional meaning and structure to the text of the document, or provide instructions on the manner in which it should be displayed to the reader.
For instance, a tag may state that one portion of the text is a header, while another portion is a paragraph of text. Consider the following document fragment:
<h1>This is a heading</h1>
<p>This is a paragraph of text</p>
In this example, the tags can be clearly differentiated from the content of the document by the angle brackets. The following represents the start of a heading:
<h1>
while this represents the end of the heading:
</h1>
Note
HTML defines six categories of header from h1 to h6. The lower the number, the more important the header is.
The entire h1 structure—including the start tag, the end tag, and its textual content—is referred to as an element.
The HTML5 markup language specifies the tags that can be used in an HTML document, how they should be used, and what additional information (called attributes) they can contain.
In the early days of HTML, many of the tags included in the markup language instructed the browser how to present information. For instance, tags were used to dictate font size and color.
The HTML markup language is no longer responsible for dictating the presentation of a document, and in HTML5 most of the remaining presentation tags have been removed. Presentation is now the sole preserve of another technology called Cascading Style Sheets, which will be examined later in this section.
Instead, the HTML5 markup language is responsible for conveying the meaning of the various components of the document and how they interact with other components.
Note
Browsers can still provide their own default styles for tags, however, and this is why an h1 element will appear in large, bold text.
HTML5 greatly enhances the expressiveness of earlier version of HTML, however, and allows sections of the document to be marked as, amongst other things, headers, footers, and asides.
Earlier versions of HTML were based on a technology called SGML, which is a language for expressing markup languages. As of HTML5, the HTML markup language is not based on any other technology. This has removed a number of restrictions from the language; therefore, if you are familiar with HTML, you will notice in the sections that follow that a number of the old rules no longer apply.
The Simplest HTML Page Possible
When learning any technology, it's always a good idea to start out with the simplest implementation possible. In HTML5, the simplest page you can possibly write is as follows:
<!DOCTYPE html>
hello world!!!
Open your favorite text editor, enter this text, and save the document as hello.html.
Now, open Chrome, and select Ctrl-O in Windows or -O on a Mac, navigate to the file you have just saved, and select “Open”. This should look like Figure 1.1 when loaded in the web browser.
Figure 1.1
This may not look like a web page; after all, there are no tags in the page except the strange looking tag on the first line of the document.
With the page open in Chrome, now select to open the developer tools:
· Command+Option+I on OS X
· F12 or Ctrl+Shift+I on Windows
This should open the window shown in Figure 1.2 below the web page.
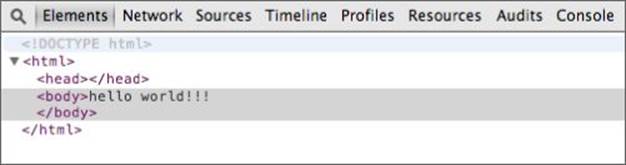
Figure 1.2
This is the web-browser's internal representation of the web page. As you can see, this has normalized the structure of the document, and does provide a set of tags nested inside one another. On the outermost level is the html element, and inside this are two elements: head and body. The content of the body element is the text you wrote in the text editor.
The document has been normalized to conform to the rules of the Document Object Model (DOM). The DOM will turn out to be enormously important throughout this book because much of the power of modern web pages comes from their ability to manipulate the DOM after the page has loaded.
The manner in which a Document Object Model should be constructed from an HTML page has been a contentious issue since HTML first appeared. Historically, different browsers would generate different models for the same HTML, and this made it very difficult to write cross-browser web pages.
In order to counteract cross-browser issues, the World Wide Web Consortium (W3C), which is the standards body behind web standards such as HTML, decided to recommend a set of standards placing the onus on the web page developer. These standards, called HTML Strict and XHTML, forced the web page developer to create a normalized web page, and therefore made it easy for web browsers to render pages consistently.
This approach did not work very well. The real power behind HTML is not the standards bodies, but the browser vendors because they ultimately decide what is a valid web page. They did not want to enforce this strictness on web pages because failing to load web pages would only serve to make their browser look deficient.
As the W3C continued on with their strict standards, a rival group called WHATWG started work on a rival standard that would eventually become HTML5. The members of this group were made up of participants from the main browser vendors, and their goals were far more pragmatic. Rather than creating a whole new set of standards, this group first looked at what browsers were already doing and, where possible, formed standards from this.
W3C eventually abandoned their efforts for strictness and joined WHATWG's efforts, and the two groups each publish a version of the HTML5 standard.
A large part of the HTML5 standard describes how browser vendors should create a normalized DOM from a non-normalized HTML document. This is why Chrome created the DOM that it did in the preceding example, and why Firefox, IE, and Safari would create exactly the same structures.
An HTML Template
In the previous section, you wrote the simplest web page you could write. In this section, you will write a web page following a basic template that is intended to represent the simplest HTML structure you should write.
I will first present the template, and then I will walk you through it line by line. Open a new document in your text editor, and save the following as template.html:
<!DOCTYPE html>
<html lang="en">
<head>
<meta charset="utf-8">
</head>
<body>
This is the body of the document.
</body>
</html>
If you open this in Chrome, and then view the DOM in the developer tools, it will look like the example in Figure 1.3.
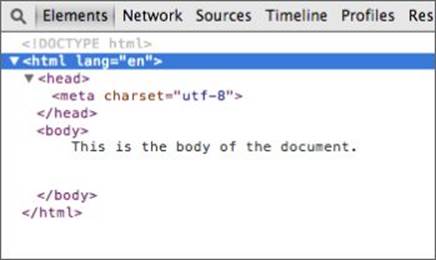
Figure 1.3
As you can see, in this case there is far closer alignment between the content you provided in the HTML file and the normalized structure generated by the browser.
Let's now walk through each line in the document and examine its purpose.
The first line in the document is as follows:
<!DOCTYPE html>
This line defines the document type of the page. Because there have been many different HTML standards over the years, the browser uses this line to understand which of these standards the page is using, and then uses the rules applicable for this standard to interpret the content of the page and render it accordingly.
This is the HTML5 document type definition, and comes as a pleasant surprise for developers who may be accustomed to copying and pasting DOCTYPE declarations such as:
<!DOCTYPE HTML PUBLIC "-//W3C//DTD HTML 4.01//EN" "http://www.w3.org/TR/html4/strict.dtd">
The other main surprise about this document type definition is that it does not include a version number: The document type is simply html.
Although the specification is referred to as HTML5, it defines a “living-standard” that will be subject to incremental change as and when browser vendors implement, and agree on, new features. Put another way, there will never be another version of HTML, but HTML will always continue to evolve.
The next line contains the opening html tag, which encapsulates the remainder of the document:
<html lang="en">
This tag contains an attribute called lang, which has been given the value en. Attributes provide a mechanism for providing extra meaning to tags. This particular attribute is stating that the language of the document is English.
Note
The ISO standard 639-1 defines the set of two-letter codes that can be used for languages. These can also be paired with a country code, for instance en-US. Country codes are defined in the ISO standard 3166.
As with many aspects of HTML5, although the specification defines the attributes and their expected values, it is up to the browser to decide what to do with this information. The browser may use this information to suggest a translation to a non-English speaker, or it may do absolutely nothing with this information.
The next element in the document is the head element. This is the section of the document where you can provide important metadata about the document, along with links to other files needed by the document. The head section never contains any visual components of the web page. In this particular case, the head contains one important piece of metadata:
<meta charset="utf-8"/>
This specifies that the character encoding of the document is UTF-8. I will not cover character encodings in this section, but the specification recommends setting this.
There is one other element that is commonly added to the head element: the title element. This is the text that the browser will display in the title bar when the web page is loaded. Therefore, add the following inside the head section:
<title>Basic template</title>
and then view the page in Chrome; the tab header will appear as follows:

Figure 1.4
Next you come to the body element. This is where all the visual elements of the page will be described. In this particular example, the body consists of a single text string, but it is this area of the document that you will enhance in the chapters ahead to create interesting web pages.
Understanding Elements and Attributes
Even though the examples you have created are very simple, you can already see that elements can be nested inside one another, and as a result, create a tree-like structure.
Every HTML document has a single top-level element, which is always the html element (the document type element is not part of the document as such).
In addition, every element in the document can have zero or more children. The html element has two children: head and body. The head element in turn has a child of its own: the meta element.
Every element in the document (except the html element) has one (and only one) parent. The parent of the head element is the html element. The parent of the meta element is the head element.
As you will see, the structure of pages will become considerably more complex, and the degrees of nesting will increase enormously. No matter how complex the pages become, however, all the elements will follow these simple rules.
You have examined how elements consist of an opening and closing tag; for instance the opening of the head tag is <head> while the closing is an identically named tag preceded by a forward slash </head>.
Some elements do not require any content: The tag and its attributes provide all the information that is required. In this case, the start and the end tag can be combined into the following construct:
<meta charset="utf-8"/>
The forward slash before the end of the tag indicates that the tag is being closed. This is the direct equivalent of the following:
<meta charset="utf-8"/>
You should always ensure that all tags are closed in the reverse order they are opened. For example, you should never write markup as follows:
<p><strong>Hello</p></strong>
In this case, the strong element is supposed to be the child of the p element, but the p element ends before the strong element.
Note
The strong tag is used to indicate that a piece of text is important. Although this is often confused with the now deprecated bold tag, it is, in fact, still a valid HTML5 tag. This tag is not considered a presentation tag because it indicates that text is important, not how this text should be styled. You may decide that strong elements are colored red rather than with a bold font.
If you add this to your template.html file before the ending body tag, and then view the normalized structure in Chrome, you will notice that the browser has rearranged these tags, as you can see in Figure 1.5.

Figure 1.5
Although the HTML5 specification does have rules for fixing up your mistakes, it is generally best not to make mistakes in the first place because the rules of the HTML5 specification may not be what you intended.
I generally find it best to write tags in lowercase. As it turns out, tag names are entirely case insensitive because they are automatically converted to lowercase in the DOM. The following is therefore valid, but should be avoided for obvious readability reasons:
<HEADER>this is a header</header>
The final feature I will cover in this lesson is attributes. You have already seen two examples of attributes, on the html tag and on the meta tag. Many other tags also support attributes, and you will examine these throughout the book.
Attributes often consist of a name/value pair. When an attribute has a value, the value can either be included in single or double quotes. The following are equivalent:
<meta charset="utf-8"/>
<meta charset='utf-8'/>
A tag can contain more than one attribute, in which case they are simply separated by white space:
<p id="firstParagraph" class="bold">
Additionally, some attributes do not have a value. These are referred to as Boolean attributes. The presence of the attribute is all that is required. For instance:
<input read-only/>
In this case, the attribute is called read-only, but the presence of the attribute is enough to indicate that the element is read-only. It is still possible to add a value to a Boolean attribute, but it has no meaning. For instance, the following input field is still read-only:
<input read-only="false"/>
Attribute names should also be written in lowercase (because this is how they will be represented in the DOM). Generally attribute names will also use hyphens if they contain more than one word.
Try It
In this Try It, you will duplicate the template html page outlined in the lesson. You may choose to skip this portion if you are familiar with HTML, but the simple act of typing code word for word enhances your understanding.
If you get stuck in this example, you can refer back to the example earlier in the lesson, or use the screencast to guide you though the process.
Lesson Requirements
You will need a text editor and a web browser.
Step-by-Step
1. Open your text editor and create a new document.
2. Add the HTML5 doctype to the document.
3. Add an html element (both the opening and closing tags) below the document type.
4. Indicate the language of the document using an attribute on the html tag.
5. Add a head element inside the html element. You will need both an opening and a closing tag.
6. Add a title inside the head element, and give the document a name. Remember that this needs to be a child of the head element.
7. Add a body element inside the html element just below the closing head tag.
8. Add a meta element to the head indicating that the charset is UTF-8.
9. Add any text you like to the body of the document. Any text that you add should be displayed back to you when you open the web page in Chrome.
10.Save the document with a .html extension.
11.Open the document in Chrome and inspect the Document Object Model in the developer tools.
When you open this in Chrome, and then open the development tools to inspect the elements, the markup should look like Figure 1.6.
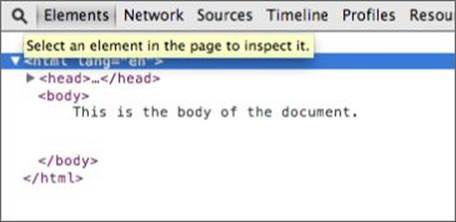
Figure 1.6
There is also a complete example in the Lesson 1 folder on the book's website called tryit.html.
Reference
Please select the video for Lesson 1 online at www.wrox.com/go/html5jsjquery24hr. You will also be able to download the code and resources for this lesson from the website.
All materials on the site are licensed Creative Commons Attribution-Sharealike 3.0 Unported CC BY-SA 3.0 & GNU Free Documentation License (GFDL)
If you are the copyright holder of any material contained on our site and intend to remove it, please contact our site administrator for approval.
© 2016-2026 All site design rights belong to S.Y.A.