HTML5, JavaScript and jQuery (Programmer to Programmer) - 2015
Part I HTML and CSS
Lesson 2 Basic HTML
This lesson provides a basic introduction to the most common HTML tags. If you are already familiar with HTML and are reading this book primarily to learn about HTML5, you could choose to skip the next two lessons, although each lesson does include material that is specific to HTML5.
In the previous lesson, you created an HTML template. In this lesson, you will start adding content to the body of this template using some of the most common HTML tags.
Structuring Text
You will begin by examining the ways you can structure text in a web page. HTML originally started life as a means of sharing research papers; thus, text formatting has always been an important part of HTML.
Begin by opening the template.html file created in the previous chapter. Replace the body of the web page, as shown in the following markup:
<!DOCTYPE html>
<html lang="en">
<head>
<meta charset="utf-8">
</head>
<body>
<h1>This is a top level heading</h1>
<h2>This is a second level heading</h2>
<h3>This is a third level heading</h3>
</body>
</html>
The body now contains three separate header elements. If you open this in Chrome, it should look like Figure 2.1.
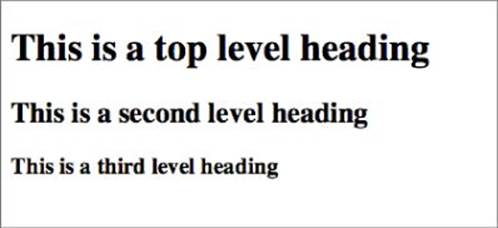
Figure 2.1
Notice that the h1 element's text is displayed in a larger font than the h2 element. As it happens, this has nothing to do with the HTML specification; this is simply the default style provided by the web browser, just as the font is the default font of the browser. InLesson 4, you will see how this can be overridden with Cascading Style Sheets (CSS).
You will also notice that each heading is displayed on a new line. This is not because the elements are placed on new lines in the HTML file; in fact, white space is mostly ignored in HTML. In order to prove this, change the h1 tag as follows:
<h1>This is a top
level heading</h1>
<h2>This is a second level heading</h2>
If you reload the web page, you will see that this change makes no difference to the way the headings display. Although a single whitespace character is displayed as a space inside an element, a sequence of whitespace characters, even if it contains new-line characters, is collapsed down to a single white space character.
HTML does provide a special character sequence, , for adding extra whitespace characters, but new lines should be created using the tags introduced shortly.
Note
The ampersand character, followed by a sequence of characters and terminated by a semicolon, indicates that this is a special character sequence.
There are a number of special character sequences in HTML. Perhaps the most common ones you will encounter are < and >, which are used for the less than (<) and greater than (>) characters respectively. These are required because the < and > characters have special meaning in HTML. In case you were wondering, nbsp stands for “non-breaking space.”
So what did generate the new lines after each heading? These appear because the elements h1 through h6 are block elements. All visual HTML elements have a display type, the most common of which are block and inline. Whenever a block element ends, the next element automatically begins on a new line.
Next, you can continue by adding some paragraphs to the body:
<p>This is the first paragraph</p>
<p>This is the second paragraph</p>
If you refresh the web page, it will look like what you see in Figure 2.2.
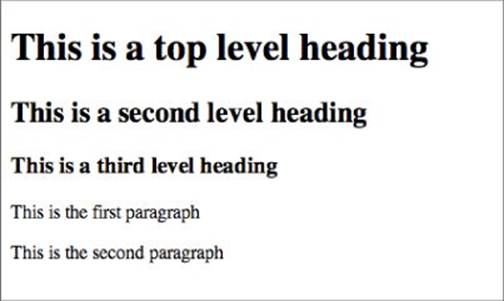
Figure 2.2
Each paragraph appears on a new line, and there is a space between each paragraph.
It is actually possible to omit the ending tag from a p tag. In fact, there are many cases where the ending tag can be omitted because the next tag in the document implies it. I usually find it easier to add the ending tag in these cases, but the specification makes this entirely optional. You will see throughout the examples that I sometimes omit the closing tag and sometimes include it.
What about XHTML?
If you are already familiar with HTML, you may be aware of XHTML, which is an XML-based version of HTML. HTML5 extends and replaces XHTML as well as HTML. In order to serialize an HTML5 page to XML, all tags must be closed, and the document as a whole must be well-formed. In addition, the html tag should be declared as follows:
<html xmlns="http://www.w3.org/1999/xhtml">
and the content type of the document should be set to application/xhtml+xml rather than text/html when it is served to the browser.
If you are not already familiar with XHTML, you can ignore it for the duration of this book: It is typically only used if you have a need to process an HTML page with XML parsers and tools.
The text in a paragraph will automatically wrap if it reaches the far right side of the browser. Additionally, if the user resizes their browser, the text will automatically be adjusted: This process is referred to as a browser reflow.
Sometimes the browser will break your paragraphs in an inconvenient place, especially if it contains very large words. In order to give you more control over line breaks, HTML5 has introduced a tag called wbr that can be added anywhere inside a paragraph as a hint to the browser that this would be a good place to add a line break.
If you would like a line break within a paragraph, you can use the br tag. This is also a self-closing tag so it can be used as follows:
<p>This is a paragraph<br>that spans two lines</p>
HTML supports several other tags for encapsulating blocks of text. The final one you will look at in this section is the blockquote element, which can be used to capture quoted text, optionally with a citation:
<blockquote>Tell me and I forget. Teach me and I remember. Involve me and I learn.
<cite>Benjamin Franklin</cite>
</blockquote>
This structure is slightly more complex: The blockquote tag contains the quote, while cite, which is an optional child tag, captures the source of the quote. Figure 2.3 shows an example of this tag in Chrome.
![]()
Figure 2.3
Notice that the blockquote is indented and that the cite element displays in italics. Again, these are browser defaults rather than part of the HTML5 specification.
Finally, as your web pages become more complex, you may find cases where you would like to add comments to remind you what the markup means. Comments can be added as follows, and will not display to the user:
<!-- This is a comment -->
Links and Images
HTML pages naturally consist of far more than text. This section will introduce two of the most fundamental tags found in most web pages: hyperlinks and images.
I will assume you know what hyperlinks are: They are a mechanism for referencing another HTML document and can be clicked to allow the user to navigate to that document.
Start by creating a new page in the same folder as the page you developed in the previous section, but call this one page2.html. Add some contents to this page so that you can distinguish it when it loads.
Now, in the original HTML file, add the following paragraph:
<p>Please click <a href="page2.html">here</a> to view page 2</p>
If you reload the page, this HTML will generate the text found in Figure 2.4.
![]()
Figure 2.4
Notice that the text displayed to the user is derived from the content of the a tag, while the page that is loaded when the link is clicked can be found in the href attribute.
This particular URL is referred to as a relative URL because it does not start with a forward slash or a domain name. The browser will attempt to find page2.html in a location relative to the page currently being displayed.
If you had created page2.html in a subfolder called sub, the URL would be represented as follows:
<p>Please click <a href="sub/page2.html">here</a> to view page 2</p>
When running a website inside a web server, it is also possible to use absolute URLs. These begin with a leading / and require the full path for the file to be specified.
It is also possible to add URLs to other websites. For example:
<a href="http://www.google.com">Link to Google</a>
You will also notice that the a tag does not cause an implicit new line to be generated in the document. This is because, unlike most of the other tags you have examined, it has a display type of inline.
Hyperlinks can be surprisingly complex. As you progress through the book you will see more interesting features of hyperlinks, such as the manner in which they can encode parameters, but for now a basic understanding is sufficient.
Images can be inserted into an HTML page with the img tag. I seldom use the img tag anymore: I typically use CSS to embed images as the background of other tags because this provides greater control for positioning the image, but it is important to understand how this tag works.
You can either find an image you would like to use or download photo1.jpg from the Lesson 2 files at the book's website.
Now, add the following to the HTML page:
<p>This is a photo I took in Cambridge
<img src="photo1.jpg"
title="Cambridge, England" width="200"></p>
If you view this in Chrome, it will display in much the same way as you see in Figure 2.5.

Figure 2.5
This is the first tag you have examined with multiple attributes.
· The src attribute is used to specify the location of the file. Just like hyperlinks, this can be an absolute or a relative URL, or it can even reference an image on another website.
· The title attribute is used to specify a tooltip that will be displayed to the reader when the reader hovers over the image with her mouse cursor, and to describe the image to screen readers.
· The width attribute is used to specify the width of the image in pixels. It is also possible to specify a height, but if just width or height is specified, the image will be scaled appropriately.
Browsers support many different image types, but by far the most common are PNG, GIF, and JPEG images.
The img tag previously supported a number of other presentation-orientated attributes. These are deprecated in HTML5, and CSS properties should be used instead.
Note
When a feature is deprecated, it is still available to use, and will probably still work, but it is strongly suggested that you find an alternative because support may be removed entirely in the future.
Try It
This Try It is an opportunity to experiment with the tags that have been discussed in this lesson. You do not necessarily need to follow this lesson exactly; just try to create an interesting web page from the tags that have been introduced.
Lesson Requirements
You will need the template.html file from Lesson 1, a text editor, and a web browser.
Step-by-Step
1. Open the template.html page in your text editor.
2. Add an h1 element to the page and include some header text.
3. Add some paragraphs to the web page using the p tag, and split some paragraphs across multiple lines with the br tag.
4. Add a quote to the page along with a citation, using the blockquote and cite tags.
5. Find an image you would like to include in the page, and add it at the bottom. Make the image a fixed width, and allow the browser to determine the correct height.
6. Add a hyperlink to your page to point to another page in a subfolder of the current page.
7. Add a hyperlink to an external website such as Google.
8. Although I have not covered it, attempt to turn the image into a hyperlink so that it loads another page when it is clicked. Hint: The image will need to be a child element of the hyperlink.
My example can be found in the Lesson 2 resources on the tryit.html website.
Reference
Please select the video for Lesson 2 online at www.wrox.com/go/html5jsjquery24hr. You will also be able to download the code and resources for this lesson from the website.