HTML5, JavaScript and jQuery (Programmer to Programmer) - 2015
Part I HTML and CSS
Lesson 3 Lists and Tables
In this lesson, you will look at two important ways content can be structured in web pages: lists and tables.
Lists
Lists are common to anyone who has worked with word processing tools such as Microsoft Word: They are the bulleted and numbered lists that are used for capturing a sequence of points. HTML lists are very similar to these lists. In this section, I introduce the three types of list provided by HTML.
Unordered lists
Unordered lists are used to create the familiar set of bullet points seen in Word documents. In order to create an unordered list, a set of li elements is placed inside an ul element. li stands for “list item,” while ul stands for “unordered list.”
The following is an example:
<!DOCTYPE html>
<html lang="en">
<head>
<meta charset="utf-8">
</head>
<body>
<ul>
<li>This is the first point
<li>This is the second point
<li>This is the third point
</ul>
</body>
</html>
If you save this in an HTML file and open it in Chrome, it will display like the example in Figure 3.1.
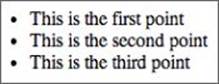
Figure 3.1
The li tag is self-closing, so I have omitted the ending tag. Obviously, this could have been included without affecting the display of the list.
Although unordered lists are simple, once they are combined with CSS, they can become very powerful. Whenever you see a horizontal list of navigation links at the top of a web page, there is a good chance that they were created from an unordered list.
Ordered Lists
Ordered lists are identical to unordered lists, except they use the ol tag rather than the ul tag. The only visual difference between the two lists is that ordered lists are numbered:
<ol>
<li>This is the first point
<li>This is the second point
<li>This is the third point
</ol>
Figure 3.2 illustrates how this displays.

Figure 3.2
Any element can be used as the content for an li tag; thus, it is possible to nest lists within lists. The following example lists an unordered list inside an ordered list:
<ol>
<li>point 1
<ul>
<li>sub point 1</li>
<li>sub point 2</li>
</ul>
</li>
<li>point 2
<ul>
<li>sub point 1</li>
<li>sub point 2</li>
</ul>
</li>
<li>point without sub points</li>
</ol>
The result of this can be seen in Figure 3.3.
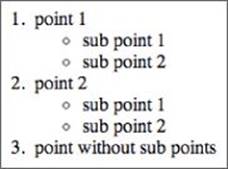
Figure 3.3
Description Lists
Description lists are probably the least used type of list. They are a type of list where each entry captures a name-value group. Each group in turn consists of one or more names, followed by one or more definitions. Consider the following list, which captures information about the drinks served by a cafe:
<dl>
<dt>Coffee</dt>
<dd>Cappuccino</dd>
<dd>Espresso</dd>
<dd>Mocha</dd>
<dt>Tea</dt>
<dd>Earl grey</dd>
<dd>Green tea</dd>
<dd>Chai tea</dd>
</dl>
This list contains two groups: coffee and tea. Each group then consists of a set of beverages relating to that group. You can see the result of this in Figure 3.4.
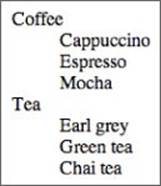
Figure 3.4
Definition lists were originally specified purely in terms of terms and definitions. The HTML5 standard broadens the suggested uses of definition lists and encourages you to think in terms of groups with names and values.
Tables
Tables are a more complex structure than lists and support the familiar notion of rows and columns.
Throughout the course of this book, you will write a web application from scratch, and this web application will utilize a table. The web application will perform basic Customer Relationship Management (CRM) capabilities; in particular, it will keep track of a set of contacts and the last date they were contacted.
In order to start this web application, create a folder somewhere on your file system called CRM. This will hold all the files needed by the web application.
Next, add a file called contacts.html to this folder, and populate it with the basic HTML5 template outlined in Lesson 1.
You will now create a table in the body of the web page for capturing the following information:
· Contact name
· Phone number
· Email address
· Contact's company
· Date last contacted
To start, begin by creating an opening and closing table tag in the body of the web page:
<table>
</table>
HTML tables are row orientated: You add one row at a time using the tr (table row) element and provide values for all the relevant columns. The rows can either be added to the header, body or footer of the table. Add the following inside the table element:
<thead>
<tr>
<th>Contact name</th>
<th>Phone number</th>
<th>Email address</th>
<th>Company name</th>
<th>Last contacted</th>
</tr>
</thead>
The row in the thead element contains five children of its own: These th (table heading) elements are the individual cells in the row of the table.
Next, you will add two rows to the body of the table. The body of the table is encapsulated in a tbody element. The individual cells in the body use the td (table datum) element rather than the th element. Add the following after the end of the thead element:
<tbody>
<tr>
<td>William Smith</td>
<td>555-642-7371</td>
<td>william@testing.com</td>
<td>ACME Industries</td>
<td>2014-10-21</td>
</tr>
<tr>
<td>Bob Morris</td>
<td>555-999-2991</td>
<td>bob@testing.com</td>
<td>ABC Corp</td>
<td>2014-09-12</td>
</tr>
</tbody>
Next, you will add a footer row to the table. The footer will simply state how many rows are in the table; thus, it only needs to occupy a single cell. This presents a dilemma because you want all the rows in the able to have the same number of columns. The solution to this is to utilize the colspan attribute with the td element to specify that a single td spans multiple columns. Add the following after the end of the tbody element:
<tfoot>
<tr>
<td colspan="5">2 contacts displayed</td>
</tr>
</tfoot>
Finally, you will add a caption for the table. This can be added anywhere in the table, provided it is a direct child of the table element itself:
<caption>Sales leads</caption>
The complete web page should now look as follows:
<table>
<thead>
<tr>
<th>Contact name</th>
<th>Phone number</th>
<th>Email address</th>
<th>Company name</th>
<th>Last contacted</th>
</tr>
</thead>
<tbody>
<tr>
<td>William Smith</td>
<td>555-642-7371</td>
<td>william@testing.com</td>
<td>ACME Industries</td>
<td>2014-10-21</td>
</tr>
<tr>
<td>Bob Morris</td>
<td>555-999-2991</td>
<td>bob@testing.com</td>
<td>ABC Corp</td>
<td>2014-09-12</td>
</tr>
</tbody>
<tfoot>
<tr>
<td colspan="5">2 contacts displayed</td>
</tr>
</tfoot>
<caption>Sales leads</caption>
</table>
If you open the page in Chrome, it should display as you see in Figure 3.5.
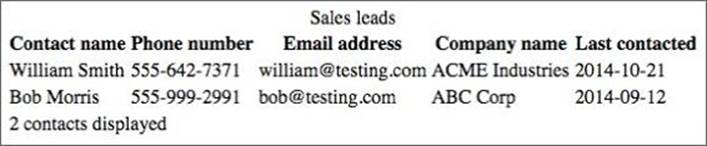
Figure 3.5
You will notice that the columns in the table have sized themselves according to the data that has been added to them, but the last row in the table spans column boundaries.
Technically, you could have avoided using the thead, tbody, and tfoot tags, and just wrapped every row in a tr element directly within the table element. There are, however, a number of reasons why it is worth adding the extra structure to the table that these tags afford:
· It will help you style the different components of the table differently. Usually, the header and footer rows will be styled differently from the rows in the body of the table.
· You can add extra functionality to the table such as sorting and filtering. In this case, you would not want to sort or filter the header and footer rows.
Prior to HTML5, the table tag supported a number of attributes for controlling the presentation of the table such as the border size, the width of the table, the background color of the table, and the padding that should surround each cell. These have all been removed in HTML5, and you should not use them.
Note
In the early days of website development, it was common to use tables as a layout mechanism. This is now strongly discouraged because CSS provides more than enough power to lay out complex web pages by itself. Tables should only be used for data where data needs to be stored in columns and rows.
Try It
In this Try It, you will experiment with lists and tables. As with the previous lesson, you do not need to follow this lesson implicitly, the most important thing is to experiment with the tags and discover for yourself the way they can be combined to create interesting web pages.
Lesson Requirements
You will need the template.html file from Lesson 1, a text editor, and a web browser.
Step-by-Step
1. Open the template.html page in your text editor.
2. Start by creating a simple numbered list of all the tags that you have learned about in this lesson—for instance table, tfoot, and thead.
3. Now, imagine that you want to categorize these based on whether they are relevant to tables or lists. Try to convert the numbered list into a description list. Each category should be captured in a dt element, while the tag names should be placed in dd elements. The goal is to create a structure that looks like Figure 3.6.
4. Now you will add a table to the web page to present the same information in the same way. Create a table with the following columns:
· Tag name
· Category (for example, list, table)
· Description
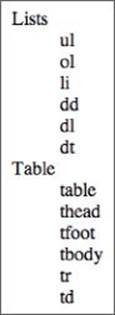
Figure 3.6
Ensure that the table utilizes the thead and the tbody elements.
Provide a caption for the table.
The first few rows of the table may look like Figure 3.7.
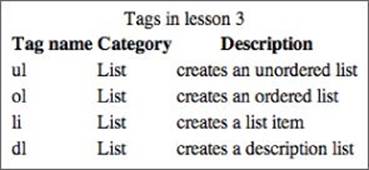
Figure 3.7
Reference
Please select the video for Lesson 3 online at www.wrox.com/go/html5jsjquery24hr. You will also be able to download the code and resources for this lesson from the website.
All materials on the site are licensed Creative Commons Attribution-Sharealike 3.0 Unported CC BY-SA 3.0 & GNU Free Documentation License (GFDL)
If you are the copyright holder of any material contained on our site and intend to remove it, please contact our site administrator for approval.
© 2016-2026 All site design rights belong to S.Y.A.