Multiplayer Game Development with HTML5 (2015)
Chapter 5. Leveraging the Bleeding Edge
So far in the book, we have focused our discussion on topics related to multiplayer game development. This time around, with the exception of WebRTC, we will discuss some of the newest APIs in HTML5 that, by themselves, have very little to do with multiplayer gaming, but they afford great opportunities in the context of game development.
In this chapter, we will discuss the following principles and concepts:
· Connecting peers directly with WebRTC
· Adding game pads to your browser-based games
· Maximizing your games in the fullscreen mode
· Accessing the user's media devices
HTML5 – the final frontier
Although the technologies with which we'll be experimenting in this chapter are exciting and very promising, we must not as yet get too attached to any one of them. At the very least, we must be cautious about how we use these APIs because they are still either experimental, or the specification is either in the Working Draft or Candidate Recommendation stage. In other words, chances are pretty good that, as of this writing and for the near, foreseeable future after the publication of this book, browser support for each feature may vary, APIs that do support each feature might differ slightly across browsers, and the future of the APIs may be uncertain.
The World Wide Web Consortium (W3C) defines four development stages (also known as maturity levels) that every specification evolves through before the specification is final, stable, and considered to be of the W3C standard. These four stages are Working Draft, Candidate Recommendation, Proposed Recommendation, and W3C Recommendation.
The initial level is Working Draft, in which the community discusses the proposed specification and defines the precise details that they try to accomplish. At this level, the recommendation is very unstable, and its eventual publication is all but guaranteed.
The next one is the Candidate Recommendation level, in which feedback is elicited from groups that implement the recommendation. Here, the standard is still unstable and subject to change (or deprecation, as is sometimes the case), but it tends to change less frequently than when it is at the Working Draft stage.
Once a specification document is published as a Proposed Recommendation, the advisory committee at W3C reviews the proposal. If at least four weeks have gone by since the review period began and the document has received enough endorsement from the community and implementers, the document is forwarded for publication as a recommendation.
Finally, when a specification becomes a W3C Recommendation, it carries with it the stamp of approval from W3C as an endorsed standard. Sadly, even at this point, there are no guarantees that a browser will support a standard or implement it according to the specification. However, in our day and age, all major browsers do a pretty good job of following specifications and implementing all the useful standards that are out there.
Maximizing your game with the fullscreen mode
Of all the APIs that we'll discuss in this chapter, fullscreen is the simplest to understand and use. As you might have guessed, what this API allows you to do is set an HTML element node that can be presented in the fullscreen mode.
Note that, although the first Editor's Draft (the maturation level that comes before a recommended standard becomes a Working Draft) for the fullscreen mode was published in October 2011, the specification is still in its early drafting stages. (refer to the following article for more information: Using fullscreen mode, (July 2014). https://developer.mozilla.org/en-US/docs/Web/Guide/API/DOM/Using_full_screen_mode).
As for the current browser support, you will find that it is pretty safe to use the API in all modern browsers, although today there are subtle differences in implementation as well as how you should enable the fullscreen mode.
The main thing to keep in mind when using fullscreen is that you must set a single element to the fullscreen mode. This element can indeed have a subtree of element nodes, but you will still need to enable the fullscreen mode on a particular element. In the context of game development, you will most likely set the main canvas element to fullscreen, but this is not a hard requirement. You could just as well request that the browser make the entire document fullscreen by calling the requetFullscreen() method on the body element.
There are two methods that are involved in setting an element in the fullscreen mode, and removing an element from the fullscreen mode. The methods are requestFullscreen and exitFullscreen respectively. Note that as of this writing, all major browsers implement these methods under their individual vendor prefix.
In addition, remember that the fullscreen mode cannot be enabled unless a user-initiated event makes the request to the browser. In other words, you cannot simply attempt to change the body element to fullscreen as soon as your DOM has loaded. Likewise, you cannot programmatically fire a DOM event (such as triggering a fake click on the page or using JavaScript to scroll the page, thus firing an onScroll event) and use the event handler callback to trick the browser into thinking that it was the user that initiated the action.
<!doctype html>
<html>
<head>
<title> Fullscreen</title>
<!-- [some custom CSS here, left out for brevity] -->
</head>
<body>
<ul>
<li>
<span>1</span>
</li>
<li>
<span>O</span>
</li>
<li>
<span>O</span>
</li>
<li>
<span>1</span>
</li>
</ul>
<script>
var list = document.querySelector('ul');
list.addEventListener('click', function (event) {
var block = event.target;
block.requestFullscreen();
});
</script>
</body>
</html>
The preceding code demonstrates how to set an element to the fullscreen mode after that element receives a click. In this case, you may have noticed that we assume that whatever browser executes that code will have dropped their vendor support, and we can simply call requestFullscreen()as it was intended.
A better way to go about this today, since browsers have not yet implemented the specification without a vendor prefixing the API, is to use a polyfill or helper function that detects whether a vendor prefix is needed and does what is needed to make it work.
var reqFullscreen = (function () {
var method = (function () {
var el = document.createElement('div');
var supported = '';
var variations = [
'requestFullscreen',
'msRequestFullscreen',
'mozRequestFullScreen',
'webkitRequestFullscreen'
];
variations.some(function (method) {
supported = method;
return el[method] instanceof Function;
});
return supported;
}());
return function (element) {
element[method]();
};
}());
var list = document.querySelector('ul');
list.addEventListener('click', function (event) {
var block = event.target;
reqFullscreen(block);
});
The preceding sample code creates a function called reqFullscreen, which does the heavy lifting for us by determining if a vendor prefix is needed; it then remembers which version of the fullscreen request needs to be made. We then call that function when we want the element to go the fullscreen mode, by passing it within the element.
Note
It seems that the makers of browsers have the goal to make experimental APIs as confusing as possible for end users. In the case of fullscreen, note that the specification names the interface functions as requestFullscreen and exitFullscreen (where the word Fullscreen only capitalizes the first letter).
Every vendor prefix, except for Mozilla Firefox, follows the specification with regards to the function names—that is, webkitRequestFullscreen and msRequestFullscreen. Mozilla Firefox differs because it implements mozRequestFullScreen, which differs from the other vendors since it spellsFullScreen as two words in the camel case. As a final detail, the folks at Webkit decided to please both the sides of the crowd by implementing both the versions: webkitRequestFullscreen and webkitRequestFullScreen.
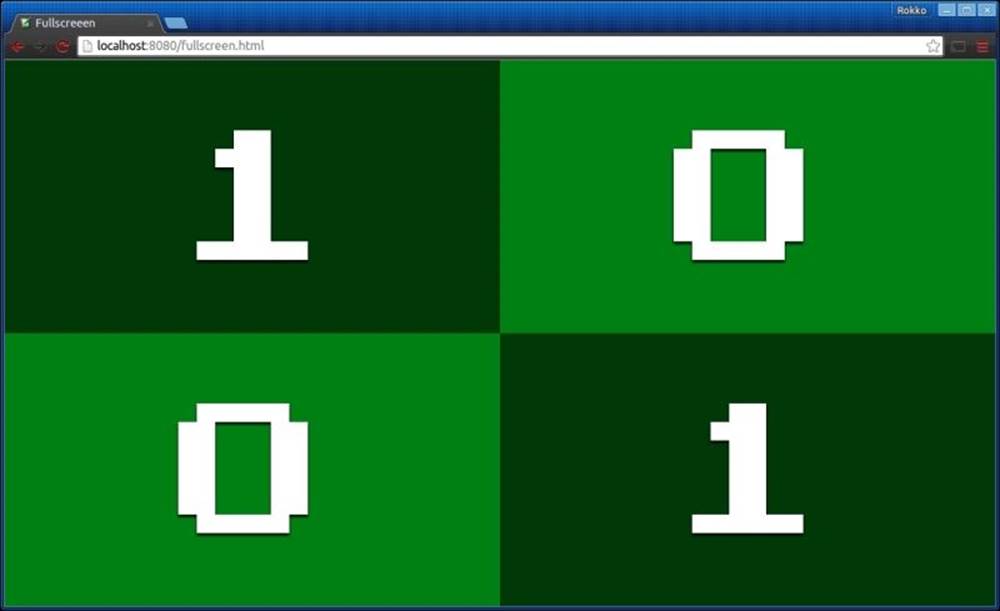
In the previous image, our page is not in the the fullscreen mode. However, when you click on one of the elements, that element is presented in the fullscreen mode:
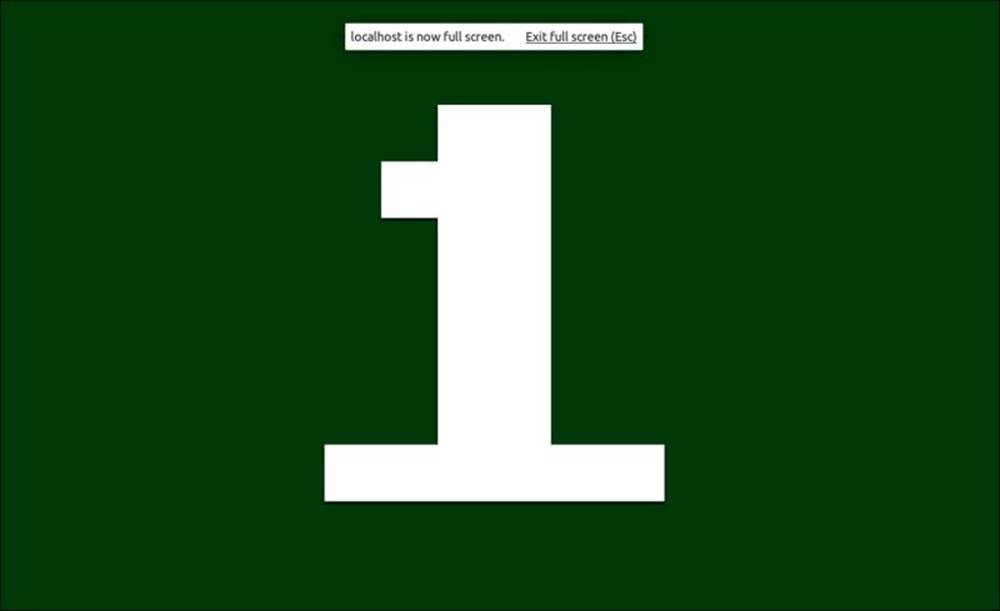
You may observe that the only requirement that the browser imposes is that a user action must initiate the request to enable fullscreen. This does not mean that the action must be on the same element that is set to fullscreen, as shown in the following example:
var list = document.querySelector('ul');
var btn = document.querySelector('button');
btn.addEventListener('click', function (event) {
// Somehow determine what element to use
var firstBlock = list.children[0].children[0];
reqFullscreen(firstBlock);
});
The preceding example binds to a button element. then add a click handler that sets some other element to enable in fullscreen mode.
We can check whether a specific element is in the fullscreen mode by looking up an automatically updated property of the document object.
var element = document.webkitFullscreenElement;
When you run the previous statement, it will return a reference to any element that's currently in the fullscreen mode; otherwise, it will return a null value.
We can also query the document to test whether the document can be enabled as fullscreen.
var canFullscreen = document.webkitFullscreenEnabled; // => bool
Finally, there is a special CSS pseudo selector that allows us to target the element in fullscreen. Again, this selector is also vendor prefixed as of this moment.
full-screen,
:-moz-full-screen,
:-moz-full-screen-ancestor,
:-webkit-full-screen {
font-size: 50vw;
line-height: 1.25;
/* … */
}
Note that the selector targets the very element that called requestFullscreen. In the preceding example, the styles specified before apply to the ul li span.
Better controlling with gamepad
Over the last several years, we have seen a very welcome and robust list of new APIs added to HTML5. These include WebSockets, canvas, local storage, WebGL, and many more. In the context of game development, the next natural step was to add standard support for a gamepad.
Similar to the fullscreen mode, the gamepad API is still in the very early drafting stages. In fact, gamepad support is even more "primitive" than fullscreen. Although you will find browser support to be adequate, working with the API can be buggy and somewhat unpredictable. However, the gamepad API does provide a good enough interface for a great end user experience. As the specification matures, the prospect of adding a gamepad to the browser is very exciting and promising.
The first thing you'll notice about the gamepad API is the way in which it differs from all other input APIs in the DOM as it is not driven by events such as a mouse or keyboard. For example, although every input with a keyboard triggers an event (in other words, a registered callback is invoked), input from a connected gamepad can only be detected by manually polling the hardware. In other words, the browser will fire gamepad-related events to let you know that a gamepad has connected and disconnected. However, beyond these kinds of events, the browser does not fire an event every time a key is pressed on a connected gamepad.
To start using a gamepad in your game, you will first need to wait for one to connect to the game. This is done by registering a callback to listen to the global gamepadconnected event:
/**
* @type {GamepadEvent} event
*/
function onGamepadConnected(event) {
var gamepad = event.gamepad;
}
window.addEventListener('gamepadconnected', onGamepadConnected);
The gamepadconnected event will fire any time a gamepad is connected to your computer during the lifetime of your game. If a gamepad is already connected before the script loads, the gamepadconnected event will not fire until the player presses a button on the gamepad. While this may seem weird at first, this restriction was put in place for a very good reason—namely, to protect the player from being fingerprinted by ill-intentioned scripts. However, requiring the user to press a button before the controller is activated is not that big of a deal since the player will need to press a button at some point if he or she wishes to play your game. The only drawback to this, as you can imagine, is that we won't know right off the bat whether the user has a gamepad connected to the computer yet. Still, coming up with creative solutions to work around this limitation is not too difficult of a task.
The GamepadEvent object exposes a gamepad property, which is a reference to the actual Gamepad object, which is what we're after. The interesting thing about this object is that it is not self updating like other objects in JavaScript. In other words, whenever the browser receives input from a connected gamepad, it keeps track of its state internally. Then, once you poll the gamepad state, the browser creates a new Gamepad object with all the updated properties to reflect the current state of the controller.
function update(){
var gamepads = navigator.getGamepads();
var gp_1 = gamepads[0];
if (gp_1.buttons[1].pressed) {
// Button 1 pressed on first connected gamepad
}
if (gp_1.axes[1] < 0) {
// Left stick held to the left on first connected gamepad
}
requestAnimationFrame(update);
}
During each update cycle, you will need to obtain the most recent snapshot of the gamepad object and look up its state.
The Gamepad object interface defines no methods, but its several properties are as follows:
interface Gamepad {
readonly attribute DOMString id;
readonly attribute long index;
readonly attribute boolean connected;
readonly attribute DOMHighResTimeStamp timestamp;
readonly attribute GamepadMappingType mapping;
readonly attribute double[] axes;
readonly attribute GamepadButton[] buttons;
};
The id attribute describes the actual hardware connected to the application. If you connect a gamepad through some USB adapter, it is likely that the id will reference the adapter device rather than the actual controller that was used.
The index will reference the Gamepad object within the GamepadList object, which is what the browser provides in response to navigator.getGamepads(). Using this index value, we can get a reference to a specific gamepad that we wish to query.
As expected, the boolean connected property indicates whether a particular gamepad is still connected to the application. If a gamepad disconnects prior to a call to navigator.getGamepads(), the corresponding element that is based on a Gamepad.index offset will be null in the GamepadList. However, if a reference to a Gamepad object is obtained, but the hardware disconnects, the object will still have its connected property set to true because those properties are not dynamically updated. In summary, this property is superfluous and will probably be removed from the spec in future updates.
We can check when the browser last updated the gamepad state by looking at the timestamp attribute on a Gamepad object.
A particularly interesting attribute is mapping. The idea behind this is that there can be several standard mappings so as to make it easier to wire up the application corresponding to the way the hardware is laid out.

Currently, there is only one standard mapping, which can be identified by the name standard, as demonstrated previously (for more information refer to, Gamepad W3C Working Draft 29 April 2015. http://www.w3.org/TR/gamepad). If the browser doesn't know how to layout the controller, it will respond with an empty string for the mapping attribute and map the buttons and axes in the best way that it can. In such cases, the application should probably ask the user to manually map the buttons that the application uses. Keep in mind that there are cases where the d-pad buttons are mapped to one of the axes, so handle each case with care:
var btns = {
arrow_up: document.querySelector('.btn .arrow-up'),
arrow_down: document.querySelector('.btn .arrow-down'),
arrow_left: document.querySelector('.btn .arrow-left'),
arrow_right: document.querySelector('.btn .arrow-right'),
button_a: document.querySelector('.buttons .btn-y'),
button_b: document.querySelector('.buttons .btn-x'),
button_x: document.querySelector('.buttons .btn-b'),
button_y: document.querySelector('.buttons .btn-a'),
button_select: document.querySelector('.controls .btn- select'),
button_start: document.querySelector('.controls .btn- start'),
keyCodes: {
37: 'arrow_left',
38: 'arrow_up',
39: 'arrow_right',
40: 'arrow_down',
32: 'button_a',
65: 'button_b',
68: 'button_x',
83: 'button_y',
27: 'button_select',
16: 'button_start'
},
keyNames: {
axe_left: 0,
axe_left_val: -1,
axe_right: 0,
axe_right_val: 1,
axe_up: 1,
axe_up_val: -1,
axe_down: 1,
axe_down_val: 1
}
};
Object.keys(btns.keyCodes).map(function(index){
btns.keyNames[btns.keyCodes[index]] = index;
});
function displayKey(keyCode, pressed) {
var classAction = pressed ? 'add' : 'remove';
if (btns.keyCodes[keyCode]) {
btns[btns.keyCodes[keyCode]].classList[classAction]('active');
}
}
function update(now) {
requestAnimationFrame(update);
// GamepadList[0] references the first gamepad that connected to the app
gamepad = navigator.getGamepads().item(0);
if (gamepad.buttons[0].pressed) {
displayKey(btns.keyNames.button_x, true);
} else {
displayKey(btns.keyNames.button_x, false);
}
if (gamepad.buttons[1].pressed) {
displayKey(btns.keyNames.button_a, true);
} else {
displayKey(btns.keyNames.button_a, false);
}
if (gamepad.buttons[2].pressed) {
displayKey(btns.keyNames.button_b, true);
} else {
displayKey(btns.keyNames.button_b, false);
}
if (gamepad.buttons[3].pressed) {
displayKey(btns.keyNames.button_y, true);
} else {
displayKey(btns.keyNames.button_y, false);
}
if (gamepad.buttons[8].pressed) {
displayKey(btns.keyNames.button_select, true);
} else {
displayKey(btns.keyNames.button_select, false);
}
if (gamepad.buttons[9].pressed) {
displayKey(btns.keyNames.button_start, true);
} else {
displayKey(btns.keyNames.button_start, false);
}
if (gamepad.axes[btns.keyNames.axe_left] === btns.keyNames.axe_left_val){
displayKey(btns.keyNames.arrow_left, true);
} else {
displayKey(btns.keyNames.arrow_left, false);
}
if (gamepad.axes[btns.keyNames.axe_down] === btns.keyNames.axe_down_val) {
displayKey(btns.keyNames.arrow_down, true);
} else {
displayKey(btns.keyNames.arrow_down, false);
}
if (gamepad.axes[btns.keyNames.axe_up] === btns.keyNames.axe_up_val) {
displayKey(btns.keyNames.arrow_up, true);
} else {
displayKey(btns.keyNames.arrow_up, false);
}
if (gamepad.axes[btns.keyNames.axe_right] === btns.keyNames.axe_right_val) {
displayKey(btns.keyNames.arrow_right, true);
} else {
displayKey(btns.keyNames.arrow_right, false);
}
}
window.addEventListener('gamepadconnected', function (e) {
update(0);
});
The preceding example connects a gamepad with no recognizable mapping; thus, it assigns each button to a specific layout. Since the d-pad buttons map to the left axis in this particular case, we check for that state when we want to determine whether the d-pad is being used. The output of this demonstration can be seen as follows:
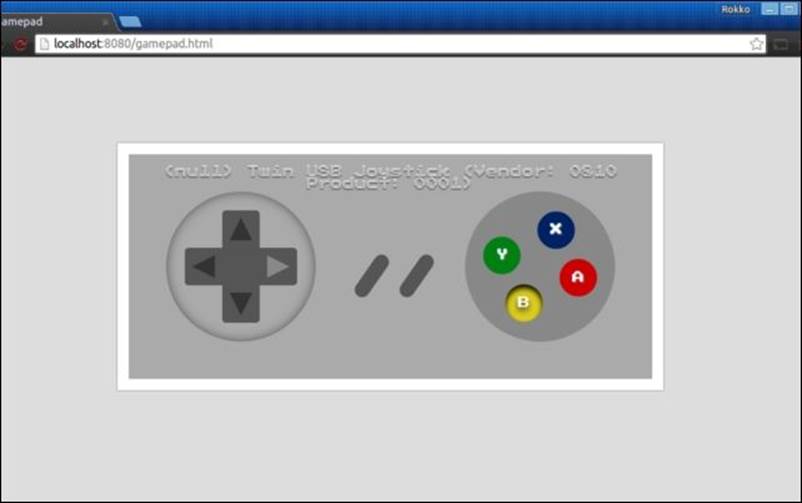
Often, you might wish to offer the user the ability to choose the way they would prefer to interact with your game—using a keyboard and mouse, a gamepad, or both. In the previous example, this is precisely the reason why the btns object referenced seemingly random and arbitrary keyCodevalues. These values are mapped to specific keyboard keys so that the player could use the arrow keys on a standard keyboard or a gamepad.
Peer-to-peer with WebRTC
One of the most exciting APIs to come out in recent years is WebRTC (which stand for Web real-time communication). The purpose of this API is to allow users to communicate in real-time streaming audio and video across platforms that support the technology.
WebRTC is made up of several individual APIs and can be broken down into three separate components, namely getUserMedia (which we'll discuss in more depth in the next section), RTCPeerConnection, and RTCDataChannel.
Since we'll discuss getUserMedia in the next section, we'll leave a more involved definition for it when we get there (although the name might give away what the API is intended to do).
RTCPeerConnection is what we use to connect two peers together. Once a connection has been established, we can use RTCDataChannel and transmit any data (including binary data) between the peers. In the context of game development, we can use RTCDataChannel to send a player's state toeach peer without the need for a server linking each player.
To get started with RTCPeerConnection, we need some way to tell each peer about the other one. Note that the WebRTC specification deliberately leaves out any specific way in which this data transfer should take place. In other words, we are free to use whatever method we like to manually connect two peers.
The first step to get a RTCPeerConnection is to instantiate RTCPeerConnection object, configuring it with the STUN servers that you wish to use and other options that are related to the type of connection that you expect:
var pcConfig = {
iceServers: [{
url: 'stun:stun.l.google.com:19302'
}]
};
var pcOptions = {
optional: [{
RtpDataChannels: true
}]
};
var pc = new webkitRTCPeerConnection(pcConfig, pcOptions);
Here, we use a public STUN server that Google provides free of cost. We also use a vendor prefix to be consistent with the other examples in this chapter. As of this writing, every vendor that implements WebRTC in some fashion uses a vendor prefix.
Note
If you're not too familiar with STUN, Interactive Connectivity Establishment (ICE), NAT, TURN, and SDP, don't worry too much about it. While this book won't explain these networking concepts in any depth, you won't really need to know too much about them in order to follow the examples in this chapter and to implement data channels in your own game.
In brief, a STUN server is used to tell a client about its public IP address and whether the client is behind a router's NAT, so another peer can connect to it. Thus, we use one in creating our RTCPeerConnection.
Again, with simplicity and brevity in mind, an ICE candidate allows the browser the reach another browser directly.
Once we have an RTCPeerConnection ready, we connect to a peer by offering to connect with them. The first step is to create an offer, which describes how the other client would connect back to us. Here is where we use a protocol of our choosing to inform the other peer about our offer. Commonly, this would be done using a WebSocket, but in order to demonstrate each step more explicitly, we will use the oldest communication protocol known to man: mouth to mouth:
/**
*
*/
function makeMessage(msg, user, color) {
var container = document.createElement('p');
var tag = document.createElement('span');
var text = document.createElement('span');
if (color) {
tag.classList.add(color);
} else if (nickColor) {
tag.classList.add(nickColor);
}
tag.textContent = '[' + (user || nick) + '] ';
text.textContent = msg;
container.appendChild(tag);
container.appendChild(text);
var out = document.getElementById('out');
var footer = document.getElementById('outFooter');
out.appendChild(container);
footer.scrollIntoView();
}
/**
*
*/
function createOffer() {
pc.createOffer(function (offer) {
// Note #1
makeMessage('offer: ' + encodeURIComponent(offer.sdp));
// Note #2
pc.setLocalDescription(new RTCSessionDescription(offer),
// Note #3
function () {},
// Note #4
function (e) {
console.error(e);
makeMessage('error creating offer');
}
);
});
}
In this hello world demonstration of WebRTC's peer-to-peer connection, we'll build a simple chat room with no servers in the middle (except for the STUN server that we need to initiate the peer-to-peer connection).
Given the preceding sample code, we can assume some HTML structure with an input element where we can enter text and commands and use them to drive the WebRTC components.
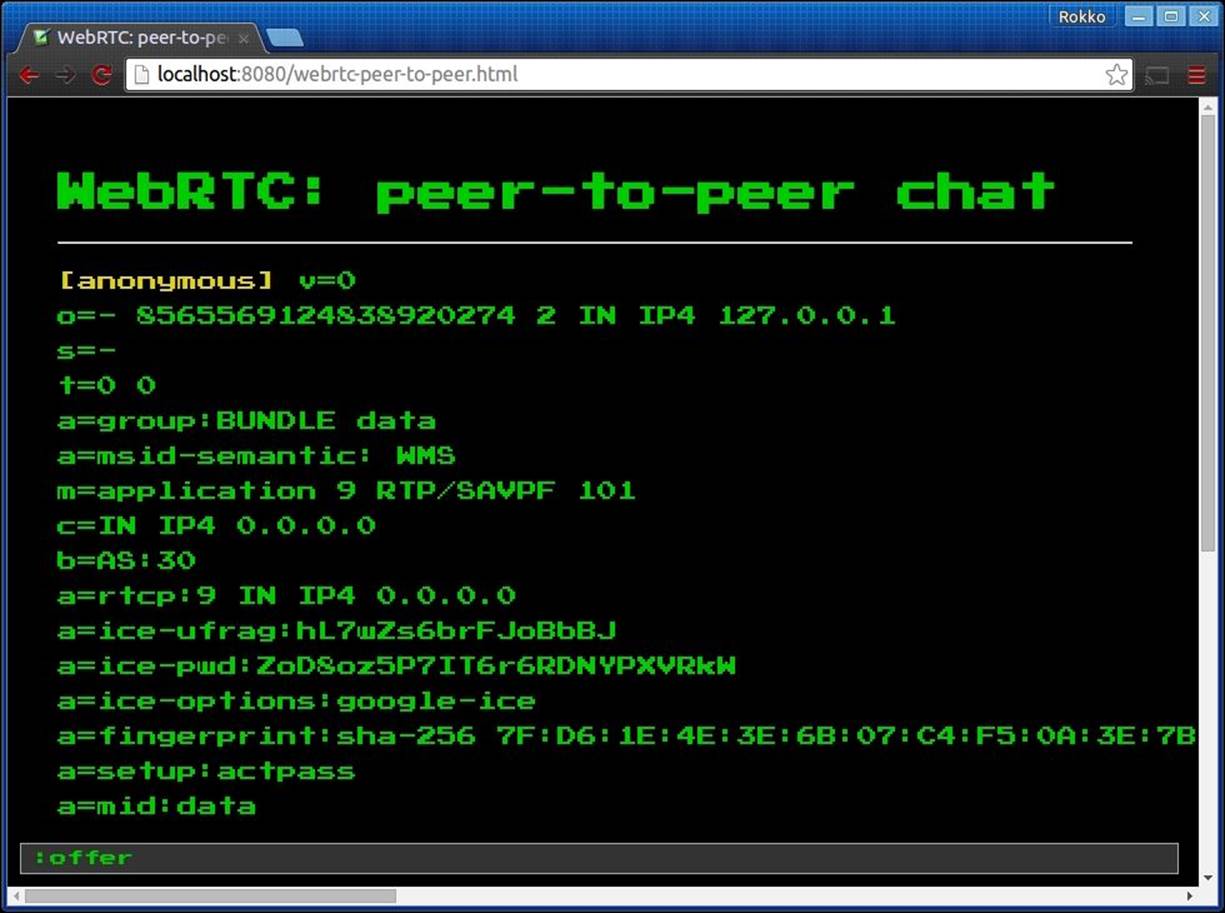
The previous screenshot shows the output once we invoke the createOffer function shown previously. We'll make extensive use of the makeMessage function to help us see messages initiated by the system (meaning the WebRTC API) as well as messages from the other peer with whom we're trying to connect and chat.
Note #1 in the previous code sample is intended to draw your attention to the way we' display the offer's Session Description Protocol (SDP), which is a protocol for negotiating session capabilities between the peers (taken from Suhas Nandakumar article on, SDP for the WebRTC,http://tools.ietf.org/id/draft-nandakumar-rtcweb-sdp-01.html). Since line breaks are meaningful in the protocol, we need to preserve every character in that string. By encoding the string, we guarantee that the string provided to us by the framework is not altered in any way (although it makes it slightly less readable for us humans).
Note #2 shows the second step of this information exchange process that will connect us to another peer. Here, we need to set our own client's session description. You can think of this as you remembering your own home address (or PO box, if you're into engaging in a series of lettercommunications with a pen pal).
Note #3 and Note #4 are the second and third arguments that we send to the RTCSessionDescription constructor. They are the success and error callback functions respectively, which we are not very concerned with at the moment. Actually, we do care about the error callback function because we wish to be informed about any possible error that might occur when we attempt to reach the STUN server, and so on.
Now that we have an offer object, we just need to let the other peer know what that offer looks like. The two things that make up the offer are the SDP block and the type of session description.
Once our peer knows what the SDP block looks like, he or she can instantiate an RTCSessionDescription object and set the SDP and type properties. Next, the second peer sets that session description as his or her own remote session descriptor. In this case, we just open a new window to represent the second peer and transmit the SDP string via the ever-so-sophisticated copy + paste method.
function setRemoteDesc(sdp, type) {
var offer = new RTCSessionDescription();
offer.sdp = decodeURIComponent(sdp);
offer.type = type;
makeMessage('remote desc: ' + offer.sdp);
pc.setRemoteDescription(new RTCSessionDescription(offer),
function () {
},
function (e) {
console.log(e);
makeMessage('error setting remote desc');
}
);
}
Here, we manually create an offer object for the other client. We use the SDP data that we obtained from the first client and set the second client's session description type to offer. This offer is set to the second client's remote descriptor. You can think of this, in the example of you writing to a pen pal, as the pen pal writing down your home address so that he or she knows where to send their letters.
After the second peer has made note of your session description, the next step is for that offer to be accepted. In RTC lingo, the second peer needs to answer to this offer. Similar to how we called createOffer() to create the initial offer, we call createAnswer() on the webkitRTCPeerConnectionobject. The output of this call is also a session description object, except that it contains the second user's SDP, and the session description type is answer instead of offer.
function answerOffer() {
pc.createAnswer(function (answer) {
makeMessage('answer: ' + encodeURIComponent(answer.sdp));
pc.setLocalDescription(new RTCSessionDescription(answer));
}, function (e) {
console.log(e);
makeMessage('error creating answer');
});
}
Here, the remote peer first sets its own local description from the SDP that it received from the answer object. Then, we display that to the screen so that we can use that same information as the first peer's (the local peer) remote description. This is representative of your pen pal first remembering their own home address and then letting you have a copy of it so that you now know where to send your letters.
Now that both peers know where the other can be reached, all that is needed is a way to reach the other peer. This level of detail is abstracted away from the data channel. So, before we can use the data channel, we need to add at least one ICE candidate to the peer connection object.
When each peer creates their offer and answer object, the peer connection object receives one or more ICE candidate references. In this demo, we print these out to the screen when we receive them, so that at this point we can copy and paste the data that makes up each ICE candidate, and thus we can recreate them on the opposing peer's machine, and add the ICE candidate to the peer connection object.
pc.onicecandidate = function (event) {
if (event.candidate) {
makeMessage('ice candidate: ' + JSON.stringify(event.candidate), 'sys', 'sys');
}
};
function addIceCandidate(candidate) {
pc.addIceCandidate(candidate);
}
addIceCandidate(JSON.parse({
/* encoded candidate object from onIceCandidate callback */
});
Once each peer has the other peer's session descriptor and there is an ICE candidate to guide the browser to the other peer, we can start sending messages directly from one to the other.
The next step is to simply send and receive messages using the DataChannel object. Here, the API is very similar to WebSocket's API, where we call a send() method on the channel object to send data to the peer, and we register a onmessage event handler from which we receive data from the other side of the peer-to-peer connection. The main difference here is that, unlike the WebSocket scenario, we're now connected directly to the other peer, so sending a message is blazingly fast:
// When creating the RTCPeerConnection object, we also create the DataChannel
var pc = new webkitRTCPeerConnection(pcConfig, pcOptions);
var channelName = 'packtRtc';
var dc = dc = pc.createDataChannel(channelName);
function sendMessage(msg) {
if (dc.readyState === 'open') {
var data = {
msg: msg,
user: nick,
color: nickColor
};
// Since this is a chat app, we want to see our own message
makeMessage(msg);
// The actual send command
dc.send(JSON.stringify(data));
} else {
makeMessage('Could not send message: DataChannel not yet open.');
}
}
dc.onmessage = function (event) {
var data = JSON.parse(event.data);
makeMessage(data.msg, data.user, data.color);
};
dc.onopen = function () {
makeMessage('dataChannel open', 'sys', 'sys');
};
dc.onerror = function (e) {
makeMessage('dataChannel error: ' + e, 'sys', 'sys');
};
dc.onclose = function () {
makeMessage('dataChannel close', 'sys', 'sys');
};

To summarize, before we can start using our DataChannel to communicate with the other peer, we need to manually (meaning, outside the real of WebRTC APIs) configure each peer relative to each other. Often, you will want to first connect the peers through a WebSocket and use that connection to create and answer the offer from the initiating peer. In addition, data sent through the DataChannel is not limited to text only. We can send binary data, such as video and audio using another WebRTC API, which we'll discuss in the next section.
Capturing the moment with Media Capture
One of the newer components of online multiplayer games is the social aspect that involves real-time voice and video communication. This last component can be perfectly satisfied by using HTML Media Capture APIs, which allow you to access your player's camera and microphone. Once you have gained access to a camera and microphone, you can broadcast that data to other players, save them as audio and video files, or even create a standalone experience that is based on that alone.
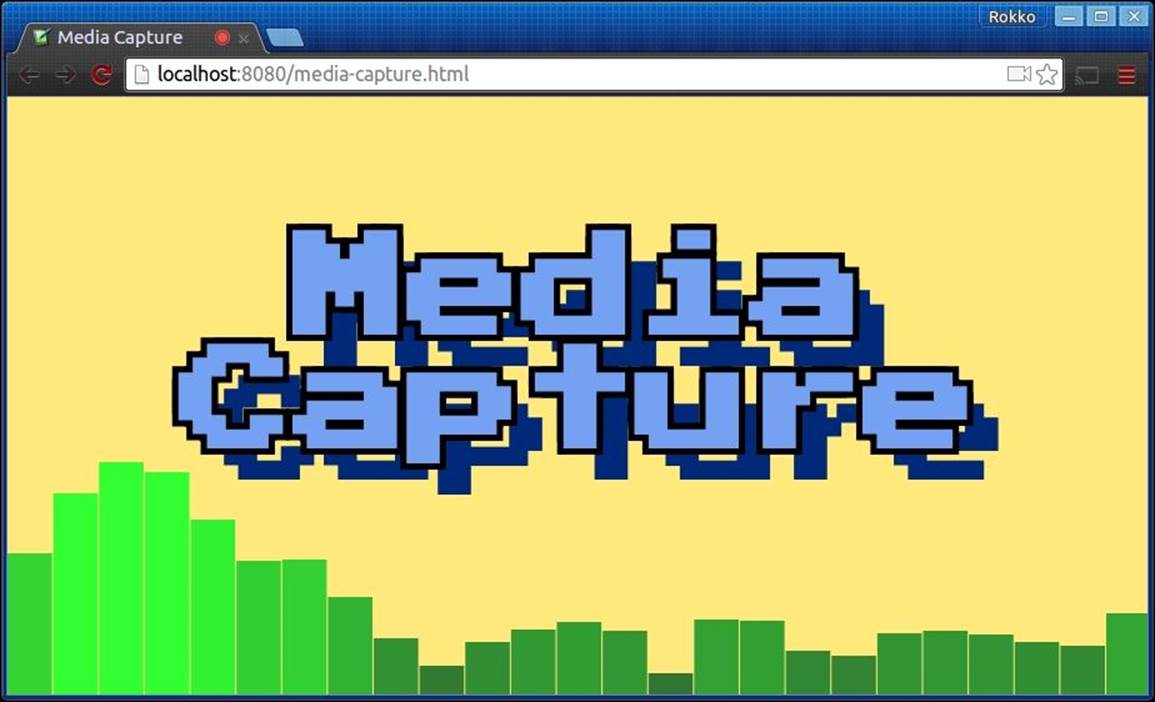
The hello world example of Media Capture is probably the eye candy of audio visualization demonstration. We can achieve this with a mixture of Media Capture and Web Audio API. With media capture, we can actually receive the raw audio data from the user's microphone; then, we can use Web Audio to connect the data and analyze it. With that data in place, we can lean on the canvas API to render the data representing the sound waves that was received by the microphone.
First, let us take a more involved look at Media Capture. Then, we'll look at the important pieces of Web Audio and leave it as an exercise for you to find a better, more complete, and dedicated source to deepen your' understanding of the rest of the Web Audio API.
Currently, media capture is in candidate recommendation, so we still need to look for and include vendor prefixes. For brevity, we will assume Webkit targetting (HTML Media Capture W3C Candidate Recommendation, (September 2014). http://www.w3.org/TR/html-media-capture/).
We begin by calling the getUserMedia function on the navigator object. (for more information about the window.navigator property, go to https://developer.mozilla.org/en-US/docs/Web/API/Window/navigator.) In this, we specify any constraints about the media we wish to capture, such as the audio, the video frame rate that we want, and so on:
var constraints = {
audio: false,
video: {
mandatory: {
minAspectRatio: 1.333,
maxAspectRatio: 1.334
},
optional: {
width: {
min: 640,
max: 1920,
ideal: 1280
},
height: {
min: 480,
max: 1080,
ideal: 720
},
framerate: 30
}
}
};
var allowCallback = function(stream){
// use captured local media stream
// ...
};
var denyCallback = function(e){
// user denied permission to let your app access media devices
console.error('Could not access media devices', e);
};
navigator.webkitGetUserMedia(constraints, allowCallback, denyCallback);
In its simplest form, the constraints dictionary only includes a key indicating the type of media that we wish to capture, followed by a Boolean value that represents our intent. Optionally, any false values can be shorthanded by leaving out the attribute altogether.
var constraints = {
audio: true,
video: false
};
// the above is equivalent to simply {audio: true}
navigator.webkitGetUserMedia(constraints, allowCallback, denyCallback);
Once the call to getUserMedia is executed, the browser will display a warning message to the user, alerting him or her that the page is attempting to access media devices; this will give the user a chance to allow or deny such a request:
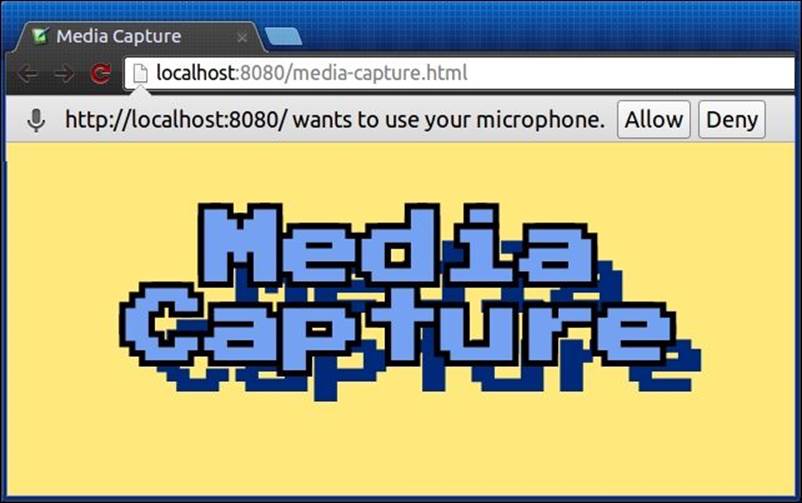
Although it is different from the old window.alert, window.confirm, and window.prompt APIs, the browser-generated prompt is always asynchronous and non-blocking. This is the reason for providing callback functions for the cases where the user allows or denies your request.
Once we have been granted access to the user's audio device, as in the previous example, we can leverage the Web Audio API and create an AudioContext object; from this, we can then create a media stream source:
var allowCallback = function(stream){
var audioContext = new AudioContext();
var mic = audioContext.createMediaStreamSource(stream);
// ...
};
As you may have guessed, a MediaStream object represents the microphone as a source of data. With that reference, we can now connect the microphone to an AnalyserNode to help us break down the audio input into something that we can represent visually:
var allowCallback = function(stream){
var audioContext = new AudioContext();
var mic = audioContext.createMediaStreamSource(stream);
var analyser = audioContext.createAnalyser();
analyser.smoothingTimeConstant = 0.3;
analyser.fftSize = 128;
mic.connect(analyser);
// ...
};
The next step is to use the analyser object and get the frequency data from the audio source. With this on hand, we can just render it to some existing canvas as we see fit:
var allowCallback = function(stream){
var audioContext = new AudioContext();
var mic = audioContext.createMediaStreamSource(stream);
var analyser = audioContext.createAnalyser();
analyser.smoothingTimeConstant = 0.3;
analyser.fftSize = 128;
mic.connect(analyser);
var bufferLength = analyser.frequencyBinCount;
var frequencyData = new Uint8Array(bufferLength);
// assume some canvas and ctx objects already loaded and bound to the DOM
var WIDTH = canvas.width;
var HEIGHT = canvas.height;
var lastTime = 0;
visualize(e);
function visualize(now) {
// we'll slow down the render speed so it looks smoother
requestAnimationFrame(draw);
if (now - lastTime >= 200) {
ctx.clearRect(0, 0, WIDTH, HEIGHT);
analyser.getByteFrequencyData(frequencyData);
var barWidth = (WIDTH / bufferLength) * 2.5;
var x = 0;
[].forEach.call(frequencyData, function (barHeight) {
ctx.fillStyle = 'rgb(50, ' + (barHeight + 100) + ', 50)';
ctx.fillRect(x, HEIGHT - barHeight / 1, barWidth, barHeight / 1);
x += barWidth + 1;
});
lastTime = now;
}
}
};
Working with a video is equally simple, but it does require, as you would expect, that a camera to be connected to your computer. If you make the request to getUserMedia with a set video constraint, but no camera is present, the error callback will be executed and the NavigatorUserMediaErrorobject will sent as the argument:
navigator.webkitGetUserMedia({video: true}, function(stream){
// ...
}, function(e){
// e => NavigatorUserMediaError {
// constraintName: '',
// message: '',
// name: 'DevicesNotFoundError'
// }
});
On the other hand, when a video device is accessible, we can stream it to a video element in the most simple manner by setting its src attribute to a objectUrl, which is pointing to the stream source that we acquire from the user media:
var video = document.createElement('video');
video.setAttribute('controls', true);
video.setAttribute('autoplay', true);
document.body.appendChild(video);
var constraints = {
video: true
};
function allowCallback(stream){
video.src = window.URL.createObjectURL(stream);
}
function denyCallback(e){
console.error('Could not access media devices', e);
}
navigator.webkitGetUserMedia(constraints, allowCallback, denyCallback);
Summary
This chapter took us forward in time, giving us a glimpse of the latest HTML5 APIs that we can incorporate into our multiplayer games. These APIs include the Fullscreen mode, gamepad, media capture, and WebRTC. With these powerful additional features, your games will be that much more engaging and fun to play.
However, the one takeaway point from the entire discussion is that all of the APIs that were described in this chapter are still in the early drafting stages; therefore, they can be subjected to drastic interface changes, or they can be deprecated as well. In the meantime, be sure to add the appropriate vendor prefixes to each API and look out for any one-off browser quirks or implementation differences.
In the next chapter, we'll conclude our journey through the wonderful world of multiplayer game development in JavaScript by discussing security vulnerabilities that are associated with network gaming. We'll describe common techniques to minimize opportunities for cheating, thus providing a fair and adequate playing experience.