JavaScript, 20 Lessons to Successful Web Development (2015)
PART II Advanced JavaScript
LESSON 16 Inserting Inline JavaScript and Events

To view the accompanying video for this lesson, please visit mhprofessional.com/nixonjavascript/.
Sometimes the easiest way to achieve dynamic interaction with users of your web pages is to directly interact with them from the code they are using. So far we have mostly looked at running JavaScript from within <script> elements, but that is not the only way you can use it.
For example, it’s quite legal to place JavaScript instructions inside elements, and you generally do this by attaching them to various event attributes such as onmouseover. What this does is enable you to provide interactivity to elements on an individual basis, and sometimes (if the task is simple enough) without even having to link it to functions later in a web document.
Therefore, tasks that might seem nontrivial, such as changing an image when the mouse passes over it, are easily achievable with a couple of simple JavaScript statements attached to the image. In this lesson you learn how this works, and also how to link to more complex code later in a web document should you wish to.
Also, in this lesson you will learn how you can even add new elements and remove existing ones from a document using JavaScript, providing an even greater level of flexibility and control.
Inline JavaScript
Using <script> tags isn’t the only way you can execute JavaScript statements. You can also access JavaScript from within HTML tags, which makes for great dynamic interactivity.
For example, to add a quick effect when the mouse passes over an object, you can use the following HTML, which displays one image but replaces it with another when the mouse passes over:

Another Instance of this
In the preceding example, you see another instance of the this keyword in use, where it tells JavaScript to operate on the calling object, namely the <img> tag. You can see the result in the top half of Figure 16-1, created using the file inline.htm from the companion archive—try it for yourself and you’ll see how the mom.jpg image swaps in and out as you pass your mouse over the dad.jpg image (although you won’t see anything changing in this figure, you will if you try this example in your browser).
FIGURE 16-1 Applying JavaScript to HTML tag events
Non-inline Event Attaching
The preceding code is the equivalent of providing an ID to the <img> tag, and then attaching the actions to the tag’s mouse events, like this:
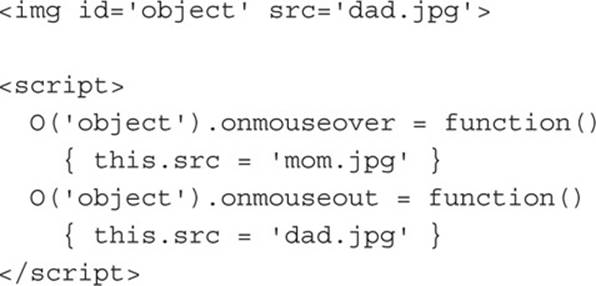
This code applies the id of object to the tag in the HTML section and then proceeds to manipulate it separately in the JavaScript section by attaching anonymous functions to each event.

Any of the preceding methods are fine for attaching to element events, and the one you use is entirely up to you. However, I would personally reserve the first style (inline JavaScript) just for popping in quick bits of interactivity here and there, and would normally use the second (separate JavaScript) when I am writing a lot of code. I do this because when programs get larger, I like all the code to be in the same place where I can work on it independently from the HTML. It also separates the code from the content so that I can easily go in and change the event actions in the JavaScript section, without touching the HTML.
Attaching to Other Events
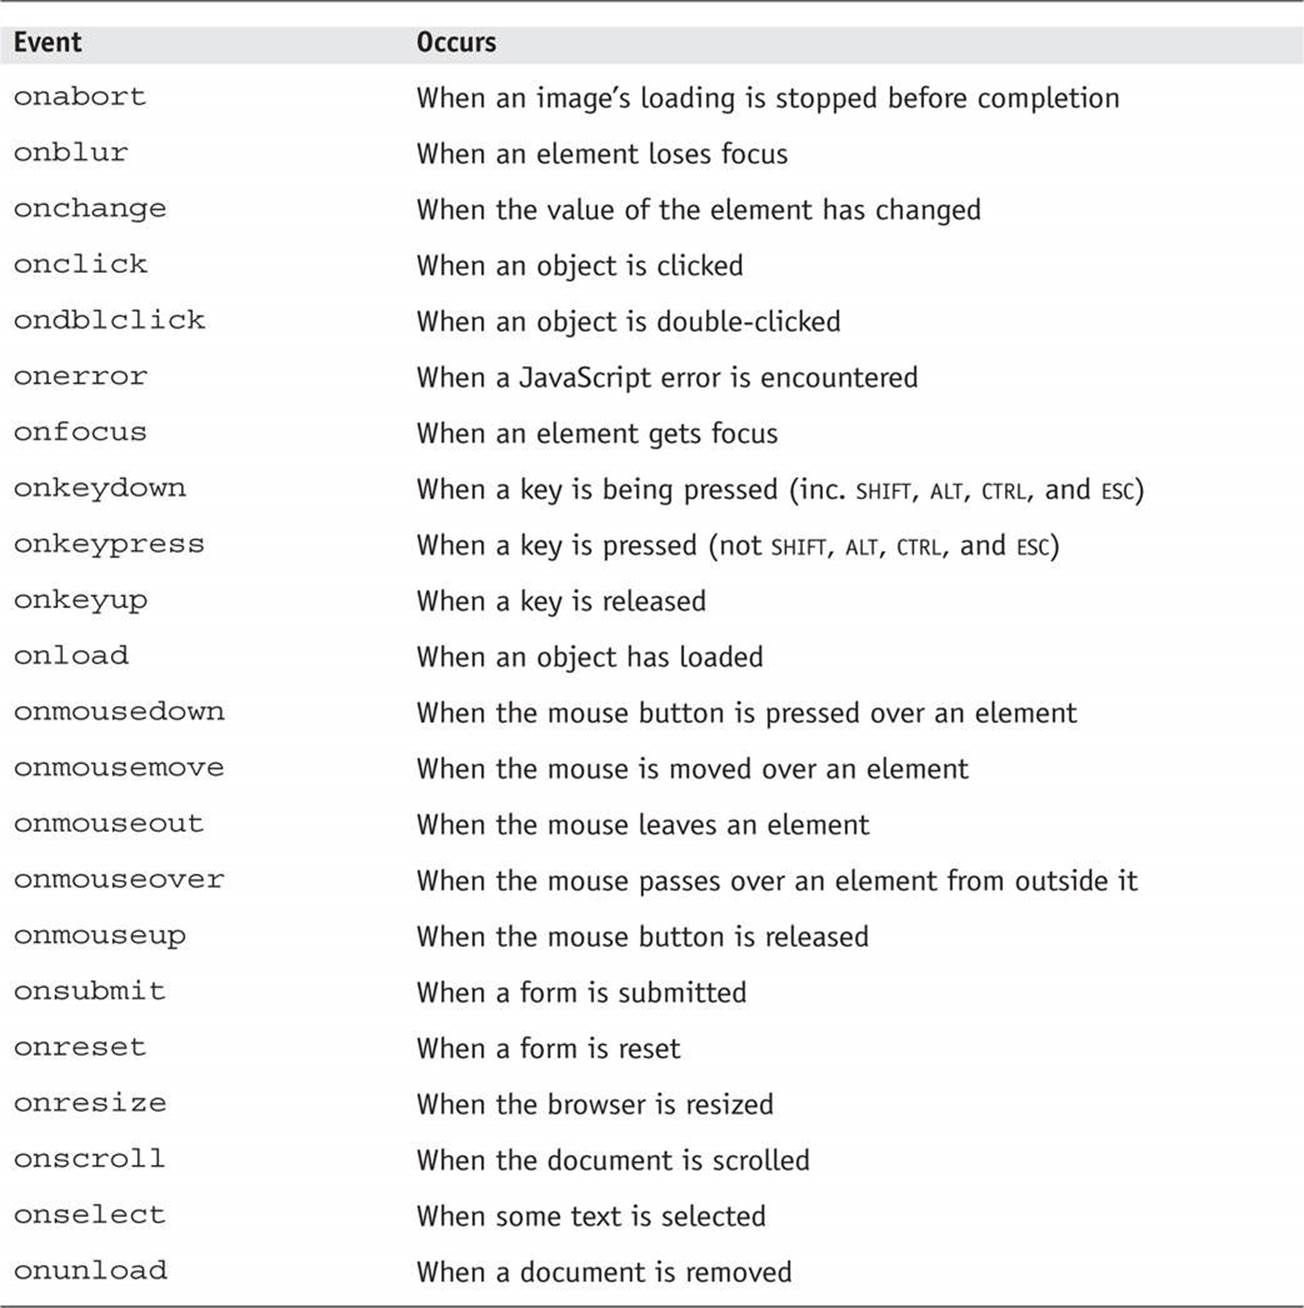
Using either inline or separate JavaScript, you find several events to which you can attach actions, providing a wealth of additional features you can make available for your users. Table 16-1 lists some of these events, and details when they will be triggered.
TABLE 16-1 Events and When They Are Triggered
You can attach to these events in either previously described manner, but make sure you attach events to objects that make sense. For example, an object that is not a form will not respond to the onsubmit event.
Adding New Elements
With JavaScript you are not limited to only manipulating the elements and objects supplied to a document in its HTML. In fact, you can create objects at will by inserting them into the Document Object Model (DOM). For example, suppose you need a new <div> element. Here’s one way you can add it to the web page:

First, the new element is created with createElement(), but it isn’t yet inserted into the DOM and so won’t be displayed. Then the appendChild() function is called, and the element gets inserted into the DOM and therefore is displayed.
Figure 16-2 shows this code (addelement.htm in the companion archive) being used to add a new <div> element to a web document. This new element is exactly the same as if it had been included in the original HTML, and has all the same properties and methods available.
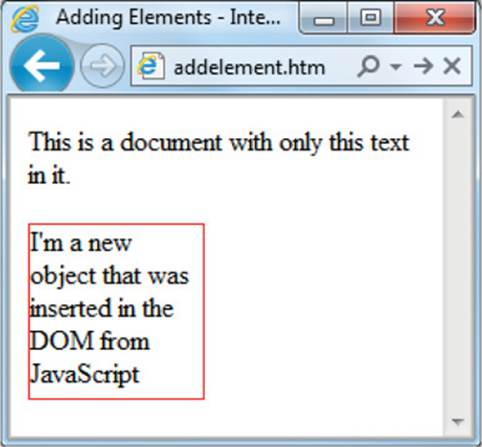
FIGURE 16-2 Adding a <div> to a web page
I sometimes use this method when I want to create in-browser pop-up windows because it doesn’t need a spare <div> to be available in the DOM.
Removing Elements
You can also remove elements from the DOM, including ones that you didn’t insert using JavaScript. It’s just as easy as adding an element and works like this, assuming the element to remove is in the object element:
element.parentNode.removeChild(element)
This code accesses the element’s parentNode object so that it can remove the element from that node. Then it calls the removeChild() method on that object, passing the object to be removed.
Alternatives to Adding and Removing Elements
Inserting an element is intended for adding major new objects into a web page. But if all you are doing is hiding and revealing objects according to an onmouseover or other event, don’t forget that there are always a couple of CSS properties you can use for this purpose, without taking such drastic measures as creating and deleting DOM elements.
For example, when you want to make an element invisible but leave it in place (and with all the elements surrounding it remaining in their positions), you can simply set the object’s visibility property to hidden, like this:
MyObject.style.visibility = ′hidden′
And to redisplay the object, you can use the following:
MyObject.style.visibility = ′visible′
You can also collapse elements down to occupy zero width and height (with all objects around it filling in the freed-up space) like this:
MyObject.style.display = ′none′
To then restore an element to its original dimensions, you would use the following:
MyObject.style.display = ′block′
If you prefer, you can also use the shorter S() function from mainfunctions.js in the companion archive of files, like this:
S(MyObject).display = ′block′
While you’re at it, don’t forget other great CSS properties you can access from JavaScript, such as opacity for setting the visibility of an object to somewhere between visible and invisible, or simply changing the width and height properties of an object to resize it. And, of course, using the position property with values of absolute, static, or relative, you can even locate an object anywhere in the browser window that you like.
Controlling HTML5 Media
For the last few years, since the dawn of HTML5, it has been possible to embed audio and video into web browsers without needing plug-ins. Things started off a little slow with varied browser take-up. And then there were a few skirmishes about which audio and video software to use, meaning that media had to be converted into a few different formats to work on all browsers. But nowadays a couple of formats will suffice for all major browsers, and embedding media in a web page is really simple.
In fact, you don’t even need JavaScript to add audio or video to a web page, but once the audio or video is embedded, you can provide greater functionality by attaching JavaScript to it to create your own methods of playing or pausing playback and so on.
Adding audio or video to a web page is as simple as using either the <audio> or the <video> tag, and then supplying one or more <source> tags to tell the web browser where to fetch the media from. For example, here’s some HTML to add audio to a web page, which results in Figure 16-3:
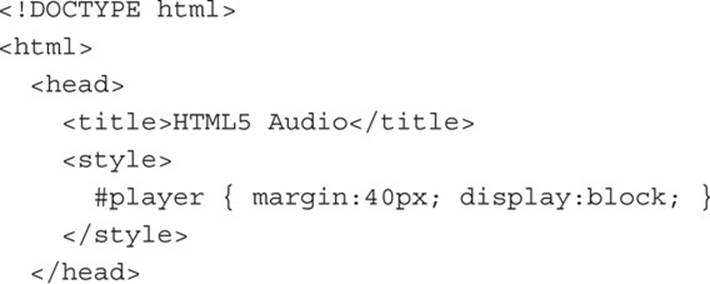
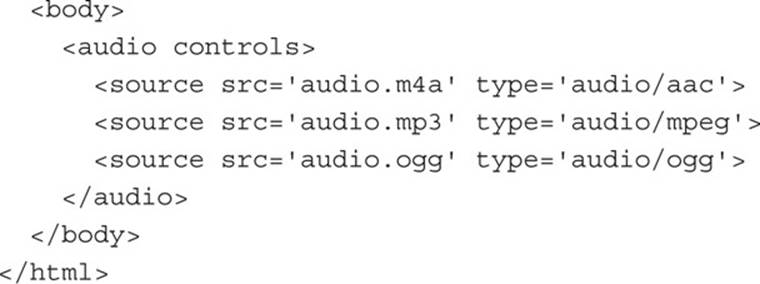
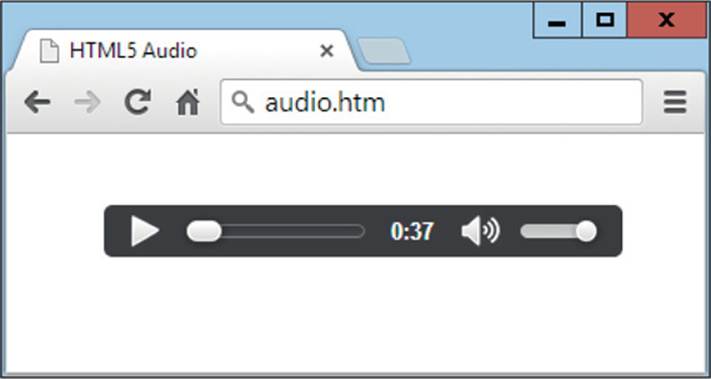
FIGURE 16-3 Playing an audio file with HTML5
In the <audio> section there are three files, all containing the same audio, but converted to AAC, MP3, and OGG. Because of the controls attribute, the audio player is shown; otherwise, it would not display and there would be no way to play the audio (unless it was set to auto start, which can be very annoying).
However, if we give the <audio> element an ID (such as player), we can then attach to it with JavaScript to create our own (in this case, very simple) play and pause buttons. Here’s all we have to do (the result of which is shown in Figure 16-4):
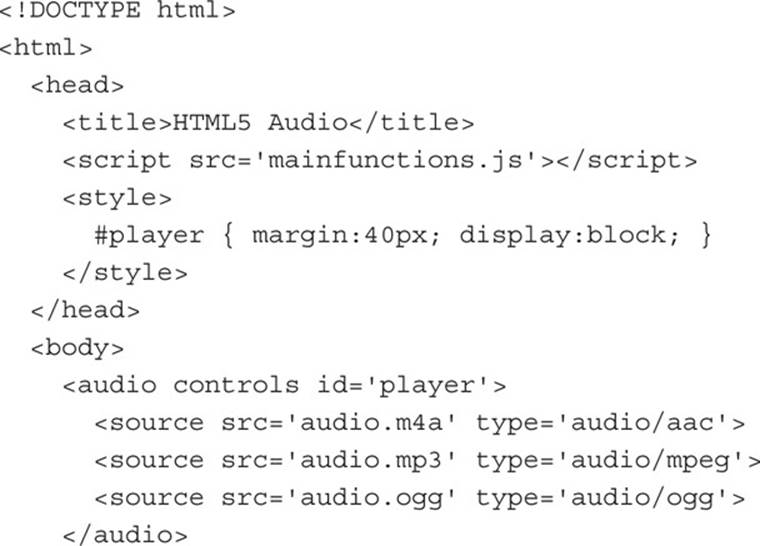

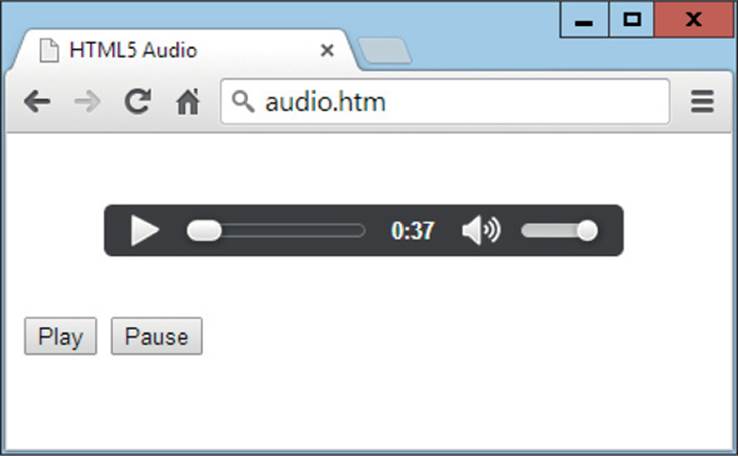
FIGURE 16-4 Attaching our own play and pause buttons to the player
Two new buttons have been added underneath the audio player, and the mainfunctions.js file has been included within the <head> section to give access to the O() function. Using O(), you attach the HTML5 play() and pause() functions to the onclick events of the two new buttons, and can now possibly remove the controls attribute from the <audio> tag if you wish to remove the default player from view.
So, our new interface isn’t very pretty, but now that you see how this works, you can attach the controls you need to any interface of your design. And you can do exactly the same with HTML5 video too, like this (see Figure 16-5):
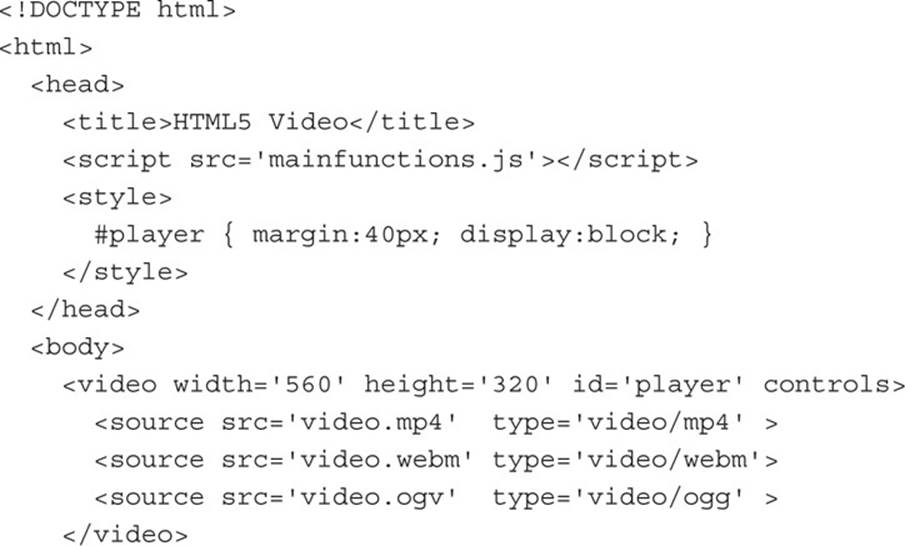

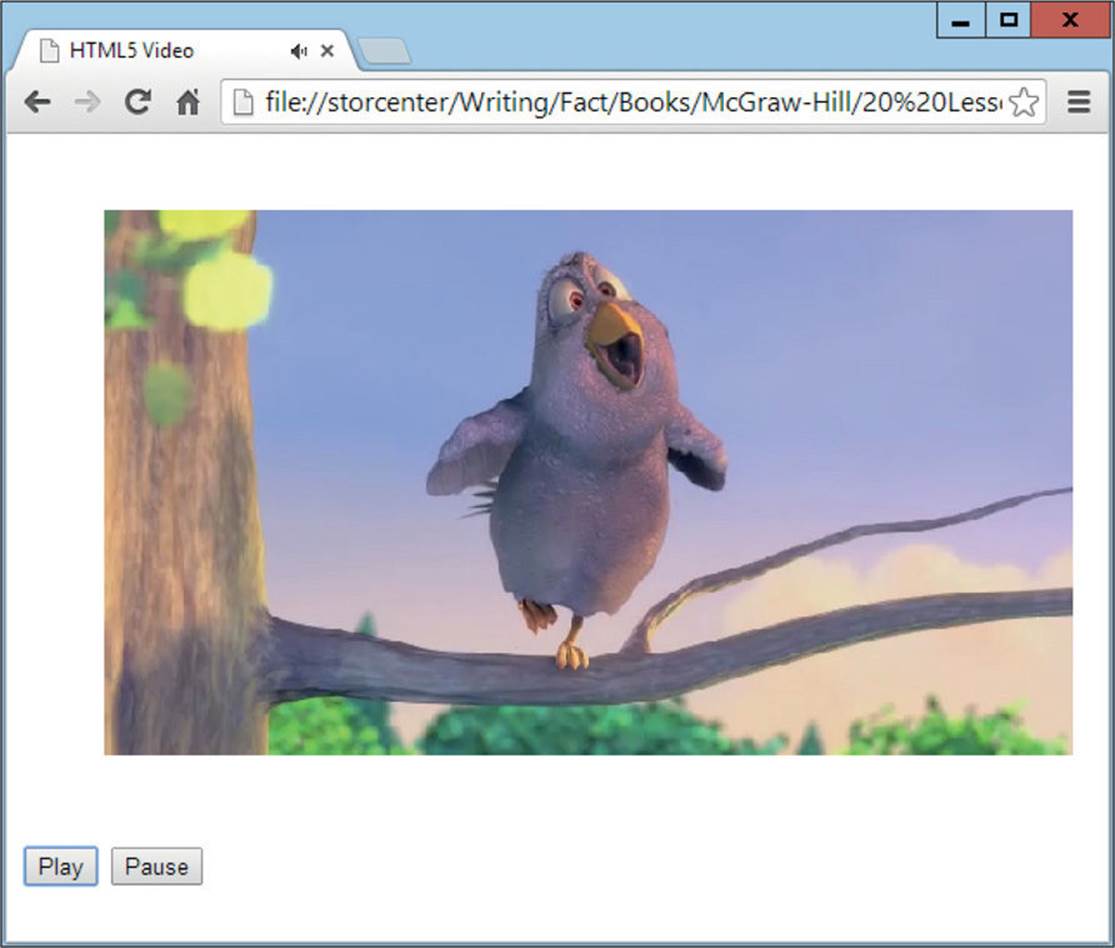
FIGURE 16-5 Embedding HTML5 video with attached play and pause buttons
Summary
Having now learned numerous ways of interacting with web pages using the DOM, the things you can do with JavaScript are now limited only by your imagination. In Lesson 17, I’ll show you a few more advanced things you can do, starting with how to use cookies and access the local storage made available with HTML5.
Self-Test Questions
Using these questions, test how much you have learned in this lesson. If you don’t know an answer, go back and reread the relevant section until your knowledge is complete. You can find the answers in Appendix A.
1. How would you change the file displayed by an <img> tag to newimage.jpg when the mouse passes over it?
2. Which event is triggered when an element is clicked?
3. With which function can you create a new element?
4. With which function can you attach a newly created element to the DOM?
5. How can you remove an element from the DOM?
6. How can you change the visibility of an object?
7. How can you prevent an object from displaying at all (without even reserving the space it should occupy)?
8. With which functions can you stop and restart HTML5 audio and video playback?
9. To which element(s) should you attach the functions referred to in question 8?
10. How can you specify whether or not the default play and other buttons display on an audio or video player?
All materials on the site are licensed Creative Commons Attribution-Sharealike 3.0 Unported CC BY-SA 3.0 & GNU Free Documentation License (GFDL)
If you are the copyright holder of any material contained on our site and intend to remove it, please contact our site administrator for approval.
© 2016-2026 All site design rights belong to S.Y.A.