Continuous Enterprise Development in Java (2014)
Chapter 4. Requirements and the Example Application
Whatever pursuit you undertake, the requirements should start with a love of what it is that you are pursuing.
— Bill Toomey
Although the previous chapter provides decent proof that it’s possible to jumpstart development on a greenfield Java EE project without too much hassle, we all recognize that this may be a far cry from how applications are built in the real world. The benefits of quickly going from a blank canvas to a deployed, functioning application are largely educational or handy in rapid prototyping, but in the majority of cases we’re likely looking to:
§ Have greater control over the architectural design of our program
§ Augment an existing application with new features
§ Integrate one or more systems
§ Increase modularity during development
In short, the preceding chapter introduced us to some potentially new technologies and is capable of getting us up and running, but the end result is a toy that would need a lot more work before it became a viable product.
This book will aim to address some of the common issues encountered during enterprise development. Our primary goal is education, and that will inform some of the design choices we make in building our application; for instance, we may expose more technologies than necessary to fulfill our objectives. But just as a guide on design patterns doesn’t advocate usage of every technique at the same time, neither should these examples. It’s your responsibility as developer to choose appropriate tools for the job, and we’ll aspire to help you make informed decisions.
Introducing GeekSeek
Our example application will be a software conference tracker, roughly modeled after the excellent Lanyrd service. Its purpose will be to expose information to aid conference-goers in planning their experience around technical sessions and related activities. The goal is to provide a single example with all layers working in concert to showcase how various technologies interact, and each use case detailed in the book will dig into various slices of the application. We’ve lovingly named this example GeekSeek.
Reading this book should not be a passive endeavor; we’ve designed the example application to be an executable proof of the approaches we’ll use to satisfy our broad use cases. Readers will likely get the greatest benefit by pulling down the GeekSeek source and building, testing, and running the application locally.
The live “production” GeekSeek site is hosted at http://geekseek.continuousdev.org; let’s first have a look at the requirements comprising this application.
Featureset
We’ll start by outlining in broad strokes the features provided by GeekSeek. This will provide a high-level view of the actions users may take, and from these we can start to drill down into more technical requirements.
Account-centric actions
§ Users may sign up by associating the site with their Twitter account
§ Users may track others whom they follow on Twitter
§ Users may see others who may be interested in their activity (their Twitter followers)
§ Users may get updates on the activity of their followee’s followees (transitively, the people followed by the people you follow)
Directory view
§ Users may display upcoming and prior Conferences in the system
Conferences and sessions
§ Users may add Conference and Session data, additionally associating them with a Venue and Room
§ Users may define who is speaking at or attending a Session
§ Users may add arbitrary Attachments (media) information to a Conference, Session, Venue, or Room
§ Users may track Conferences and Sessions to receive alerts for updates and changes
Search
§ Users may search for a Conference, Session, or User by some criteria
Conceptual Data Model
Because we’re still in the process of defining what our application does and the types of data it’ll be dealing with, this is not the place to delve into database design just yet. This is the stage where we describe our conceptual data model; first we need to understand:
§ What kind of data is to be represented?
§ Who are the major players (entities), and what are their fields?
Here we speak at a very coarse level of granularity, and we seek to define from a business perspective the nouns of our application. In our case, we have:
User
|
Name |
String |
|
Twitter ID |
String, unique among all users |
|
Bio |
String |
Conference
|
Name |
String |
|
Tagline |
String |
|
Start |
Date/Time |
|
End |
Date/Time |
Session
|
Title |
String |
|
Outline |
String |
|
Start |
Date/Time |
|
End |
Date/Time |
Attachment
|
Content |
Binary |
|
Type |
Media Type (i.e., JPEG, PDF, etc.) |
Venue
|
Name |
String |
|
Location |
Place |
Room
|
Name |
String |
|
Location |
Place |
Once we’ve got a solid understanding of the kinds of data we’ll be addressing, we can go a bit further and see how these nouns might play out in the context of our proposed featureset.
Logical Data Model
We’ve taken the first step in describing our data types by acknowledging the information we’ll need to capture. Now we need to take into account some additional concerns:
§ What are the relationships inherent between entities?
§ How much data are we expecting in each entity?
§ What features will be demanded of our entities?
It’s questions like these that will help us to arrive at a logical data model, a representation of our data that isn’t yet tied to any specific storage mechanism but still addresses the preceding questions. Decisions at this step are instrumental in our later choices, which will have heavy impact in areas like efficiency and performance.
This is because database systems have varying strengths when we couple data representation with the requests we may make. Actions like searching and sorting can take milliseconds or days, depending only upon the backing data structures and implementation used! Therefore, it’s very important for us to define the relationships required between our data, and recognize cases where we could have potentially large result sets; it’s here that we’ll need to design efficiently.
Relationships
Relationships are the bonds that tie our entities together, and come in three flavors of cardinality:
|
Cardinality |
Name |
Example |
|
1:1 |
One-to-one |
I have one nose; my nose belongs to only me. |
|
1:N |
One-to-many |
I have many fingers; my fingers belong to only me. |
|
N:N |
Many-to-many |
I have many friends; my friends also have many other friends besides me. |
So in the case of the entities for our application as defined by our desired featureset, we can draw the following relationships:
|
# |
Entity 1 |
Entity 2 |
Cardinality |
Description |
|
1 |
Conference |
Session |
1:N |
A conference may have many sessions. |
|
2 |
Session |
Room |
N:N |
A session may take place in many rooms (spanned together). |
|
3 |
Venue |
Room |
1:N |
A venue may have many rooms; a room exists only in one venue. |
|
4 |
Conference |
Venue |
1:N |
A conference may take place in many venues. |
|
5 |
Conference |
Attachment |
1:N |
A conference may have many attachments. |
|
6 |
Session |
Attachment |
1:N |
A session may have many attachments. |
|
7 |
Venue |
Attachment |
1:N |
A venue may have many attachments. |
|
8 |
Room |
Attachment |
1:N |
A room may have many attachments. |
|
9 |
User |
User |
N:N |
A user may follow many other users on Twitter, and may also have many followers. |
In graphical terms, this may look a little like Figure 4-1.
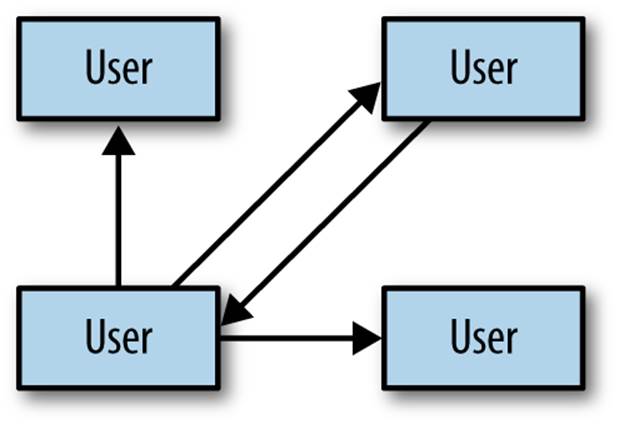
Figure 4-1. Cardinality in a relational database management system (RBDMS)
Intended use
When considering the efficiency of operations like database lookups, we should attempt to strike a balance between premature optimization and planning for performance. For instance, it really wouldn’t matter how complex the relationships between these entities are if we were only expecting a small, finite number of records; these would likely be cached at some level and held in memory, avoiding the need for lengthy tasks like full table scans. At the other end of the spectrum, it’d be an oversight to recognize that we’re expecting lots of data in a normalized form, and anticipate that querying against this model has time complexity that’s linear (O(n)), geometric (O(n2)), or worse.
Unfortunately, a quick peek at our data types and featureset shows that given enough time and interest in the application, we could reasonably expect entries for each of our main data types to grow, unbounded.
Of particular note is the many-to-many relationship among users. Because a user may have both many followers and may follow many people, we have two unidirectional relationships; a follower of mine is not necessarily someone I follow. This is in contrast to a mutual “friend” model employed by, say, the Facebook social networking site. In effect, this relationship has a graph structure.
Although we might store and model this structure in any number of ways, it’s worth noting that requesting transient relationships can be a problem with geometric time complexity. That is, we’d need one query to find all of a user’s followers. Then, for each of the results in that set, we’d need another query to find their followers. With each level we drill in to find followers, the problem becomes more prohibitively complex and unsolvable when organized in standard tables and rows.
Because the relationship is naturally a graph, it will likely make sense to store our relationship data in this fashion. That way, instead of querying standard records, we can walk the graph (simply obtaining a value from a pointer is an operation with constant time complexity, and thus will perform many factors better when we compound the process in a loop).
Another interesting area revolves around the system’s attachments. An attachment can be associated with a conference, session, venue, or room, and ultimately consists of some arbitrary series of bytes. This amounts to a natural “key/value” store, where we can add a bunch of content, associate some metadata with it, and draw a relationship to its “owner.” Again, we might tackle this in a standard table representation, but perhaps the problem domain suggests a native solution more in tune with the key/value model.
Now that we’ve developed a better understanding of our data, what requests we’ll make of it, and how much we might have, we can move on to designing some user-based and technical use cases to drive the construction of our application.
Obtaining, Building, Testing, and Running GeekSeek
We mentioned earlier that we’d be using the distributed version control system Git to store the source for this book and its examples, and our authoritative repository is kindly hosted at GitHub. Unlike centralized version control systems, Git stores the full repository history in each clone; when you “fork” or “copy” our repo, you’ll get the entire history with every commit made since the book’s inception. The authoritative repository refers to the one we elect to act as the upstream; changes that are approved to make it into new releases go here.
Obtaining the source
The first step toward obtaining the source is to sign up for a GitHub account. Though it’s absolutely possible to clone the authoritative repo locally, without an account either here or at some other writable host you won’t have an avenue to push changes of your own or contribute ideas. Because signing up for an account is free for our uses and has become commonplace especially in open source development, it’s the avenue we’ll advise.
As shown in Figure 4-2, signup is fairly simple, and the process starts at https://github.com.
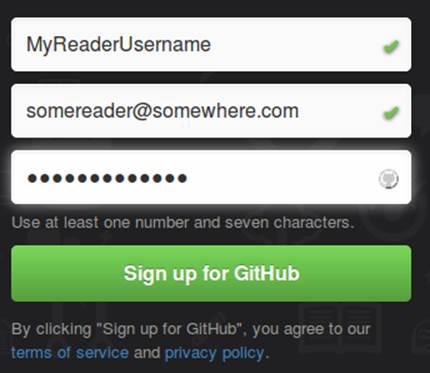
Figure 4-2. GitHub signup
Once logged in, you’ll fork the authoritative repo into your own publicly viewable repository. You do this by visiting the book’s repo and clicking the Fork button, as shown in Figure 4-3.
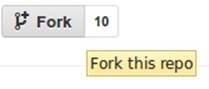
Figure 4-3. Forking a GitHub repository
With the fork in your account, now you’ll be able to clone this repository locally. And because you have your own fork on GitHub, you’ll be able to push the commits you make locally to your own fork, where you have write access. This provides two important benefits. First, it serves as a backup in case of disk failure, loss of machine, or a synchronization point if you develop on many machines. Second, it allows others to see the changes you’ve made and optionally bring them in for their own use.
Before bringing in your fork of the repository locally, you’ll need to have a Git client installed. This is a command-line tool available on many platforms, but there are also GUI wrappers included in many IDEs, like Eclipse or IntelliJ IDEA. We’ll offer instructions based on the command line.
Installation is platform-specific, but in flavors of Linux, this is easily enough achieved via your package manager of choice:
$> sudo apt-get install -y git
apt-get is the default for Debian-based distributions including Ubuntu and Linux Mint; for others (including RHEL and Fedora), yum may be more appropriate:
$> sudo yum install -y git
You can obtain the Git Client for Windows as an executable installer at http://git-scm.com/download/win. Similarly, the client for Mac is available at http://git-scm.com/download/mac.
You can verify your installation at the command prompt by executing:
$> git --version
git version 1.8.1.2
With your Git client installed locally, now you’re free to pull down the book’s repository from your public fork on GitHub to your local machine. You do this by first finding the URI to your repository on your GitHub repo’s home page, as shown in Figure 4-4.
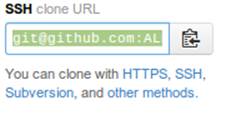
Figure 4-4. GitHub URI to clone
Then simply move to a directory in which you’d like to place your local clone, and issue the git clone command, passing in the URI to your GitHub repository. For instance:
$> git clone git@github.com:ALRubinger/continuous-enterprise-development.git
Cloning into 'continuous-enterprise-development'...
remote: Counting objects: 2661, done.
remote: Compressing objects: 100% (1170/1170), done.
remote: Total 2661 (delta 534), reused 2574 (delta 459)
Receiving objects: 100% (2661/2661), 1.19 MiB | 1.24 MiB/s, done.
Resolving deltas: 100% (534/534), done.
This will create a new directory called continuous-enterprise-development, under which you’ll be able to see the book’s source in the root and all supporting code under the code directory. The GeekSeek application root is housed under code/application:
$> ls -l
total 492
-rw-r--r-- 1 alr alr 468 Jul 6 17:18 book.asciidoc
-rw-r--r-- 1 alr alr 3227 Jun 26 03:20 Chapter00-Prelude.asciidoc
-rw-r--r-- 1 alr alr 23634 Jun 28 18:03 Chapter01-Continuity.asciidoc
-rw-r--r-- 1 alr alr 40527 Jun 28 18:03 Chapter02-EnablingTechnologies.asciidoc
-rw-r--r-- 1 alr alr 29803 Jun 28 18:03 Chapter03-ScratchToProduction.asciidoc
-rw-r--r-- 1 alr alr 20772 Jul 7 17:29
Chapter04-RequirementsAndExampleApplication.asciidoc
-rw-r--r-- 1 alr alr 32765 Jun 28 18:03
Chapter05-JavaPersistenceAndRelationalData.asciidoc
...etc
drwxr-xr-x 8 alr alr 4096 Jul 6 20:24 code
drwxr-xr-x 6 alr alr 4096 Jun 26 03:20 images
-rw-r--r-- 1 alr alr 2733 Jul 7 16:19 README.asciidoc
This will pull the current upstream version of the application into your local disk. If, for instance, you’d like to work against one of the authoritative repository’s tags, you can:
§ Create a remote reference to the authoritative repo: git remote add upstream https://github.com/arquillian/continuous-enterprise-development.git
§ fetch all the tags from the remote repo: git fetch -t upstream
§ checkout the tag as a local branch: git checkout -b remotes/upstream/1.0.0 (checks out tag 1.0.0)
§ Work on your new branch, based off the tag you’ve specified: git branch
Building and testing GeekSeek
We’ll be using the Maven software management tool to handle our build, test, and packaging needs. The Java 7 JDK is a prerequisite we’ll assume is installed on your system, referenced by the environment variable JAVA_HOME, and the executables in $JAVA_HOME/bin available on the system PATH; you can simply download and extract Maven on your drive to MAVEN_HOME from http://maven.apache.org/download.cgi. Ensure that MAVEN_HOME/bin is on your PATH, and you’ll be good to go:
$> mvn -version
Apache Maven 3.0.5 (r01de14724cdef164cd33c7c8c2fe155faf9602da;
2013-02-19 08:51:28-0500)
Maven home: /home/alr/opt/apache/maven/apache-maven-3.0.5
Java version: 1.7.0_25, vendor: Oracle Corporation
Java home: /home/alr/opt/oracle/java/jdk1.7.0_25/jre
Default locale: en_US, platform encoding: UTF-8
OS name: "linux", version: "3.8.0-19-generic", arch: "amd64", family: "unix"
You build and test GeekSeek by invoking the package phase of Maven on the pom.xml file located in code/application:
application $> mvn package
...lots of output
[INFO] BUILD SUCCESS
The first run is likely to take some time because Maven will resolve all dependencies of the project (including the application servers in which it will run), and download them onto your local disk. Subsequent runs will not require this initial “downloading the Internet” step and will execute much faster.
The test phase will instruct Maven to fire up the application servers and run all tests to ensure that everything is working as expected. If you’d like to save some time and simply fetch the dependencies, build the sources, and package the application, execute mvn package -DskipTests=true. Here’s a full list of the Maven lifecycles.
Packaging the full application will result in a WAR (Web Archive) file located at application/target/geekseek-(version).war. It’s this file that can be deployed into an application server to run GeekSeek locally; by default, we’ll be using WildFly from the JBoss Community.
Running GeekSeek
Although we’ve configured the build to obtain and use WildFly for use in testing GeekSeek automatically, you may prefer to have an installation on your local disk to use manually. This is useful for testing with remote containers (as covered in Chapter 11) as well as poking around the running application locally.
WildFly is available for free download, and should be extracted to a location we’ll call JBOSS_HOME. By executing JBOSS_HOME/bin/standalone.sh, the server will start:
wildfly-8.0.0.Alpha2 $> JBOSS_HOME=`pwd`
wildfly-8.0.0.Alpha2 $> cd bin/
bin $> ./standalone.sh
=========================================================================
JBoss Bootstrap Environment
JBOSS_HOME: /home/alr/business/oreilly/git/continuous-enterprise-development/
code/application/target/wildfly-8.0.0.Alpha2
JAVA: /home/alr/opt/oracle/java/jdk7/bin/java
JAVA_OPTS: -server -XX:+UseCompressedOops -Xms64m -Xmx512m -XX:MaxPermSize=
256m -Djava.net.preferIPv4Stack=true -Djboss.modules.system.pkgs=org.jboss.
byteman -Djava.awt.headless=true
=========================================================================
18:08:42,477 INFO [org.jboss.modules] (main) JBoss Modules version 1.2.2.Final
18:08:43,290 INFO [org.jboss.msc] (main) JBoss MSC version 1.2.0.Beta1
...trimm output
JBAS015874: WildFly 8.0.0.Alpha2 "WildFly" started in 8624ms - Started 153 of 189
services (56 services are lazy, passive or on-demand)
Copying the application/target/geekseek-(version).war file into JBOSS_HOME/standalone/deployments will trigger deployment of the GeekSeek application:
$> cp code/application/application/target/geekseek-1.0.0-alpha-1-SNAPSHOT.war
code/application/target/wildfly-8.0.0.Alpha2/standalone/deployments/
geekseek.war -v
'code/application/application/target/geekseek-1.0.0-alpha-1-SNAPSHOT.war' ->
'code/application/target/wildfly-8.0.0.Alpha2/standalone/deployments/
geekseek.war'
This will trigger something similar to the following on the server console:
18:11:46,839 INFO [org.jboss.as.server] (DeploymentScanner-threads - 2)
JBAS018559: Deployed "geekseek.war" (runtime-name : "geekseek.war")
Once deployed, you’ll be able to launch your web browser of choice, point it to http://localhost:8080/geekseek, and explore the screens powering the featureset we’ve covered here.
Use Cases and Chapter Guide
Each chapter from here on out will address a set of related technical and user-centric use cases. They’ll be organized as follows:
Chapter 5: Java Persistence and Relational Data
Our featureset demands a variety of operations that depend upon persistent data; information that must be saved longer than a user’s session or even the application’s startup/shutdown lifecycle. It’s likely we won’t be able to hold all of our data in memory either, so we’ll need to tackle issues like serialization and concurrent, multiuser access.
As our logical data analysis has exposed, we have plenty of data types that might work well arranged in a table/row/column structure as provided by the relational model, and that’s exactly what we’ll cover in Chapter 5.
We’ll also give a brief overview of mapping from a relational database to an object model that’s more familiar and friendly using the Java Persistence API and transactional support via Enterprise JavaBeans, and we’ll be sure to test that our domain layer is properly tested against known data sets using the handy Arquillian Persistence Extension.
Chapter 6: NoSQL: Data Grids and Graph Databases
Although it enjoys popularity as the most widely deployed database management system flavor, the relational model is not the only representation we have at our disposal. In recent years a paradigm shift has been prevalent in the persistence space.
NoSQL is a blanket term that has varied definitions, but generally refers to any number of database systems that do not employ the relational model. Popular implementations include a document store (i.e., MongoDB), a key/value store (i.e., Infinispan), or a graph database (i.e., Neo4j).
We noted earlier that our user relationship model is a natural graph and that our attachments might be well-served from a key/value store, so Chapter 6 will take a look at implementing persistent storage through these mechanisms.
Chapter 7: Business Logic and the Services Layer
With our persistence layers covered, we need to expose some way of allowing users to interact with the data and carry out the business logic demanded by our requirements. Java EE recommends encapsulating business logic in components such as Enterprise JavaBeans (EJBs) or Contexts and Dependency Injection (CDI) beans; we’ll be using primarily EJBs.
EJBs and CDI beans are very handy for either direct calling or using a remote procedure call (RPC) style, but they don’t do much to inform us as users about the possible state transitions and available operations as we navigate the application.
Our use case will explore the testable development of an SMTP service and interacting with an external, asynchronous, nontransactional resource.
Chapter 8: REST and Addressable Services
REST (Representational State Transfer) is an architecture of patterns that reveal services as resources in a fashion consistent with the guiding concepts behind the Web itself. Chapter 8 will introduce the exposition of enterprise services using REST guidelines, and will be implemented with Java EE’s JAX-RS framework. Additionally, we’ll test our endpoints using Arquillian Warp and the REST-assured project.
Chapter 9: Security
Our featureset requirements clearly couple user registration with an existing Twitter account, so we’ll need plenty of implementation and testing to ensure that the integrity of our users is not compromised.
Chapter 9 will involve OAuth authentication using security and identity management from the PicketLink project. We’ll again look to REST-assured to help us with our client testing strategy.
Chapter 10: UI
The user interface represents the visible elements with which end users will interact to submit form data and view our domain objects in a unified aggregate view. We test the UI through Arquillian Drone, Arquillian Warp, and hooks into the Selenium project.
In this fashion we automate and emulate real user input by writing tests to push data into the browser and reading the response after it’s been rendered.
Chapter 11: Assembly and Deployment
Once we’ve abided by proper modular design principles, it’s time to bring everything together and do some full-scale integration testing upon the final deployable archive. Chapter 11 will combine our application and set up some test configurations to flex all layers of GeekSeek working in tandem.
With our bird’s-eye view of the GeekSeek example application complete, it’s time to dig into some code.
All materials on the site are licensed Creative Commons Attribution-Sharealike 3.0 Unported CC BY-SA 3.0 & GNU Free Documentation License (GFDL)
If you are the copyright holder of any material contained on our site and intend to remove it, please contact our site administrator for approval.
© 2016-2026 All site design rights belong to S.Y.A.