Neo4j in Action (2015)
Appendix B. Setting up and running the sample code
All of the source code used in the book is available for download from www.manning.com/Neo4jinAction as well as at https://github.com/opencredo/neo4j-in-action.
All of the code and demos use Java so you’ll need to have an appropriate version of Java installed. Additionally, we use Maven as the primary framework for providing the automatic building, compiling, and running of the code.
JUnit-based tests have primarily been used to demonstrate features in the book, but there are some standalone classes as well (which are not run as part of the test suite) that can also be executed to view their results.
This appendix provides the instructions required to set up your system to run the examples and associated source code.
B.1. Setting up your environment
This section describes how to prepare your machine for running the associated samples and demo code.
Download the sample code
Download and unpack the sample code into a directory that we’ll refer to as N4JIA_SAMPLE_HOME. The source code is provided in zip format and can be downloaded from www.manning.com/Neo4jinAction. Alternatively you can simply clone the github repository available athttps://github.com/opencredo/neo4j-in-action.
Install JDK (Oracle SE 7)
Neo4j requires Java 7 as the minimum JDK (Java Development Kit) to run and has officially been tested against Java 7. For those wishing to try it out with Java 8, though in theory you can give it a bash, there are no guarantees at this stage and so we recommend you stick with Java 7 for now until Java 8 is officially supported. Maven is also a Java-based tool, and it specifically requires a JDK to be installed rather than simply a JRE (Java Runtime Environment).
You should download and install the latest Oracle JDK (Java SE 7u60 at the time of writing) into a JAVA_HOME directory. OS-specific downloads can be found at www.oracle.com/technetwork/java/javase/downloads/index.html with installation instructions provided athttp://docs.oracle.com/javase/7/docs/webnotes/install/index.html.
Remember
Follow the JDK installation instructions, not the JRE instructions!
Install Maven (3.0.5+)
Maven (http://maven.apache.org) is a Java-based development framework that’s used to help manage the setup, building, compiling, and dependency resolution aspects of your code, including the running of tests. These are all part of its well-known and standardized process called the Maven lifecycle, which is controlled by a project object model file, a.k.a. the pom.xml file.
With its standardized structure and process, one of the nice things about Maven is that whenever a user encounters a new Maven project, they’ll generally be able to get up and running quickly. Everything will be in the places they expect, and common commands are used to build and execute the code.
Another benefit to using Maven is its dependency management system. You simply need to tell Maven what libraries you are dependent on, and it will generally go and fetch them (as well as any subdependencies)—no manual downloading is required. That means all the source code can be built and tests can be run through Maven.
A snippet of the dependency section from a pom.xml file is shown next, demonstrating how you can specify that version 3.1.1.RELEASE of the spring-data-neo4j library is required:
<dependencies>
<dependency>
<groupId>org.springframework.data</groupId>
<artifactId>spring-data-neo4j</artifactId>
<version>3.1.1.RELEASE<version>
</dependency>
...
</dependencies>
You can find the appropriate binary files as well as OS-specific installation instructions at http://maven.apache.org/download.cgi. Please ensure you use Maven 3.0.5 or greater. The setup process described on the Maven site will help you to set up your Maven home (the M2_HOME directory), and it should be a relatively simple process.
If, however, you’re running in a restricted environment (behind a firewall or on a machine with restricted rights), you may need to do a bit more configuration. The “Building a Project with Maven” page of the Maven site provides a more detailed set of instructions for setting up Maven to build a project, including its use in restricted situations: http://maven.apache.org/run-maven/index.html.
B.2. Running the demos and samples
This section provides specific instructions for running the samples and demo code that accompany this book. This assumes you have already followed the setup instructions detailed in section B.1.
General instructions
The instructions here are for running the samples from a command line, but you can just as easily run them from an IDE such as Eclipse or IntelliJ, provided the appropriate (Maven) plugins are available and basic setup has been performed:
1. If you haven’t already, follow the instructions in section B.1 to install Java and Maven.
2. Open a command prompt (Windows) or terminal (Unix) window.
3. Change to the base N4JIA_SAMPLE_HOME directory.
4. Type in the following command, which will build, compile, and run various tests for all the main code samples detailed within this book:
mvn clean install
5. You should see a lot of output in the terminal window; if everything was successful, you should see something like the following output at the end:
[INFO] --------------------------------------------------------------------
[INFO] Reactor Summary:
[INFO]
[INFO] neo4j-in-action-reactor ........................... SUCCESS [0.298s]
[INFO] chapter01 ......................................... SUCCESS [1.898s]
[INFO] chapter02 ......................................... SUCCESS [0.035s]
[INFO] chapter03 ......................................... SUCCESS [2.319s]
[INFO] chapter04 ......................................... SUCCESS [1.494s]
[INFO] chapter05 ......................................... SUCCESS [1.556s]
[INFO] chapter06 ......................................... SUCCESS [3.873s]
[INFO] chapter07-core .................................... SUCCESS [5.450s]
[INFO] chapter07-spring .................................. SUCCESS [2.420s]
[INFO] chapter08 ......................................... SUCCESS [0.290s]
[INFO] chapter09-current-simple .......................... SUCCESS [7.704s]
[INFO] chapter09-current-advanced ........................ SUCCESS [6.123s]
[INFO] chapter09-legacy-simple ........................... SUCCESS [7.815s]
[INFO] chapter09-legacy-advanced ......................... SUCCESS [5.268s]
[INFO] chapter10-embedded ................................ SUCCESS [0.053s]
[INFO] chapter10-server .................................. SUCCESS [0.201s]
[INFO] chapter10-performance-demos-server ................ SUCCESS [0.535s]
[INFO] chapter10-performance-demos-embedded .............. SUCCESS [0.122s]
[INFO] chapter11-community-embedded ...................... SUCCESS [1.042s]
[INFO] chapter11-enterprise-embedded ..................... SUCCESS [3.832s]
[INFO] --------------------------------------------------------------------
[INFO] BUILD SUCCESS
[INFO] --------------------------------------------------------------------
[INFO] Total time: 52.638s
[INFO] Finished at: Sat Jul 05 22:13:59 BST 2014
[INFO] Final Memory: 38M/305M
[INFO] --------------------------------------------------------------------
If you only want to run the tests for one of the chapters, you can change directories to the appropriate chapter (ensure that this is the directory with a pom.xml file in it) and run the mvn clean install command again. Alternatively, staying in the N4JIA_SAMPLE_HOME directory, you can use the following command (substituting the appropriate directory where the pom.xml file resides as required):
mvn clean install -f chapter04/pom.xml
Chapter 10 instructions
The sample code in chapter 10 includes tests and demos that involve running Neo4j in server mode. As quite a few of these tests are used for gauging performance-related metrics using different options, we decided to have the server start up independently of the tests running against them, to get as accurate a measurement as possible. This also enables you to go through the process of setting up a server for yourself.
Unlike all the other tests, which up until now have made use of Java JUnit-based tests, the performance-related tests in chapter 10 are to be initiated from the command line via a series of bash scripts.
As one of the clients chosen to execute some performance tests was the simple Unix-based curl (http://curl.haxx.se) client, the performance-testing scripts are only available as bash scripts that can be run in (*nix) environments. If you’re on Windows, you could try installing Cygwin (www.cygwin.com), which provides a form of Linux emulation, and then run the scripts from within there:
1. By default, when you run the standard mvn clean install, the performance-related tests in chapter 10 are not run. If you look at the output in the console, when it gets to chapter 10, you should see something like figure B.1.
Figure B.1. Default Maven output for chapter 10
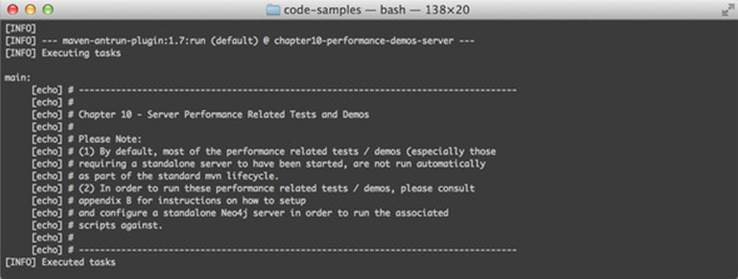
This is to be expected. It’s been done this way to ensure that the basic tests can all run without you having to first install a Neo4j server or wait a long time for the performance tests to run. The instructions that follow detail the additional steps required to run the performance-related demos and tests.
2. To run some of the embedded performance related tests, run with the Maven profile include-embedded-perfdemos:
mvn clean test -f chapter10/performance-demos-embedded/pom.xml -P
include-embedded-perfdemos
3. Follow the instructions in appendix A that detail how to set up and install a single Neo4j server (the samples use version 2.0.1). We’ll refer to the directory where the Neo4j server has been installed as <<NEO4J_HOME>>.
4. Within the <<NEO4J_HOME>>/conf/neo4j-server.properties file,
1. Ensure that the location of the Neo4j server database is set to that expected by the performance tests by modifying the following property value as shown here:
org.neo4j.server.database.location=<<N4JIA_SAMPLE_HOME>>/chapter10/
performance-demos-server/the-chapter10-server-db
2. Ensure the unmanaged extension (to be installed in the upcoming steps) has been registered. This can be done by uncommenting and modifying the following property value as shown here:
org.neo4j.server.thirdparty_jaxrs_classes=com.manning.neo4jia.chapter
10.unmanagedext=/n4jia/unmanaged
5. Provided you have performed at least one successful general mvn clean install, a jar file containing the server plugins and extensions will have been generated here:
<<N4JIA_SAMPLE_HOME>>/chapter10/server/target/chapter10-server-1.0-
SNAPSHOT.jar. Copy this file to the server's plugin directory located
here: <<NEO4J_HOME>>/plugins.
6. Create and export a NEO4J_HOME variable within your terminal window, as this will be expected by the scripts. Do this by executing the following command:
export NEO4J_HOME=<<NEO4J_HOME>>
7. Change to the base directory from which the bash scripts will be run: <<N4JIA_SAMPLE_HOME>>/chapter10/performance-demos-server/src/test/scripts/bash.
8. Seed the performance database by executing the following script from within the bash directory:
./seed_performance_db.sh
You should now be ready to run the bash scripts.
9. Ensure that you’re still in the base directory from which the bash scripts will be run:
<<N4JIA_SAMPLE_HOME>>/chapter10/performance-demos-server/src/test/
scripts/bash.
10. Run the bash-based tests:
1. To run the curl-based demo/performance test scripts, use this command:
./curl_adams_friends.sh
2. To run the Java REST-binding-based demo/performance test scripts use this command:
./javarestbinding_adams_friends.sh
Note: As this is a Java REST client, these scripts essentially call certain Java-based demo/JUnit tests under the covers. This will spew out quite a bit of information. If you’re only interested in seeing the stopwatch details, the recommended way to call script is as follows:
./javarestbinding_adams_friends.sh | grep StopWatch