Sams Teach Yourself Java in 24 Hours, 7th Edition (2014)
Part IV: Programming a Graphical User Interface
Hour 13. Building a Simple User Interface
THIS HOUR’S TO-DO LIST:
![]() Create user interface components such as buttons.
Create user interface components such as buttons.
![]() Create labels, text fields, and other components.
Create labels, text fields, and other components.
![]() Group components together.
Group components together.
![]() Put components inside other components.
Put components inside other components.
![]() Scroll components horizontally and vertically.
Scroll components horizontally and vertically.
![]() Open and close windows.
Open and close windows.
Things are going to get pretty gooey during this hour. You will make an enormous mess creating your first graphical user interface (GUI) with Java.
Computer users have come to expect their software to feature a GUI, take user input from a mouse, and work like other programs. Although some users still work in command-line environments such as MS-DOS or a Linux shell, most would be confused by software that does not offer a point-and-click, drag-and-drop graphical interface like Microsoft Windows or Mac OS.
Java supports this kind of software with Swing, a collection of Java classes that represent all the different buttons, text fields, sliders, and other components that can be part of a GUI, as well as the classes needed to take user input from those components.
During this hour and the next, you create and organize GUIs in Java. Afterward in Hour 15, “Responding to User Input,” you enable those interfaces to receive mouse clicks and other user input.
Swing and the Abstract Windowing Toolkit
Because Java is a cross-platform language that enables you to write programs for many operating systems, its graphical user software must be flexible. Instead of catering only to the Windows style or the Mac version, it must handle both along with other platforms.
With Java, the development of a program’s user interface is based on Swing and an earlier set of classes called the Abstract Windowing Toolkit. These classes enable you to create a GUI and receive input from the user.
Note
Swing includes dozens of components that can be customized in far more ways than can be documented here. This book covers the most common components and their most useful methods. As you explore them in the next four hours, you can learn more about each component and find new methods in Oracle’s official documentation for the Java Class Library. Read it on the Web at http://download.java.net/jdk8/docs/api. It offers additional reference documentation on every class and interface in Java 8.
Swing includes everything you need to write programs that use a GUI. With Java’s user interface classes, you can create a GUI that includes all the following and more:
![]() Buttons, check boxes, labels, and other simple components
Buttons, check boxes, labels, and other simple components
![]() Text fields, sliders, and other more complex components
Text fields, sliders, and other more complex components
![]() Pull-down menus and pop-up menus
Pull-down menus and pop-up menus
![]() Windows, frames, dialog boxes, panels, and applet windows
Windows, frames, dialog boxes, panels, and applet windows
Using Components
In Java, every part of a GUI is represented by a class in the Swing package. There is a JButton class for buttons, a JWindow class for windows, a JTextField class for text fields, and so on.
To create and display an interface, you create objects, set their variables, and call their methods. The techniques are the same as those you used during the previous three hours as you were introduced to object-oriented programming (OOP).
When you are putting a GUI together, you work with two kinds of objects: components and containers. A component is an individual element in a user interface, such as a button or slider. A container is a component that you can use to hold other components.
The first step in creating an interface is to create a container that can hold components. In an application, this container is often a window or a frame.
Windows and Frames
Windows and frames are containers that can be displayed in a user interface and hold other components. Windows are simple containers that do not have a title bar or any of the other buttons normally along the top edge of a GUI. Frames are windows that include all the common windowing features users expect to find when they run software—such as buttons to close, expand, and shrink the window.
You create these containers using Swing’s JWindow and JFrame classes. To refer to Swing classes in a Java program without using their full package-and-class name, use the following statement:
import javax.swing.*;
This only imports the class names from the javax.swing package. There are other packages you’ll be putting to work in Swing.
One way to make use of a frame in a Java application is to make the application a subclass of JFrame. Your program inherits the behavior it needs to function as a frame. The following statements create a subclass of JFrame:
import javax.swing.*;
public class MainFrame extends JFrame {
public MainFrame() {
// set up the frame
}
}
This class creates a frame but doesn’t set it up completely. In the frame’s constructor, you must do several things when creating a frame:
![]() Call a constructor of the superclass, JFrame.
Call a constructor of the superclass, JFrame.
![]() Set up the title of the frame.
Set up the title of the frame.
![]() Set up the size of the frame.
Set up the size of the frame.
![]() Set the frame’s look and feel.
Set the frame’s look and feel.
![]() Define what happens when the frame is closed by a user.
Define what happens when the frame is closed by a user.
You also must make the frame visible, unless for some reason it should not be displayed when the application begins running.
Most of these things can be handled in the frame’s constructor. The first thing the method must contain is a call to one of the constructors of JFrame, using the super statement. Here’s an example:
super();
The preceding statement calls the JFrame constructor with no arguments. You also can call it with the title of your frame as an argument:
super("Main Frame");
This sets the title of the frame, which appears in the title bar along the top edge, to the specified string. In this example, the text “Main Frame” appears.
If you don’t set up a title in this way, you can call the frame’s setTitle(String) method with the title as the argument:
setTitle("Main Frame");
The size of the frame can be established by calling its setSize(int, int) method with two arguments: the width and height. The following statement sets up a frame that is 350 pixels wide and 125 pixels tall:
setSize(350, 125);
Another way to set the size of a frame is to fill it with components and then call the frame’s pack() method with no arguments:
pack();
The pack() method sets the frame big enough to hold the preferred size of each component inside the frame (but no bigger). Every interface component has a preferred size, though this is sometimes disregarded, depending on how components have been arranged within an interface. You don’t need to explicitly set the size of a frame before calling pack()—the method sets it to an adequate size before the frame is displayed.
Every frame is displayed with a button along the title bar that can be used to close the frame. On a Windows system, this button appears as an X in the upper-right corner of the frame. To define what happens when this button is clicked, call the frame’ssetDefaultCloseOperation(int) method with one of four JFrame class variables as the argument:
![]() EXIT_ON_CLOSE—Exit the program when the button is clicked.
EXIT_ON_CLOSE—Exit the program when the button is clicked.
![]() DISPOSE_ON_CLOSE—Close the frame and keep running the application.
DISPOSE_ON_CLOSE—Close the frame and keep running the application.
![]() DO_NOTHING_ON_CLOSE—Keep the frame open and continue running.
DO_NOTHING_ON_CLOSE—Keep the frame open and continue running.
![]() HIDE_ON_CLOSE—Close the frame and continue running.
HIDE_ON_CLOSE—Close the frame and continue running.
This call to the method is the most common, because when an application’s graphical user interface closes, it means the application should complete its work and shut down:
setDefaultCloseOperation(JFrame.EXIT_ON_CLOSE);
A graphical user interface created with Swing can customize its appearance with a look and feel, a visual theme that controls how buttons and other components appear and how they behave.
Java includes an enhanced look and feel called Nimbus, but it must be turned on to be used in a class. Setting a look and feel is done by calling the setLookAndFeel() method of the UIManager class in the main Swing package.
The method takes one argument: the full name of the look and feel’s class.
The following statement sets Nimbus as the look and feel:
UIManager.setLookAndFeel(
"com.sun.java.swing.plaf.nimbus.NimbusLookAndFeel"
);
One last thing is required is to make the frame visible. Call its setVisible() method with true as an argument:
setVisible(true);
This opens the frame at the defined width and height. You also can call it with false to stop displaying a frame.
Listing 13.1 contains the source code described in this section. In a Java file named SalutonFrame, enter these statements.
LISTING 13.1 The Full Text of SalutonFrame.java
1: package com.java24hours;
2:
3: import javax.swing.*;
4:
5: public class SalutonFrame extends JFrame {
6: public SalutonFrame() {
7: super("Saluton mondo!");
8: setLookAndFeel();
9: setSize(350, 100);
10: setDefaultCloseOperation(JFrame.EXIT_ON_CLOSE);
11: setVisible(true);
12: }
13:
14: private void setLookAndFeel() {
15: try {
16: UIManager.setLookAndFeel(
17: "com.sun.java.swing.plaf.nimbus.NimbusLookAndFeel"
18: );
19: } catch (Exception exc) {
20: // ignore error
21: }
22: }
23:
24: public static void main(String[] arguments) {
25: SalutonFrame frame = new SalutonFrame();
26: }
27: }
Lines 24–26 of Listing 13.1 contain a main() method, which turns this frame class into an application. When you run the class, you see the frame shown in Figure 13.1.
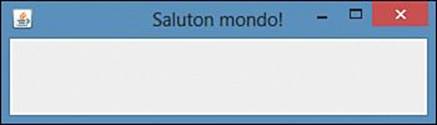
FIGURE 13.1 Displaying a frame in an application.
The only thing that SalutonFrame displays is a title: the traditional programmer’s greeting “Saluton mondo!” The frame is an empty window because it doesn’t contain any other components yet.
To add components to a frame, you must create the component and add it to the container. Each container has an add() method that takes one argument: the component to display.
The SalutonFrame class includes a setLookAndFeel() method that designates Nimbus as the frame’s look and feel. The setLookAndFeel() method of the UIManager class is called in lines 16–18 to accomplish this.
The call to this method is placed inside a try-catch block, which enables errors that might occur to be handled. The try and catch statements are new because they haven’t been introduced yet. Dealing with errors using these statements is covered in Hour 18, “Handling Errors in a Program.”
At this point, all you need to know is that calling UIManager.setLookAndFeel() sets a GUI’s look and feel. Any error that might occur as a result would just cause a program to keep the default look and feel instead of Nimbus.
Tip
There’s something you might not have seen before in Listing 13.1. Look at Lines 16–18 carefully. They are a single statement spread out over three lines. The statement could be on a single line, but it was spread out to make the code more readable—for humans. The Java compiler doesn’t care about the extra whitespace. As long as the statement has the right things in it and ends with a semicolon, it can be on multiple lines.
Buttons
One simple component you can add to a container is a JButton object. JButton, like the other components you are working with during this hour, is part of the java.awt.swing package. A JButton object is a clickable button with a label that describes what clicking the button does. This label can be text, graphics, or both. The following statement creates a JButton called okButton and gives it the text label OK:
JButton okButton = new JButton("OK");
After a component such as JButton is created, it should be added to a container by calling its add() method:
add(okButton);
When you add components to a container, you do not specify the place in the container where the component should be displayed. The arrangement of components is decided by an object called a layout manager. The simplest of these managers is the FlowLayout class, which is part of thejava.awt package.
To make a container use a specific layout manager, you must first create an object of that layout manager’s class. You can create a FlowLayout object by calling its constructor with no arguments:
FlowLayout flo = new FlowLayout();
After you create a layout manager, you call the container’s setLayout method to associate the specified manager with that container:
setLayout(flo);
This statement designates the flo object as the layout manager.
The next application you create, a class called Playback, is a Java application that displays a frame with three buttons. Enter the text from Listing 13.2 into a new Java file and save the file.
LISTING 13.2 The Full Text of Playback.java
1: package com.java24hours;
2:
3: import javax.swing.*;
4: import java.awt.*;
5:
6: public class Playback extends JFrame {
7: public Playback() {
8: super("Playback");
9: setLookAndFeel();
10: setSize(225, 80);
11: setDefaultCloseOperation(JFrame.EXIT_ON_CLOSE);
12: FlowLayout flo = new FlowLayout();
13: setLayout(flo);
14: JButton play = new JButton("Play");
15: JButton stop = new JButton("Stop");
16: JButton pause = new JButton("Pause");
17: add(play);
18: add(stop);
19: add(pause);
20: setVisible(true);
21: }
22:
23: private void setLookAndFeel() {
24: try {
25: UIManager.setLookAndFeel(
26: "com.sun.java.swing.plaf.nimbus.NimbusLookAndFeel"
27: );
28: } catch (Exception exc) {
29: // ignore error
30: }
31: }
32:
33: public static void main(String[] arguments) {
34: Playback frame = new Playback();
35: }
36: }
The Playback program creates a FlowLayout layout manager in line 12 and sets the frame to employ it in line 13. When three buttons are added to the frame in lines 17–19, they’re arranged by this manager.
Note
Because so many different user interface components are introduced during this hour, the full source code used to create each figure is not listed here. You can find full versions of each program on the book’s website at www.java24hours.com on the Hour 13 page.
When you run the application, your output should resemble Figure 13.2. Though you can click the buttons, nothing happens in response because the program does not contain any methods to receive and respond to user input. That’s covered during Hour 15.
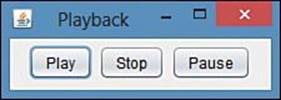
FIGURE 13.2 Displaying buttons on a GUI.
You can add many Swing user components to a container in this manner.
Labels and Text Fields
A JLabel component displays information that the user cannot modify. This information can be text, a graphic, or both. These components are often used to label other components in an interface, hence the name. They often identify text fields.
A JTextField component is an area where a user can enter a single line of text. You can set up the width of the box when you create the text field.
The following statements create a JLabel component and JTextField component and add them to a container:
JLabel pageLabel = new JLabel("Web page address: ", JLabel.RIGHT);
JTextField pageAddress = new JTextField(20);
FlowLayout flo = new FlowLayout();
setLayout(flo);
add(pageLabel);
add(pageAddress);
Figure 13.3 shows this label and text field side-by-side. Both of the statements in this example use an argument to configure how the component should look.

FIGURE 13.3 Displaying labels and text fields.
The pageLabel label is set up with the text “Web page address:” and a JLabel.RIGHT argument. This last value indicates that the label should appear flush right. JLabel.LEFT aligns the label text flush left, and JLabel.CENTER centers it. The argument used with JTextFieldindicates the text field should be approximately 20 characters wide. You also can specify default text that appears in the text field with a statement such as the following:
JTextField country = new JTextField("Togolese Republic", 29);
This statement would create a JTextField object that is 20 characters wide and has the text “Togolese Republic” in the field.
You can retrieve the text contained within the object with the getText() method, which returns a string:
String countryChoice = country.getText();
As you might have guessed, you also can set the text with a corresponding method:
country.setText("Separate Customs Territory of Taiwan, Penghu, Kinmen, and Matsu");
This sets the text to the official name of Chinese Taipei, which is the longest country name in the world, edging out the second-place finisher: United Kingdom of Great Britain and Northern Ireland.
Check Boxes
A JCheckBox component is a box next to a line of text that can be checked or unchecked by the user. The following statements create a JCheckBox object and add it to a container:
JCheckBox jumboSize = new JCheckBox("Jumbo Size");
FlowLayout flo = new FlowLayout();
setLayout(flo);
add(jumboSize);
The argument to the JCheckBox() constructor indicates the text to be displayed alongside the box. If you want the box to be checked, use the following statement instead:
JCheckBox jumboSize = new JCheckBox("Jumbo Size", true);
You can present a JCheckBox singly or as part of a group. In a group of check boxes, only one can be checked at a time. To make a JCheckBox object part of a group, you have to create a ButtonGroup object. Consider the following:
JCheckBox frogLegs = new JCheckBox("Frog Leg Grande", true);
JCheckBox fishTacos = new JCheckBox("Fish Taco Platter", false);
JCheckBox emuNuggets = new JCheckBox("Emu Nuggets", false);
FlowLayout flo = new FlowLayout();
ButtonGroup meals = new ButtonGroup();
meals.add(frogLegs);
meals.add(fishTacos);
meals.add(emuNuggets);
setLayout(flo);
add(jumboSize);
add(frogLegs);
add(fishTacos);
add(emuNuggets);
This creates three check boxes that are all grouped under the ButtonGroup object called meals. The Frog Leg Grande box is checked initially, but if the user checked one of the other meal boxes, the check next to Frog Leg Grande would disappear automatically. Figure 13.4 shows the different check boxes from this section.
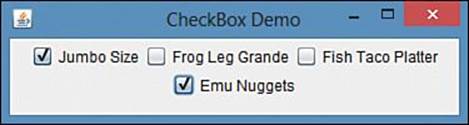
FIGURE 13.4 Displaying check box components.
Combo Boxes
A JComboBox component is a pop-up list of choices that also can be set up to receive text input. When both options are enabled, you can select an item with your mouse or use the keyboard to enter text instead. The combo box serves a similar purpose to a group of check boxes, except that only one of the choices is visible unless the pop-up list is being displayed.
To create a JComboBox object, you have to add each of the choices after creating the object, as in the following example:
JComboBox profession = new JComboBox();
FlowLayout flo = new FlowLayout();
profession.addItem("Butcher");
profession.addItem("Baker");
profession.addItem("Candlestick maker");
profession.addItem("Fletcher");
profession.addItem("Fighter");
profession.addItem("Technical writer");
setLayout(flo);
add(profession);
This example creates a single JComboBox component that provides six choices from which the user can select. When one is selected, it appears in the display of the component. Figure 13.5 shows this example while the pop-up list of choices is being displayed.
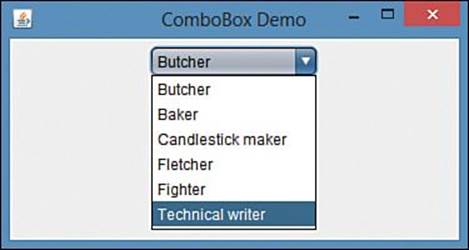
FIGURE 13.5 Displaying combo box components.
To enable a JComboBox component to receive text input, you must call its setEditable(boolean) method with an argument of true:
profession.setEditable(true);
You must call this method before the component is added to a container.
Text Areas
A JTextArea component is a text field that enables the user to enter more than one line of text. You can specify the width and height of the component. The following statements create a JTextArea component with a width of 40 characters and a height of 8 lines and add it to a container:
JTextArea comments = new JTextArea(8, 40);
FlowLayout flo = new FlowLayout();
setLayout(flo);
add(comments);
Figure 13.6 shows this example in a frame.
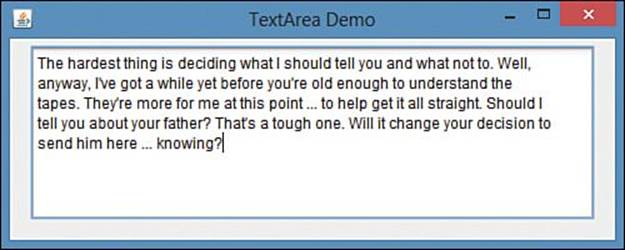
FIGURE 13.6 Displaying text area components.
You can specify a string in the JTextArea() constructor to be displayed in the text area, using the newline character \n to send text to the next line, as in the following:
JTextArea comments = new JTextArea("I should have been a pair\n"
+ "of ragged claws.", 10, 25);
Text areas have two methods that can be called to specify how the component behaves when a user types text past the right edge of a line. Call the setLineWrap(boolean) method with an argument of true to cause text to wrap to the next line:
comments.setLineWrap(true);
To determine how text wraps to the next line, use the setWrapStyleWord(boolean) method. Call it with the argument true to wrap based on where a word ends, or false to wrap based on characters.
If you don’t call these methods, text will not wrap. A user can keep entering text on the same line until hitting the Enter key, going past the right edge of the area.
Text area components behave in ways you might not expect—they expand in size when the user reaches the bottom of the area and do not include scrollbars along the right edge or bottom edge. To implement them in a more well-behaved way, you must place the text area inside a container called a scroll pane.
Components in a GUI are often bigger than the area available to display them. To enable a component to move from one part of the component to another, you use vertical and horizontal scrollbars.
In Swing, you support scrolling by adding a component to a scroll pane, a container that is represented by the JScrollPane class.
You can create a scroll pane with the following constructors:
![]() JScrollPane()—Create a scroll pane with a horizontal and vertical scrollbar that appear as needed.
JScrollPane()—Create a scroll pane with a horizontal and vertical scrollbar that appear as needed.
![]() JScrollPane(int, int)—Create a scroll pane with the specified vertical scrollbar and horizontal scrollbars.
JScrollPane(int, int)—Create a scroll pane with the specified vertical scrollbar and horizontal scrollbars.
![]() JScrollPane(Component)—Create a scroll pane that contains the specified user interface component.
JScrollPane(Component)—Create a scroll pane that contains the specified user interface component.
![]() JScrollPane(Component, int, int)—Create a scroll pane with the specified component, vertical scrollbar, and horizontal scrollbar.
JScrollPane(Component, int, int)—Create a scroll pane with the specified component, vertical scrollbar, and horizontal scrollbar.
The integer arguments to these constructors determine how scrollbars are used in the pane. Use the following class variables as these arguments:
![]() JScrollPane.VERTICAL_SCROLLBAR_AS_NEEDED or JScrollPane.HORIZONTAL_SCROLLBAR_AS_NEEDED
JScrollPane.VERTICAL_SCROLLBAR_AS_NEEDED or JScrollPane.HORIZONTAL_SCROLLBAR_AS_NEEDED
![]() JScrollPane.VERTICAL_SCROLLBAR_NEVER or JScrollPane.HORIZONTAL_SCROLLBAR_NEVER
JScrollPane.VERTICAL_SCROLLBAR_NEVER or JScrollPane.HORIZONTAL_SCROLLBAR_NEVER
![]() JScrollPane.VERTICAL_SCROLLBAR_ALWAYS or JScrollPane.HORIZONTAL_SCROLLBAR_ALWAYS
JScrollPane.VERTICAL_SCROLLBAR_ALWAYS or JScrollPane.HORIZONTAL_SCROLLBAR_ALWAYS
If you have created a scroll pane without a component in it, you can use the pane’s add(Component) method to add components. After you have finished setting up a scroll pane, it should be added to a container in place of the component.
Here’s the previous example rewritten to put the text area inside a scroll pane:
FlowLayout flo = new FlowLayout();
setLayout(flo);
JTextArea comments = new JTextArea(8, 40);
comments.setLineWrap(true);
comments.setWrapStyleWord(true);
JScrollPane scroll = new JScrollPane(comments,
JScrollPane.VERTICAL_SCROLLBAR_ALWAYS,
JScrollPane.HORIZONTAL_SCROLLBAR_NEVER);
add(scroll);
Figure 13.7 shows this example in a frame.
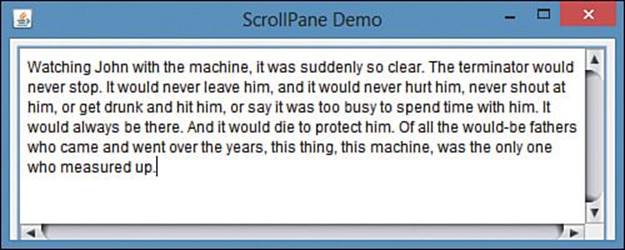
FIGURE 13.7 Displaying text area components in a scroll pane container.
Panels
The last component you learn to create during this hour is a panel, which is created in Swing using the JPanel class. JPanel objects are the simplest kind of container available in a graphical user interface. The purpose of JPanel objects is to subdivide a display area into different groups of components. When the display is divided into sections, you can use different layout managers in each section.
The following statements create a JPanel object and assign it a layout manager:
JPanel topRow = new JPanel();
FlowLayout flo = new FlowLayout();
topRow.setLayout(flo);
add(topRow);
Panels often are used when arranging the components in an interface, as you see in Hour 14, “Laying Out a User Interface.”
You add components to a panel by calling its add() method. You can assign a layout manager directly to the panel by calling its setLayout() method.
You also can use panels when you need an area in an interface to draw something, such as an image from a graphics file.
Another convenient use of JPanel is to create your own components that can be added to other classes. This is demonstrated in the hour’s final project.
Creating Your Own Component
An advantage of OOP is the capability to reuse classes in different projects. For the next project, you create a special panel component that you can reuse in other Java programs. The component, FreeSpacePanel, reports the disk space available on the computer running the application. The panel displays the amount of free space, the total space, and the percentage that is free.
The first step in creating your own user interface component is to decide the existing component from which to inherit. Your new component will have all of its existing attributes and behavior, aside from anything you modify and anything new you add.
The FreeSpacePanel component is a subclass of JPanel defined in Listing 13.3. Enter the text from Listing 13.3 into a new empty Java file and save the file.
LISTING 13.3 The Full Text of FreeSpacePanel.java
1: package com.java24hours;
2:
3: import java.io.IOException;
4: import java.nio.file.*;
5: import javax.swing.*;
6:
7: public class FreeSpacePanel extends JPanel {
8: JLabel spaceLabel = new JLabel("Disk space: ");
9: JLabel space = new JLabel();
10:
11: public FreeSpacePanel() {
12: super();
13: add(spaceLabel);
14: add(space);
15: try {
16: setValue();
17: } catch (IOException ioe) {
18: space.setText("Error");
19: }
20: }
21:
22: private final void setValue() throws IOException {
23: // get the current file storage pool
24: Path current = Paths.get("");
25: FileStore store = Files.getFileStore(current);
26: // find the free storage space
27: long totalSpace = store.getTotalSpace();
28: long freeSpace = store.getUsableSpace();
29: // get this as a percentage (with two digits)
30: double percent = (double)freeSpace / (double)totalSpace * 100;
31: percent = (int)(percent * 100) / (double)100;
32: // set the label's text
33: space.setText(freeSpace + " free out of " + totalSpace + " ("
34: + percent + "%)");
35:
36: }
37: }
This class is a component that can be added to any graphical user interface when you want to display information about available disk space. It cannot run on its own as an application.
The setValue() method in FreeSpacePanel sets the text of the label that presents disk space information. This method has the keyword final when it is declared in line 22:
private final void setValue() {
// ...
}
Including the final keyword in a method declaration prevents the method from being overridden in a subclass. This is required for FreeSpacePanel to be a GUI component.
The panel is created in the constructor in Lines 11–20. The following things are taking place:
![]() Line 12—The super() method calls the constructor of the JPanel class, ensuring that it is set up properly.
Line 12—The super() method calls the constructor of the JPanel class, ensuring that it is set up properly.
![]() Line 13—The new label spaceLabel, which has the text “Disk space:” and was created as an instance variable in Line 8, is added to the panel by calling add(Component) with the label as an argument.
Line 13—The new label spaceLabel, which has the text “Disk space:” and was created as an instance variable in Line 8, is added to the panel by calling add(Component) with the label as an argument.
![]() Line 14—The space label, an instance variable with no text created in Line 9, also is added to the panel.
Line 14—The space label, an instance variable with no text created in Line 9, also is added to the panel.
![]() Line 16—The setValue() method is called, which sets the text of the space label.
Line 16—The setValue() method is called, which sets the text of the space label.
The call to setValue() in Line 16 is enclosed within another try-catch block like the one employed when setting a look and feel. You learn more about how to deal with errors during Hour 18, but here’s the TLDR version: try-catch makes it possible to handle one or more errors that could occur in part of a Java program.
Note
The acronym “TLDR” stands for “too long; didn’t read,” and it appears on the Internet when people give an extremely brief summary of a long piece of writing for the people who don’t want to read the whole thing.
I hope this book isn’t TLDR for you. We tried to make it JRLRWTANIRJP (just-right length; read whole thing and now I’m rich Java programmer).
This is necessary because calling setValue() might cause an error to occur when the computer’s file system is accessed to see how much free space it contains. The error has its own class in Java, IOException, which represents input/output errors.
The try block encloses the potential error-causing code. The catch block identifies the kind of error within parentheses and the code to execute if that error occurs.
If such an error is encountered as the application runs, Line 18 sets the space label’s text to the text “Error” to let the user know something has gone wrong.
Giving the custom component something interesting to do requires a quick toe-dip into Java file handling, a subject that will be covered at length in Hour 21, “Reading and Writing Files.”
To figure out how much disk space is free on a computer, you need four classes in the java.nio.file package, which is employed to access a computer’s file system.
A Path object represents the location of a file or folder. The Paths class has a get(String) method that converts a string to a path matching that string. When called with “” (an empty string), it returns the path of the current folder in which the Java application is running:
Path current = Paths("");
Storage information for a disk is represented in Java by a FileStore object, which is a file storage pool. After you have a path, you can get the file store where that path is located with a method in the Files class. Call the getFileStore(Path) method of Files to retrieve that file storage pool:
FileStore store = Files.getFileStore(current);
With this pool, you now can call its getTotalSpace() and getUsableSpace() methods to find out how much disk space is available on the current disk:
long totalSpace = store.getTotalSpace();
long freeSpace = store.getUsableSpace();
double percent = (double)freeSpace / (double)totalSpace * 100;
Caution
The expression that calculates the percentage includes a lot of references to double, which may seem weird. The second and third cast the freeSpace and totalSpace variables to double values before they are used in the expression. This is necessary to keep the expression from producing an integer value instead of a floating-point number. Java determines the data type of an expression’s result by the types in the expression. A long divided by a long multiplied by the integer 100 would produce a long, not the desired percentage.
The percentage calculated in the final statement may be an extremely long number of digits past the decimal point, such as 64.8675309.
The following expression converts a double percentage to no more than two decimal places:
percent = (int)(percent * 100) / (double)100;
The first half of the expression multiplies the percentage by 100—moving the decimal two places to the right—and then converts it to an integer, so 64.8675309 becomes 6487.
The second half divides this by 100—moving the decimal back two places to the left—to restore an approximation of the percentage. This makes 6486 into 64.86.
With a percentage limited to two decimal places, the label’s text can be set to report the available and occupied disk space:
space.setText(freeSpace + " free out of " + totalSpace + " ("
+ percent + "%)");
There’s no way to see the panel you’ve just created until it is added to a graphical user interface. To try out FreeSpacePanel, create the FreeSpaceFrame application defined in Listing 13.4. Enter a new text file for a class called FreeSpaceFrame.
LISTING 13.4 The Full Text of FreeSpaceFrame.java
1: package com.java24hours;
2:
3: import java.awt.*;
4: import javax.swing.*;
5:
6: public class FreeSpaceFrame extends JFrame {
7: public FreeSpaceFrame() {
8: super("Disk Free Space");
9: setLookAndFeel();
10: setSize(500, 100);
11: setDefaultCloseOperation(JFrame.EXIT_ON_CLOSE);
12: FlowLayout flo = new FlowLayout();
13: setLayout(flo);
14: FreeSpacePanel freePanel = new FreeSpacePanel();
15: add(freePanel);
16: setVisible(true);
17: }
18:
19: private void setLookAndFeel() {
20: try {
21: UIManager.setLookAndFeel(
22: "com.sun.java.swing.plaf.nimbus.NimbusLookAndFeel"
23: );
24: } catch (Exception exc) {
25: // ignore error
26: }
27: }
28:
29: public static void main(String[] arguments) {
30: FreeSpaceFrame frame = new FreeSpaceFrame();
31: }
32: }
This application creates a FreeSpacePanel component in Line 14 and adds the panel to its frame in Line 15.
When you run the application, it should resemble Figure 13.8 with values from your own computer.
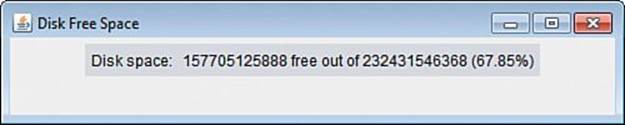
FIGURE 13.8 Displaying a custom disk space component.
Summary
Users have come to expect a point-and-click, visual environment for the programs they run. This expectation makes creating software more of a challenge, but Java puts these capabilities into your hands with Swing, which provides all the classes you need to provide a working, useful GUI—regardless of what kind of setup you’re using to run Java programs.
Developing graphical Java applications with Swing is a good way to get some practice working with object-oriented programming. Every component, container, and layout manager is represented by its own class of object. Many of them inherit their common behavior from the same superclass. For instance, all user interface components introduced during this hour are subclasses of javax.swing.JComponent.
During the next hour, you learn more about the design of a GUI as you work with new layout managers that can specify the placement of components within a container in more sophisticated ways than FlowLayout.
Workshop
Q&A
Q. How are components arranged if I don’t assign a layout manager to a container?
A. In a simple container such as a panel, components are arranged using FlowLayout by default. Each component is added in the same manner that words are displayed on a page in English, from left to right, then down to the next line when there’s no more room. Frames, windows, and applets use the BorderLayout default layout style you learn about during the next hour.
Q. Why do so many of the graphical user interface classes have names preceded by a “J,” such as JFrame and JLabel?
A. These classes are a part of the Swing framework, which was the second attempt at graphical user interface classes in the Java class library. The Abstract Windowing Toolkit (AWT) was first, and it had simpler class names, such as Frame and Label.
The AWT classes belong to the java.awt package and related packages, while Swing classes belong to javax.swing and the like, so they could have the same class names. The use of the “J” names keeps the classes from being mistaken for each other.
Swing classes also are called Java Foundation Classes (JFC).
Q. Where can I buy an uncut sheet of $1 bills?
A. The U.S. Bureau of Engraving and Printing sells sheets of real $1, $10, $20, and $50 bills at the website www.moneyfactorystore.gov.
A sheet of 32 $1 bills sells for $61, 16 $10 bills for $249, 16 $20 bills for $409, and 16 $50 bills for $900. Because the money is actual currency, these purchases are cheaper if you factor in the face value of those bills. You’re paying an extra $29 for the ones, $89 for the tens, $89 for the twenties, and $100 for the fifties.
There’s also a five-pound bag containing $10,000 of shredded bills that sells for $45.
The bureau is the only U.S. government agency that admits it is throwing money away.
Quiz
If your brain hasn’t been turned into a GUI mush with this hour’s toil, test your skills by answering the following questions.
1. Which user component is used as a container to hold other components?
A. TupperWare
B. JPanel
C. Choice
2. Which of the following must be done first within a container?
A. Establish a layout manager
B. Add components
C. Doesn’t matter
3. What method determines how components are arranged within a container?
A. setLayout()
B. setLayoutManager()
C. setVisible()
Answers
1. B. JPanel. You can add components to the panel and then add the panel to another container such as a frame.
2. A. You must specify the layout manager before the components so you can add them in the correct way.
3. A. The setLayout() method takes one argument: the layout manager object that has the job of deciding where components should be displayed.
Activities
To interface further with the subject of GUI design, undertake the following activities:
![]() Modify the SalutonFrame application so that it displays “Saluton Mondo!” in the frame’s main area instead of the title bar.
Modify the SalutonFrame application so that it displays “Saluton Mondo!” in the frame’s main area instead of the title bar.
![]() Enhance the FreeSpacePanel component by displaying commas every three places in the disk size figures. One way to do it uses a StringBuilder object, the String class method charAt(int), and a for loop to iterate through the string.
Enhance the FreeSpacePanel component by displaying commas every three places in the disk size figures. One way to do it uses a StringBuilder object, the String class method charAt(int), and a for loop to iterate through the string.
To see Java programs that implement these activities, visit the book’s website at www.java24hours.com.