PROFESSIONAL JAVA FOR WEB APPLICATIONS (2014)
Part I Creating Enterprise Applications
Chapter 4 Using JSPs to Display Content
IN THIS CHAPTER
· Using <br /> is easier than output.println("<br />")
· Creating your first JSP
· Using Java within a JSP (and why you shouldn’t)
· Combining Servlets and JSPs
· A note about JSP Documents (JSPX)
WROX.COM CODE DOWNLOADS FOR THIS CHAPTER
You can find the wrox.com code downloads for this chapter at www.wrox.com/go/projavaforwebapps on the Download Code tab. The code for this chapter is divided into the following major examples:
· Hello-World-JSP Project
· Hello-User-JSP Project
· Customer-Support-v2 Project
NEW MAVEN DEPENDENCIES FOR THIS CHAPTER
In addition to the Maven dependency introduced in the previous chapter, you will also need the following Maven dependencies. The exclusions are necessary because the JSTL implementation defines transient dependencies on older versions of the JSP and Servlet specifications that have different Maven artifact IDs than the current versions.
<dependency>
<groupId>javax.servlet.jsp</groupId>
<artifactId>javax.servlet.jsp-api</artifactId>
<version>2.3.1</version>
<scope>provided</scope>
</dependency>
<dependency>
<groupId>javax.servlet.jsp.jstl</groupId>
<artifactId>javax.servlet.jsp.jstl-api</artifactId>
<version>1.2.1</version>
<scope>compile</scope>
</dependency>
<dependency>
<groupId>org.glassfish.web</groupId>
<artifactId>javax.servlet.jsp.jstl</artifactId>
<version>1.2.2</version>
<scope>compile</scope>
<exclusions>
<exclusion>
<groupId>javax.servlet</groupId>
<artifactId>servlet-api</artifactId>
</exclusion>
<exclusion>
<groupId>javax.servlet.jsp</groupId>
<artifactId>jsp-api</artifactId>
</exclusion>
<exclusion>
<groupId>javax.servlet.jsp.jstl</groupId>
<artifactId>jstl-api</artifactId>
</exclusion>
</exclusions>
</dependency>
In the last chapter you learned about Servlets and handling requests, responses, request parameters, file uploads, Servlet configuration, and more. However, you may have noticed a serious inconvenience when writing the Servlet code to output HTML content to the response: Repeatedly calling methods on the ServletOutputStream or PrintWriter classes to output the content and having to put HTML content within Java Strings, requiring escaping of quotation marks, is a real pain. In this chapter, you explore JavaServer Pages and how they can make your life a whole lot easier.
<BR /> IS EASIER THAN OUTPUT.PRINTLN(“<BR />”)
Java is a powerful language. It has many capabilities and features that make it useful, flexible, and easy to use. Chances are, you are reading this book because you like Java and want to learn how to do more with it. So what’s up with this?
PrintWriter writer = response.getWriter();
writer.append("<!DOCTYPE html>\r\n")
.append("<html>\r\n")
.append(" <head>\r\n")
.append(" <title>Hello World Application</title>\r\n")
.append(" </head>\r\n")
.append(" <body>\r\n")
.append(" Nick says, \"Hello, World!\"\r\n")
.append(" </body>\r\n");
.append("</html>\r\n");
The number of ways this is inconvenient and cumbersome is rather long. Significantly more code must be written to achieve this. More file space is needed to store the code. Time is wasted writing and testing the code. Verbosity with line endings (\r\n) is necessary to make HTML source that is readable in the browser’s View Source feature. Any quotation marks that appear in the HTML must be escaped so that they do not prematurely terminate the String literal. And — perhaps one of the worst problems — code editors cannot easily (in most cases, at all) recognize and validate HTML code within Strings to tell you if you’re doing something wrong. Surely there is a better way. After all, it’s just text. If you wrote the previous example in a plain HTML file, it would be simple:
<!DOCTYPE html>
<html>
<head>
<title>Hello World Application</title>
</head>
<body>
Hello, World!
</body>
</html>
Fortunately, the creators of the Java EE specification realized that this system would quickly become unwieldy and designed JavaServer Pages, also known as JSPs, to answer the need.
Why JSPs Are Better
The problem with the most-recent code example is that it’s a static HTML document. It may have been easier to write and it will likely be infinitely easier to maintain than the example written in Java, but there’s nothing dynamic about it. JSPs are essentially a hybrid solution, combining Java code and HTML tags. JSPs can contain any HTML tag in addition to Java code, built-in JSP tags (Chapter 7), custom JSP tags (Chapter 8), and something called the Expression Language (Chapter 5). Many of these features you learn about in later chapters.
In this chapter, you explore the basic rules of JSPs and learn about the syntax, directives, declarations, scriptlets, and expressions of the JSP technology. You also learn about the life cycle of a JSP and how it is ultimately used to send a response back to the user.
There are alternatives to JSPs. Perhaps the most common alternative is Facelets, part of the broader JavaServer Faces technology (or JSF for short, making it easy to confuse with JSP). There are also templating frameworks, such as Velocity, Freemarker, SiteMesh, and Tiles, that all, in some fashion, supplement or replace the features provided by JSPs. This book cannot possibly cover all the options and variations of presentation technologies that work with the Servlet 3.1 specification. It will, therefore, focus on the most popular and widely used technology.
The following example, which you can find in the index.jsp file of the Hello-World-JSP project on the wrox.com downloads page, re-creates the Hello-World project from Chapter 2, but uses a JSP instead of a Servlet to display the greeting to the user.
<%@ page contentType="text/html;charset=UTF-8" language="java" %>
<!DOCTYPE html>
<html>
<head>
<title>Hello World Application</title>
</head>
<body>
Hello, World!
</body>
</html>
This example is nearly identical to the original HTML-only example earlier in the section. The only new code is the first line, highlighted in bold. This is one of several JSP directives that you will examine in more detail in the section “Creating Your First JSP.” This particular directive sets the content type and character encoding of the page, something you previously did with the setContentType and setCharacterEncoding method calls on the HttpServletResponse. Everything else in this JSP is plain HTML, transmitted back to the client as-is in the response. The interesting question is, “What’s actually happening behind the scenes?”
What Happens to a JSP at Run Time
A JSP is really just a fancy Servlet. Perhaps you have heard the phrase “syntactic sugar.” Ultimately, in one way or another, all popular languages programmers use today on a regular basis are syntactic sugar. Take Java, for example, as a code you write with. When you compile Java code, it is turned into bytecode. The bytecode is what matters — not the Java code. In fact, many different statements in Java can turn into identical bytecode. But to take it a step further, bytecode is not the final rendering of a Java program. This bytecode is still platform-independent, but that is not sufficient to run on varying operating systems.
When Java runs in the JRE, the Just In Time compiler compiles it into machine code, which is specific to the platform it runs on. Ultimately, it’s this machine code that is executed. Even lower-level languages, such as C, are simply syntactic sugar for the machine code they actually get compiled to. JSPs are another form of syntactic sugar. At run time, the JSP code is interpreted by the JSP compiler, which parses out all the special features in the JSP code and translates them to Java code. The Java class created from each JSP implements Servlet. Then, the Java code goes through the same cycle it normally does. Still at run time, it is compiled into bytecode and then into machine code. Finally, the JSP-turned-Servlet responds to requests like any other Servlet.
To investigate this, for these steps:
1. Compile the Hello-World-JSP project in your IDE, start your debugger, and open your browser to http://localhost:8080/hello-world/. You should see the all-too-familiar greeting on your screen.
2. Browse your file system to the Tomcat 8.0 home directory (C:\Program Files\Apache Software Foundation\Tomcat 8.0 on Windows) and go into the directory work\Catalina\localhost\hello-world. Tomcat puts all compiled JSPs for the application in this directory, but it also leaves behind the intermediate Java files it generates so that you can inspect and troubleshoot with them.
3. Continue going down further directories until you come across the index_jsp.java file. Open it (not the index_jsp.class file) in your favorite text editor.
What you should find is a class that extends org.apache.jasper.runtime.HttpJspBase. This abstract class extends — you may have guessed — HttpServlet. HttpJspBase provides some base functionality that will be used by all JSPs that Tomcat compiles, and when your JSP is executed, ultimately the service method on that Servlet is executed, which eventually executes the _jspService method.
If you inspect the _jspService method, you’ll find a series of method calls writing your HTML to the output stream. This code should look very familiar to you because it’s not that different from the Java code that you replaced with this JSP. Of course, the JSP Servlet class does not look the same on every web container. The org.apache.jasper classes, for example, are Tomcat-specific classes. Your JSP compiles differently on each different web container you run it on. The important point is that there is a standard specification for the behavior and syntax of JSPs, and as long as the web containers you use are compliant with the specification, your JSPs should run the same on all of them, even if the Java code they get translated into looks completely different.
JSPs, just like your normal Servlets, can also be debugged at run time. To demonstrate this, place a breakpoint on the line of your JSP that contains “Hello, World,” and then refresh your browser. At this point you should hit the breakpoint in the JSP, and you should notice a few things. First, you can hit breakpoints directly within the JSP code! You don’t have to place breakpoints in the translated JSP Servlet class; Java, Tomcat, and your IDE can match the breakpoint in the JSP to code executing in the run time. You should also notice that, although the breakpoint might be in the JSP code, the debugger clearly is not. The stack will show that your run time has paused within the _jspService method, and the variables window shows you all the instance and local variables defined within that scope in the index_jsp class.
WARNING IntelliJ IDEA has much better JSP debugging facilities than does Eclipse IDE. If you are using Eclipse, it’s possible that you may not be able to place a breakpoint in this JSP at all. As of now, Eclipse only lets you place breakpoints in the Java code embedded in your JSPs, while IntelliJ allows breakpoints in any JSP code.
Like all other Servlets running in your web container, JSPs have a life cycle. In some web containers, such as Tomcat, the JSP is translated and compiled just in time when the first request to that JSP arrives. For future requests, the JSP is already compiled and ready to use. This, as you can imagine, introduces some performance impacts. Although the performance hit generally comes only on the first request, leaving all subsequent requests to run at a decent speed, this is still unwanted in some production environments. Because of this, many web containers give you the option of precompiling all of an application’s JSPs as it deploys. This, of course, significantly slows down deployment for large applications. If you have many thousands of JSPs, your application could conceivably take 10 minutes to deploy instead of just 1. It’s up to the organization to decide which configuration meets its needs best. Regardless of the time of compilation, after the first request arrives, the JSP Servlet will be instantiated and initialized, and then the first request can be serviced.
By this point you should realize that the code you write in your JSP ultimately is translated into some version of the code you would have had to write anyway if you didn’t have JSPs. So why, you might ask, should one even bother with JSPs? The fact remains that the JSP is a much easier file format for producing markup for display in a web browser than writing straight Java code. If this can improve the speed, efficiency, and accuracy of your development process, the question actually is, “Why wouldn’t you use JSPs?”
CREATING YOUR FIRST JSP
You’ve explored a JSP that was already written for you, so now work on creating your own JSP. You need to know some things about how JSPs are structured and what you can put in JSPs. You go over some of the basic need-to-knows in this section and then delve a little further in the next.
Understanding the File Structure
In the previous chapter you explored Servlets and answered the question, “What must you do in the service method?” The answer was that you must appropriately respond to the HTTP request with a valid HTTP response, but because HttpServlet takes care of all of that for you, your doGet and doPost methods could literally be empty methods (as useless as that was). As it turns out, the question in this case is still the same. There are many things that must happen when a JSP is executed, but all those “musts” are handled for you.
To demonstrate this, create a file named blank.jsp in the web root of an empty project; delete all its contents (your IDE might put some code in there for you — delete it all); and redeploy your project. Alternatively, just use the Hello-World-JSP you downloaded fromwrox.com, which already contains a blank.jsp. When you go to http://localhost:8080/hello-world/blank.jsp, you don’t get any errors. Everything works fine; you just get a useless blank page back. Now put the following code in it, redeploy, and reload:
<!DOCTYPE html>
<html>
<head>
<title>Hello World Application</title>
</head>
<body>
Hello, World!
</body>
</html>
There’s just a slight difference between blank.jsp and index.jsp now, that being the missing special tag that’s on the first line of index.jsp. And yet, the content still displays the same. This is because JSPs by default have a content type of text/html and a character encoding of ISO-8859-1. However, this default character encoding is incompatible with many special characters like those in non-English languages, which can interfere with efforts to localize your application. So, at a minimum, your JSP needs to contain HTML to display to the user. However, to ensure that HTML displays correctly in all browsers on all systems in many languages, you’ll want to include certain JSP tags to control the data sent to the client, such as setting the character encoding to the localization-friendly UTF-8.
Several different types of tags can be used in JSPs, and you explore more of them in the next section. Of the directive tag type, there is one that you have already seen:
<%@ page ... %>
This directive tag provides you with some controls over how the JSP is translated, rendered, and transmitted back to the client. In the index.jsp example, the page directive looks like this:
<%@ page contentType="text/html;charset=UTF-8" language="java" %>
The language attribute tells the container which JSP scripting language this JSP uses. A JSP scripting language (not to be confused with interpreted scripting languages) is a language that can be embedded in a JSP for scripting certain actions. Currently, Java is the only supported scripting language for JSPs, but this attribute leaves that open for extension someday.
Technically, you can omit this attribute. Because Java is the only supported JSP scripting language, and in addition Java is the default in the specification, Java is implied when this attribute is missing. The contentType attribute tells the container the value of theContent-Type header that should be sent back along with the response. The Content-Type header contains both the content type and the character encoding, separated with a semicolon. If you recall reading the index_jsp.java file, it contained the Java that this attribute was translated to:
response.setContentType("text/html;charset=UTF-8");
It should be noted that the previous code snippet is the equivalent of the following two lines of code, which you saw in your Hello-User project from Chapter 3:
response.setContentType("text/html");
response.setCharacterEncoding("UTF-8");
And furthermore, these are both equivalent to the following line of code:
response.setHeader("Content-Type", "text/html;charset=UTF-8");
As you can see, there are several ways to accomplish the same task. The setContentType and setCharacterEncoding methods are convenience methods. Which method you use is up to you; although, you should generally pick one and stick to it to avoid confusion. However, as most of your content code from here on will be JSP-based, you’ll mostly just be concerned with the contentType attribute of the page directive.
Directives, Declarations, Scriptlets, and Expressions
In addition to the various HTML and JSP tags you can use within a JSP, there are several unique structures that define a sort of JSP language. They are directives, declarations, scriptlets, and expressions. In the simplest terms, they look like this:
<%@ this is a directive %>
<%! This is a declaration %>
<% this is a scriptlet %>
<%= this is an expression %>
Using Directives
Directives are used to direct the JSP interpreter to perform an action (such as setting the content type) or make an assumption about the file (such as which scripting language it uses), to import a class, to include some other JSP at translation time, or to include a JSP tag library.
Using Declarations
You use declarations to declare something within the scope of your JSP Servlet class. For example, you could define instance variables, methods, or classes within a declaration tag. You need to remember that these declarations all are made within the generated JSP Servlet class, so any classes you define are actually inner classes of the JSP Servlet class.
Using Scriptlets
Like a declaration, a scriptlet also contains Java code. However, scriptlets have a different scope. Although code within a declaration is copied to the JSP Servlet class body at translation time and must therefore be used to declare some field, type, or method, scriptlets are copied to the body of the _jspService method you looked at earlier. Any local variables that are in scope within this method execution will be in scope within your scriptlets, and any code that is legal within a method body is legal within a scriptlet. So, you can define local variables, but not instance fields. You can use conditional statements, manipulate objects, and perform arithmetic, all things you cannot do within a declaration. You can even define classes (as odd as that may sound, but it is legal in Java to have class definitions within a method), but the classes do not have scope outside the _jspService method. A class, method, or variable defined within a declaration can be used within a scriptlet, but a class or variable defined within a scriptlet cannot be used within a declaration.
Using Expressions
Expressions contain simple Java code that returns something that can be written to the client output, and expressions output the return variable of that code to the client. So, you could have an arithmetic calculation within an expression because that results in a numeric value that can be displayed. You could call some method that returns a String or number or other primitive because that results in a displayable returned value. Essentially, any code that can legally be the entire right side of an assignment statement can be placed within an expression. Expressions execute within the same method scope as scriptlets; that is, expressions get copied into the _jspService method just like scriptlets do.
Take a look at the following example code. It doesn’t actually do anything useful, but it demonstrates the variety of things you can do within directives, declarations, scriptlets, and expressions.
<%@ page contentType="text/html;charset=UTF-8" language="java" %>
<%!
private final int five = 0;
protected String cowboy = "rodeo";
//The assignment below is not declarative and is a syntax error if uncommented
//cowboy = "test";
public long addFive(long number)
{
return number + 5L;
}
public class MyInnerClass
{
}
MyInnerClass instanceVariable = new MyInnerClass();
//WeirdClassWithinMethod is in method scope, so the declaration below is
// a syntax error if uncommented
//WeirdClassWithinMethod bad = new WeirdClassWithinMethod();
%>
<%
class WeirdClassWithinMethod
{
}
WeirdClassWithinMethod weirdClass = new WeirdClassWithinMethod();
MyInnerClass innerClass = new MyInnerClass();
int seven;
seven = 7;
%>
<%= "Hello, World" %><br />
<%= addFive(12L) %>
Putting It All Together
Create a JSP file named gibberish.jsp in the web root of an empty project, and put the preceding gibberish code in there (or just use the JSP in the Hello-World-JSP project). Compile and run your application and go to http://localhost:8080/hello-world/gibberish.jsp. Obviously, this page isn’t useful in the browser; the point that you should understand is in the source file. Go back into the Tomcat work directory and find the gibberish_jsp.java file. Examine how the code in your JSP got translated into Java code in the JSP Servlet class to gain a better understanding of the differing purposes of directives, declarations, scriptlets, and expressions.
Commenting Your Code
Like nearly every other language or markup in existence, JSP also has a method for commenting code. There are four different ways that you can comment code within a JSP:
· XML comments
· Traditional Java line comments
· Traditional Java block comments
· JSP comments.
The XML comment (also known as the HTML comment) is syntax you are most likely already familiar with:
<!-- This is an HTML/XML comment -->
This type of comment is passed through to the client because it is standard XML and HTML markup. The browser ignores it, but it appears in the source of the response. More important, any JSP tags within this comment will still be evaluated. This is essential to remember because commenting out code with this style of comment does not prevent Java code within from executing. To demonstrate this, consider the following example:
<!-- This is an HTML/XML comment: <%= someObject.dumpInfo() %> -->
If someObject.dumpInfo() returns “connections=5, errors=12, successes=3847,” the response sent back to the client’s browser will contain the following HTML comment in it:
<!-- This is an HTML/XML comment: connections=5, errors=12, successes=3847 -->
You can use any legal Java comment within declarations and scriptlets in JSPs. This includes, as mentioned previously, line comments and block comments. In the following example, all the code in bold is commented out and will not be evaluated:
<%
String hello = "Hello, World!"; // this is a comment
//long test = 12L;
/*int i = 0;
int j = 12;*/
String goodbye = "Goodbye, World!";
%>
The new type of comment that you have not used yet is the JSP comment. The syntax of the JSP comment closely resembles an XML/HTML comment, with the only difference being the percent sign instead of the exclamation point at the beginning, and the percent sign at the end:
<%-- This is a JSP comment --%>
Just as with the XML/HTML comment, everything between the <%-- and the --%> is considered commented. Not only is it not sent to the browser, it isn’t even interpreted/translated by the JSP compiler. Whereas all three of the previously covered comment types appear in the JSP Servlet java file, this last comment type does not. To the translator, it does not even exist. This is especially useful for commenting out some range of code that includes JSP scriptlets, expressions, declarations, directives, and markup that you do not want to be evaluated or sent to the browser.
Adding Imports to Your JSP
In Java when you use a class directly, you must either reference it using its fully qualified class name, or you must include an import statement at the top of the Java code file. The rules are the same in JSPs. Any time a JSP contains Java code that uses a class directly, it must either use the fully qualified class name or include an import directive in the JSP file. And just as every class in the java.lang package is imported implicitly in Java files, similarly every class in the java.lang package is implicitly imported in JSP files.
Importing Java classes in JSPs is different but just as easy as importing Java classes in a Java code file. Importing one or more classes is as simple as adding an import attribute to the page directive you learned about earlier:
<%@ page import="java.util.*,java.io.IOException" %>
In this example, you use a comma to separate multiple imports, and the result is that the java.io.IOException class and all the members of the java.util package are imported. Of course, you do not have to use a separate directive to import classes. You could combine this with the example seen earlier:
<%@ page contentType="text/html;charset=UTF-8" language="java"
import="java.util.*,java.io.IOException" %>
You also don’t have to combine multiple imports into a single directive using a comma separator. You could use multiple directives to accomplish this task:
<%@ page import="java.util.Map" %>
<%@ page import="java.util.List" %>
<%@ page import="java.io.IOException" %>
Something to consider when doing this is that every JSP tag that results in no output, and also every directive, declaration, and scriptlet, results in an empty line being output to the client. So, if you have many page directives for imports followed by various declarations and scriptlets, you could end up with dozens of blank lines in your output. To compensate for this, JSP developers often chain the end of one tag to the beginning of the next:
<%@ page import="java.util.Map"
%><%@ page import="java.util.List"
%><%@ page import="java.io.IOException" %>
This code example has the exact same logical outcome as the previous example, but it results in only one blank line at the top of the output instead of three. In the section “Combining Servlets and JSPs,” you will learn about a deployment descriptor setting that trims this white space entirely.
Using Directives
Earlier you were introduced to the directive, a JSP feature denoted with a beginning <%@ and an ending %>. There are three different types of directives, which are discussed at this time.
Changing Page Properties
You have already explored some features of the page directive, such as the contentType, language, and import attributes. There are also many more features of the page directive. As explained earlier, the page directive provides you with some controls over how the JSP is translated, rendered, and transmitted back to the client. Here are some of the other attributes that may be included in this directive:
pageEncoding
Specifies the character encoding used by your JSP and is equivalent to setCharacterEncoding on HttpServletResponse. Instead of contentType="text/html;charset=UTF-8", you could write contentType="text/html" pageEncoding="UTF-8".
session
This must either be true or false, and indicates whether the JSP participates in HTTP sessions. By default it is true, giving you access to the implicit session variable in the JSP (covered in the section “Using Java within a JSP (and Why You Shouldn’t)”). If you set it to false, you cannot use the implicit session variable. If your application does not use sessions and you want to improve performance, setting this to false might be a good idea. You learn more about HTTP sessions in Chapter 5.
isELIgnored
This attribute specifies whether expression language (EL) is parsed and translated for this JSP. You learn more about EL in Chapter 6. Prior to the JSP 2.0 specification, the default value was true, meaning you had to set it to false for every JSP in which you wanted to use EL. As of JSP 2.0 (you use JSP 2.3 in this book) the default value is false, so you should never need to worry about this setting.
buffer and autoFlush
These attributes are closely related, and their defaults are “8kb” and true, respectively. They control whether the output of the JSP is sent immediately to the browser as it is generated or buffered and sent in batches. The buffer attribute specifies the size of the JSP buffer or “none” (the output will not be buffered), whereas autoFlush indicates whether the buffer will be flushed automatically after it reaches its size limit. If buffer is set to “none” and autoFlush is set to false, an exception occurs when the JSP is translated to Java. IfautoFlush is set to false and the buffer becomes full, an exception occurs. This is a handy way to ensure that the content a JSP generates does not exceed a certain length.
With autoFlush set to true (the default), the smaller your buffer, the more often data will be flushed to the client, and the larger the buffer, the less often data will be flushed to the client. Disabling the buffer entirely with buffer="none" can improve the performance of your JSPs because it decreases memory consumption and CPU overhead. However, this is not without its setbacks. Using no buffer can result in sending more packets to the browser, which can increase bandwidth consumption marginally. Also, when the first character of the response begins flowing to the client, the HTTP response headers must be committed and sent before the response. Because of this, you cannot set response headers (response.setHeader(...)) or forward the JSP (<jsp:forward />) after the buffer has flushed, and you cannot set response headers or forward the JSP at all in a JSP where the buffer has been disabled. This may be an acceptable sacrifice to improve server-side performance in certain circumstances.
errorPage
If an error occurs during the execution of the JSP, this attribute instructs the container what JSP to forward the request to.
isErrorPage
This attribute indicates that this JSP is serving as an error page (by default, it is false). If set to true, this enables the implicit exception variable on the page. You would do this on JSPs that you forward to when errors occur, or that you have defined in the container as error-handling JSPs.
isThreadSafe
true by default, this tells the container that the JSP can safely serve multiple requests simultaneously. If changed to false, the container only serves requests to this JSP one-by-one. A good rule of thumb is to never change this. Remember, “If your JSP isn’t thread safe, you’re doing it wrong.”
extends
This attribute specifies which class your JSP Servlet should inherit from. Using this is not portable from one web container to another, and it should never be necessary. Just don’t do it.
Other Attributes
In most of your JSPs, contentType (and optionally pageEncoding) are the only attributes of the page directive that you will ever change from the default values. The session and isErrorPage attributes are probably the two most common of the other attributes. Occasionally, you may need to disable buffering. With each JSP, you should evaluate your options and decide which attributes should be changed to suit your application’s needs.
Including Other JSPs
Including other JSPs in a JSP is easy, but there are some interesting rules and options to keep in mind. The first tool that you can use to include another JSP in your JSP is the include directive. It is straightforward:
<%@ include file="/path/to/some/file.jsp" %>
The file attribute provides the container with the path to the JSP file that should be included. If it is absolute, the path resolves from the web root of the application, so a file named included.jsp in the WEB-INF directory could be included with path /WEB-INF/included.jsp. If the path is relative, it resolves from the same directory the including JSP exists in. The include directive is evaluated at translation time. Before the JSP is translated to Java, the include directive is replaced (virtually) with the contents of the included JSP file. After this happens, the combined contents are then translated to Java and compiled. Thus, as you can see, this process is static and only occurs once.
To demonstrate this, follow these steps:
1. Create a JSP called includer.jsp in the web root of your Hello-World-JSP project and place the following line of code in it (deleting any code your IDE generated). Alternatively, just use the Hello-World-JSP project.
<%@ include file="index.jsp" %>
2. Compile and debug your application and navigate to http://localhost:8080/hello-world/includer.jsp in your favorite browser. You should see the familiar page, which means your include has worked.
3. Now go into the Tomcat work directory and open the includer_jsp.java file that Tomcat created. You should immediately notice that, other than the class name, it is identical to index_jsp.java. This is because the JSP was included statically at translation time.
There is a different way to include other JSPs that results in a dynamic (run time) inclusion instead of a static (translation time) inclusion. You use the <jsp:include> tag to achieve this:
<jsp:include page="/path/to/some/page.jsp" />
The <jsp:include> tag doesn’t have a file attribute; it has a page attribute. The path is still relative to the current file or absolute from the web root, just like with the include directive. But it is not included at translation time. Instead, the included file is compiled separately. At run time, the request is temporarily forwarded to the included JSP, the resulting output of that JSP is written to the response, and then the control returns back to the including JSP. This can easily be seen by creating a file named dynamicIncluder.jsp in your project’s web root with the following line of code (or use the Hello-World-JSP project):
<jsp:include page="index.jsp" />
Compile and debug again and navigate to http://localhost:8080/hello-world/dynamicIncluder.jsp, then open the dynamicIncluder_jsp.java file that Tomcat created. You can see now that the content of this Java file is quite different. The most interesting line in the file is:
org.apache.jasper.runtime.JspRuntimeLibrary.include(request, response, "index.jsp",
out, false);
This sends the request and response down into another method, which runs the included JSP, writes its contents to the response, and returns.
Both of these methods of inclusion have their strengths and weaknesses. The include directive is fast because it is evaluated only once, and all variables defined in the including JSP are in scope and can be referenced by the included JSP. But this method makes your JSP (and the _jspService method, as a result) longer, which is important to keep in mind because the bytecode of compiled Java methods can’t be longer than 65,534 bytes. The <jsp:include> tag does not cause this problem, but it also does not perform as well because it must be evaluated every page load, and variables defined in the including JSP are out of scope and cannot be used in the included JSP. Ultimately, you must decide which is appropriate each time you need to include a file, but in most cases, the includedirective is a good choice.
NOTE By default, web containers translate and compile files ending in .jsp and .jspx (which you learn about later) as JSPs. You may have also seen the extension .jspf. JSPF files are generally called JSP Fragments and are not compiled by the web container. Although there are no hard-and-fast rules governing JSPF files (you can technically configure most web containers to compile them if you want), there are some agreed-upon best practices. JSPF files represent fragments of JSPs that cannot stand alone and should always be included, not accessed directly. This is why web containers do not normally compile them. Actually, in many cases a JSPF file references variables that can exist only if it is included in another JSP file. For this reason, JSPF files should be included only using the include directive because variables defined in the including JSP must be in scope in the included JSP.
Including Tag Libraries
Chapters 7 and 8 talk more about tag libraries, but they are mentioned now because of how they are included. You use the taglib directive to reference a tag library so that you can use the tags defined by that tag library in your JSP. Like the include directive, thetaglib directive is quite simple:
<%@ taglib uri="http://java.sun.com/jsp/jstl/core" prefix="c" %>
The uri attribute specifies the URI namespace that the tag library is defined under, and the prefix attribute defines the alias with which you reference the tags in that library. You learn more about what this means in Chapter 7.
Using the <jsp> Tag
All JSPs support a special kind of tag with an XMLNS prefix of jsp. This tag has many uses and features. Most of the features are used in JSP Documents (XML versions of JSPs that you learn about in the last section of this chapter) or relics from older versions of JSP in which some things were much harder to do than they are now (and so are not covered here). However, you should learn about a few useful features of this tag.
You have already learned about <jsp:include> and how it differs from the include directive. A similar tag is the <jsp:forward> tag. This enables you to forward a request from the JSP it is currently executing in to some other JSP. Unlike a <jsp:include>, the request does not return to the original JSP. This is not a redirect; the client’s browser does not see the change. Also, anything the JSP writes to the response stays in the response when the forward occurs; it is not erased, like it would be with a redirect. Using the <jsp:forward> tag is simple:
<jsp:forward page="/some/other/page.jsp" />
In this example the request is internally forwarded to /some/other/page.jsp. Any response content generated before the tag still goes to the client’s browser. Any code that comes after the tag is ignored and not evaluated. This is how this tag differs from the<jsp:include> tag. If the code after the <jsp:forward> tag were not ignored, this tag would behave just like the <jsp:include> tag.
Three other related tags are <jsp:useBean>, <jsp:getProperty>, and <jsp:setProperty>. The <jsp:useBean> tag declares the presence of a JavaBean on the page, whereas <jsp:getProperty> retrieves properties (using getter methods) from beans declared with <jsp:useBean>. Similarly, <jsp:setProperty> sets properties (using setter methods). A Java bean in this case is any instantiated object. <jsp:useBean> instantiates a class to create a bean, and this bean can then be accessed using the other two bean tags, custom tags, and JSP scriptlets and expressions. The advantage to declaring a bean in this way is that it makes the bean available to other JSP tags; if you simply declared the bean in a scriptlet, it would only be available to scriptlets and expressions.
Finally, there is the <jsp:plugin> tag, which is a handy tool for embedding Java Applets in the rendered HTML. This tag removes the risk of messing up the careful structure of <object> and <embed> tags necessary to get Java Applets to work in all browsers. It handles creating these HTML tags for you so that the Applet should work in all mainstream browsers that support the Java plug-in. Here is an example of using the <jsp:plugin> tag:
<jsp:plugin type="applet" code="MyApplet.class" jreversion="1.8">
<jsp:params>
<jsp:param name="appletParam1" value="paramValue1"/>
</jsp:params>
<jsp:fallback>
The browser you are using does not support Java Applets. You might
consider switching browsers.
</jsp:fallback>
</jsp:plugin>
Note that <jsp:plugin> can also contain standard object/embed HTML attributes such as name, align, height, width, hspace, and vspace. These attributes are copied to the HTML markup.
NOTE Java Applets are a completely different subject from web applications and are outside the scope of this book. If you want to learn more about Java Applets, most beginner Java books cover the topic.
USING JAVA WITHIN A JSP (AND WHY YOU SHOULDN’T!)
In this section you explore using Java within a JSP a little more by replacing the Servlet in the Hello-User project (from the previous chapter) with just a JSP. Then you briefly consider why using Java in a JSP is discouraged (and why there’s actually a deployment descriptor setting to disable it). For the rest of this section you use the Hello-User-JSP project on the wrox.com download site.
Using the Implicit Variables in a JSP
JSP files have several implicit variables (objects) available for use within scriptlets and expressions in the JSP. They are considered implicit because you do not have to define or declare them anywhere in your code. The JSP specification requires that the translator and compiler of the JSP provide these variables, with the exact names specified. The variables have method scope. They are defined at the beginning of the Servlet method that the JSP executes in (in Tomcat 8.0, the _jspService method). This means you cannot use them within any code you place inside JSP declarations. Declarations have class scope. Because the implicit variables are in scope only within the method that the JSP executes in, code inside declarations cannot use them. You can see an example of how the implicit variables are defined by looking at the _jspService method of any of the previously compiled JSPs you examined in the last section:
public void _jspService(final javax.servlet.http.HttpServletRequest request,
final javax.servlet.http.HttpServletResponse response)
throws java.io.IOException, javax.servlet.ServletException
{
final javax.servlet.jsp.PageContext pageContext;
javax.servlet.http.HttpSession session = null;
final javax.servlet.ServletContext application;
final javax.servlet.ServletConfig config;
javax.servlet.jsp.JspWriter out = null;
final java.lang.Object page = this;
javax.servlet.jsp.JspWriter _jspx_out = null;
javax.servlet.jsp.PageContext _jspx_page_context = null;
try {
response.setContentType("text/html;charset=UTF-8");
pageContext = _jspxFactory.getPageContext(this, request, response,
null, true, 8192, true);
_jspx_page_context = pageContext;
application = pageContext.getServletContext();
config = pageContext.getServletConfig();
session = pageContext.getSession();
out = pageContext.getOut();
_jspx_out = out;
...
}
...
}
The code isn’t exactly the picture of clean code, but the important parts of the code are bold so that you can understand what’s going on. The bold code emphasizes the declaration or assignment (or both) of implicit variables required by the JSP specification. Variables that are not bold (such as _jspx_out or _jspx_page_context) are Tomcat-specific variables that are not guaranteed to exist and should never be used in your JSP. Eight implicit variables are in this code, but the JSP specification defines nine implicit variables. Now take a look at each of these implicit variables, and then you’ll understand why one is missing.
request and response
The request variable is an instance of HttpServletRequest and the response variable is an instance of HttpServletResponse, both of which you learned about in detail in Chapter 3. Anything you can do with a request in a Servlet you can also do in a JSP, including getting request parameters, getting and setting attributes, and even reading from the response body. The same rules you learned about in the last chapter apply here. However, there are some restrictions on what you can do with the response object in a JSP. These restrictions are not contract restrictions, so they are not enforced at compile time. Instead, they are enforced at run time because violating them could cause unexpected behavior or even errors. For example, you should not call getWriter or getOutputStream because the JSP is already writing to the response output. You also should not set the content type or character encoding, flush or reset the buffer, or change the buffer size. These are all things that the JSP does, and if your code does them, too, it can cause problems.
session
This variable is an instance of HttpSession. You learn more about sessions in the next chapter. Remember from the previous section that the page directive has a session attribute that defaults to true. This is why the session variable is available in the previous code example and will be available by default in all of your JSPs. If you set the page directive’s session attribute to false, the session variable in the JSP is not defined and cannot be used.
out
The JspWriter instance out is available for you to use in all your JSPs. It is a Writer, just like what you get from calling the getWriter method on HttpServletResponse. If for some reason you need to write directly to the response, you should use the out variable. However, in most cases you can simply use an expression or write text or HTML content in the JSP.
application
This is an instance of the ServletContext interface. Recall from Chapter 3 that this interface gives you access to the configuration of the web application as a whole, including all the context init parameters. Why this variable was named application instead of context orservletContext is a mystery.
config
The config variable is an instance of the ServletConfig interface. Unlike the application variable, its name actually reflects what it is. As you learned in Chapter 3, you can use this object to access the configuration of the JSP Servlet, such as the Servlet init parameters.
pageContext
This object, an instance of the PageContext class, provides several convenience methods for getting request attributes and session attributes, accessing the request and response, including other files, and forwarding the request. You will probably never need to use this class within a JSP. It will, however, come in handy when you write custom JSP tags in Chapter 8.
page
The page variable is an interesting object to examine. It is an instance of java.lang.Object, which initially makes it seem unuseful. However, it essentially is the this variable from the JSP Servlet object. So, you could cast it to Servlet and use methods defined on theServlet interface. It is also a javax.servlet.jsp.JspPage (which extends Servlet) and a javax.servlet.jsp.HttpJspPage (which extends JspPage), so you could cast it to either of those and use methods defined on those interfaces. In reality, you will probably never have a reason to use this variable. It may be useful if other JSP scripting languages are ever supported. However, the JSP 2.3 specification, section 1.8.3 note “a,” says that page is always a synonym for this when the scripting language is Java. Thus, anything you can do withpage (such as get the Servlet name or access methods or instance variables you defined in a JSP declaration) you can also do with this.
exception
This is the variable that was missing from the previous code example. Recall from the previous section that you can specify as true the isErrorPage attribute on the page directive to indicate that the JSP’s purpose is to handle errors. Doing so makes the exceptionvariable available for use within the JSP. Because the default value for isErrorPage is false and you have not used it anywhere, the exception variable has not been defined in any JSPs you created. If you create a JSP with isErrorPage set to true, the implicit exceptionvariable, a Throwable, is defined automatically.
NOTE You can read the JavaServer Pages 2.3 specification document on the JSP specification page.
Trying Out the Implicit Variables
Now that you understand the available implicit variables and their purposes, you should explore this more by writing some JSP code that uses the implicit variables. In your project, create a greeting.jsp file in the web root, and place the following code in it (or just use the Hello-User-JSP project):
<%@ page contentType="text/html;charset=UTF-8" language="java" %>
<%!
private static final String DEFAULT_USER = "Guest";
%>
<%
String user = request.getParameter("user");
if(user == null)
user = DEFAULT_USER;
%>
<!DOCTYPE html>
<html>
<head>
<title>Hello User Application</title>
</head>
<body>
Hello, <%= user %>!<br /><br />
<form action="greeting.jsp" method="POST">
Enter your name:<br />
<input type="text" name="user" /><br />
<input type="submit" value="Submit" />
</form>
</body>
</html>
Compare this to the code you wrote in HelloServlet.java for the Hello-User project in the previous chapter. There’s much less to it, but it accomplishes the same thing. Notice the use of a declaration to define the DEFAULT_USER variable, a scriptlet to look for the userrequest parameter and default it if it is not set, and an expression to output the value of the user variable. Now compile and debug this code and go to http://localhost:8080/hello-world/greeting.jsp in your browser. Try entering a name in the input field and clicking the Submit button — the post variable is detected and used. Now try going to http://localhost:8080/hello-world/greeting.jsp?user=Allison, and you should see that the query parameter is also detected and used. You are encouraged to explore the Java code that Tomcat translated your JSP into.
Another thing you did in the Hello-User project was create a Servlet to demonstrate using multiple-value parameters. This, too, can be replicated using JSPs. Create a file in your project web root named checkboxes.jsp (or use the Hello-User-JSP project):
<%@ page contentType="text/html;charset=UTF-8" language="java" %>
<!DOCTYPE html>
<html>
<head>
<title>Hello User Application</title>
</head>
<body>
<form action="checkboxesSubmit.jsp" method="POST">
Select the fruits you like to eat:<br />
<input type="checkbox" name="fruit" value="Banana" /> Banana<br />
<input type="checkbox" name="fruit" value="Apple" /> Apple<br />
<input type="checkbox" name="fruit" value="Orange" /> Orange<br />
<input type="checkbox" name="fruit" value="Guava" /> Guava<br />
<input type="checkbox" name="fruit" value="Kiwi" /> Kiwi<br />
<input type="submit" value="Submit" />
</form>
</body>
</html>
This file replicates the output of the doGet method in the MultiValueParameterServlet.java file from the Hello-User project. Next, create checkboxesSubmit.jsp (also in the Hello-User-JSP project):
<%@ page contentType="text/html;charset=UTF-8" language="java" %>
<%
String[] fruits = request.getParameterValues("fruit");
%>
<!DOCTYPE html>
<html>
<head>
<title>Hello User Application</title>
</head>
<body>
<h2>Your Selections</h2>
<%
if(fruits == null)
{
%>You did not select any fruits.<%
}
else
{
%><ul><%
for(String fruit : fruits)
{
out.println("<li>" + fruit + "</li>");
}
%></ul><%
}
%>
</body>
</html>
This file replicates the logic and output of the doPost method from the MultiValueParameterServlet class. Notice how the bold code jumps in and out of scriptlets, using Java only where the logic requirements demand and leaving the scriptlets to use straight output instead of writing with the implicit out variable. The exception is inside the for loop, which demonstrates one use case for the out variable. This could have just as easily been replaced with %><li><%= fruit %></li><% to accomplish the same thing. Now compile and debug the project and go to http://localhost:8080/hello-world/checkboxes.jsp in your browser. You should see a page like that in Figure 4-1. Experiment with different combinations of the check boxes, and verify that it behaves identically to the Hello-User project in Chapter 3. Try replacing the use of out in the for loop with %><li><%= fruit %></li><%. When you recompile and run the project again, the output should not change.
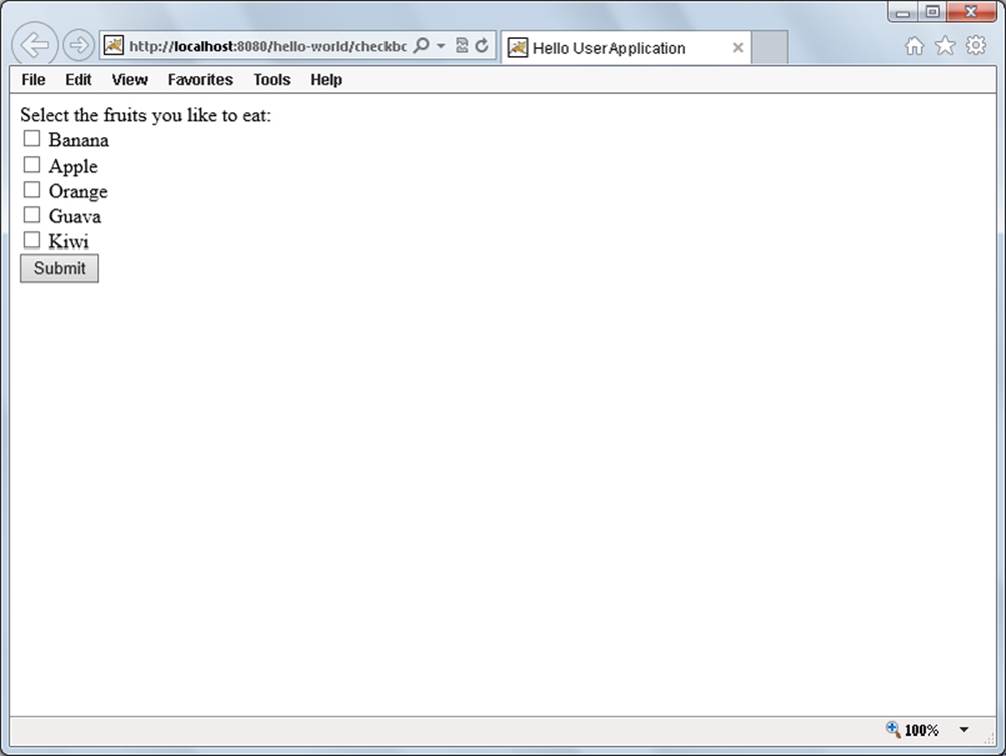
FIGURE 4-1
Finally, create a file named contextParameters.jsp to explore the use of the application implicit variable and the retrieval of context init parameters. Alternatively, use the file already in the Hello-User-JSP project.
<%@ page contentType="text/html;charset=UTF-8" language="java" %>
<!DOCTYPE html>
<html>
<head>
<title>Hello User Application</title>
</head>
<body>
settingOne: <%= application.getInitParameter("settingOne") %>,
settingTwo: <%= application.getInitParameter("settingTwo") %>
</body>
</html>
Also, you need to have some context init parameters defined in your deployment descriptor, just like in Chapter 3:
<context-param>
<param-name>settingOne</param-name>
<param-value>foo</param-value>
</context-param>
<context-param>
<param-name>settingTwo</param-name>
<param-value>bar</param-value>
</context-param>
Now compile, debug, and navigate to http://localhost:8080/hello-world/contextParameters.jsp. As with the Servlet-based Hello-User project, you should see the values of the context init parameters.
Why You Shouldn’t Use Java in a JSP
There are plenty of advantages to using Java within a JSP, and in addition to the uses previously pointed out so far in this chapter, you are likely thinking of other uses as you read this paragraph. The coolest thing about using Java in a JSP is that almost anything you can do in a normal Java class you can do in a JSP. However, one of the biggest dangers of using Java in a JSP is that almost anything you can do in a normal Java class you can do in a JSP. These sentences might sound crazy, but it’s true. Think about all the things you can do in Java code. Here are a few to help you out.
You could connect to, query, and manipulate a relational database (or NoSQL database, as the case may be). You could also access and write to files on the server file system. You could connect to remote servers, perform REST web service transactions, and interact with system peripherals. You could even do some number crunching, sort a binary tree with one billion nodes, traverse a large data set looking for suspicious data, or search a Document Object Model for a particular set of nodes. Now raise your hand if you think any of these things are good ideas in a JSP.
Java is a powerful language, and the problem with having all that power at your fingertips is that it’s so hard not to use it. Depending on the application, any one of those tasks might be tasks you need to perform within a web application. But consider this: In a cleanly structured application, would it be appropriate to put all the database access, file manipulation, and number crunching code in a single class? Probably not. Most likely, you would have several classes that performed specialized functions and then use those classes wherever needed. JavaServer Pages is a technology that was designed for the presentation layer, also known as the view. Although it’s possible to mix database access with the presentation layer, or to mix number crunching with the presentation layer, it is not a good idea. Functional languages, scripting languages, and other languages that execute from the top of a file to the bottom of a file, such as PHP, certainly have their uses. But it’s likely you didn’t pick Java as your platform of choice so that you could make pages written in this manner. Chances are you picked Java for its elegance, strong typing, and strict object-oriented structure, among other reasons.
Additionally, in most organizations, user interface developers are responsible for creating the presentation layer. These developers rarely have experience writing Java code, and providing them with that ability can be dangerous. Instead, it often makes sense to provide them with a less-powerful set of tools to work with.
In a well-structured, cleanly coded application, the presentation layer is separated from the business logic, which is likewise separated from the data persistence layer. It’s actually possible to create JSPs that display dynamic content without a single line of Java inside the JSP. This enables application developers to concentrate on the business and data logic while user interface developers work on the JSPs. You may wonder how this is possible, but you will not be disappointed. You learn the first step in the next section, and explore even more powerful JSP technologies in Chapters 6, 7, and 8.
COMBINING SERVLETS AND JSPS
For the rest of this chapter you improve the customer support application you began working on in Chapter 3. You can follow along with the examples and find the entire source code in the Customer-Support-v2 project on the wrox.com download site. When dealing with complex logic, data validation, data persistence, and a detailed presentation layer, it makes the most sense to use a combination of Servlets and JSPs instead of using exclusively one or the other. In this section, you separate the business logic of customer support from the presentation layer.
Configuring JSP Properties in the Deployment Descriptor
Earlier in the chapter you learned about the page directive and the many attributes it provides to enable you to customize how your JSP is translated, compiled, and processed. If you have many JSPs with similar properties, however, it can be cumbersome to place this page directive at the top of every JSP file. Fortunately, there is a way to configure common JSP properties within the deployment descriptor. In the web.xml file, which should be empty except for the <display-name>, add the following contents:
<jsp-config>
<jsp-property-group>
<url-pattern>*.jsp</url-pattern>
<url-pattern>*.jspf</url-pattern>
<page-encoding>UTF-8</page-encoding>
<scripting-invalid>false</scripting-invalid>
<include-prelude>/WEB-INF/jsp/base.jspf</include-prelude>
<trim-directive-whitespaces>true</trim-directive-whitespaces>
<default-content-type>text/html</default-content-type>
</jsp-property-group>
</jsp-config>
Understanding JSP Property Groups
The <jsp-config> tag contains any number of <jsp-property-group> tags. These property groups are used to differentiate properties for different groups of JSPs. For example, you may want to define one set of common properties for all JSPs in the /WEB-INF/jsp/adminfolder and a different set of common properties for all the JSPs in the /WEB-INF/jsp/help folder. You differentiate these property groups by defining distinct <url-pattern> tags for each <jsp-property-group>. In the previous code example, the <url-pattern> tags indicate that this property group applies to all files ending in .jsp and .jspf, anywhere in the web application. If you want to treat JSPs in one folder differently from JSPs in another in the fashion mentioned just earlier, you could have two (or more) <jsp-property-group>tags, with one having <url-pattern>/WEB-INF/jsp/admin/*.jsp</url-pattern> and the other having <url-pattern>/WEB-INF/jsp/help/*.jsp</url-pattern>.
Consider some important rules when dealing with the <url-pattern> tag:
· If some file in your applications matches a <url-pattern> in both a <servlet-mapping> and a JSP property group, whichever match is more specific wins. For example, if one matching <url-pattern> were *.jsp and the other were /WEB-INF/jsp/admin/*.jsp, the one with/WEB-INF/jsp/admin/*.jsp would win. If the <url-pattern> tags are identical, the JSP property group wins over the Servlet mapping.
· If some file matches a <url-pattern> in more than one JSP property group, the more specific match wins. If two or more most-specific matches are identical, the first matching JSP property group in the order it appears in the deployment descriptor wins.
· If some file matches a <url-pattern> in more than one JSP property group and more than one of those property groups contains <include-prelude> or <include-coda> rules, the include rules from all the JSP property groups are applied for that file, even though only one of the property groups is used for the other properties.
To understand that last bullet point, consider the following hypothetical property groups:
<jsp-property-group>
<url-pattern>*.jsp</url-pattern>
<url-pattern>*.jspf</url-pattern>
<page-encoding>UTF-8</page-encoding>
<include-prelude>/WEB-INF/jsp/base.jspf</include-prelude>
</jsp-property-group>
<jsp-property-group>
<url-pattern>/WEB-INF/jsp/admin/*.jsp</url-pattern>
<url-pattern>/WEB-INF/jsp/admin/*.jspf</url-pattern>
<page-encoding>ISO-8859-1</page-encoding>
<include-prelude>/WEB-INF/jsp/admin/include.jspf</include-prelude>
</jsp-property-group>
A file named /WEB-INF/jsp/user.jsp would match only the first property group. It would have a character encoding of UTF-8 and the /WEB-INF/jsp/base.jspf file would be included at the beginning. On the other hand, /WEB-INF/jsp/admin/user.jsp would match both property groups. Because the second property group is a more specific match, this file would have a character encoding of ISO-8859-1. However, both /WEB-INF/jsp/base.jspf and /WEB-INF/jsp/admin/include.jspf would be included at the beginning of this file. This can get very confusing, so you are urged to keep your JSP property groups as simple as possible.
Using JSP Properties
The <include-prelude> tag in the Customer Support project’s deployment descriptor tells the container to include the /WEB-INF/jsp/base.jspf file at the beginning of every JSP that belongs in this property group. This is useful for defining common variables, tag library declarations, or other resources that should be made available to all JSPs in the group. Similarly, an <include-coda> tag defines a file to be included at the end of every JSP in the group. You can use both of these tags more than once in a single JSP group. You might, for example, create header.jspf and footer.jspf files to include at the beginning and end, respectively, of every JSP. These files could contain header and footer HTML content to work as a sort of template for your application. Of course, you must take care when doing this, because you could easily include these files in places you don’t intend.
The <page-encoding> tag is identical to the pageEncoding attribute of the page directive. Because JSPs already have a content type of text/html by default, you could simply specify a <page-encoding> of UTF-8 to change the content type character encoding of your JSPs from text/html;ISO-8859-1 to text/html;UTF-8. You could also use the <default-content-type> tag to override text/html with some other default content type.
A particularly useful property is <trim-directive-whitespaces>. This property instructs the JSP translator to remove from the response output any white space only text created by directives, declarations, scriptlets, and other JSP tags. Earlier in this chapter you learned how to chain the end of one directive to the beginning of the next to prevent extra new lines from appearing in the response. This tag takes care of that for you so that you can write cleaner code.
Also mentioned earlier was the possibility to use the deployment descriptor to completely disable Java within JSPs. The <scripting-invalid> tag serves that purpose. The default value and value in your code, false, permits Java in all JSPs in the group. Later in the book you change this value to true. Once true, using Java within a matching JSP results in a translation error. The <el-ignored> tag is similar and corresponds to the isELIgnored attribute of the page directive. If true, expression language is prohibited in the group’s JSPs (resulting in a translation error if EL is used). This defaults to false (allow expression language), and you can leave it that.
There are a handful of other JSP property group tags that you will probably never use. <is-xml> indicates that matching JSPs are JSP documents (which you learn about in the next section). The <deferred-syntax-allowed-as-literal> tag is an expression language feature you learn about in Chapter 6. <buffer> corresponds to the buffer attribute of the page directive that you learned about earlier in the chapter. Finally, <error-on-undeclared-namespace> indicates whether an error is raised if a tag with unknown namespace is used within a matching JSP, and defaults to false.
Except for <url-pattern>, all of the tags within <jsp-property-group> are optional, but they must appear in the following order, with unused tags omitted: <url-pattern>, <el-ignored>, <page-encoding>, <scripting-invalid>, <is-xml>, <include-prelude>, <include-coda>, <deferred-syntax-allowed-as-literal>, <trim-directive-whitespace>, <default-content-type>, <buffer>, <error-on-undeclared-namespace>.
In the Customer Support project you have included /WEB-INF/jsp/base.jspf in all JSPs in the application. (The web container is smart enough not to apply this include rule to base.jspf itself.) Its contents are simple:
<%@ page import="com.wrox.TicketServlet, com.wrox.Attachment" %>
<%@ taglib prefix="c" uri="http://java.sun.com/jsp/jstl/core" %>
This accomplishes two things: It imports these classes for all JSPs and declares the JSTL core tag library with an XMLNS prefix of c. You learn more about the JSTL in Chapter 7. You may wonder why this file is placed in the /WEB-INF/jsp directory instead of in the web root. Remember that files within the WEB-INF directory are protected from web access. Placing the JSP file in this directory prevents users from accessing the JSP from their browser. You would want to do this for any JSP that you do not want browsers to access directly, such as JSPs that rely on session and request attributes provided by a forwarding Servlet and JSPs that are only included.
The last thing you should look at before moving on is the index.jsp file in the web root of the Customer Support project. This is a web application directory index file, and its existence in the web root means it can respond to requests for the deployed application root (/) without being directly identified in the URL. It has two simple lines of code in it:
<%@ page session="false" %>
<c:redirect url="/tickets" />
The second line of code redirects the user to the /tickets Servlet URL relative to the deployed application. The first line of code disables sessions in the index.jsp file to prevent the unnecessary JSESSIONID parameter from being automatically appended to the redirect URL (which happens when a session is created and the client is redirected in the same request).
Forwarding a Request from a Servlet to a JSP
A typical pattern when combining Servlets and JSPs is to have the Servlet accept the request, do any business logic processing and data storage or retrieval necessary, prepare a model that can easily be used in a JSP, and then forward the request to the JSP. The methods in the Customer Support application’s TicketServlet need a few changes to make this happen. You can apply these changes yourself or just view them in the project you downloaded.
Using the Request Dispatcher
You should first address the showTicketForm method because it is the simplest to change. You need to change its signature to also accept an HttpServletRequest and then replace the entire contents with a simple forward to the JSP:
private void showTicketForm(HttpServletRequest request,
HttpServletResponse response)
throws ServletException, IOException
{
request.getRequestDispatcher("/WEB-INF/jsp/view/ticketForm.jsp")
.forward(request, response);
}
The new code for this method introduces you to a new feature of the HttpServletRequest. The getRequestDispatcher method obtains a javax.servlet.RequestDispatcher, which handles internal forwards and includes for a specific path (in this case /WEB-INF/jsp/view/ticketForm.jsp). With this object, you can forward the current request to that JSP by calling the forward method. Note that this is not a redirect: The user’s browser does not receive a redirect status code, and the browser URL bar does not change. Instead, the internal request handling is forwarded to a different part of the application. After you call forward, your Servlet code should never manipulate the response again. Doing so could result in errors or erratic behavior. Now create the JSP file that this method forwards to (or view it in the project you downloaded):
<%@ page session="false" %>
<!DOCTYPE html>
<html>
<head>
<title>Customer Support</title>
</head>
<body>
<h2>Create a Ticket</h2>
<form method="POST" action="tickets" enctype="multipart/form-data">
<input type="hidden" name="action" value="create"/>
Your Name<br/>
<input type="text" name="customerName"><br/><br/>
Subject<br/>
<input type="text" name="subject"><br/><br/>
Body<br/>
<textarea name="body" rows="5" cols="30"></textarea><br/><br/>
<b>Attachments</b><br/>
<input type="file" name="file1"/><br/><br/>
<input type="submit" value="Submit"/>
</form>
</body>
</html>
Designing for the Presentation Layer
This isn’t an impressive example because all you’ve done is copy some code from Java to JSP — not a new thing at this point. You are not using sessions yet, so that has been disabled in the JSP. You should next change the TicketServlet’s viewTicket method, which is more complicated. A good approach to take is to think of your presentation, first — what data elements does it need to work? — and then code your Servlet method to provide that information. With this in mind, start with the /WEB-INF/jsp/view/viewTicket.jsp file:
<%@ page session="false" %>
<%
String ticketId = (String)request.getAttribute("ticketId");
Ticket ticket = (Ticket)request.getAttribute("ticket");
%>
<!DOCTYPE html>
<html>
<head>
<title>Customer Support</title>
</head>
<body>
<h2>Ticket #<%= ticketId %>: <%= ticket.getSubject() %></h2>
<i>Customer Name - <%= ticket.getCustomerName() %></i><br /><br />
<%= ticket.getBody() %><br /><br />
<%
if(ticket.getNumberOfAttachments() > 0)
{
%>Attachments: <%
int i = 0;
for(Attachment a : ticket.getAttachments())
{
if(i++ > 0)
out.print(", ");
%><a href="<c:url value="/tickets">
<c:param name="action" value="download" />
<c:param name="ticketId" value="<%= ticketId %>" />
<c:param name="attachment" value="<%= a.getName() %>" />
</c:url>"><%= a.getName() %></a><%
}
}
%>
<a href="<c:url value="/tickets" />">Return to list tickets</a>
</body>
</html>
Creating this JSP should show you that the presentation layer needs a ticketId and a ticket to display correctly (the code in bold). The viewTicket method can be changed to provide these variables and forward the request to the JSP:
private void viewTicket(HttpServletRequest request,
HttpServletResponse response)
throws ServletException, IOException
{
String idString = request.getParameter("ticketId");
Ticket ticket = this.getTicket(idString, response);
if(ticket == null)
return;
request.setAttribute("ticketId", idString);
request.setAttribute("ticket", ticket);
request.getRequestDispatcher("/WEB-INF/jsp/view/viewTicket.jsp")
.forward(request, response);
}
The first few lines of the method perform the business logic of parsing the request parameter and getting the ticket from the database. Then the code in bold adds two attributes to the request. This is the primary purpose of request attributes. They can be used to pass data between different elements of the application that are handling the same request, such as between a Servlet and a JSP. Request attributes are different from request parameters: Request attributes are Objects while request parameters are Strings, and clients cannot pass in attributes like they can parameters. Request attributes exist solely for internal use within your application. If the Servlet places a Ticket into a request attribute, the JSP retrieves it as a Ticket. During the life of the request, any component of the application that has access to the HttpServletRequest instance has access to the request attributes. When the request has completed, the request attributes are discarded.
The last method you need to change is the listTickets method. Again, begin by creating the /WEB-INF/jsp/view/listTickets.jsp presentation file in the Customer Support application. Because request attributes are Objects, you must cast them when you retrieve them. In this case, the cast to a Map<Integer, Ticket> is an unchecked operation, so you need to suppress the warning.
<%@ page session="false" import="java.util.Map" %>
<%
@SuppressWarnings("unchecked")
Map<Integer, Ticket> ticketDatabase =
(Map<Integer, Ticket>)request.getAttribute("ticketDatabase");
%>
<!DOCTYPE html>
<html>
<head>
<title>Customer Support</title>
</head>
<body>
<h2>Tickets</h2>
<a href="<c:url value="/tickets">
<c:param name="action" value="create" />
</c:url>">Create Ticket</a><br /><br />
<%
if(ticketDatabase.size() == 0)
{
%><i>There are no tickets in the system.</i><%
}
else
{
for(int id : ticketDatabase.keySet())
{
String idString = Integer.toString(id);
Ticket ticket = ticketDatabase.get(id);
%>Ticket #<%= idString %>: <a href="<c:url value="/tickets">
<c:param name="action" value="view" />
<c:param name="ticketId" value="<%= idString %>" />
</c:url>"><%= ticket.getSubject() %></a> (customer:
<%= ticket.getCustomerName() %>)<br /><%
}
}
%>
</body>
</html>
As you can see, this JSP needs the ticketDatabase, so you should change the listTickets method to provide this variable and forward the request:
private void listTickets(HttpServletRequest request,
HttpServletResponse response)
throws ServletException, IOException
{
request.setAttribute("ticketDatabase", this.ticketDatabase);
request.getRequestDispatcher("/WEB-INF/jsp/view/listTickets.jsp")
.forward(request, response);
}
Testing the Updated Customer Support Application
At this point your Servlet code should look much less cluttered. You have moved the presentation code into JSPs and focused on business logic in the Servlet. There are two methods from the previous version of the TicketServlet, writeHeader and writeFooter, that are now unused and can be removed. These made writing presentation code in the Servlet slightly easier, but now you don’t need that. Finally, doGet and doPost had to be updated to reflect the changed signature of the methods they call.
Compile the customer support application and run Tomcat in your IDE debugger. Navigate in your favorite browser to http://localhost:8080/support/. You should be redirected to http://localhost:8080/support/tickets because of the redirect code in the index.jspfile. You should see the page in Figure 4-2. Create a few tickets, uploading attachments with some and not with others; view tickets; and download attachments. Overall, the application should function identically to version 1 created in Chapter 3. However, now that you are no longer writing presentation layer code in Java, it is much easier to improve and expand the application.
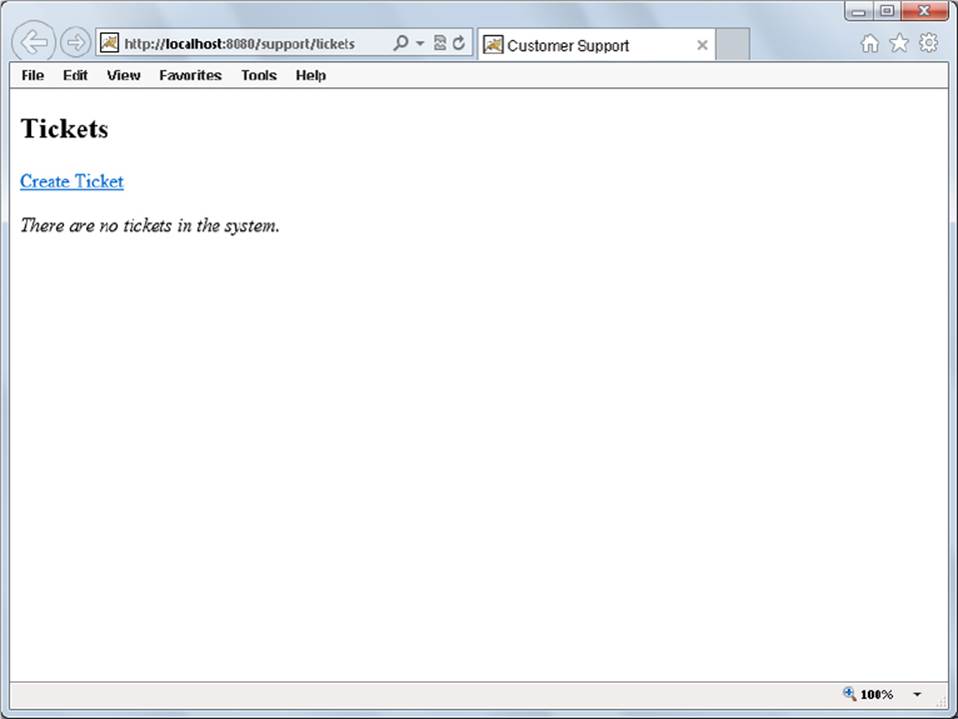
FIGURE 4-2
In the next chapter you continue improving the customer support application by introducing session support and the ability to add comments to support tickets.
A NOTE ABOUT JSP DOCUMENTS (JSPX)
Earlier in the chapter you saw a passing reference to a technology known as JSP Documents, which end in the .jspx extension. They are not as widely used as standard JSPs, and although they support the same features, they do so in different ways. Overall, the increased difficulty and code that comes with using JSP Documents instead of JSPs can be nontrivial, as demonstrated in this section. Also, due to the lesser popularity of JSP Documents, you can find fewer examples and code samples online that use JSP Documents, and it may be harder to find forum and mailing list users with experience in JSP Documents to help you with any questions you might have. For this reason, JSP Documents are not used in this book. Only in this chapter do you see an example of JSP Documents for the purpose of understanding the difference between the two related technologies. Nevertheless, the technology exists in case you prefer working with pure XML.
JSP Documents are XML Documents (hence their name), and therefore many of the features you have seen, such as directives, cannot work the same way. XML Documents must adhere to a strict schema or they will fail to parse correctly. The main advantage to using JSP Documents over standard JSPs is that it’s slightly easier to detect problems with the JSPs at compile time instead of run time. However, in many cases this benefit is not worth the added cost of dealing with JSP Documents. Table 4-1 lists several JSP features and compares their JSP syntax to their JSP Document syntax.
TABLE 4.1: Comparison of JSP Features and JSP Document Features
|
FEATURE |
JSP SYNTAX |
JSP DOCUMENT SYNTAX |
|
Page Directive |
<%@ page %> |
<jsp:directive.page /> |
|
Include Directive |
<%@ include %> |
<jsp:directive.include /> |
|
Tag Library Directive |
<%@ taglib %> |
xmlns:prefix="Library URI" |
|
Declaration |
<%! ... %> |
<jsp:declaration> ... </jsp:declaration> |
|
Scriptlet |
<% ... %> |
<jsp:scriptlet> ... </jsp:scriptlet> |
|
Expression |
<%= ... %> |
<jsp:expression> ... </jsp:expression> |
|
Comment |
<%-- ... --%> |
<!-- ... --> |
You should notice two patterns in this table:
· Everything is a jsp tag. Directives, declarations, scriptlets, and expressions are all XML tags now, with the jsp namespace prefix. The only exception is the tag library directive, which becomes an attribute of the root document tag, instead.
· You no longer differentiate between JSP comments and XML comments. All comments are XML comments. (Of course, inside declarations and scriptlets, you can still use Java comments.)
To demonstrate how this can change a document, consider Listing 4-1. This is a simple JSP file with all the features covered in this chapter. Then, compare that code to Listing 4-2, the JSP Document-equivalent of Listing 4-1. Notice how the directives, declarations, scriptlets, expressions, and comments all change. Pay particular attention to the XML doctype, the <jsp:root> element, and the XMLNS attributes. As you can see, JSPs are noticeably easier to work with than JSP Documents.
LISTING 4-1: A standard JSP file
<%@ page contentType="text/html;charset=UTF-8" language="java" %>
<%@ include file="/WEB-INF/jsp/base.jspf" %>
<%@ taglib prefix="c" uri="http://java.sun.com/jsp/jstl/core" %>
<%!
private static final String DEFAULT_USER = "Guest";
%>
<%
String user = request.getParameter("user");
if(user == null)
user = DEFAULT_USER;
%>
<%--<%= "This code is commented" %>--%>
<!DOCTYPE html>
<html>
<head>
<title>Hello User Application</title>
</head>
<body>
Hello, <%= user %>!<br /><br />
<form action="greeting.jsp" method="POST">
Enter your name:<br />
<input type="text" name="user" /><br />
<input type="submit" value="Submit" />
</form>
</body>
</html>
LISTING 4-2: The JSP Document-equivalent of Listing 4-1
<?xml version="1.0" encoding="UTF-8"?>
<jsp:root xmlns="http://www.w3.org/1999/xhtml" version="2.0"
xmlns:jsp="http://java.sun.com/JSP/Page"
xmlns:c="http://java.sun.com/jsp/jstl/core">
<jsp:directive.page contentType="text/html;charset=UTF-8" language="java" />
<jsp:directive.include file="/WEB-INF/jsp/base.jspx" />
<jsp:declaration>
private static final String DEFAULT_USER = "Guest";
</jsp:declaration>
<jsp:scriptlet>
String user = request.getParameter("user");
if(user == null)
user = DEFAULT_USER;
</jsp:scriptlet>
<!--<jsp:expression>"This code is commented"</jsp:expression> -->
<!DOCTYPE html>
<html>
<head>
<title>Hello User Application</title>
</head>
<body>
Hello, <jsp:expression>user</jsp:expression>!<br /><br />
<form action="greeting.jsp" method="post">
Enter your name:<br />
<input type="text" name="user" /><br />
<input type="submit" value="Submit" />
</form>
</body>
</html>
</jsp:root>
SUMMARY
In this chapter you explored the world of JSPs and learned how they can make your life easier by simplifying the task of writing HTML markup to the response output. You were introduced to directives, declarations, scriptlets, and expressions. You learned about the various ways you can comment out code in JSPs and about the many ways you can include Java code in a JSP file. You also discovered the nine implicit Java variables available in your JSP and read about why using Java scriptlets and declarations is discouraged. Finally, you applied these principles and improved the Customer Support application by adding JSP properties to the deployment descriptor and separating the business logic in the Servlet from the presentation code in the JSP.
In the next chapter you learn about HTTP sessions, their purpose, and how to use them in Java EE web applications.
All materials on the site are licensed Creative Commons Attribution-Sharealike 3.0 Unported CC BY-SA 3.0 & GNU Free Documentation License (GFDL)
If you are the copyright holder of any material contained on our site and intend to remove it, please contact our site administrator for approval.
© 2016-2026 All site design rights belong to S.Y.A.