Wrox Press Beginning JavaScript 5th (2015)
Chapter 2. Data Types and Variables
WHAT YOU WILL LEARN IN THIS CHAPTER:
· Representing data in code
· Storing data in memory
· Making calculations
· Converting data
WROX.COM CODE DOWNLOADS FOR THIS CHAPTER
You can find the wrox.com code downloads for this chapter at http://www.wiley.com/go/BeginningJavaScript5E on the Download Code tab. You can also view all of the examples and related files at http://beginningjs.com.
One of the main uses of computers is to process and display information. By processing, we mean the information is modified, interpreted, or filtered in some way by the computer. For example, on an online banking website, a customer may request details of all money paid out from his account in the past month. Here the computer would retrieve the information, filter out any information not related to payments made in the past month, and then display what’s left in a web page. In some situations, information is processed without being displayed, and at other times, information is obtained directly without being processed. For example, in a banking environment, regular payments may be processed and transferred electronically without any human interaction or display.
In computing, information is referred to as data. Data comes in all sorts of forms, such as numbers, text, dates, and times, to mention just a few. In this chapter, you look specifically at how JavaScript handles data such as numbers and text. An understanding of how data is handled is fundamental to any programming language.
In this chapter you start by looking at the various types of data JavaScript can process. Then you look at how you can store this data in the computer’s memory so you can use it again and again in the code. Finally, you see how to use JavaScript to manipulate and process the data.
TYPES OF DATA IN JAVASCRIPT
Data can come in many different forms, or types. You’ll recognize some of the data types that JavaScript handles from the world outside of programming—for example, numbers and text. Other data types are a little more abstract and are used to make programming easier; one example is the object data type, which you won’t see in detail until Chapter 5.
Some programming languages are strongly typed. In these languages, whenever you use a piece of data, you need to explicitly state what sort of data you are dealing with, and use of that data must follow strict rules applicable to its type. For example, in a strongly typed language you can’t add a number and a word.
JavaScript, on the other hand, is a weakly typed language and a lot more forgiving about how you use different types of data. When you deal with data, you often don’t need to specify type; JavaScript will work that out for itself. Furthermore, when you are using different types of data at the same time, JavaScript will work out behind the scenes what it is you’re trying to do.
Given how easygoing JavaScript is about data, why talk about data types at all? Why not just cut to the chase and start using data without worrying about its type?
First of all, although JavaScript is very good at working out what data it’s dealing with, on occasion it’ll get things wrong or at least not do what you want it to do. In these situations, you need to make it explicit to JavaScript what sort of data type you intended and how it should be used. To do that, you first need to know a little bit about data types.
A second reason is that data types enable you to use data effectively in your code. The things that you can do with data and the results you’ll get depend on the type of data being used, even if you don’t explicitly specify what type it is. For example, although trying to multiply two numbers makes sense, doing the same thing with text doesn’t. Also, the result of adding numbers is very different from the result of adding text. With numbers you get the sum, but with text you get one big piece of text consisting of the other pieces joined together.
Let’s take a brief look at some of the more commonly used data types: numerical, text, and boolean. You see how to use them later in the chapter.
Numerical Data
Numerical data comes in two forms:
· Whole numbers, such as 145, which are also known as integers. These numbers can be positive or negative and can span a very wide range in JavaScript: –253 to 253.
· Fractional numbers, such as 1.234, which are also known as floating-point numbers. Like integers, they can be positive or negative, and they also have a massive range.
In simple terms, unless you’re writing specialized scientific applications, you’re not going to face problems with the size of numbers available in JavaScript. Also, although you can treat integers and floating-point numbers differently when it comes to storing them, JavaScript actually treats them both as floating-point numbers. It kindly hides the detail from you so you generally don’t need to worry about it. One exception is when you want an integer but you have a floating-point number, in which case you’ll round the number to make it an integer. You take a look at rounding numbers later in this chapter.
Text Data
Another term for one or more characters of text is a string. You tell JavaScript that text is to be treated as text and not as code simply by enclosing it inside quotation marks ("). For example, "Hello World" and "A" are examples of strings that JavaScript will recognize. You can also use the single quotation marks ('), so 'Hello World' and 'A' are also examples of strings that JavaScript will recognize. However, you must end the string with the same quotation mark that you started it with. Therefore, "A' is not a valid JavaScript string, and neither is 'Hello World".
What if you want a string with a single quotation mark in the middle, say a string like Peter O'Toole? If you enclose it in double quotes, you’ll be fine, so "Peter O'Toole" is recognized by JavaScript. However, 'Peter O'Toole' will produce an error. This is because JavaScript thinks that your text string is Peter O (that is, it treats the middle single quote as marking the end of the string) and falls over wondering what the Toole' is.
Another way around this is to tell JavaScript that the middle ' is part of the text and is not indicating the end of the string. You do this by using the backslash character (\), which has special meaning in JavaScript and is referred to as an escape character. The backslash tells the browser that the next character is not the end of the string, but part of the text. So 'Peter O\'Toole' will work as planned.
What if you want to use a double quote inside a string enclosed in double quotes? Well, everything just said about the single quote still applies. So 'Hello "Paul"' works, but "Hello "Paul"" won’t. However, "Hello \"Paul\"" will work.
JavaScript has a lot of other special characters, which can’t be typed in but can be represented using the escape character in conjunction with other characters to create escape sequences. These work much the same as in HTML. For example, more than one space in a row is ignored in HTML, so a space is represented by the term . Similarly, in JavaScript you’ll find instances where you can’t use a character directly but must use an escape sequence. The following table details some of the more useful escape sequences.
|
ESCAPE SEQUENCES |
CHARACTER REPRESENTED |
|
\b |
Backspace |
|
\f |
Form feed |
|
\n |
New line |
|
\r |
Carriage return |
|
\t |
Tab |
|
\' |
Single quote |
|
\" |
Double quote |
|
\\ |
Backslash |
|
\xNN |
NN is a hexadecimal number that identifies a character in the Latin-1 character set. |
The least obvious of these is the last, which represents individual characters by their character number in the Latin-1 character set rather than by their normal appearance. Let’s pick an example: Say you wanted to include the copyright symbol (©) in your string. What would your string need to look like? The answer is "\xA9 Paul Wilton".
Similarly, you can refer to characters using their Unicode escape sequence. These are written \uNNNN, where NNNN refers to the Unicode number for that particular character. For example, to refer to the copyright symbol using this method, you use the string \u00A9.
Boolean Data
The use of yes or no, positive or negative, and true or false is commonplace in the physical world. The idea of true and false is also fundamental to digital computers; they don’t understand maybes, only true and false. In fact, the concept of “yes or no” is so useful it has its own data type in JavaScript: the boolean data type. The boolean type has two possible values: true for yes and false for no.
The purpose of boolean data in JavaScript is just the same as in the world outside programming: it enables you to answer questions and make decisions based on the answer. For example, if you are asked, “Is this book about JavaScript?” you would hopefully answer, “Yes it is,” or you might also say, “That’s true.” Similarly, you might say, “If it’s false that the subject of the book is JavaScript, then put it down.” Here you have a boolean logic statement (named after its inventor George Boole), which asks a question and then does something based on whether the answer is true or false. In JavaScript, you can use the same sort of boolean logic to give your programs decision-making abilities. You take a more detailed look at boolean logic in the next chapter.
VARIABLES—STORING DATA IN MEMORY
Data can be stored either permanently or temporarily.
You will want to keep important data, such as the details of a person’s bank account, in a permanent store. For example, when Ms. Bloggs takes ten dollars or pounds or euros out of her account, you want to deduct the money from her account and keep a permanent record of the new balance. Information like this might be stored in something called a database.
However, in other cases you don’t want to permanently store data, but simply want to keep a temporary note of it. Let’s look at an example. Say Ms. Bloggs has a loan from BigBank Inc., and she wants to find out how much is still outstanding on this loan. She goes to the online banking page for loans and clicks a link to find out how much she owes. This is data that will be stored permanently somewhere. However, suppose you also provide a facility for increasing loan repayments to pay off the loan early. If Ms. Bloggs enters an increased repayment amount into the text box on the web page, you might want to show how much sooner the loan will be paid. This will involve a few possibly complex calculations, so to make it easier, you want to write code that calculates the result in several stages, storing the result at each stage as you go along, before providing a final result. After you’ve done the calculation and displayed the results, there’s no need to permanently store the results for each stage, so rather than use a database, you need to use something called a variable. Why is it called a variable? Well, perhaps because a variable can be used to store temporary data that can be altered, or varied.
Another bonus of variables is that unlike permanent storage, which might be saved to disk or magnetic tape, variables are held in the computer’s memory. This means that it is much, much faster to store and retrieve the data.
So what makes variables good places for temporarily storing your data? Well, variables have a limited lifetime. When your visitors close the page or move to a new one, your variables are lost, unless you take some steps to save them somewhere.
You give each variable a name so that you can refer to it elsewhere in your code. These names must follow certain rules.
As with much of JavaScript code, variable names are case sensitive. For example, myVariable is not the same as myvariable. You’ll find that this is a very easy way for errors to slip into your code, even when you become an expert at JavaScript.
Also, you can’t use certain names and characters for your variable names. Names you can’t use are called reserved words. Reserved words are words that JavaScript keeps for its own use (for example, the word var or the word with). Certain characters are also forbidden in variable names: for example, the ampersand (&) and the percent sign (%). You are allowed to use numbers in your variable names, but the names must not begin with numbers. So 101myVariable is not okay, but myVariable101 is. Let’s look at some more examples.
Invalid names include:
· with
· 99variables
· my%Variable
· theGood&theBad
Valid names include:
· myVariable99
· myPercent_Variable
· the_Good_and_the_Bad
You may want to use a naming convention for your variables (for example, one that describes what sort of data you plan to hold in the variable). You can notate your variables in lots of different ways—none are right or wrong, but it’s best to stick with one of them.
Today, the convention most JavaScript developers use is to simply give their variables descriptive names. For example, a variable for a person’s first name would be called firstName; his account number would be accountNumber. However, as long as the names you use make sense and are used consistently, it really doesn’t matter what convention you choose.
Creating Variables and Giving Them Values
Before you can use a variable, you should declare its existence to the JavaScript engine using the var keyword. This warns the engine that it needs to reserve some memory in which to store your data later. To declare a new variable called myFirstVariable, write the following:
var myFirstVariable;
Note that the semicolon at the end of the line is not part of the variable name, but instead is used to indicate to JavaScript the end of a statement. This line is an example of a JavaScript statement.
Once declared, you can use a variable to store any type of data. As mentioned earlier, many other programming languages (called strongly typed languages) require you to declare not only the variable, but also the type of data that will be stored, such as numbers or text. However, JavaScript is a weakly typed language; you don’t need to limit yourself to what type of data a variable can hold.
You put data into your variables, a process called assigning values to your variables, by using the equals sign (=). For example, if you want your variable named myFirstVariable to hold the number 101, you would write this:
myFirstVariable = 101;
The equals sign has a special name when used to assign values to a variable; it’s called the assignment operator.
TRY IT OUT Declaring Variables
Let’s look at an example in which a variable is declared, store some data in it, and finally, access its contents. You’ll also see that variables can hold any type of data, and that the type of data being held can be changed. For example, you can start by storing text and then change to storing numbers without JavaScript having any problems. Type the following code into your text editor and save it as ch2 _ example1.html:
<!DOCTYPE html>
<html lang="en">
<head>
<title>Chapter 2, Example 1</title>
</head>
<body>
<script>
var myFirstVariable;
myFirstVariable = "Hello";
alert(myFirstVariable);
myFirstVariable = 54321;
alert(myFirstVariable);
</script>
</body>
</html>
As soon as you load this into your web browser, it should show an alert box with “Hello” in it, as shown in Figure 2.1. This is the content of the variable myFirstVariable at that point in the code.
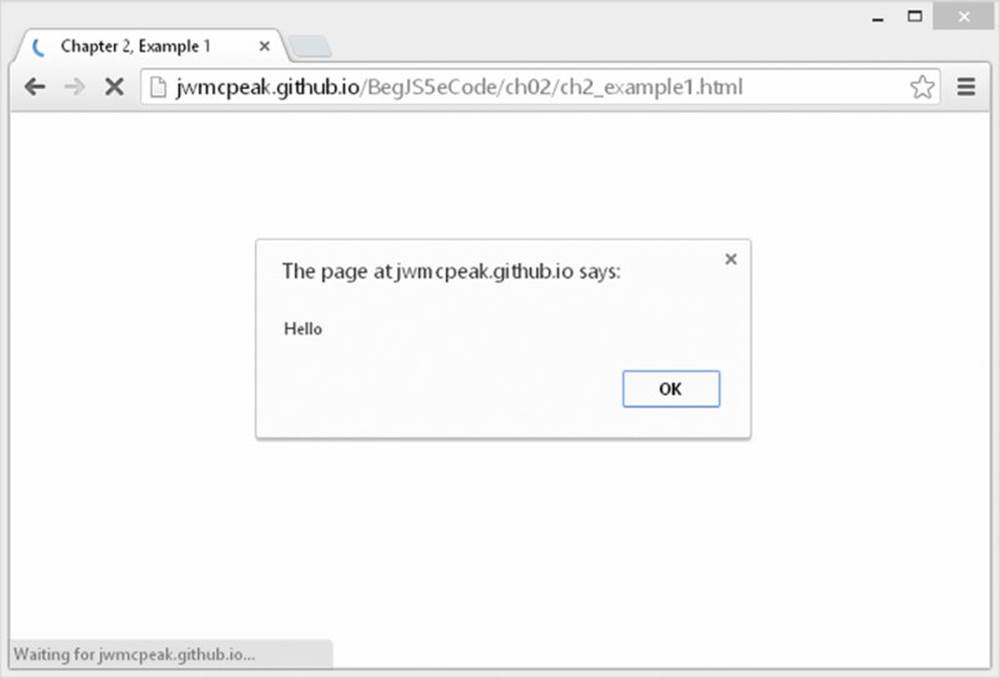
Figure 2.1
Click OK and another alert box appears with 54321 in it, as shown in Figure 2.2. This is the new value you assigned to the variable myFirstVariable.
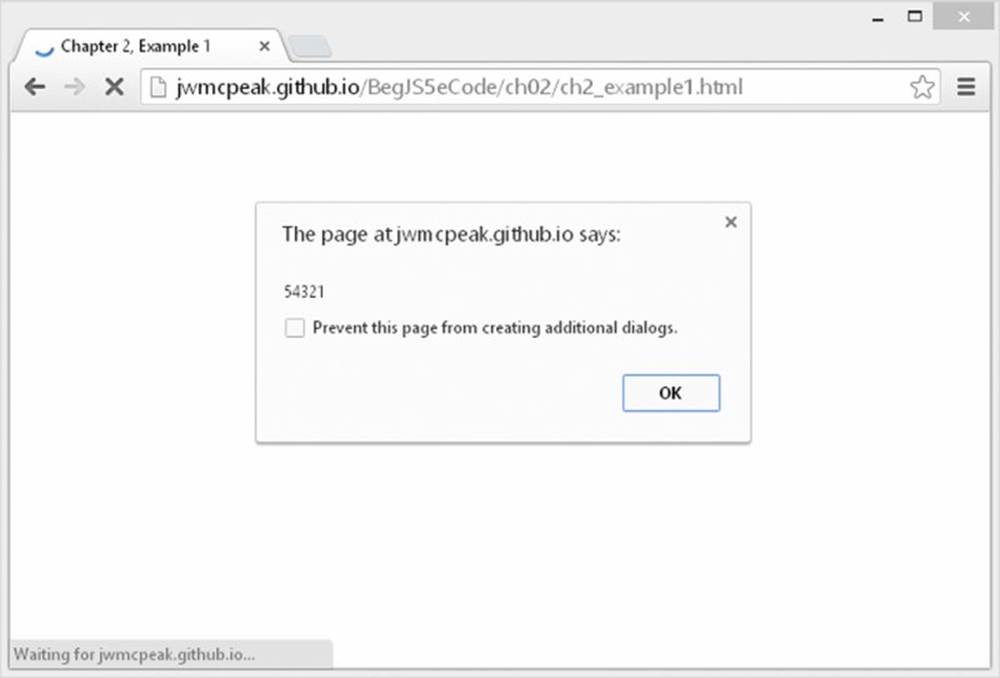
Figure 2.2
Within the script block, you first declare your variable:
var myFirstVariable;
Currently, its value is the undefined value because you’ve declared only its existence to the JavaScript engine, not any actual data. It may sound odd, but undefined is an actual primitive value in JavaScript, and it enables you to do comparisons. (For example, you can check to see whether a variable contains an actual value or whether it has not yet been given a value, that is, whether it is undefined.) However, in the next line you assign myFirstVariable a string value, namely the value Hello:
myFirstVariable = "Hello";
Here you have assigned the variable a literal value (that is, a piece of actual data rather than data obtained by a calculation or from another variable). Almost anywhere that you can use a literal string or number, you can replace it with a variable containing number or string data. You see an example of this in the next line of code, where you use your variable myFirstVariable in the alert() function that you saw in the previous chapter:
alert(myFirstVariable);
This causes the first alert box to appear. Next you store a new value in your variable, this time a number:
myFirstVariable = 54321;
The previous value of myFirstVariable is lost forever. The memory space used to store the value is freed up automatically by JavaScript in a process called garbage collection. Whenever JavaScript detects that the contents of a variable are no longer usable, such as when you allocate a new value, it performs the garbage collection process and makes the memory available. Without this automatic garbage collection process, more and more of the computer’s memory would be consumed, until eventually the computer would run out and the system would grind to a halt. However, garbage collection is not always as efficient as it should be and may not occur until another page is loaded.
Just to prove that the new value has been stored, use the alert() function again to display the variable’s new contents:
alert(myFirstVariable);
Assigning Variables with the Value of Other Variables
You’ve seen that you can assign a variable with a number or string, but can you assign a variable with the data stored inside another variable? The answer is yes, very easily, and in exactly the same way as giving a variable a literal value. For example, if you have declared the two variables myVariable and myOtherVariable and have given the variable myOtherVariable the value 22, like this:
var myVariable;
var myOtherVariable;
myOtherVariable = 22;
you can use the following line to assign myVariable the same value as myOtherVariable (that is, 22):
myVariable = myOtherVariable;
TRY IT OUT Assigning Variables the Values of Other Variables
Let’s look at another example, this time assigning variables the values of other variables.
1. Type the following code into your text editor and save it as ch2_example2.html:
2. <!DOCTYPE html>
3.
4. <html lang="en">
5. <head>
6. <title>Chapter 2, Example 2</title>
7. </head>
8. <body>
9. <script>
10. var string1 = "Hello";
11. var string2 = "Goodbye";
12.
13. alert(string1);
14. alert(string2);
15.
16. string2 = string1;
17.
18. alert(string1);
19. alert(string2);
20.
21. string1 = "Now for something different";
22.
23. alert(string1);
24. alert(string2);
25. </script>
26. </body>
<html>
27.Load the page into your browser, and you’ll see a series of six alert boxes appear.
28.Click OK on each alert box to see the next alert. The first two show the values of string1 and string2—Hello and Goodbye, respectively. Then you assign string2 the value that’s in string1. The next two alert boxes show the contents of string1 andstring2; this time both are Hello.
29.Finally, you change the value of string1. Note that the value of string2 remains unaffected. The final two alert boxes show the new value of string1 (Now for something different) and the unchanged value of string2 (Hello).
The first thing you do in the script block is declare your two variables: string1 and string2. However, notice that you have assigned them values at the same time that you have declared them. This is a shortcut, called initializing, that saves you typing too much code:
var string1 ="Hello";
var string2 = "Goodbye";
Note that you can use this shortcut with all data types, not just strings. In the next two lines you use the alert() function to show the current value of each variable to the user:
alert(string1);
alert(string2);
Then you assign string2 the value that’s contained in string1. To prove that the assignment has really worked, you again use the alert() function to show the user the contents of each variable:
string2 = string1;
alert(string1);
alert(string2);
Next, you set string1 to a new value:
string1 = "Now for something different";
This leaves string2 with its current value, demonstrating that string2 has its own copy of the data assigned to it from string1 in the previous step. You see in later chapters that this is not always the case. However, as a general rule, basic data types, such as text and numbers, are always copied when assigned, whereas more complex data types, like the objects you come across in Chapter 5, are actually shared and not copied. For example, if you have a variable with the string Hello and assign five other variables the value of this variable, you now have the original data and five independent copies of the data. However, if it was an object rather than a string and you did the same thing, you’d find you still have only one copy of the data, but that six variables share it. Changing the data using any of the six variable names would change it for all the variables.
Finally, you use the alert() function to show the current values of each variable:
alert(string1);
alert(string2);
USING DATA—CALCULATIONS AND BASIC STRING MANIPULATION
You’ve seen how to declare variables and how they can store information, but so far you haven’t done anything really useful with this knowledge—so just why would you want to use variables at all?
What variables enable you to do is temporarily hold information that you can use for processing in mathematical calculations, in building up text messages, or in processing words that the user has entered. Variables are a little bit like the Memory Store button on the average pocket calculator. Say you were adding up your finances. You might first add up all the money you needed to spend, and then store it in temporary memory. After you had added up all your money coming in, you could deduct the amount stored in the memory to figure out how much would be left over. You can use variables in a similar way: You can first gain the necessary user input and store it in variables, and then you can do your calculations using the values obtained.
In this section you see how you can put the values stored in variables to good use in both number-crunching and text-based operations.
Numerical Calculations
JavaScript has a range of basic mathematical capabilities, such as addition, subtraction, multiplication, and division. Each of the basic math functions is represented by a symbol: plus (+), minus (−), star (*), and forward slash (/), respectively. These symbols are calledoperators because they operate on the values you give them. In other words, they perform some calculation or operation and return a result. You can use the results of these calculations almost anywhere you’d use a number or a variable.
Imagine you were calculating the total value of items on a shopping list. You could write this calculation as follows:
· Total cost of shopping = 10 + 5 + 5
Or, if you actually calculate the sum, it’s:
· Total cost of shopping = 20
Now let’s see how to do this in JavaScript. In actual fact, it is very similar except that you need to use a variable to store the final total:
var totalCostOfShopping;
totalCostOfShopping = 10 + 5 + 5;
alert(totalCostOfShopping);
First, you declare a variable, totalCostOfShopping, to hold the total cost.
In the second line, you have the code 10 + 5 + 5. This piece of code is known as an expression. When you assign the variable totalCostOfShopping the value of this expression, JavaScript automatically calculates the value of the expression (20) and stores it in the variable. Notice that the equals sign tells JavaScript to store the results of the calculation in the totalCostOfShopping variable. This is called assigning the value of the calculation to the variable, which is why the single equals sign (=) is called the assignment operator.
Finally, you display the value of the variable in an alert box.
The operators for subtraction and multiplication work in exactly the same way. Division is a little different.
TRY IT OUT Calculations
Let’s take a look at an example using the division operator to see how it works.
1. Enter the following code and save it as ch2_example3.html:
2. <!DOCTYPE html>
3.
4. <html lang="en">
5. <head>
6. <title>Chapter 2, Example 3</title>
7. </head>
8. <body>
9. <script>
10. var firstNumber = 15;
11. var secondNumber = 10;
12. var answer;
13. answer = 15 / 10;
14. alert(answer);
15.
16. alert(15 / 10);
17.
18. answer = firstNumber / secondNumber;
19. alert(answer);
20. </script>
21. </body>
</html>
22.Load this into your web browser. You should see a succession of three alert boxes, each containing the value 1.5. These values are the results of three calculations.
23. The first thing you do in the script block is declare your three variables and assign the first two of them values that you’ll be using later:
24. var firstNumber = 15;
25. var secondNumber = 10;
var answer;
26. Next, you set the answer variable to the results of the calculation of the expression 15/10. You show the value of this variable in an alert box:
27. answer = 15 / 10;
alert(answer);
This example demonstrates one way of doing the calculation, but in reality you’d almost never do it this way.
To demonstrate that you can use expressions in places you’d use numbers or variables, you show the results of the calculation of 15/10 directly by including it in the alert() function:
alert(15 / 10);
Finally, you do the same calculation, but this time using the two variables: firstNumber, which was set to 15, and secondNumber, which was set to 10. You have the expression firstNumber / secondNumber, the result of which you store in your answer variable. Then, to prove it has all worked, you show the value contained in answer by using your friend the alert() function:
answer = firstNumber / secondNumber;
alert(answer);
You’ll do most calculations the third way (that is, using variables, or numbers and variables, and storing the result in another variable). The reason for this is that if the calculation used literal values (actual values, such as 15 / 10), then you might as well program in the result of the calculation, rather than force JavaScript to calculate it for you. For example, rather than writing 15 / 10, you might as well just write 1.5. After all, the more calculations you force JavaScript to do, the slower it will be, though admittedly just one calculation won’t tax it too much.
Another reason for using the result rather than the calculation is that it makes code more readable. Which would you prefer to read in code: 1.5 * 45 – 56 / 67 + 2.567 or 69.231? Still better, a variable named, for example, pricePerKG, makes code even easier to understand for someone not familiar with it.
Increment and Decrement Operators
A number of operations using the math operators are so commonly used that they have been given their own operators. The two you’ll be looking at here are the increment and decrement operators, which are represented by two plus signs (++) and two minus signs (−−), respectively. Basically, all they do is increase or decrease a variable’s value by one. You could use the normal + and − operators to do this, for example:
myVariable = myVariable + 1;
myVariable = myVariable − 1;
NOTE You can assign a variable a new value that is the result of an expression involving its previous value.
However, using the increment and decrement operators shortens this to:
myVariable++;
myVariable−−;
The result is the same—the value of myVariable is increased or decreased by one—but the code is shorter. When you are familiar with the syntax, this becomes very clear and easy to read.
Right now, you may well be thinking that these operators sound as useful as a poke in the eye. However, in Chapter 3, when you look at how you can run the same code a number of times, you’ll see that these operators are very useful and widely used. In fact, the ++operator is so widely used it has a computer language named after it: C++. The joke here is that C++ is one up from C. (Well, that’s programmer humor for you!)
As well as placing the ++ or −− after the variable, you can also place it before, like so:
++myVariable;
−−myVariable;
When the ++ and −− are used on their own, as they usually are, it makes no difference where they are placed, but it is possible to use the ++ and −− operators in an expression along with other operators. For example:
myVar = myNumber++ − 20;
This code takes 20 away from myNumber and then increments the variable myNumber by one before assigning the result to the variable myVar. If instead you place the ++ before and prefix it like this:
myVar = ++myNumber − 20;
myNumber is first incremented by one, and then myNumber has 20 subtracted from it. It’s a subtle difference, but in some situations a very important one. Take the following code:
myNumber = 1;
myVar = (myNumber++ * 10 + 1);
What value will myVar contain? Well, because the ++ is postfixed (it’s after the myNumber variable), it will be incremented afterward. So the equation reads: Multiply myNumber by 10 plus 1 and then increment myNumber by one.
myVar = 1 * 10 + 1 = 11
Then add 1 to myNumber to get 12, but do this after the value 11 has been assigned to myVar. Now take a look at the following code:
myNumber = 1;
myVar = ++myNumber * 10 + 1;
This time myNumber is incremented by one first, then times 10 and plus 1:
myVar = 2 * 10 + 1 = 21
As you can imagine, such subtlety can easily be overlooked and lead to bugs in code; therefore, it’s usually best to avoid this syntax.
Before going on, this seems to be a good place to introduce another operator: +=. You can use this operator as a shortcut for increasing the value held by a variable by a set amount. For example,
myVar += 6;
does exactly the same thing as:
myVar = myVar + 6;
You can also do the same thing for subtraction and multiplication, as shown here:
myVar −= 6;
myVar *= 6;
which is equivalent to:
myVar = myVar − 6;
myVar = myVar * 6;
Operator Precedence
You’ve seen that symbols that perform some function—like +, which adds two numbers, and −, which subtracts one number from another—are called operators. Unlike people, not all operators are created equal; some have a higher precedence—that is, they get dealt with sooner. A quick look at a simple example will help demonstrate this point:
var myVariable;
myVariable = 1 + 1 * 2;
alert(myVariable);
If you were to type this, what result would you expect the alert box to show as the value of myVariable? You might expect that because 1 + 1 = 2 and 2 * 2 = 4, the answer is 4. Actually, you’ll find that the alert box shows 3 as the value stored in myVariable as a result of the calculation. So what gives? Doesn’t JavaScript add up right?
Well, you probably already know the reason from your understanding of mathematics. The way JavaScript does the calculation is to first calculate 1 * 2 = 2, and then use this result in the addition, so that JavaScript finishes off with 1 + 2 = 3.
Why? Because * has a higher precedence than +. The = symbol, also an operator (called the assignment operator), has the lowest precedence—it always gets left until last.
The + and − operators have an equal precedence, so which one gets done first? Well, JavaScript works from left to right, so if operators with equal precedence exist in a calculation, they get calculated in the order in which they appear when going from left to right. The same applies to * and /, which are also of equal precedence.
TRY IT OUT Fahrenheit to Centigrade
Take a look at a slightly more complex example—a Fahrenheit to centigrade converter. (Centigrade is another name for the Celsius temperature scale.) Type this code and save it as ch2_example4.html:
<!DOCTYPE html>
<html lang="en">
<head>
<title>Chapter 2, Example 4</title>
</head>
<body>
<script>
// Equation is °C = 5/9 (°F - 32).
var degFahren = prompt("Enter the degrees in Fahrenheit",50);
var degCent;
degCent = 5/9 * (degFahren - 32);
alert(degCent);
</script>
</body>
</html>
If you load the page into your browser, you should see a prompt box, like that shown in Figure 2.3, that asks you to enter the degrees in Fahrenheit to be converted. The value 50 is already filled in by default.
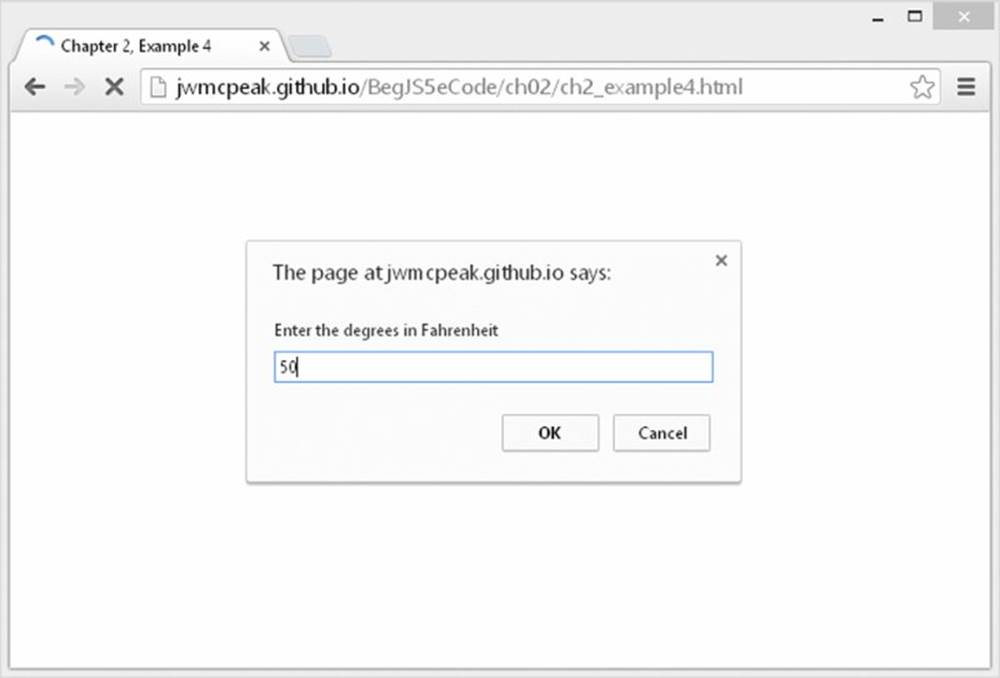
Figure 2.3
If you leave it at 50 and click OK, an alert box with the number 10 in it appears. This represents 50 degrees Fahrenheit converted to centigrade.
Reload the page and try changing the value in the prompt box to see what results you get. For example, change the value to 32 and reload the page. This time you should see 0 appear in the box.
Because it’s still a fairly simple example, there’s no checking of data input, so it’ll let you enter abc as the degrees Fahrenheit. Later, in the “Data Type Conversion” section of this chapter, you see how to spot invalid characters posing as numeric data.
TRY IT OUT Security Issues with Internet Explorer
When loading the page to Internet Explorer (IE), you may see the security warning issue shown in Figure 2.4, and the prompt window doesn’t appear.
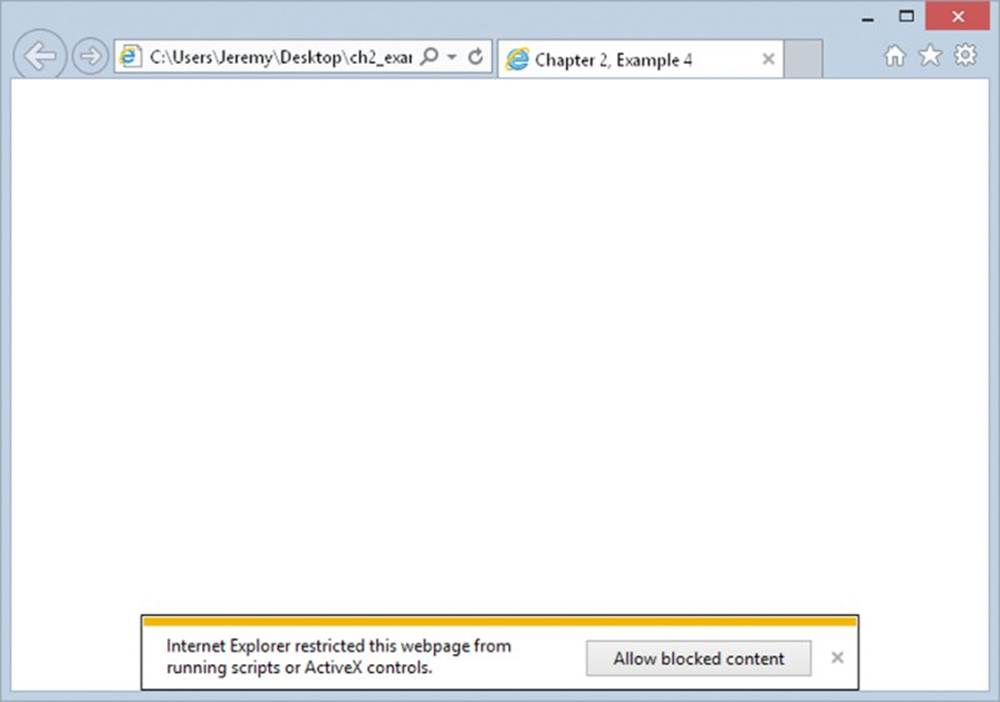
Figure 2.4
If it does you’ll need to change IE’s security settings to allow active content from your computer. To do this:
1. Open IE and select the “Internet options” menu from the Tools menu, as shown in Figure 2.5.
2. Click the Advanced tab and then scroll down to the Security section. Check the “Allow active content to run in files on My Computer” option, as shown in Figure 2.6.
3. Click the OK button on the Internet Options dialog box and close Internet Explorer. Open Example 4 from the “Fahrenheit to Centigrade” Try It Out again, and the example will now work.
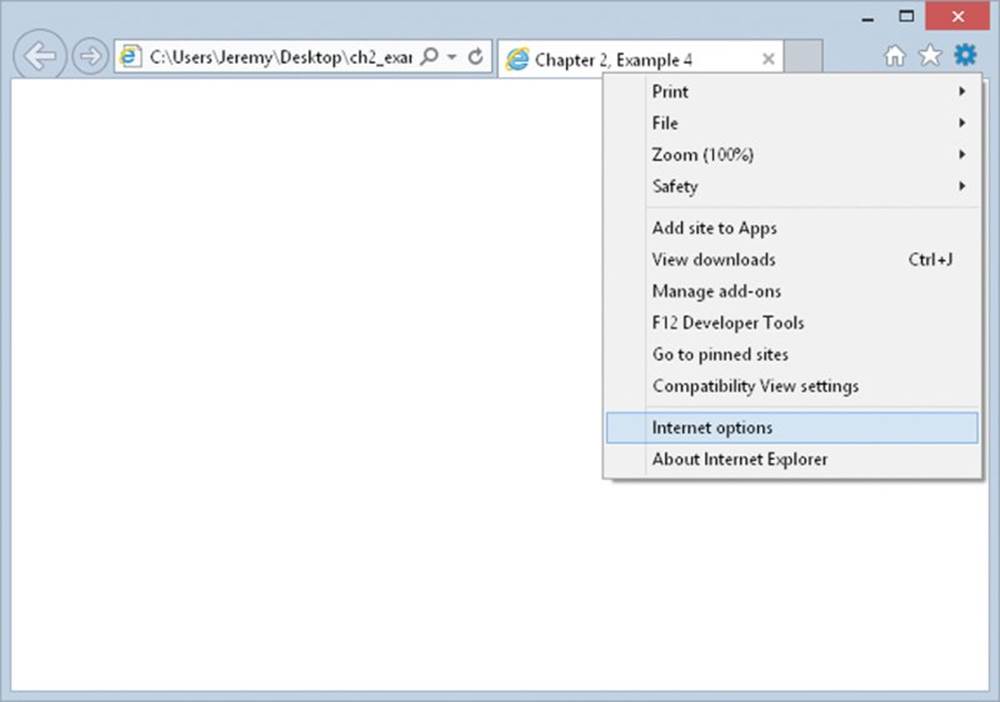
Figure 2.5
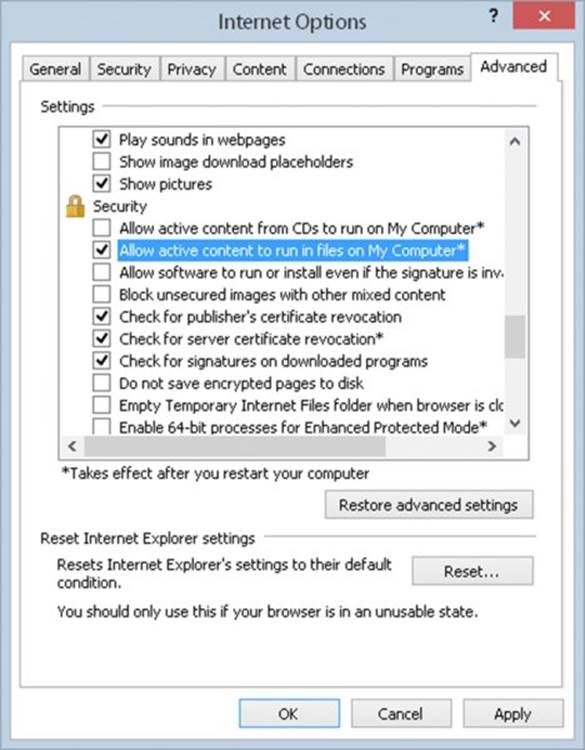
Figure 2.6
The first line of the script block is a comment, because it starts with two forward slashes (//). It contains the equation for converting Fahrenheit temperatures to centigrade and is in the example code solely for reference:
// Equation is °C = 5/9 (°F - 32).
Your task is to represent this equation in JavaScript code. You start by declaring your variables, degFahren and degCent:
var degFahren = prompt(“Enter the degrees in Fahrenheit”,50);
var degCent;
Instead of initializing the degFahren variable to a literal value, you get a value from the user using the prompt() function. The prompt() function works in a similar way to an alert() function, except that as well as displaying a message, it also contains a text box in which the user can enter a value. It is this value that will be stored inside the degFahren variable. The value returned is a text string, but this will be implicitly converted by JavaScript to a number when you use it as a number, as discussed in the section “Data Type Conversion” later in this chapter.
You pass two pieces of information to the prompt() function:
· The text to be displayed—usually a question that prompts the user for input
· The default value that is contained in the input box when the prompt dialog box first appears
These two pieces of information must be specified in the given order and separated by a comma. If you don’t want a default value to be contained in the input box when the prompt box opens, use an empty string ("") for the second piece of information.
As you can see in the preceding code, the text is “Enter the degrees in Fahrenheit,” and the default value in the input box is 50.
Next in the script block comes the equation represented in JavaScript. You store the result of the equation in the degCent variable. You can see that the JavaScript looks very much like the equation you have in the comment, except you use degFahreninstead of °F, and degCent rather than °C:
degCent = 5/9 * (degFahren - 32);
The calculation of the expression on the right-hand side of the equals sign raises a number of important points. First, just as in math, the JavaScript equation is read from left to right, at least for the basic math functions like +, -, and so on. Secondly, as you saw earlier, just as there is precedence in math, there is precedence in JavaScript.
Starting from the left, first JavaScript works out 5/9 = .5556 (approximately). Then it comes to the multiplication, but wait… the last bit of your equation, degFahren – 32, is in parentheses. This raises the order of precedence and causes JavaScript to calculate the result of degFahren – 32 before doing the multiplication. For example, when degFahren is set to 50, (degFahren - 32) = (50 – 32) = 18. Now JavaScript does the multiplication, .5556 * 18, which is approximately 10.
What if you didn’t use the parentheses? Then your code would be:
degCent = 5/9 * degFahren - 32;
The calculation of 5/9 remains the same, but then JavaScript would have calculated the multiplication, 5/9 * degFahren. This is because the multiplication takes precedence over the subtraction. When degFahren is 50, this equates to 5/9 * 50 = 27.7778. Finally, JavaScript would have subtracted the 32, leaving the result as –4.2221; not the answer you want!
Finally, in your script block, you display the answer using the alert() function:
alert(degCent);
That concludes a brief look at basic calculations with JavaScript. However, in Chapter 5 you look at the Math object, which enables you to do more complex calculations.
Basic String Operations
In an earlier section, you looked at the text or string data type, as well as numerical data. Just as numerical data has associated operators, strings have operators too. This section introduces some basic string manipulation techniques using such operators. Strings are covered in more depth in Chapter 5, and advanced string handling is covered in Chapter 6.
One thing you’ll find yourself doing again and again in JavaScript is joining two strings to make one string—a process termed concatenation. For example, you may want to concatenate the two strings "Hello " and "Paul" to make the string "Hello Paul". So how do you concatenate? Easy! Use the + operator. Recall that when applied to numbers, the + operator adds them up, but when used in the context of two strings, it joins them:
var concatString = "Hello " + "Paul";
The string now stored in the variable concatString is "Hello Paul". Notice that the last character of the string "Hello" is a space—if you left this out, your concatenated string would be "HelloPaul".
TRY IT OUT Concatenating Strings
Let’s look at an example using the + operator for string concatenation.
1. Type the following code and save it as ch2_example5.html:
2. <!DOCTYPE html>
3.
4. <html lang="en">
5. <head>
6. <title>Chapter 2, Example 5</title>
7. </head>
8. <body>
9. <script>
10. var greetingString = "Hello";
11. var myName = prompt("Please enter your name", "");
12. var concatString;
13.
14. document.write(greetingString + " " + myName + "<br/>");
15.
16. concatString = greetingString + " " + myName;
17.
18. document.write(concatString);
19. </script>
20. </body>
</html>
21.If you load it into your web browser, you should see a prompt box asking for your name.
22.Enter your name and click OK. You should see a greeting and your name displayed twice on the web page.
You start the script block by declaring three variables. You set the first variable, greetingString, to a string value. The second variable, myName, is assigned to whatever is entered by the user in the prompt box. You do not initialize the third variable,concatString, here. It will be used to store the result of the concatenation that you’ll do later in the code.
var greetingString = "Hello";
var myName = prompt("Please enter your name", "");
var concatString;
In the previous chapter, you saw how the web page was represented by the concept of a document and that it had a number of different properties, such as bgColor. You can also use document to write text and HTML directly into the page itself. You do this by using the word document, followed by a dot, and then write(). You then use document.write() much as you do the alert() function, in that you put the text that you want displayed in the web page inside the parentheses following the word write. Don’t worry too much about this here, though, because it is all explained in detail in later chapters. However, you now make use of document.write() in your code to write the result of an expression to the page:
document.write(greetingString + " " + myName + "<br/>");
The expression written to the page is the concatenation of the value of the greetingString variable, a space (" "), the value of the myName variable, and the HTML <br/> element, which causes a line break. For example, if you enter Jeremy into the prompt box, the value of this expression will be as follows:
Hello Jeremy<br/>
In the next line of code is a similar expression. This time it is just the concatenation of the value in the variable greetingString, a space, and the value in the variable myName. You store the result of this expression in the variable concatString. Finally, you write the contents of the variable concatString to the page using document.write():
concatString = greetingString + " " + myName;
document.write(concatString);
Mixing Numbers and Strings
What if you want to mix text and numbers in an expression? A prime example of this would be in the temperature converter you saw earlier. In the example, you just display the number without telling the user what it actually means. What you really want to do is display the number with descriptive text wrapped around it, such as “The value converted to degrees centigrade is 10.”
Mixing numbers and text is actually very easy. You can simply join them using the + operator. JavaScript is intelligent enough to know that when both a string and a number are involved, you’re not trying to do numerical calculations, but rather that you want to treat the number as a string and join it to the text. For example, to join the text My age is and the number 101, you could simply do the following:
alert("My age is " + 101);
This would produce an alert box with “My age is 101” inside it.
TRY IT OUT Making the Temperature Converter User-Friendly
You can try out this technique of concatenating strings and numbers in the temperature-converter example. You output some explanatory text, along with the result of the conversion calculation. The changes that you need to make are very small, so loadch2_example4.html into your text editor and change the following line. Then save it as ch2_example6.html.
<!DOCTYPE html>
<html lang="en">
<head>
<title>Chapter 2, Example 6</title>
</head>
<body>
<script>
// Equation is °C = 5/9 (°F - 32).
var degFahren = prompt("Enter the degrees in Fahrenheit",50);
var degCent;
degCent = 5/9 * (degFahren - 32);
alert(degFahren + "\xB0 Fahrenheit is " + degCent + "\xB0 centigrade");
</script>
</body>
</html>
Load the page into your web browser. Click OK in the prompt box to submit the value 50, and this time you should see the box shown in Figure 2.7.

Figure 2.7
This example is identical to ch2 _ example4.html, except for one line:
alert(degFahren + "\xB0 Fahrenheit is " + degCent + "\xB0 centigrade");
So we will just look at this line here. You can see that the alert() function contains an expression. Let’s look at that expression more closely.
First is the variable degFahren, which contains numerical data. You concatenate that to the string "\xBO Fahrenheit is ". JavaScript realizes that because you are adding a number and a string, you want to join them into one string rather than trying to take their sum, and so it automatically converts the number contained in degFahren to a string. You next concatenate this string to the variable degCent, containing numerical data. Again JavaScript converts the value of this variable to a string. Finally, you concatenate to the string "\xBO centigrade".
Note also the escape sequence used to insert the degree character into the strings. You’ll remember from earlier in the chapter that you can use \xNN to insert special characters not available to type in directly. (NN is a hexadecimal number representing a character from the Latin-1 character table.) So when JavaScript spots \xB0 in a string, instead of showing those characters it does a lookup to see what character is represented by B0 and shows that instead.
Something to be aware of when using special characters is that they are not necessarily cross-platform–compatible. Although you can use \xNN for a certain character on a Windows computer, you may find you need to use a different character on a Mac or a Unix machine.
You look at more string manipulation techniques in Chapter 5—you see how to search strings and insert characters in the middle of them, and in Chapter 6 you see some very sophisticated string techniques.
DATA TYPE CONVERSION
As you’ve seen, if you add a string and a number, JavaScript makes the sensible choice and converts the number to a string, then concatenates the two. Usually, JavaScript has enough sense to make data type conversions like this whenever it needs to, but in some situations you need to convert the type of a piece of data yourself. For example, you may be given a piece of string data that you want to think of as a number. This is especially likely if you are using forms to collect data from the user. Any values input by the user are treated as strings, even though they may contain numerical data, such as the user’s age.
Why is changing the type of the data so important? Consider a situation in which you collect two numbers from the user using a form and want to calculate their sum. The two numbers are available to you as strings, for example "22" and "15". When you try to calculate the sum of these values using "22" + "15" you get the result "2215", because JavaScript thinks you are trying to concatenate two strings rather than trying to find the sum of two numbers. To add to the possible confusion, the order also makes a difference. So:
1 + 2 + "abc"
results in a string containing "3abc", whereas:
"abc" + 1 + 2
would result in the string containing "abc12".
In this section you look at two conversion functions that convert strings to numbers: parseInt() and parseFloat().
Let’s take parseInt() first. This function takes a string and converts it to an integer. The name is a little confusing at first—why parseInt() rather than convertToInt()? The main reason for the name comes from the way that the function works. It actually goes through (that is, parses) each character of the string you ask it to convert and sees if it’s a valid number. If it is valid, parseInt() uses it to build up the number; if it is not valid, the command simply stops converting and returns the number it has converted so far.
For example, if your code is parseInt("123"), JavaScript will convert the string "123" to the number 123. For the code parseInt("123abc"), JavaScript will also return the number 123. When the JavaScript engine gets to the letter a, it assumes the number has ended and gives 123 as the integer version of the string "123abc".
The parseFloat() function works in the same way as parseInt(), except that it returns floating-point numbers—fractional numbers—and that a decimal point in the string, which it is converting, is considered to be part of the allowable number.
TRY IT OUT Converting Strings to Numbers
Let’s look at an example using parseInt() and parseFloat(). Enter the following code and save it as ch2_example7.html:
<!DOCTYPE html>
<html lang="en">
<head>
<title>Chapter 2, Example 7</title>
</head>
<body>
<script>
var myString = "56.02 degrees centigrade";
var myInt;
var myFloat;
document.write("\"" + myString + "\" is " + parseInt(myString, 10) +
" as an integer" + "<br/>");
myInt = parseInt(myString, 10);
document.write("\"" + myString +
"\" when converted to an integer equals " + myInt + "<br/>");
myFloat = parseFloat(myString);
document.write("\"" + myString +
"\" when converted to a floating point number equals " + myFloat);
</script>
</body>
</html>
Load it into your browser, and you’ll see three lines written in the web page, as shown in Figure 2.8.

Figure 2.8
Your first task in the script block is to declare some variables. The variable myString is declared and initialized to the string you want to convert. You could just as easily have used the string directly in this example rather than storing it in a variable, but in practice you’ll find that you use variables more often than literal values. You also declare the variables myInt and myFloat, which will hold the converted numbers:
var myString = "56.02 degrees centigrade";
var myInt;
var myFloat;
Next, you write to the page the converted integer value of myString displayed inside a user-friendly sentence you build up using string concatenation. Notice that you use the escape sequence \" to display quotes (") around the string you are converting:
document.write("\"" + myString + "\" is " + parseInt(myString, 10) +
" as an integer" + "<br/>");
As you can see, you can use parseInt() and parseFloat() in the same places you would use a number itself or a variable containing a number. In fact, in this line the JavaScript engine is doing two conversions. First, it converts myString to an integer, because that’s what you asked for by using parseInt(). Then it automatically converts that integer number back to a string, so it can be concatenated with the other strings to make up your sentence. Also note that only the 56 part of the myString variable’s value is considered a valid number when you’re dealing with integers. Anything after the 6 is considered invalid and is ignored.
Notice the second value, the number 10, that is passed to parseInt(). This is called the radix, and it determines how the string is parsed into a number. By passing the number 10, you tell the parseInt() function to convert the number using the Base 10 number system. Base 10 is our common number system, but you can use parseInt() to convert numbers to binary (Base 2), hex (Base 16), and other number systems. For example, parseInt(10, 2) converts the number 10 using the binary number system, resulting in the number 2. Always specify the radix! Without it, JavaScript guesses what number system to use, and you could encounter unexpected results.
Next, you do the same conversion of myString using parseInt(), but this time you store the result in the myInt variable. On the following line you use the result in some text you display to the user:
myInt = parseInt(myString, 10);
document.write("\"" + myString +
"\" when converted to an integer equals " + myInt + "<br/>");
Again, though myInt holds a number, the JavaScript interpreter knows that +, when a string and a number are involved, means you want the myInt value converted to a string and concatenated to the rest of the string so it can be displayed.
Finally, you use parseFloat() to convert the string in myString to a floating-point number, which you store in the variable myFloat. This time the decimal point is considered to be a valid part of the number, so it’s anything after the 2 that is ignored. Again you use document.write() to write the result to the web page inside a user-friendly string:
myFloat = parseFloat(myString);
document.write("\"" + myString +
"\" when converted to a floating point number equals " + myFloat);
Dealing with Strings That Won’t Convert
Some strings simply are not convertible to numbers, such as strings that don’t contain any numerical data. What happens if you try to convert these strings? As a little experiment, try changing the preceding example so that myString holds something that is not convertible. For example, change the line
var myString = "56.02 degrees centigrade";
to
var myString = "I'm a name not a number";
Now reload the page in your browser and you should see what’s shown in Figure 2.9.
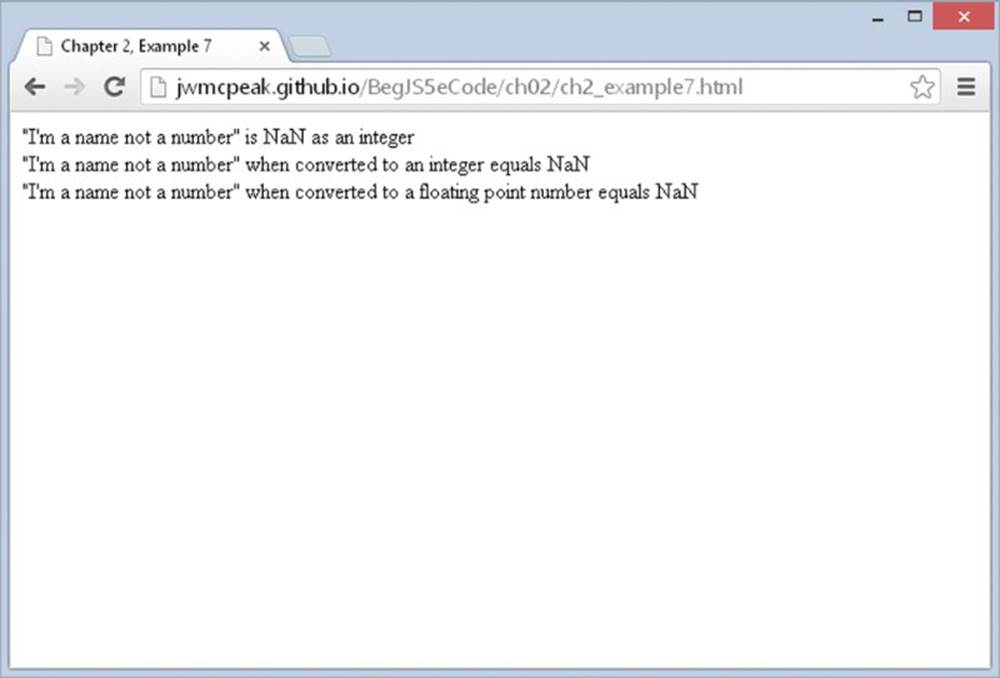
Figure 2.9
You can see that in the place of the numbers you got before, you get NaN. What sort of number is that? Well, it’s Not a Number at all!
If you use parseInt() or parseFloat() with any string that is empty or does not start with at least one valid digit, you get NaN, meaning Not a Number.
NaN is actually a special value in JavaScript. It has its own function, isNaN(), which checks whether something is NaN or not. For example,
myVar1 = isNaN("Hello");
will store the value true in the variable myVar1, because "Hello" is not a number, whereas
myVar2 = isNaN("34");
will store the value false in the variable myVar2, because 34 can be converted successfully from a string to a number by the isNaN() function.
In later chapters you see how you can use the isNaN() function to check the validity of strings as numbers, something that proves invaluable when dealing with user input.
ARRAYS
Now we’re going to look at a new concept—something called an array. An array is similar to a normal variable, in that you can use it to hold any type of data. However, it has one important difference, which you see in this section.
As you have already seen, a normal variable can only hold one piece of data at a time. For example, you can set myVariable to be equal to 25 like so:
myVariable = 25;
and then go and set it to something else, say 35:
myVariable = 35;
However, when you set the variable to 35, the first value of 25 is lost. The variable myVariable now holds just the number 35.
The following table illustrates the variable:
|
VARIABLE NAME |
VALUE |
|
myVariable |
35 |
The difference between such a normal variable and an array is that an array can hold more than one item of data at the same time. For example, you could use an array with the name myArray to store both the numbers 25 and 35. Each place where a piece of data can be stored in an array is called an element.
How do you distinguish between these two pieces of data in an array? You give each piece of data an index value. To refer to that piece of data, you enclose its index value in square brackets after the name of the array. For example, an array called myArray containing the data 25 and 35 could be illustrated using the following table:
|
ELEMENTNAME |
VALUE |
|
myArray[0] |
25 |
|
myArray[1] |
35 |
Notice that the index values start at 0 and not 1. Why is this? Surely 1 makes more sense—after all, we humans tend to say the first item of data, followed by the second item, and so on. Computers start from 0, and think of the first item as the zero item, the second as the first item, and so on. Confusing, but you’ll soon get used to this.
Arrays can be very useful because you can store as many (within the limits of the language, which specifies a maximum of two to the power of 32 elements) or as few items of data in an array as you want. Also, you don’t have to say up front how many pieces of data you want to store in an array.
So how do you create an array? This is slightly different from declaring a normal variable. To create a new array, you need to declare a variable name and tell JavaScript that you want it to be a new array using the new keyword and the Array() function. For example, you could define the array myArray like this:
var myArray = new Array();
Note that, as with everything in JavaScript, the code is case-sensitive, so if you type array() rather than Array(), the code won’t work. Using the new operator is explained in Chapter 5.
Today’s JavaScript developers create arrays like this:
var myArray = [];
This uses an array literal to create the array. It is functionally the same as using new Array(), but it requires less typing. There is no right or wrong way to create an array, but for the remainder of this book, we use the array literal to create arrays.
As with normal variables, you can also declare your variable first, and then tell JavaScript you want it to be an array. For example:
var myArray;
myArray = [];
You have seen how to declare a new array, but how do you store your pieces of data inside it? You can do this when you define your array by including your data inside the square brackets, with each piece of data separated by a comma. For example:
var myArray = ["Paul",345,"John",112,"Bob",99];
Here the first item of data, "Paul", will be put in the array with an index of 0. The next piece of data, 345, will be put in the array with an index of 1, and so on. This means that the element with the name myArray[0] contains the value "Paul", the element with the namemyArray[1] contains the value 345, and so on.
You don’t have to provide an array’s data when you first create the array. For example, you could also write the preceding line like this:
var myArray = [];
myArray[0] = "Paul";
myArray[1] = 345;
myArray[2] = "John";
myArray[3] = 112;
myArray[4] = "Bob";
myArray[5] = 99;
You use each element name as you would a variable, assigning them with values. You learn this method of declaring the values of array elements in the following “Try It Out” section.
Obviously, in this example the first way of defining the data items is much easier. However, there will be situations in which you want to change the data stored in a particular element in an array after the data items have been declared. In that case you will have to use the latter method of defining the values of the array elements.
You’ll also spot from the preceding example that you can store different data types in the same array. JavaScript is very flexible as to what you can put in an array and where you can put it.
TRY IT OUT An Array
In this example, you create an array to hold some names, and you use the second method described in the preceding section to store these pieces of data in the array. You then display the data to the user. Type this code and save it as ch2_example8.html:
<!DOCTYPE html>
<html lang="en">
<head>
<title>Chapter 2, Example 8</title>
</head>
<body>
<script>
var myArray = [];
myArray[0] = "Jeremy";
myArray[1] = "Paul";
myArray[2] = "John";
document.write("myArray[0] = " + myArray[0] + "<br/>");
document.write("myArray[2] = " + myArray[2] + "<br/>");
document.write("myArray[1] = " + myArray[1] + "<br/>");
myArray[1] = "Mike";
document.write("myArray[1] changed to " + myArray[1]);
</script>
</body>
</html>
If you load this into your web browser, you should see a web page that looks something like the one shown in Figure 2.10.
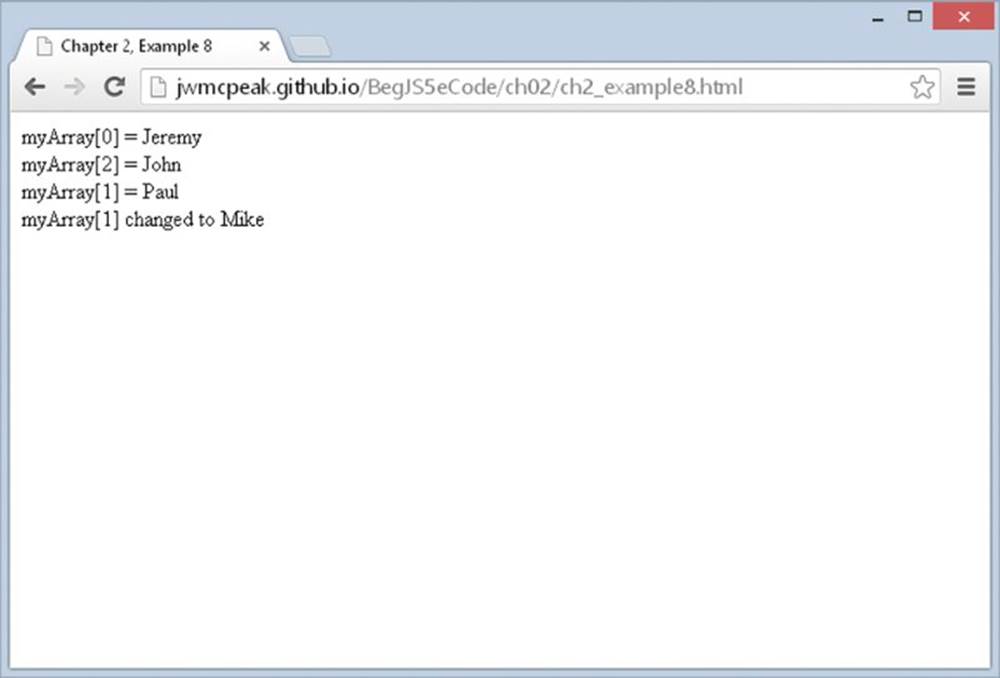
Figure 2.10
The first task in the script block is to declare a variable and initialize it as an array:
var myArray = [];
Now that you have your array defined, you can store some data in it. Each time you store an item of data with a new index, JavaScript automatically creates a new storage space for it. Remember that the first element will be at myArray[0].
Take each addition to the array in turn and see what’s happening. Before you add anything, your array is empty. Then you add an array element with the following line:
myArray[0] = "Jeremy";
Your array now looks like this:
|
INDEX |
DATA STORED |
|
0 |
Jeremy |
Then you add another element to the array, this time with an index of 1:
myArray[1] = "Paul";
Your array now looks like this:
|
INDEX |
DATA STORED |
|
0 |
Jeremy |
|
1 |
Paul |
Finally, you add another element to the array with an index of 2:
myArray[2] = "John";
Your array now looks like this:
|
INDEX |
DATA STORED |
|
0 |
Jeremy |
|
1 |
Paul |
|
2 |
John |
Next, you use a series of document.write() functions to insert the values that each element of the array contains into the web page. Here the array is out of order just to demonstrate that you can access it that way:
document.write("myArray[0] = " + myArray[0] + "<br/>");
document.write("myArray[2] = " + myArray[2] + "<br/>");
document.write("myArray[1] = " + myArray[1] + "<br/>");
You can treat each particular position in an array as if it’s a standard variable, so you can use it to do calculations, transfer its value to another variable or array, and so on. However, if you try to access the data inside an array position before you have defined it, you’ll get undefined as a value.
Finally, you changed the value of the second array position to "Mike". You could have changed it to a number because, just as with normal variables, you can store any data type at any time in each individual data position in an array:
myArray[1] = "Mike";
Now your array’s contents look like this:
|
INDEX |
DATA STORED |
|
0 |
Jeremy |
|
1 |
Mike |
|
2 |
John |
Just to show that the change you made has worked, you use document.write() to display the second element’s value:
document.write("myArray[1] changed to " + myArray[1]);
A Multi-Dimensional Array
Suppose you want to store a company’s personnel information in an array. You might have data such as names, ages, addresses, and so on. One way to create such an array would be to store the information sequentially—the first name in the first element of the array, then the corresponding age in the next element, the address in the third, the next name in the fourth element, and so on. Your array could look something like this:
|
INDEX |
DATA STORED |
|
0 |
Name1 |
|
1 |
Age1 |
|
2 |
Address1 |
|
3 |
Name2 |
|
4 |
Age2 |
|
5 |
Address2 |
|
6 |
Name3 |
|
7 |
Age3 |
|
8 |
Address3 |
This would work, but there is a neater solution: using a multi-dimensional array. Up to now you have been using single-dimension arrays. In these arrays each element is specified by just one index—that is, one dimension. So, taking the preceding example, you can see Name1 is at index 0, Age1 is at index 1, and so on.
A multi-dimensional array is one with two or more indexes for each element. For example, this is how your personnel array could look as a two-dimensional array:
|
INDEX |
0 |
1 |
2 |
|
0 |
Name1 |
Name2 |
Name3 |
|
1 |
Age1 |
Age2 |
Age3 |
|
2 |
Address1 |
Address2 |
Address3 |
You see how to create such multi-dimensional arrays in the following “Try It Out” section.
TRY IT OUT A Two-Dimensional Array
This example illustrates how you can create such a multi-dimensional array in JavaScript code and how you can access the elements of this array. Type this code and save it as ch2_example9.html:
<!DOCTYPE html>
<html lang="en">
<head>
<title>Chapter 2, Example 9</title>
</head>
<body>
<script>
var personnel = [];
personnel[0] = [];
personnel[0][0] = "Name0";
personnel[0][1] = "Age0";
personnel[0][2] = "Address0";
personnel[1] = [];
personnel[1][0] = "Name1";
personnel[1][1] = "Age1";
personnel[1][2] = "Address1";
personnel[2] = [];
personnel[2][0] = "Name2";
personnel[2][1] = "Age2";
personnel[2][2] = "Address2";
document.write("Name : " + personnel[1][0] + "<br/>");
document.write("Age : " + personnel[1][1] + "<br/>");
document.write("Address : " + personnel[1][2]);
</script>
</body>
</html>
If you load it into your web browser, you’ll see three lines written into the page, which represent the name, age, and address of the person whose details are stored in the personnel[1] element of the array, as shown in Figure 2.11.
Figure 2.11
The first thing to do in this script block is declare a variable, personnel, and tell JavaScript that you want it to be a new array:
var personnel = [];
Then you do something new; you tell JavaScript you want index 0 of the personnel array, that is, the element personnel[0], to be another new array:
personnel[0] = [];
So what’s going on? Well, the truth is that JavaScript doesn’t actually support multi-dimensional arrays, only single ones. However, JavaScript enables you to fake multi-dimensional arrays by creating an array inside another array. So what the preceding line is doing is creating a new array inside the element with index 0 of your personnel array.
In the next three lines, you put values into the newly created personnel[0] array. JavaScript makes it easy to do this: You just state the name of the array, personnel[0], followed by another index in square brackets. The first index (0) belongs to thepersonnel array; the second index belongs to the personnel[0] array:
personnel[0][0] = "Name0";
personnel[0][1] = "Age0";
personnel[0][2] = "Address0";
After these lines of code, your array looks like this:
|
INDEX |
0 |
|
0 |
Name0 |
|
1 |
Age0 |
|
2 |
Address0 |
The numbers at the top, at the moment just 0, refer to the personnel array. The numbers going down the side, 0, 1, and 2, are actually indices for the new personnel[0] array inside the personnel array.
For the second person’s details, you repeat the process, but this time you are using the personnel array element with index 1:
personnel[1] = [];
personnel[1][0] = "Name1";
personnel[1][1] = "Age1";
personnel[1][2] = "Address1";
Now your array looks like this:
|
INDEX |
0 |
1 |
|
0 |
Name0 |
Name1 |
|
1 |
Age0 |
Age1 |
|
2 |
Address0 |
Address1 |
You create a third person’s details in the next few lines. You are now using the element with index 2 inside the personnel array to create a new array:
personnel[2] = [];
personnel[2][0] = "Name2";
personnel[2][1] = "Age2";
personnel[2][2] = "Address2";
The array now looks like this:
|
INDEX |
0 |
1 |
2 |
|
0 |
Name0 |
Name1 |
Name2 |
|
1 |
Age0 |
Age1 |
Age2 |
|
2 |
Address0 |
Address1 |
Address2 |
You have now finished creating your multi-dimensional array. You end the script block by accessing the data for the second person (Name1, Age1, Address1) and displaying it in the page by using document.write(). As you can see, accessing the data is very much the same as storing it. You can use the multi-dimensional array anywhere you would use a normal variable or single-dimension array.
document.write("Name : " + personnel[1][0] + "<br/>");
document.write("Age : " + personnel[1][1] + "<br/>");
document.write("Address : " + personnel[1][2]);
Try changing the document.write() commands so that they display the first person’s details. The code would look like this:
document.write("Name : " + personnel[0][0] + "<br/>");
document.write("Age : " + personnel[0][1] + "<br/>");
document.write("Address : " + personnel[0][2]);
It’s possible to create multi-dimensional arrays of three, four, or even a hundred dimensions, but things can start to get very confusing, and you’ll find that you rarely, if ever, need more than two dimensions. To give you an idea, here’s how to declare and access a five-dimensional array:
var myArray = [];
myArray[0] = [];
myArray[0][0] = [];
myArray[0][0][0] = [];
myArray[0][0][0][0] = [];
myArray[0][0][0][0][0] = "This is getting out of hand";
document.write(myArray[0][0][0][0][0]);
That’s it for arrays for now, but you return to them in Chapter 5, where you’ll find out something shocking about them. You also learn about some of their more advanced features.
SUMMARY
In this chapter you have built up knowledge of the fundamentals of JavaScript’s data types and variables and how to use them in operations. In particular, you saw that:
· JavaScript supports a number of types of data, such as numbers, text, and booleans.
· Text is represented by strings of characters and is surrounded by quotes. You must match the quotes surrounding strings. Escape characters enable you to include characters in your string that cannot be typed.
· Variables are JavaScript’s means of storing data, such as numbers and text, in memory so that they can be used again and again in your code.
· Variable names must not include certain illegal characters, like the percent sign (%) and the ampersand (&), or be a reserved word, like with.
· Before you can give a value to a variable, you must declare its existence to the JavaScript interpreter.
· JavaScript has the four basic math operators, represented by the symbols plus (+), minus (−), star (*), and forward slash (/). To assign values of a calculation to a variable, you use the equals sign (=), termed the assignment operator.
· Operators have different levels of precedence, so multiplication and division will be calculated before addition and subtraction.
· Strings can be joined, or concatenated, to produce one big string by means of the + operator. When numbers and strings are concatenated with the + operator, JavaScript automatically converts the number into a string.
· Although JavaScript’s automatic data conversion suits us most of the time, on some occasions you need to force the conversion of data. You saw how parseInt() and parseFloat() can be used to convert strings to numbers. Attempting to convert strings that won’t convert will result in NaN (Not a Number) being returned.
· Arrays are a special type of variable that can hold more than one piece of data. The data is inserted and accessed by means of a unique index number.
EXERCISES
1. Write a JavaScript program to convert degrees centigrade into degrees Fahrenheit, and to write the result to the page in a descriptive sentence. The JavaScript equation for Fahrenheit to centigrade is as follows:
degFahren = 9 / 5 * degCent + 32
2. The following code uses the prompt() function to get two numbers from the user. It then adds those two numbers and writes the result to the page:
3. <!DOCTYPE html>
4.
5. <html lang="en">
6. <head>
7. <title>Chapter 2, Question 2</title>
8. </head>
9. <body>
10.
11. <script>
12. var firstNumber = prompt("Enter the first number","");
13. var secondNumber = prompt("Enter the second number","");
14. var theTotal = firstNumber + secondNumber;
15.
16. document.write(firstNumber + " added to " + secondNumber +
17. " equals " + theTotal);
18. </script>
19. </body>
</html>
However, if you try out the code, you’ll discover that it doesn’t work. Why not? Change the code so that it does work.