Wiley Linux Command Line and Shell Scripting Bible 3rd (2015)
Part II. Shell Scripting Basics
In This Part
1. Chapter 11 Basic Script Building
1. Chapter 12 Using Structured Commands
1. Chapter 13 More Structured Commands
1. Chapter 14 Handling User Input
1. Chapter 15 Presenting Data
1. Chapter 16 Script Control
Chapter 11. Basic Script Building
In This Chapter
1. Using multiple commands
2. Creating a script file
3. Displaying messages
4. Using variables
5. Redirecting input and output
6. Pipes
7. Performing math
8. Exiting the script
Now that we've covered the basics of the Linux system and the command line, it's time to start coding. This chapter discusses the basics of writing shell scripts. You need to know these basic concepts before you can start writing your own shell script masterpieces.
Using Multiple Commands
So far you've seen how to use the command line interface (CLI) prompt of the shell to enter commands and view the command results. The key to shell scripts is the ability to enter multiple commands and process the results from each command, even possibly passing the results of one command to another. The shell allows you to chain commands together into a single step.
If you want to run two commands together, you can enter them on the same prompt line, separated with a semicolon:
$ date ; who
Mon Feb 21 15:36:09 EST 2014
Christine tty2 2014-02-21 15:26
Samantha tty3 2014-02-21 15:26
Timothy tty1 2014-02-21 15:26
user tty7 2014-02-19 14:03 (:0)
user pts/0 2014-02-21 15:21 (:0.0)
$
Congratulations, you just wrote a shell script! This simple script uses just two bash shell commands. The date command runs first, displaying the current date and time, followed by the output of the who command, showing who is currently logged on to the system. Using this technique, you can string together as many commands as you wish, up to the maximum command line character count of 255 characters.
Using this technique is fine for small scripts, but it has a major drawback: You must enter the entire command at the command prompt every time you want to run it. Instead of having to manually enter the commands onto a command line, you can combine the commands into a simple text file. When you need to run the commands, just simply run the text file.
Creating a Script File
To place shell commands in a text file, first you need to use a text editor (see Chapter 10) to create a file and then enter the commands into the file.
When creating a shell script file, you must specify the shell you are using in the first line of the file. Here's the format for this:
#!/bin/bash
In a normal shell script line, the pound sign (#) is used as a comment line. A comment line in a shell script isn't processed by the shell. However, the first line of a shell script file is a special case, and the pound sign followed by the exclamation point tells the shell what shell to run the script under (yes, you can be using a bash shell and run your script using another shell).
After indicating the shell, commands are entered onto each line of the file, followed by a carriage return. As mentioned, comments can be added by using the pound sign. An example looks like this:
#!/bin/bash
# This script displays the date and who's logged on
date
who
And that's all there is to it. You can use the semicolon and put both commands on the same line if you want to, but in a shell script, you can list commands on separate lines. The shell processes commands in the order in which they appear in the file.
Also notice that another line was included that starts with the pound symbol and adds a comment. Lines that start with the pound symbol (other than the first #! line) aren't interpreted by the shell. This is a great way to leave comments for yourself about what's happening in the script, so when you come back to it two years later, you can easily remember what you did.
Save this script in a file called test1, and you are almost ready. You need to do a couple of things before you can run your new shell script file.
If you try running the file now, you'll be somewhat disappointed to see this:
$ test1
bash: test1: command not found
$
The first hurdle to jump is getting the bash shell to find your script file. If you remember from Chapter 6, the shell uses an environment variable called PATH to find commands. A quick look at the PATH environment variable demonstrates our problem:
$ echo $PATH
/usr/kerberos/sbin:/usr/kerberos/bin:/usr/local/bin:/usr/bin
:/bin:/usr/local/sbin:/usr/sbin:/sbin:/home/user/bin $
The PATH environment variable is set to look for commands only in a handful of directories. To get the shell to find the test1 script, we need to do one of two things:
· Add the directory where our shell script file is located to the PATH environment variable.
· Use an absolute or relative file path to reference our shell script file in the prompt.
Tip
Some Linux distributions add the $HOME/bin directory to the PATH environment variable. This creates a place in every user's HOME directory to place files where the shell can find them to execute.
For this example, we use the second method to tell the shell exactly where the script file is located. Remember that to reference a file in the current directory, you can use the single dot operator in the shell:
$ ./test1
bash: ./test1: Permission denied
$
The shell found the shell script file just fine, but there's another problem. The shell indicated that you don't have permission to execute the file. A quick look at the file permissions should show what's going on here:
$ ls -l test1
-rw-rw-r-- 1 user user 73 Sep 24 19:56 test1
$
When the new test1 file was created, the umask value determined the default permission settings for the new file. Because the umask variable is set to 002 (see Chapter 7) in Ubuntu, the system created the file with only read/write permissions for the file's owner and group.
The next step is to give the file owner permission to execute the file, using the chmod command (see Chapter 7):
$ chmod u+x test1
$ ./test1
Mon Feb 21 15:38:19 EST 2014
Christine tty2 2014-02-21 15:26
Samantha tty3 2014-02-21 15:26
Timothy tty1 2014-02-21 15:26
user tty7 2014-02-19 14:03 (:0)
user pts/0 2014-02-21 15:21 (:0.0) $
Success! Now all the pieces are in the right places to execute the new shell script file.
Displaying Messages
Most shell commands produce their own output, which is displayed on the console monitor where the script is running. Many times, however, you will want to add your own text messages to help the script user know what is happening within the script. You can do this with the echo command. The echo command can display a simple text string if you add the string following the command:
$ echo This is a test
This is a test
$
Notice that by default you don't need to use quotes to delineate the string you're displaying. However, sometimes this can get tricky if you are using quotes within your string:
$ echo Let's see if this'll work
Lets see if thisll work
$
The echo command uses either double or single quotes to delineate text strings. If you use them within your string, you need to use one type of quote within the text and the other type to delineate the string:
$ echo "This is a test to see if you're paying attention"
This is a test to see if you're paying attention
$ echo 'Rich says "scripting is easy".'
Rich says "scripting is easy".
$
Now all the quotation marks appear properly in the output.
You can add echo statements anywhere in your shell scripts where you need to display additional information:
$ cat test1
#!/bin/bash
# This script displays the date and who's logged on
echo The time and date are:
date
echo "Let's see who's logged into the system:"
who
$
When you run this script, it produces the following output:
$ ./test1
The time and date are:
Mon Feb 21 15:41:13 EST 2014
Let's see who's logged into the system:
Christine tty2 2014-02-21 15:26
Samantha tty3 2014-02-21 15:26
Timothy tty1 2014-02-21 15:26
user tty7 2014-02-19 14:03 (:0)
user pts/0 2014-02-21 15:21 (:0.0)
$
That's nice, but what if you want to echo a text string on the same line as a command output? You can use the -n parameter for the echo statement to do that. Just change the first echo statement line to this:
echo -n "The time and date are: "
You need to use quotes around the string to ensure that there's a space at the end of the echoed string. The command output begins exactly where the string output stops. The output now looks like this:
$ ./test1
The time and date are: Mon Feb 21 15:42:23 EST 2014
Let's see who's logged into the system:
Christine tty2 2014-02-21 15:26
Samantha tty3 2014-02-21 15:26
Timothy tty1 2014-02-21 15:26
user tty7 2014-02-19 14:03 (:0)
user pts/0 2014-02-21 15:21 (:0.0)
$
Perfect! The echo command is a crucial piece of shell scripts that interact with users. You'll find yourself using it in many situations, especially when you want to display the values of script variables. Let's look at that next.
Using Variables
Just running individual commands from the shell script is useful, but this has its limitations. Often, you'll want to incorporate other data in your shell commands to process information. You can do this by using variables. Variables allow you to temporarily store information within the shell script for use with other commands in the script. This section shows how to use variables in your shell scripts.
Environment variables
You've already seen one type of Linux variable in action. Chapter 6 described the environment variables available in the Linux system. You can access these values from your shell scripts as well.
The shell maintains environment variables that track specific system information, such as the name of the system, the name of the user logged in to the system, the user's system ID (called UID), the default home directory of the user, and the search path used by the shell to find programs. You can display a complete list of active environment variables available by using the set command:
$ set
BASH=/bin/bash
[...]
HOME=/home/Samantha
HOSTNAME=localhost.localdomain
HOSTTYPE=i386
IFS=$' \t\n'
IMSETTINGS_INTEGRATE_DESKTOP=yes
IMSETTINGS_MODULE=none
LANG=en_US.utf8
LESSOPEN='|/usr/bin/lesspipe.sh %s'
LINES=24
LOGNAME=Samantha
[...]
You can tap into these environment variables from within your scripts by using the environment variable's name preceded by a dollar sign. This is demonstrated in the following script:
$ cat test2
#!/bin/bash
# display user information from the system.
echo "User info for userid: $USER"
echo UID: $UID
echo HOME: $HOME
$
The $USER, $UID, and $HOME environment variables are used to display the pertinent information about the logged-in user. The output should look something like this:
$chmod u+x test2
$ ./test2
User info for userid: Samantha
UID: 1001
HOME: /home/Samantha
$
Notice that the environment variables in the echo commands are replaced by their current values when the script runs. Also notice that we were able to place the $USER system variable within the double quotation marks in the first string, and the shell script still figured out what we meant. There is a drawback to using this method, however. Look at what happens in this example:
$ echo "The cost of the item is $15"
The cost of the item is 5
That is obviously not what was intended. Whenever the script sees a dollar sign within quotes, it assumes you're referencing a variable. In this example, the script attempted to display the variable $1 (which was not defined) and then the number 5. To display an actual dollar sign, you must precede it with a backslash character:
$ echo "The cost of the item is \$15"
The cost of the item is $15
That's better. The backslash allowed the shell script to interpret the dollar sign as an actual dollar sign and not a variable. The next section shows how to create your own variables in your scripts.
Note
You may also see variables referenced using the format ${variable}. The extra braces around the variable name are often used to help identify the variable name from the dollar sign.
User variables
In addition to the environment variables, a shell script allows you to set and use your own variables within the script. Setting variables allows you to temporarily store data and use it throughout the script, making the shell script more like a real computer program.
User variables can be any text string of up to 20 letters, digits, or an underscore character. User variables are case sensitive, so the variable Var1 is different from the variable var1. This little rule often gets novice script programmers in trouble.
Values are assigned to user variables using an equal sign. No spaces can appear between the variable, the equal sign, and the value (another trouble spot for novices). Here are a few examples of assigning values to user variables:
var1=10
var2=-57
var3=testing
var4="still more testing"
The shell script automatically determines the data type used for the variable value. Variables defined within the shell script maintain their values throughout the life of the shell script but are deleted when the shell script completes.
Just like system variables, user variables can be referenced using the dollar sign:
$ cat test3
#!/bin/bash
# testing variables
days=10
guest="Katie"
echo "$guest checked in $days days ago"
days=5
guest="Jessica"
echo "$guest checked in $days days ago"
$
Running the script produces the following output:
$ chmod u+x test3
$ ./test3
Katie checked in 10 days ago
Jessica checked in 5 days ago
$
Each time the variable is referenced, it produces the value currently assigned to it. It's important to remember that when referencing a variable value you use the dollar sign, but when referencing the variable to assign a value to it, you do not use the dollar sign. Here's an example of what I mean:
$ cat test4
#!/bin/bash
# assigning a variable value to another variable
value1=10
value2=$value1
echo The resulting value is $value2
$
When you use the value of the value1 variable in the assignment statement, you must still use the dollar sign. This code produces the following output:
$ chmod u+x test4
$ ./test4
The resulting value is 10
$
If you forget the dollar sign and make the value2 assignment line look like this:
value2=value1
you get the following output:
$ ./test4
The resulting value is value1
$
Without the dollar sign, the shell interprets the variable name as a normal text string, which is most likely not what you wanted.
Command substitution
One of the most useful features of shell scripts is the ability to extract information from the output of a command and assign it to a variable. After you assign the output to a variable, you can use that value anywhere in your script. This comes in handy when processing data in your scripts.
There are two ways to assign the output of a command to a variable:
· The backtick character (`)
· The $() format
Be careful with the backtick character; it is not the normal single quotation mark character you are used to using for strings. Because it is not used very often outside of shell scripts, you may not even know where to find it on your keyboard. You should become familiar with it because it's a crucial component of many shell scripts. Hint: On a U.S. keyboard, it is usually on the same key as the tilde symbol (∼).
Command substitution allows you to assign the output of a shell command to a variable. Although this doesn't seem like much, it is a major building block in script programming.
You must either surround the entire command line command with two backtick characters:
testing='date'
or use the $() format:
testing=$(date)
The shell runs the command within the command substitution characters and assigns the output to the variable testing. Notice that there are no spaces between the assignment equal sign and the command substitution character. Here's an example of creating a variable using the output from a normal shell command:
$ cat test5
#!/bin/bash
testing=$(date)
echo "The date and time are: " $testing
$
The variable testing receives the output from the date command, and it is used in the echo statement to display it. Running the shell script produces the following output:
$ chmod u+x test5
$ ./test5
The date and time are: Mon Jan 31 20:23:25 EDT 2014
$
That's not all that exciting in this example (you could just as easily just put the command in the echo statement), but after you capture the command output in a variable, you can do anything with it.
Here's a popular example of how command substitution is used to capture the current date and use it to create a unique filename in a script:
#!/bin/bash
# copy the /usr/bin directory listing to a log file
today=$(date +%y%m%d)
ls /usr/bin -al > log.$today
The today variable is assigned the output of a formatted date command. This is a common technique used to extract date information for log filenames. The +%y%m%d format instructs the date command to display the date as a two-digit year, month, and day:
$ date +%y%m%d
140131
$
The script assigns the value to a variable, which is then used as part of a filename. The file itself contains the redirected output (discussed in the “Redirecting Input and Output” section) of a directory listing. After running the script, you should see a new file in your directory:
-rw-r--r-- 1 user user 769 Jan 31 10:15 log.140131
The log file appears in the directory using the value of the $today variable as part of the filename. The contents of the log file are the directory listing from the /usr/bin directory. If the script runs the next day, the log filename is log.140201, thus creating a new file for the new day.
Caution
Command substitution creates what's called a subshell to run the enclosed command. A subshell is a separate child shell generated from the shell that's running the script. Because of that, any variables you create in the script aren't available to the subshell command.
Subshells are also created if you run a command from the command prompt using the ./ path, but they aren't created if you just run the command without a path. However, if you use a built-in shell command, that doesn't generate a subshell. Be careful when running scripts from the command prompt!
Redirecting Input and Output
Sometimes, you want to save the output from a command instead of just having it displayed on the monitor. The bash shell provides a few different operators that allow you to redirect the output of a command to an alternative location (such as a file). Redirection can be used for input as well as output, redirecting a file to a command for input. This section describes what you need to do to use redirection in your shell scripts.
Output redirection
The most basic type of redirection is sending output from a command to a file. The bash shell uses the greater-than symbol (>) for this:
command > outputfile
Anything that would appear on the monitor from the command instead is stored in the output file specified:
$ date > test6
$ ls -l test6
-rw-r--r-- 1 user user 29 Feb 10 17:56 test6
$ cat test6
Thu Feb 10 17:56:58 EDT 2014
$
The redirect operator created the file test6 (using the default umask settings) and redirected the output from the date command to the test6 file. If the output file already exists, the redirect operator overwrites the existing file with the new file data:
$ who > test6
$ cat test6
user pts/0 Feb 10 17:55
$
Now the contents of the test6 file contain the output from the who command.
Sometimes, instead of overwriting the file's contents, you may need to append output from a command to an existing file — for example, if you're creating a log file to document an action on the system. In this situation, you can use the double greater-than symbol (>>) to append data:
$ date >> test6
$ cat test6
user pts/0 Feb 10 17:55
Thu Feb 10 18:02:14 EDT 2014
$
The test6 file still contains the original data from the who command processed earlier — and now it contains the new output from the date command.
Input redirection
Input redirection is the opposite of output redirection. Instead of taking the output of a command and redirecting it to a file, input redirection takes the content of a file and redirects it to a command.
The input redirection symbol is the less-than symbol (<):
command < inputfile
The easy way to remember this is that the command is always listed first in the command line, and the redirection symbol “points” to the way the data is flowing. The less-than symbol indicates that the data is flowing from the input file to the command.
Here's an example of using input redirection with the wc command:
$ wc < test6
2 11 60
$
The wc command provides a count of text in the data. By default, it produces three values:
· The number of lines in the text
· The number of words in the text
· The number of bytes in the text
By redirecting a text file to the wc command, you can get a quick count of the lines, words, and bytes in the file. The example shows that there are 2 lines, 11 words, and 60 bytes in the test6 file.
Another method of input redirection is called inline input redirection. This method allows you to specify the data for input redirection on the command line instead of in a file. This may seem somewhat odd at first, but a few applications are available for this process (such as those shown in the “Performing Math” section).
The inline input redirection symbol is the double less-than symbol (<<). Besides this symbol, you must specify a text marker that delineates the beginning and end of the data used for input. You can use any string value for the text marker, but it must be the same at the beginning of the data and the end of the data:
command << marker
data
marker
When using inline input redirection on the command line, the shell prompts for data using the secondary prompt, defined in the PS2 environment variable (see Chapter 6). Here's how this looks when you use it:
$ wc << EOF
> test string 1
> test string 2
> test string 3
> EOF
3 9 42
$
The secondary prompt continues to prompt for more data until you enter the string value for the text marker. The wc command performs the line, word, and byte counts of the data supplied by the inline input redirection.
Pipes
Sometimes, you need to send the output of one command to the input of another command. This is possible using redirection, but somewhat clunky:
$ rpm -qa > rpm.list
$ sort < rpm.list
abrt-1.1.14-1.fc14.i686
abrt-addon-ccpp-1.1.14-1.fc14.i686
abrt-addon-kerneloops-1.1.14-1.fc14.i686
abrt-addon-python-1.1.14-1.fc14.i686
abrt-desktop-1.1.14-1.fc14.i686
abrt-gui-1.1.14-1.fc14.i686
abrt-libs-1.1.14-1.fc14.i686
abrt-plugin-bugzilla-1.1.14-1.fc14.i686
abrt-plugin-logger-1.1.14-1.fc14.i686
abrt-plugin-runapp-1.1.14-1.fc14.i686
acl-2.2.49-8.fc14.i686
[...]
The rpm command manages the software packages installed on systems using the Red Hat Package Management system (RPM), such as the Fedora system as shown. When used with the -qa parameters, it produces a list of the existing packages installed, but not necessarily in any specific order. If you're looking for a specific package or group of packages, it can be difficult to find it using the output of the rpm command.
Using the standard output redirection, the output was redirected from the rpm command to a file, called rpm.list. After the command finished, the rpm.list file contained a list of all the installed software packages on my system. Next, input redirection was used to send the contents of the rpm.list file to the sort command to sort the package names alphabetically.
That was useful, but again, a somewhat clunky way of producing the information. Instead of redirecting the output of a command to a file, you can redirect the output to another command. This process is called piping.
Like the command substitution backtick, the symbol for piping is not used often outside of shell scripting. The symbol is two vertical lines, one above the other. However, the pipe symbol often looks like a single vertical line in print (|). On a U.S. keyboard, it is usually on the same key as the backslash (∖). The pipe is put between the commands to redirect the output from one to the other:
command1 | command2
Don't think of piping as running two commands back to back. The Linux system actually runs both commands at the same time, linking them together internally in the system. As the first command produces output, it's sent immediately to the second command. No intermediate files or buffer areas are used to transfer the data.
Now, using piping you can easily pipe the output of the rpm command directly to the sort command to produce your results:
$ rpm -qa | sort
abrt-1.1.14-1.fc14.i686
abrt-addon-ccpp-1.1.14-1.fc14.i686
abrt-addon-kerneloops-1.1.14-1.fc14.i686
abrt-addon-python-1.1.14-1.fc14.i686
abrt-desktop-1.1.14-1.fc14.i686
abrt-gui-1.1.14-1.fc14.i686
abrt-libs-1.1.14-1.fc14.i686
abrt-plugin-bugzilla-1.1.14-1.fc14.i686
abrt-plugin-logger-1.1.14-1.fc14.i686
abrt-plugin-runapp-1.1.14-1.fc14.i686
acl-2.2.49-8.fc14.i686
[...]
Unless you're a (very) quick reader, you probably couldn't keep up with the output generated by this command. Because the piping feature operates in real time, as soon as the rpm command produces data, the sort command gets busy sorting it. By the time the rpmcommand finishes outputting data, the sort command already has the data sorted and starts displaying it on the monitor.
There's no limit to the number of pipes you can use in a command. You can continue piping the output of commands to other commands to refine your operation.
In this case, because the output of the sort command zooms by so quickly, you can use one of the text paging commands (such as less or more) to force the output to stop at every screen of data:
$ rpm -qa | sort | more
This command sequence runs the rpm command, pipes the output to the sort command, and then pipes that output to the more command to display the data, stopping after every screen of information. This now lets you pause and read what's on the display before continuing, as shown in Figure 11.1.
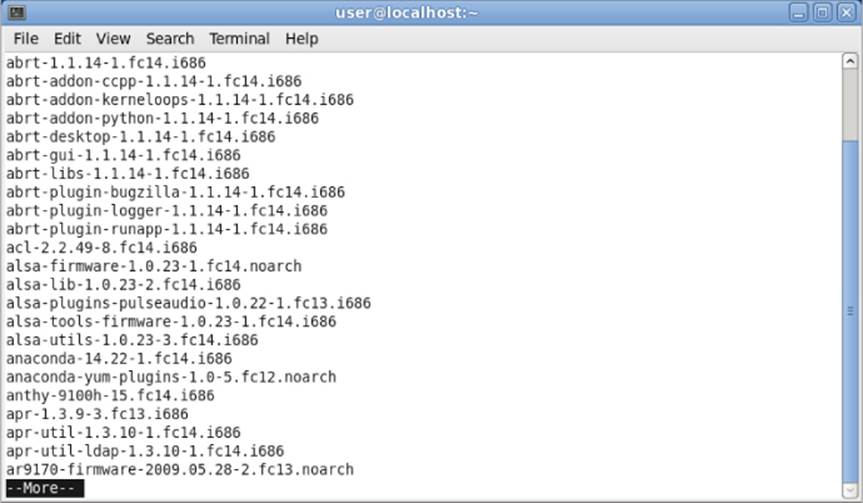
Figure 11.1 Using piping to send data to the more command
To get even fancier, you can use redirection along with piping to save your output to a file:
$ rpm -qa | sort > rpm.list
$ more rpm.list
abrt-1.1.14-1.fc14.i686
abrt-addon-ccpp-1.1.14-1.fc14.i686
abrt-addon-kerneloops-1.1.14-1.fc14.i686
abrt-addon-python-1.1.14-1.fc14.i686
abrt-desktop-1.1.14-1.fc14.i686
abrt-gui-1.1.14-1.fc14.i686
abrt-libs-1.1.14-1.fc14.i686
abrt-plugin-bugzilla-1.1.14-1.fc14.i686
abrt-plugin-logger-1.1.14-1.fc14.i686
abrt-plugin-runapp-1.1.14-1.fc14.i686
acl-2.2.49-8.fc14.i686
[...]
As expected, the data in the rpm.list file is now sorted!
By far one of the most popular uses of piping is piping the results of commands that produce long output to the more command. This is especially common with the ls command, as shown in Figure 11.2.
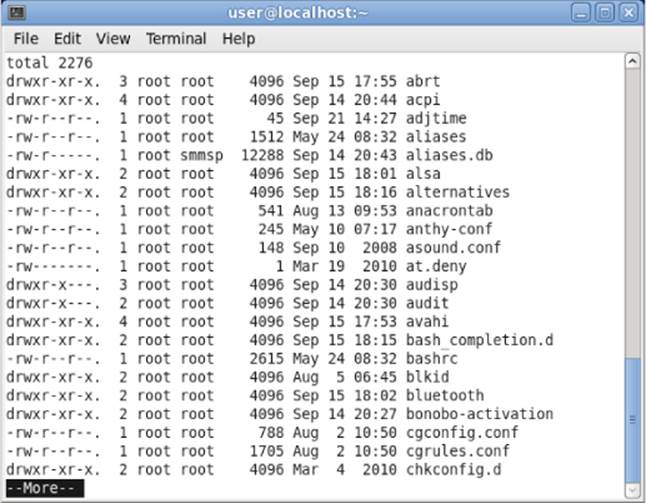
Figure 11.2 Using the more command with the ls command
The ls -l command produces a long listing of all the files in the directory. For directories with lots of files, this can be quite a listing. By piping the output to the more command, you force the output to stop at the end of every screen of data.
Performing Math
Another feature crucial to any programming language is the ability to manipulate numbers. Unfortunately, for shell scripts this process is a bit awkward. There are two different ways to perform mathematical operations in your shell scripts.
The expr command
Originally, the Bourne shell provided a special command that was used for processing mathematical equations. The expr command allowed the processing of equations from the command line, but it is extremely clunky:
$ expr 1 + 5
6
The expr command recognizes a few different mathematical and string operators, shown in Table 11.1.
Table 11.1 The expr Command Operators
|
Operator |
Description |
|
ARG1 | ARG2 |
Returns ARG1 if neither argument is null or zero; otherwise, returns ARG2 |
|
ARG1 & ARG2 |
Returns ARG1 if neither argument is null or zero; otherwise, returns 0 |
|
ARG1 < ARG2 |
Returns 1 if ARG1 is less than ARG2; otherwise, returns 0 |
|
ARG1 <= ARG2 |
Returns 1 if ARG1 is less than or equal to ARG2; otherwise, returns 0 |
|
ARG1 = ARG2 |
Returns 1 if ARG1 is equal to ARG2; otherwise, returns 0 |
|
ARG1 != ARG2 |
Returns 1 if ARG1 is not equal to ARG2; otherwise, returns 0 |
|
ARG1 >= ARG2 |
Returns 1 if ARG1 is greater than or equal to ARG2; otherwise, returns 0 |
|
ARG1 > ARG2 |
Returns 1 if ARG1 is greater than ARG2; otherwise, returns 0 |
|
ARG1 + ARG2 |
Returns the arithmetic sum of ARG1 and ARG2 |
|
ARG1 - ARG2 |
Returns the arithmetic difference of ARG1 and ARG2 |
|
ARG1 * ARG2 |
Returns the arithmetic product of ARG1 and ARG2 |
|
ARG1 / ARG2 |
Returns the arithmetic quotient of ARG1 divided by ARG2 |
|
ARG1 % ARG2 |
Returns the arithmetic remainder of ARG1 divided by ARG2 |
|
STRING : REGEXP |
Returns the pattern match if REGEXP matches a pattern in STRING |
|
match STRING REGEXP |
Returns the pattern match if REGEXP matches a pattern in STRING |
|
substr STRING POS LENGTH |
Returns the substring LENGTH characters in length, starting at position POS (starting at 1) |
|
index STRING CHARS |
Returns position in STRING where CHARS is found; otherwise, returns 0 |
|
length STRING |
Returns the numeric length of the string STRING |
|
+ TOKEN |
Interprets TOKEN as a string, even if it's a keyword |
|
(EXPRESSION) |
Returns the value of EXPRESSION |
Although the standard operators work fine in the expr command, the problem occurs when using them from a script or the command line. Many of the expr command operators have other meanings in the shell (such as the asterisk). Using them in the expr command produces odd results:
$ expr 5 * 2
expr: syntax error
$
To solve this problem, you need to use the shell escape character (the backslash) to identify any characters that may be misinterpreted by the shell before being passed to the expr command:
$ expr 5 \* 2
10
$
Now that's really starting to get ugly! Using the expr command in a shell script is equally cumbersome:
$ cat test6
#!/bin/bash
# An example of using the expr command
var1=10
var2=20
var3=$(expr $var2 / $var1)
echo The result is $var3
To assign the result of a mathematical equation to a variable, you have to use command substitution to extract the output from the expr command:
$ chmod u+x test6
$ ./test6
The result is 2
$
Fortunately, the bash shell has an improvement for processing mathematical operators as you shall see in the next section.
Using brackets
The bash shell includes the expr command to stay compatible with the Bourne shell; however, it also provides a much easier way of performing mathematical equations. In bash, when assigning a mathematical value to a variable, you can enclose the mathematical equation using a dollar sign and square brackets ($[ operation ]):
$ var1=$[1 + 5]
$ echo $var1
6
$ var2=$[$var1 * 2]
$ echo $var2
12
$
Using brackets makes shell math much easier than with the expr command. This same technique also works in shell scripts:
$ cat test7
#!/bin/bash
var1=100
var2=50
var3=45
var4=$[$var1 * ($var2 - $var3)]
echo The final result is $var4
$
Running this script produces the output:
$ chmod u+x test7
$ ./test7
The final result is 500
$
Also, notice that when using the square brackets method for calculating equations, you don't need to worry about the multiplication symbol, or any other characters, being misinterpreted by the shell. The shell knows that it's not a wildcard character because it is within the square brackets.
There's one major limitation to performing math in the bash shell script. Look at this example:
$ cat test8
#!/bin/bash
var1=100
var2=45
var3=$[$var1 / $var2]
echo The final result is $var3
$
Now run it and see what happens:
$ chmod u+x test8
$ ./test8
The final result is 2
$
The bash shell mathematical operators support only integer arithmetic. This is a huge limitation if you're trying to do any sort of real-world mathematical calculations.
Note
The z shell (zsh) provides full floating-point arithmetic operations. If you require floating-point calculations in your shell scripts, you might consider checking out the z shell (discussed in Chapter 23).
A floating-point solution
You can use several solutions for overcoming the bash integer limitation. The most popular solution uses the built-in bash calculator, called bc.
The basics of bc
The bash calculator is actually a programming language that allows you to enter floating-point expressions at a command line and then interprets the expressions, calculates them, and returns the result. The bash calculator recognizes these:
· Numbers (both integer and floating point)
· Variables (both simple variables and arrays)
· Comments (lines starting with a pound sign or the C language /* */ pair)
· Expressions
· Programming statements (such as if-then statements)
· Functions
You can access the bash calculator from the shell prompt using the bc command:
$ bc
bc 1.06.95
Copyright 1991-1994, 1997, 1998, 2000, 2004, 2006 Free Software Foundation, Inc.
This is free software with ABSOLUTELY NO WARRANTY.
For details type 'warranty'.
12 * 5.4
64.8
3.156 * (3 + 5)
25.248
quit
$
The example starts out by entering the expression 12 * 5.4. The bash calculator returns the answer. Each subsequent expression entered into the calculator is evaluated, and the result is displayed. To exit the bash calculator, you must enter quit.
The floating-point arithmetic is controlled by a built-in variable called scale. You must set this value to the desired number of decimal places you want in your answers, or you won't get what you were looking for:
$ bc -q
3.44 / 5
0
scale=4
3.44 / 5
.6880
quit
$
The default value for the scale variable is zero. Before the scale value is set, the bash calculator provides the answer to zero decimal places. After you set the scale variable value to four, the bash calculator displays the answer to four decimal places. The -q command line parameter suppresses the lengthy welcome banner from the bash calculator.
In addition to normal numbers, the bash calculator also understands variables:
$ bc -q
var1=10
var1 * 4
40
var2 = var1 / 5
print var2
2
quit
$
After a variable value is defined, you can use the variable throughout the bash calculator session. The print statement allows you to print variables and numbers.
Using bc in scripts
Now you may be wondering how the bash calculator is going to help you with floating-point arithmetic in your shell scripts. Do you remember command substitution? Yes, you can use the command substitution character to run a bc command and assign the output to a variable! The basic format to use is this:
variable=$(echo "options; expression" | bc)
The first portion, options, allows you to set variables. If you need to set more than one variable, separate them using the semicolon. The expression parameter defines the mathematical expression to evaluate using bc. Here's a quick example of doing this in a script:
$ cat test9
#!/bin/bash
var1=$(echo "scale=4; 3.44 / 5" | bc)
echo The answer is $var1
$
This example sets the scale variable to four decimal places and then specifies a specific calculation for the expression. Running this script produces the following output:
$ chmod u+x test9
$ ./test9
The answer is .6880
$
Now that's fancy! You aren't limited to just using numbers for the expression value. You can also use variables defined in the shell script:
$ cat test10
#!/bin/bash
var1=100
var2=45
var3=$(echo "scale=4; $var1 / $var2" | bc)
echo The answer for this is $var3
$
The script defines two variables, which are used within the expression sent to the bc command. Remember to use the dollar sign to signify the value for the variables and not the variables themselves. The output of this script is as follows:
$ ./test10
The answer for this is 2.2222
$
And of course, after a value is assigned to a variable, that variable can be used in yet another calculation:
$ cat test11
#!/bin/bash
var1=20
var2=3.14159
var3=$(echo "scale=4; $var1 * $var1" | bc)
var4=$(echo "scale=4; $var3 * $var2" | bc)
echo The final result is $var4
$
This method works fine for short calculations, but sometimes you need to get more involved with your numbers. If you have more than just a couple of calculations, it gets confusing trying to list multiple expressions on the same command line.
There's a solution to this problem. The bc command recognizes input redirection, allowing you to redirect a file to the bc command for processing. However, this also can get confusing, because you'd need to store your expressions in a file.
The best method is to use inline input redirection, which allows you to redirect data directly from the command line. In the shell script, you assign the output to a variable:
variable=$(bc << EOF
options
statements
expressions
EOF
)
The EOF text string indicates the beginning and end of the inline redirection data. Remember that the command substitution characters are still needed to assign the output of the bc command to the variable.
Now you can place all the individual bash calculator elements on separate lines in the script file. Here's an example of using this technique in a script:
$ cat test12
#!/bin/bash
var1=10.46
var2=43.67
var3=33.2
var4=71
var5=$(bc << EOF
scale = 4
a1 = ( $var1 * $var2)
b1 = ($var3 * $var4)
a1 + b1
EOF
)
echo The final answer for this mess is $var5
$
Placing each option and expression on a separate line in your script makes things cleaner and easier to read and follow. The EOF string indicates the start and end of the data to redirect to the bc command. Of course, you must use the command substitution characters to indicate the command to assign to the variable.
You'll also notice in this example that you can assign variables within the bash calculator. It's important to remember that any variables created within the bash calculator are valid only within the bash calculator and can't be used in the shell script.
Exiting the Script
So far in our sample scripts, we terminated things pretty abruptly. When we were finished with our last command, we just ended the script. There's a more elegant way of completing things available to us.
Every command that runs in the shell uses an exit status to indicate to the shell that it's finished processing. The exit status is an integer value between 0 and 255 that's passed by the command to the shell when the command finishes running. You can capture this value and use it in your scripts.
Checking the exit status
Linux provides the $? special variable that holds the exit status value from the last command that executed. You must view or use the $? variable immediately after the command you want to check. It changes values to the exit status of the last command executed by the shell:
$ date
Sat Jan 15 10:01:30 EDT 2014
$ echo $?
0
$
By convention, the exit status of a command that successfully completes is zero. If a command completes with an error, then a positive integer value is placed in the exit status:
$ asdfg
-bash: asdfg: command not found
$ echo $?
127
$
The invalid command returns an exit status of 127. There's not much of a standard convention to Linux error exit status codes. However, you can use the guidelines shown in Table 11.2.
Table 11.2 Linux Exit Status Codes
|
Code |
Description |
|
0 |
Successful completion of the command |
|
1 |
General unknown error |
|
2 |
Misuse of shell command |
|
126 |
The command can't execute |
|
127 |
Command not found |
|
128 |
Invalid exit argument |
|
128+x |
Fatal error with Linux signal x |
|
130 |
Command terminated with Ctrl+C |
|
255 |
Exit status out of range |
An exit status value of 126 indicates that the user didn't have the proper permissions set to execute the command:
$ ./myprog.c
-bash: ./myprog.c: Permission denied
$ echo $?
126
$
Another common error you'll encounter occurs if you supply an invalid parameter to a command:
$ date %t
date: invalid date '%t'
$ echo $?
1
$
This generates the general exit status code of 1, indicating that an unknown error occurred in the command.
The exit command
By default, your shell script exits with the exit status of the last command in your script:
$ ./test6
The result is 2
$ echo $?
0
$
You can change that to return your own exit status code. The exit command allows you to specify an exit status when your script ends:
$ cat test13
#!/bin/bash
# testing the exit status
var1=10
var2=30
var3=$[$var1 + $var2]
echo The answer is $var3
exit 5
$
When you check the exit status of the script, you get the value used as the parameter of the exit command:
$ chmod u+x test13
$ ./test13
The answer is 40
$ echo $?
5
$
You can also use variables in the exit command parameter:
$ cat test14
#!/bin/bash
# testing the exit status
var1=10
var2=30
var3=$[$var1 + $var2]
exit $var3
$
When you run this command, it produces the following exit status:
$ chmod u+x test14
$ ./test14
$ echo $?
40
$
You should be careful with this feature, however, because the exit status codes can only go up to 255. Watch what happens in this example:
$ cat test14b
#!/bin/bash
# testing the exit status
var1=10
var2=30
var3=$[$var1 * $var2]
echo The value is $var3
exit $var3
$
Now when you run it, you get the following:
$ ./test14b
The value is 300
$ echo $?
44
$
The exit status code is reduced to fit in the 0 to 255 range. The shell does this by using modulo arithmetic. The modulo of a value is the remainder after a division. The resulting number is the remainder of the specified number divided by 256. In the case of 300 (the result value), the remainder is 44, which is what appears as the exit status code.
In Chapter 12, you'll see how you can use the if-then statement to check the error status returned by a command to see whether the command was successful.
Summary
The bash shell script allows you to string commands together into a script. The most basic way to create a script is to separate multiple commands on the command line using a semicolon. The shell executes each command in order, displaying the output of each command on the monitor.
You can also create a shell script file, placing multiple commands in the file for the shell to execute in order. The shell script file must define the shell used to run the script. This is done in the first line of the script file, using the #! symbol, followed by the full path of the shell.
Within the shell script you can reference environment variable values by using a dollar sign in front of the variable. You can also define your own variables for use within the script, and assign values and even the output of a command by using the backtick character or the $() format. The variable value can be used within the script by placing a dollar sign in front of the variable name.
The bash shell allows you to redirect both the input and output of a command from the standard behavior. You can redirect the output of any command from the monitor display to a file by using the greater-than symbol, followed by the name of the file to capture the output. You can append output data to an existing file by using two greater-than symbols. The less-than symbol is used to redirect input to a command. You can redirect input from a file to a command.
The Linux pipe command (the broken bar symbol) allows you to redirect the output of a command directly to the input of another command. The Linux system runs both commands at the same time, sending the output of the first command to the input of the second command without using any redirect files.
The bash shell provides a couple of ways for you to perform mathematical operations in your shell scripts. The expr command is a simple way to perform integer math. In the bash shell, you can also perform basic math calculations by enclosing equations in square brackets, preceded by a dollar sign. To perform floating-point arithmetic, you need to utilize the bc calculator command, redirecting input from inline data and storing the output in a user variable.
Finally, the chapter discussed how to use the exit status in your shell script. Every command that runs in the shell produces an exit status. The exit status is an integer value between 0 and 255 that indicates if the command completed successfully, and if not, what the reason may have been. An exit status of 0 indicates that the command completed successfully. You can use the exit command in your shell script to declare a specific exit status upon the completion of your script.
So far in your shell scripts, things have proceeded in an orderly fashion from one command to the next. In the next chapter, you'll see how you can use some logic flow control to alter which commands are executed within the script.
All materials on the site are licensed Creative Commons Attribution-Sharealike 3.0 Unported CC BY-SA 3.0 & GNU Free Documentation License (GFDL)
If you are the copyright holder of any material contained on our site and intend to remove it, please contact our site administrator for approval.
© 2016-2026 All site design rights belong to S.Y.A.