Linux Web Server Development (2015)
Chapter 2 Cherokee Installation and Configuration
Cherokee Installation
To install and configure Cherokee, root privilege is required. One option for Linux is to login as user root. An alternative is to precede each command with the sudo command. The sudo utility allows a user to run programs as the root user and is the recommended approach for Ubuntu. For the Fedora Linux, as described in the appendix, we will use the root user account.
The user who installs Ubuntu can use the sudo command to execute commands that require root privilege. To enable another user, for example user christos, to use sudo you make /etc/sudoers file writable. Enter in the Linux terminal:
$ sudo chmod +w /etc/sudoers
To edit the /etc/sudoers file:
$ sudo gedit /etc/sudoers
Add the following entry to the /etc/sudoers file:
christos ALL=(ALL) NOPASSWD: ALL
Instead of gedit you can also use the echo command:
$ echo "christos ALL=(ALL) NOPASSWD: ALL" >> /etc/sudoers
Reset the permissions of /etc/sudoers to the original permissions:
$ sudo chmod -w /etc/sudoers
The command to download and install Cherokee varies among the Linux distributions. For Ubuntu:
$ sudo apt-get install cherokee
The apt-get command is a command-line tool which uses Ubuntu’s Advanced Packaging Tool (apt) to download, install, upgrade, and remove software packages.
Note that the previous command requires an active Internet connection since the apt-get command downloads packages.
To update the package repositories used by apt-get and install the most recent Cherokee version, enter the following command before using the previous apt-get:
$ sudo apt-get update
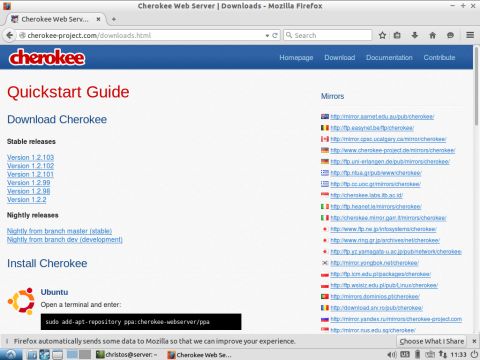
In the case that the apt-get depositories are not updated with the latest version, you can download and install Cherokee from source. At the home page of cherokee-project.com, click on the Download Cherokee link.
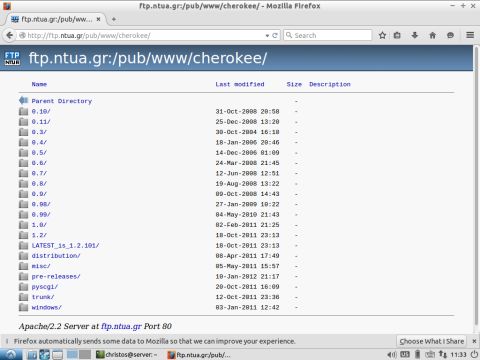
Choose one of the Mirror servers to download the latest package (e.g., LATEST_is_1.2.101).
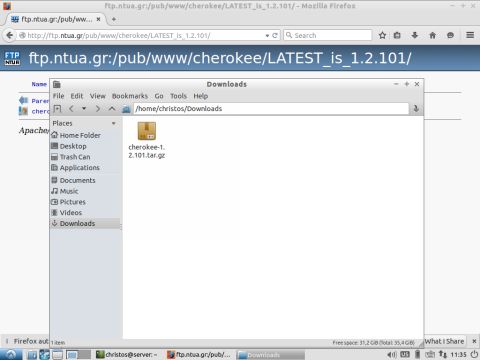
When downloading is complete, right-click cherokee-1.2.101.tar.gz and select Extract Here from the pop-up menu to unzip it.
Follow the usual Linux method for installing a program using the configure and make commands. In a Linux terminal, change directories to the directory of the unzipped package:
$ cd Downloads/cherokee-1.2.101
and run configure and make using the arguments suggested at the Download link at the home page of cherokee-project.com:
$ sudo ./configure --prefix=/usr --localstatedir=/var --sysconfdir=/etc
$ sudo make && sudo make install
Note that for the previous example to work on some systems, some Linux tools must be installed (the compiler gcc, make, gettext utilities). Run:
$ sudo apt-get install gcc
$ sudo apt-get install gettext
$ sudo apt-get install make
The Cherokee package used in this book, cherokee_1.2.101.orig.tar.gz, was downloaded from the following URL:
https://launchpad.net/ubuntu/+source/cherokee/1.2.101-1
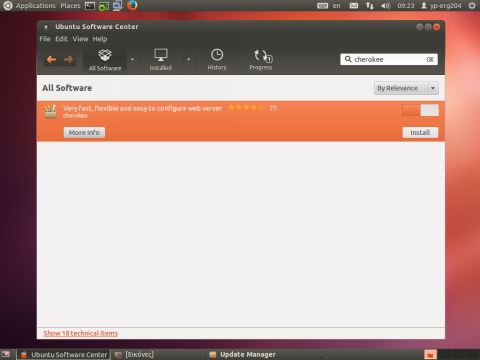
Installing Cherokee from the Ubuntu Software Center is another option. The Ubuntu Software Center is a GUI (Graphical User Interface) utility for browsing, installing, and removing applications.
On the Ubuntu desktop, click the Applications menu and select the Ubuntu Software Center option. In the search box, enter cherokee and press Enter. In the results, select the cherokee entry and click the Install button to start the Cherokee download and installation.
Starting the Cherokee Administration Panel with cherokee-admin
Cherokee configuration is straightforward because it has a big advantage: a simple browser-based configuration interface provided by the utility cherokee-admin.
You can configure Cherokee using Firefox, Internet Explorer, or Chrome or any other browser.
To open the browser-based Administration Panel, a one-time password is required. A one-time password, as implied by its name, is valid only for a single login. After it is used, it expires and a new password must be created. A potential intruder that records a one-time password will not be able to reuse it since the password will not be valid after its first and only use.
The Cherokee one-time password is generated by cherokee-admin. cherokee-admin, which must be executed with root privilege, is the administrative interface to Cherokee. The cherokee-admin output conveniently reminds the user of the address to be entered in the browser’s address line to open the Cherokee Administration Panel.
To start cherokee-admin and obtain the one-time password, enter in a Linux terminal:
$ sudo cherokee-admin
Here is the output of cherokee-admin:
[sudo] password for christos:
Cherokee Web Server 1.2.101 (May 23 2015): Listening on port 127.0.0.1:9090,
TLS disabled, IPv6 enabled, using epoll, 4096 fds system limit, max. 2041
connections, caching I/O, single thread
Login:
User: admin
One-time Password: YW61JfCFdXConKyj
Web Interface:
URL: http://127.0.0.1:9090/
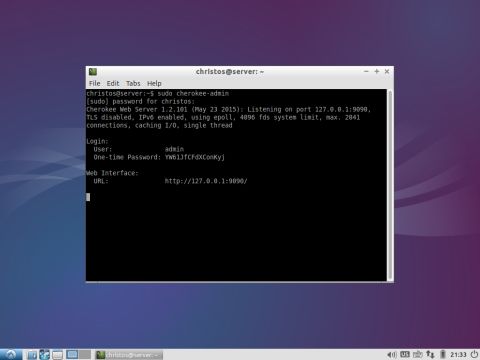
cherokee-admin indicates that we should enter 127.0.0.1:9090 in our browser’s address bar to start the Cherokee Administration Panel. On most computer systems the localhost hostname resolves to address 127.0.0.1. localhost uses the computer’s loopback network interface. The loopback interface bypasses the network interface hardware. Port 9090 is the default TCP port on which the cherokee-admin process listens for connections.
Open the browser and type at the address line the following URL (Uniform Resource Locator):
http://localhost:9090
or
http://127.0.0.1:9090
A dialog box appears with two fields: User Name and Password.
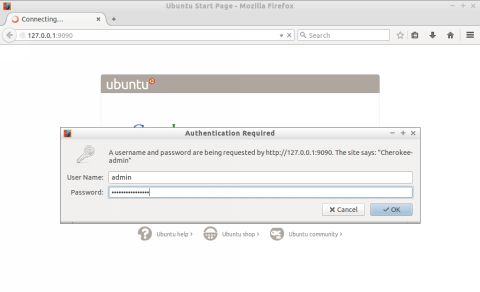
Use admin as the User Name and the one-time password returned from cherokee-admin as the Password, which was YW61JfCFdXConKyj in the previous example. If the login is successful, you reach the main admin page of the Cherokee Administration Panel:
By default, cherokee-admin binds only to 127.0.0.1 (localhost), which means you can only connect to it from the same system. You can, however, run cherokee-admin with the bind (-b) option to specify the network address on which to listen. If no IP address is provided in the -b option, Cherokee will bind to all interfaces. In the following example you can use the Administration Panel from any computer on your LAN:
$ sudo cherokee-admin –b
Assuming that the private IP address of your Web server is 192.168.1.101, the following URL to start the Administration Panel should be used in any browser on your LAN:
http://192.168.1.101:9090
You will learn how to set the private IP address of the server in Chapter 3.
For more information on the cherokee-admin options, use the utility’s manual:
$ man cherokee-admin
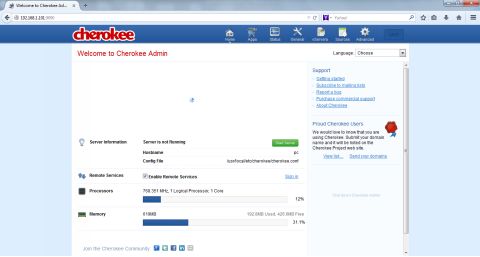
The Cherokee Administration Panel
From the home page of the Cherokee Administration Panel, we can go to the other configuration pages using the tabs: Status, General, vServers, Sources and Advanced. The following image shows the home page of the Administration Panel:
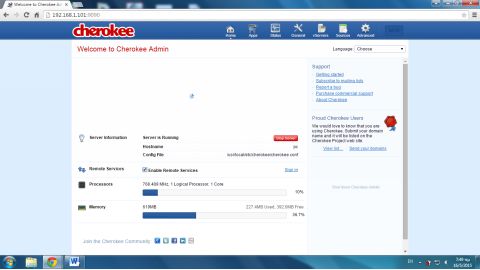
The most important feature of the Home tab is the green button that starts Cherokee, labeled Start Server. When you click this button, the button toggles from green to red and the Stop Server caption appears.
The Cherokee Test Page
Let’s test the server you just started. Using the same IP address as we used to access cherokee-admin, enter the following URL in the browser’s address bar:
http://127.0.0.1
Cherokee uses by default the official port for the HTTP protocol, the protocol of the World Wide Web, port 80. You don’t have to explicitly denote this port at the URL. On the other hand, it would not be an error to use:
http://127.0.0.1:80
Instead of the loopback IP address, you could also use the localhost hostname:
http://localhost
The Cherokee test page appears in the browser’s window. The test page has the filename index.html and is titled Cherokee Test Page. When you set up your Web site, you will replace the Cherokee test page with your own page.
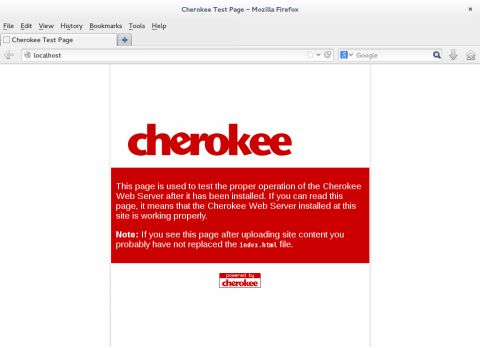
The Cherokee test page or any page from your Web site can thus be tested from the Web server computer itself.
What if something goes wrong and the Cherokee test page is not displayed? If you use Fedora, you must open each port used by the Web server in your system’s firewall. For the Web server, the default port is port 80. Also ports 8080 and 8181 are used in the examples of this book. You must allow these ports and also open port 9090, which is the port on which by default cherokee-admin listens for connections. You must configure the firewall as described in the appendix.
Note that some versions of Lubuntu come with the Apache Web server pre-installed. This server already uses port 80 and you must disable the apache process from starting on system startup or use another port number (e.g., port 8080). Both approaches are described in chapter 4. Finally, in some Lubuntu systems the -t option must be used to start the cherokee-admin program:
$ sudo cherokee-admin -b -t
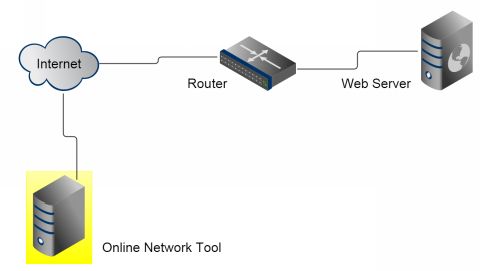
In chapter 3, you will test Web pages from another computer on your LAN.
In chapter 5, you will test your Web pages from another computer on the Internet using online network tools.