Microsoft Azure Machine Learning
Chapter 2. ML Studio Inside Out
While working on a predictive analysis model, you typically follow different steps, such as pulling data from one or more sources, exploring and preparing data, or applying different algorithms to get your desired output. Then, you test and improve on it. Usually, this is an iterative process. Once you are happy with your model, you find ways so that it can be deployed for production and other people or applications can consume or make use of your developed model.
To perform the preceding tasks, you need an environment with the right tools available. ML Studio provides you with everything to develop and deploy a predictive model.
In this chapter, you will start exploring ML Studio after you know how to create a Microsoft account and a Azure ML workspace. Then, you will get introduced to different parts of ML Studio and learn how to create an experiment. You can also find out, briefly, how to work with other projects in ML Studio collaboratively. This chapter aims to familiarize you with the environment without doing any actual work, which is the content for the chapters following this one.
Introduction to ML Studio
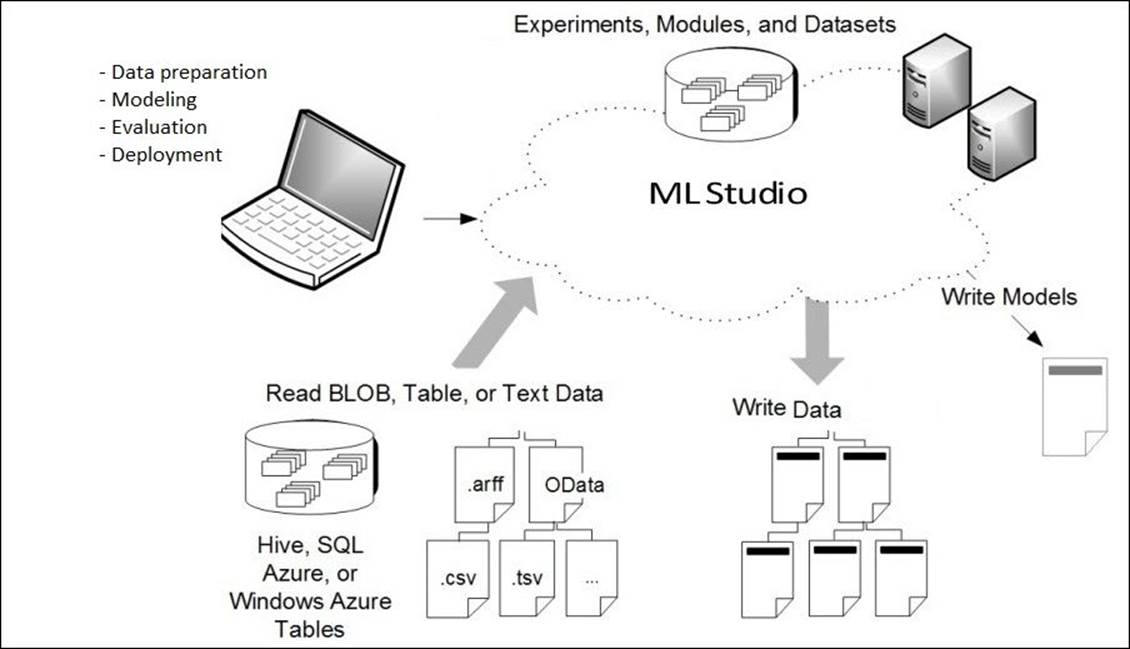
ML Studio gives you an interactive visual workspace to easily build, test, and iterate a predictive analysis model.
You drag-and-drop datasets and analysis modules onto an interactive canvas, connecting them together to form an experiment, which you submit to ML Studio to run or execute. To iterate your model design, you edit the experiment, save a copy if desired, and submit it again.
There is no programming required for this; visually connecting datasets and modules to construct your predictive analysis model is enough. However, if you need more functionality than what is available visually in ML Studio out of the box, you can write R or Python code to get the desired result. R or Python programming is not an absolute must to work with ML Studio.
https://azure.microsoft.com/en-gb/documentation/articles/machine-learning-what-is-ml-studio/
Before you start working with ML Studio, you need to get a subscription for Microsoft Azure and sign in to ML Studio. The following section walks you through the process if you are not familiar with it.
Getting started with Microsoft Azure
Getting into the details of Microsoft Azure is beyond the scope of this book. However, the following subsection details the steps to start with it by creating an account and starting a subscription.
Microsoft account and subscription
If you don't already have a Microsoft account, you need to create one by visiting http://www.microsoft.com/account. This URL might change in future and if so, you can just search online for Microsoft Account to find the right URL.
At the time of writing this book, if you sign up for the first time, Microsoft offers you a free trial for a month and a credit worth $200 to spend on the services on Azure, which is more than enough if you just need to follow through the examples in this book and use only ML Studio.
Once you are successfully signed in, you can visit https://manage.windowsazure.com/ to find different services available through Azure.
Creating and managing ML workspaces
You can scroll through on the left-hand side of the Azure services panel and click on Machine Learning.
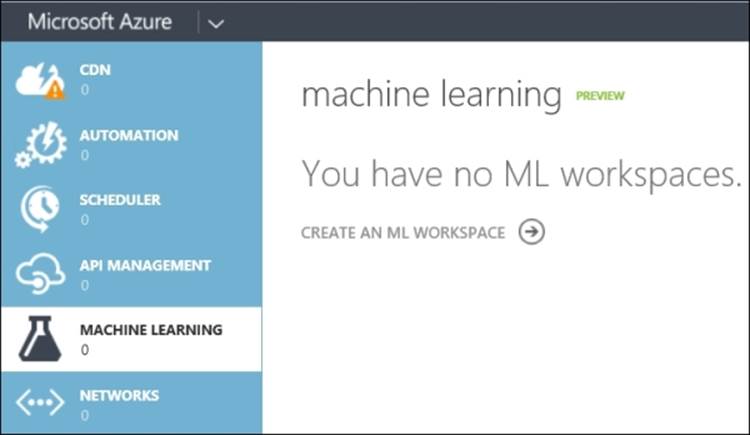
To create a project in machine learning follow the steps:
1. Click on the CREATE AN ML WORKSPACE option.
2. In the QUICK CREATE page, enter your workspace information.
Note
Note that the WORKSPACE OWNER option is your Microsoft account (name@outlook.com) or organization account.
3. Click on the CREATE AN ML WORKSPACE option.
4. After your ML workspace is created, you will see it listed on the machine learning page, as shown in the following screenshot:
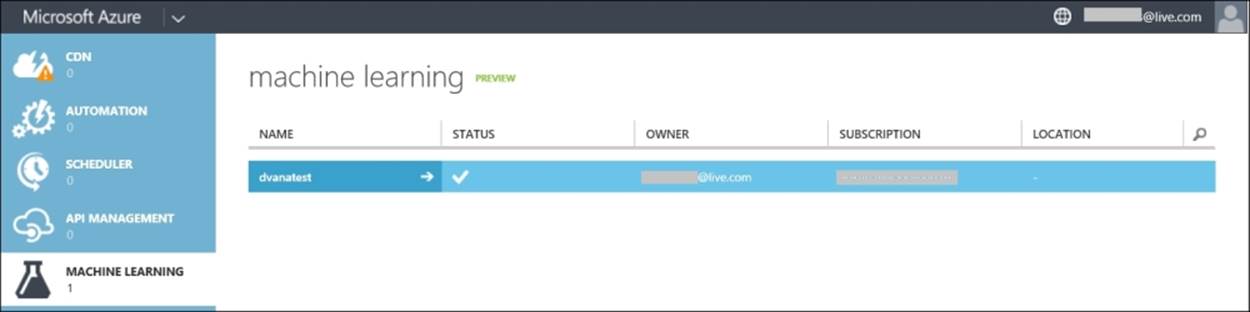
You can create more than one workspace and manage them all from this area. Click on the created workspace and it will take you to its dashboard page where you can also find the option to configure it. Then, click on the OPEN IN STUDIO link to enter in ML Studio.
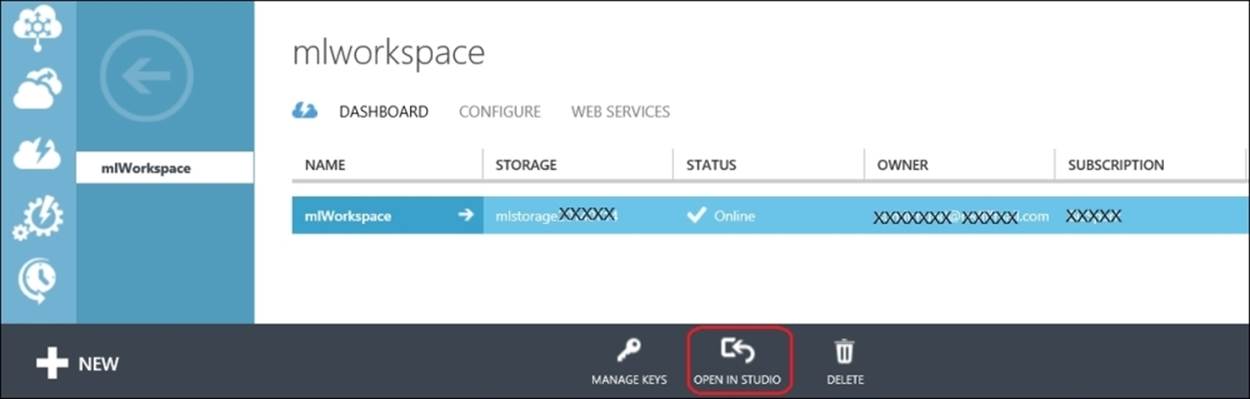
You can also go straight to ML Studio using https://studio.azureml.net/home.
Inside ML Studio
You usually land at the ML Studio home page that contains a bunch of links to different resources, including documentation and quick-start videos.
Apart from ML Studio Home, you will also find the following tabs on the left-hand side of the screen:
· EXPERIMENTS: These are the experiments that have been created, run, and saved
· WEB SERVICES: This is a list of experiments that you have published
· DATASETS: This is a collection of all the datasets that are either uploaded or saved from a experiment along with all the sample ones
· TRAINED MODELS: This is a list of all the trained models
· SETTINGS: This is a collection of settings that you can use to configure your account and resources
Experiments
You can think of an experiment as any analysis you would perform in ML Studio—it can be a simple one, such as a simple statistical analysis, or a complex predictive analysis. An experiment inside ML Studio is a collection of modules connected hierarchically. A module is a unit that encapsulates a machine learning library provided in ML Studio and performs a task common in machine learning scenarios. A dataset after it is uploaded to ML Studio is also available as a module to be used in an experiment. You just need to drag a module to the canvas of the experiment and visually join the output port of one to the input port of another to build the workflow for your model. A module may have one or more input ports or no input port at all. However, it must have at least one output port. You may think of a module as a block that may take inputs and generate a dataset per output port as output.
You can create more than one experiment in a workspace.
Creating and editing an experiment
To create a new experiment, click on the + NEW button at the bottom of the left-hand side of the screen and then choose Blank Experiment. A new experiment will appear.
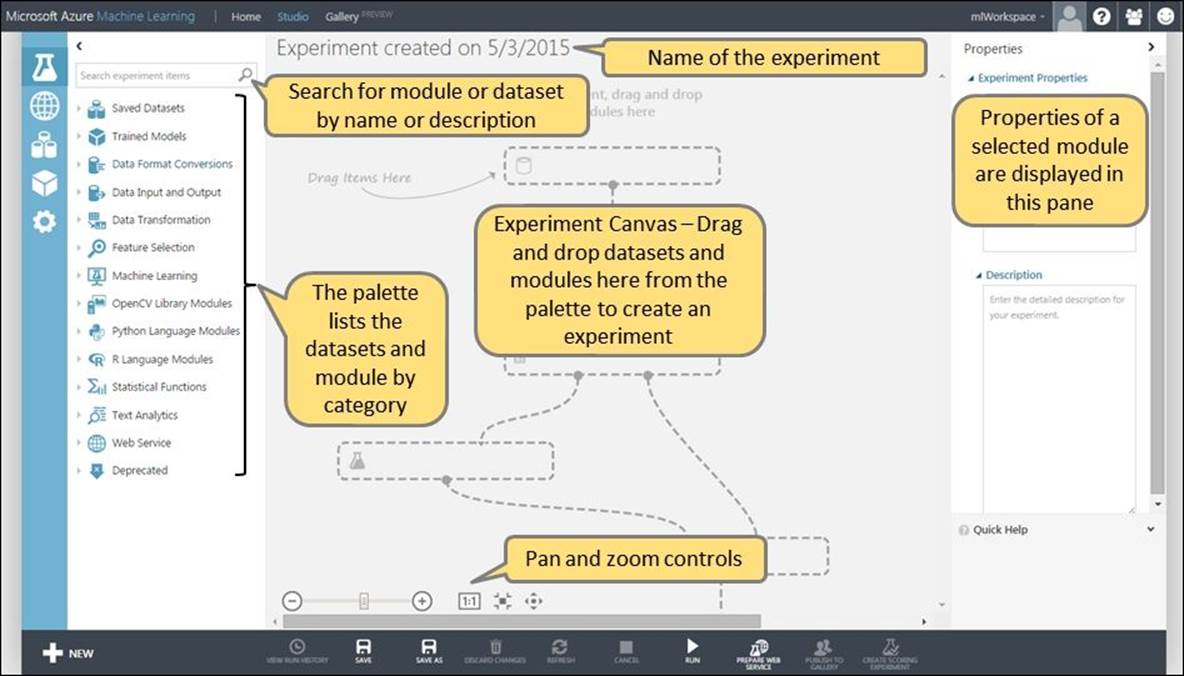
When you create a new experiment, you will see the following view. The interface includes a module palette, an experiment canvas, a properties panel, and various menus and controls at the top, bottom, and far left of the screen.
While editing an experiment, the screen looks similar to the following screenshot. Clicking on a module displays its parameters in the properties pane to the right of the experiment canvas—you can view and modify parameters in this pane.
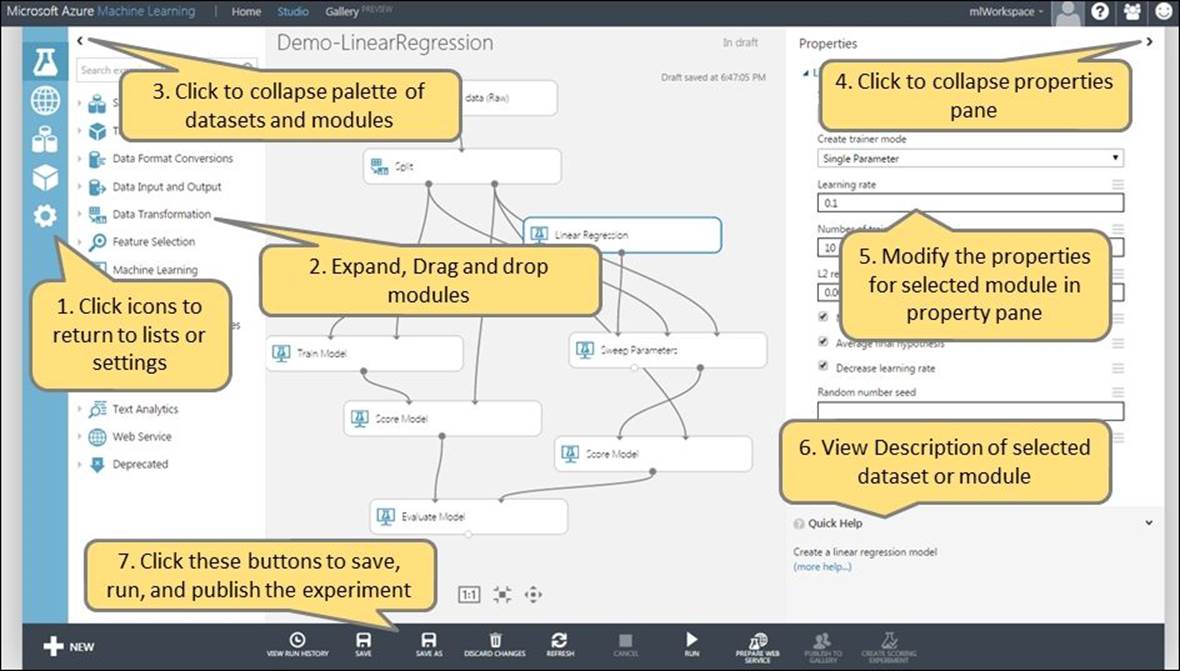
To check the various options that are present on the screen, follow the steps:
1. Click on the icons on the screen to return to lists or settings.
2. Expand drag and drop.
3. Click on the < icon to collapse the palette of datasets and modules as shown in the preceding screenshot.
4. Click on the > icon to collapse the properties pane as shown in the preceding screenshot.
5. Modify the properties for the selected module in the property pane.
6. View the description of the selected dataset or module.
7. Click on these buttons to save, run, and publish the experiment.
To zoom and pan the experiment canvas, you can use the controls at the bottom of the page.
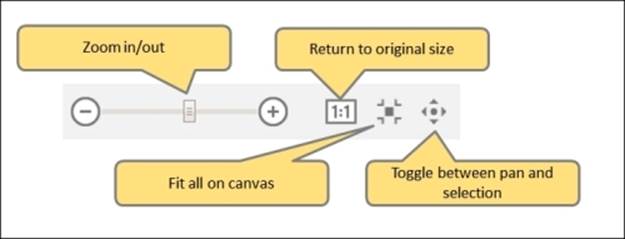
The slider bar to the left zooms the experiment canvas in and out. You can click on the - and + buttons or use the mouse to slide the bar to left and right.
Click on the 1:1 button to return the experiment to its actual size; you can also type 9 on the keyboard to do so. The button to the right of the 1:1 button zooms the experiment to fit on the canvas; you can also type 0 on the keyboard to do so.
Running an experiment
When you click on the RUN button below the experiment canvas, the experiment is submitted to ML Studio to be executed.
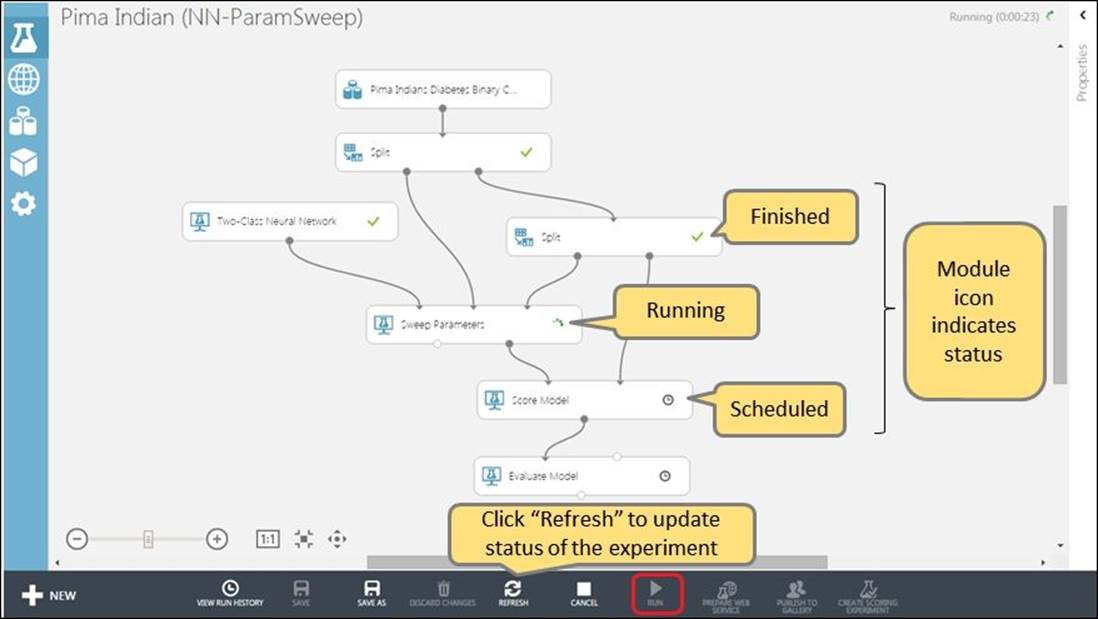
After submitting an experiment, you can click on the REFRESH button below the experiment canvas to update the status of each module as the experiment gets executed. Status icons on the modules indicate the status information of the modules (datasets do not display a status indicator). Let's take a look at the following table:
|
clock |
|
This icon tells you that the module is scheduled to run |
|
busy indicator |
|
This icon indicates that the module is running |
|
green check mark |
|
This icon means that the module ran successfully |
|
red X |
|
This icon indicates that the module has encountered an error |


An experiment is completed once all the modules display green check marks, indicating that all modules are executed successfully, or when a module displays a red X, indicating that it has failed. If a module fails, the experiment terminates and other modules in the experiment may not get executed.
You are able to view the results of any module in an experiment once it has executed. To do so, right-click on the output port of a module and select the Visualize option. You may view the output of a module or save the output as a dataset for use in other experiments. If you save it, then it would be available as a saved dataset in ML Studio.
If a module fails, there are logs that you can examine. These logs can be helpful to include in bug reports to Microsoft. Links to the output and error logs can be found in the properties pane when you select the module. You can also access them by right-clicking on the module and selecting the View Log option.
After an experiment has run, you can modify it and run it again. After editing an experiment, you can click on the SAVE button below the experiment canvas to save your work or you can click on the SAVE AS option to save a copy of the experiment under a different name. When you are ready to run the experiment again, click on the RUN option. Each copy of the experiment that you save or run is listed in the EXPERIMENTS list in the ML Studio default view.
Creating and running an experiment – do it yourself
Now that you know enough about an experiment, lets create and run a simple experiment:
1. Create a new experiment by clicking on the + NEW button at the bottom of the left-hand side of the screen and then choose the Black Experiment option.
2. On the canvas of the new experiment, name the new project as Ch-2.
3. Expand the Saved Datasets modules to the left of the screen and drag the first dataset named Adult Census Income Binary Classification dataset and drop it in to the center of the canvas.
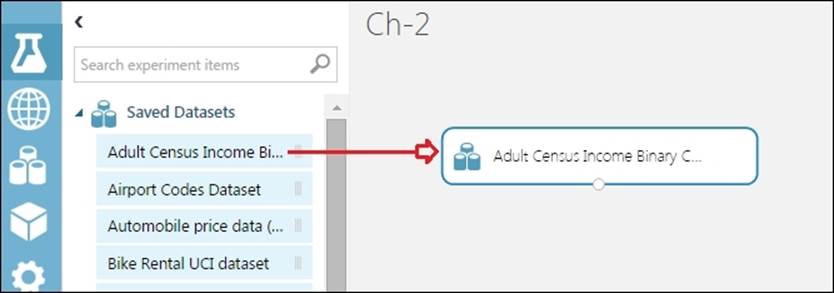
4. Collapse the Saved Datasets modules and expand the Statistical Functions modules. Then, drag the Descriptive Statistics module to the canvas.
5. Connect the output port of the Adult Census Income Binary Classification dataset module to the input port of the Descriptive Statistics module.
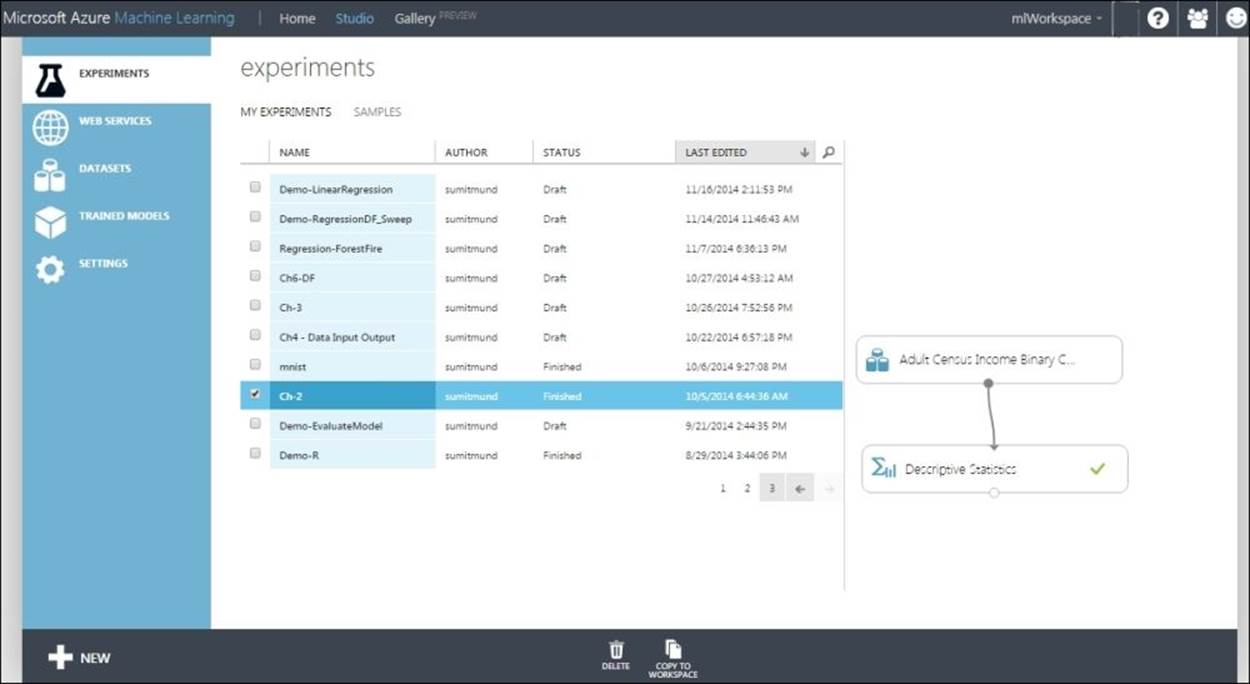
6. Click on the RUN button at the bottom of the screen. It should run without any error marking the Descriptive Statistics module with a green tick mark, as shown in the following screenshot:

After running the experiment, it already gets autosaved. You may exit from the workspace now. At this point, we are not concerned about investigating the result of the experiment, which you will learn in the subsequent chapters.
Workspace as a collaborative environment
Workspaces enable groups to work on common projects by gathering data, modules, and experiments together in a single location for common use. Workspaces let users securely share ideas and resources. You can be a member of several workspaces and can easily switch between them.
As the owner of a workspace, you can invite others to the workspace by clicking on the Setting icon on the left-hand side of the screen and then clicking on USERS from the top tabs. You can invite others to the workspace by adding their Microsoft accounts.
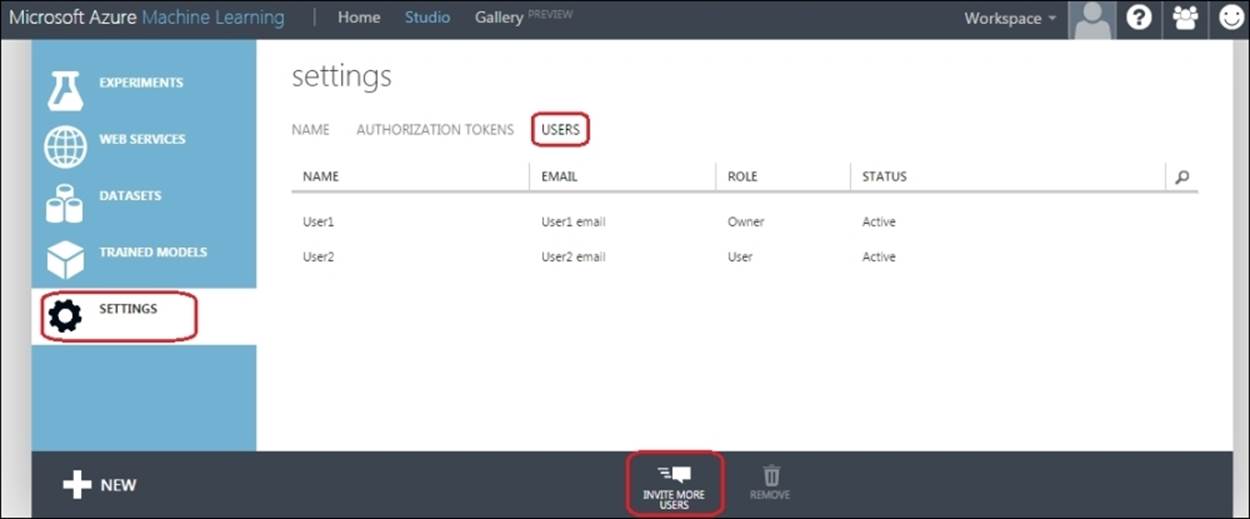
Once you have successfully added other users, they can use the same workspace like you as an owner can, except that they can't invite others unless you give them ownership privileges.
One user can be an owner or user of more than one workspace.
Note
Note that a workspace can be shared and owned by multiple users, but billing is made only to the user who created the workspace.
Summary
Practically speaking, ML Studio is the Microsoft Azure Machine Learning! If you are working on a predictive analysis, ML Studio provides a platform for everything—for development, testing and deployment. It does this in the easiest way possible, just by mouse clicks.
In this chapter, you started with creating a Microsoft account and creating an ML workspace. Then, you explored ML studio from inside out. You moved on to create a simple experiment in ML Studio and also quickly explored how ML Studio can be used as a collaboration environment to work with others.
Now that you know ML Studio, in the next chapter you will learn about data exploration and data visualization using ML Studio.
All materials on the site are licensed Creative Commons Attribution-Sharealike 3.0 Unported CC BY-SA 3.0 & GNU Free Documentation License (GFDL)
If you are the copyright holder of any material contained on our site and intend to remove it, please contact our site administrator for approval.
© 2016-2026 All site design rights belong to S.Y.A.