Excel 2016 All-in-One For Dummies (2016)
Book IV
Worksheet Collaboration and Review
Chapter 4
Sharing Workbooks and Worksheet Data
In This Chapter
![]() Sharing online workbooks with clients and co-workers
Sharing online workbooks with clients and co-workers
![]() Sharing Excel 2016 data with other Office programs
Sharing Excel 2016 data with other Office programs
![]() Inserting Excel 2016 data into Word and PowerPoint documents
Inserting Excel 2016 data into Word and PowerPoint documents
![]() Exporting workbooks as PDF, XPS, and HTML (web page) files
Exporting workbooks as PDF, XPS, and HTML (web page) files
Sharing data between Excel 2016 and other Windows programs that you use is the topic of this chapter. Perhaps the most straightforward way to share worksheet data is by sharing the Excel workbook saved in the cloud on your OneDrive, on your SharePoint team site, or in a folder in your Dropbox.
In some cases, data sharing involves getting Excel data tables, data lists, and charts into other Office 2016 programs that you use, especially Microsoft Word documents and PowerPoint presentations. In other cases, data sharing involves getting data generated in other programs, such as in tables and lists created in Microsoft Word and contacts maintained in Microsoft Outlook, into an Excel worksheet.
In addition to data sharing that involves bringing data stored in different types of documents into Excel worksheets, the program supports data sharing in the form of Actions (formally known as SmartTags in Office versions prior to 2010) that can bring information into the spreadsheet that’s related to a particular type of data entry, such as a date or a company’s stock symbol. Information imported through the use of Actions can come from local sources, such as your Outlook Calendar, as well as from online sources, such as MSN MoneyCentral on the web. (For information on enabling Actions in Excel 2016, refer to Book I, Chapter 2.)
Finally, you can give people access to worksheet data using programs other than Excel, including Acrobat Reader, the XML Paper Specification Viewer, and their own web browsers by saving the workbook in a special PDF, XPS, or HTML file format.
Sharing Your Workbooks Online
Excel 2016 makes it easy to share your spreadsheets with trusted clients and co-workers. Simply use the options on the Share screen in Backstage view to e-mail worksheets or send them by Skype Instant Message to others who have access to Excel on their computers. If you use Microsoft’s Skype for Business online meeting software, you can present the worksheet to the other attendees as part of an online meeting.
And if you save your workbook files in the cloud on your OneDrive, you can easily share their worksheets by inviting co-workers and clients to open them in Excel on their own devices or, if they don’t have Excel, in their web browsers with the Excel Online web app.
Additionally, you yourself can edit the workbooks you save on your OneDrive when you’re away from your office and the computer or device to which you have access doesn’t have a compatible version of Excel installed on it. You simply use that device’s Internet access to log on to the Documents folder of your OneDrive containing uploaded copies of your spreadsheets, and then you can use Excel Online, the web app version of Excel that runs on most modern web browsers to open and then review and edit them.
Sharing workbooks saved on your OneDrive
To share Excel workbooks from your OneDrive, you follow these steps:
1. Open the workbook file you want to share in Excel 2016 and then click the Share button at the far right of the row with the Ribbon.
Excel opens the Share task pane on the right side of the worksheet area.
If you’ve not yet saved the workbook on your OneDrive, this Share task pane contains a Save to Cloud button that when clicked takes you backstage to the Save As screen where you can choose the OneDrive folder where you want it saved.
Once the workbook has been saved to the Cloud, the Share task pane contains the Invite People option selected (similar to the one shown in Figure 4-1).
2. Click the Invite People text box and then begin typing the e-mail address of the first person with whom you want to share the workbook.
As you type, Excel matches the letters with the names and e-mail addresses entered in your Address book. When it finds possible matches, they are displayed in a drop-down menu, and you can select the person’s e-mail address by clicking his or her name in the list. To find e-mail addresses in your Address list and add them to this text box, click the Search the Address Book for Contacts button (to the immediate left of the Can Edit drop-down list box) and then use the options in the Address Book: Global Address List dialog box. To share the workbook with multiple people, type a semicolon (;) after each e-mail address you add to this text box.
3. (Optional) Click the Can Edit drop-down button and choose Can View option from the menu to prevent the people you invite from making any changes to the workbook you’re sharing.
By default, Excel 2016 allows the people with whom you share your workbooks to make editing changes to the workbook that are automatically saved on your OneDrive. If you want to restrict your recipients to reviewing the data in a read-only version without being able to make changes to the file, be sure to replace the Can Edit option with Can View before sharing the workbook.
4. (Optional) Click the Include a Personal Message with the Invitation text box and type in any personal message that you want to incorporate as part of the e-mail with the generic invitation to share the file.
By default, Excel creates a generic invitation.
5. (Optional) Select the Require User to Sign-In before Accessing Document check box if you want the people with whom you share the workbook to have to log into a Windows Live account before they can open the workbook.
Don’t select this check box unless you’re giving your log-in information to the recipient(s) of the e-mail invitation, and don’t give this log-in information to anyone who isn’t in your inner circle or isn’t someone you trust completely.
6. Click the Share button in the Share task pane.
As soon as you click this Share button, Excel e-mails the invitation to share the workbook to each of the recipients entered in the Type Name or E-Mail Addresses text box. The program also adds the e-mail address and the editing status of each recipient (Can Edit or Can View) in the Shared With section at the bottom of the Share screen.
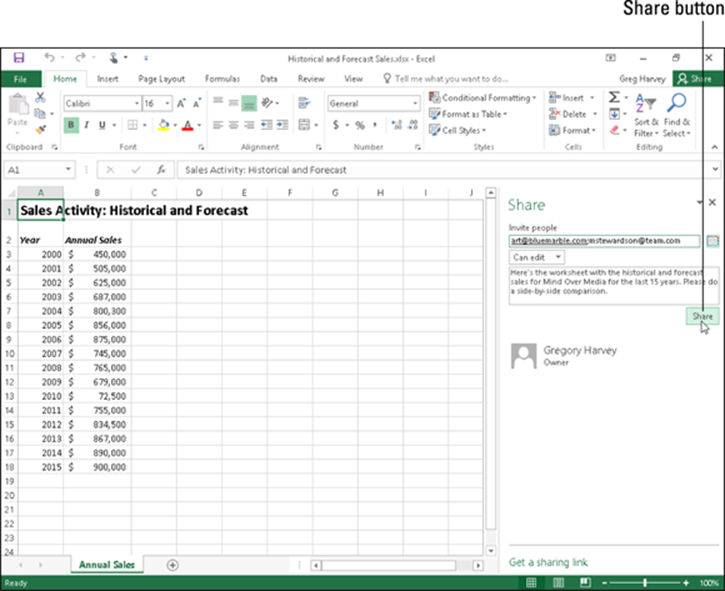
Figure 4-1: Inviting co-workers or clients to share an Excel workbook saved on your OneDrive in the new Share task pane.
All the people with whom you share a workbook receive an e-mail message containing a hyperlink to the workbook on your OneDrive. When they follow this link (and sign into the site if this is required), a copy of the workbook opens on a new page in their default web browser using the Excel Online web app. If you’ve given the user permission to edit the file, the web app contains an Edit Workbook drop-down button.
When the user clicks this button in Excel Online, he or she has a choice between choosing the Edit in Excel or Edit in Excel Online option from its drop-down menu. When the user chooses Edit in Excel, the workbook is downloaded and opened in his version of Excel. When the user chooses Edit in Excel Online, the browser opens the workbook in a new version of the Excel Online, containing Home, Insert, Data, Review, and View tabs, each with a more limited set of command options than Excel 2016, which you can use in making any necessary changes and which are automatically saved to workbook on the OneDrive when you close Excel Online.
Getting Sharing links
Instead of sending e-mail invitations to individual recipients with links to the workbooks you want to share on your OneDrive, you can create hyperlinks to them that you can then make available to all the people who require online editing or review access.
To create a link to a workbook open in Excel 2016 that you’ve saved on your OneDrive, you click the Share button at the very right of the Ribbon and then click the hyperlink called Get a Sharing Link that appears at the very bottom of the Share task pane.
To create a view-only link that doesn’t allow online editing, you then click the Create a View-Only Link button under the View-Only Link heading in the Share task pane. To create an edit-type link that enables online editing instead of a view-only link or in addition to it, you click the Create an Edit Link button by the Edit Link heading in this task pane.
Excel then displays the long and complex hyperlink for sharing your workbook under the View-Only Link or Edit Link heading (depending upon which Create Link button you selected).
 After creating a view link or an edit link for a workbook on your OneDrive, you can copy it to the Clipboard by clicking the Copy button that appears to the immediate right of the text box containing the edit or view-only link. After copying it to the Clipboard, you can insert it into a new e-mail message (Ctrl+V) that you send to all the people with whom you want to share the Excel workbook to which it refers.
E-mailing workbooks
To e-mail a copy of a workbook you have open in Excel to a client or co-worker, choose File ⇒ Share ⇒ Email (Alt+FHE). When you do this, a Send Using E-Mail panel appears with the following five options:
· Send as Attachment to create a new e-mail message using your default e-mail program with a copy of the workbook file as its attachment file.
· Send a Link to create a new e-mail message using your default e-mail program that contains a hyperlink to the workbook file. (This option is available only when the workbook file is saved on your company’s OneDrive or ISP’s web server.)
· Send as PDF to convert the Excel workbook to the Adobe PDF (Portable Document File) format and make this new PDF the attachment file in a new e-mail message. (Your e-mail recipient must have a copy of the Adobe Reader installed on his or her computer in order to open the attachment.)
· Send as XPS to convert the Excel workbook to a Microsoft XPS (XML Paper Specification) file and make this new XPS file the attachment in a new e-mail message. (Your e-mail recipient must have an XPS Reader installed on his or her computer in order to open the attachment; this reader is installed automatically on computers running Windows 7 or Windows Vista.)
· Send as Internet Fax to send the workbook as a fax through an online fax service provider. You will need an account with a service provider as well as the Windows Fax and Scan feature installed.
After selecting the e-mail option you want to use, Windows opens a new e-mail message in your e-mail program with a link to the workbook file or the file attached to it. To send the link or file, fill in the recipient’s e-mail address in the To text box and any comments you want to make about the spreadsheet in the body of the message before you click the Send button.
Sharing workbooks with Instant Message
If you have access to Skype IM (Instant Message) or have Microsoft’s Skype for Business software (see following section) installed on the device running Excel 2016, you can share a workbook saved on your OneDrive by sending a link to co-worker or client via instant messaging.
To do this, simply open the workbook saved on your OneDrive in Excel 2016 and then select the Send by Instant Message option on the Share screen in the Excel Backstage view (Alt+FHIM).
Then, fill in the recipient’s name in the To text box or select it from your Address Book using the Search the Address Book for Contacts button that immediately follows this box. Type any message about the spreadsheet you want to include into the Type Your Message Here text box and then select the Send IM button that appears near the bottom of the right side of the Share screen under the heading Send by Instant Message.
If you want to send a copy of the workbook via instant message, it must be saved on a local drive on the device running Excel 2016 and your message software. To do this, use the Save As command to save a copy of the workbook on a local drive and then open that copy in Excel 2016 before you select the Send by Instant Message option on Excel’s Share screen in the Backstage view.
Presenting worksheets online
If the device running Excel 2016 also has Microsoft’s Skype for Business 2016 online communication software installed on it, you can present your worksheets to the other attendees as part of any online meeting that you organize. To do this, first open the workbook you want to present at the online meeting in Excel 2016 before you select the Present Online option on the Share screen in the program’s Share screen on the Backstage view (Alt+FHP). Click the Present button under the Present Online heading that appears on the right side of the Share screen.
If no Skype meeting is currently running on your computer, a Share Workbook Window dialog box then appears where you can launch one simply by clicking OK. After you close the Join Meeting Audio dialog box, your name then appears in a floating Conversation window.
To present your worksheet, highlight the Present button (the circle with a monitor icon between the Mute My Mic and Hang Up button) and then click the Present Programs item on its pop-up palette. When you select this option, a Present Programs window appears with the image of the active worksheet of the Excel workbook you’re presenting. You then click the Present button, and the Skype for Business toolbar appears pinned to the top of your computer screen with the active worksheet displayed below.
When you first present a worksheet, you have control over it. While you’re in control, any menu selections or edits you make to its sheet are visible to all the other attendees of the online meeting. If you wish to give editing control to another attendee, simply choose his or her name from the Give Control drop-down menu in the Skype for Business toolbar.
You can then take back control of the worksheet by choosing Take Back Control option at the very top of the Give Control drop-down menu. When you’re finished presenting the worksheet and no longer want it to be visible to the other attendees, click the Stop Presenting button on the right side of the mini-menu at the top of the presentation window.
The Skype for Business toolbar then disappears from the screen, and you return to the open workbook in Excel 2016, where you can save or abandon any editing changes made by you or by any other attendees to whom you ceded control during the time the worksheet was being presented.
Editing worksheets online
Microsoft offers Online versions of Word, Excel, PowerPoint, and OneNote as part of the Office 365 account that provides you with your OneDrive storage in the cloud. You can use Excel Online to edit worksheets saved on your OneDrive online right within your web browser.
Excel Online is very useful when you need to make last-minute edits to a worksheet but don’t have access to a device on which a copy of the Excel program is installed. As long as the device has an Internet connection and runs a web browser that supports the Excel Online web app (such as Internet Explorer on a Microsoft Surface tablet or even Safari on an Apple iPad or MacBook Air), you can make eleventh-hour edits to the data, formulas, and even charts that are automatically saved to the workbook file on your OneDrive.
Excel Online versus Excel for Windows 10
Don’t confuse Excel Online with Excel for Windows 10 (also sometimes called Universal Excel). Excel Online is the name for the Web app that you access via a web browser using your Office 365 account. Excel for Windows 10 is a touch-oriented, slimmed down version of Excel that you download and install using your Office 365 account for use on a tablet or touch-screen sensitive laptop running under Windows 10. Excel for Windows 10 is optimally designed for smaller touchscreen devices using the latest version of Windows.
Oddly enough, the features of Excel Online and Excel for Windows 10 are very similar. The biggest difference is that Excel Online has a Data tab for refreshing data connections and sorting that is missing from Excel for Windows 10 whereas Excel for Windows has a Formulas tab for inserting built-in functions that is missing from Excel Online. Otherwise, they both share similar commands on their respective Home, Insert, Review, and View tabs.
To edit a workbook saved on your OneDrive with the Excel web app, you follow these simple steps:
1. Launch the web browser on your device that supports the Excel web app and then go to www.office.com.
A Collaborate with Office Online web page appears.
2. Click or tap the Excel Online button.
A Welcome to Excel Online banner appears where you can sign into your Microsoft account. A Microsoft Excel Online tab then opens in your web browser displaying a list of all the workbook files saved on your OneDrive that you’ve recently edited.
3. To edit an Excel workbook file not shown in the Recent list, click or tap the Open from OneDrive button at the bottom of the list.
A Recent Documents tab for your OneDrive opens in your web browser. In a panel on the left side of this page, you see a list of all the file folders you have on your OneDrive. The folder you select in this panel displays all the files it contains.
4. Select the appropriate folder and then select the check box in front of the name of the workbook file you want to edit in Excel Online to select the file.
When you select the name of the Excel workbook file to edit, the View Details display button is selected (which displays the file name and date last modified in a list), and you click or tap the Details Pane display button as well, the OneDrive page displays the current Share status of the file underneath a list of viewing and editing options in the Details pane on the right side of the page as shown in Figure 4-2.
5. Click the Open drop-down button followed by the Open in Excel Online option (or simply click the workbook’s filename).
Your web browser opens the workbook in Excel Online on a new browser tab (similar to the one shown in Figure 4-3) that replaces your OneDrive page. This workbook contains all the worksheets that you’ve placed in the file with their tabs displayed.
You can then use the command buttons on the Home and Insert tabs (most of which are identical to those found on the Home and Insert tabs on the Excel 2016 Ribbon) to modify the layout or formatting of the data and charts on any of its sheets. You can also add new data to the worksheets as well as edit existing data just as you do in Excel 2016.
6. When you’re finished editing the workbook, click the web browser’s Close button to save your changes. If you want to save a copy under a new filename in the same folder on the OneDrive, choose File ⇒ Save As and then edit the filename that appears in the text box of the Save As dialog box before you click its Save button (or select the Overwrite Existing Files check box if you want to save the changes under the same filename).
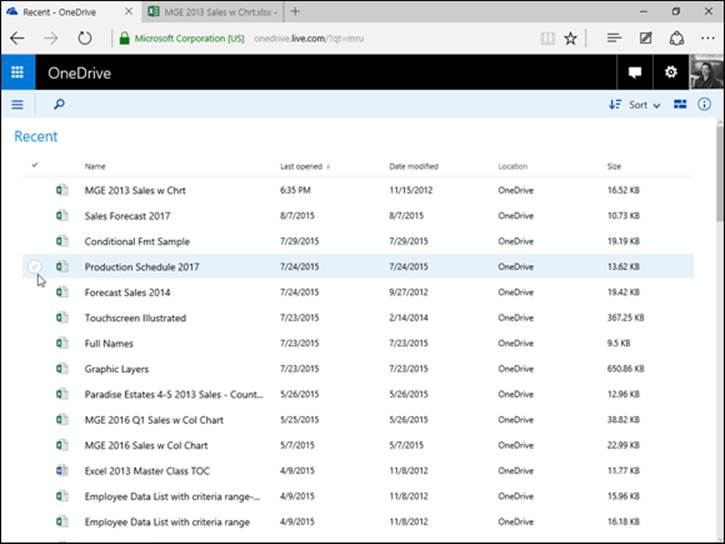
Figure 4-2: Selecting the Excel workbook on my OneDrive to edit online in Excel Online.
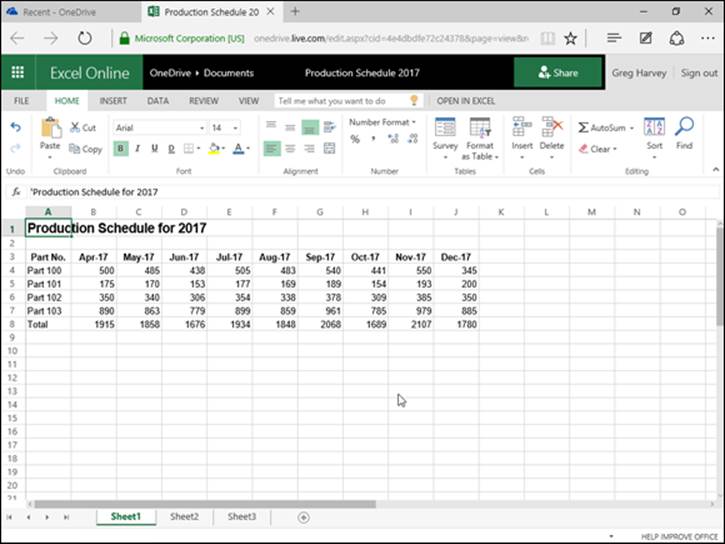
Figure 4-3: Editing the Production Schedule worksheet in Microsoft Edge web browser with Excel Online.
 The Excel web app is proficient at making simple editing, formatting, and layout changes to your spreadsheet data and charts using common commands on its Home, Insert, and even Chart Tools tabs (when a chart is selected) or adding and editing comments on the Review tab. However, the web app does not support the editing of any type of graphics object such as shapes that you draw, and other types of graphics that you’ve added. (Charts are about the only type of Excel graphic objects that Excel Online can handle.)
To make modifications to elements in your worksheet unsupported by Excel Online, you have two choices. You can open the workbook in a local copy of Excel (assuming that the device you’re using has Excel 2010 or 2016 installed on it) by clicking the Open in Excel command to the immediate right of the Tell Me What You Want to Do text box. Or you can download a copy of the workbook to your local office computer (where you do have Excel 2016 installed) by choosing File ⇒ Save As ⇒ Download a Copy and make the more advanced edits to this downloaded copy of the file after you get back to the office.
 Don’t forget about Microsoft’s Excel app for the Apple iPad and iPhone, if you use either of these devices. The free app is available for download from the App Store (just search for Microsoft Office or Excel). The Excel app enables you to create new workbook files as well as access all the Excel workbook files you store on your OneDrive from your iPad or iPhone.
Excel 2016 Data Sharing Basics
You share information between Excel 2016 and other programs you use in two ways: You either copy or move discrete objects or blocks of data from one program’s file to another, or you open an entire file created with one program in the other program.
The key to sharing blocks of data or discrete objects in Excel is the Windows Clipboard. Remember that Excel always gives you access to contents of the Clipboard in the form of the Clipboard task pane, which you can open by clicking the Dialog Box launcher in the lower-right corner of the Clipboard group at the beginning of the Home tab on the Ribbon. When the Clipboard task pane is open, you can then copy its objects or blocks of text into cells of the open worksheet simply by clicking the item in this task pane.
Because very few people purchase Excel 2016 as a separate program outside the Microsoft Office 2016 suite, it should be no surprise that most of the file sharing happens between Excel and one of the other major applications included in Microsoft Office (such as Word, PowerPoint, and Access).
However, before you rush off and start wildly throwing Excel 2016 worksheets into Word 2016 documents and Excel 2016 charts into PowerPoint 2016 presentations, you need to realize that Microsoft offers you a choice in the way that you exchange data between your various Office programs. You can either embed the worksheet or chart in the other program or set up a link between the Excel-generated object in the other program and Excel itself.
· Embedding means that the Excel object (whether it’s a worksheet or a chart) actually becomes part of the Word document or PowerPoint presentation. Any changes that you then need to make to the worksheet or chart must be made within the Word document or PowerPoint presentation. This presupposes, however, that you have Excel on the same device as Word or PowerPoint and that that device has sufficient memory to run them both.
· Linking means that the Excel object (worksheet or chart) is only referred to in the Word document or PowerPoint presentation. Any changes that you make to the worksheet or chart must be made in Excel itself and then updated when you open the Word document or PowerPoint presentation to which it is linked.
Use the embedding method when the Excel object (worksheet or chart) is not apt to change very often, if at all. Use the linking method when the Excel object (worksheet or chart) changes fairly often, when you always need the latest-and-greatest version of the object to appear in your Word document or PowerPoint presentation, or when you don’t want to make the Word or PowerPoint document any bigger by adding the Excel data to it.
Be aware that when you link an Excel worksheet or chart to another Office document and you want to show or print that document on a different device, you must copy both the Excel workbook with the linked worksheet/chart and the Word or PowerPoint file to it. Also be aware that when you embed an Excel worksheet or a chart in another Office document and then want to edit it on another device, that device must have both Excel 2016 and the other Microsoft Office program (Word or PowerPoint 2016) installed on it.
Use the embedding or linking techniques only when you have a pretty good suspicion that the Excel stuff is far from final and that you want to be able to update the Excel data either manually (with embedding) or automatically (with linking). If your Excel stuff will remain unchanged, just use the old standby method of copying the Excel data to the Clipboard with the Copy command button on the Home tab (or pressing Ctrl+C) and then switching to the Word or PowerPoint document and pasting it in place with the Paste command button (or pressing Ctrl+V).
Excel maintains a very close relationship with Microsoft Access, thus making it easy to import data from any of the tables or queries set up for a database into your Excel worksheet. For details on how to bring in data from Access, see Book VI, Chapter 2.
Excel and Word 2016
Of all the Office programs (besides our beloved Excel), Microsoft Word 2016 is the one that you are most apt to use. You will probably find yourself using Word to type up any memos, letters, and reports that you need in the course of your daily work (even if you really don’t understand how the program works). From time to time, you may need to bring some worksheet data or charts that you’ve created in your Excel workbooks into a Word document that you’re creating. When those occasions arise, check out the information in the next section.
Although Word has a Table feature that supports calculations through a kind of mini-spreadsheet operation, you probably will be more productive if you create the data (formulas, formatting, and all) in an Excel workbook and then bring that data into your Word document by following the steps outlined in the next section. Likewise, although you can keep, create, and manage the data records that you use in mail merge operations within Word, you probably will find it more expedient to create and maintain them in Excel — considering that you are already familiar with how to create, sort, and filter database records in Excel.
Getting Excel data into a Word document
As with all the other Office programs, you have two choices when bringing Excel data (worksheet cell data or charts) into a Word document: You can embed the data in the Word document, or you can link the data that you bring into Word to its original Excel worksheet. Embed the data or charts when you want to be able to edit right within Word. Link the data or charts when you want to be able to edit in Excel and have the changes automatically updated when you open the Word document.
Happily embedded after
The easiest way to embed a table of worksheet data or a chart is to use the good old drag-and-drop method: Simply drag the selected cells or chart between the Excel and Word program windows instead of to a new place in a worksheet. The only trick to dragging and dropping between programs is the sizing and maneuvering of the Excel and Word program windows themselves. Figures 4-4 and 4-5 illustrate the procedure for dragging a table of worksheet data with the 2000 to 2015 annual sales activity from its worksheet (named Annual Sales) into a new Sales memo document in Word 2016.
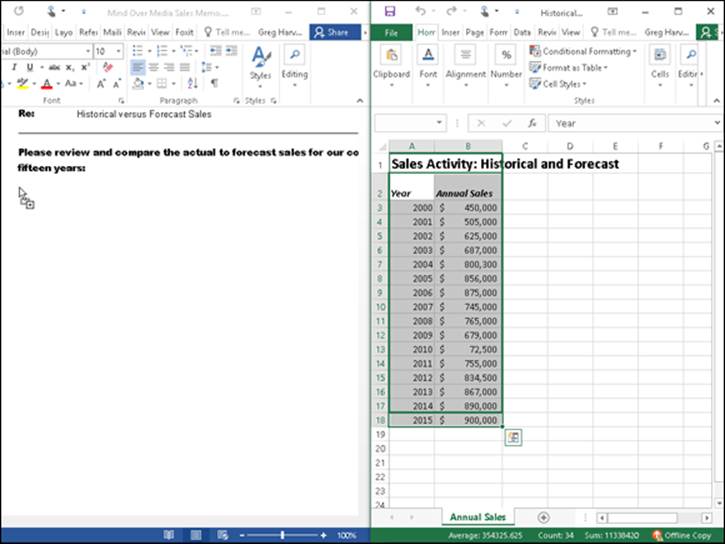
Figure 4-4: Dragging the cell range A1:B18 from the Historical Sales worksheet to the Word memo.
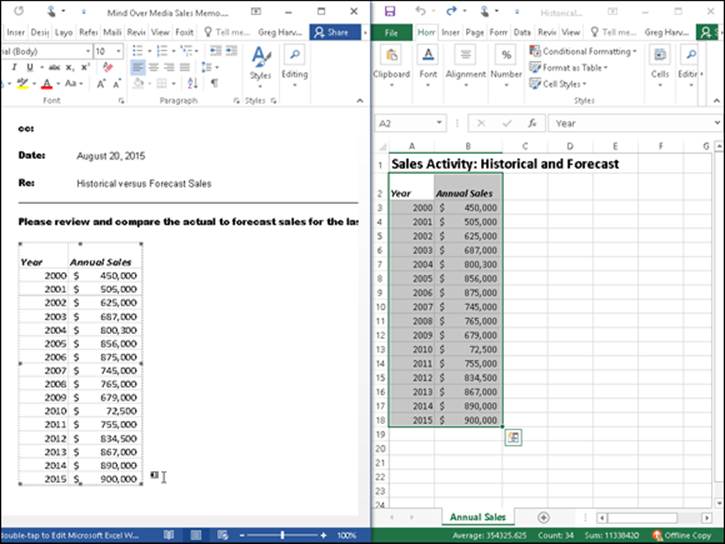
Figure 4-5: Word memo after copying the worksheet data.
Before I could drag the selected worksheet data, I had to size and position the Excel and Word program windows. To do this, I opened the Historical Sales spreadsheet in Excel 2016 and then launched Word 2016 and started a new document. To tile the windows side by side, I simply right-clicked the Windows taskbar and then chose the Show Windows Side by Side option from its shortcut menu.
In Figure 4-4, you can see that the Excel 2016 window is positioned to the immediate right of the Word 2016 window after I selected the Show Windows Side by Side option. At that point, I had only to select the worksheet data in the Excel worksheet and then hold down the Ctrl key (to copy) as I dragged the outline over to the new paragraph marker in the memo in the Word document window.
As I passed over the border between the Excel and Word program windows, the mouse pointer changed shape to the international “oh-no-you-don’t” symbol. When I reached the safe havens of the Word document area, however, the pointer changed again, this time to the shape of an arrowhead sticking up from a box with a plus sign. (How’s that for a description?) To indicate where in the Word document to embed the selected data, I simply positioned the arrowhead-sticking-up-from-a-box-with-a-plus-sign pointer at the place in the document where the Excel stuff is to appear. Then I released the mouse button. Figure 4-5 shows you the embedded worksheet table that appeared after I released the mouse button.
You can also use the cut-and-paste method to embed worksheet data into a Word document. Simply select the cells in Excel and then copy them to the Clipboard by clicking the Copy button on the Home tab of the Ribbon (Ctrl+C). Then, open the Word document and position the cursor at the place where the spreadsheet table is to appear. Click the Paste Special option on the Paste button’s drop-down menu on the Home tab of Word’s Ribbon (or press Alt+HVS). Click Microsoft Excel Worksheet Object in Word’s Paste Special dialog box and then click OK. Word then embeds the data in the body of the Word document just as though you had Ctrl+dragged the data from the Excel window over to the Word window.
If you don’t want gridlines to appear in the worksheet data that you copy to a Word document (as shown in Figure 4-5), be sure to remove their display in Excel before you do the copying. To remove gridlines from a worksheet, you just deselect the Gridlines check box in the Show/Hide group of the View tab on the Ribbon (or press Alt+WVG).
Editing embedded stuff
The great thing about embedding Excel stuff (as opposed to linking, which I get to in a later section) is that you can edit the data right from within Word. Figure 4-6 shows the table after I centered it with the Center button on Word’s Formatting toolbar. Notice what happens when I double-click the embedded table (or click the table once and then choose Worksheet Object ⇒ Edit from the table’s shortcut menu): A frame with columns and rows, scroll bars around two columns of sales data. Notice, too, that the tabs on the Word Ribbon have changed to ones on the Excel Ribbon. (It’s like being at home when you’re still on the road.) At this point, you can edit any of the table’s contents by using the Excel commands that you already know.
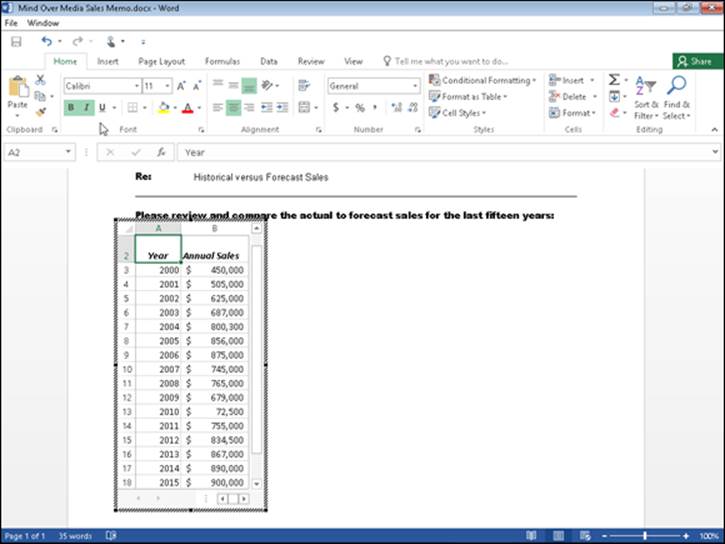
Figure 4-6: Editing the embedded worksheet sales data from within the Word memo.
The links that bind
Of course, as nice as embedding is, you will encounter occasions when linking the Excel data to the Word document is the preferred method (and, in fact, even easier to do). First, I select a chart that I created in the worksheet by single-clicking it, not double-clicking it, as I would do to edit the chart in the worksheet.
Then, after copying the chart (or selected data) to the Clipboard by clicking the Copy command on the Excel Ribbon’s Home tab, I switched over to Word and my memo to all store managers. After positioning the insertion point at the beginning of the paragraph where the chart needs to be, I chose the Paste Special option from the Paste button’s drop-down menu on the Home tab of Word’s Ribbon. (You can also do this by pressing Alt+HVS.) Figure 4-7 shows the Paste Special dialog box that appears. In this dialog box, the crucial thing is to select the Paste Link option button and Microsoft Excel Chart Object in the list box before clicking OK. Figure 4-8 shows the Word memo after I clicked OK and pasted the Excel chart into place.

Figure 4-7: Selecting the Paste Link option in Word’s Paste Special dialog box.
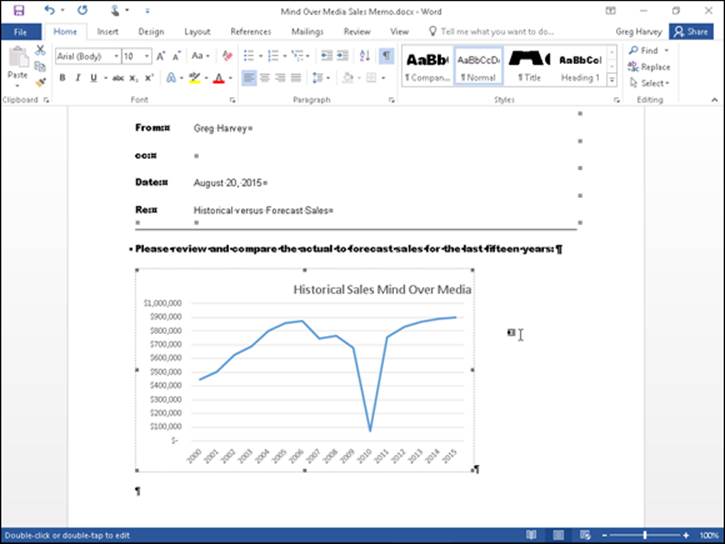
Figure 4-8: Pasting the linked chart into the Word memo.
Editing linked data
Editing data linked to Excel (as a chart or cells) is not quite as delightful as editing embedded worksheet data. For one thing, you first have to go back to Excel and make your changes — although you can easily open Excel and its workbook just by double-clicking the linked chart. The nice thing, however is that any changes that you make to the original data or chart are immediately reflected in the Word document the moment you open it.
Excel and PowerPoint 2016
The process of embedding and linking worksheet data and charts in the slides of your Microsoft PowerPoint presentations is very similar to the techniques outlined for Word. To embed a cell selection or chart, drag the data or chart object from the Excel worksheet to the PowerPoint slide. If you prefer using the cut-and-paste method, copy the data or chart to the Clipboard (Ctrl+C), switch to PowerPoint, and choose the Paste Special option from the Paste button’s drop-down menu on the Home tab of the PowerPoint Ribbon (or press Alt+HVS). Then, make sure that the Microsoft Excel Worksheet Object is selected in the As list box and the Paste option button is selected in PowerPoint’s Paste Special dialog box before you click OK.
If you want to link Excel data or a chart that you pasted into a PowerPoint presentation slide to its source Excel workbook, the only thing you do differently is to select the Paste Link option button in the Paste Special dialog box before you click OK.
Sometimes, after making changes to the linked data or chart in Excel, you need to manually update the link in the PowerPoint presentation slide to ensure that your presentation has the latest-and-greatest version of the Excel data. To manually update a linked table of Excel spreadsheet data or a linked chart, go to the slide in question, right-click the table or chart, and then choose Update Link from its shortcut menu.
Figure 4-9 illustrates how easy it is to edit an Excel chart that is embedded in a PowerPoint 2016 slide. To edit the table from in PowerPoint, all I have to do is double-click the chart on the slide. The PowerPoint Ribbon then adds a Chart Tools contextual tab with its Design and Format tab command buttons so that I can use its command buttons to make all my editing changes (see Book V, Chapter 1 to find out to create and edit Excel charts).
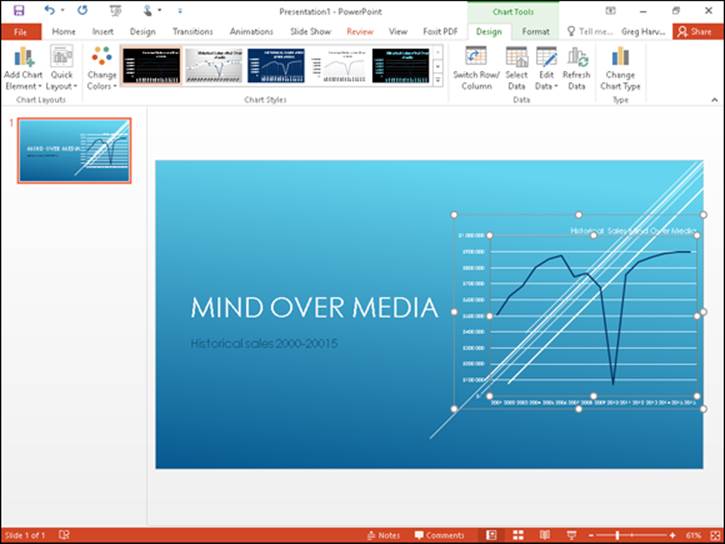
Figure 4-9: Editing the embedded Excel Scatter chart in its PowerPoint slide.
Exporting Workbooks to Other Usable File Formats
Sometimes you may need to share worksheet data with co-workers and clients who do not have Excel installed on their computers. Therefore, they can’t open up and print Excel workbook files saved either in the default XML file format (with the .xlsx filename extension) favored by Excel versions 2007 through 2016 or in the older binary file format (with the .xls filename extension) used in versions 97 through 2003.
It’s hard to imagine a co-worker or client getting by without Excel 2016, but it does happen. For those rare occasions, you can export your Excel workbook to one of three usable file formats for opening and printing with readily available software programs that support them:
· PDF files for opening with Adobe Reader or Adobe Acrobat
· XPS files for opening with the XML Paper Specification Viewer or newer web browser such as Internet Explorer 7 and up
· ODS files for opening with open source spreadsheet program OpenOffice Calc
· HTML files for opening with all types and versions of web browsers
When converting an Excel workbook to one of these other file formats, you can either change the file type in the Save As dialog box when using the File ⇒ Save As command, or you can export them from the Export screen in the Backstage view by using the File ⇒ Export command.
Saving and exporting worksheets as PDF files
The PDF (Portable Document File) file format, developed by Adobe Systems Incorporated, enables people to open and print documents without any access to the original programs with which the documents were created. All they then need installed in order to be able to open and print the worksheet-as-PDF file is a copy of Adobe Reader (a free download from www.adobe.com) or a copy of Adobe’s Acrobat software.
Excel 2016 enables you to save your workbook files directly in this special PDF file format. To save a workbook as a PDF file, choose File ⇒ Save As (Alt+FA), select the place where you want to save the new PDF file in the Save As screen, and then select PDF from the Save as Type drop-down list.
You can modify the filename and the drive and folder in which the new PDF file is saved and change any of the following options added to the bottom of the Save As dialog box:
· Standard (Publishing Online and Printing) following Optimize For (that is selected by default) or Minimum Size (Publishing Online) option buttons to compress the resulting PDF document for use on the web
· Open File after Publishing check box (selected by default) to have Excel automatically open the new workbook saved as PDF file in your copy of Adobe Reader or Acrobat
· Options button to open the Options dialog box where you can select the part of the workbook or worksheet to publish and choose to not have the document properties and accessibility tags included in the resulting PDF file
Note that if you need to restrict which parts of the current workbook are included in the new PDF file or you don’t want nonprinting information included in the resulting file, click the Options button that appears immediately above the Publish button. Doing this opens the Options dialog box.
After you designate the filename and file location and select your PDF file options, click the Save button to have Excel save the workbook (or some part of it) in a new PDF file that automatically opens in your computer’s Adobe Reader or Acrobat.
In addition to saving your workbook file in the PDF file format using the Save As dialog box, you can also accomplish the same thing from the Export screen. Choose File ⇒ Export and then click the Create PDF/XPS button (or press Alt+FEPA) to open the Publish as PDF or XPS dialog box. In the Publish as PDF or XPS (which pretty much looks and acts like the Save As dialog box when PDF is selected as the file type), PDF is automatically selected as the file format type, and you can then use the Folder list box, Filename text box, and PDF options (in a slightly different order) as needed before clicking the Publish button to save the PDF file version of your Excel workbook.
If you create an Excel 2016 workbook that incorporates new features not supported in earlier versions of Excel, instead of saving the workbook as an .xls file, thereby losing all of its 2010 enhancements, consider saving it as a PDF file so that co-workers still using pre-2007 Excel versions can still have access to the data in all its glory via the Adobe Reader.
Saving worksheets as XPS files
The XPS (XML Paper Specification) file format also enables people to open and print Excel worksheets without access to the Excel program. In fact, spreadsheets saved in the XPS file format can be opened by anyone who uses Internet Explorer 10 on Windows 7 or 8 or uses Internet Explorer 6 or higher after installing Win FX Runtime Components or, barring that, a special XML Paper Specification Viewer (which is a free download from the Microsoft website at www.microsoft.com).
As with the PDF format, you can convert a workbook to an XPS file either in the Save As dialog box opened from the Save As screen (Alt+FA) or in the Publish as PDF or XPS dialog box opened from the Export screen by clicking the Create PDF/XPS button (Alt+FEPA).
From either dialog box, you will need to choose XPS Document as the file format from the Save as Type drop-down menu. And in either dialog box, you have access (in a slightly different order) to Optimize For option buttons, Open File After Publishing check box, and the Options command button for controlling the file size and what to do after it’s created.
After choosing XPS Document as the file type, if you don’t need to edit the filename (Excel automatically appends .xps to the current filename) or the folder location, simply click the Save button (in the Save As dialog box) or Publish button (in the Publish as PDF or XPS dialog box), and Excel saves the workbook in an XPS file.
If you want Excel to automatically open the new XPS file for your inspection in Internet Explorer or the XML Paper Specification Viewer, make sure that the Open File after Publishing check box is selected before you click the Publish button.
By default, the Standard (Publishing Online and Printing) option button is selected in the Optimize For section at the bottom of the Publish as PDF or XPS dialog box. If you want to make your XPS file version of the spreadsheet smaller for viewing online, click the Minimum Size (Publishing Online) option button before you click the Publish button. Also, if you need to restrict which parts of the current workbook are included in the new XPS file or don’t want nonprinting information included in the resulting file, open the Options dialog box by clicking the Options button and select the part of the workbook or worksheet to publish and choose which nonprinting information to omit from the resulting XPS file.
Saving worksheets as ODS files
ODS (OpenDocument Spreadsheet) is the default spreadsheet file format that OpenOffice.org Calc, the spreadsheet program that comes with the open source and completely free OpenOffice suite, uses. To save your Excel workbook in this file format, you choose the OpenDocument Spreadsheet (*.ods) option at the very bottom of the Save as Type drop-down list in the Excel 2016 Save As dialog box.
Keep in mind that OpenOffice.org Calc can open native Excel workbook files (either .xls or .xlsx) just as Excel 2016 can open .ods files with any prior conversion.
Saving worksheets as HTML files
If converting your worksheets to PDF or XPS files is way too complex for your needs, you can save your worksheets as good old HTML files for viewing and printing in anybody’s web browser (as well as for publishing to your website). To save
1. Choose File ⇒ Save As or press Alt+FA to open the Save As screen in the Backstage view.
Here you select the place into which to save the HTML file.
2. Select the drive and folder where you want the web version of the workbook saved.
Excel opens the Save As dialog box with the drive and folder you just designated open and selected.
3. Choose Single File Web Page or Web Page from the Save as Type drop-down menu.
Select Single File Web Page as the file type when your workbook only has one worksheet or you want the data on all the worksheets to appear on a single page. Select Web Page when you want each worksheet in the workbook to appear on sequential web pages.
When you select either web page option, Excel expands the Save As dialog box to include the Entire Workbook (selected by default) and Selection: Sheet option buttons along with the Page Title text box and Change Title command button.
Next, you need to give a new filename to your web page in the File Name text box. Note that Excel automatically appends the filename extension .htm (for Hypertext Markup page) to whatever filename you enter here. When selecting a filename, keep in mind that some file servers (especially those running some flavor of UNIX) are sensitive to upper- and lowercase letters in the name.
4. Enter the filename for the new HTML file in the File Name text box.
By default, Excel selects the Entire Workbook option button, meaning that all the worksheets in the workbook that contain data will be included in the new HTML file. To save only the data on the current worksheet in the HTML file, you need to take Step 5.
5. (Optional) If you want only the current worksheet saved in the new HTML file, select the Selection: Sheet option button.
If you want, you can have Excel add a Page title to your new HTML file by taking Step 6. The page appears centered at the top of the page right above your worksheet data. Don’t confuse the page title with the web page header that appears on the web browser’s title bar — the only way to set the web page header is to edit this HTML tag after the HTML file is created.
6. (Optional) If you want to add a page title to your HTML file, click the Change Title button and then type the text in the Page Title text box in the Set Page Title dialog box before you click OK.
You’re now ready to save your spreadsheet as an HTML file by clicking the Save button. If you want to see how this file looks in your web browser immediately upon saving it, click the Publish button to open the Publish as Web Page dialog box and save the file from there after selecting the Open Published Web Page in Browser check box. And if you want Excel to automatically save an HTML version of the worksheet each time you save the workbook, you select the AutoRepublish Every Time This Workbook Is Saved check box as well.
7. Click the Save button to save the file without opening it in your web browser. Otherwise, click the Publish button so that you can see the web page in your browser right after saving it.
If you click the Save button, Excel closes the Save As dialog box, saves the file to disk, and returns to the Excel window (that now contains the HTML version of your workbook or worksheet in place of the original .xls file).
If you click the Publish button to view the new HTML file in your browser, Excel opens the Publish as Web Page dialog box, where you select the Open Published Web Page in Browser check box before clicking the Publish button.
8. Select the Open Published Web Page in Browser check box and then click the Publish button.
When you click the Publish button, Excel closes the Publish As Web Page dialog box, saves the spreadsheet as an HTML file, and then immediately launches your default web browsing program while at the same time opening the new HTML file in the browser. After you finish looking over the new HTML file in your web browser, click its program window’s Close button to close the browser and HTML file and to return to Excel and the original worksheet.
Keep in mind that you can control which worksheets and named ranges (see Book III, Chapter 1 for details) appear when a workbook is viewed in a web browser in the Browser View Options dialog box opened by choosing File ⇒ Export ⇒ Browser View Options and then clicking the Browser View Options button (Alt+FEBA).
If you add the Web Page Preview and Web Options commands as custom buttons to the Quick Access toolbar, you can use them to preview how a worksheet will appear as a web page locally in your web browser as well as control a whole variety of web page save options. To add these buttons, open the Customize the Quick Access Toolbar tab of the Excel Options dialog box (Alt+FTQ) and then add the Web Page Preview and Web Options from Commands Not in the Ribbon section. (See Book I, Chapter 2 for details.)
All materials on the site are licensed Creative Commons Attribution-Sharealike 3.0 Unported CC BY-SA 3.0 & GNU Free Documentation License (GFDL)
If you are the copyright holder of any material contained on our site and intend to remove it, please contact our site administrator for approval.
© 2016-2026 All site design rights belong to S.Y.A.