Microsoft Office for iPad Step by Step (2015)
Part 4: Microsoft PowerPoint for iPad
10. Prepare and deliver slide shows
In this chapter
![]() Add notes to slides
Add notes to slides
![]() Animate slide transitions
Animate slide transitions
![]() Incorporate external media content
Incorporate external media content
![]() Manage and present slide shows
Manage and present slide shows
After you create the most important content of your PowerPoint presentation—the slides—there are other modifications that you can make in preparation for actually presenting the slide show to an audience. Among these are the addition of notes, slide transitions, and embedded media.
Notes are a valuable feature of PowerPoint slide shows. You can add notes to each individual slide; for example, as development notes, speaking points, or supporting information for handouts.
Animated slide transitions can liven up a presentation and help to keep the audience’s attention. You can assign a variety of animations to accompany the change from one slide to the next.
Practice files
For this chapter, use the practice files from the iPadOfficeSBS\Ch10 folder. For practice file download instructions, see the Introduction.
If the information you’re presenting in your slide show is supported by video content—for example, statements by experts that support the concepts you discuss—you can streamline the presentation process (and also ensure that the information is always available with the slide show) byembedding the video on a slide.
This chapter guides you through procedures related to adding notes to slides, animating the transitions between slides, embedding and managing media recordings, and presenting slide shows.
Add notes to slides
A PowerPoint slide show can include many types of information; the information on the slides is intended for the audience, and the information stored in the notes attached to the slides is usually intended for the presenter. You can also provide the slide content and notes to attendees by printing Notes pages from a desktop version of PowerPoint.
 Tip
Tip
PowerPoint for iPad currently prints only full-page slides. You can use the desktop versions of PowerPoint to print various permutations of slides, notes, and note-taking areas.
You can enter ancillary information in the Notes pane while you’re developing a slide show in Normal view, or when you preview or present a slide show in Presenter view.
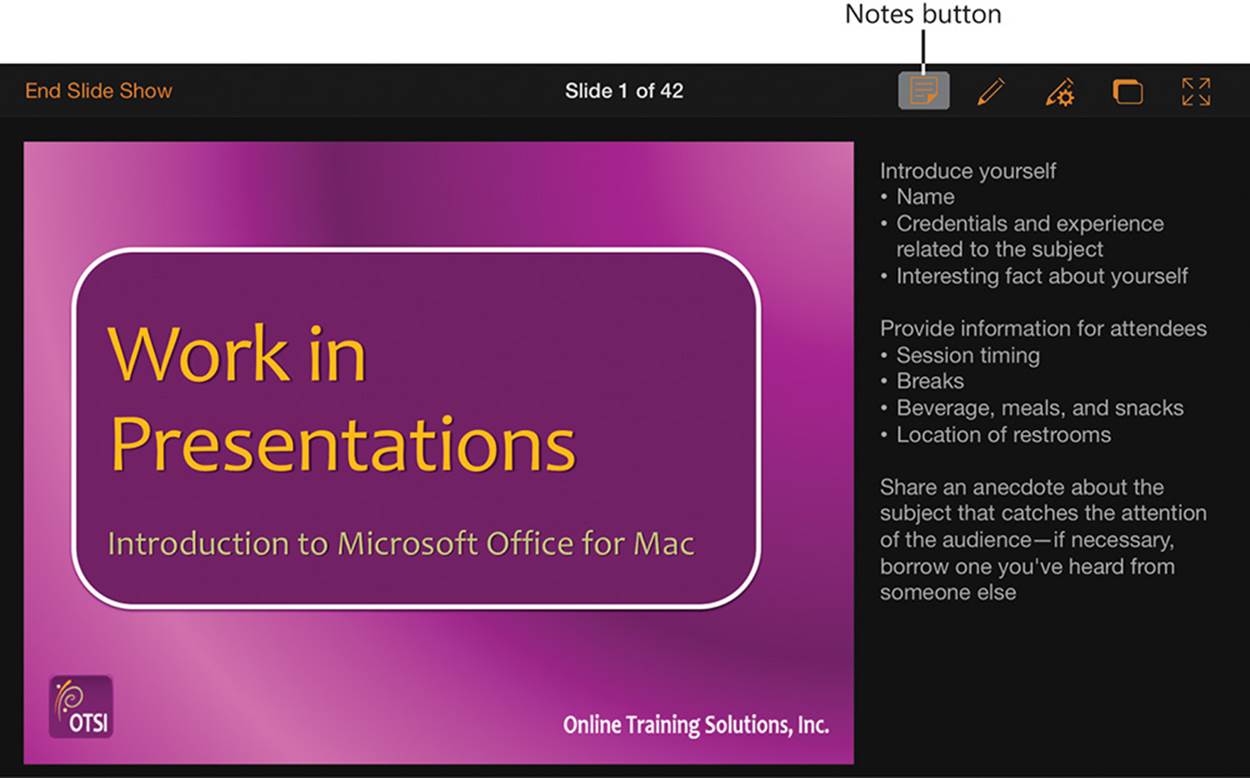
A slide and its associated notes in Presenter view
In Normal view, you open the Notes pane by tapping the Notes button in the lower-right corner of the Slide pane. This moves the Notes header up to the top of the pane above the note content area. When a slide has associated notes, a red-outlined note icon appears to the left of the wordNotes in the header to alert you to that fact.
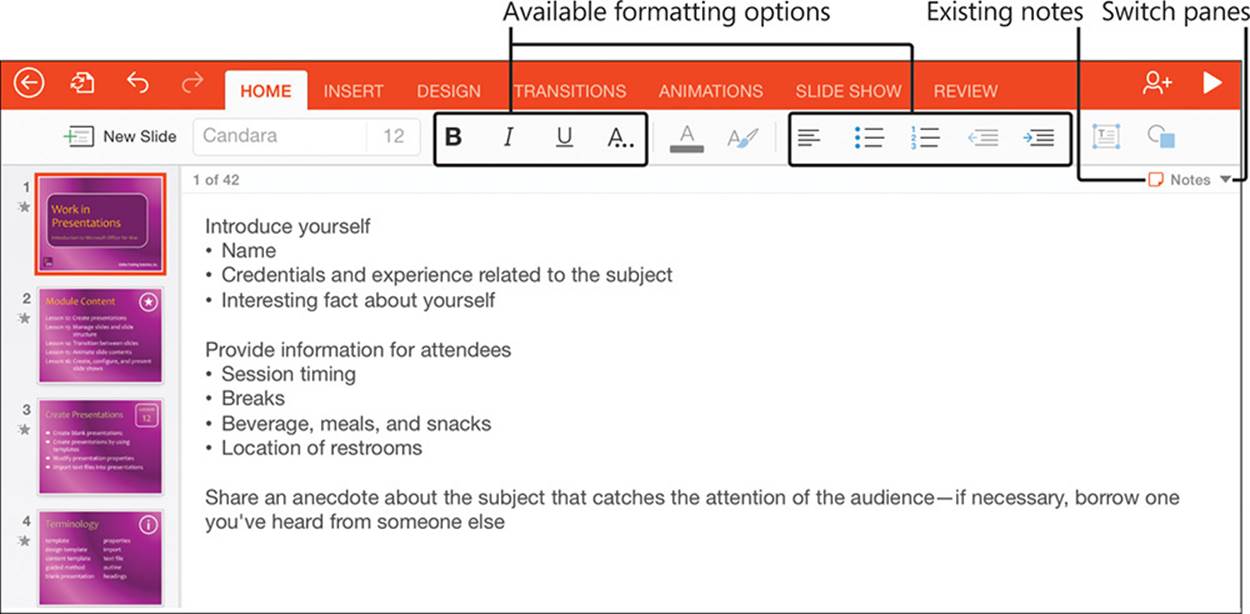
The Notes page of a slide in Normal view
You can’t display both the Slide pane and the Notes pane at the same time, but the Thumbnails pane remains available and the current slide is indicated therein by a thick red outline. You can switch to the Notes pane for a specific slide without closing the Notes pane by tapping the thumbnail of the slide you want to switch to.
Regardless of the font that is assigned to the headings and body text of the slides in your presentation, the content of the Notes pane is always 12-point Calibri. Note content can include standard paragraphs, bulleted lists, and numbered lists. In PowerPoint for iPad, you can apply basic character formatting options—bold, italic, underline, and strikethrough—and basic paragraph formatting options—alignment, indent level—to the notes when you’re working in the Notes pane. Other formatting options are unavailable. If you need to apply fancier formatting to your notes, edit them in a desktop version of PowerPoint.
Tip
You can’t apply formatting to notes in Presenter view. To format note text, display the Notes pane in Normal view and then apply formatting from the ribbon.
To display the Notes pane
1. In Normal view, tap the Notes button in the lower-right corner of the Slide pane to display the Notes pane.
Or
1. In Presenter view, tap the Notes button on the Presenter toolbar to display the Notes pane if necessary.
To add notes to a slide
1. In Normal view or Presenter view, display the Notes pane.
2. Double-tap the Notes pane to activate it for editing, and then enter the note text.
To apply character formatting to text
1. In Normal view, display the Notes pane and activate it for editing.
2. Select the text you want to format.
3. On the Home tab, do either or both of the following:
• To apply font attributes, tap the Bold, Italic, or Underline button.
• To strike through the selected text, tap the Formatting button (labeled A...) and then, on the Formatting menu, tap Strikethrough.
To clear character formatting from text
1. Select the text you want to clear the formatting from.
2. On the Home tab, tap the Formatting button, and then tap Clear Formatting.
To apply paragraph formatting to text
1. In Normal view, display the Notes pane and activate it for editing.
2. Tap anywhere in the paragraph you want to format.
Tip
To format multiple paragraphs at one time, select all the paragraphs that you want to apply the same formatting to.
3. On the Home tab, do any of the following:
• To change the paragraph alignment, tap the Alignment button and then, on the Alignment menu, tap Left, Center, Right, or Justify.
• To format the paragraph as a bulleted list, tap the Bullets button and then, on the Bullets menu, tap the bullet symbol you want to use.
• To format the paragraph as a numbered list, tap the Numbering button and then, on the Numbering menu, tap the numbering format you want to use.
• To change the paragraph indent, tap the Increase Indent or Decrease Indent button.
To hide the Notes pane
1. In Normal view, tap the Notes button in the upper-right corner of the Notes pane to redisplay the Slide pane.
Or
1. In Presenter view, tap the Notes button on the Presenter toolbar to hide the Notes pane.
Animate slide transitions
The action that occurs between the display of one slide and the display of the next slide is the slide transition. By default, when you are presenting a slide show by using PowerPoint for iPad, there is no visible transition; the content of one slide is simply replaced with the content of the next slide.
To help keep the audience’s attention, you can add an interesting animation effect that occurs as the slide show transitions from one slide to the next. In PowerPoint for iPad, you can choose from the same 46 slide transitions that are available in the desktop versions of PowerPoint.
The slide transitions are divided into three categories:
![]() Subtle transitions These transition effects provide a reasonably clean and simple movement between slides.
Subtle transitions These transition effects provide a reasonably clean and simple movement between slides.
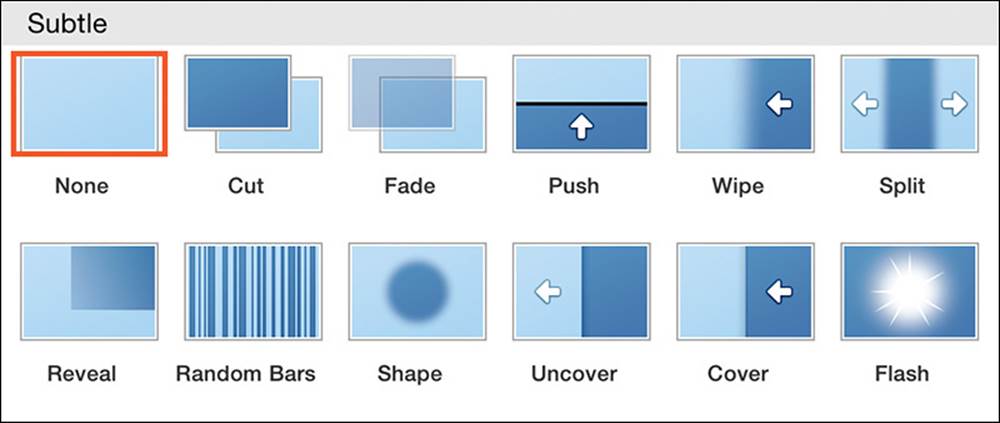
The Subtle category of transition effects
![]() Exciting transitions These include many three-dimensional effects that are a lot of fun—but be cautious, because it’s easy to overuse these effects.
Exciting transitions These include many three-dimensional effects that are a lot of fun—but be cautious, because it’s easy to overuse these effects.

The Exciting category of transition effects
![]() Dynamic Content transitions These effects animate the slide content only, and not the slide background. This creates a unique effect that can be both more dramatic and more subtle than the full-slide effects.
Dynamic Content transitions These effects animate the slide content only, and not the slide background. This creates a unique effect that can be both more dramatic and more subtle than the full-slide effects.
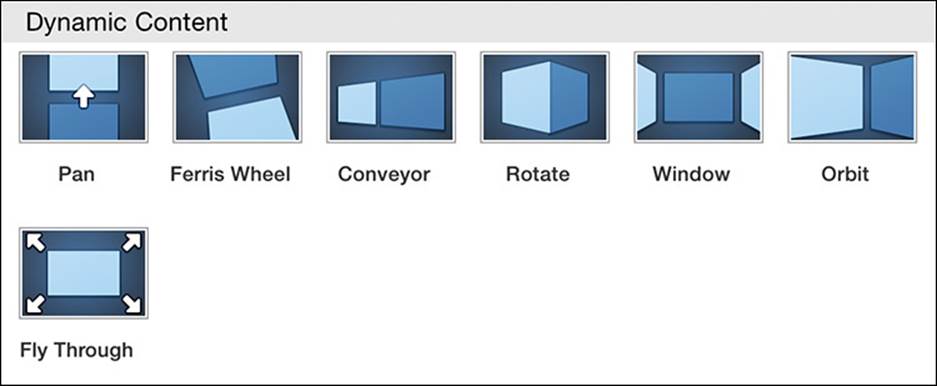
The Dynamic Content category of transition effects
The Exciting category includes the Random Transition option. It might be tempting to apply this to every slide in your presentation, but think carefully before doing so about whether random transitions will catch the attention of your audience or distract them from the slide show subject.
For almost every transition effect, you can choose from options to configure the specific behavior of the transition. Most frequently, you can choose the starting location or the direction in which the transition moves. Sometimes you can specify the shape of the effect as it occurs. Transition aspects that you can’t specify in PowerPoint for iPad (but can in the desktop versions of PowerPoint) are the trigger of the transition, the duration of the transition effect (the length of time from the beginning to the end of the transition), and the sound that plays during the transition.
You apply slide transition effects to the incoming slide—in other words, to affect the transition from slide 2 to slide 3, you apply the effect to slide 3. If you apply a transition effect to slide 1, it plays when you start the slide show.
In the Thumbnails pane and Presenter view, a shooting star adjacent to the slide number indicates that a slide transition is applied to the slide.
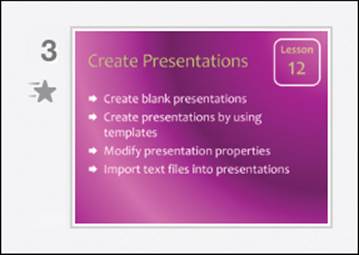
You can tell at a glance which slides have animated transitions
For the most professional and least frazzling audience experience, choose one slide transition effect for all the slides in your presentation or, if the presentation includes specific types of slides (for example, slides that display the overview, objectives, teaching points, or lab description for each section of the presentation), you can provide consistent visual cues for the audience by assigning a specific transition effect to all slides of a specific type.
To animate the transition to a slide
1. Select the slide to which you want to apply the transition.
2. On the Transitions tab, tap the Transition Effect button.
3. On the Transition To This Slide menu, tap the transition effect you want to apply.
To configure options for a transition effect
1. Apply the transition effect to the slide.
2. On the Transitions tab, tap the Effect Options button.
3. On the Effect Options menu, tap the option you want to apply to the selected transition effect on the currently selected slide.
To apply one transition effect to all slides
1. Apply the transition effect to one slide and configure the effect options for the transition.
2. On the Transitions tab, tap the Apply To All button.
To remove the transition effect from a slide
1. Select the slide that you want to remove the transition effect from.
2. On the Transitions tab, tap the Transition Effect button.
3. On the Transition To This Slide menu, in the Subtle section, tap the None thumbnail.
Incorporate external media content
In PowerPoint for iPad, you can insert a video recording from your iPad directly onto a slide, and then play the video while presenting the slide show. If you’re accustomed to switching between a presentation and video clips, this is a much smoother way of presenting information from multiple sources.
When you’re selecting a video to embed, you can preview videos at their regular speed with the soundtrack or slide forward or backward through the video content. When you select the video you want to use, PowerPoint for iPad compresses it and embeds it on the slide. You can insert multiple videos on one slide. The video images stack in order of insertion.
Video preview controls
A video that is embedded on a slide is represented by an image of the first frame of the video. There is no special tool tab for working with embedded videos, but you can use the sizing handles to resize the video on the slide, and the commands on the shortcut bar to cut, copy, paste, or delete it.
Tip
In PowerPoint for iPad, you can’t modify aspects of an embedded video, such as its length. If you want to modify a video, you can edit it in another program before you insert it, or insert it and then edit it by using the tools in a desktop version of PowerPoint.
Format embedded video images
There are no formatting options for videos, but you can work around that by copying formatting from another object or positioning a shape behind a video image to give the appearance of a frame. An easy way to apply a professional style to the embedded video and its representative image is to copy the formatting from another object.
For example, you can insert any picture on any slide (it can even be a blank slide that you use specifically as a staging location for this sort of thing), apply a picture style to the picture, copy the picture, and then paste only the formatting onto the video image.

Paste the format of a reference image onto a video preview image
SEE ALSO For information about inserting and formatting pictures on slides, see “Add visual elements to slides” in Chapter 9, “Create compelling presentations.”
You can play audio and video content on a slide only while you’re presenting the slide show. The easiest way to preview embedded audio and video recordings is to start the slide show from the current slide, either in regular presentation mode or in Presenter view. PowerPoint for iPad has a conveniently placed button at the right end of the ribbon that you can tap to start the slide show from the current slide.
When you’re presenting a slide show, you can play (and pause) embedded audio or video, move around within the recording, and control the volume by using the controls that appear when the audio icon or video placeholder image is active. When playing back a video, you can display it at the embedded size or full screen.

Playing an embedded video
Tip
A method you can use to provide a framelike effect is to insert and format a shape that is slightly larger than the video image. Position the shape on top of the image, and then on the Shape tool tab, tap the Send Backward command on the Arrange menu.
PowerPoint for iPad doesn’t officially allow you to insert audio recordings on slides, although it does support the playback of audio recordings that have been inserted in presentations by using a desktop version of PowerPoint. By default, audio recordings are represented by a discreet speaker icon on the slide. With the exception of the Full Screen option, the playback controls that are available for audio recordings are the same as those for video recordings.

Playing back an embedded audio recording
However, because PowerPoint for iPad supports the insertion of video and video soundtracks, you can get around the limitations of the app in this regard by saving the audio as a video soundtrack (with a simple video image such as a speaker icon or a video that has some significance), and then embedding that video.
Tip
From a desktop version of PowerPoint, you can insert audio clips onto slides and configure them to play for a specific period of time, while a specific slide is displayed, or through the end of the slide show.
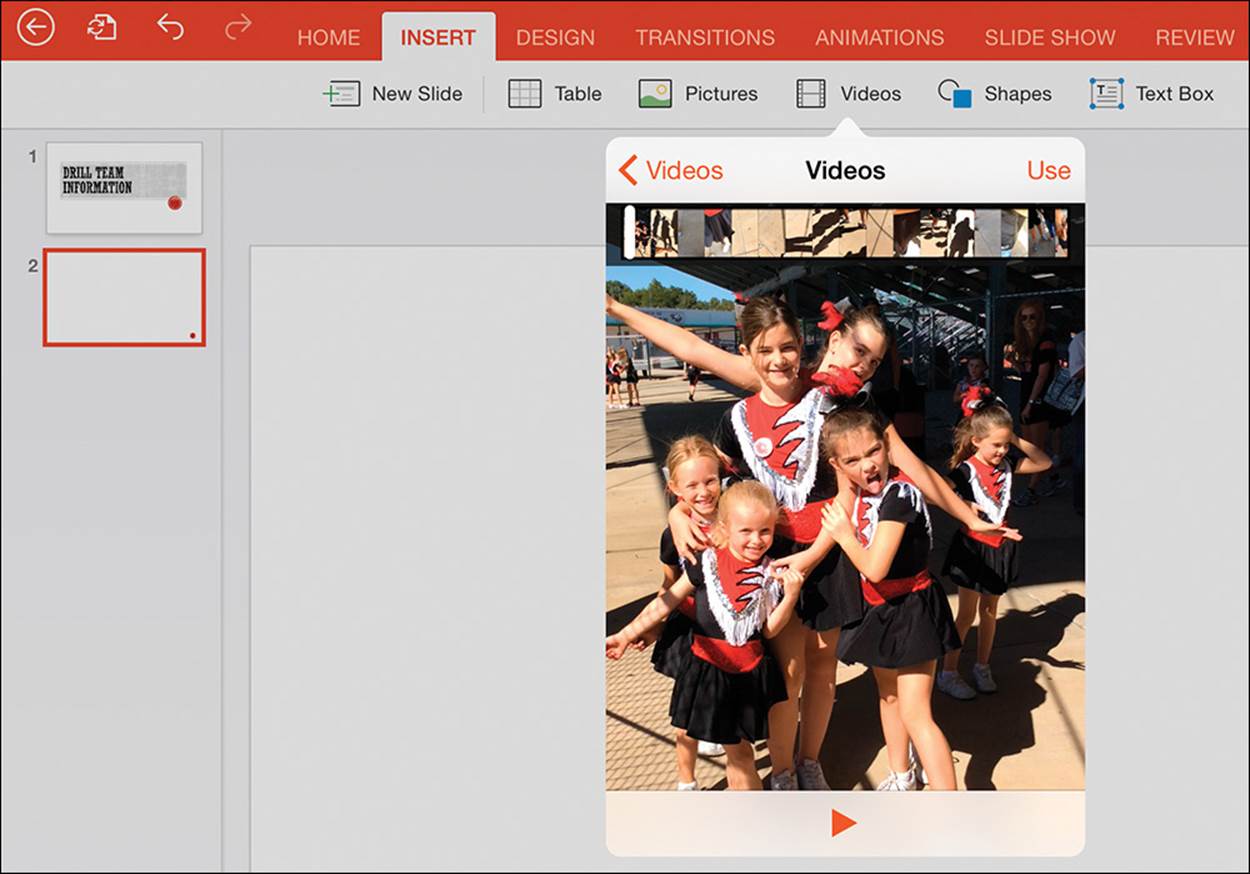
To embed a video on a slide
1. On the Insert tab, tap the Videos button.
2. Flick through the Videos library menu to locate the library that contains the video you want to use, and then tap the library to display its contents.
3. Flick through the library to locate the video you want to insert. Preview the video in any of these ways:
• To display the video thumbnail at menu width, tap the thumbnail.
• To preview a video, tap its thumbnail and then tap the Play button.
• To move through a video preview, drag the slider at the top of the Videos menu.
4. To insert a video from the Videos menu preview, tap Use.
Or
To return to the Videos library, tap Videos.
To select an embedded video
1. On the slide, tap the video preview image.
To change the dimensions of an embedded video
1. Select the video image.
2. Drag the sizing handles to resize the video image in any of the following ways:
• To resize the shape and maintain its aspect ratio, drag any round corner handle.
• To change only the height, drag the square handle on the top or bottom of the shape.
• To change only the width, drag the square handle on the left or right side of the shape.
To rotate an embedded video
1. Select the video image.
2. Drag the Rotate handle in a clockwise or counterclockwise direction until the shape is at the angle of rotation you want.
To move an embedded video
1. Select the video image.
2. To move the video to another location on the slide, drag the video to the location where you want it.
3. To move the video to a different slide, follow these steps:
a. On the shortcut bar, tap Cut.
b. In the Thumbnails pane, tap the slide you want to move the video to.
c. Tap the approximate location at which you want to insert the video.
d. On the shortcut bar, tap Paste.
To delete an embedded video
1. Select the video image.
2. On the shortcut bar, tap Delete.
To change the stacking order of videos on a slide
1. If there are two videos on the slide, follow these steps:
a. Select the video you want to be on top.
b. On the shortcut bar, tap Cut.
c. Tap an empty area of the slide to display the shortcut bar.
d. On the shortcut bar, tap Paste.
2. If there are more than two videos on the slide, follow step 1 for each video, starting with the video you want to have second from the back and continuing in order to the video you want to have in front.
Tip
PowerPoint for iPad always displays videos on the slide in the order of insertion.
To preview video content
1. At the right end of the ribbon, tap the Play button.
Or
On the Slide Show tab, tap the From Current button.
1. On the slide, tap the video you want to play.
2. In the player controls that appear, tap the Play button.

Video player controls
3. When you finish previewing the video, tap the top of the screen to display the presenter tools, and then tap End Slide Show.
To manage the playback of a video
1. On the slide, tap the video preview image.
2. In the player controls that appear, tap the Play button.
3. To manage the video playback, do any of the following:
• To pause the video, tap the Pause button.
• To move to a different location in the video, drag the progress slider.
• To adjust the audio volume, tap the Volume button, and then drag the volume slider.
• To display the video at its maximum size, tap the Full Screen button.
• To return to the original video size, tap the Exit Full Screen button.
Tip
If the player controls disappear, tap the video to redisplay them.
To manage the playback of an audio recording
1. On the slide, tap the audio icon.
2. In the player controls that appear, tap the Play button.
3. To manage the audio playback, do any of the following:
• To pause the audio playback, tap the Pause button.
• To move to a different location in the audio recording, drag the progress slider.
• To adjust the audio volume, tap the Volume button, and then drag the volume slider.
Manage and present slide shows
All the work you’ve done to create and finalize your presentation is about to pay off—you’ll deliver your presentation, the audience will go wild, and you’ll get a raise, a book contract, or international speaking engagements. Possibly. The important thing is that you will have effectively communicated information to your audience.
If you’re going to present the slide show from your iPad, you can choose from two presentation interfaces:
![]() Standard view This method runs the slide show on your iPad and shows the same view of the slides on any other screen you’re connected to (such as a conference room or auditorium display screen).
Standard view This method runs the slide show on your iPad and shows the same view of the slides on any other screen you’re connected to (such as a conference room or auditorium display screen).
![]() Presenter view This method displays a multipanel view of the slide show on your iPad and the Standard view of the slide show on the other screen. So while the remote display shows only the current slide, your iPad shows the current slide, its associated notes, and thumbnails of all the slides in the show.
Presenter view This method displays a multipanel view of the slide show on your iPad and the Standard view of the slide show on the other screen. So while the remote display shows only the current slide, your iPad shows the current slide, its associated notes, and thumbnails of all the slides in the show.
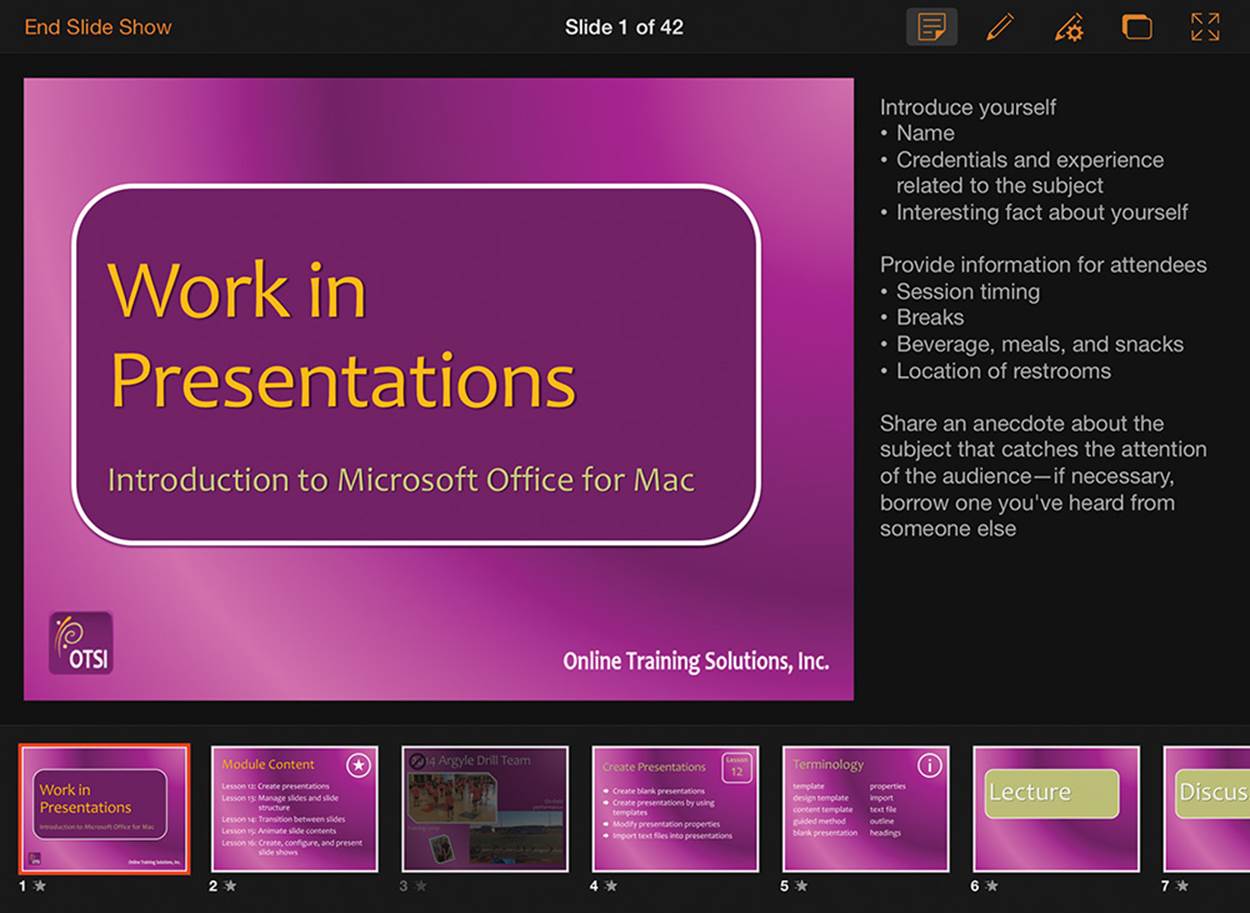
Presenter view gives you access to all aspects of a slide show
Presenter view is one of the greatest cures for stage fright that’s come along in years (a close second to picturing your audience in their underwear), because you can reference the current slide without turning your back on the audience, you can refer to the notes you’ve included to support the slide content, you know what slide is coming up next, and, if you need to, you can easily skip a slide or display a specific slide from elsewhere in the presentation.
You can run Presenter view on one monitor for the purpose of rehearsing the delivery of information and adding speaker notes. Actually delivering a presentation in Presenter view requires two monitors: one displays Presenter view for your use, and the other displays the Standard slide show view for the audience.
In either view, you have access to a set of presenter tools—displayed all the time in Presenter view and on request in Standard view.
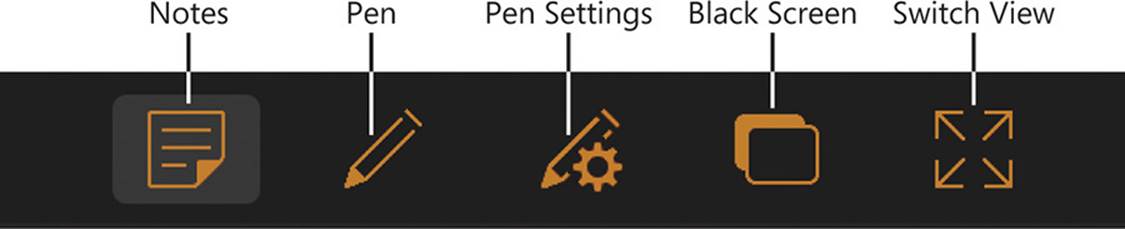
You can mark up a slide and control the display of slides by using the presenter tools
The presenter tools include a pen with multiple settings to mark up slides as you present them, and commands you can use to display a black screen when you pause a presentation and to switch to the Standard view of the presentation.

Annotate slides with any of five pen colors and five highlighter colors
To start a slide show from the current slide in Presenter view
1. On the Slide Show tab, tap Presenter View.
Or
1. While displaying a slide show in Standard view, display the Presenter toolbar, and then tap the Switch View button.
To start a slide show from the beginning in Standard view
1. On the Slide Show tab, tap From Start.
To start a slide show from the current slide in Standard view
1. On the Slide Show tab, tap From Current.
Or
1. At the right end of the ribbon, tap the Play button.
Or
1. While displaying a slide show in Presenter view, on the Presenter toolbar, tap the Switch View button.
To display the presenter tools in Standard view
1. Swipe down from the top of the screen to display the End Slide Show button and the Presenter toolbar.
To move among slides
1. To move forward in a presentation, flick from right to left.
2. To move backward, flick from left to right.
To pause and restart a slide show
1. To pause the slide show, on the Presenter toolbar, tap the Black Screen button.
2. To restart the slide show, tap the Black Screen button again.
To skip a slide
1. In Presenter view, in the thumbnail pane, tap the slide you want to display next.
Tip
To skip one or more slides in a slide show, hide them before presenting the slide show. For more information, see “Create and manage slides” in Chapter 9, “Create compelling presentations.”
To end a slide show
1. On the Presenter toolbar, tap the End Slide Show button.
To display or hide speaker notes in Presenter view
1. On the Presenter toolbar, tap the Notes button.
To annotate a slide in Presenter view
1. On the Presenter toolbar, tap the Pen button.
2. To mark up the slide, drag your finger.
3. To change the pen color or pen type, tap the Pen Settings button, and then tap the pen or highlighter color you want to change to.
4. To delete annotations, tap the Pen Settings button, and tap the eraser size you want to use. Then drag your finger to delete annotations.
Tip
The eraser won’t delete slide content other than your annotations.
Or
On the Pen Settings menu, tap Clear All.
Skills review
In this chapter, you learned how to:
![]() Add notes to slides
Add notes to slides
![]() Animate slide transitions
Animate slide transitions
![]() Incorporate external media content
Incorporate external media content
![]() Manage and present slide shows
Manage and present slide shows
Practice tasks

The practice files for these tasks are located in the iPadOfficeSBS\Ch10 folder.
Add notes to slides
Start PowerPoint, open the EnterNotes presentation, and then perform the following tasks:
1. Display slide 2 and open the Notes pane. Then enter Bunnies can have babies every 30 days. If you do not plan to breed your bunnies, be sure to have them spayed or neutered.
2. Select the text 30 days, and then apply bold formatting to it.
3. Make the second sentence a separate paragraph, and then center both paragraphs.
4. Hide the Notes pane.
Animate slide transitions
Open the AnimateTransitions presentation, and then perform the following tasks:
1. Apply a transition effect of your choice to slide 1.
2. Configure the effect options for the transition, if it has any. Then apply the slide 1 transition to all the slides.
3. Clear the transition effect from all the slides.
4. Apply the following types of transition effects:
• Slide 1 Any Exciting transition
• Slides 2 through 12 Any one Subtle transition (apply the same transition to all 11 slides)
• Slide 13 Any Dynamic Content transition
Incorporate external media content
Open the ManageRecordings presentation, and then perform the following tasks:
1. On slide 9, insert a video recording from your Camera Roll. Resize the video preview image to about one-fourth the size of the slide.
2. On slide 9, insert a picture from your Camera Roll. Resize the picture so that it is slightly smaller than the video image.
3. Apply a fancy picture effect to the picture. Then copy the picture effect to the video image.
4. Position the picture so that it overlaps the video preview image. Then change the stacking order so the video image is on the top.
5. Preview slide 9 and play the video recording, first at the embedded size and then at full screen size.
6. Move the embedded audio recording from slide 1 to slide 8, and position it to the right of the list of tips.
7. Resize the picture that the audio clip is attached to so it fits in the right margin of the slide. Maintain the original aspect ratio of the picture.
8. Preview slide 8 and play the audio clip.
Manage and present slide shows
Open the PresentShow presentation, and then perform the following tasks:
1. Display slide 2. Start the slide show from slide 2 in Standard view.
2. Switch to Presenter view, and move forward through the next three slides.
3. Use the pen tool to circle the picture of the bunny you like best with a green pen. Then circle the other picture with a red pen.
4. Pause the slide show, return to slide 1, and restart the slide show.
5. Hide the Notes pane, and then switch to Standard view.
6. Wait for the presenter tools to disappear, then redisplay them and choose any color of highlighter.
7. Use the highlighter to add an annotation to any slide in the presentation.