Microsoft Office for iPad Step by Step (2015)
Part 1: Get started with Microsoft Office for iPad
2. Get connected
In this chapter
![]() Start and activate apps
Start and activate apps
![]() Connect to additional storage locations
Connect to additional storage locations
![]() Get help with Office apps
Get help with Office apps
![]() Exit files and apps
Exit files and apps
As mentioned in Chapter 1, “Office for iPad basics,” the only credentials necessary for displaying, creating, and editing files by using Word for iPad, Excel for iPad, PowerPoint for iPad, and OneNote for iPad is a registered Microsoft account. You can activate premium features of the Word, Excel, and PowerPoint iPad apps by associating a Office 365 subscription with the apps.
Microsoft accounts and Office 365 accounts provide access to specific online storage locations associated with the account: either a OneDrive or OneDrive for Business site, and possibly a SharePoint site.
Practice files
No practice files are necessary to complete the practice tasks in this chapter.
You can access content on your OneDrive and SharePoint sites, and also on a Dropbox site if you have one, from within the Office for iPad apps or from individual iPad apps created specifically for those resources.
This chapter guides you through procedures related to starting and activating Office apps, connecting to user accounts, storing files locally and online, locating helpful resources, and exiting files and apps.
Start and activate apps
Before you can start using an Office app, you need to activate the app. Depending on the method you choose, you can end up with any one of three versions of the apps: display only, standard, or premium.
Connect to an account
When you first start Word for iPad, Excel for iPad, or PowerPoint for iPad, the app displays a series of informational screens. The final screen prompts you to sign in to the app. You have three options for continuing from this screen to the app:
![]() Sign In You can sign in to the app by using any Microsoft account or Office 365 account. If the account you sign in with is associated with an Office 365 subscription that supports the premium Office for iPad features, the app starts with full functionality. If the user account is not associated with a qualified subscription, the app presents you with two options after you enter your credentials:
Sign In You can sign in to the app by using any Microsoft account or Office 365 account. If the account you sign in with is associated with an Office 365 subscription that supports the premium Office for iPad features, the app starts with full functionality. If the user account is not associated with a qualified subscription, the app presents you with two options after you enter your credentials:
• Create and Edit for Free This option activates the basic feature set of the app, which enables you to display, edit, and create documents, workbooks, presentations, and notebooks.
• Go Premium This option displays a selection of current personal Office 365 subscription plans. You can follow the subscription process to activate the premium features of Word for iPad, Excel for iPad, and PowerPoint for iPad. (OneNote for iPad doesn’t have a premium version.)
![]() Create an Account This option starts the process of creating a Microsoft account, and then returns you to the Sign In screen. You can sign in with your new Microsoft account to activate the standard version of the app, or subscribe to Office 365 to activate the premium version of the app.
Create an Account This option starts the process of creating a Microsoft account, and then returns you to the Sign In screen. You can sign in with your new Microsoft account to activate the standard version of the app, or subscribe to Office 365 to activate the premium version of the app.
![]() Sign In Later This option starts the app in a limited functionality mode in which you can display (but not edit) documents, workbooks, and presentations. If you choose this option, you can connect to an account (and activate the standard or premium feature set) at a later time.
Sign In Later This option starts the app in a limited functionality mode in which you can display (but not edit) documents, workbooks, and presentations. If you choose this option, you can connect to an account (and activate the standard or premium feature set) at a later time.
 Tip
Tip
At any time, you can continue to the app by clicking an option, or cancel the sign-in process by closing the window.
One activation option that isn’t obvious is that of connecting to an Office 365 subscription that is associated with your Apple ID but that is not yet connected to the iPad you’re working on. You can access the process necessary to reconnect to a disconnected account by following the Go Premium path and selecting any of the subscription options.
Activating any one Office product on your computer, iPad, or other device automatically activates all the Office apps on the device.
Sidebars in the first chapter of each app-specific part of this book provide information about the features that are available in the iPad, online, and desktop versions of Word, Excel, PowerPoint, and OneNote. Outside of the procedures in this topic that are specific to connecting to Microsoft accounts and Office 365 accounts, the procedures in this book assume that you have access to the full feature sets of each app.
 See Also
For information about the functionality available in Word for iPad, see Chapter 4, “Create professional documents”; in Excel for iPad, see Chapter 7, “Store and retrieve data”; in PowerPoint for iPad, see Chapter 9, “Create compelling presentations”; and in OneNote for iPad, see Chapter 11, “Store information in digital notebooks.”
To start an Office app
1. On the Home Screen, locate the icon for the app you want to start, and then tap the icon.
Tip
It might be necessary to swipe left or right to a different Home Screen to find the app icon or the folder that contains the app.
Or
Locate the app on any page of the App Store, and tap the Open button next to the app name.
Or
Display the app information page, and then tap the Open button.
Organize apps in folders
To simplify the process of finding the Office apps (or any set of related apps) that you’ve installed on your iPad, you can put them all into one folder. Grouping apps in folders also cuts down on the amount of swiping you have to do to locate apps on the Home Screen. This is especially useful if you have a lot of apps installed.
To create a folder, follow these steps:
1. On the Home Screen, tap and hold any app icon to activate all the app icons.
2. Locate the icons for two of the apps you want to group. Drag one app icon on top of the other app icon and hold it there briefly until a box appears around the icons.
When you release the icon, the new folder opens. Depending on the apps you grouped, the folder might already have a meaningful name.
To add apps to an existing folder, simply drag the app icons onto the folder to drop them inside it. You can access all your folders from the Home Screen. (You can’t create subfolders within these top-level folders.)
To change a folder name, follow these steps:
1. Open the folder and activate the app icons.
2. Tap the existing folder name to activate it for editing. Then edit or replace the name.
3. Press the Home button to leave the editing mode.
To remove an app from a folder, follow these steps:
1. Open the folder and activate the app icons.
2. Drag the app icon from the box that denotes the folder to the space outside the box.
When only one app remains in the folder, the folder is automatically deleted.
To connect to an Office app for the first time
1. Tap or flick through the Office 365 sign-in screen series.
2. On the Sign in now screen, do one of the following:
• To sign in with an existing account, tap Sign In, enter your credentials on the Sign in screen that appears, and then follow the process to activate the standard or premium versions of the Office for iPad apps.
• To create a Microsoft account that you can use to activate the standard versions of the Office for iPad apps, tap Create an Account, and then follow the process for creating a Microsoft account.
See Also
For information about creating Microsoft accounts, see “Install Office for iPad apps” in Chapter 1, “Office for iPad basics.”
• To start the app in read-only mode, tap Sign In Later.
Manage account connections
When you start Word, Excel, or PowerPoint on your iPad for the first time, or if you weren’t working in a specific file the last time you exited the app, the app displays the Open page of the Backstage view. (This is different from the experience on the desktop version of the program, which displays a blank file.)
If the app isn’t connected to a user account, the words Sign In appear below the Account button and only the local iPad storage is available.
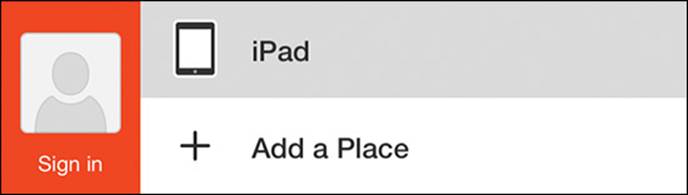
OneDrive, SharePoint, and Dropbox storage locations aren’t shown until you connect to an account
 Tip
Tip
In this book, information that applies both to Microsoft accounts and to organizational accounts refers generically to the account you use to sign in to Office apps as a user account. The process of connecting an app to a user account is accomplished by signing in using the account credentials.
If you signed in to the app with a user account, the Account button displays your name, and the Account menu that appears when you tap the Account button provides access to your connected storage resources, and to account-specific settings.
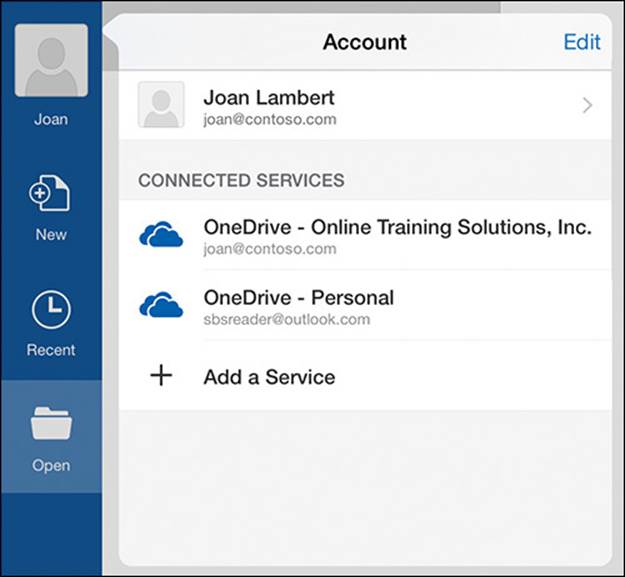
You can manage account-specific settings from the Account menu
See Also
For information about cloud storage options, see “Connect to additional storage locations” later in this chapter.
Until you activate the premium features of an app, the Go Premium button (which is represented by a shopping cart icon) appears at the bottom of the File bar. Although the button displays a shopping cart, if you have an existing Office 365 subscription, no purchase is required.
To connect to an account from within an Office app
1. If necessary, tap the Back button (located at the left end of the ribbon) to display the Backstage view of the app.
The Account button at the top of the File bar is labeled Sign in.
2. On the File bar, tap the Account button.
3. On the Sign In screen, enter the email address associated with your Microsoft account or Office 365 account, and then tap Next.
4. On the secondary Sign In screen, re-enter the email address, enter the associated account password, and then tap Sign In.
The Account button displays your account name to indicate that you’re signed in.
To activate premium features from within an app
1. Connect (sign in) to Office by using an account that has an associated Office 365 license.
Or
1. Display the Backstage view of the app.
2. At the bottom of the File bar, tap the Go Premium button, and then do one of the following:
• Tap Activate by Signing In, and then provide the credentials of an account that has an Office 365 subscription.
• Tap one of the available subscription options, review the details and price, tap Buy Now, and provide the necessary account information.
• Tap one of the available subscription options, tap Restore Previous Purchase, tap Buy, and enter the password for your Apple ID to sign in to the iTunes Store and restore a previously connected subscription.
Alternative file access methods
If you’re accustomed to working with Word, Excel, or PowerPoint on other platforms, one experience that you might find different when working with the iPad apps is that the most usual method of working in a file is to first start the app, and then open the file you want to work with from within the app. Because the iPad doesn’t have a native browsable file storage system like those provided by the Windows and Mac operating systems, you can’t navigate to and open the files stored on your iPad from outside of the app.
SEE ALSO For information about managing files from iTunes, see the sidebar “iTunes support for the iPad” in Chapter 1, “Office for iPad basics.”
Methods for opening files on your iPad from outside of the apps include the following:
![]() You can browse through the contents of your OneDrive or OneDrive for Business site by using the related iPad app, and open files directly in Word, Excel, PowerPoint, or OneNote from within those apps.
You can browse through the contents of your OneDrive or OneDrive for Business site by using the related iPad app, and open files directly in Word, Excel, PowerPoint, or OneNote from within those apps.
![]() You can browse through the contents of your Dropbox site and open files directly in Word, Excel, or PowerPoint from within the Dropbox app.
You can browse through the contents of your Dropbox site and open files directly in Word, Excel, or PowerPoint from within the Dropbox app.
![]() You can open a OneDrive, OneDrive for Business, SharePoint, or Dropbox site in Safari or another web browser and open files from that site.
You can open a OneDrive, OneDrive for Business, SharePoint, or Dropbox site in Safari or another web browser and open files from that site.
![]() If you receive a document, workbook, or presentation as an attachment to an email message, you can display the file content or open the file for editing.
If you receive a document, workbook, or presentation as an attachment to an email message, you can display the file content or open the file for editing.
![]() If you receive a link to a OneNote notebook in an email message, you can open the notebook from the message in OneNote Online, and from there you can open the notebook in OneNote.
If you receive a link to a OneNote notebook in an email message, you can open the notebook from the message in OneNote Online, and from there you can open the notebook in OneNote.
Connect to additional storage locations
Signing in to a user account connects the Office apps to the online storage location associated with that account. Microsoft accounts have associated OneDrive storage sites, personal Office 365 accounts have OneDrive storage sites, and business Office 365 accounts have OneDrive for Business storage sites.
See Also
For more information about Microsoft accounts and Office 365 accounts, see “Install Office for iPad apps” in Chapter 1, “Office for iPad basics.”
The default storage location for Office files you save to your iPad is your iPad. You can connect to multiple online storage locations, including OneDrive, OneDrive for Business, SharePoint, and Dropbox sites.
 Important
Apple offers the iCloud online storage solution. iCloud is not available as a storage location for files you create and edit in Word, Excel, or other Office apps. You can configure iCloud as a backup location for the contents of your iPad.
Each storage location is referred to as a Place. You can add Places by connecting to services or specifying locations. You can open files that are stored in any of the Places you connect to, and save files to those same Places.
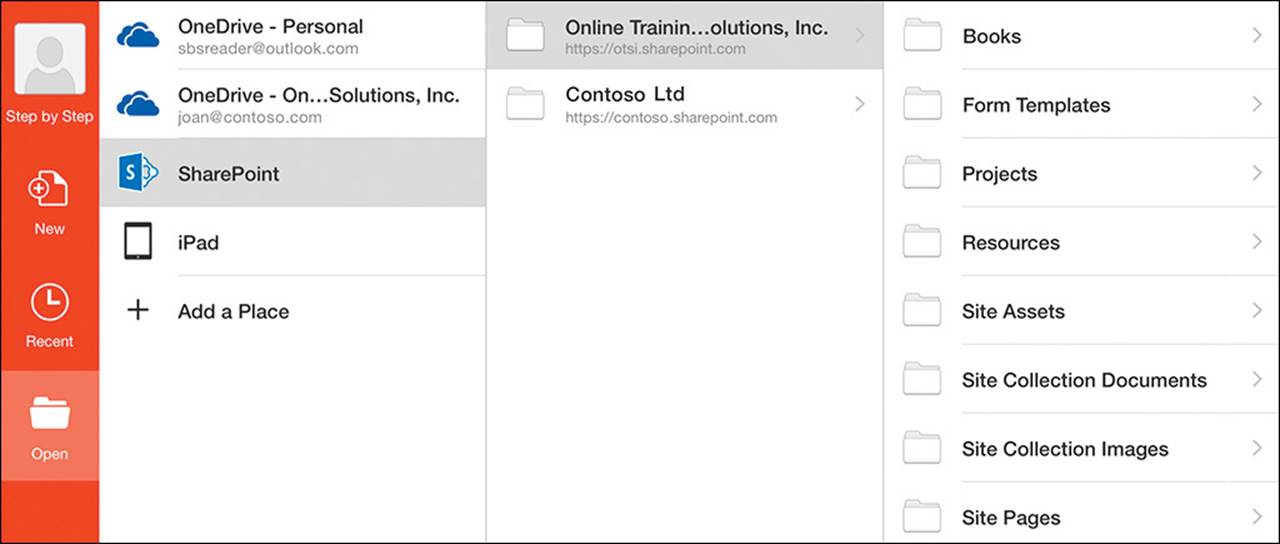
Individual SharePoint sites are organized within the SharePoint Place
Tip
You can connect to multiple OneDrive sites or SharePoint sites. Each OneDrive site appears as a place and each SharePoint site as a subset of the SharePoint place.
Use OneDrive to work anywhere
If you’re new to the world of OneDrive, here’s a quick tutorial to help you get started.
OneDrive is a cloud-based storage solution. The purpose of OneDrive is to provide a single place for you to store and access all your files. Although this might seem like a simple concept, it provides major value for people who use Word or other Office products on multiple devices, including computers running Windows, Mac computers, iPads and other tablets, and Windows, iPhone, and Android smartphones.
For example, you can create a file on your desktop computer at work, edit it on your iPad at home, and review it on your smartphone while you’re waiting for your lunch to be served at a restaurant. If you use the full suite of Office products within your organization, you can even present the file in a Skype for Business (formerly Lync) meeting from your tablet PC, all while the file is stored in the same central location.
There are currently two types of OneDrive—one for personal use and one for business use:
![]() OneDrive A personal OneDrive storage site, formerly known as a SkyDrive, is provided free with every Microsoft account. Each OneDrive is linked to a specific account.
OneDrive A personal OneDrive storage site, formerly known as a SkyDrive, is provided free with every Microsoft account. Each OneDrive is linked to a specific account.
![]() OneDrive for Business An organizational OneDrive storage site, formerly part of SharePoint MySites, is provided with every business-level Office 365 subscription license. These storage locations are part of an organization’s Office 365 online infrastructure.
OneDrive for Business An organizational OneDrive storage site, formerly part of SharePoint MySites, is provided with every business-level Office 365 subscription license. These storage locations are part of an organization’s Office 365 online infrastructure.
You might have both types of OneDrive available to you; if you do, you can connect to both from the Office for iPad apps.
In this book, the personal and organizational versions are referred to generically as OneDrive sites except in instructions that are specific to one version or the other.
To make OneDrive a realistic one-stop storage solution, Microsoft has chosen to support the storage of very large files (up to 10 gigabytes [GB] each) and to provide a significant amount of free storage—from a minimum of 15 GB for every Microsoft account, to unlimited storage for Office 365 subscribers!
By default, files that you store on your OneDrive site are password-protected and available only to you. You can share specific files or folders with other people by sending a personalized invitation or a generic link that allows recipients to view or edit files. You can also create a collaboration space called a OneDrive Group, in which multiple people can freely create and manage files.
You can access files stored on your OneDrive from your iPad in several ways:
![]() From within the Word, Excel, PowerPoint, or OneNote apps when opening or saving a file.
From within the Word, Excel, PowerPoint, or OneNote apps when opening or saving a file.
![]() Through the OneDrive or OneDrive for Business apps.
Through the OneDrive or OneDrive for Business apps.
![]() Through a web browser such as Safari. Personal OneDrive sites are available at https://onedrive.live.com; organizational OneDrive sites have addresses linked to your Office 365 account, such as https://contoso-my.sharepoint.com/personal/joan_contoso_com/.
Through a web browser such as Safari. Personal OneDrive sites are available at https://onedrive.live.com; organizational OneDrive sites have addresses linked to your Office 365 account, such as https://contoso-my.sharepoint.com/personal/joan_contoso_com/.
When you’re working on a computer, you have even more access to the files that are stored on your OneDrive site:
![]() On a computer running Windows, you can synchronize your OneDrive site contents with the computer to make the OneDrive contents available in File Explorer.
On a computer running Windows, you can synchronize your OneDrive site contents with the computer to make the OneDrive contents available in File Explorer.
![]() On a Mac computer, you can install a OneDrive app and synchronize your OneDrive with the app.
On a Mac computer, you can install a OneDrive app and synchronize your OneDrive with the app.
Because OneDrive and OneDrive for Business file storage locations are easily configurable in all versions of Word, Excel, PowerPoint, and OneNote, OneDrive is a simple and useful cloud storage option. And best of all, it’s completely free!
Connect to a remote storage location
Creating a Microsoft account simultaneously creates a OneDrive online storage account on which you can store files that you create in Office apps or other apps. Since the inception of OneDrive, the amount of free storage granted to OneDrive users has continually increased.
OneDrive for Business is the online storage provided to each user who has a business subscription to Office 365. You access this storage from your organization’s SharePoint site by using your Office 365 credentials. You can also add it to the list of Places that is available in an Office app.
To add a storage location from within an Office app
1. At the left end of the ribbon, tap the Back button to display the Backstage view.
2. On the File bar, tap Open to display the storage locations you’re connected to.
3. On the Open page, tap Add a Place.
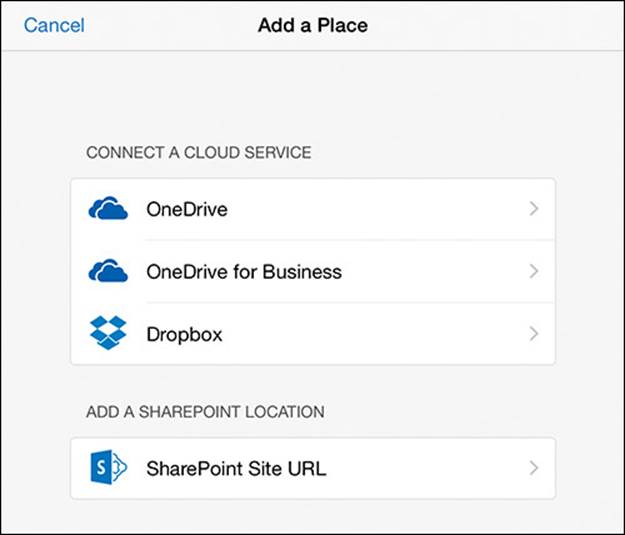
The Add A Place window displays the types of storage locations you can connect to
4. In the Add a Place window, do one of the following:
• Tap OneDrive, enter your Microsoft account credentials, and then tap the Sign In button.
• Tap OneDrive for Business, enter your organizational credentials, and then tap the Sign In button.
• Tap Dropbox, enter the email address and password associated with your Dropbox account, and then tap the Sign in button.
• Tap SharePoint Site URL, enter the SharePoint site address (including https:// if it’s a secure site), and then tap the Next button. Enter your SharePoint site credentials if prompted to do so.
Or
1. On the File bar, tap the Account button, and then tap Add a Service.
2. In the Add a Service window, do one of the following:
• Tap OneDrive, enter your Microsoft account credentials, and then tap Sign In.
• Tap OneDrive for Business, enter your organizational credentials, and then tap Sign In.
Tip
SharePoint sites you’re connected to appear in the Connected Services list for the account, but you can’t add a SharePoint site from that location.
Synchronize OneDrive with desktop computers
Your OneDrive is easy to access from within the Office apps on the iPad, but to fully take advantage of it as a central file storage location, you can synchronize it with your desktop computer and browse its contents as you would those of any storage folder.
To synchronize your OneDrive contents with a computer running Windows 7 or Windows 8, follow these steps:
1. In Internet Explorer or another web browser, display the OneDrive download site at https://onedrive.live.com/about/en-us/download.
2. With Windows selected in the operating system list, tap or click the Download now button for the OneDrive software you want to install.
3. Run the OneDriveSetup installation file and configure your preferences.
To synchronize your OneDrive contents with a Mac, follow these steps:
1. Install the OneDrive app from the App Store (not from iTunes—the full app is available only from the App Store).
2. Start the OneDrive app, and then configure your preferences, which include:
• Whether to start OneDrive automatically.
• Which folders to synchronize with OneDrive.
• Whether to display the OneDrive icon in the Dock.
3. To simplify the process of saving files to OneDrive, add the OneDrive folder to your Favorites list by dragging the folder to the Finder.
The OneDrive app for the Mac requires Mac OS X Lion (10.7) or later. For more information, go to windows.microsoft.com/en-us/onedrive/mac-app-faq.
Get help with Office apps
While you’re working in Word, Excel, PowerPoint, or another Office app on your iPad, you can access general information and helpful tips from the Help module.

The Excel Help module
Important
The content of the Help module is stored online, so you can access it only when your iPad is connected to the Internet.
If you don’t find the information you’re looking for in the Help file, you can consult online resources including these:
![]() Microsoft Office Mobile website Visit office.microsoft.com/mobile and tap the links on the top link bar to display information about apps, subscriptions, support options, and your account.
Microsoft Office Mobile website Visit office.microsoft.com/mobile and tap the links on the top link bar to display information about apps, subscriptions, support options, and your account.
![]() Microsoft Community forum Product experts and users participate in moderated online discussions about specific product features and issues. You can search the forum discussions to find out whether other people have had the same problem and what they’ve done to resolve it.
Microsoft Community forum Product experts and users participate in moderated online discussions about specific product features and issues. You can search the forum discussions to find out whether other people have had the same problem and what they’ve done to resolve it.
![]() Microsoft Answer Desk Product advisors provide technical support, account information, and product recommendations through a live chat interface.
Microsoft Answer Desk Product advisors provide technical support, account information, and product recommendations through a live chat interface.
To open the Help module for the current app
1. Open any file in the app to display the ribbon.
2. Near the left end of the ribbon, tap the File button.
3. On the File menu, tap Help and Support.
To access community discussions relevant to the current app
1. Visit answers.microsoft.com/en-us/office/forum/office_mobile from any computer.
Or
1. Open the Help module.
2. Scroll to the Still have questions? section at the end of the main page.
3. In the paragraph that follows the heading, tap the Microsoft Community link.
To chat with a support person
1. Visit support.microsoft.com/contactus from any computer.
Or
1. Open the Help module.
2. In the Still have questions? section at the end of the main page, tap the Answer Desk link.
Exit files and apps
In any Office for iPad app, you can have only one file open in the app window at a time. Opening a second file doesn’t start a second instance of the app, as you might be accustomed to when working with Office files on other platforms—the second file simply replaces the first file in the same app window.
When working in the primary Office for iPad apps, you can’t simply close an open file. You have the following options for leaving a Word, Excel, or PowerPoint file:
![]() Delete the file, if you haven’t yet saved it for the first time.
Delete the file, if you haven’t yet saved it for the first time.
See Also
For information about deleting unsaved files, see “Create, open, and save files” in Chapter 3, “Create and manage files.”
![]() Open a different file in the current app window (thereby closing the current file).
Open a different file in the current app window (thereby closing the current file).
![]() Exit the app.
Exit the app.
You can’t exit an Office for iPad app from within the app window; you must first display the list of running apps and then exit the app by dismissing it from the list.
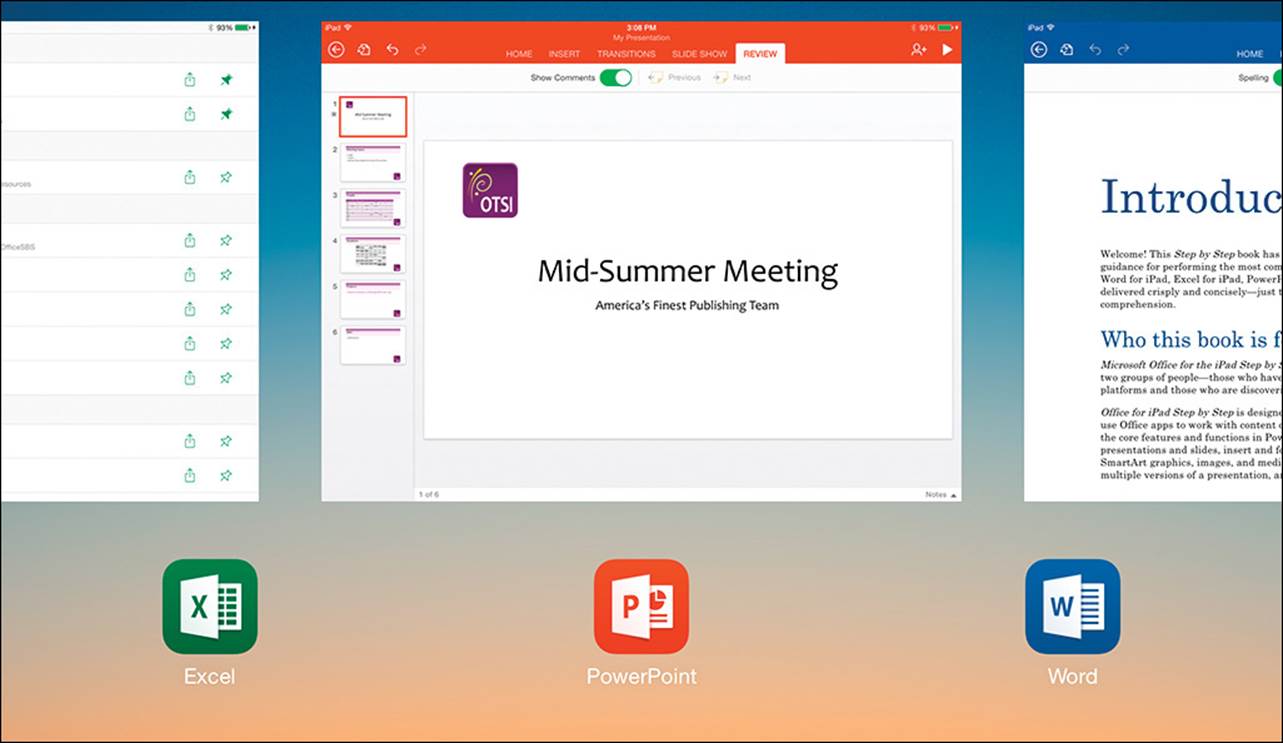
App icons and app preview screens help you quickly identify apps
To exit an Office app
1. Use one of the following methods to display the currently open apps:
• From within the app window, flick up with four or five fingers.
• Press the Home button twice.
2. Flick left or right if necessary to locate the app you want to exit.
See Also
For information about multitasking gestures, see the sidebar “Switch among running apps” on the next page.
3. Flick the app preview screen up past the top of the window.
Skills review
In this chapter, you learned how to:
![]() Start and activate apps
Start and activate apps
![]() Connect to additional storage locations
Connect to additional storage locations
![]() Get help with Office apps
Get help with Office apps
![]() Exit files and apps
Exit files and apps
Switch among running apps
It’s likely that you’ll run more than one app at a time on your iPad (for example, you might concurrently run the Word, Excel, Mail, and FaceTime apps), but you can interact with only one app at a time. The process of navigating among apps is different from that of navigating among program windows on a desktop computer. If you’re not already familiar with iPad app-switching techniques, here is a quick tutorial.
You can switch among apps in two ways:
![]() From within an app, use four or five fingers to flick left or right between the open apps.
From within an app, use four or five fingers to flick left or right between the open apps.
![]() Use one of the following techniques to display the open apps:
Use one of the following techniques to display the open apps:
• Use four or five fingers to flick up from within the app window.
• Press the Home button twice.
Then flick left or right to locate the app you want to make active, and tap the app preview screen or icon.
The four-finger and five-finger techniques work only when multitasking gestures are turned on (as they are by default). You can turn multitasking gestures on and off from the General page of the Settings app.
SEE ALSO For related information, see the sidebar “Switch among files” in Chapter 3, “Create and manage files.”
Practice tasks

No practice files are necessary to complete the practice tasks in this chapter.
Start and activate apps
Perform the following tasks:
1. Start the Excel for iPad app.
2. If the app is not already connected to a user account, provide your Microsoft account or Office 365 account credentials.
3. Connect to a user account.
4. If the app is not already activated, link to an existing Office 365 subscription or subscribe to Office 365.
5. Activate Office.
Connect to additional storage locations
Start Word for iPad, and then perform the following tasks:
1. Add your OneDrive or OneDrive for Business storage site to your Places list, and browse its contents from within Word.
2. Install the appropriate OneDrive management app or apps on your iPad:
• If you have only personal OneDrive storage sites, install the OneDrive app.
• If you have only organizational OneDrive storage sites, install the OneDrive for Business app.
• If you have personal and organizational OneDrives, install both apps.
3. Connect the app or apps you installed in step 2 to your OneDrive storage sites.
4. If you work with files that are stored on a SharePoint site, add the site to your Places list, and browse its contents from within Word.
Get help with Office apps
Start PowerPoint for iPad, and then perform the following tasks:
1. Display the PowerPoint Help module.
2. Locate information in the Help module about new features in PowerPoint for iPad.
3. Locate information about accessibility options for PowerPoint.
4. Visit the Microsoft Community forum for PowerPoint, and read at least two discussions.
Exit files and apps
With the Word for iPad, Excel for iPad, and PowerPoint for iPad apps running, perform the following tasks:
1. Display the list of running apps.
2. Exit each of the apps.