Training Guide Installing and Configuring Windows Server 2012 R2 (2014)
Chapter 7. Hyper-V virtualization
Virtualization is rapidly becoming the essential foundation for today’s data center environments. Both private and public cloud computing are based on virtualization technologies, as is the emerging Virtual Desktop Infrastructure (VDI) paradigm that can provide benefits beyond those provided by traditional desktop computing for certain scenarios. Being able to implement and manage a virtualization infrastructure, therefore, is becoming a key job role for data center administrators.
The Hyper-V server role of Microsoft Windows Server provides an out-of-the-box platform for virtualizing both server workloads and desktops. The numerous enhancements and improvements made to Hyper-V in Windows Server 2012 and Windows Server 2012 R2 make it easier than ever to deploy, configure, manage, and maintain an organization’s virtualized computing infrastructure. This chapter demonstrates how to deploy and manage virtualization hosts and virtual machines by using both the GUI administration tools and Windows PowerShell cmdlets included in Windows Server 2012 and Windows Server 2012 R2.
Lessons in this chapter:
![]() Lesson 1: Deploying and configuring Hyper-V hosts
Lesson 1: Deploying and configuring Hyper-V hosts
![]() Lesson 2: Deploying and configuring virtual machines
Lesson 2: Deploying and configuring virtual machines
![]() Lesson 3: Managing virtual machines
Lesson 3: Managing virtual machines
Before you begin
To complete the practice exercises in this chapter
![]() You need to know how to perform a clean install of Windows Server 2012 R2 and perform initial configuration tasks like configuring the server’s TCP/IP settings for Internet connectivity.
You need to know how to perform a clean install of Windows Server 2012 R2 and perform initial configuration tasks like configuring the server’s TCP/IP settings for Internet connectivity.
![]() You should have some familiarity with using Hyper-V Manager to manage hosts running Windows Server 2008 R2 or Windows Server 2008.
You should have some familiarity with using Hyper-V Manager to manage hosts running Windows Server 2008 R2 or Windows Server 2008.
![]() You also should have at least rudimentary knowledge of using Windows PowerShell.
You also should have at least rudimentary knowledge of using Windows PowerShell.
Lesson 1: Deploying and configuring Hyper-V hosts
The first step in implementing a virtualization infrastructure is deploying and configuring the servers that will host your virtualized workloads. For the Windows Server platform, this means planning, installing, and configuring Hyper-V hosts. This lesson helps you understand the issues and considerations involved in planning host deployment. The lesson also demonstrates how to configure storage and networking for Hyper-V hosts.
After this lesson, you will be able to:
![]() Describe the various considerations involved in planning the deployment of Windows Server 2012 and Windows Server 2012 R2 Hyper-V hosts.
Describe the various considerations involved in planning the deployment of Windows Server 2012 and Windows Server 2012 R2 Hyper-V hosts.
![]() Describe some of the scalability, availability, mobility, security, management, and disaster-recovery improvements in Hyper-V.
Describe some of the scalability, availability, mobility, security, management, and disaster-recovery improvements in Hyper-V.
![]() Describe the different types of virtual switches you can create on Hyper-V hosts.
Describe the different types of virtual switches you can create on Hyper-V hosts.
![]() Describe the different types of storage devices that hosts can use.
Describe the different types of storage devices that hosts can use.
![]() Install the Hyper-V role by using either Server Manager or Windows PowerShell on any installation option of Windows Server 2012 or Windows Server 2012 R2.
Install the Hyper-V role by using either Server Manager or Windows PowerShell on any installation option of Windows Server 2012 or Windows Server 2012 R2.
![]() Configure virtual machine storage for hosts.
Configure virtual machine storage for hosts.
![]() Create and configure virtual switches on hosts.
Create and configure virtual switches on hosts.
![]() Perform additional host-configuration tasks.
Perform additional host-configuration tasks.
Estimated lesson time: 30 minutes
Planning Hyper-V deployment
Successful deployment requires careful planning ahead of time to ensure problems don’t arise during or after the deployment process. The following issues should be considered when planning the deployment of Hyper-V hosts within your data center:
![]() Hardware
Hardware
![]() Licensing
Licensing
![]() Networking
Networking
![]() Storage
Storage
![]() Management
Management
![]() Security
Security
![]() Scalability
Scalability
![]() Availability
Availability
![]() Mobility
Mobility
![]() Disaster recovery
Disaster recovery
You should consider each of these issues from both the host and virtual machine perspective before you begin to deploy Hyper-V hosts within your data center. Although the sections that follow focus mainly on considerations relating to planning for host machines, some mention of planning for virtual machines is included where appropriate, especially when it directly relates to host-planning issues.
Real World: Data center design
Although the discussion below focuses on issues relating to the features and capabilities of the Windows Server platform, there are other matters that you need to carefully consider before you begin deploying servers in your data center. These include power and cooling requirements, physical security, role-based administration, network and storage infrastructure design, and the use of virtualization, automation, and monitoring. There are helpful resources on many of these things in various presentations found on Microsoft TechNet; to find them, use Bing to search for “how Microsoft does IT.” In addition, if you will be deploying third-party server applications you should check the vendors’ hardware, software, virtualization, and licensing requirements for their applications.
Hardware
A key hardware requirement for a Hyper-V host is that the underlying host system support hardware-assisted virtualization such as Intel Virtualization Technology (Intel VT) or AMD Virtualization (AMD-V) technologies. In addition, hardware-enforced Data Execution Prevention (DEP) must be available and enabled on the host system. Specifically, this means that the Intel XD bit (the execute disable bit) or AMD NX bit (the no execute bit) must be enabled.
Although you can install the Hyper-V role on a Windows Server 2012 or Windows Server 2012 R2 server that meets the minimum system requirements of a single-core, 1.4-gigahertz (GHz) CPU and 512 MBs of RAM, you probably won’t be able to run any virtual machines on that host machine. This is mainly because each virtual machine you run on a host requires a minimum amount of RAM that depends on the guest operating system installed in the virtual machine. In other words, the number of virtual machines and types of virtualized workloads you can run on Hyper-V hosts directly relate to the available hardware resources of the host.
To plan your host hardware, you should be aware of the maximum supported processor and memory capabilities of Windows Server 2012 and Windows Server 2012 R2, which are as follows:
![]() Up to 64 physical processors (sockets) per host
Up to 64 physical processors (sockets) per host
![]() Up to 320 logical processors (cores) per host
Up to 320 logical processors (cores) per host
![]() Up to 4 terabytes (TBs) of physical memory per host
Up to 4 terabytes (TBs) of physical memory per host
Next, you should consider the maximum supported processor and memory capabilities for virtual machines running on Windows Server 2012 or Windows Server 2012 R2 Hyper-V hosts. These are as follows:
![]() Up to 64 virtual processors per virtual machine (up to a total of 2048 virtual processors per host)
Up to 64 virtual processors per virtual machine (up to a total of 2048 virtual processors per host)
![]() Up to 1 TB of physical memory per virtual machine
Up to 1 TB of physical memory per virtual machine
![]() Up to 1024 active virtual machines running on the host
Up to 1024 active virtual machines running on the host
Finally, you must decide how many virtual machines you want to run on each host. In deciding this, you must consider the following:
![]() How many cores you can afford when you purchase your host systems
How many cores you can afford when you purchase your host systems
![]() How much physical memory you can afford for your host systems
How much physical memory you can afford for your host systems
![]() How much processing power and physical memory your virtualized workloads will need to meet the performance requirements of your service level agreement (SLA)
How much processing power and physical memory your virtualized workloads will need to meet the performance requirements of your service level agreement (SLA)
Real World: Planning the host processor and memory
As an example, let’s say you wanted to run two file servers and a Microsoft SQL Server database server on a single Hyper-V host in your data center. You’ve determined that the file servers will each require two virtual processors and 4 GBs of RAM to perform as intended and the database server will require four virtual processors and 12 GBs of RAM for optimal performance. The total processor and memory requirements of your virtual machines will therefore be
(2 × 2) + 4 = 8 virtual processors
(2 × 4) + 12 = 20 GBs RAM
By including the minimum processor and memory requirements of the underlying host operating system plus room for growth, you might decide that a rack-mounted system with dual Intel Xeon E5-2430 processors and 24 GBs of RAM can meet your needs. The Intel Xeon E5-2430 is a six-core processor, so two of them give you 12 cores, which easily meets the requirements of eight dedicated virtual processors needed by the virtual machines. And the 24 GBs of RAM provides several GBs of RAM overhead on the host in case extra memory needs to be assigned to the database server workload.
Licensing
Your decision concerning how many virtualized workloads to run on a host might also influence your decision about which edition of Windows Server 2012 R2 to purchase. There are no technical differences between the capabilities of the Standard and Datacenter editions of Windows Server 2012 R2. Both editions support up to 64 physical processors and 4 TBs of physical memory. Both editions also support installing the same set of roles and features. The only differences between these editions are the virtualization rights included in their licensing and the price of the editions.
The virtualization rights included with the licensing for each edition are as follows:
![]() The Standard edition includes two instances of Windows Server.
The Standard edition includes two instances of Windows Server.
![]() The Datacenter edition includes unlimited instances of Windows Server.
The Datacenter edition includes unlimited instances of Windows Server.
As a result, you should choose the Standard edition if you need to deploy Windows Server 2012 R2 as a workload on bare metal in a nonvirtualized environment and choose the Datacenter edition if you need to deploy Windows Server 2012 Hyper-V hosts for a virtualized data center or private-cloud scenario.
The licensing model for Windows Server 2012 R2 has also been simplified to make it easier for you to plan the budget for your IT department. Specifically, the Datacenter edition is licensed in increments of two physical processors. This means, for example, that if you want to deploy the Datacenter edition onto a system that has eight processors, you need to purchase four licenses of the product.
More Info: Comparing editions
For more information on how Windows Server 2012 R2 editions compare and for current pricing information, see the Windows Server 2012 R2 home page at http://www.microsoft.com/en-us/server-cloud/products/windows-server-2012-r2/ and click Buy.
Networking
Hyper-V networking requires careful planning to ensure reliable and secure network connectivity and management of both hosts and virtual machines. At a minimum, your host machines should have at least two physical network adapters configured as follows:
![]() One network adapter to allow virtualized workloads to communicate with other systems on your production network
One network adapter to allow virtualized workloads to communicate with other systems on your production network
![]() One network adapter dedicated for the management of your Hyper-V hosts and connected to a dedicated network used by your systems management platform
One network adapter dedicated for the management of your Hyper-V hosts and connected to a dedicated network used by your systems management platform
You might need more physical network adapters if you have additional services or special requirements. For example, you might need additional network adapters for the following:
![]() Providing connectivity between hosts and Internet SCSI (iSCSI) storage
Providing connectivity between hosts and Internet SCSI (iSCSI) storage
![]() Deploying a failover cluster
Deploying a failover cluster
![]() Using Cluster Shared Volumes (CSV) shared storage
Using Cluster Shared Volumes (CSV) shared storage
![]() Performing live migrations of running virtual machines
Performing live migrations of running virtual machines
![]() Increasing available bandwidth using Windows NIC Teaming
Increasing available bandwidth using Windows NIC Teaming
Real World: Planning host networking
As an example, let’s say you want to deploy Hyper-V to run a number of mission-critical server workloads for your organization. You decide that your hosts should be clustered and use CSV for performing live migration. You also decide that a single 1-gigabit Ethernet (GbE) network adapter will have insufficient bandwidth to allow clients to access the workloads. So you decide to use Windows NIC Teaming, a feature introduced in Windows Server 2012, to allow two network adapters to provide 2 gigabits per second (Gbps) of network connectivity between your host cluster and the 10 GbE backbone of your production network. Finally, you plan on using your Fibre Channel storage area network (SAN) to provide storage for your host machines. How many physical network adapters will each host machine need?
![]() One NIC to provide dedicated connectivity to your management network
One NIC to provide dedicated connectivity to your management network
![]() Two NICs teamed together to provide connectivity between the virtualized workloads and your production network
Two NICs teamed together to provide connectivity between the virtualized workloads and your production network
![]() One NIC dedicated to the private network for failover clustering
One NIC dedicated to the private network for failover clustering
![]() One NIC dedicated for use by CSV shared storage
One NIC dedicated for use by CSV shared storage
![]() One NIC dedicated to live migration traffic
One NIC dedicated to live migration traffic
That’s six network adapters in total that are needed for each host. Note that no network adapter is required for SAN connectivity because you’re using Fibre Channel, not iSCSI.
In addition to deciding how many network adapters your hosts will need, you must also consider what types of virtual switches you will need for your environment. A Hyper-V virtual switch is a layer 2 network switch that works like a physical Ethernet switch but is implemented in software on the host. Hyper-V enables you to create three different kinds of virtual switches:
![]() Private This type of virtual switch allows virtual machines running on the host to communicate only with each other and not with the operating system of the host. A private virtual switch is not bound to any physical network adapter on the host, which means that the virtual machines on the host cannot communicate with any other system on any physical network connected to the host.
Private This type of virtual switch allows virtual machines running on the host to communicate only with each other and not with the operating system of the host. A private virtual switch is not bound to any physical network adapter on the host, which means that the virtual machines on the host cannot communicate with any other system on any physical network connected to the host.
![]() Internal This type of virtual switch allows virtual machines running on the host to communicate with each other and with the operating system of the host. An internal virtual switch is not bound to any physical network adapter on the host, which means that the virtual machines on the host cannot communicate with any other system on any physical network connected to the host.
Internal This type of virtual switch allows virtual machines running on the host to communicate with each other and with the operating system of the host. An internal virtual switch is not bound to any physical network adapter on the host, which means that the virtual machines on the host cannot communicate with any other system on any physical network connected to the host.
![]() External Unlike the other two types of virtual switches listed, this type is bound to a physical network adapter on the host. The result is that an external virtual switch allows virtual machines running on the host to communicate with each other, with the operating system of the host, and with other systems on the physical network connected to the host through that adapter. In addition, the external virtual switch can be bound to the physical network adapter by means of miniports in one of three ways:
External Unlike the other two types of virtual switches listed, this type is bound to a physical network adapter on the host. The result is that an external virtual switch allows virtual machines running on the host to communicate with each other, with the operating system of the host, and with other systems on the physical network connected to the host through that adapter. In addition, the external virtual switch can be bound to the physical network adapter by means of miniports in one of three ways:
![]() By using a single miniport representing a single physical network adapter
By using a single miniport representing a single physical network adapter
![]() By using a single miniport representing multiple physical network adapters
By using a single miniport representing multiple physical network adapters
![]() By using multiple miniports representing a single physical network adapter
By using multiple miniports representing a single physical network adapter
Real World: Virtual switches
In most cases, you’ll want to create one or more external virtual switches to enable clients on your production subnet or subnets to access server workloads running in virtual machines on your hosts. If you’re doing test or development work, however, a private or internal virtual switch might be a good choice.
The Hyper-V virtual switch was enhanced in Windows Server 2012 with extensibility features that allow independent software vendors (ISVs) to add functionality for filtering, forwarding, and monitoring network traffic through virtual switches. These virtual-switch extensions can be implemented using two kinds of drivers:
![]() NDIS filter drivers These extensions can be used to perform network packet inspection, network packet filtering, and network forwarding. They are based on the Network Driver Interface Specification (NDIS) 6.0 specification, which was introduced in Windows Server 2012.
NDIS filter drivers These extensions can be used to perform network packet inspection, network packet filtering, and network forwarding. They are based on the Network Driver Interface Specification (NDIS) 6.0 specification, which was introduced in Windows Server 2012.
![]() WFP callout drivers These extensions are based on the Windows Filtering Platform (WFP) and can be used to provide virtual firewall functionality, connection monitoring, and filtering traffic that is protected using Internet Protocol security (IPsec).
WFP callout drivers These extensions are based on the Windows Filtering Platform (WFP) and can be used to provide virtual firewall functionality, connection monitoring, and filtering traffic that is protected using Internet Protocol security (IPsec).
If your virtualized infrastructure requires any of the preceding functionalities to be implemented at the virtual-switch level on Windows Server 2012 or Windows Server 2012 R2 Hyper-V hosts, you can search for an ISV that provides a software solution that meets your needs.
Storage
Different organizations have different requirements and different budgets for their IT operations, and Windows Server 2012 R2 provides a wide range of physical storage options for Hyper-V hosts. Choosing the storage solution that meets your needs and cost parameters is an important part of the host-deployment planning process.
Hyper-V hosts can use the following types of physical storage for storing virtual machine configuration files and disks:
![]() Direct Attached Storage (DAS) With DAS solutions, the storage is directly attached to the management operating system. Hyper-V supports the following DAS technologies:
Direct Attached Storage (DAS) With DAS solutions, the storage is directly attached to the management operating system. Hyper-V supports the following DAS technologies:
![]() Serial Advanced Technology Attachment (SATA)
Serial Advanced Technology Attachment (SATA)
![]() External SATA (eSATA)
External SATA (eSATA)
![]() Small Computer System Interface (SCSI)
Small Computer System Interface (SCSI)
![]() Serial Attached SCSI (SAS)
Serial Attached SCSI (SAS)
![]() Parallel Advanced Technology Attachment (PATA)
Parallel Advanced Technology Attachment (PATA)
![]() Universal Serial Bus (USB)
Universal Serial Bus (USB)
![]() FireWire
FireWire
![]() Storage area network (SAN) With SAN solutions, the storage is provided by a set of interconnected devices that are connected to a common communication and data-transfer infrastructure, commonly known as the storage fabric. Hyper-V supports the following types of storage fabrics:
Storage area network (SAN) With SAN solutions, the storage is provided by a set of interconnected devices that are connected to a common communication and data-transfer infrastructure, commonly known as the storage fabric. Hyper-V supports the following types of storage fabrics:
![]() Fibre Channel
Fibre Channel
![]() Internet SCSI (iSCSI)
Internet SCSI (iSCSI)
![]() Serial Attached SCSI (SAS)
Serial Attached SCSI (SAS)
![]() Scale-Out File Servers New features of version 3.0 of the Server Message Block (SMB) protocol allow file servers running Windows Server 2012 or Windows Server 2012 R2 to provide continuously available and scalable storage for CSVs. This allows you to use a file share on a Windows Server 2012 or Windows Server 2012 R2 file server to provide storage for Hyper-V host clusters.
Scale-Out File Servers New features of version 3.0 of the Server Message Block (SMB) protocol allow file servers running Windows Server 2012 or Windows Server 2012 R2 to provide continuously available and scalable storage for CSVs. This allows you to use a file share on a Windows Server 2012 or Windows Server 2012 R2 file server to provide storage for Hyper-V host clusters.
Note: NAS and Hyper-V
Network-attached storage (NAS) is not supported for Hyper-V hosts.
Deciding whether to use SAN or DAS as your host storage solution depends on a number of factors. For example, the advantages of the SAN approach include the following:
![]() SAN allows multiple servers access to a pool of storage. This means SAN provides flexibility by allowing any server to access any storage unit in the SAN array.
SAN allows multiple servers access to a pool of storage. This means SAN provides flexibility by allowing any server to access any storage unit in the SAN array.
![]() Because SAN is a centralized storage solution, it is easier to manage than DAS. This might be an important consideration if you will be deploying many Hyper-V hosts.
Because SAN is a centralized storage solution, it is easier to manage than DAS. This might be an important consideration if you will be deploying many Hyper-V hosts.
![]() SAN has a more scalable architecture than the DAS approach.
SAN has a more scalable architecture than the DAS approach.
The disadvantages of the SAN approach include the following:
![]() SANs are usually more costly than DAS solutions, and depending on your business priorities, this factor might weigh heavily in your decision.
SANs are usually more costly than DAS solutions, and depending on your business priorities, this factor might weigh heavily in your decision.
![]() DAS solutions typically have lower latency than SANs. So if application I/O or service latency is a priority, DAS might be the route to take.
DAS solutions typically have lower latency than SANs. So if application I/O or service latency is a priority, DAS might be the route to take.
Management
Once you deploy your Hyper-V hosts, you need to be able to manage them efficiently. Choosing the right management solution, therefore, is a key aspect of the host-deployment process.
Hyper-V includes two in-box tools for configuring and managing host machines:
![]() Hyper-V Manager This Microsoft Management Console (MMC) snap-in has been enhanced with additional functionality in Windows Server 2012 and Windows Server 2012 R2, but it basically provides the same level of host-management capability as in previous versions of Windows Server. You can use this tool to manage any number of host machines, but as the number of managed hosts increases, the amount of work to manage them scales accordingly.
Hyper-V Manager This Microsoft Management Console (MMC) snap-in has been enhanced with additional functionality in Windows Server 2012 and Windows Server 2012 R2, but it basically provides the same level of host-management capability as in previous versions of Windows Server. You can use this tool to manage any number of host machines, but as the number of managed hosts increases, the amount of work to manage them scales accordingly.
![]() Windows PowerShell The Hyper-V module in Windows Server 2012 and Windows Server 2012 R2 includes over a hundred new Windows PowerShell cmdlets that you can use to manage both Hyper-V hosts and virtual machines running on these hosts. Because of its flexibility and support for automation, Windows PowerShell is the preferred in-box tool for managing Hyper-V hosts and virtual machines in large environments such as data centers and cloud-computing environments.
Windows PowerShell The Hyper-V module in Windows Server 2012 and Windows Server 2012 R2 includes over a hundred new Windows PowerShell cmdlets that you can use to manage both Hyper-V hosts and virtual machines running on these hosts. Because of its flexibility and support for automation, Windows PowerShell is the preferred in-box tool for managing Hyper-V hosts and virtual machines in large environments such as data centers and cloud-computing environments.
Note: Managing Hyper-V on different Windows Server versions
You can use the Hyper-V Manager snap-in to manage Windows Server 2012 and Windows Server 2012 R2 Hyper-V hosts from either a Server With A GUI or Minimal Server Interface installation that has the Hyper-V management tools installed or from a Windows 8.1 administrator workstation that has the Remote Server Administration Tools (RSAT) for Windows 8.1 installed. However, you cannot manage Hyper-V hosts running earlier versions of Windows Server by using these tools. Such hosts must be managed by using an earlier version of Hyper-V Manager. This means that you might need multiple sets of management tools to manage a mixed environment that has Hyper-V hosts running different Windows Server versions. The alternative is to use System Center 2012 Virtual Machine Manager R2, which allows you to manage all versions of Hyper-V hosts.
You can use Windows PowerShell to manage hosts and virtual machines by using one-off commands issued from the Windows PowerShell console, by using Windows PowerShell scripts, and by using the following capabilities introduced in Windows PowerShell 3.0 in Windows Server 2012:
![]() Windows PowerShell workflows These allow you to create sequences of multicomputer management activities that are long-running, repeatable, frequent, parallelizable, interruptible, stoppable, and restartable. Windows PowerShell workflows can be suspended and resumed after a network outage, machine restart, or power loss. Windows PowerShell workflows are also portable and can be exported and imported as XAML files.
Windows PowerShell workflows These allow you to create sequences of multicomputer management activities that are long-running, repeatable, frequent, parallelizable, interruptible, stoppable, and restartable. Windows PowerShell workflows can be suspended and resumed after a network outage, machine restart, or power loss. Windows PowerShell workflows are also portable and can be exported and imported as XAML files.
![]() Windows PowerShell scheduled jobs These allow you to schedule Windows PowerShell background jobs and manage them in Windows PowerShell and in Task Scheduler. Windows PowerShell scheduled jobs run asynchronously in the background. You can create, edit, manage, disable, and re-enable them; create scheduled job triggers; and set scheduled job options by using Windows PowerShell cmdlets.
Windows PowerShell scheduled jobs These allow you to schedule Windows PowerShell background jobs and manage them in Windows PowerShell and in Task Scheduler. Windows PowerShell scheduled jobs run asynchronously in the background. You can create, edit, manage, disable, and re-enable them; create scheduled job triggers; and set scheduled job options by using Windows PowerShell cmdlets.
Windows PowerShell 4.0 in Windows Server 2012 R2 also includes Desired State Configuration (DSC), which is designed to allow you to specify what software should be installed on a server and how that software should be configured. For more information on DSC, you can refer to the section titled “Desired State Configuration” in Chapter 3, “Server remote management.”
In addition to using the preceding in-box tools for managing Hyper-V hosts and virtual machines that are included in Windows Server 2012 and Windows Server 2012 R2, organizations that need to deploy and manage large numbers of hosts or virtual machines can benefit from the following products from the Microsoft System Center platform:
![]() System Center Virtual Machine Manager Allows you to configure and deploy virtual machines and centrally manage your physical and virtual infrastructure from one console
System Center Virtual Machine Manager Allows you to configure and deploy virtual machines and centrally manage your physical and virtual infrastructure from one console
![]() System Center Configuration Manager Allows you to assess, deploy, and update servers, client computers, and devices across physical, virtual, distributed, and mobile environments
System Center Configuration Manager Allows you to assess, deploy, and update servers, client computers, and devices across physical, virtual, distributed, and mobile environments
Note: System Center and Windows Server 2012 R2 Hyper-V
System Center 2012 R2 is required for managing Hyper-V hosts running Windows Server 2012 R2. For more information, see the System Center 2012 R2 home page at http://www.microsoft.com/en-us/server-cloud/system-center/default.aspx.
Security
It’s important to consider the security of your Hyper-V hosts as you prepare your host deployment plan. To begin, you should apply the same principles, processes, and practices for securing Hyper-V hosts that you would apply to any other Windows Server components within your environment. In addition to adhering to such best practices, you should also do the following:
![]() Deploy the Server Core installation option on your Hyper-V hosts instead of the Server With A GUI installation option. Server Core is the default installation option when installing Windows Server 2012 or Windows Server 2012 R2 because of its smaller attack surface and reduced servicing footprint. If needed, you can still use the Hyper-V Manager snap-in to manage Server Core hosts as long as you do so from either a server that has the Server With A GUI installation option installed or a client machine that has the Remote Server Administration Tools (RSAT) for Windows 8 installed.
Deploy the Server Core installation option on your Hyper-V hosts instead of the Server With A GUI installation option. Server Core is the default installation option when installing Windows Server 2012 or Windows Server 2012 R2 because of its smaller attack surface and reduced servicing footprint. If needed, you can still use the Hyper-V Manager snap-in to manage Server Core hosts as long as you do so from either a server that has the Server With A GUI installation option installed or a client machine that has the Remote Server Administration Tools (RSAT) for Windows 8 installed.
![]() Do not install any server roles on your hosts other than the Hyper-V role. Your Hyper-V hosts should be dedicated servers whose only function is to host the virtualized workloads that run on them. Installing additional roles on hosts not only uses additional server resources (processor, memory, disk, and network) but also can also increase the server’s attack surface and maintenance (updating) requirements. The exception to this is the File And Storage Services role because the role services for this role can be used for configuration storage pools for virtual machine storage. For more information on the File And Storage Services role, see Chapter 8, “File services and storage.”
Do not install any server roles on your hosts other than the Hyper-V role. Your Hyper-V hosts should be dedicated servers whose only function is to host the virtualized workloads that run on them. Installing additional roles on hosts not only uses additional server resources (processor, memory, disk, and network) but also can also increase the server’s attack surface and maintenance (updating) requirements. The exception to this is the File And Storage Services role because the role services for this role can be used for configuration storage pools for virtual machine storage. For more information on the File And Storage Services role, see Chapter 8, “File services and storage.”
For more information on securing Hyper-V hosts and the virtual machines that run on them, see “Planning for Hyper-V Security” at http://technet.microsoft.com/en-us/library/dd283088(v=ws.10) and “Planning for Hyper-V Security” at http://technet.microsoft.com/en-us/library/cc974516.aspx.
Scalability, availability, and mobility

The section titled “Hardware” earlier in this lesson described some of the scalability enhancements for processor and memory resources on Hyper-V hosts and virtual machines in Windows Server 2012 and Windows Server 2012 R2. Scalability is the ability of a system or technology to expand to meet business needs, and it is therefore an important consideration when planning the deployment of Hyper-V hosts.
Availability is another important consideration for deployment planning and is related to scalability. Availability is the degree to which clients perceive a system or technology to be available so that they can access it. Systems that are available are considered resilient for two reasons. First, they minimize the occurrence of service-affecting incidents that can interrupt access by clients. Second, they allow effective actions to be performed when a service-affecting incident does happen.
The Failover Clustering feature of Windows Server 2012 and Windows Server 2012 R2 can provide both high availability and increased scalability for Hyper-V hosts and for the virtualized workloads that run on such hosts. A failover cluster is a group of servers that work together to increase the availability of applications and services running on those servers. The clustered servers, also called nodes, are connected by both physical cables and software such that if one of the cluster nodes fails, another node can begin providing service by using a process known asfailover.
Failover Clustering was enhanced in a number of ways in Windows Server 2012:
![]() It has improved scalability. Hyper-V host clusters can scale up to 64 nodes with up to 4000 virtual machines per cluster and up to 1024 virtual machines per node.
It has improved scalability. Hyper-V host clusters can scale up to 64 nodes with up to 4000 virtual machines per cluster and up to 1024 virtual machines per node.
![]() A priority setting can be assigned to each virtual machine in a Hyper-V host cluster to control the order in which virtual machines are started when a failover event occurs.
A priority setting can be assigned to each virtual machine in a Hyper-V host cluster to control the order in which virtual machines are started when a failover event occurs.
![]() CSV storage can be located on a SMB 3.0 file share on a Scale-Out File Server, which can potentially help reduce the cost of storage for Hyper-V host cluster solutions.
CSV storage can be located on a SMB 3.0 file share on a Scale-Out File Server, which can potentially help reduce the cost of storage for Hyper-V host cluster solutions.
![]() CSV storage can be encrypted with BitLocker Drive Encryption to provide greater security for host deployments outside secure data centers.
CSV storage can be encrypted with BitLocker Drive Encryption to provide greater security for host deployments outside secure data centers.
![]() Cluster-Aware Updating (CAU) allows software updates to be applied automatically to each node in a host cluster while maintaining availability during the update process.
Cluster-Aware Updating (CAU) allows software updates to be applied automatically to each node in a host cluster while maintaining availability during the update process.
Besides improving availability, implementing Failover Clustering with Hyper-V hosts also provides mobility by allowing the migration of running virtual machines from one node to another in a host cluster. Live migration can help organizations create a dynamic and flexible IT environment that responds to changing business needs, so understanding and planning for virtual machine mobility is an important aspect of host-deployment planning.
Live migration improvements in Windows Server 2012 include the following:
![]() Live migrations of multiple running virtual machines can be performed concurrently, which helps minimize service interruption when a cluster node needs to be taken down for maintenance.
Live migrations of multiple running virtual machines can be performed concurrently, which helps minimize service interruption when a cluster node needs to be taken down for maintenance.
![]() Live migrations can be implemented using SMB 3.0 shared storage on a Scale-Out File Server even if the Hyper-V hosts involved are not members of a host cluster. In this scenario, the virtual hard disks of the virtual machines on the hosts reside and remain on the same file server and only the running state of the virtual machine is migrated from one host to another.
Live migrations can be implemented using SMB 3.0 shared storage on a Scale-Out File Server even if the Hyper-V hosts involved are not members of a host cluster. In this scenario, the virtual hard disks of the virtual machines on the hosts reside and remain on the same file server and only the running state of the virtual machine is migrated from one host to another.
![]() Live migrations can even be performed without shared storage if the hosts involved belong to the same domain. In this scenario, the storage of a running virtual machine is first mirrored on the destination host. Once everything is synchronized, the mirror is broken and the storage on the source host is deleted.
Live migrations can even be performed without shared storage if the hosts involved belong to the same domain. In this scenario, the storage of a running virtual machine is first mirrored on the destination host. Once everything is synchronized, the mirror is broken and the storage on the source host is deleted.
![]() A feature called Storage Migration allows you to move the storage of a running virtual machine without any downtime. This enables new scenarios—for example, the ability to add more physical disk storage to a clustered or nonclustered Hyper-V host and then move the virtual machines to the new storage while the virtual machines continue to run.
A feature called Storage Migration allows you to move the storage of a running virtual machine without any downtime. This enables new scenarios—for example, the ability to add more physical disk storage to a clustered or nonclustered Hyper-V host and then move the virtual machines to the new storage while the virtual machines continue to run.
For more information on these and other availability and mobility enhancements in Windows Server 2012, see “What’s New in Failover Clustering in Windows Server 2012” at http://technet.microsoft.com/en-US/library/hh831414.aspx and “Virtual Machine Live Migration” athttp://technet.microsoft.com/en-us/library/hh831435.aspx.
Disaster recovery
Preparing for disaster to ensure business continuity is a critical component of any deployment plan. Essential to any disaster-recovery planning is the ability to create and restore from reliable backups. With Hyper-V, you have to consider backing up the following:
![]() The management operating system on the Hyper-V host itself
The management operating system on the Hyper-V host itself
![]() The configuration, virtual hard disks, checkpoints, and other files associated with each virtual machine running on the host
The configuration, virtual hard disks, checkpoints, and other files associated with each virtual machine running on the host
Performing backups of disk volumes on Windows servers uses the Volume Shadow Copy Service (VSS), which is a set of COM interfaces that implements a framework to enable volume backups to be performed while applications and services running on the server continue to write to the volumes being backed up. VSS provides an underlying framework that the following Windows features and applications use:
![]() Windows Server Backup An optional feature that uses VSS and block-level backup technology to provide basic backup and recovery functionality. Windows Server Backup can be managed using an MMC snap-in, command-line tools, or Windows PowerShell.
Windows Server Backup An optional feature that uses VSS and block-level backup technology to provide basic backup and recovery functionality. Windows Server Backup can be managed using an MMC snap-in, command-line tools, or Windows PowerShell.
![]() Shadow Copies of Shared Folders A feature that provides point-in-time copies of files stored on file shares on file servers. Shadow Copies of Shared Folders allows users to view and access shadow copies, which are shared files and folders as they existed at different points of time in the past. By accessing previous versions of files and folders, users can compare versions of a file while working and recover files that were accidentally deleted or overwritten.
Shadow Copies of Shared Folders A feature that provides point-in-time copies of files stored on file shares on file servers. Shadow Copies of Shared Folders allows users to view and access shadow copies, which are shared files and folders as they existed at different points of time in the past. By accessing previous versions of files and folders, users can compare versions of a file while working and recover files that were accidentally deleted or overwritten.
![]() System Restore A client-only feature that is available in Windows 8 and Windows 8.1 but not in Windows Server 2012 or Windows Server 2012 R2, System Restore creates restore points you can use to return a computer to its previous state for troubleshooting purposes.
System Restore A client-only feature that is available in Windows 8 and Windows 8.1 but not in Windows Server 2012 or Windows Server 2012 R2, System Restore creates restore points you can use to return a computer to its previous state for troubleshooting purposes.
In addition, VSS is used by System Center Data Protection Manager (DPM), which enables disk-based and tape-based data protection and recovery for Windows servers, including Hyper-V hosts and the virtualized workloads running on such hosts. In addition, you can use DPM to centrally manage system state and bare metal recovery (BMR).
Note: System Center DPM and Windows Server 2012 R2 Hyper-V
System Center 2012 Data Protection Manager Service R2 is required for managing Hyper-V hosts running Windows Server 2012 R2. For more information, see the System Center 2012 R2 home page at http://www.microsoft.com/en-us/server-cloud/system-center/default.aspx.
A new feature of VSS introduced in Windows Server 2012 was VSS for SMB File Shares, which allows VSS-aware backup applications such as System Center DPM to create shadow copies of VSS-aware server applications that store their data on SMB 3.0 file shares, such as file shares on a Scale-Out File Server. On previous versions of Windows Server, VSS only supported creating shadow copies of data stored on local volumes. Because Windows Server 2012 and Windows Server 2012 R2 Hyper-V hosts can use SMB 3.0 shared storage for storing virtual machine files, VSS for SMB File Shares is needed to ensure that virtual machines running on hosts using SMB 3.0 shared storage can reliably back up such virtual machine files.
Windows Server Backup does not support VSS for SMB File Shares functionality, but the Diskshadow.exe command-line utility included in Windows Server 2012 and Windows Server 2012 R2 that exposes the functionality offered by VSS does support it. For more information on VSS for SMB File Shares and how to configure it for use with Diskshadow.exe or System Center DPM, see the post “VSS for SMB File Shares” by Claus Joergensen, Principal Program Manager on the Windows File Server Team, on his TechNet blog athttp://blogs.technet.com/b/clausjor/archive/2012/06/14/vss-for-smb-file-shares.aspx. For information on the syntax of the Diskshadow.exe command, see “Command-Line Reference for Windows Server 2012” at http://technet.microsoft.com/en-us/library/hh831799(WS.11).aspx.
Whether you are using Windows Server Backup, System Center DPM, or a third-party backup product, the recommended approach for backing up Hyper-V hosts is to perform full backups from the host operating system itself. Such backups will include all virtual machine files, including virtual hard disks, checkpoint files, and virtual machine configuration files. Virtual switches are not included in such backups, however, and after a host has been restored you need to re-create the host’s virtual switches and reconnect the virtual network adapters in each virtual machine to the appropriate virtual switch. Because of this, you should make sure that you carefully document the configuration of all virtual switches on your Hyper-V hosts as part of your disaster-recovery plan.
The preceding approach to backing up Hyper-V hosts will not work, however, in scenarios in which the host storage does not support the Hyper-V VSS writer. An example of this is when virtual machine files are being stored on a SMB 3.0 file share on a Scale-Out File Server. In such scenarios, you should augment the preceding approach by also running the backup program from within the guest operating system of each virtual machine.
A new feature of Hyper-V introduced in Windows Server 2012 that can provide additional options for disaster-continuity scenarios is Hyper-V Replica, which you can use to replicate all changes on a virtual machine to a counterpart virtual machine running on a different host. For example, for an organization with a single head office and multiple branch offices whose IT infrastructure has been implemented in a hub-and-spoke topology, you can use Hyper-V Replica to replicate virtual machines running on hosts deployed at headquarters to standby hosts deployed at each branch office. This way, if wide area network (WAN) connectivity is lost between a branch office and headquarters, the standby host at that branch office can take over the workload from the host at the head office. For more information on Hyper-V Replica, see “Hyper-V Replica Overview” at http://technet.microsoft.com/en-us/library/jj134172.
Important: Using checkpoints in place of backups
Microsoft recommends that you do not use virtual machine checkpoints (previously called snapshots in Windows Server 2012 and earlier versions of Hyper-V) in place of backups because of the risk of unintended data loss associated with using them for such purposes. Checkpoints are intended primarily for development and test purposes, and you should avoid using them in production environments.
![]() Quick check
Quick check
![]() Which of the following cannot be used as virtual machine storage for Hyper-V hosts?
Which of the following cannot be used as virtual machine storage for Hyper-V hosts?
![]() SAN
SAN
![]() NAS
NAS
![]() DAS
DAS
![]() Scale-Out File Server
Scale-Out File Server
Quick check answer
![]() NAS, or network-attached storage, is not supported for this purpose.
NAS, or network-attached storage, is not supported for this purpose.
Installing the Hyper-V role
Once you have planned the deployment of your Hyper-V hosts, you are ready to install the Hyper-V role on the servers you plan to use for this purpose. As with other server roles in Windows Server 2012 and Windows Server 2012 R2, you can install the Hyper-V role on a server by using either of the following:
![]() Server Manager
Server Manager
![]() Windows PowerShell
Windows PowerShell
Using Server Manager
You can use Server Manager to install the Hyper-V role on a server as follows:
1. On either the All Servers page or a custom server group page in Server Manager, right-click the remote server on which you want to install the Hyper-V role and select Add Roles And Features to launch the Add Roles And Features Wizard.
2. On the Installation Type Wizard page, select Role-Based Or Feature-Based Installation.
3. On the Server Roles page, select the Hyper-V role. At this point, you will be prompted to install the GUI and Windows PowerShell management tools for the Hyper-V role. If the server on which you are installing the Hyper-V role is a Server Core installation, clear the Include Management Tools check box.
4. Proceed through the remaining wizard pages to install the role and restart the remote server when prompted.
Note: Installing management tools on Server Core
If you are using Server Manager to install the Hyper-V role on a remote server, you might want to select the Hyper-V Module For Windows PowerShell on the Features page of the Add Roles And Features Wizard to install this module locally on the server. That way, if at some future time you are unable to manage the Hyper-V role on the remote server by using either the Hyper-V Manager snap-in or Windows PowerShell you might still be able to establish a Remote Desktop session with the remote server so that you can run Windows PowerShell commands locally on the server.
Alternatively, you might decide to install the Hyper-V role on a Windows Server 2012 or Windows Server 2012 R2 instance that has been configured with the Minimal Server Interface installation option, which will allow you to install both the Hyper-V Management snap-in and Hyper-V Module For Windows PowerShell while retaining some of the security and servicing advantages of the Server Core installation option. When the Hyper-V role is installed on a server that has the Minimal Server Interface installation, you can launch the Hyper-V Management snap-in locally on the server by entering virtmgmt.msc at the command prompt. Note that Minimal Server Interface is not available on the stand-alone Windows Server 2012 or Windows Server 2012 R2 Hyper-V product, which has only the Server Core installation option.
Using Windows PowerShell
You can also use Windows PowerShell to install the Hyper-V role on a server. The command you use depends on the installation option used when the remote server was deployed. For example, if the remote server is a Server With A GUI installation, you can install the Hyper-V role with the management tools for the role by using the following command:
Install-WindowsFeature -Name Hyper-V -ComputerName <name> -IncludeManagementTools
-Restart
Here, <name> is the NetBIOS name, an IP address, or fully qualified domain name (FQDN) of the remote server. For example, to see what happens if this command is run against a server named HOST4, you can include the –WhatIf parameter as follows:
PS C:\> Install-WindowsFeature -Name Hyper-V -ComputerName HOST4 -IncludeManagementTools
-Restart -WhatIf
What if: Continue with installation?
What if: Performing installation for "[Hyper-V] Hyper-V".
What if: Performing installation for "[Remote Server Administration Tools] Hyper-V
Module for Windows PowerShell".
What if: Performing installation for "[Remote Server Administration Tools] Hyper-V
Management Tools".
What if: Performing installation for "[Remote Server Administration Tools] Role
Administration Tools".
What if: Performing installation for "[Remote Server Administration Tools] Remote Server
Administration Tools".
What if: Performing installation for "[Remote Server Administration Tools] Hyper-V GUI
Management Tools".
What if: The target server may need to be restarted after the installation completes.
Success Restart Needed Exit Code Feature Result
------- -------------- --------- --------------
True Maybe Success {Hyper-V, Hyper-V Module for Windows Power...
Run the command again without the –WhatIf parameter to install the Hyper-V role on the remote server. After the remote server has restarted, you can use the Get-WindowsFeature cmdlet to verify installation of the Hyper-V role and associated management features:
PS C:\> Get-WindowsFeature -Name *Hyper-V* -ComputerName HOST4 | `
ft DisplayName,InstallState
DisplayName InstallState
----------- ------------
Hyper-V Installed
Hyper-V Management Tools Installed
Hyper-V GUI Management Tools Installed
Hyper-V Module for Windows PowerShell Installed
Note: Advantages of the GUI approach
Although using the Install-WindowsFeature cmdlet of Windows PowerShell is the preferred method for installing most roles and features on remote servers running Windows Server 2012 or Windows Server 2012 R2, there might be some advantage to using the Add Roles And Features Wizard when you want to install the Hyper-V role on a server. This is because the wizard presents you with four Hyper-V configuration options that you would have to configure separately using different cmdlets after role installation if you were using Windows PowerShell to install the role. These four configuration options are as follows:
![]() Configuring the default location for virtual disk files
Configuring the default location for virtual disk files
![]() Configuring the default location for virtual machine configuration files
Configuring the default location for virtual machine configuration files
![]() Creating a new virtual switch
Creating a new virtual switch
![]() Enabling live migration
Enabling live migration
If you configure these settings during the installation of the role using the wizard, you won’t need to configure them later as part of the post-installation configuration of the host.
Configuring Hyper-V hosts
After you have installed the Hyper-V role on a server, you still need to configure the role to meet the needs of your environment. Configuring a Hyper-V host involves steps such as the following:
![]() Configuring virtual machine storage
Configuring virtual machine storage
![]() Creating virtual switches
Creating virtual switches
![]() Performing other configuration tasks
Performing other configuration tasks
Hyper-V hosts can also be configured using either the Hyper-V Manager snap-in or Windows PowerShell cmdlets. To view the configuration of a host using the Hyper-V Manager snap-in, right-click the host in the console tree and select Hyper-V Settings to display the Hyper-V Settings dialog box shown in the screen shots in this section. To view the configuration of a host using Windows PowerShell, use the Get-VMHost cmdlet as shown here:
PS C:\> Get-VMHost -ComputerName HOST4
Name LogicalProcessorCount MemoryCapacity(M) VirtualMachineMigrationEnabled
---- --------------------- ----------------- ------------------------------
HOST4 4 24570.2421875 False
To view all configuration settings associated with the specified host, pipe the output of the preceding command into the Format-List cmdlet and specify a wildcard:
PS C:\> Get-VMHost -ComputerName HOST4 | Format-List *
ComputerName : HOST4
VirtualHardDiskPath : C:\Users\Public\Documents\Hyper-V\Virtual Hard Disks
VirtualMachinePath : C:\ProgramData\Microsoft\Windows\Hyper-V
FullyQualifiedDomainName : WORKGROUP
Name : HOST4
MacAddressMinimum : 00155D0BE600
MacAddressMaximum : 00155D0BE6FF
MaximumStorageMigrations : 2
MaximumVirtualMachineMigrations : 2
VirtualMachineMigrationEnabled : False
VirtualMachineMigrationAuthenticationType : CredSSP
UseAnyNetworkForMigration : False
FibreChannelWwnn : C003FF0000FFFF00
FibreChannelWwpnMaximum : C003FF68F816FFFF
FibreChannelWwpnMinimum : C003FF68F8160000
LogicalProcessorCount : 4
MemoryCapacity : 25763766272
ResourceMeteringSaveInterval : 01:00:00
NumaSpanningEnabled : True
HostNumaStatus : {HOST4}
NumaStatus :
InternalNetworkAdapters : {CONTOSO Virtual Switch}
ExternalNetworkAdapters : {CONTOSO Virtual Switch_External}
IovSupport : False
IovSupportReasons : {Ensure that the system has chipset...
Note that the configuration of virtual switches on a host is not included in the output of the Get-VMHost cmdlet. To view a list of virtual switches that have been created on the host, use the Get-VMSwitch cmdlet as shown here:
PS C:\> Get-VMSwitch
Name SwitchType NetAdapterInterfaceDescription
---- ---------- ------------------------------
CONTOSO Virtual Switch External Broadcom NetXtreme Gigabit Ethernet #2
To view all of the properties of all virtual switches on the host, use the following command:
PS C:\> Get-VMSwitch | Format-List *
ComputerName : HOST4
Name : CONTOSO Virtual Switch
Id : cffd5106-2735-4c54-b9e1-1cad8944e8c0
Notes :
SwitchType : External
AllowManagementOS : True
NetAdapterInterfaceDescription : Broadcom NetXtreme Gigabit Ethernet #2
AvailableVMQueues : 0
NumberVmqAllocated : 0
IovEnabled : False
IovVirtualFunctionCount : 0
IovVirtualFunctionsInUse : 0
IovQueuePairCount : 0
IovQueuePairsInUse : 0
AvailableIPSecSA : 0
NumberIPSecSAAllocated : 0
BandwidthPercentage : 10
BandwidthReservationMode : Absolute
DefaultFlowMinimumBandwidthAbsolute : 10000000
DefaultFlowMinimumBandwidthWeight : 0
Extensions : {Microsoft NDIS Capture, Microsoft Windows Filtering Platform}
IovSupport : False
IovSupportReasons : {Ensure that the system has chipset support...
IsDeleted : False
Configuring virtual machine storage
Figure 7-1 shows the default location where a Hyper-V host stores the virtual hard disk files for its virtual machines. Such files might include the following:
![]() VHD or VHDX, which can be the system drive or data drives for each virtual machine
VHD or VHDX, which can be the system drive or data drives for each virtual machine
![]() AVHD files, which are the differencing disk files used for virtual machine checkpoints
AVHD files, which are the differencing disk files used for virtual machine checkpoints
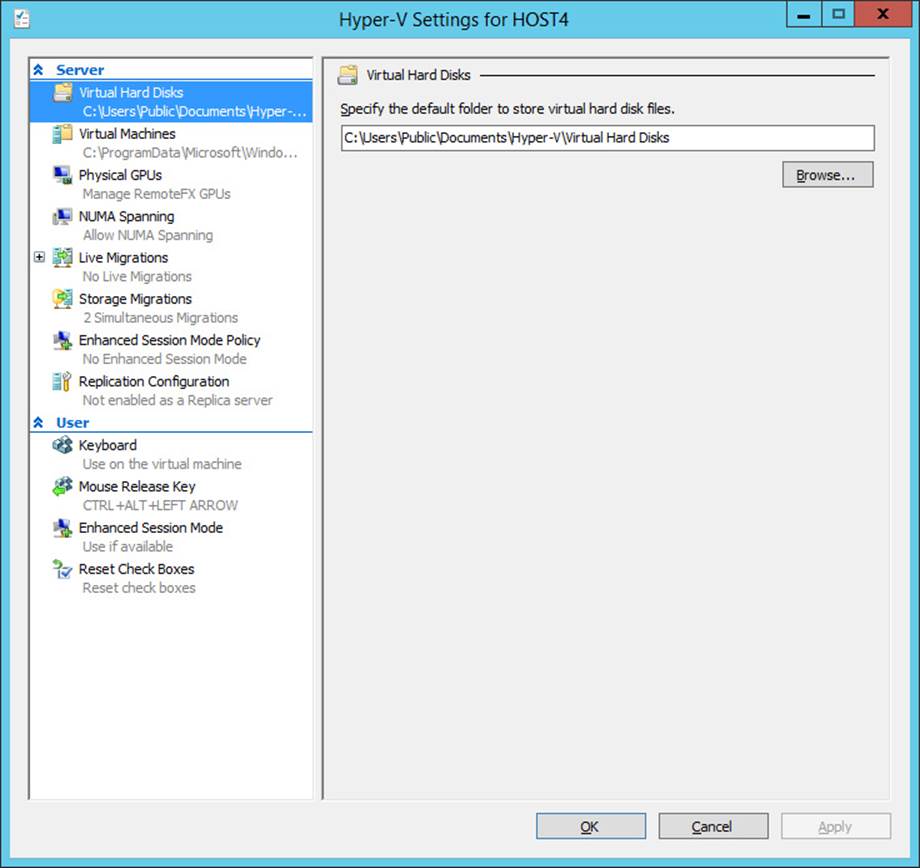
FIGURE 7-1 Configure the location where virtual hard disk files will be stored.
As part of the post-installation configuration of your Hyper-V hosts, you should change this location to the volume where you want the virtual hard disk files stored. This volume will depend on the type of storage solution that you have decided to use for your Hyper-V hosts, as described earlier in this lesson in the section titled “Storage.”
You can also use the Set-VMHost cmdlet to configure the virtual hard disk location using Windows PowerShell. For example, you can use the following command to change the virtual hard disk location on HOST4 to the E:\VM Storage folder:
Set-VMHost -ComputerName HOST4 -VirtualHardDiskPath "E:\VM Storage"
Figure 7-2 shows the default location where a Hyper-V host stores its virtual machine configuration files. Such files can include the following:
![]() XML files named with the globally unique identifier (GUID) used to internally identify a virtual machine or checkpoint
XML files named with the globally unique identifier (GUID) used to internally identify a virtual machine or checkpoint
![]() BIN files containing the memory of a virtual machine or checkpoint
BIN files containing the memory of a virtual machine or checkpoint
![]() VSV files containing the saved state from the devices associated with a virtual machine
VSV files containing the saved state from the devices associated with a virtual machine

FIGURE 7-2 Configure the location where virtual machine configuration files will be stored.
You can also use the Set-VMHost cmdlet to configure the virtual machine configuration files location using Windows PowerShell. For example, you can use the following command to change the virtual machine configuration files location on HOST4 to the E:\VM Configurations folder:
Set-VMHost -ComputerName HOST4 -VirtualMachinePath "E:\VM Configurations"
Real World: Preventing problems
Everyone knows that it’s better to prevent problems from happening than to try to deal with things after they go wrong. That’s why it’s important to make sure you configure your default Hyper-V storage locations appropriately before you start creating new virtual machines on a Hyper-V host or importing existing virtual machines onto the host. Ben Armstrong, a Program Manager on the Hyper-V team at Microsoft, indicates in his “Virtual PC Guy Blog” that one of the top support-call generators for Hyper-V is when customers run out of space on their host. This is because the default location for storing virtual hard disks and virtual machine configuration files is the system drive on the host, and if this drive becomes filled the host can fail to function. Because of the problems that can arise if this default location remains unchanged, some changes were made to the Add Roles And Features Wizard to ensure that customers think about the potential impact of this issue when they are installing the Hyper-V role. For more information, see “Default Hyper-V Storage Paths in Windows Server 2012” athttp://blogs.msdn.com/b/virtual_pc_guy/archive/2012/06/19/default-hyper-v-storage-paths-in-windows-server-2012.aspx.
Creating virtual switches
Figure 7-3 shows the New Virtual Network Switch page of the Virtual Switch Manager dialog box for a Hyper-V host. You can use this page to create virtual switches of the external, internal, and private types described earlier in this lesson in the section titled “Networking.”
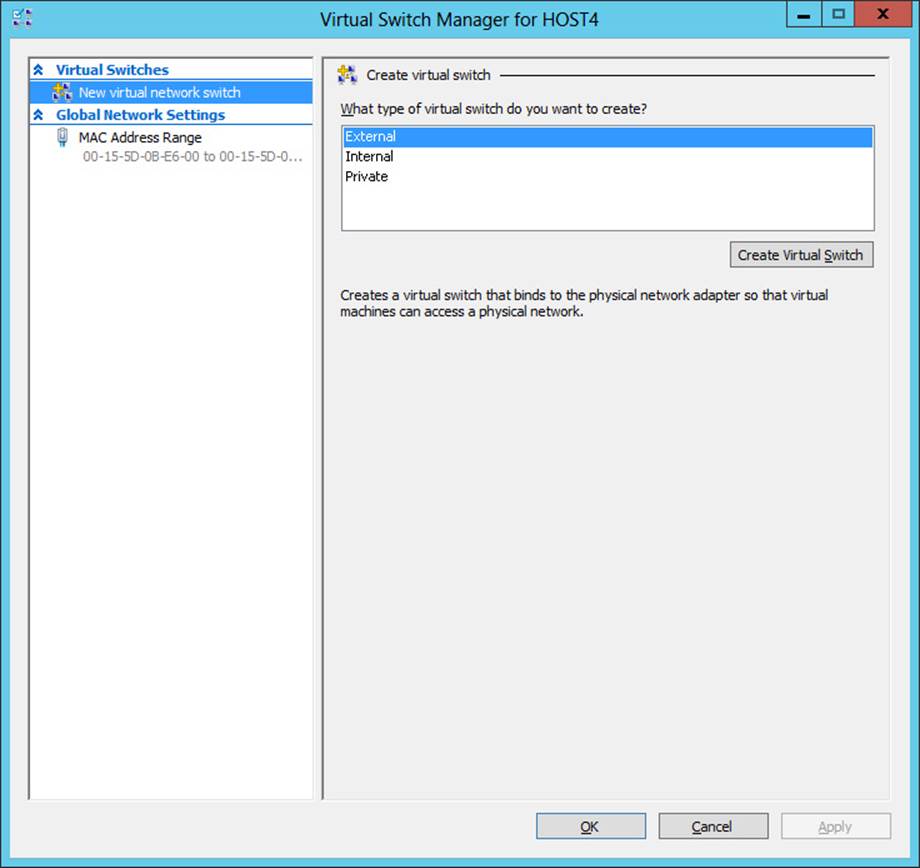
FIGURE 7-3 Create a new virtual switch in Hyper-V Manager.
Clicking Create Virtual Switch, shown in Figure 7-3, creates a new virtual switch of the type selected (here, External), and you can now configure the properties of the new virtual switch as shown in Figure 7-4. The key properties to configure are these:
![]() Specifying a descriptive name for the new switch
Specifying a descriptive name for the new switch
![]() Selecting the connection type (External, Internal, or Private) if you decide to change your initial choice
Selecting the connection type (External, Internal, or Private) if you decide to change your initial choice
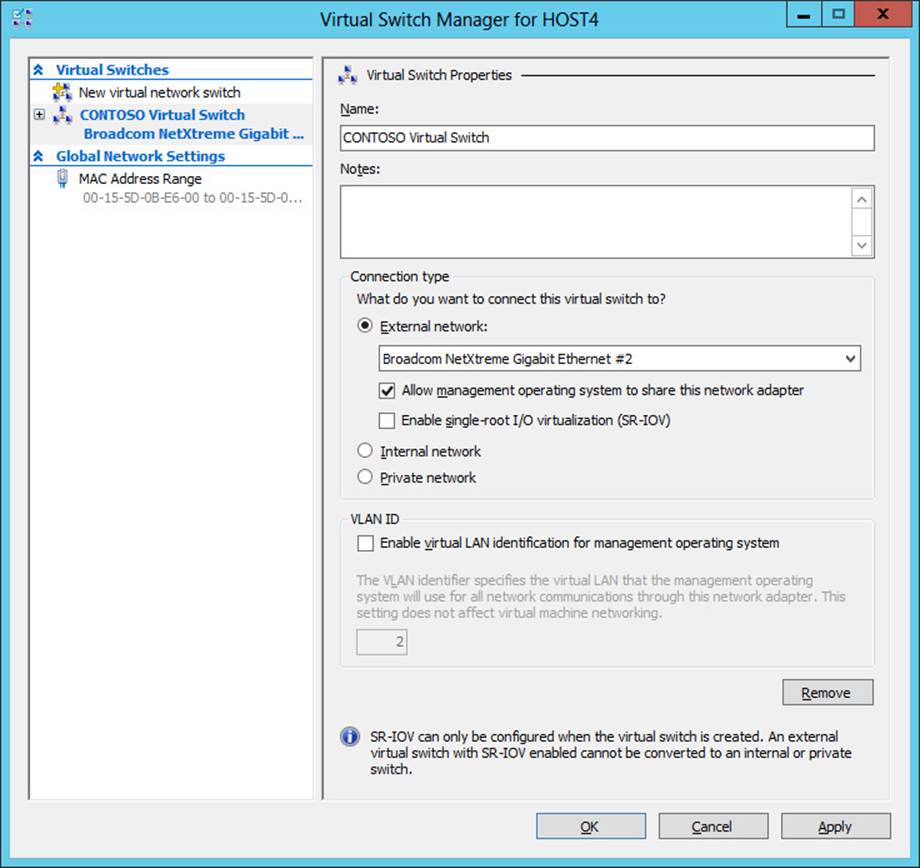
FIGURE 7-4 Configure the new virtual switch.
If you select External as the connection type, you must assign a physical network adapter on the host to the new switch. In that case, you also have the option of allowing the management operating system on the host to share the selected network adapter. If you are using a separate physical network for host management and the host has another physical network adapter connected to the management network, you can clear the check box shown as selected in Figure 7-4. Additionally, you have the option of enabling single-root I/O virtualization (SR-IOV) if the selected network adapter supports this feature. SR-IOV is described later in this chapter. Finally, if you are using virtual local area networks (VLANs) to segment traffic on your production network, you can enable this feature and specify a VLAN identifier here.
Note: Network connections and virtual switches
Creating a new virtual switch of type External also creates a new network connection in the Network Connections folder on the server, which can be displayed using the Network And Internet utility in Control Panel. The new network connection is typically named vEthernet (<name of virtual switch>), and the TCP/IP settings assigned to the physical network adapter associated with the switch become the TCP/IP settings of the new connection.
You can also use the New-VMSwitch cmdlet to create new virtual switches using Windows PowerShell. For example, you could use the following command to create the CONTOSO Virtual Switch shown in Figure 7-4:
New-VMSwitch -Name "CONTOSO Virtual Switch" `
-NetAdapterName "Broadcom NetXtreme Gigabit Ethernet #2" -ComputerName HOST4
For help with the syntax of this cmdlet, use the Get-Help New-VMSwitch command.
Important: Network connectivity with the host
Creating or reconfiguring a virtual switch results in changes that might disrupt network connectivity with the host. If you are managing the host remotely using Remote Desktop Connection, you might need to close and reopen the connection after making such changes. In addition, loss of network connectivity by the host when the changes are applied might affect any network operations in progress. This is one reason why it’s a best practice for a Hyper-V host to have at least two physical network adapters with one adapter being used for host and virtual machine management and the other for inbound and outbound traffic.
In addition to creating and configuring virtual switches on your hosts, you can configure the range of media access control (MAC) addresses that the host can use to dynamically assign MAC addresses to the virtual network adapters of virtual machines on the host. Figure 7-5 shows the default range of MAC addresses used for this purpose. Although this default range might suffice when only a few hosts are being deployed, it’s generally a good idea to assign a different MAC address range to each host to ensure that duplicate MAC addresses cannot be assigned to virtual machines on different hosts, which could cause network problems for the guest operating systems of such virtual machines.
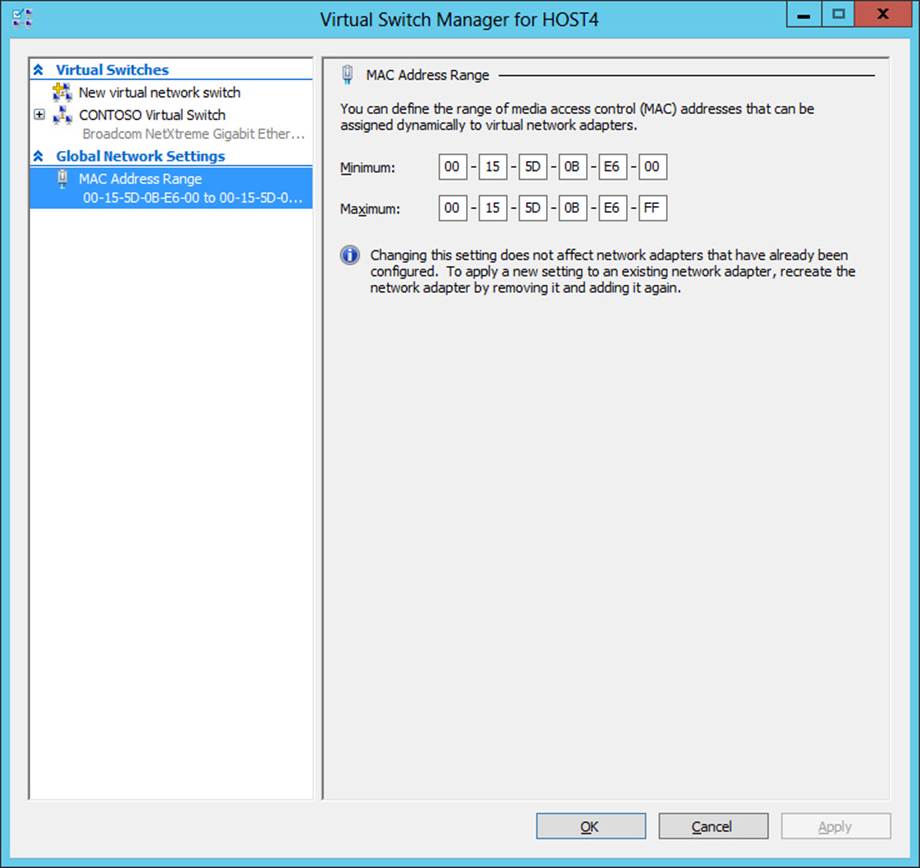
FIGURE 7-5 Configure the range of MAC addresses that the host can assign to virtual network adapters.
You can also use the Set-VMHost cmdlet to configure the range of MAC addresses that the host can assign to virtual network adapters of virtual machines on the host. For example, you can use the following command to change the MAC address range on HOST4 to span from 00-00-04-00-00-00 to 00-00-04-FF-FF-FF:
Set-VMHost -ComputerName HOST4 -MacAddressMinimum 000004000000 `
-MacAddressMaximum 000004FFFFFF
Other configuration steps
Additional steps needed for configuring your Hyper-V hosts depend on what types of functionality you want to enable on them. For example, by using the Hyper-V Settings dialog box, you can:
![]() Enable live migrations on the host and configure the authentication protocol used for live migration, how many live migrations can be performed simultaneously, and which network or IP address can be used for incoming live migrations.
Enable live migrations on the host and configure the authentication protocol used for live migration, how many live migrations can be performed simultaneously, and which network or IP address can be used for incoming live migrations.
![]() Configure how many simultaneous storage migrations can be performed on the host.
Configure how many simultaneous storage migrations can be performed on the host.
![]() Enable Hyper-V Replica functionality on the host and the authentication protocol and ports used for replication and choose whether replication will be allowed from any authenticated server or from a list of specified servers.
Enable Hyper-V Replica functionality on the host and the authentication protocol and ports used for replication and choose whether replication will be allowed from any authenticated server or from a list of specified servers.
![]() Enable NUMA spanning, a new feature of Hyper-V introduced in Windows Server 2012 that allows virtual machines to span non-uniform memory architecture (NUMA) nodes on NUMA-capable hosts. NUMA spanning works by projecting a virtual NUMA topology to the guest operating system in a way that is optimized to match the NUMA topology of the underlying physical host machine. This provides virtual machines with additional computing resources for high-performance server applications such as Microsoft SQL Server and modern server operating systems such as Windows Server 2012 and Windows Server 2012 R2 that include built-in NUMA optimizations.
Enable NUMA spanning, a new feature of Hyper-V introduced in Windows Server 2012 that allows virtual machines to span non-uniform memory architecture (NUMA) nodes on NUMA-capable hosts. NUMA spanning works by projecting a virtual NUMA topology to the guest operating system in a way that is optimized to match the NUMA topology of the underlying physical host machine. This provides virtual machines with additional computing resources for high-performance server applications such as Microsoft SQL Server and modern server operating systems such as Windows Server 2012 and Windows Server 2012 R2 that include built-in NUMA optimizations.
You can also use Windows PowerShell to perform these additional configuration steps on your hosts. For example, you can use the Set-VMHost cmdlet to enable live migration, configure it to use CredSSP for authentication, and configure it to allow incoming live migrations using any available network as follows:
Set-VMHost -VirtualMachineMigrationEnabled $true `
-VirtualMachineMigrationAuthenticationType CredSSp -UseAnyNetworkForMigration $true
More Info: Hyper-V cmdlets
For information about the syntax of the Hyper-V cmdlets and for usage examples, see “Hyper-V Cmdlets in Windows PowerShell” at http://technet.microsoft.com/en-us/library/hh848559.
Lesson summary
![]() Key considerations for planning the deployment of Hyper-V hosts include hardware, licensing, networking, storage, management, security, scalability, availability, mobility, and disaster recovery.
Key considerations for planning the deployment of Hyper-V hosts include hardware, licensing, networking, storage, management, security, scalability, availability, mobility, and disaster recovery.
![]() You can install and configure the Hyper-V role using either the Hyper-V Manager snap-in or Windows PowerShell.
You can install and configure the Hyper-V role using either the Hyper-V Manager snap-in or Windows PowerShell.
![]() Whenever possible, you should deploy Hyper-V on Server Core installations and manage your hosts by using Windows PowerShell.
Whenever possible, you should deploy Hyper-V on Server Core installations and manage your hosts by using Windows PowerShell.
![]() Configuring virtual machine storage for a host involves specifying the location where virtual machine configuration files and virtual hard disk files will be stored.
Configuring virtual machine storage for a host involves specifying the location where virtual machine configuration files and virtual hard disk files will be stored.
![]() Configuring virtual networking for a host involves creating and configuring virtual switches of the type and number needed by your environment.
Configuring virtual networking for a host involves creating and configuring virtual switches of the type and number needed by your environment.
Lesson review
Answer the following questions to test your knowledge of the information in this lesson. You can find the answers to these questions and explanations of why each answer choice is correct or incorrect in the “Answers” section at the end of this chapter.
1. Which edition and installation option of Windows Server 2012 R2 are the best choices for deploying Hyper-V hosts in a data center environment?
A. Standard edition on Server Core
B. Standard edition on Server With A GUI
C. Datacenter edition on Server Core
D. Datacenter edition on Server With A GUI
2. You want to use a Server Core installation of Windows Server 2012 R2 as a Hyper-V host. The server has been joined to an Active Directory domain and resides in your data center. Because you do not yet feel confident managing servers from the command line, you want to manage the host using the Hyper-V Manager snap-in. Given that security is a concern and you also want to keep the servicing overhead low for your servers while managing them conveniently, which of the following would be the best approach for you to pursue?
A. Log on to the local console of the server, type powershell at the command prompt, and type Install-WindowsFeature –Server-Gui-Mgmt-Infra –Restart to convert your Server Core installation to a Minimal Server Interface installation. Now log on again to the local console of the server and launch the Hyper-V Manager snap-in to manage the Hyper-V host and its virtual machines.
B. Enable Remote Desktop on the server and configure it to allow only remote clients that use Network Level Authentication to connect to the server. Now log on to an administrator workstation running Windows 8.1, use Remote Desktop Connection to connect to the remote host, and manage the host from your workstation.
C. Log on to the local console of the server, type powershell at the command prompt, and type Install-WindowsFeature –Server-Gui-Mgmt-Infra –Restart to convert your Server Core installation to a Minimal Server Interface installation. Enable Remote Desktop on the server and configure it to allow only remote clients that use Network Level Authentication to connect to the server. Now log on to an administrator workstation running Windows 8, use Remote Desktop Connection to connect to the remote host, and manage the host from your workstation.
D. Install the RSAT for Windows 8 on an administrator workstation running Windows 8, launch the Hyper-V Manager snap-in, connect to the remote host, and manage the host from your workstation.
3. Which Windows PowerShell cmdlet can you use to configure the default storage location for virtual machine files on a Hyper-V host?
A. Get-VMHost
B. Set-VMHost
C. Add-VMStoragePath
D. Set-VM
Lesson 2: Deploying and configuring virtual machines
After deploying and configuring your Hyper-V hosts, the next step in implementing your virtualization infrastructure is deploying and configuring the virtual machines that will be used to virtualize your server workloads. This lesson helps you understand the issues and considerations involved in planning virtual machine deployment and how to create and configure virtual machines.
After this lesson, you will be able to:
![]() Describe the different ways that virtual machines can be deployed on Hyper-V hosts.
Describe the different ways that virtual machines can be deployed on Hyper-V hosts.
![]() Describe the various considerations involved in planning the deployment of virtual machines on Hyper-V hosts.
Describe the various considerations involved in planning the deployment of virtual machines on Hyper-V hosts.
![]() Explain the difference between Generation 1 and Generation 2 virtual machines.
Explain the difference between Generation 1 and Generation 2 virtual machines.
![]() Describe the different types of virtual hard disks and their purposes and limitations.
Describe the different types of virtual hard disks and their purposes and limitations.
![]() Explain why using checkpoints is not recommended in production environments.
Explain why using checkpoints is not recommended in production environments.
![]() Describe the different choices involved when importing virtual machines onto a host.
Describe the different choices involved when importing virtual machines onto a host.
![]() Create new virtual machines using the Hyper-V Manager snap-in and Windows PowerShell.
Create new virtual machines using the Hyper-V Manager snap-in and Windows PowerShell.
![]() Create new virtual disks and add them to virtual machines using the Hyper-V Manager snap-in and Windows PowerShell.
Create new virtual disks and add them to virtual machines using the Hyper-V Manager snap-in and Windows PowerShell.
![]() Add new virtual network adapters to virtual machines and configure the adapters.
Add new virtual network adapters to virtual machines and configure the adapters.
![]() Configure virtual hardware and management settings for virtual machines.
Configure virtual hardware and management settings for virtual machines.
Estimated lesson time: 40 minutes
Planning virtual machine deployment
Depending on the scenario being envisioned, deploying a virtual machine can mean different things, such as
![]() Creating a new virtual machine and installing a guest operating system and applications on it.
Creating a new virtual machine and installing a guest operating system and applications on it.
![]() Importing an existing virtual machine that already has a guest operating system and applications installed on it.
Importing an existing virtual machine that already has a guest operating system and applications installed on it.
![]() Performing a physical-to-virtual (P2V) conversion of a physical server to migrate the server’s operating system and applications into a virtual machine.
Performing a physical-to-virtual (P2V) conversion of a physical server to migrate the server’s operating system and applications into a virtual machine.
![]() Performing a virtual-to-virtual (V2V) conversion by converting another vendor’s virtual machine to a Hyper-V virtual machine.
Performing a virtual-to-virtual (V2V) conversion by converting another vendor’s virtual machine to a Hyper-V virtual machine.
You can perform the first two types of virtual-machine deployments by using the in-box management tools of the Hyper-V role of Windows Server 2012 and Windows Server 2012 R2—specifically, the Hyper-V Manager and the Hyper-V module for Windows PowerShell. Deploying new virtual machines by performing P2V or V2V conversions requires additional tools, such as System Center Virtual Machine Manager or third-party utilities.
More Info: VMM and P2V
Performing P2V conversions using Virtual Machine Manager (VMM) is beyond the scope of this book. For more information on how to use VMM for performing P2V conversion, see the topic “How to Convert Physical Computers to Virtual Machines” athttp://technet.microsoft.com/en-us/library/hh427286.aspx.
The following issues should be considered when creating new virtual machines on a Hyper-V host:
![]() Virtual machine generation
Virtual machine generation
![]() Location of configuration files
Location of configuration files
![]() Startup memory
Startup memory
![]() Dynamic Memory
Dynamic Memory
![]() Virtual processors
Virtual processors
![]() Virtual networking
Virtual networking
![]() Virtual hard disks
Virtual hard disks
![]() Guest operating system deployment
Guest operating system deployment
![]() Automatic virtual machine activation
Automatic virtual machine activation
![]() Performing checkpoints
Performing checkpoints
Note that these issues apply mainly to the creation of new virtual machines. Importing existing virtual machines entails a different set of conditions that are described later in this section.
Virtual machine generation
Windows Server 2012 and earlier versions of Hyper-V supported only a single type (generation) of virtual machines. Such virtual machines had the following characteristics:
![]() They used a standard set of emulated hardware devices to ensure compatibility running all versions of Windows. These emulated devices include an AMI BIOS, Intel 440BX chipset motherboard, S3 Trio graphics display adapter, Intel/DEC 21140 network adapter, and other virtual devices.
They used a standard set of emulated hardware devices to ensure compatibility running all versions of Windows. These emulated devices include an AMI BIOS, Intel 440BX chipset motherboard, S3 Trio graphics display adapter, Intel/DEC 21140 network adapter, and other virtual devices.
![]() They included a legacy network adapter virtual device, which you had to use for PXE-based installation of a guest operating system.
They included a legacy network adapter virtual device, which you had to use for PXE-based installation of a guest operating system.
![]() They could only boot from integrated development environment (IDE) disks (virtual disks attached to the virtual machine using the IDE controller).
They could only boot from integrated development environment (IDE) disks (virtual disks attached to the virtual machine using the IDE controller).
Windows Server 2012 R2 introduces a new kind of virtual machine called a Generation 2 virtual machine. The characteristics of Generation 2 virtual machines include the following:
![]() They comply with the Unified Extensible Firmware Interface (UEFI) standard and enable virtual machines to use Secure Boot.
They comply with the Unified Extensible Firmware Interface (UEFI) standard and enable virtual machines to use Secure Boot.
![]() Many of the emulated devices have been removed and replaced with synthetic drivers and software-based devices as summarized in Table 7-1.
Many of the emulated devices have been removed and replaced with synthetic drivers and software-based devices as summarized in Table 7-1.
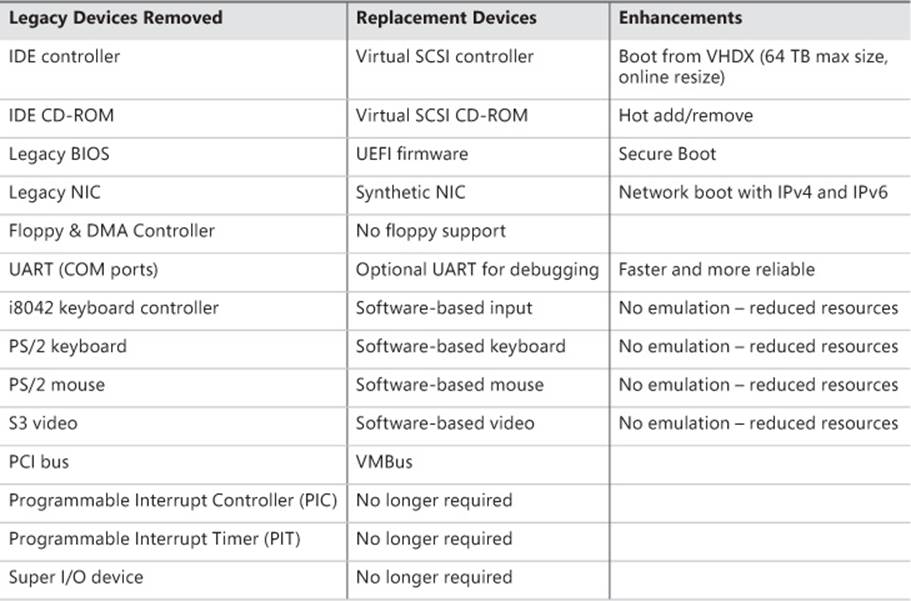
TABLE 7-1 Hardware device changes in Generation 2 virtual machines
![]() The legacy network adapter device is no longer required (or even supported) by Generation 2 virtual machines. Instead, you can PXE-boot a Generation 2 virtual machine using a standard network adapter.
The legacy network adapter device is no longer required (or even supported) by Generation 2 virtual machines. Instead, you can PXE-boot a Generation 2 virtual machine using a standard network adapter.
![]() They can boot directly from SCSI disks (virtual disks attached to the virtual machine using the SCSI controller). In fact, Generation 2 virtual machines don’t even have an IDE controller and they can also boot from a SCSI virtual DVD. The SCSI controller performs much better than the legacy IDE controller in the previous generation of virtual machines. This means, for example, that installing a supported guest operating system in a Generation 2 virtual machine takes about half as long as installing the same guest operating system in a previous-generation virtual machine.
They can boot directly from SCSI disks (virtual disks attached to the virtual machine using the SCSI controller). In fact, Generation 2 virtual machines don’t even have an IDE controller and they can also boot from a SCSI virtual DVD. The SCSI controller performs much better than the legacy IDE controller in the previous generation of virtual machines. This means, for example, that installing a supported guest operating system in a Generation 2 virtual machine takes about half as long as installing the same guest operating system in a previous-generation virtual machine.
Because of all these hardware changes, Generation 2 virtual machines only support the following versions of Windows as guest operating systems:
![]() 64-bit versions of Windows 8 and Windows Server 2012
64-bit versions of Windows 8 and Windows Server 2012
![]() 64-bit versions of Windows 8.1 and Windows Server 2012 R2
64-bit versions of Windows 8.1 and Windows Server 2012 R2
Inside a Generation 2 virtual machine
As the screenshot below shows, Windows Server 2012 R2 Hyper-V supports both Generation 1 and Generation 2 virtual machines. You must choose the generation of a virtual machine when you create the virtual machine, and you cannot change its generation after you create it.
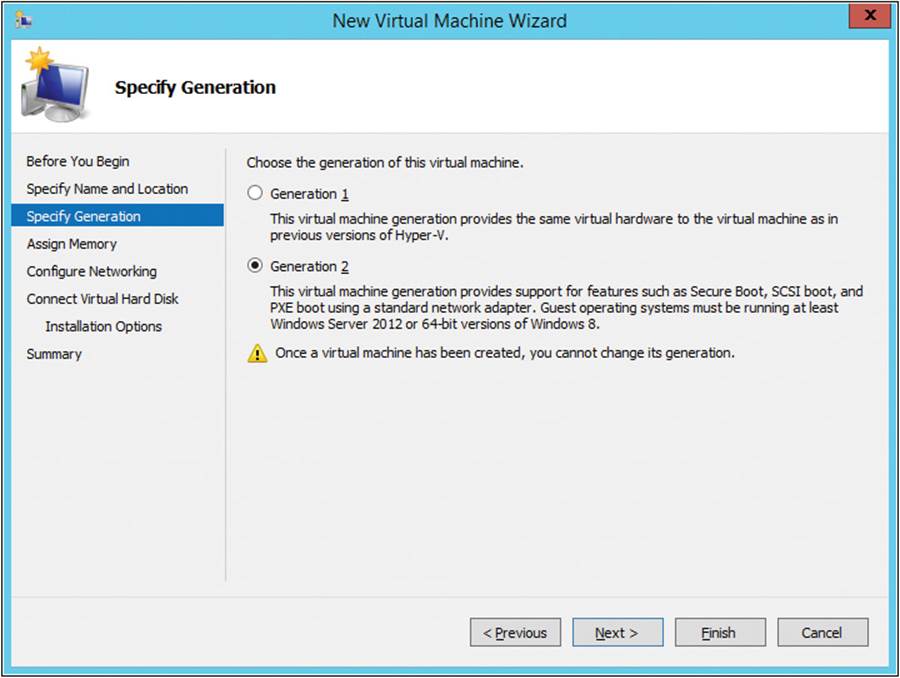
Once the Generation 2 virtual machine has Windows Server 2012 R2 installed as the guest operating system, opening Device Manager reveals the various synthetic and software-based devices attached to the VMBus. Note that unlike first-generation virtual machines, there is no PCI-to-ISA bridge running in ISA mode, no PS/2 keyboard, no PS/2 mouse, no COM ports, and so on. The next screenshot compares Device Manager for Generation 1 virtual machines (left) with Device Manager for Generation 2 virtual machines (right):
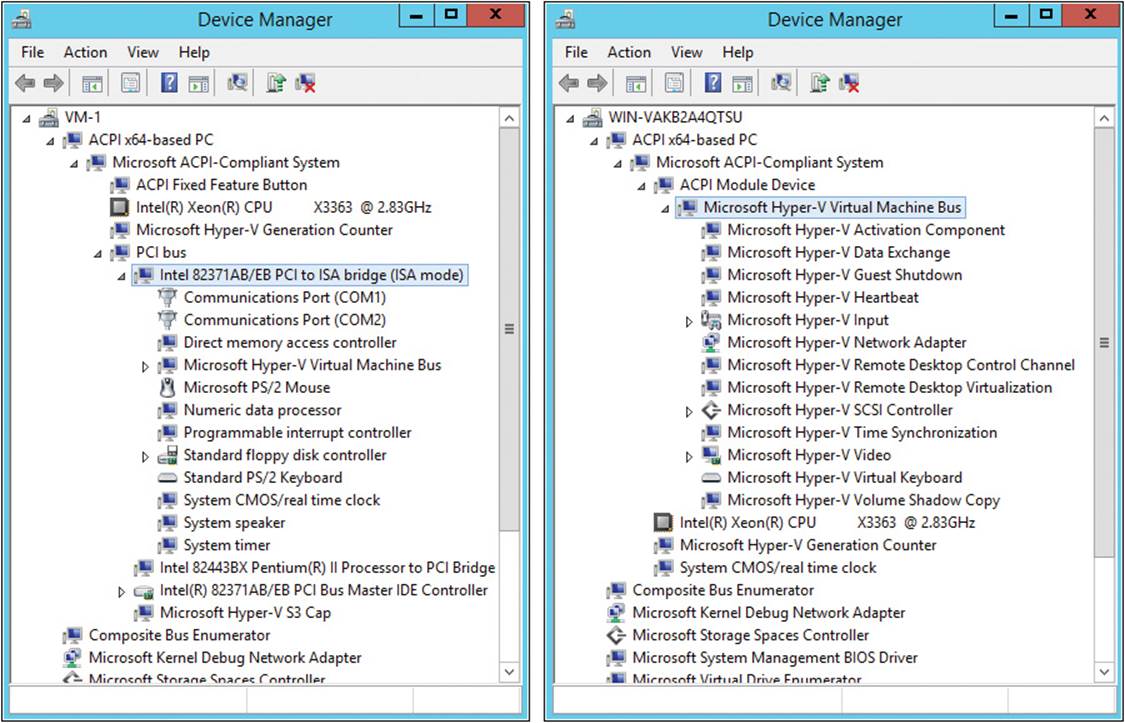
The key benefits of using Generation 2 virtual machines as opposed to Generation 1 virtual machines are twofold. First, as mentioned previously, Generation 2 virtual machines can be quickly provisioned because they can boot from a SCSI device or a standard network adapter. This can be useful in scenarios in which you need to quickly deploy new virtual machines to scale out a cloud-based application to meet rapidly increasing demand.
The second main benefit of Generation 2 virtual machines is in the area of security. Because Generation 2 virtual machines are UEFI-based and support Secure Boot, unauthorized operating systems, drivers, and firmware can be prevented from running when the virtual machine starts. For this to apply, however, Secure Boot must be enabled for the virtual machine. As the screenshot below shows, you can enable or disable Secure Boot on a Generation 2 virtual machine by opening the Settings of the virtual machine, selecting Firmware under Hardware, and selecting or clearing the Enable Secure Boot checkbox. By default, Secure Boot is enabled when you create a new Generation 2 virtual machine:
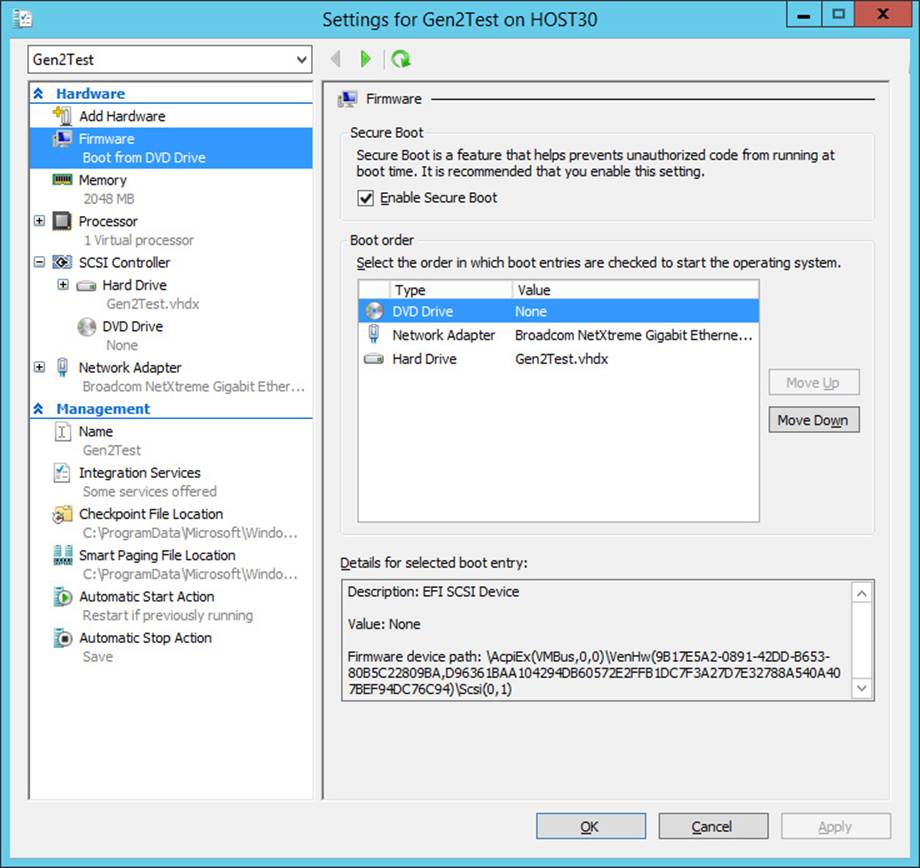
For more information about UEFI Secure Boot, see the post titled “Protecting the pre-OS environment with UEFI” in the Building Windows 8 blog at http://blogs.msdn.com/b/b8/archive/2011/09/22/protecting-the-pre-os-environment-with-uefi.aspx.
Location of configuration files
Although the default location where virtual machine configuration files are stored can be configured at the host level, you have the option of overriding this default when you create a new virtual machine. You might do this, for example, if you are creating a virtual machine for high availability—that is, a clustered virtual machine on a failover cluster of Hyper-V hosts that uses CSV shared storage. In such a scenario, you need to specify the CSV under the ClusterStorage folder in Failover Cluster Manager as the location where the virtual machine will be stored. Another scenario in which you might override the default configuration file storage location is when you are creating a virtual machine that will be stored on a SMB 3.0 file share on a Scale-Out File Server. In this case, you would specify the client access point that is configured in the failover cluster for the Scale-Out File Server as the location where the virtual machine will be stored. For an example of this second scenario, see “Configure Hyper-V to use Scale-Out File Server” at http://technet.microsoft.com/en-us/library/hh831463.aspx.
Startup memory
The memory that each new virtual machine will need is an important consideration when planning the creation of new virtual machines. Physical host systems have a fixed amount of physical memory, and this memory must be shared in an appropriate way among the different virtual machines that run on the host. (The host itself also requires some physical memory to function with optimum performance.) Planning the amount of physical memory to be allocated to a new virtual machine you will create involves two considerations:
![]() Deciding upon the amount of startup memory to be assigned to the virtual machine. The guest operating system installed in a virtual machine must have access to sufficient memory; otherwise, the virtual machine might not be able to start. The recommended startup memory varies based on the guest operating system involved and also on whether Dynamic Memory is enabled on the host. Some recommended values for startup memory include the following:
Deciding upon the amount of startup memory to be assigned to the virtual machine. The guest operating system installed in a virtual machine must have access to sufficient memory; otherwise, the virtual machine might not be able to start. The recommended startup memory varies based on the guest operating system involved and also on whether Dynamic Memory is enabled on the host. Some recommended values for startup memory include the following:
![]() 512 MBs for Windows Server 2008 R2 and Windows 7
512 MBs for Windows Server 2008 R2 and Windows 7
![]() 128 MBs for Windows Server 2003
128 MBs for Windows Server 2003
![]() Deciding whether to enable Dynamic Memory on the virtual machine. Dynamic Memory manages physical memory on the host as a shared resource that can be automatically reallocated among running virtual machines based on changes in memory demand and values you can specify. Dynamic Memory is discussed in more detail in Lesson 3 of this chapter.
Deciding whether to enable Dynamic Memory on the virtual machine. Dynamic Memory manages physical memory on the host as a shared resource that can be automatically reallocated among running virtual machines based on changes in memory demand and values you can specify. Dynamic Memory is discussed in more detail in Lesson 3 of this chapter.
Virtual processors
Some workloads can require additional processor resources to perform optimally. Hyper-V allows you to assign one or more virtual processors to each virtual machine running on the host, up to the maximum number of logical processors supported by the guest operating system installed in the virtual machine. You can also use Hyper-V to keep a reserve of the processor resources available to a virtual machine, specify a limit to the amount of processor resources the virtual machine can use, and configure how Hyper-V allocates processor resources when multiple running virtual machines on a host compete for the host’s processor resources. For more information on resource control settings for virtual processors, see “Configure Memory and Processors” at http://technet.microsoft.com/en-us/library/cc742470.aspx.
Virtual networking
Virtual networking involves creating virtual network adapters in virtual machines and assigning these adapters to virtual switches on the host. The following considerations apply when planning virtual networking for virtual machines:
![]() Each virtual machine can have up to 12 virtual network adapters installed in it. Of these 12 virtual network adapters, up to 8 can be the network adapter type and up to 4 can be the legacy network adapter type. These two types of virtual network adapters are discussed in more detail later in this lesson.
Each virtual machine can have up to 12 virtual network adapters installed in it. Of these 12 virtual network adapters, up to 8 can be the network adapter type and up to 4 can be the legacy network adapter type. These two types of virtual network adapters are discussed in more detail later in this lesson.
![]() Each virtual network adapter can be configured with either a static MAC address or a dynamic MAC address that is automatically assigned from the configured MAC address range on the host.
Each virtual network adapter can be configured with either a static MAC address or a dynamic MAC address that is automatically assigned from the configured MAC address range on the host.
![]() Each virtual network can be assigned a unique VLAN channel to segment or isolate network traffic.
Each virtual network can be assigned a unique VLAN channel to segment or isolate network traffic.
![]() Up to 512 virtual machines can be assigned to each virtual switch on the host.
Up to 512 virtual machines can be assigned to each virtual switch on the host.
Note: Hyper-V and wireless networking
Virtual switches on a Hyper-V host cannot be connected to a wireless network adapter on the host system.
Virtual hard disks
When you create a new virtual machine, you have three options concerning the virtual hard disks associated with the new virtual machine:
![]() You can create a new virtual hard disk when you create the new virtual machine.
You can create a new virtual hard disk when you create the new virtual machine.
![]() You can assign an existing virtual hard disk to the new virtual machine you are creating.
You can assign an existing virtual hard disk to the new virtual machine you are creating.
![]() You can create a new virtual machine with no virtual hard disk and then assign a virtual hard disk to it afterward.
You can create a new virtual machine with no virtual hard disk and then assign a virtual hard disk to it afterward.
Another planning consideration concerning virtual hard disks is the type of storage controller used for the disk. Virtual machines include both IDE and SCSI controllers, and you can add virtual hard disks to either type of controller. And although the startup (boot) disk of a virtual machine must be connected to the IDE controller, the underlying physical storage used for the virtual IDE device can be any of the storage types described in the section titled “Storage” in Lesson 1 earlier in this chapter.
Another planning consideration is the type of virtual disk to use—namely, one of the following types:
![]() Fixed-size This type of virtual hard disk has its image file preallocated on the physical storage device for the maximum size requested when the disk is created. For example, a 250 GB, fixed-size virtual hard disk will occupy 250 GBs of space on the host’s storage device.
Fixed-size This type of virtual hard disk has its image file preallocated on the physical storage device for the maximum size requested when the disk is created. For example, a 250 GB, fixed-size virtual hard disk will occupy 250 GBs of space on the host’s storage device.
![]() Dynamically expanding This type of virtual hard disk uses only as much physical storage space as it needs to store the actual data that the disk currently contains. The size of the virtual disk’s image file then grows as additional data is written to it. For example, the image file for a dynamic virtual hard disk of a newly created virtual machine that has no operating system installed on it has a size of only 4 MBs even though its maximum size is configured with the default value of 127 GBs. Once Windows Server 2012 or Windows Server 2012 R2 has been installed as the guest operating system, however, the size of the virtual disk’s image file will grow to more than 8 GBs. See Lesson 3 in this chapter for information on how to expand, compact, or shrink dynamically expanding disks.
Dynamically expanding This type of virtual hard disk uses only as much physical storage space as it needs to store the actual data that the disk currently contains. The size of the virtual disk’s image file then grows as additional data is written to it. For example, the image file for a dynamic virtual hard disk of a newly created virtual machine that has no operating system installed on it has a size of only 4 MBs even though its maximum size is configured with the default value of 127 GBs. Once Windows Server 2012 or Windows Server 2012 R2 has been installed as the guest operating system, however, the size of the virtual disk’s image file will grow to more than 8 GBs. See Lesson 3 in this chapter for information on how to expand, compact, or shrink dynamically expanding disks.
![]() Differencing This type of virtual hard disk allows you to make changes to a parent virtual hard disk without modifying the parent disk. For example, the parent disk could have a clean install of Windows Server 2012 R2 as its guest operating system and the differencing disk could contain changes to the parent. The changes can be reverted if needed by merging the differencing disk with the parent. Hyper-V checkpoints use such differencing disk technology.
Differencing This type of virtual hard disk allows you to make changes to a parent virtual hard disk without modifying the parent disk. For example, the parent disk could have a clean install of Windows Server 2012 R2 as its guest operating system and the differencing disk could contain changes to the parent. The changes can be reverted if needed by merging the differencing disk with the parent. Hyper-V checkpoints use such differencing disk technology.
Real World: Pass-through disks
Another type of disk that a Hyper-V virtual machine can use is the pass-through disk, which is not really a virtual disk at all. Instead, with pass-through disks the virtual machine is directly attached to a physical disk on the host’s storage system and the physical disk on the host is dedicated for use by the virtual machine only. With the performance improvements that have been made to both fixed-size and dynamically expanding virtual hard disks in recent versions of Hyper-V and given the added flexibility that virtual hard disks can provide, pass-through disks no longer offer any performance benefits beyond those provided by virtual hard disks and should not be used anymore.
Some additional planning considerations relating to virtual hard disks include the following:
![]() Whether to use virtual hard disks that use the VHD disk format used by previous versions of Hyper-V or the newer VHDX format introduced in Windows Server 2012. Although the older VHD format supported virtual hard disks up to 2040 GBs in size, the newer VHDX format supports virtual hard disks up to 64 TBs in size. VHDX also includes other enhancements, such as improved alignment to make the format work well on large-format disks, larger block sizes for dynamic and differencing disks, support for trim, support for 4 KB logical sector virtual disks, improved safeguards against data corruption when power interruptions occur, and other features. For more information on VHDX improvements, see “Hyper-V Virtual Hard Disk Format Overview” at http://technet.microsoft.com/en-us/library/hh831446.aspx.
Whether to use virtual hard disks that use the VHD disk format used by previous versions of Hyper-V or the newer VHDX format introduced in Windows Server 2012. Although the older VHD format supported virtual hard disks up to 2040 GBs in size, the newer VHDX format supports virtual hard disks up to 64 TBs in size. VHDX also includes other enhancements, such as improved alignment to make the format work well on large-format disks, larger block sizes for dynamic and differencing disks, support for trim, support for 4 KB logical sector virtual disks, improved safeguards against data corruption when power interruptions occur, and other features. For more information on VHDX improvements, see “Hyper-V Virtual Hard Disk Format Overview” at http://technet.microsoft.com/en-us/library/hh831446.aspx.
![]() If the storage capacity provided by a single virtual hard disk is not sufficient for the needs of the virtual machine’s workload, you can create additional virtual disks and attach them to the virtual machine using the IDE controller, SCSI controller, or both controllers.
If the storage capacity provided by a single virtual hard disk is not sufficient for the needs of the virtual machine’s workload, you can create additional virtual disks and attach them to the virtual machine using the IDE controller, SCSI controller, or both controllers.
![]() The maximum supported storage for a single virtual machine is 512 TBs for all types.
The maximum supported storage for a single virtual machine is 512 TBs for all types.
![]() If your Hyper-V hosts are using a SAN for their storage, you can improve storage performance by taking advantage of the Offloaded Data Transfer (ODX) functionality included in Windows Server 2012 and Windows Server 2012 R2. ODX can help minimize latency, maximize array throughput, and reduce processing and network resource usage on Hyper-V hosts by transparently offloading file-transfer operations from the host to the SAN. For more information, see “Windows Offloaded Data Transfers Overview” at http://technet.microsoft.com/en-us/library/hh831628.aspx.
If your Hyper-V hosts are using a SAN for their storage, you can improve storage performance by taking advantage of the Offloaded Data Transfer (ODX) functionality included in Windows Server 2012 and Windows Server 2012 R2. ODX can help minimize latency, maximize array throughput, and reduce processing and network resource usage on Hyper-V hosts by transparently offloading file-transfer operations from the host to the SAN. For more information, see “Windows Offloaded Data Transfers Overview” at http://technet.microsoft.com/en-us/library/hh831628.aspx.
![]() If your virtual machines need to be able to access storage on a Fibre Channel SAN, they can take advantage of the virtual Fibre Channel feature introduced in Windows Server 2012 Hyper-V. This feature provides Fibre Channel ports within the guest operating system so that you can directly connect virtual machines to SAN storage. The benefits of virtual Fibre Channel include being able to virtualize workloads that require direct SAN connectivity and being able to cluster guest operating systems over Fibre Channel. Implementing virtual Fibre Channel requires that the host bus adapter (HBA) on the host have an updated driver that supports virtual Fibre Channel and that the HBA ports be configured with a Fibre Channel topology that supports N_Port ID Virtualization (NPIV). For more information, see “Hyper-V Virtual Fibre Channel Overview” at http://technet.microsoft.com/en-us/library/hh831413.aspx.
If your virtual machines need to be able to access storage on a Fibre Channel SAN, they can take advantage of the virtual Fibre Channel feature introduced in Windows Server 2012 Hyper-V. This feature provides Fibre Channel ports within the guest operating system so that you can directly connect virtual machines to SAN storage. The benefits of virtual Fibre Channel include being able to virtualize workloads that require direct SAN connectivity and being able to cluster guest operating systems over Fibre Channel. Implementing virtual Fibre Channel requires that the host bus adapter (HBA) on the host have an updated driver that supports virtual Fibre Channel and that the HBA ports be configured with a Fibre Channel topology that supports N_Port ID Virtualization (NPIV). For more information, see “Hyper-V Virtual Fibre Channel Overview” at http://technet.microsoft.com/en-us/library/hh831413.aspx.
Online VHDX resize
New in Windows Server 2012 R2 Hyper-V is the ability to increase or decrease the size of a virtual hard disk attached to a virtual machine while that virtual machine is still running on the host. This means that if the workload running on a virtual machine requires more space, you can expand the virtual hard disk without interrupting any applications accessing the workload. And if you want to reallocate storage space from one virtual machine to another, you can shrink the virtual hard disk attached to the first virtual machine (provided that there is sufficient unpartitioned space on the disk) to free up space for expanding the disk on the second machine.
Online resizing of virtual hard disks requires that these disks be using the newer VHDX virtual hard disk format first introduced in Windows Server 2012. VHDX was designed to address the growing technological demands of today’s enterprises and provides greater storage capacity, built-in data protection, and support for large-sector hard disk drives. In addition, online resizing requires that the virtual disk be attached to the virtual machine’s SCSI bus.
For example, you can take the following steps to use Hyper-V Manager to expand the size of a running virtual machine:
1. In Hyper-V Manager, right-click the virtual machine and select Settings.
2. In the Settings dialog box for the virtual machine, click the Hard Drive node under SCSI Controller for the virtual hard disk you want to expand and then click the Edit button to launch the Edit Virtual Hard Disk Wizard.
3. Select the Expand option on the Choose Action page, click Next, type the new size you want the virtual hard disk to have (see the screenshot below), and then click Next followed by Finish.
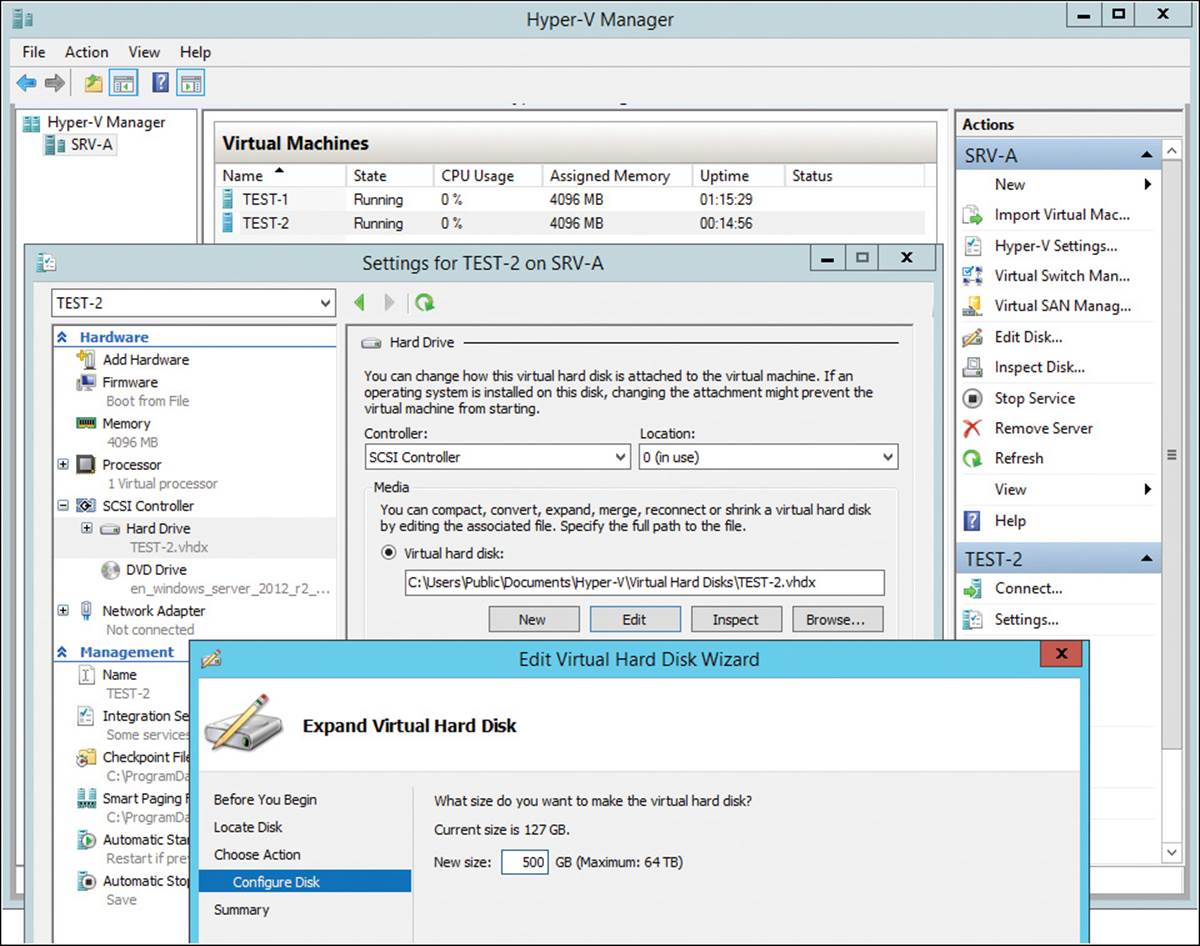
Once you’ve expanded a virtual hard disk, the option to shrink it will be displayed the next time you use the Edit Virtual Hard Disk Wizard. Of course, you can also resize online virtual disks by using Windows PowerShell.
Guest operating system deployment
You can install guest operating systems in virtual machines the same way you install them on physical systems. For example, you could do the following:
![]() Manually install the guest operating system by attaching an ISO image of the product media to the virtual machine’s virtual DVD drive and then walk through the steps of the installation process.
Manually install the guest operating system by attaching an ISO image of the product media to the virtual machine’s virtual DVD drive and then walk through the steps of the installation process.
![]() Perform a Lite Touch Installation (LTI) deployment of the guest operating system by booting the virtual machine from a server that has the Windows Deployment Services role installed and then stepping through (or automating) the Windows Deployment Wizard of Microsoft Deployment Toolkit (MDT) 2012 Update 1. For more information, see Chapter 2, “Deploying servers.”
Perform a Lite Touch Installation (LTI) deployment of the guest operating system by booting the virtual machine from a server that has the Windows Deployment Services role installed and then stepping through (or automating) the Windows Deployment Wizard of Microsoft Deployment Toolkit (MDT) 2012 Update 1. For more information, see Chapter 2, “Deploying servers.”
![]() Perform a Zero Touch Installation (ZTI) deployment of the guest operating system by using System Center 2012 Configuration Manager SP1 to deploy a reference image created using MDT 2012 Update 1. For more information, see “Operating System Deployment in Configuration Manager” at http://technet.microsoft.com/en-us/library/gg682018.
Perform a Zero Touch Installation (ZTI) deployment of the guest operating system by using System Center 2012 Configuration Manager SP1 to deploy a reference image created using MDT 2012 Update 1. For more information, see “Operating System Deployment in Configuration Manager” at http://technet.microsoft.com/en-us/library/gg682018.
Linux as a guest
In addition to supporting the full range of Windows client and server operating systems as guest operating systems, Windows Server 2012 R2 Hyper-V also includes broad support for Linux as a guest operating system. Linux guest support in Hyper-V is especially desired by hosting providers who often like to provide their customers with a wide range of platform options for running their web applications and services. Linux (and UNIX) support in Hyper-V is also important in the enterprise space in which heterogeneous IT solutions are generally the norm.
Because of the needs of these customer segments, Microsoft envisions Hyper-V virtualization as “cross-platform from the metal up” and supports a wide range of Linux distros, as shown in the table below, by providing Linux Integration Services (LIS) for specific versions of popular distros.
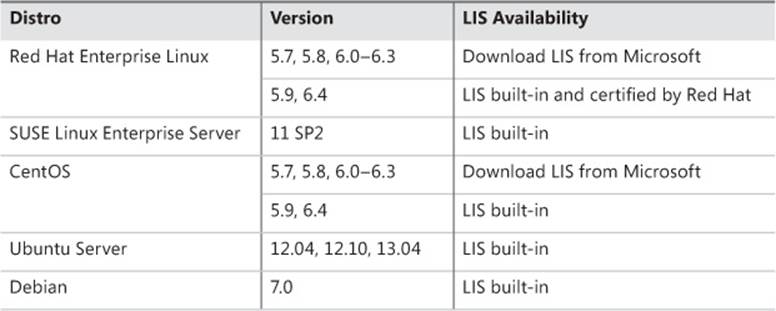
As part of Microsoft’s continuing commitment to making Hyper-V the best all-around virtual platform for hosting providers, Linux support for Hyper-V in Windows Server 2012 R2 has been enhanced in the following ways:
![]() Improved video A virtualized video driver is now included for Linux virtual machines to provide an enhanced video experience with better mouse support.
Improved video A virtualized video driver is now included for Linux virtual machines to provide an enhanced video experience with better mouse support.
![]() Dynamic Memory Dynamic Memory is now fully supported for Linux virtual machines, including both hot-add and remove functionality. This means you can now run Windows and Linux virtual machines side by side on the same host machine while using Dynamic Memory to ensure fair allocation of memory resources to each virtual machine on the host.
Dynamic Memory Dynamic Memory is now fully supported for Linux virtual machines, including both hot-add and remove functionality. This means you can now run Windows and Linux virtual machines side by side on the same host machine while using Dynamic Memory to ensure fair allocation of memory resources to each virtual machine on the host.
![]() Online VHDX resize Virtual hard disks attached to Linux virtual machines can now be resized while the virtual machine is running.
Online VHDX resize Virtual hard disks attached to Linux virtual machines can now be resized while the virtual machine is running.
![]() Online backup You can now back up running Linux virtual machines to Windows Azure by using the Windows Azure Online Backup capabilities of the in-box Windows Server Backup utility, System Center Data Protection Manager, or any third-party backup solution that supports backing up Hyper-V virtual machines.
Online backup You can now back up running Linux virtual machines to Windows Azure by using the Windows Azure Online Backup capabilities of the in-box Windows Server Backup utility, System Center Data Protection Manager, or any third-party backup solution that supports backing up Hyper-V virtual machines.
Microsoft also includes robust Linux/UNIX capabilities across the entire System Center family of products and in Windows Azure. Linux/UNIX support is an integral part of all of these platforms, not merely an extension of Windows-centric functionality.
Automatic virtual machine activation
Beginning with Windows Server 2003 R2 with Service Pack 2, the Datacenter edition of Windows Server has provided unlimited virtualization rights for servers to allow organizations to deploy as many virtual machines as they need in their environments. Until now, however, this benefit has come with the cost of the administrative overhead of deploying a key management infrastructure for licensing and activating these virtual machines.
Beginning with Windows Server 2012 R2, the task of managing product keys for virtual machines can be simplified by using a new capability called Automatic Virtual Machine Activation (AVMA). It works like this:
1. To start, the Hyper-V host on which your virtual machines will be deployed must have Windows Server 2012 R2 Datacenter edition installed on it as the host operating system.
2. Next, to avoid having to activate virtual machines and manage their product keys, the virtual machines must have Windows Server 2012 R2 Standard, Windows Server 2012 R2 Datacenter, or Windows Server 2012 R2 Essentials installed on them as their guest operating systems.
3. Once the guest operating system is installed in a virtual machine and the virtual machine is started, you can log on to the virtual machine, open an elevated command prompt, and install the AVMA key in the virtual machine by running this command:
slmgr /ipk <AVMA_key>
Doing this automatically activates the license for the virtual machine against the host.
4. Alternatively, you can use the AVMA key in an unattend.xml answer file and completely automate the activation of the virtual machine when an unattended installation of the guest operating system is performed on the virtual machine.
AVMA greatly reduces the time and effort that large enterprises and hosters need for managing licensing and activation of large numbers of virtual machines in their environment. Regardless of whether your Hyper-V hosts are OEM machines or are running a volume-licensed version of Windows Server activated using Key Management Service (KMS) or Multiple Activation Key (MAK), if the host machine is running Windows Server 2012 R2 Datacenter edition and is activated then all virtual machines running any Windows Server 2012 R2 edition as a guest operating system are automatically activated.
In addition, AVMA is completely secure with respect to your existing key management infrastructure because no keys are used to activate the virtual machines. So if you copy or move one of your virtual machines to someone else’s environment—for example, for demonstration purposes—your keys won’t be exposed. Of course, the other environment must also be using hosts running an activated copy of a Datacenter edition of Windows Server.
Performing checkpoints
Although checkpoints (called snapshots in Windows Server 2012 and earlier versions of Hyper-V but now called checkpoints to harmonize with System Center Virtual Machine Manager terminology) are not recommended for use in production environments, they might have value in certain limited scenarios. For example, you might consider performing a checkpoint of a production virtual machine just before you apply a critical software update to the guest operating system of the virtual machine. That way, if something goes wrong after applying the update you can quickly revert the virtual machine to its previous state (that is, before the update was applied). However, there are certain scenarios in which you should never perform checkpoints, specifically the following:
![]() Don’t perform checkpoints on virtualized domain controllers.
Don’t perform checkpoints on virtualized domain controllers.
![]() Don’t perform checkpoints on virtualized workloads that run time-sensitive services.
Don’t perform checkpoints on virtualized workloads that run time-sensitive services.
![]() Don’t perform checkpoints on virtualized workloads that use data distributed across multiple databases.
Don’t perform checkpoints on virtualized workloads that use data distributed across multiple databases.
Also, don’t try to restore checkpoints older than 30 days because the computer password for the guest operating system might have expired, which will cause the guest to disjoin itself from the domain.
Finally, if you do plan on performing checkpoints, make sure the host has sufficient storage for all the checkpoint files you might create. Checkpoints can consume a lot of disk space, and you could end up running out of storage space if you perform too many of them.
Considerations for importing virtual machines
Although the process of importing an existing virtual machine onto a Hyper-V host has been simplified in Windows Server 2012 and Windows Server 2012 R2, there are still a number of issues that you should consider before you perform the import. The following improvements were made to the virtual machine import process beginning with Windows Server 2012:
![]() The import process has been updated so that configuration problems that might prevent the import from being successful are detected and resolved. For example, if you are importing the virtual machine onto a target host that has a different set of virtual switches from those on the source host, the Import Virtual Machine Wizard, which can be launched from Hyper-V Manager, prompts you to choose a virtual switch to connect to the virtual network adapter on the virtual machine.
The import process has been updated so that configuration problems that might prevent the import from being successful are detected and resolved. For example, if you are importing the virtual machine onto a target host that has a different set of virtual switches from those on the source host, the Import Virtual Machine Wizard, which can be launched from Hyper-V Manager, prompts you to choose a virtual switch to connect to the virtual network adapter on the virtual machine.
![]() Virtual machines can be directly imported from the virtual machine’s configuration file without first exporting the virtual machine. You can do this by manually copying the virtual machine files instead of exporting them. In fact, when you export a virtual machine in Windows Server 2012 or Windows Server 2012 R2, all that happens is that a copy of the virtual machine’s files is created.
Virtual machines can be directly imported from the virtual machine’s configuration file without first exporting the virtual machine. You can do this by manually copying the virtual machine files instead of exporting them. In fact, when you export a virtual machine in Windows Server 2012 or Windows Server 2012 R2, all that happens is that a copy of the virtual machine’s files is created.
![]() Hyper-V includes Windows PowerShell cmdlets that you can use to export and import virtual machines.
Hyper-V includes Windows PowerShell cmdlets that you can use to export and import virtual machines.
The following issues might be important to consider when planning the import of virtual machines onto your hosts:
![]() When you import a virtual machine, you have the choice of either of the following approaches:
When you import a virtual machine, you have the choice of either of the following approaches:
![]() Registering the virtual machine in-place and assigning the GUID of the existing virtual machine to the new virtual machine (the default). You can choose this option if the virtual machine’s files are already in the location where they need to be to run on the target host and you just want to begin running the virtual machine from where it is located.
Registering the virtual machine in-place and assigning the GUID of the existing virtual machine to the new virtual machine (the default). You can choose this option if the virtual machine’s files are already in the location where they need to be to run on the target host and you just want to begin running the virtual machine from where it is located.
![]() Restoring the virtual machine and assigning the GUID of the existing virtual machine to the new virtual machine. You can use this option if the virtual machine’s files are stored on a file share or removable storage device and you want to move them to the default storage location on the target host.
Restoring the virtual machine and assigning the GUID of the existing virtual machine to the new virtual machine. You can use this option if the virtual machine’s files are stored on a file share or removable storage device and you want to move them to the default storage location on the target host.
![]() Copying the virtual machine and generating a new GUID for the new virtual machine. You can use this option if you want to use the existing virtual machine as a template that you will be importing multiple times to create new virtual machines—for example, for test or development work.
Copying the virtual machine and generating a new GUID for the new virtual machine. You can use this option if you want to use the existing virtual machine as a template that you will be importing multiple times to create new virtual machines—for example, for test or development work.
![]() If you are migrating the virtual machines from a host running an earlier version of Windows Server such as Windows Server 2008 R2, you can use the Compare-VM cmdlet to generate a compatibility report that lists any incompatibilities that the virtual machine might have with the target host. You can then use this report to take steps to resolve such issues so that when you use the Import-VM cmdlet later the import process will go smoothly.
If you are migrating the virtual machines from a host running an earlier version of Windows Server such as Windows Server 2008 R2, you can use the Compare-VM cmdlet to generate a compatibility report that lists any incompatibilities that the virtual machine might have with the target host. You can then use this report to take steps to resolve such issues so that when you use the Import-VM cmdlet later the import process will go smoothly.
![]() If you are importing virtual machines from a nonclustered host to a clustered host, there might be additional considerations, such as whether you need to import the virtual machines to the shared storage used by the failover cluster.
If you are importing virtual machines from a nonclustered host to a clustered host, there might be additional considerations, such as whether you need to import the virtual machines to the shared storage used by the failover cluster.
Live export
New in Windows Server 2012 R2 is the ability to export a complete copy of a running virtual machine or to export any checkpoint of a running virtual machine. You also can use Virtual Machine Manager 2012 R2 to clone a running virtual machine, which basically involves exporting and then importing a virtual machine to create a new virtual machine that is based on the existing virtual machine. You can even export snapshots (checkpoints) associated with a virtual machine while the virtual machine is running.
One scenario in which live export can be helpful is when a running virtual machine in your environment begins to exhibit some instability but is still performing its expected workload. Previously, you had to choose between the lesser of two evils:
![]() Stop the virtual machine or take it offline and try to troubleshoot the problem. Unfortunately, while the virtual machine is stopped or offline its workload will no longer be available to users, which can result in loss of either business or productivity.
Stop the virtual machine or take it offline and try to troubleshoot the problem. Unfortunately, while the virtual machine is stopped or offline its workload will no longer be available to users, which can result in loss of either business or productivity.
![]() Let the virtual machine continue to run and hope it doesn’t fail. This approach allows the virtual machine’s workload to continue to be available, but instability often causes the application or guest operating system to crash, which means a probable interruption in workload will occur. Once again, this is likely to result in loss of either business or productivity.
Let the virtual machine continue to run and hope it doesn’t fail. This approach allows the virtual machine’s workload to continue to be available, but instability often causes the application or guest operating system to crash, which means a probable interruption in workload will occur. Once again, this is likely to result in loss of either business or productivity.
With live export, however, you can now clone a copy of your unstable virtual machine without shutting down the virtual machine. You can then let your production virtual machine continue to run while you perform troubleshooting steps on the cloned workload to see if you can resolve the issue causing the instability. Once you determine how to fix the problem by working with the cloned virtual machine, you might be able to repair your production virtual machine without needing to reboot the guest operating system or restart its running applications, depending on the issue causing the instability.
Some other scenarios in which being able to export running virtual machines can be useful include troubleshooting problems with applications running in virtual machines, performing tests prior to moving a virtual machine from your private cloud to a hosted or public cloud environment (or vice versa), and duplicating your existing production environment to create a test lab.
Creating virtual machines
You can create new virtual machines on a Hyper-V host by using either Hyper-V Manager or Windows PowerShell.
Using Hyper-V Manager
You create a new virtual machine using Hyper-V Manager in the same way as in previous versions of Windows Server. The steps in this process are as follows:
1. Launch the New Virtual Machine Wizard by right-clicking the host in Hyper-V Manager and selecting New and then Virtual Machine.
2. Specify a descriptive name for the new virtual machine and optionally specify a different location for storing the virtual machine’s files (configuration files, virtual hard disks, and checkpoints) if the default storage locations for the host are not the ones you want to use.
3. Specify the amount of startup memory to be used by the virtual machine’s guest operating system and specify whether Dynamic Memory is to be used for the virtual machine.
4. Select an existing virtual switch on the host that should be connected to the virtual network adapter on the virtual machine or leave the virtual machine unconnected from any virtual switches on the host.
5. Create a new virtual disk as the system volume on the virtual machine, attach an existing virtual disk for this purpose, or create the virtual machine without any virtual hard disks attached so that you can attach one later. If you choose the first option, you can specify whether to install the guest operating system later; install it from the virtual CD/DVD drive, ISO image file, or virtual floppy disk; or install it from a network-based installation server (if you have connected the virtual network adapter to a virtual switch).
Using Windows PowerShell
You can also use the New-VM cmdlet to create a new virtual machine using Windows PowerShell. For example, to create a new virtual machine named SRV-A on HOST4, assign the virtual machine 1 GB of startup memory, attach it to the virtual switch named CONTOSO Virtual Switch, create a new virtual hard disk (VHDX file) of 500 GBs in the default location, and make the virtual CD drive the default boot device, use the following command:
PS C:\> New-VM -ComputerName HOST4 -Name SRV-A -MemoryStartupBytes 1GB `
-BootDevice CD -SwitchName "CONTOSO Virtual Switch" -NewVHDSizeBytes 500GB `
-NewVHDPath SRV-A.vhdx
Name State CPUUsage(%) MemoryAssigned(M) Uptime Status
---- ----- ----------- ----------------- ------ ------
SRV-A Off 0 0 00:00:00 Operating normally
Importing virtual machines
You can also import existing virtual machines onto a Hyper-V host by using either Hyper-V Manager or Windows PowerShell. For example, to import a virtual machine by using Hyper-V Manager, select the target host and click Import Virtual Machine in the Actions pane. This launches the Import Virtual Machine Wizard. As Figure 7-6 shows, you can use this wizard to perform the various import scenarios described earlier in this lesson.
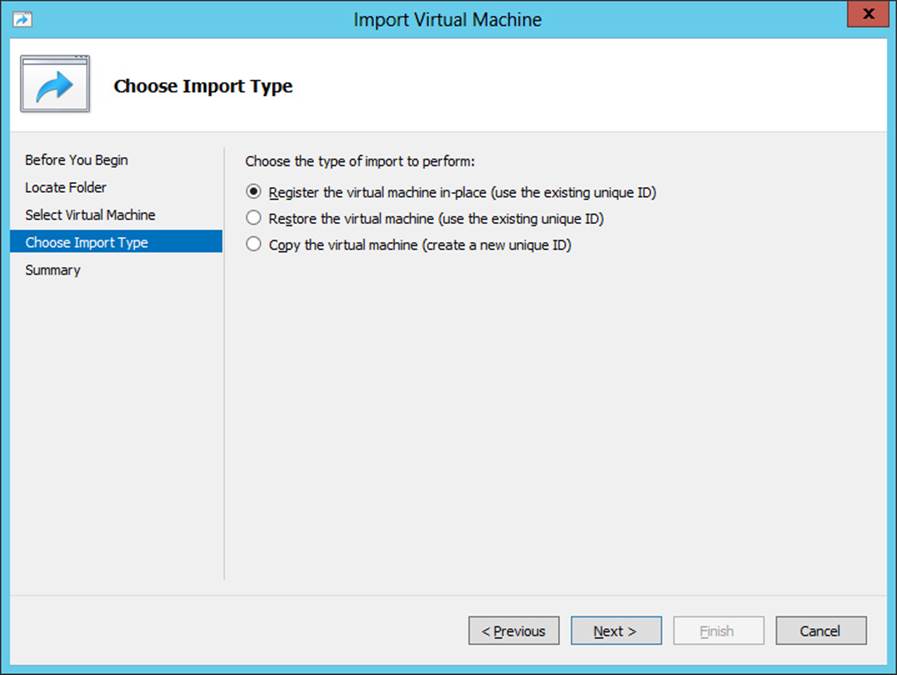
FIGURE 7-6 Use the Import Virtual Machine Wizard.
To import virtual machines by using Windows PowerShell, use the Import-VM cmdlet. For help on using this cmdlet, see the examples at the end of the “Import-VM” topic at http://technet.microsoft.com/en-us/library/hh848495.
![]() Quick check
Quick check
![]() You want to use an existing virtual machine as a template for creating new virtual machines on a Hyper-V host in your test environment. Should you register, restore, or copy the virtual machine when you import it onto a host?
You want to use an existing virtual machine as a template for creating new virtual machines on a Hyper-V host in your test environment. Should you register, restore, or copy the virtual machine when you import it onto a host?
Quick check answer
![]() You should copy it. This generates a new GUID for each new virtual machine you create with the import process.
You should copy it. This generates a new GUID for each new virtual machine you create with the import process.
Configuring virtual machines
Once you have created a virtual machine, you might need to further configure its virtual hardware and management settings. You can do this either by opening the virtual machine’s settings in Hyper-V Manager or by using Windows PowerShell. For example, to view or modify the settings for a virtual machine by using Hyper-V Manager, right-click the virtual machine and select Settings. Doing this displays a Settings dialog box such as the one shown in Figure 7-7.
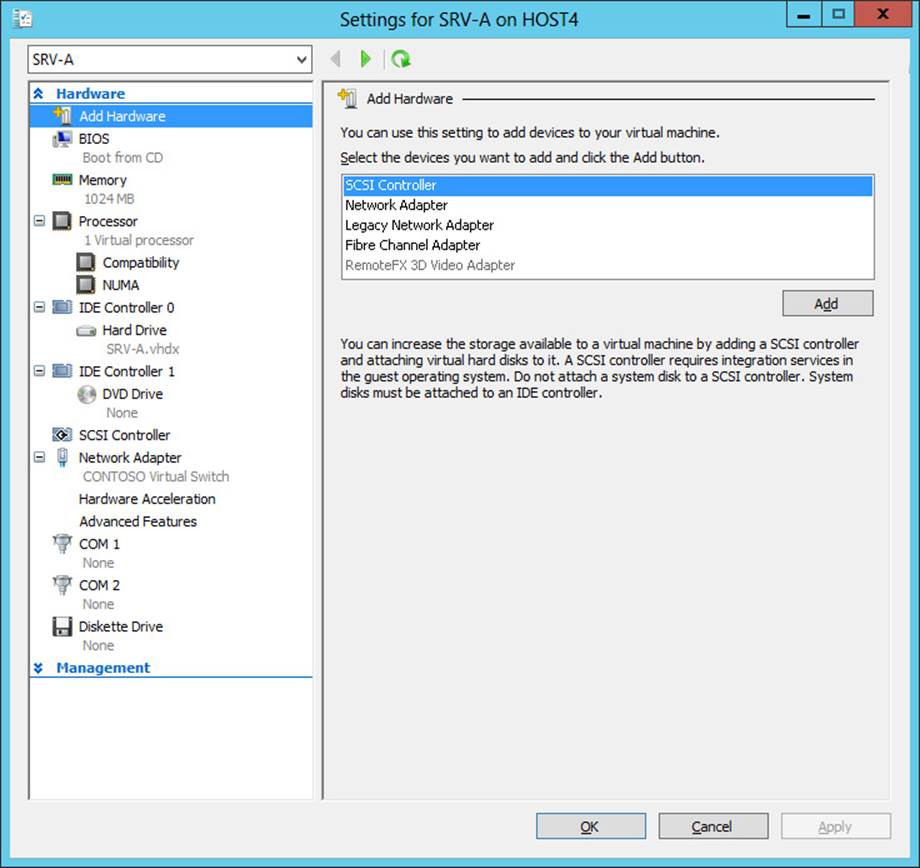
FIGURE 7-7 Configure virtual hardware for a virtual machine.
To view the settings of the same virtual machine by using Windows PowerShell, you can use the Get-VM cmdlet as shown here:
PS C:\> Get-VM -Name SRV-A | Format-List *
VMName : SRV-A
VMId : cabb9f25-1d4a-4ce0-884a-a04520ed0880
Id : cabb9f25-1d4a-4ce0-884a-a04520ed0880
Name : SRV-A
State : Off
OperationalStatus : {Ok}
PrimaryOperationalStatus : Ok
SecondaryOperationalStatus :
StatusDescriptions : {Operating normally}
PrimaryStatusDescription : Operating normally
SecondaryStatusDescription :
Status : Operating normally
Heartbeat :
ReplicationState : Disabled
ReplicationHealth : NotApplicable
ReplicationMode : None
CPUUsage : 0
MemoryAssigned : 0
MemoryDemand : 0
MemoryStatus :
SmartPagingFileInUse : False
Uptime : 00:00:00
IntegrationServicesVersion :
ResourceMeteringEnabled : False
ConfigurationLocation : C:\ProgramData\Microsoft\Windows\Hyper-V
SnapshotFileLocation : C:\ProgramData\Microsoft\Windows\Hyper-V
AutomaticStartAction : StartIfRunning
AutomaticStopAction : Save
AutomaticStartDelay : 0
SmartPagingFilePath : C:\ProgramData\Microsoft\Windows\Hyper-V
NumaAligned :
NumaNodesCount : 1
NumaSocketCount : 1
IsDeleted : False
ComputerName : HOST4
Notes :
Path : C:\ProgramData\Microsoft\Windows\Hyper-V
CreationTime : 8/13/2012 8:16:47 AM
IsClustered : False
SizeOfSystemFiles : 28464
ParentSnapshotId :
ParentSnapshotName :
MemoryStartup : 1073741824
DynamicMemoryEnabled : False
MemoryMinimum : 536870912
MemoryMaximum : 1099511627776
ProcessorCount : 1
RemoteFxAdapter :
NetworkAdapters : {Network Adapter}
FibreChannelHostBusAdapters : {}
ComPort1 : Microsoft.HyperV.PowerShell.VMComPort
ComPort2 : Microsoft.HyperV.PowerShell.VMComPort
FloppyDrive : Microsoft.HyperV.PowerShell.VMFloppyDiskDrive
DVDDrives : {DVD Drive on IDE controller number 1 at location 0}
HardDrives : {Hard Drive on IDE controller number 0 at location 0}
VMIntegrationService : {Time Synchronization, Heartbeat, Key-Value Pair Exchange, Shutdown...}
To modify these virtual machine settings, you can use the Set-VM cmdlet and other Hyper-V cmdlets. In the sections that follow, we examine only a few of these different virtual machine settings and how to configure them. For additional information on configuring virtual machine settings, search the TechNet Library for the appropriate topic.
Adding virtual disks
You can use the IDE Controller 0, IDE Controller 1, and SCSI Controller pages of the virtual machine Settings dialog box in Hyper-V Manager to add new virtual disks to a virtual machine. You can also use subpages of these pages to inspect, browse, or edit an existing virtual hard disk; remove a virtual disk that is attached to the virtual machine; or attach a physical disk on the host’s storage system to the virtual machine.
When you add a virtual disk using the New Virtual Hard Disk Wizard, you have a choice of using either the VHDX or VHD format for the new disk. (The default is VHDX.) The New Virtual Hard Disk Wizard also lets you configure a name for the new disk, the disk type (the default is dynamically expanding), the maximum size for the disk (the default is 127 GBs), and whether the new disk should be blank or contain the data on a physical disk on the host or on an existing virtual disk, as shown in Figure 7-8.
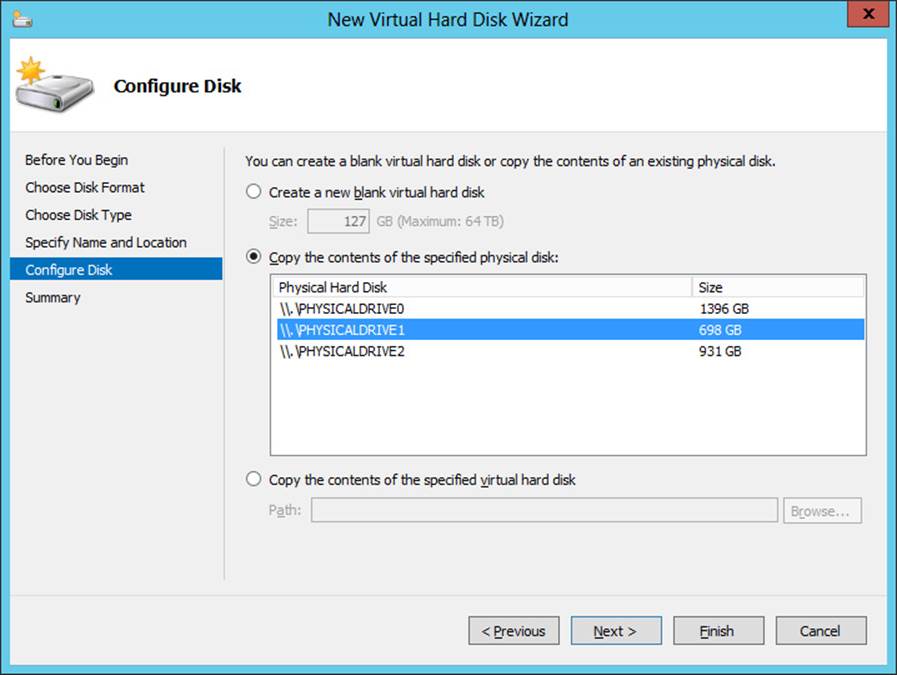
FIGURE 7-8 Configure a new virtual disk to copy its data from a physical disk on the host.
You can also use the Add Hardware page of the virtual machine Settings dialog box to add SCSI controllers to your virtual machine so that you can connect more virtual disks to the virtual machine.
You can also use Windows PowerShell to create new virtual disks and add them to your virtual machines. For example, say you want to create and attach a 500 GB dynamically expanding data disk to virtual machine SRV-A on HOST4. You can begin by using the Get-VHD command to display a list of disks attached to SRV-A as follows:
PS C:\> Get-VM -VMName SRV-A | Select-Object VMId | Get-VHD | `
Format-List Path,VhdFormat,VhdType,Size
Path : C:\Users\Public\Documents\Hyper-V\Virtual Hard Disks\SRV-A.vhdx
VhdFormat : VHDX
VhdType : Dynamic
Size : 536870912000
The preceding command takes advantage of the pipeline capabilities of Windows PowerShell and works like this:
1. The command Get-VM –VMName SRV-A returns an object representing virtual machine SRV-A.
2. The output of the preceding command is then piped into the command Select-Object VMId, which returns an object representing the GUID for SRV-A.
3. The GUID for SRV-A is then piped into the Get-VHD command to indicate which virtual machine is to be queried for its virtual disks.
4. The output of the Get-VHD command is then formatted as a list to display only those properties of interest—namely, the path and file name of the virtual disk file, the format it uses, the disk’s type, and the disk’s size.
Next you can use the New-VHD cmdlet to create the new data disk as follows:
PS C:\> New-VHD -SizeBytes 500GB `
-Path "C:\Users\Public\Documents\Hyper-V\Virtual Hard Disks\SRV-A-data.vhdx"
ComputerName : HOST4
Path : C:\Users\Public\Documents\Hyper-V\Virtual Hard Disks\SRV-A-data.vhdx
VhdFormat : VHDX
VhdType : Dynamic
FileSize : 4194304
Size : 536870912000
...
Then you can use the Add-VMHardDiskDrive cmdlet to attach the new data disk to location 1 on IDE controller 0 as follows:
PS C:\> Add-VMHardDiskDrive -VMName SRV-A `
-Path "C:\Users\Public\Documents\Hyper-V\Virtual Hard Disks\SRV-A-data.vhdx" `
-ControllerType IDE -ControllerNumber 0 -ControllerLocation 1
You can then use the Get-VHD cmdlet as before to verify the result:
PS C:\> Get-VM -VMName SRV-A | Select-Object VMId | Get-VHD | `
Format-List Path,VhdFormat,VhdType,Size
Path : C:\Users\Public\Documents\Hyper-V\Virtual Hard Disks\SRV-A.vhdx
VhdFormat : VHDX
VhdType : Dynamic
Size : 536870912000
Path : C:\Users\Public\Documents\Hyper-V\Virtual Hard Disks\SRV-A-data.vhdx
VhdFormat : VHDX
VhdType : Dynamic
Size : 536870912000
Alternatively, you can use the Get-VMHardDiskDrive cmdlet to display all disks connected to the IDE controllers on the virtual machine:
PS C:\> Get-VMHardDiskDrive -VMName SRV-A | `
Format-List ControllerNumber,ControllerLocation,Path
ControllerNumber : 0
ControllerLocation : 0
Path : C:\Users\Public\Documents\Hyper-V\Virtual Hard Disks\SRV-A.vhdx
ControllerNumber : 0
ControllerLocation : 1
Path : C:\Users\Public\Documents\Hyper-V\Virtual Hard Disks\SRV-A-data.vhdx
Viewing the IDE 0 Controller page and its subpages in the Settings dialog box for the virtual machine also confirms that the procedure was successful.
Adding and configuring virtual network adapters
You can use the Add Hardware page of the virtual machine Settings dialog box in Hyper-V Manager to add new virtual network adapters to your virtual machine. You can choose from two types of virtual network adapters:
![]() Network adapter Originally called a synthetic network adapter in the first version of Hyper-V, this type of virtual network adapter relies on Integration Components being installed in the virtual machine to ensure optimal performance. Operating systems such as Windows Server 2008 R2 and later have Integration Components built into them. When you use older operating systems for the guest, you might need to install Integration Components in the virtual machine.
Network adapter Originally called a synthetic network adapter in the first version of Hyper-V, this type of virtual network adapter relies on Integration Components being installed in the virtual machine to ensure optimal performance. Operating systems such as Windows Server 2008 R2 and later have Integration Components built into them. When you use older operating systems for the guest, you might need to install Integration Components in the virtual machine.
![]() Legacy network adapter This type of virtual network adapter emulates a multiport DEC 21140 10/100TX 100 MB Ethernet adapter and is provided for three main reasons:
Legacy network adapter This type of virtual network adapter emulates a multiport DEC 21140 10/100TX 100 MB Ethernet adapter and is provided for three main reasons:
![]() To support legacy guest operating systems that do not support the installation of Integration Components.
To support legacy guest operating systems that do not support the installation of Integration Components.
![]() To support non-Windows guest operating systems for which Hyper-V does not provide Integration Components.
To support non-Windows guest operating systems for which Hyper-V does not provide Integration Components.
![]() To support network-based installations. (Legacy network adapters have the ability to boot to the Pre-Boot Execution Environment [PXE] to start the network-based installation process.)
To support network-based installations. (Legacy network adapters have the ability to boot to the Pre-Boot Execution Environment [PXE] to start the network-based installation process.)
Note: Support for legacy network adapters
Legacy network adapters are not supported in the 64-bit edition of Windows Server 2003 or the Windows XP Professional x64 edition.
Once a virtual network adapter has been added to your virtual machine, you can configure the adapter by selecting the appropriate page in the virtual machine Settings dialog box as shown in Figures 7-9, 7-10, and 7-11. The configuration settings available for the network adapter type of virtual network adapter are as follows:
![]() Virtual Switch You can connect the virtual network adapter to a different virtual switch on the host or even remove all connectivity if needed.
Virtual Switch You can connect the virtual network adapter to a different virtual switch on the host or even remove all connectivity if needed.
![]() Virtual LAN Identification You can enable VLAN identification and specify a VLAN ID to segment or isolate network traffic for the virtual network adapter.
Virtual LAN Identification You can enable VLAN identification and specify a VLAN ID to segment or isolate network traffic for the virtual network adapter.
![]() Bandwidth Management You can specify how much network bandwidth the virtual network adapter should use for communications over the connected virtual switch.
Bandwidth Management You can specify how much network bandwidth the virtual network adapter should use for communications over the connected virtual switch.
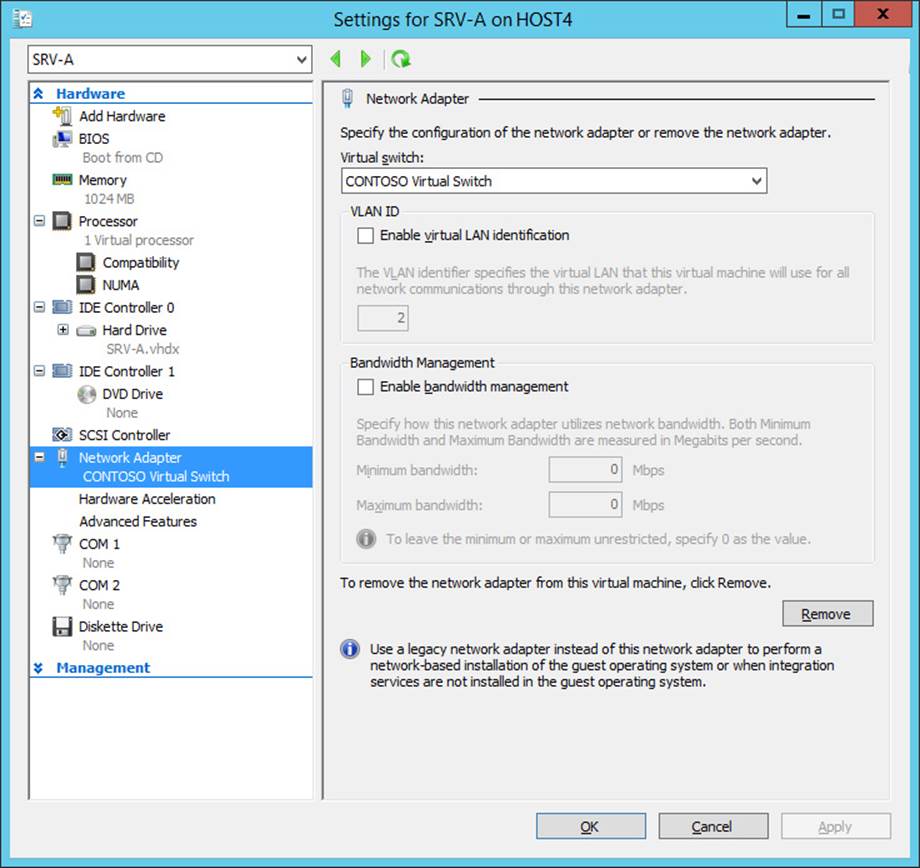
FIGURE 7-9 The Settings dialog box shows the configuration settings available for virtual network adapters.
![]() Virtual Machine Queue (VMQ) This technology allows supported network adapters to use hardware packet filtering to deliver packet data from an external virtual machine network directly to the virtual machine. This reduces the overhead of routing and copying packets from the management operating system to the virtual machine. VMQ is enabled by default on new virtual network adapters.
Virtual Machine Queue (VMQ) This technology allows supported network adapters to use hardware packet filtering to deliver packet data from an external virtual machine network directly to the virtual machine. This reduces the overhead of routing and copying packets from the management operating system to the virtual machine. VMQ is enabled by default on new virtual network adapters.
![]() IPsec Task Offloading This technology allows supported network adapters to perform IPsec processing to reduce the processing load on the host. IPsec task offloading is enabled by default on new virtual network adapters.
IPsec Task Offloading This technology allows supported network adapters to perform IPsec processing to reduce the processing load on the host. IPsec task offloading is enabled by default on new virtual network adapters.
![]() Single-Root I/O Virtualization You can assign SR-IOV-capable network adapters directly to a virtual machine to maximize network throughput while minimizing network latency and the CPU overhead required for processing network traffic. Implementing SR-IOV requires host firmware, such as Intel VT-d, that supports SR-IOV and an SR-IOV-capable network adapter and driver installed in both the management operating system and the virtual machine.
Single-Root I/O Virtualization You can assign SR-IOV-capable network adapters directly to a virtual machine to maximize network throughput while minimizing network latency and the CPU overhead required for processing network traffic. Implementing SR-IOV requires host firmware, such as Intel VT-d, that supports SR-IOV and an SR-IOV-capable network adapter and driver installed in both the management operating system and the virtual machine.
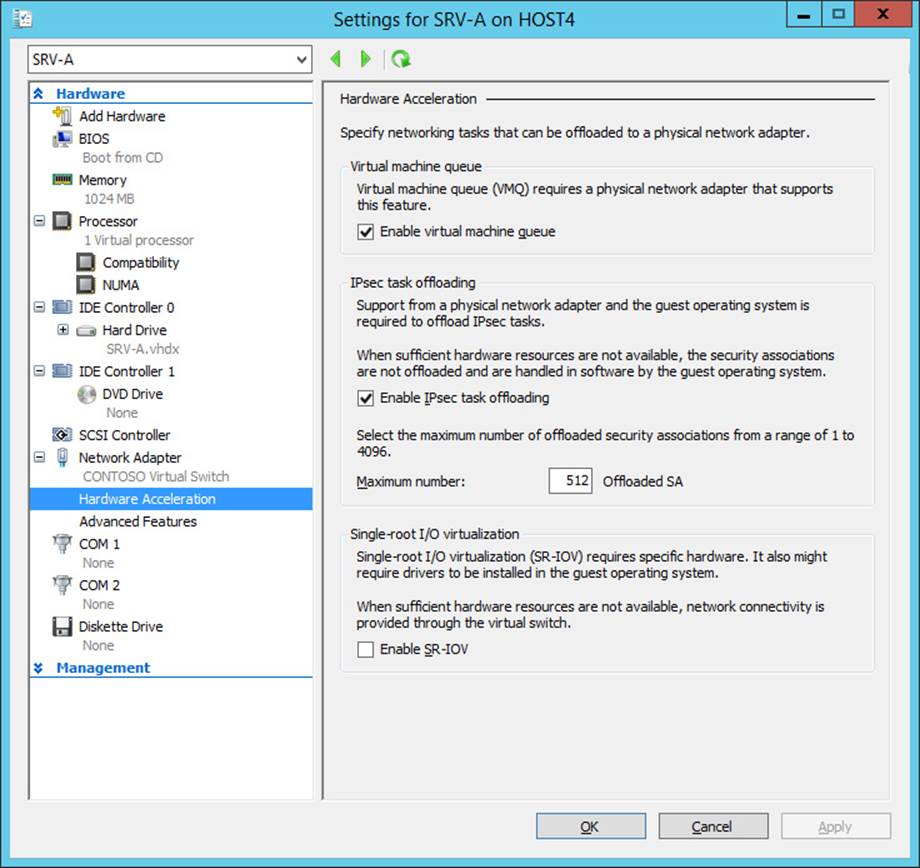
FIGURE 7-10 The Settings dialog box also shows the hardware acceleration settings available for virtual network adapters.
![]() MAC Address You can configure a virtual network adapter to obtain its MAC address dynamically from the pool of available MAC addresses configured on the host, or you can assign a static MAC address to the adapter.
MAC Address You can configure a virtual network adapter to obtain its MAC address dynamically from the pool of available MAC addresses configured on the host, or you can assign a static MAC address to the adapter.
![]() MAC Address Spoofing This feature helps protect the virtual machine against attempts to use ARP spoofing to steal IP addresses from the virtual machine by allowing the virtual machine to change the source MAC address in outgoing packets to an address that is not assigned to it.
MAC Address Spoofing This feature helps protect the virtual machine against attempts to use ARP spoofing to steal IP addresses from the virtual machine by allowing the virtual machine to change the source MAC address in outgoing packets to an address that is not assigned to it.
![]() DHCP Guard This feature helps protect the virtual machine against Dynamic Host Configuration Protocol (DHCP) man-in-the-middle attacks by dropping DHCP server messages from unauthorized virtual machines pretending to be DHCP servers.
DHCP Guard This feature helps protect the virtual machine against Dynamic Host Configuration Protocol (DHCP) man-in-the-middle attacks by dropping DHCP server messages from unauthorized virtual machines pretending to be DHCP servers.
![]() Router Guard This feature helps safeguard the virtual machine against unauthorized routers by dropping router advertisement and redirection messages from unauthorized virtual machines pretending to be routers.
Router Guard This feature helps safeguard the virtual machine against unauthorized routers by dropping router advertisement and redirection messages from unauthorized virtual machines pretending to be routers.
![]() Protected Network In a Failover Clustering environment, this feature causes the virtual machine to move to another cluster node if a network disconnection is detected. This setting is new in Windows Server 2012 R2 Hyper-V.
Protected Network In a Failover Clustering environment, this feature causes the virtual machine to move to another cluster node if a network disconnection is detected. This setting is new in Windows Server 2012 R2 Hyper-V.
![]() Port Mirroring This feature copies traffic sent to or from a Hyper-V virtual switch port to a mirror port so that third-party network diagnostic and performance tools can monitor the switch port.
Port Mirroring This feature copies traffic sent to or from a Hyper-V virtual switch port to a mirror port so that third-party network diagnostic and performance tools can monitor the switch port.
![]() NIC Teaming Also known as load balancing and failover (LBFO), this feature allows multiple virtual network adapters to be configured as a team for the purpose of bandwidth aggregation or to ensure traffic failover to prevent connectivity loss in the event of the failure of a network component. NIC Teaming is supported at both the host and guest levels in Windows Server 2012 and Windows Server 2012 R2, and it can be configured in the guest if the physical network adapters of the host do not support it.
NIC Teaming Also known as load balancing and failover (LBFO), this feature allows multiple virtual network adapters to be configured as a team for the purpose of bandwidth aggregation or to ensure traffic failover to prevent connectivity loss in the event of the failure of a network component. NIC Teaming is supported at both the host and guest levels in Windows Server 2012 and Windows Server 2012 R2, and it can be configured in the guest if the physical network adapters of the host do not support it.
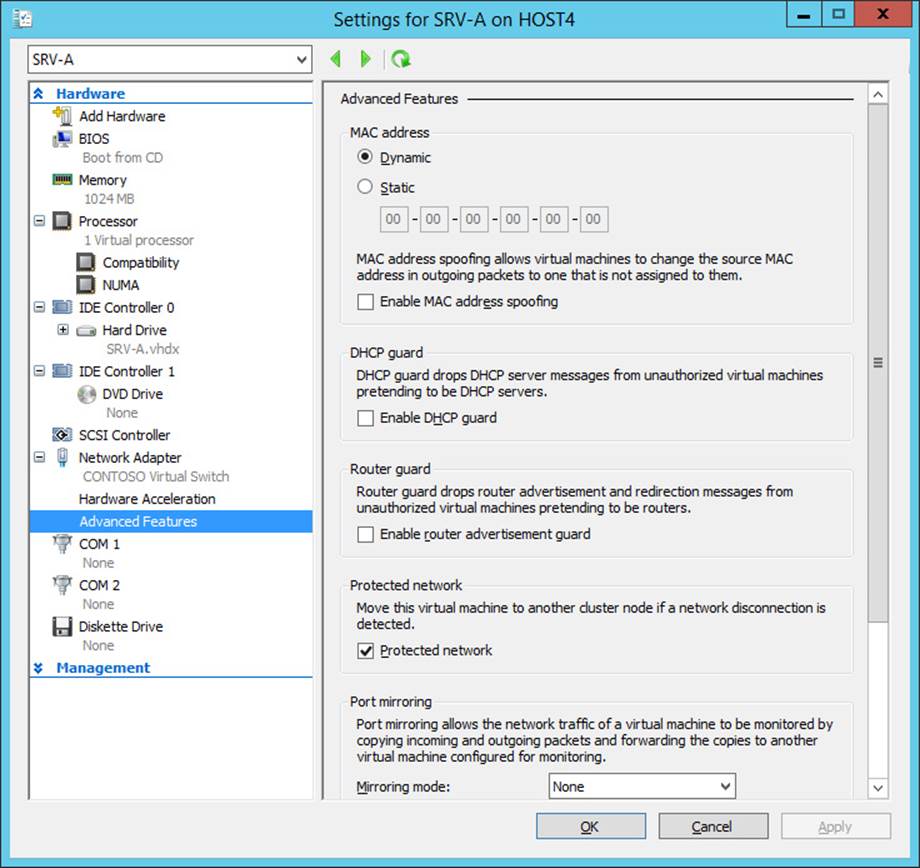
FIGURE 7-11 Additional configuration settings are available for virtual network adapters.
You can also use Windows PowerShell to view, add, remove, and configure virtual network adapters of both the network adapter type and the legacy network adapter type. For example, say you want to add a second virtual network adapter to a virtual machine, connect it to a virtual switch on the host, and enable both DHCP Guard and Router Guard on the adapter. To do this, you can begin by using the Get-VMNetworkAdapter cmdlet to display a list of virtual network adapters installed on the virtual machine:
PS C:\> Get-VMNetworkAdapter -VMName SRV-B
Name IsManagementOs VMName SwitchName MacAddress Status IPAddresses
---- -------------- ------ ---------- ---------- ------ -----------
Network Adapter False SRV-B CONTOSO Virtua... 00155D0BE600 {}
Next you can use the Add-VMNetworkAdapter to create the new adapter and connect it to the desired virtual switch:
PS C:\> Add-VMNetworkAdapter -VMName SRV-B -VMNetworkAdapterName "Network Adapter 2" `
-SwitchName "MANAGEMENT Virtual Switch"
You can then use the Get-VMNetworkAdapter again to verify the result:
PS C:\> Get-VMNetworkAdapter -VMName SRV-B
Name IsManagementOs VMName SwitchName MacAddress Status IPAddresses
---- -------------- ------ ---------- ---------- ------ -----------
Network Adapter False SRV-B CONTOSO Virt... 00155D0BE600 {}
Network Adapter 2 False SRV-B MANAGEMENT V... 000000000000 {}
You can pipe the output of the preceding command into the Format-List cmdlet to determine whether DHCP Guard and Router Guard are already enabled on the adapter:
PS C:\> Get-VMNetworkAdapter -VMName SRV-B -VMNetworkAdapterName "Network Adapter 2" `
| Format-List DhcpGuard,RouterGuard
DhcpGuard : Off
RouterGuard : Off
Now use the Set-VMNetworkAdapter to enable both of these features on the adapter:
PS C:\> Set-VMNetworkAdapter -VMName SRV-B -VMNetworkAdapterName "Network Adapter 2" `
-DhcpGuard On -RouterGuard On
Running Get-VMNetworkAdapter again verifies the result:
PS C:\> Get-VMNetworkAdapter -VMName SRV-B -VMNetworkAdapterName "Network Adapter 2" `
| Format-List DhcpGuard,RouterGuard
DhcpGuard : On
RouterGuard : On
Configuring other hardware settings
Some of the other virtual hardware settings you might want to configure include the following:
![]() BIOS settings—for example, to modify the boot device order or turn on Num Lock
BIOS settings—for example, to modify the boot device order or turn on Num Lock
![]() Memory settings—for example, to change the amount of startup RAM or enable Dynamic Memory on the virtual machine
Memory settings—for example, to change the amount of startup RAM or enable Dynamic Memory on the virtual machine
![]() Processor settings—for example, to configure the number of virtual processors that the virtual machine uses, enable processor compatibility to allow live migrations to hosts having a different processor architecture, or configure the NUMA topology on a NUMA-capable host
Processor settings—for example, to configure the number of virtual processors that the virtual machine uses, enable processor compatibility to allow live migrations to hosts having a different processor architecture, or configure the NUMA topology on a NUMA-capable host
These settings and others can be configured using either Hyper-V Manager or Windows PowerShell, and you can search the TechNet Library for more information about what they do and how to configure them.
Configuring virtual machine management
In addition to configuring the virtual hardware for a new virtual machine, you might need to configure some of its management settings. As with virtual hardware, you can do this either by opening the virtual machine’s Settings dialog box in Hyper-V Manager as shown in Figure 7-12 or by using Windows PowerShell.
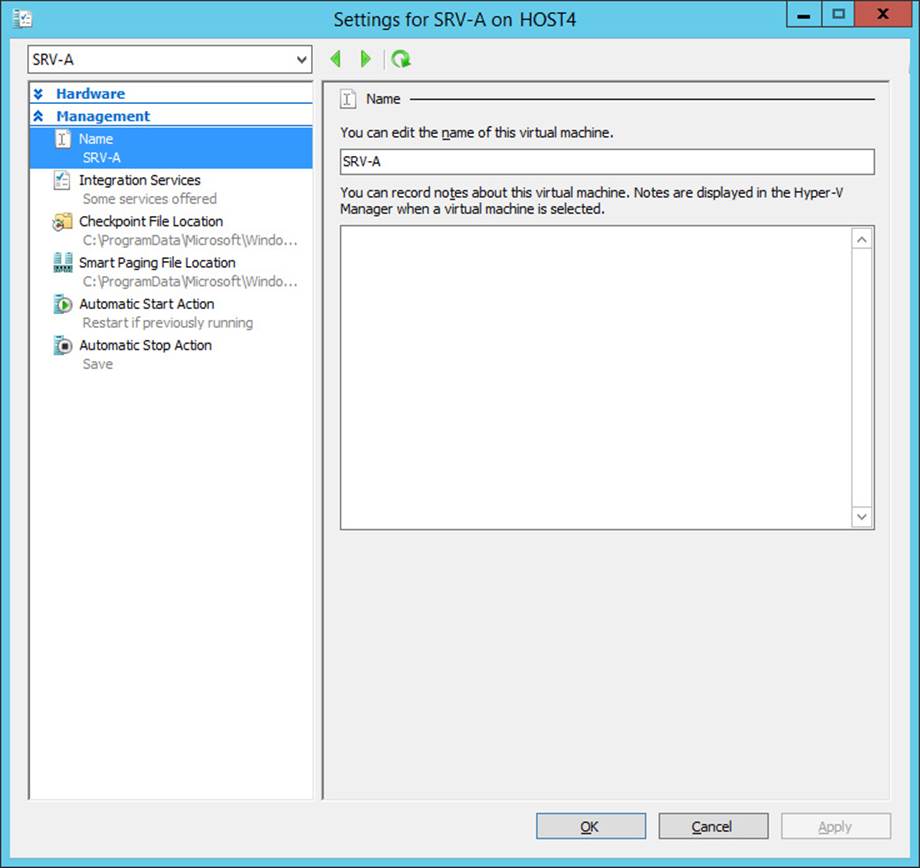
FIGURE 7-12 Configure management settings for a virtual machine.
The management settings you can configure for a virtual machine are as follows:
![]() Name If you want, you can change the name of the virtual machine as displayed in Hyper-V Manager and used with Windows PowerShell cmdlets. However, changing the name of the virtual machine does not change the names of the virtual machine’s configuration files and virtual hard disk files.
Name If you want, you can change the name of the virtual machine as displayed in Hyper-V Manager and used with Windows PowerShell cmdlets. However, changing the name of the virtual machine does not change the names of the virtual machine’s configuration files and virtual hard disk files.
![]() Integration Services By default, all Integration Services are offered to the virtual machine. However, if you need to, you can disable some or all of these services—for example, if the guest operating system doesn’t support some of them.
Integration Services By default, all Integration Services are offered to the virtual machine. However, if you need to, you can disable some or all of these services—for example, if the guest operating system doesn’t support some of them.
![]() Checkpoint File Location By default, checkpoint files are stored in subfolders of the default location where virtual machine configuration files are stored. If you frequently perform checkpoints and are running out of storage space on the host storage device, you might want to change the checkpoint files location to a different storage device.
Checkpoint File Location By default, checkpoint files are stored in subfolders of the default location where virtual machine configuration files are stored. If you frequently perform checkpoints and are running out of storage space on the host storage device, you might want to change the checkpoint files location to a different storage device.
![]() Smart Paging File Location This new feature introduced in Windows Server 2012 Hyper-V allows a virtual machine that is being restarted to temporarily use disk resources on the host as a source for any additional memory needed to successfully restart the virtual machine. Then, after the virtual machine has been restarted and its memory requirements have lessened, Smart Paging releases the previously used disk resources because of the performance hit that such use can create. Smart Paging is used only when a virtual machine is restarted and there is no free physical memory on the host and no memory can be reclaimed from other running virtual machines. Smart Paging is not used if you just try to start a virtual machine that’s in a stopped state or if a virtual machine is failing over in a cluster.
Smart Paging File Location This new feature introduced in Windows Server 2012 Hyper-V allows a virtual machine that is being restarted to temporarily use disk resources on the host as a source for any additional memory needed to successfully restart the virtual machine. Then, after the virtual machine has been restarted and its memory requirements have lessened, Smart Paging releases the previously used disk resources because of the performance hit that such use can create. Smart Paging is used only when a virtual machine is restarted and there is no free physical memory on the host and no memory can be reclaimed from other running virtual machines. Smart Paging is not used if you just try to start a virtual machine that’s in a stopped state or if a virtual machine is failing over in a cluster.
![]() Automatic Start Action This setting allows you to specify what the virtual machine should do when the host machine boots up. You can choose to automatically start the virtual machine if it was running when the VMM service on the host stopped (the default), to always start the virtual machine automatically, or to do nothing. You can also specify a startup delay in seconds to reduce resource content between different virtual machines starting up on the host.
Automatic Start Action This setting allows you to specify what the virtual machine should do when the host machine boots up. You can choose to automatically start the virtual machine if it was running when the VMM service on the host stopped (the default), to always start the virtual machine automatically, or to do nothing. You can also specify a startup delay in seconds to reduce resource content between different virtual machines starting up on the host.
![]() Automatic Stop Action This setting allows you to specify what the virtual machine should do when the host machine shuts down. You can choose to save the virtual machine state (the default), turn off the virtual machine, or shut down the guest operating system.
Automatic Stop Action This setting allows you to specify what the virtual machine should do when the host machine shuts down. You can choose to save the virtual machine state (the default), turn off the virtual machine, or shut down the guest operating system.
You can also use Set-VM cmdlet of Windows PowerShell to configure the preceding virtual machine management settings. For example, to change the name of virtual machine SRV-A on HOST4 to SQL Workload, you would use this command:
Set-VM -Name SRV-A -NewVMName "SQL Workload" -ComputerName HOST4
Lesson summary
![]() Key considerations when planning the deployment of virtual machines include the location of configuration files, startup memory, Dynamic Memory, virtual networking, virtual hard disks, guest operating system deployment, and performing checkpoints.
Key considerations when planning the deployment of virtual machines include the location of configuration files, startup memory, Dynamic Memory, virtual networking, virtual hard disks, guest operating system deployment, and performing checkpoints.
![]() Different types of virtual disks have advantages and disadvantages that make them suitable for different scenarios.
Different types of virtual disks have advantages and disadvantages that make them suitable for different scenarios.
![]() Generally, you should not use checkpoints in production environments.
Generally, you should not use checkpoints in production environments.
![]() You can create and configure new virtual machines by using the Hyper-V Manager snap-in or Windows PowerShell.
You can create and configure new virtual machines by using the Hyper-V Manager snap-in or Windows PowerShell.
![]() You can create new virtual disks and attach them to virtual machines by using the Hyper-V Manager snap-in or Windows PowerShell.
You can create new virtual disks and attach them to virtual machines by using the Hyper-V Manager snap-in or Windows PowerShell.
![]() You can create and configure new virtual network adapters on virtual machines by using the Hyper-V Manager snap-in or Windows PowerShell.
You can create and configure new virtual network adapters on virtual machines by using the Hyper-V Manager snap-in or Windows PowerShell.
![]() Hyper-V virtual network adapters in Windows Server 2012 and Windows Server 2012 R2 have many advanced features that can provide security, control bandwidth, reduce processor overhead, and provide other benefits.
Hyper-V virtual network adapters in Windows Server 2012 and Windows Server 2012 R2 have many advanced features that can provide security, control bandwidth, reduce processor overhead, and provide other benefits.
Lesson review
Answer the following questions to test your knowledge of the information in this lesson. You can find the answers to these questions and explanations of why each answer choice is correct or incorrect in the “Answers” section at the end of this chapter.
1. Which of the following is not true concerning virtual network adapters?
A. Each virtual machine can have up to 12 virtual network adapters installed in it.
B. Each virtual network adapter can be configured with either a static MAC address or a dynamic MAC address.
C. Each virtual network can be assigned a unique VLAN channel.
D. Virtual switches on a Hyper-V host can be connected to a wireless network adapter on the host system.
2. Why are pass-through disks no longer recommended for Hyper-V virtual machines? (Choose all that apply.)
A. Pass-through disks are no longer being manufactured and therefore are difficult to obtain.
B. Tests have demonstrated that fixed-size virtual hard disks perform almost as well as pass-through disks and also provide the flexibility benefits of virtual hard disks.
C. Tests have demonstrated that dynamically expanding virtual hard disks perform almost as well as pass-through disks and also provide the flexibility benefits of virtual hard disks.
D. Configuring a virtual machine to use a pass-through disk is a complex task that might introduce errors.
3. Although performing checkpoints is not recommended in production environments, they are sometimes used. Which of the following checkpoint actions should you never take? (Choose all that apply.)
A. Performing checkpoints on virtualized domain controllers
B. Performing checkpoints on a virtual machine just before applying a critical software update to the guest operating system
C. Performing checkpoints on virtualized workloads that use data distributed across multiple databases
D. Restoring checkpoints older than 30 days on domain-joined virtual machines
4. You want to enable DHCP Guard on a virtual network adapter on virtual machine SRV-B running on host HOST4. To do this, you run the following command:
Set-VMNetworkAdapter -ComputerName HOST4 -VMName SRV-B -DhcpGuard:$true
Unfortunately, running this command returns the following error:
Set-VMNetworkAdapter : Cannot bind parameter 'DhcpGuard'. Cannot convert value
"True" to type "Microsoft.HyperV.PowerShell.OnOffState". Error: "Invalid cast from
'System.Boolean' to 'Microsoft.HyperV.PowerShell.OnOffState'."
At line:1 char:67
+ Set-VMNetworkAdapter -ComputerName HOST4 -VMName SRV-B -DhcpGuard:$true
+ ~~~~~
+ CategoryInfo : InvalidArgument: (:) [Set-VMNetworkAdapter],
ParameterBindingException
+ FullyQualifiedErrorId :
CannotConvertArgumentNoMessage,Microsoft.HyperV.PowerShell.Commands.
SetVMNetworkAdapterCommand
What is the reason for this error?
A. The virtual network adapter does not support DHCP Guard.
B. You forgot to include the –VMName parameter in your command to specify which virtual network adapter you want to configure on the virtual machine.
C. You should have specified –DhcpGuard ok instead of –DhcpGuard:$true in your command.
D. You should have specified –DhcpGuard 1 instead of –DhcpGuard:$true in your command.
Lesson 3: Managing virtual machines
Once you have deployed virtual machines onto the Hyper-V hosts in your environment, you need to manage and maintain those virtual machines. This lesson focuses on a few key management tasks you can perform using built-in tools in Windows Server 2012 and Windows Server 2012 R2, such as optimizing workload consolidation, optimizing network performance, optimizing virtual disks, managing checkpoints, and monitoring virtual machines.
After this lesson, you will be able to:
![]() Optimize workload consolidation on Hyper-V hosts by configuring Dynamic Memory on virtual machines.
Optimize workload consolidation on Hyper-V hosts by configuring Dynamic Memory on virtual machines.
![]() Optimize network performance of virtual machines by configuring bandwidth management.
Optimize network performance of virtual machines by configuring bandwidth management.
![]() Optimize virtual hard disks by compacting, converting, expanding, or shrinking them as needed.
Optimize virtual hard disks by compacting, converting, expanding, or shrinking them as needed.
![]() Manage checkpoints by using the Hyper-V Manager snap-in or Windows PowerShell.
Manage checkpoints by using the Hyper-V Manager snap-in or Windows PowerShell.
![]() Monitor virtual machines by using the Hyper-V Manager snap-in or Windows PowerShell.
Monitor virtual machines by using the Hyper-V Manager snap-in or Windows PowerShell.
Estimated lesson time: 30 minutes
Optimizing workload consolidation
One of the key benefits of server virtualization is that it allows businesses to better utilize their hardware resources. For example, in a traditional (nonvirtualized) environment, you might have a dozen servers at your head office location with each server performing some specialized role, such as file server, print server, database server, DHCP server, and so on. Many of these server roles can incur low average processing overhead, and this means that much of the system hardware in your server room might be significantly underutilized. For example, a dedicated DHCP server might have an average CPU usage of less than 10 percent.
By virtualizing your server workloads, you might be able to consolidate most—or even all—of your existing physical servers as virtual machines running on a single two-mode failover cluster of Hyper-V hosts. This reduces the number of physical servers in your environment from a dozen to only two, which not only simplifies your physical infrastructure but also might lead to significant cost savings because of the reduced power requirements. By using P2V conversion using the tools available in System Center Virtual Machine Manager or a third-party product, you have a dozen virtualized server workloads to manage instead of a dozen physical systems. And by carefully analyzing the processor and memory requirements of your original servers, you can choose appropriate system hardware for your two Hyper-V hosts to ensure that they have enough processing and memory resources to run all these virtual machines with optimal performance.
This leads to the question of how many virtual machines one can actually run on a Hyper-V host. This question was previously discussed in Lesson 1 in a Real World reader aid titled “Planning the host processor and memory” to demonstrate a simple way of determining how many virtual machines a host can run if each virtual machine is assigned a fixed amount of physical memory from the host. But in the real world, the memory requirements of a server (either physical or virtual) can vary significantly over time depending on the load incurred by clients accessing the operating system and applications running on the server. By adjusting the memory allocated to each virtual machine on a host so that the virtual machine has just enough memory to perform optimally, you might be able to significantly increase the number of virtual machines that can simultaneously run on the host. Achieving higher virtual machine consolidation ratios through this approach can result in cost savings by eliminating the need for costly memory upgrades or even more costly purchases of additional host systems.
This capability is what Dynamic Memory is all about. Dynamic Memory was first introduced for Hyper-V in Windows Server 2008 R2 as a way of enabling Hyper-V hosts to make more effective use of physical memory allocated to virtual machines running on the host. Dynamic Memory works by adjusting the amount of memory available to a virtual machine in real time. These adjustments in memory allocation are based on how much memory the virtual machine needs and how Dynamic Memory settings have been configured for the virtual machine.
Although it can provide some benefit when virtualizing server workloads, Dynamic Memory is especially valuable for Virtual Desktop Infrastructure (VDI) scenarios, in which it can provide scalability and performance benefits that can result in significant cost savings. This is because at any given time in a VDI environment, some of the virtual machines running on the host tend either to be idle or to have a relatively low load. By using Dynamic Memory, you can consolidate greater numbers of virtual machines on your Hyper-V hosts. This means that you’ll need fewer hosts for provisioning virtual desktops to your user population, which means you won’t need to procure as much high-end server hardware and can therefore save money.
Configuring Dynamic Memory
As shown in Figure 7-13, you can use the Memory page of the virtual machine Settings dialog box in Hyper-V Manager to enable and configure Dynamic Memory for a virtual machine. You can only enable and configure Dynamic Memory on a per-virtual machine basis. Once it is enabled for a virtual machine, the settings you can configure for Dynamic Memory include the following:
![]() Minimum RAM This setting specifies the minimum amount of memory that the virtual machine can use while it is running.
Minimum RAM This setting specifies the minimum amount of memory that the virtual machine can use while it is running.
![]() Maximum RAM This setting specifies the maximum amount of memory that the virtual machine can use while it is running.
Maximum RAM This setting specifies the maximum amount of memory that the virtual machine can use while it is running.
![]() Memory Buffer This setting specifies the amount of memory (as a percentage of the amount that the virtual machine actually needs to perform its workload) that can be allocated to the virtual machine when there is sufficient memory available on the host.
Memory Buffer This setting specifies the amount of memory (as a percentage of the amount that the virtual machine actually needs to perform its workload) that can be allocated to the virtual machine when there is sufficient memory available on the host.
![]() Memory Weight This setting is a parameter that determines how available memory on the host is allocated among the different virtual machines running on the host.
Memory Weight This setting is a parameter that determines how available memory on the host is allocated among the different virtual machines running on the host.
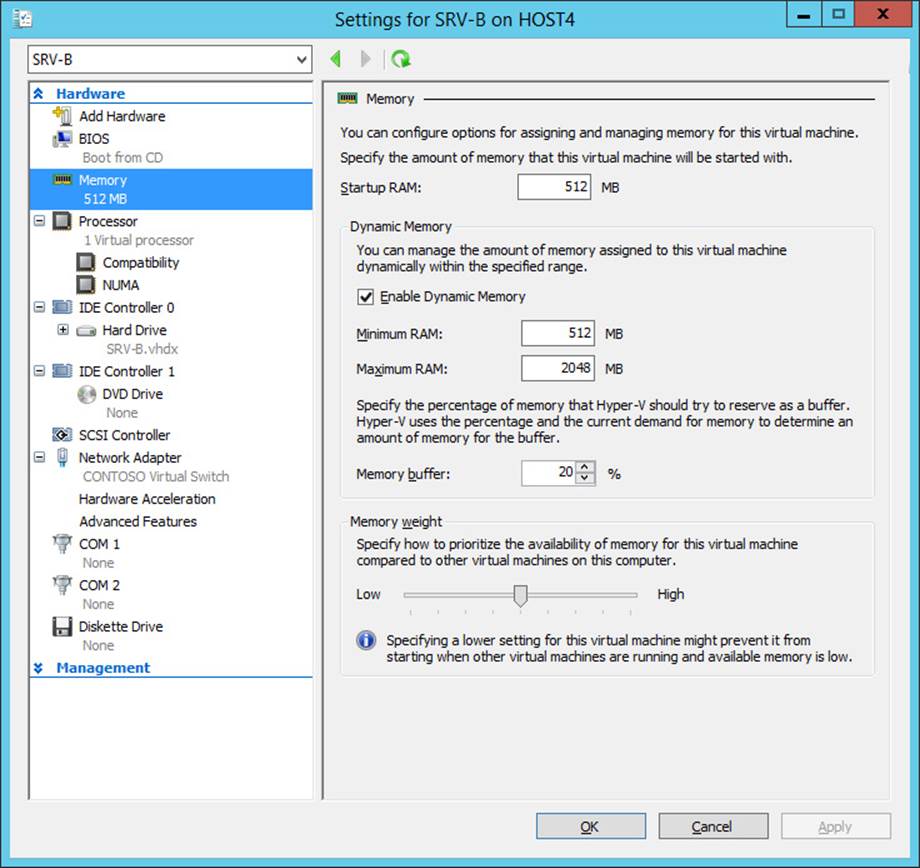
FIGURE 7-13 Configure Dynamic Memory for a virtual machine.
Real World: Understanding the memory buffer
You can think of the Memory Buffer setting for Dynamic Memory as a memory reserve for the virtual machine. For example, if you configure the buffer to have a value of 50 percent, an additional amount of memory of up to 50 percent of the committed memory can be allocated to the virtual machine when needed.
One common scenario in which this can provide benefits is when the virtual machine is running a workload that makes heavy use of the disk cache. In this case, increasing the buffer setting will result in additional memory being allocated to the virtual memory from the pool of idle memory on the host. In such scenarios, begin by raising the buffer setting from its default value of 20 percent to something like 30 or 40 percent and observe the change in the performance of the workload. Then, if additional tuning is required, try raising the buffer setting a little further. Just don’t suddenly bump it up to 300 percent, because you might end up starving the other workloads on the host!
The Minimum RAM setting was introduced in Windows Server 2012 Hyper-V because Windows generally needs more memory when starting than it does when idle and running. As a result of this change, you can specify sufficient startup RAM to enable the virtual machine to start quickly and then a lesser amount of memory (the minimum RAM) for when the virtual machine is running. That way, a virtual machine can get some extra memory so that it can start properly, and then once it’s started Windows reclaims the unneeded memory so that other virtual machines on the host can use the reclaimed memory if needed.
Another change in the way you can configure Dynamic Memory in Windows Server 2012 and Windows Server 2012 R2 is that you can modify the Maximum RAM and Minimum RAM settings while the virtual machine is running. In Windows Server 2008 R2, you could modify the Maximum RAM setting only when the virtual machine was in a stopped state. This change gives you a new way of quickly provisioning more memory to a critical virtual machine when needed.
You can also use the Set-VM cmdlet to enable and configure Dynamic Memory for a virtual machine using Windows PowerShell. For example, say you wanted to enable Dynamic Memory for a virtual machine named SRV-B that is running on HOST4 and configure the maximum RAM as 4 GBs. To do this, you first have to stop the virtual machine because you cannot enable or disable Dynamic Memory while the virtual machine is running. You can use the Stop-VM cmdlet to do this as follows:
PS C:\> Stop-VM -Name SRV-B -ComputerName HOST4
Next you can use the Set-VM cmdlet to enable Dynamic Memory for the virtual machine and set the maximum RAM to 4 GBs as follows:
PS C:\> Set-VM -Name SRV-B -ComputerName HOST4 -DynamicMemory -MemoryMaximumBytes 4GB
Now you can use Start-VM to restart the stopped virtual machine:
PS C:\> Start-VM -Name SRV-B -ComputerName HOST4
Finally, you can use Get-VM to verify the result:
PS C:\> Get-VM -Name SRV-B -ComputerName HOST4 | `
Format-List DynamicMemoryEnabled,MemoryMaximum
DynamicMemoryEnabled : True
MemoryMaximum : 4294967296
Now say that you decide later that 3 GBs would be a better value for maximum RAM than 4 GBs. By using the –Passthru parameter, which specifies that an object is to be passed through to the pipeline, you can make the change and verify the result by using a single Windows PowerShell command as follows:
PS C:\> Stop-VM -Name SRV-B -ComputerName HOST4 -Passthru | Set-VM -DynamicMemory `
-MemoryMaximumBytes 3GB -Passthru | Start-VM -Passthru | Get-VM | `
Format-List DynamicMemoryEnabled,MemoryMaximum
DynamicMemoryEnabled : True
MemoryMaximum : 3221225472
More Info: Using the –Passthru parameter
For more information on using the –Passthru parameter, see “Use the PowerShell Passthru Parameter and Get Back Objects” at http://blogs.technet.com/b/heyscriptingguy/archive/2011/11/18/use-the-powershell-passthru-parameter-and-get-back-objects.aspx.
Configuring host reserved memory
Although Dynamic Memory can help you consolidate more virtualized workloads on a host, it’s important that the host itself have enough memory. If the host has insufficient memory, the management operating system might stop responding or crash, resulting in all virtual machines being stopped unexpectedly and possible data loss.
To prevent this from happening, Hyper-V automatically reserves some of the host’s physical memory for the management operating system. With Hyper-V in Windows Server 2008 R2 SP1, you could also manually specify how much memory should be reserved for the host by using Registry Editor to create a REG_DWORD registry value named MemoryReserve in the following location:
HKLM\Software\Microsoft\Windows NT\CurrentVersion\Virtualization
You could then use MemoryReserve to specify the amount of physical memory in MBs that should be reserved for the parent partition, with 2 GBs (2048 MBs) being the recommended value. The host then had to be rebooted for the change to take effect.
With Hyper-V in Windows Server 2012 and Windows Server 2012 R2, however, the management operating system on the host reserves more memory than in previous versions of Hyper-V to ensure greater reliability and responsiveness. In addition, manually configuring the MemoryReserve registry value as just described can have undesirable results in some circumstances. For example, a combination of management activity, background processes, scheduled tasks, and other activity on the host might cause memory usage by the management operating system to temporarily rise above the value you manually configured by using the MemoryReserve registry value. Should this occur, the management operating system might stop responding or crash, resulting in service interruption and possible data loss. As a result, Microsoft no longer recommends manually configuring the MemoryReserve registry value. Instead, you should allow Hyper-V itself to ensure enough memory is always reserved for the host.
Optimizing network performance
Good network performance is also important between your virtualized workloads and clients accessing them. Windows Server 2012 and Windows Server 2012 R2 networking features were described previously in the section titled “Adding and configuring virtual network adapters” inLesson 2. The following sections describe which of these features can help optimize network performance for virtual machines.
Configuring bandwidth management
You can use the main page for a virtual network adapter in the virtual machine Settings dialog box to enable and configure bandwidth management for the adapter. Bandwidth management, also known as Hyper-V quality of service (Hyper-V QoS), is a new feature introduced in Windows Server 2012 that enables you to guarantee network traffic levels for virtual network adapters and virtual switches. In the previous version of Hyper-V, you could configure only the maximum bandwidth allowed for a virtual network adapter. Also new in Windows Server 2012 Hyper-V is the ability to also configure a minimum bandwidth for a virtual network adapter, as shown in Figure 7-14.
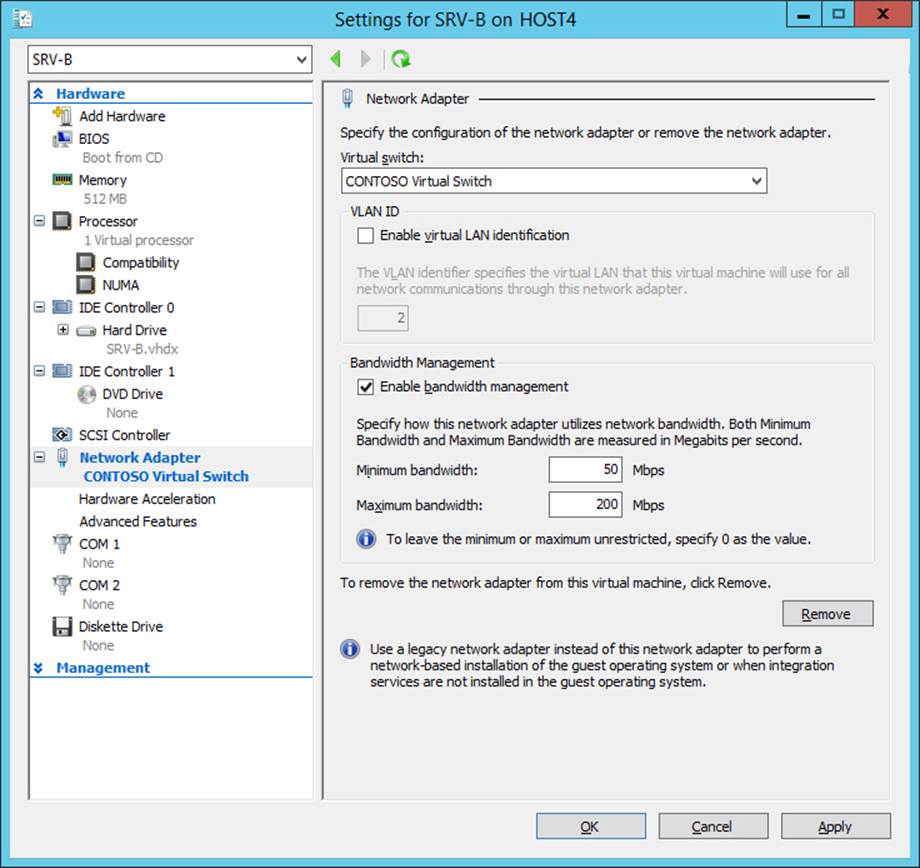
FIGURE 7-14 Configure maximum and minimum bandwidth for a virtual network adapter.
You can also use the Set-VMNetworkAdapter cmdlet to configure bandwidth management settings for a virtual network adapter using Windows PowerShell. The Set-VMNetworkAdapter cmdlet enables you to specify maximum and minimum bandwidth in either megabits per second (Mbps) or in terms of a relative weight between 0 and 100. You can use the latter approach to control how much bandwidth the virtual network adapter can have compared to other virtual network adapters connected to the same virtual switch. For example, you can use the following command to implement bandwidth fair-sharing, in which every virtual network adapter for the specified virtual machines is assigned the same minimum bandwidth weight:
PS C:\> Get-VMNetworkAdapter -VMName SRV-A,SRV-B,SRV-C | Set-VMNetworkAdapter `
-MinimumBandwidthWeight 1
You can also configure a minimum bandwidth (either absolute or relative) for a virtual switch by using the Set-VMSwitch cmdlet. You can also do this when you create a new virtual switch using the New-VMSwitch cmdlet. You cannot configure this setting using Hyper-V Manager.
More Info: Two types of QoS
Hyper-V QoS complements the policy-based QoS that can be configured by using Group Policy. For more information on the different types of QoS in Windows Server 2012, see “Quality of Service (QoS) Overview” at http://technet.microsoft.com/library/hh831679.
Other optimizations
Other network performance optimizations, such as SR-IOV and VMQ, are also available in Windows Server 2012 and Windows Server 2012 R2 Hyper-V but require specialized hardware, as described previously in the section titled “Adding and configuring virtual network adapters” inLesson 2. You can configure these additional optimizations either on the Hardware Acceleration subpage for a network adapter in the virtual machine Settings dialog box or by using Windows PowerShell cmdlets.
Optimizing virtual disks
Although both fixed-size and dynamically expanding virtual hard disks are supported in production environments, Microsoft recommends in Windows Server 2012 and Windows Server 2012 R2 Hyper-V that you continue to use fixed-size virtual hard disks to ensure that virtualized workloads on your production hosts do not run out of storage space.
Because dynamically expanding disks can automatically grow over time as data is written to them but do not automatically shrink when data is deleted from them, you might want to shrink such disks to reclaim unused storage space on the host so that you can allocate the reclaimed space to other virtual machines. And because fixed-size disks can fill up over time, you might need to expand such disks to make more room so that the guest operating system and applications can continue to perform optimally. Hyper-V enables you to perform different kinds of actions on virtual hard disks to help maintain or optimize their performance:
![]() Compacting virtual disks This action reclaims empty disk space and reduces the size of the virtual hard disk. Such empty disk space is left behind when files are deleted on the disk. You should defragment the guest operating system before you compact the disk. Both dynamically expanding and differencing disks can be compacted; fixed-size disks cannot be compacted.
Compacting virtual disks This action reclaims empty disk space and reduces the size of the virtual hard disk. Such empty disk space is left behind when files are deleted on the disk. You should defragment the guest operating system before you compact the disk. Both dynamically expanding and differencing disks can be compacted; fixed-size disks cannot be compacted.
![]() Converting virtual disks You can use this action to convert between different virtual hard disk formats (VHD and VHDX), between different virtual hard disk types (dynamically expanding and fixed-size), or both. During the conversion process, all data is retained and the guest operating system is not changed. You cannot convert dynamically expanding or fixed-size disks to or from differencing disks.
Converting virtual disks You can use this action to convert between different virtual hard disk formats (VHD and VHDX), between different virtual hard disk types (dynamically expanding and fixed-size), or both. During the conversion process, all data is retained and the guest operating system is not changed. You cannot convert dynamically expanding or fixed-size disks to or from differencing disks.
![]() Expanding virtual disks You can use this action to expand an existing virtual hard disk instead of creating a new disk and manually migrating the data. You can expand all types of virtual hard disks provided you have free storage space on the host.
Expanding virtual disks You can use this action to expand an existing virtual hard disk instead of creating a new disk and manually migrating the data. You can expand all types of virtual hard disks provided you have free storage space on the host.
![]() Shrinking virtual disks This action was introduced in Windows Server 2012 Hyper-V to allow you to reduce the storage capacity of a virtual hard disk. You can shrink all types of virtual hard disks provided you have first freed up space in them.
Shrinking virtual disks This action was introduced in Windows Server 2012 Hyper-V to allow you to reduce the storage capacity of a virtual hard disk. You can shrink all types of virtual hard disks provided you have first freed up space in them.
Important: Shrinking a virtual hard disk
Before you use either Windows PowerShell or Hyper-V Manager to shrink a VHD or VHDX file, you should log on to the Windows guest operating system and use the Disk Management snap-in to shrink the volume on the virtual disk you want to shrink. For more information, see “Shrinking a virtual hard disk in Windows 8” at http://blogs.msdn.com/b/virtual_pc_guy/archive/2012/05/07/shrinking-a-virtual-hard-disk-in-windows-8.aspx.
There are also two actions you can perform only on differencing disks:
![]() Merging differencing disks You can use this action to combine the changes stored in a differencing disk with the contents of its parent disk. You can do this either by copying the contents of the parent disk and differencing disk into a new virtual hard disk, leaving the two source disks intact, or by applying the changes contained in the differencing disk to the parent disk.
Merging differencing disks You can use this action to combine the changes stored in a differencing disk with the contents of its parent disk. You can do this either by copying the contents of the parent disk and differencing disk into a new virtual hard disk, leaving the two source disks intact, or by applying the changes contained in the differencing disk to the parent disk.
![]() Reconnecting differencing disks This action is available only when you select a differencing disk and the parent disk cannot be located. If the disks involved belong to a chain of differencing disks, this action is available only if none of the disks in the chain can be found.
Reconnecting differencing disks This action is available only when you select a differencing disk and the parent disk cannot be located. If the disks involved belong to a chain of differencing disks, this action is available only if none of the disks in the chain can be found.
Important: Avoiding data loss
Do not compact, convert, expand, shrink, or merge a virtual hard disk when any of the following conditions apply:
![]() The disk is associated with a virtual machine that has checkpoints.
The disk is associated with a virtual machine that has checkpoints.
![]() The disk is associated with a virtual machine that has replication enabled.
The disk is associated with a virtual machine that has replication enabled.
![]() The disk is associated with a chain of differencing disks.
The disk is associated with a chain of differencing disks.
If you perform any of these actions under such conditions, data loss or corruption might occur.
Using Hyper-V Manager
You can use Hyper-V Manager to compact, convert, expand, shrink, merge, and perform other actions on virtual hard disks. The actions that are available will depend on the type of virtual disk you select. To perform any of these actions, click Edit Disk in the Actions pane to launch the Edit Virtual Hard Disk Wizard. Then after browsing to select the disk you want to edit, you can choose the action you want to perform on the disk as shown in Figure 7-15.
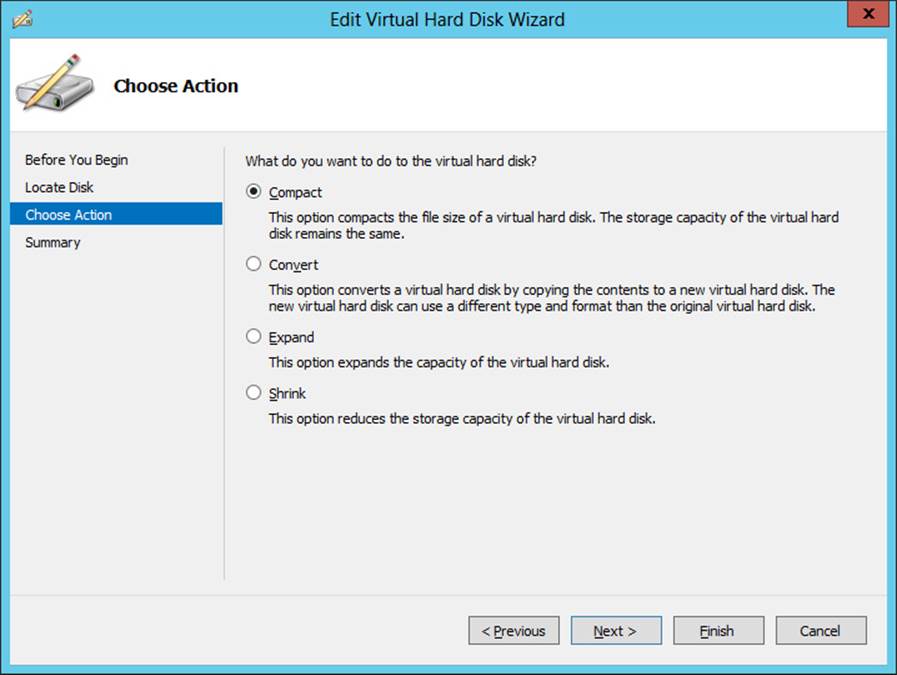
FIGURE 7-15 Edit a virtual hard disk using Hyper-V Manager.
Using Windows PowerShell
You can also use Windows PowerShell to compact, convert, expand, shrink, merge, and perform other actions on virtual hard disks. For example, you can use the Optimize-VHD cmdlet to compact a virtual disk, the Resize-VHD cmdlet to expand or shrink a virtual disk, and the Convert-VHD cmdlet to change the format version or type of a virtual disk. For help with any of these cmdlets, use the Get-Help cmdlet.
![]() Quick check
Quick check
![]() Which type of virtual hard disk cannot be compacted?
Which type of virtual hard disk cannot be compacted?
Quick check answer
![]() Fixed-size virtual hard disks
Fixed-size virtual hard disks
Managing checkpoints
As described earlier in this chapter, performing checkpoints on virtual machines is not recommended in production environments. Checkpoints are commonly used in test and development environments, however, so it’s important to be able to manage them properly. Hyper-V enables you to perform the following kinds of actions concerning virtual machine checkpoints:
![]() Performing checkpoints You can perform checkpoints on a virtual machine to create point-in-time images of the virtual machine to which you can return later if needed. You can perform checkpoints on both running and stopped virtual machines and with any guest operating system installed. There is no interruption to running virtual machines when checkpoints are performed on them.
Performing checkpoints You can perform checkpoints on a virtual machine to create point-in-time images of the virtual machine to which you can return later if needed. You can perform checkpoints on both running and stopped virtual machines and with any guest operating system installed. There is no interruption to running virtual machines when checkpoints are performed on them.
![]() Applying checkpoints This action copies the virtual machine state from the selected checkpoint to the virtual machine. As a result, any unsaved data in the virtual machine will be lost. If the checkpoint was originally performed when the virtual machine was running, the virtual machine will be in a saved state after the checkpoint has been applied. If the checkpoint was originally performed when the virtual machine was stopped, the virtual machine will be in a stopped state after the checkpoint has been applied.
Applying checkpoints This action copies the virtual machine state from the selected checkpoint to the virtual machine. As a result, any unsaved data in the virtual machine will be lost. If the checkpoint was originally performed when the virtual machine was running, the virtual machine will be in a saved state after the checkpoint has been applied. If the checkpoint was originally performed when the virtual machine was stopped, the virtual machine will be in a stopped state after the checkpoint has been applied.
![]() Reverting virtual machines This action takes the virtual machine back to the last checkpoint that was taken or applied, which is indicated in the Checkpoints pane of Hyper-V Manager by a green arrow with the word “Now” beside it as shown in Figure 7-16. The action also deletes any changes that have been made to the virtual machine since that checkpoint was performed.
Reverting virtual machines This action takes the virtual machine back to the last checkpoint that was taken or applied, which is indicated in the Checkpoints pane of Hyper-V Manager by a green arrow with the word “Now” beside it as shown in Figure 7-16. The action also deletes any changes that have been made to the virtual machine since that checkpoint was performed.
![]() Deleting checkpoints This action deletes the files associated with the checkpoint. As a result, you will no longer be able to restore the virtual machine to the point in time represented by the deleted checkpoint.
Deleting checkpoints This action deletes the files associated with the checkpoint. As a result, you will no longer be able to restore the virtual machine to the point in time represented by the deleted checkpoint.
![]() Deleting a checkpoints tree This action deletes the selected checkpoint and also any checkpoints underneath it in the hierarchy of checkpoints of the virtual machine.
Deleting a checkpoints tree This action deletes the selected checkpoint and also any checkpoints underneath it in the hierarchy of checkpoints of the virtual machine.
![]() Exporting checkpoints This action exports the selected checkpoint as a separate and independent virtual machine, which can then be imported onto another Hyper-V host if desired.
Exporting checkpoints This action exports the selected checkpoint as a separate and independent virtual machine, which can then be imported onto another Hyper-V host if desired.
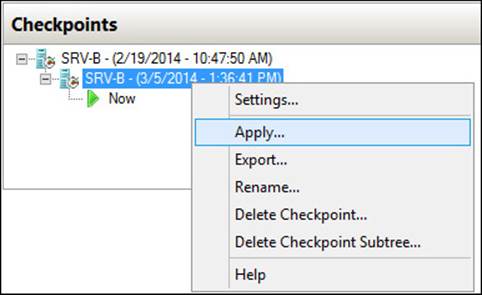
FIGURE 7-16 Apply a checkpoint to a virtual machine.
Real World: Renaming checkpoints
You can also rename checkpoints, and this is generally a good idea. Give each checkpoint you perform a name that describes either the purposes of the checkpoint or the state of the virtual machine just before the checkpoint was performed.
Using Hyper-V Manager
You can use Hyper-V Manager to perform, apply, delete, revert, or export checkpoints of virtual machines. To perform a checkpoint or revert a virtual machine, right-click the appropriate virtual machine in the Virtual Machines pane of Hyper-V Manager as shown in Figure 7-17. To apply, export, rename, or delete a checkpoint or checkpoint tree, right-click the appropriate checkpoint in the Checkpoint pane as shown in Figure 7-16 earlier.
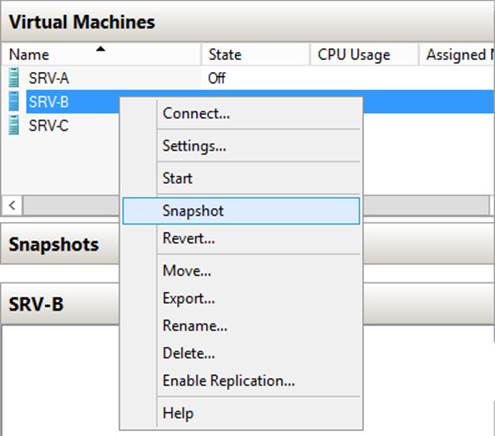
FIGURE 7-17 Perform a checkpoint on a virtual machine.
Using Windows PowerShell
You can also use Windows PowerShell to perform, apply, rename, export, or delete checkpoints and to revert virtual machines. You can use the Checkpoint-VM cmdlet to perform a checkpoint on a virtual machine, the Get-VMSnapshot cmdlet to display a list of checkpoints of a virtual machine, the RemoveVMSnapshot cmdlet to delete a checkpoint or checkpoint tree, and so on. For example, here is some output from running Get-VMSnapshot for a virtual machine on which a critical software update is being tested:
PS C:\> Get-VMSnapshot -VMName SRV-B -ComputerName HOST4
VMName Name SnapshotType CreationTime ParentSnapshotName
------ ---- ------------ ------------ ------------------
SRV-B Before installing update ... Standard 8/13/2012 8:48:15 PM
SRV-B After reconfiguring firew... Standard 8/13/2012 9:18:57 PM Before installi...
Monitoring virtual machines
Although the best tools for monitoring virtual machines running on Hyper-V hosts are those of the System Center family of products, you can monitor certain aspects of virtual machines by using Hyper-V Manager or Windows PowerShell. For example, Figure 7-18 shows the lower-center pane in Hyper-V Manager when a virtual machine named SRV-B is selected in the upper-center Virtual Machines pane. By selecting the Memory tab on this pane, you can view the current values for assigned memory and memory demand for virtual machines on which Dynamic Memory has been enabled.
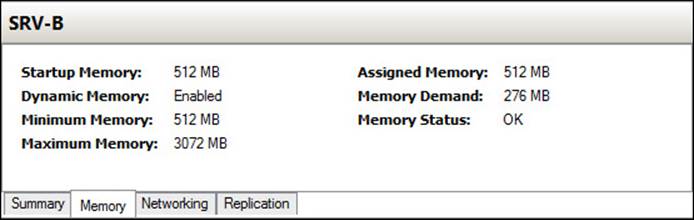
FIGURE 7-18 View Dynamic Memory in real time for a virtual machine.
You can also monitor virtual machines by using resource metering, a new feature of Hyper-V introduced in Windows Server 2012 that enables you to use Windows PowerShell to collect and report on historical resource usage of the following metrics:
![]() Average CPU usage by a virtual machine
Average CPU usage by a virtual machine
![]() Average physical memory usage by a virtual machine
Average physical memory usage by a virtual machine
![]() Minimum physical memory usage by a virtual machine
Minimum physical memory usage by a virtual machine
![]() Maximum physical memory usage by a virtual machine
Maximum physical memory usage by a virtual machine
![]() Maximum amount of disk space allocated to a virtual machine
Maximum amount of disk space allocated to a virtual machine
![]() Total incoming network traffic for a virtual network adapter
Total incoming network traffic for a virtual network adapter
![]() Total outgoing network traffic for a virtual network adapter
Total outgoing network traffic for a virtual network adapter
In addition, you can collect these metrics in a consistent fashion even when the virtual machines are moved between hosts using live migration or when their storage is moved using storage migration. Organizations that use Hyper-V to build cloud-computing solutions can also use resource metering for such purposes as tracking the resources business units or customers are consuming to bill them for their use of these resources.
For example, you can use the Enable-VMResourceMetering cmdlet to enable resource metering on a virtual machine as follows:
PS C:\> Enable-VMResourceMetering -VMName SRV-B
Use the Get-VM cmdlet to verify the result:
PS C:\> Get-VM SRV-B | Format-List ResourceMeteringEnabled
ResourceMeteringEnabled : True
You can now use the Measure-VM cmdlet to display real-time resource usage by the virtual machine:
PS C:\> Measure-VM -Name SRV-B
VMName AvgCPU(MHz) AvgRAM(M) MaxRAM(M) MinRAM(M) TotalDisk(M) NetworkIn... NetworkOut...
------ ----------- --------- --------- --------- ------------ ------------ -------------
SRV-B 176 512 512 512 130469 2 1
For more information on using these cmdlets, use the Get-Help cmdlet.
Lesson summary
![]() You can use Dynamic Memory to achieve higher virtual machine consolidation ratios on Hyper-V hosts.
You can use Dynamic Memory to achieve higher virtual machine consolidation ratios on Hyper-V hosts.
![]() Editing the registry to manually configure host-reserved memory on Hyper-V hosts is not recommended in Windows Server 2012 and Windows Server 2012 R2.
Editing the registry to manually configure host-reserved memory on Hyper-V hosts is not recommended in Windows Server 2012 and Windows Server 2012 R2.
![]() You can configure Hyper-V QoS on both virtual network adapters and virtual switches to guarantee minimum network bandwidth for the adapter or switch port.
You can configure Hyper-V QoS on both virtual network adapters and virtual switches to guarantee minimum network bandwidth for the adapter or switch port.
![]() You can optimize virtual hard disks by compacting, expanding, shrinking, or converting them. Different types of virtual disks support different types of optimizations.
You can optimize virtual hard disks by compacting, expanding, shrinking, or converting them. Different types of virtual disks support different types of optimizations.
![]() You can use the Hyper-V Manager snap-in or Windows PowerShell to perform, apply, delete, or export checkpoints or to revert a virtual machine.
You can use the Hyper-V Manager snap-in or Windows PowerShell to perform, apply, delete, or export checkpoints or to revert a virtual machine.
![]() You can use resource metering to monitor resource usage by a virtual machine using Windows PowerShell.
You can use resource metering to monitor resource usage by a virtual machine using Windows PowerShell.
Lesson review
Answer the following questions to test your knowledge of the information in this lesson. You can find the answers to these questions and explanations of why each answer choice is correct or incorrect in the “Answers” section at the end of this chapter.
1. You have three virtual machines running on a Hyper-V host that has 16 GBs of physical memory. The guest operating system installed in all three virtual machines is Windows Server 2008 R2, and none of the virtual machines is a file server. Dynamic Memory is enabled on all three machines and is configured as follows:
![]() VM-1 has 1 GB minimum RAM, 4 GBs maximum RAM, and 20 percent memory buffer.
VM-1 has 1 GB minimum RAM, 4 GBs maximum RAM, and 20 percent memory buffer.
![]() VM-2 has 2 GBs minimum RAM, 8 GBs maximum RAM, and 30 percent memory buffer.
VM-2 has 2 GBs minimum RAM, 8 GBs maximum RAM, and 30 percent memory buffer.
![]() VM-3 has 1 GB minimum RAM, 6 GBs maximum RAM, and 100 percent memory buffer.
VM-3 has 1 GB minimum RAM, 6 GBs maximum RAM, and 100 percent memory buffer.
Over time, you find that the performance of VM-1 and VM-2 is becoming sluggish. Why?
A. The minimum RAM assigned to VM-1 is probably too low.
B. The maximum RAM assigned to VM-2 is probably too high.
C. The memory buffer for both VM-1 and VM-2 is probably too low.
D. The memory buffer for VM-3 is probably too high.
2. In which of these scenarios might you try to optimize a virtual hard disk by compacting, expanding, shrinking, or merging it?
A. When the disk is associated with a virtual machine that has checkpoints
B. When you need to free up storage space on the host
C. When the disk is associated with a virtual machine that has replication enabled
D. When the disk is associated with a chain of differencing disks
3. Which of the following is not true concerning checkpoints? (Choose all that apply.)
A. Performing checkpoints creates point-in-time images of the virtual machine to which you can return later if needed. There is no interruption to running virtual machines when checkpoints are performed on them.
B. When you apply a checkpoint, any unsaved data in the virtual machine will be lost.
C. You can perform checkpoints only when the virtual machine is stopped.
D. Exporting checkpoints is not supported in Hyper-V.
Practice exercises
The goal of this section is to provide you with hands-on practice with the following:
![]() Installing and configuring Hyper-V on Server Core
Installing and configuring Hyper-V on Server Core
![]() Creating and configuring virtual machines
Creating and configuring virtual machines
To perform the following exercises, you need at least one clean installation of Windows Server 2012 R2 performed using the Server Core installation option. The server should be a stand-alone server belonging to a workgroup, have at least two physical hard disk drives with the second drive formatted as a data volume, have at least two physical network adapters with both configured with static TCP/IP settings, have Internet connectivity, and have no additional roles or features installed. You should be logged on interactively to the server using the default Administrator account. For the purposes of these exercises, the name of the server is assumed to be HOST7 and the data volume is the E drive.
If you want, you can perform these exercises remotely from another computer by enabling Remote Desktop on HOST7 and using Remote Desktop Connection on your computer. If you do this, note that certain actions (such as creating new virtual switches) might temporarily disrupt Remote Desktop connectivity with the remote host.
Exercise 1: Installing and configuring Hyper-V on Server Core
In this exercise, you use Windows PowerShell to install the Hyper-V role, configure virtual machine storage locations, and create virtual switches.
1. Log on to HOST7 and type powershell at the command prompt to open a Windows PowerShell prompt.
2. Use the Get-WindowsFeature cmdlet to verify that the Hyper-V role and Hyper-V Module For Windows PowerShell are available for installation but the Hyper-V GUI Management Tools are removed and not available for installation.
3. Use the Install-WindowsFeature cmdlet to install the Hyper-V role and Hyper-V Module For Windows PowerShell. You can use the –IncludeManagementTools parameter to do this using a single command. Make sure you include the –Restart parameter.
4. Once the server has restarted, log on as Administrator, type powershell at the command prompt, and use the Get-WindowsFeature cmdlet to verify that the Hyper-V role and Hyper-V Module For Windows PowerShell have been successfully installed.
5. Type mkdir E:\vmstorage to create a new directory on the data drive.
6. Use the Get-VMHost cmdlet to display the values of the VirtualHardDiskPath and VirtualMachinePath properties.
7. Use the Set-VMHost cmdlet to change the values of the preceding two properties to E:\vmstorage.
8. Use the Get-VMHost cmdlet to verify the change you made to the default storage location for virtual machine files.
9. Use the Get-VMSwitch cmdlet to verify that there are no virtual switches configured on the host.
10. Type Get-NetAdapter and note the names of the two physical network adapters on the host.
11. Use the New-VMSwitch cmdlet to create a new virtual switch of External type named CONTOSO. Ensure that the new switch is connected to one of the network adapters on the host.
12. Use the New-VMSwitch cmdlet to create a second virtual switch of External type named MANAGEMENT. Ensure that the new switch is connected to the other network adapter on the host.
13. Use the Get-VMSwitch cmdlet to verify that both virtual switches have been successfully created.
14. Leave yourself logged on to HOST7 and proceed to the next exercise.
Exercise 2: Creating and configuring virtual machines
In this exercise, you use Windows PowerShell to create a new virtual machine, enable and configure Dynamic Memory on the virtual machine, change the number of virtual processors on the virtual machine, enable and configure bandwidth management on the network adapter, and perform a checkpoint of the virtual machine.
1. Type New-VM –Name SERVER8 –Path E:\vmstorage –NewVHDPath server8.vhdx –NewVHDSizeBytes 100GB –SwitchName CONTOSO to create a new virtual machine named SERVER8 that has a dynamically expanding virtual hard disk of size 100 GBs and a virtual network adapter connected to the CONTOSO virtual switch.
2. Type Get-VM | fl ConfigurationLocation and verify that the configuration files for the virtual machine are stored in the E:\vmstorage\SERVER8 directory.
3. Type dir “E:\vmstorage\SERVER8\Virtual Hard Disks” and verify that a file named server8.vhdx exists in this location.
4. Type Set-VM –Name SERVER8 –MemoryStartupBytes 2GB to configure the Startup RAM setting as 2 GBs.
5. Type Set-VM –Name SERVER8 –DynamicMemory to enable the Dynamic Memory feature on the virtual machine.
6. Type Set-VM –Name SERVER8 –MemoryMinimumBytes 1GB to configure the Dynamic Memory Minimum RAM setting as 1 GB.
7. Type Set-VM –Name SERVER8 –MemoryMaximumBytes 4GB to configure the Dynamic Memory Maximum RAM setting as 4 GBs.
8. Type Set-VMMemory –VMName SERVER8 –Buffer 40 to configure the Dynamic Memory Memory Buffer setting as 40 percent.
9. Type Get-WmiObject Win32_Processor | fl NumberOfLogicalProcessors to view the number of logical processors on the host system.
10. Type Get-VMProcessor –VMName SERVER8 | fl Count to view the number of virtual processors currently configured on the virtual machine. (This should be one processor.)
11. Type Set-VMProcessor –VMName SERVER8 –Count 2 to change the number of virtual processors on the virtual machine from one to two processors.
12. Type Get-VMProcessor –VMName SERVER8 | fl Count again to confirm the change.
13. Type Get-VMNetworkAdapter –VMName SERVER8 to view information about the virtual network adapter on the virtual machine. Make a note of the name of the adapter. (It should be named Network Adapter.)
14. Type Set-VMNetworkAdapter –VMName SERVER8 –Name “Network Adapter” –MinimumBandwidthAbsolute 50000000 to assign a minimum bandwidth value of 50 Mbps to the virtual machine’s virtual network adapter.
15. Type Set-VMNetworkAdapter –VMName SERVER8 –Name “Network Adapter” –MaximumBandwidth 200000000 to assign a maximum bandwidth value of 200 Mbps to the virtual machine’s virtual network adapter.
16. Type Checkpoint-VM –VMName SERVER8 –SnapshotName “Guest OS not installed” to perform a checkpoint of the virtual machine.
17. Type dir “E:\vmstorage\SERVER8\Snapshots” and verify that the checkpoint files have been created.
18. The remaining steps in this practice exercise are optional because of the amount of time it might take to perform them.
19. Type Install-WindowsFeature –Name Server-Gui-Mgmt-Infra –Restart to convert your Server Core installation to a Minimal Server Interface installation. Because the feature binaries will need to be installed from Windows Update, this step might take some time to complete.
20. Once the server has restarted and you have logged on again, Server Manager should automatically open. When it opens, launch the Add Roles And Features Wizard and install the Hyper-V GUI Management Tools feature, which is found under Role Administration Tools\Hyper-V Management Tools on the Features page of the wizard.
21. Select the Hyper-V page in Server Manager, right-click HOST7, and select Hyper-V Manager to open the Hyper-V Manager snap-in.
22. Use the Hyper-V Manager snap-in to verify all of the configuration steps you performed in the two practice exercises in this chapter.
Suggested practice exercises
The following additional practice exercises are designed to give you more opportunities to practice what you’ve learned and to help you successfully master the lessons presented in this chapter.
![]() Exercise 1 Modify the two practice exercises so that they use as few Windows PowerShell commands as possible to perform all the configuration actions required.
Exercise 1 Modify the two practice exercises so that they use as few Windows PowerShell commands as possible to perform all the configuration actions required.
![]() Exercise 2 Build on the second practice exercise by adding a second virtual network adapter to the virtual machine, connecting the second adapter to the second virtual switch on the host, and configuring NIC Teaming for the virtual machine.
Exercise 2 Build on the second practice exercise by adding a second virtual network adapter to the virtual machine, connecting the second adapter to the second virtual switch on the host, and configuring NIC Teaming for the virtual machine.
![]() Exercise 3 Modify the second practice exercise to create and configure a Generation 2 virtual machine.
Exercise 3 Modify the second practice exercise to create and configure a Generation 2 virtual machine.
![]() Exercise 4 Start a virtual machine and resize its virtual hard disk while it is still running. Then try exporting the live virtual machine and importing it onto another host.
Exercise 4 Start a virtual machine and resize its virtual hard disk while it is still running. Then try exporting the live virtual machine and importing it onto another host.
Answers
This section contains the answers to the lesson review questions in this chapter.
Lesson 1
1. Correct answer: C
A. Incorrect: You should choose the Standard edition if you need to deploy Windows Server 2012 R2 as a workload on bare metal in a nonvirtualized environment.
B. Incorrect: You should choose the Standard edition if you need to deploy Windows Server 2012 R2 as a workload on bare metal in a nonvirtualized environment.
C. Correct: The Datacenter edition is the best choice if you need to deploy Windows Server 2012 R2 Hyper-V hosts for a virtualized data center or private-cloud scenario. The Server Core installation option is the best choice for Hyper-V hosts because of its smaller attack surface and reduced servicing footprint.
D. Incorrect: The Datacenter edition is the right choice if you need to deploy Windows Server 2012 R2 Hyper-V hosts for a virtualized data center or private-cloud scenario. However, you should deploy the Server Core installation option on your Hyper-V hosts instead of the Server With A GUI installation option because of the smaller attack surface and reduced servicing footprint of the Server Core installation option.
2. Correct answer: D
A. Incorrect: Installing the Minimal Server Interface might increase the attack surface of the host and increase its servicing overhead. Because you are concerned about security and servicing overhead, this might not be the best approach. In addition, if the server is located in a data center, it is usually not convenient to manage the server from its local console.
B. Incorrect: Using Remote Desktop to remotely manage servers has the benefit of convenience, especially when the servers are located in a data center. However, using Remote Desktop to manage a Server Core installation still presents you with only a command line for management purposes.
C. Incorrect: Using Remote Desktop to remotely manage servers has the benefit of convenience, especially when the servers are located in a data center. However, installing the Minimal Server Interface might increase the attack surface of the host and increase its servicing overhead. Because you are concerned about security and servicing overhead, this might not be the best approach.
D. Correct: Remote management is enabled by default on servers running Windows Server 2012 R2. By installing RSAT for Windows 8.1 on an administrator workstation running Windows 8, you can launch Hyper-V Manager, connect to a remote host, and manage the host from the convenience of your workstation.
3. Correct answer: B
A. Incorrect: Get-VMHost can be used only to view host configuration settings, not to configure them.
B. Correct: Set-VMHost can be used to configure settings for a Hyper-V host.
C. Incorrect: Add-VMStoragePath is used to add a path to a storage resource pool. It cannot be used to configure the default storage location for virtual machine files on a Hyper-V host.
D. Incorrect: Set-VM can be used to configure settings for virtual machines, not for hosts.
Lesson 2
1. Correct answer: D
A. Incorrect: Each virtual machine can have up to 12 virtual network adapters installed in it. Of these 12 virtual network adapters, up to 8 can be the network adapter type and up to 4 can be the legacy network adapter type.
B. Incorrect: Each virtual network adapter can be configured with either a static MAC address or a dynamic MAC address that is automatically assigned from the configured MAC address range on the host.
C. Incorrect: Each virtual network can be assigned a unique VLAN channel to segment or isolate network traffic.
D. Correct: Virtual switches on a Hyper-V host cannot be connected to a wireless network adapter on the host system.
2. Correct answers: B and C
A. Incorrect: A pass-through disk is a physical disk on the host that is attached to a virtual machine. Pass-through disks are thus just standard hard drives, which are easily obtained.
B. Correct: Tests by Microsoft have indeed demonstrated that fixed-size virtual hard disks perform almost as well as pass-through disks and also provide the flexibility benefits of virtual hard disks.
C. Correct: Tests by Microsoft have indeed demonstrated that dynamically expanding virtual hard disks perform almost as well as pass-through disks and also provide the flexibility benefits of virtual hard disks.
D. Incorrect: Configuring a virtual machine to use a pass-through disk is no more difficult than configuring it to use a virtual hard disk.
3. Correct answers: A, C, and D
A. Correct: You should never perform checkpoints on virtualized domain controllers.
B. Incorrect: You might consider performing a checkpoint of a production virtual machine just before you apply a critical software update to the guest operating system of the virtual machine. That way, if something goes wrong after applying the update, you can quickly revert the virtual machine to its previous state (that is, before the update was applied).
C. Correct: You should never perform checkpoints on virtualized workloads that use data distributed across multiple databases.
D. Correct: You should never restore checkpoints older than 30 days on domain-joined virtual machines.
4. Correct answer: D
A. Incorrect: All virtual network adapters (except legacy network adapters) support DHCP Guard.
B. Incorrect: Although you should include the –VMName parameter in your command to specify which virtual network adapter you want to configure on the virtual machine, this is unnecessary if the virtual machine has only one adapter installed.
C. Incorrect: Specifying –DhcpGuard ok also generates an error.
D. Correct: Specifying –DhcpGuard 1 works, as does specifying –DhcpGuard On. The clue is in the string “Microsoft.HyperV.PowerShell.OnOffState”, which indicates the data type accepted by this parameter.
Lesson 3
1. Correct answer: D
A. Incorrect: 1 GB is a reasonable amount for the Minimum RAM setting for VM-1 when Windows Server 2008 R2 is the guest operating system.
B. Incorrect: 8 GBs is a reasonable amount for the Maximum RAM setting for VM-2 when compared with the Maximum RAM setting configured for the other two virtual machines.
C. Incorrect: Memory buffer generally needs to be increased only for file servers that make heavy use of the disk cache. Because none of the virtual machines are file servers, keeping this setting close to its default value of 20 percent is reasonable.
D. Correct: Memory buffer generally needs to be increased only for file servers that make heavy use of the disk cache. Because VM-3 is not a file server, it is probably not a good idea to configure such a high memory buffer value for this virtual machine.
2. Correct answer: B
A. Incorrect: Do not compact, convert, expand, shrink, or merge a virtual hard disk when the disk is associated with a virtual machine that has checkpoints. If you perform any of these actions under such conditions, data loss or corruption might occur.
B. Correct: The ability to shrink a virtual hard disk is new in Windows Server 2012 Hyper-V and can be used to reduce the storage capacity of a virtual hard disk. You can shrink all types of virtual hard disks provided you have first freed up space in them.
C. Incorrect: Do not compact, convert, expand, shrink, or merge a virtual hard disk when the disk is associated with a virtual machine that has replication enabled. If you perform any of these actions under such conditions, data loss or corruption might occur.
D. Incorrect: Do not compact, convert, expand, shrink, or merge a virtual hard disk when the disk is associated with a chain of differencing disks. If you perform any of these actions under such conditions, data loss or corruption might occur.
3. Correct answers: C and D
A. Incorrect: Performing checkpoints creates point-in-time images of the virtual machine to which you can return later if needed.
B. Incorrect: Applying a checkpoint copies the virtual machine state from the selected checkpoint to the virtual machine. As a result, any unsaved data in the virtual machine will be lost. If the checkpoint was originally performed when the virtual machine was running, the virtual machine will be in a saved state after the checkpoint has been applied. If the checkpoint was originally performed when the virtual machine was stopped, the virtual machine will be in a stopped state after the checkpoint has been applied.
C. Correct: Checkpoints can be performed on both running and stopped virtual machines and with any guest operating system installed.
D. Correct: Exporting a checkpoint exports it as a separate and independent virtual machine, which can then be imported onto another Hyper-V host if desired.