The Clean Architecture in PHP (2015)
A CASE STUDY IN CLEAN ARCHITECTURE
The topics covered in the first few sections of this book provided a solid foundation for building quality applications in PHP. Let’s see these practices at work by building a small application and applying these principles as we go. When we’re done, we’ll switch services and frameworks a few times to see how our choices have made it easier to do so.
The Billing System
Our Case Study revolves around our client, SimpleTech, who wants a simple system to keep track of their customer orders, and generate invoices for those orders.
A simple UML diagram of these relationships would look like:

A Customer has multiple Orders, each of which has an Invoice.
If this application seems incredibly simple, it’s because it is. You might be asking yourself whether it is worth learning a new architecture and carefully crafting the code for such a simple application that would be quite easy to rewrite if needed.
That’s a good observation and leads to a good general rule: if an application is so small, or so simple that it can be rewritten quickly, then the value of a tool such as the Clean Architecture is diminished. That’s not to say that it shouldn’t be done, especially if you’ve become quite comfortable writing applications in this manner; it might even be faster!
Let’s pretend that our small case study is part of a much larger system that will grow over time to include procurement, manufacturing modules, distribution, accounting, etc; a full blown Enterprise Resource Planning (ERP) system for SimpleTech. Knowing this, it very much makes sense to consider the Clean Architecture as a foundation for such a large system.
Application Workflow
We’re going to fulfill the following requirements for SimpleTech:
1. Ability to add new Customers
2. Ability to create simple Orders for a Customer
3. Ability to run an Invoicing process that turns Orders into Invoices when it’s time to bill the customer.
Again, this application will be pretty simple, but will allow us to show off some of the things we’ve learned in terms of layers of applications, design patterns, and architecture.
Prerequisites
Before we begin, you’ll have to make sure you have a machine with PHP installed. If this comes as a shock, you may have purchased the wrong book. For more information on setting up PHP, checkout PHP The Right Way and their section on Getting Started.
You’ll also need to have some kind of database installed. We’ll use sqlite for simplicity, but any relational database, such as MySQL, PostgreSQL, or Oracle, should suffice. You could even setup this simple project using a NoSQL variant, but we won’t cover that here.
Everything else we need will installed via Composer.
Setting up Composer
Our next step is to setup Composer so that we can utilize its autoloader for our unit tests. If you don’t already have it set up, I highly suggest you install it globally so that you can use it from anywhere.
On a *nix based system, you can do so easily:
# for a home directory install:
curl -sS https://getcomposer.org/installer | \
php -- --install-dir=bin --filename=composer
# for a global system install:
curl -sS https://getcomposer.org/installer | \
sudo php -- --install-dir=/usr/local/bin --filename=composer
When done, assuming your paths are set up properly, you can simply run composer to verify it is installed correctly:
composer
You’ll either get an error about command not found, or you’ll get some output. You might need to double check that ~/bin or /usr/local/bin is in your $PATH variable. You can check this easily by running:
echo $PATH
And looking for those directories in the output. If they’re not in there, try adding them in your ~/.bashrc, ~/.zshrc, or similar file:
export $PATH='/home/yourname/bin:$PATH'
Make sure you include :$PATH on the end, or you’ll overwrite everything else stored in your $PATH variable!
Building Our Domain
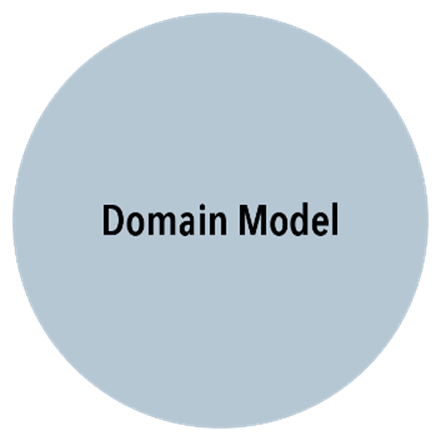
As the domain is central to our application, it makes perfect sense for us to start there. At the core, we have a Domain Model layer, which is composed of models, and models only. We’re going to call these models entities. Our entities are going to be plain PHP objects that represent something in our application. These are: Customer, Order, and Invoice.
Remember: the Domain Model layer can have no dependencies whatsoever. It is completely uncoupled from everything but PHP and itself.
Branching out from there, we’re going to have the Domain Services layer, which builds on top of the Domain Model layer. This layer can be fully dependent upon the Domain Model layer and itself, but nothing else.
In addition to services, this layer also contains factories, responsible for building objects, and repositories, although usually just interfaces that define a contract for another layer to implement.
Setting up the Project
The first thing we need is a directory structure:
mkdir -p cleanphp/src/Domain/Entity
In this directory, all of our Entities will live.
With Composer installed (see the previous chapter), we can configure our composer.json file with a simple autoload section to autoload our resources. This file should go in the root cleanphp/ directory:
{
"autoload": {
"psr-4": {
"CleanPhp\\Invoicer\\": ["src/"]
}
}
}
This configuration tells Composer that we want to use the PSR-4 autoloading standard to load the CleanPhp\Invoicer namespace, and that the root directory for that namespace is located at src/. This lets Composer’s autoloader find classes of that namespace within the src/ directory.
Finally, run the dump-autoload command to instruct Composer to build its autoload files (which are located at vendor/composer):
composer dump-autoload
If you take a peak, you should now see a vendor/composer directory with our autoload configuration set up in autoload_psr4.php.
Now we’re ready to create the entities.
Creating the Entities
These entity classes are all going to use a unique identifier that represents them. That $id attribute will require a getId() and a setId() method. To keep from repeating ourselves, and as a way to identify all entities, let’s go ahead and create an abstract AbstractEntity that all of these entities can inherit from:
// src/Domain/Entity/AbstractEntity.php
namespace CleanPhp\Invoicer\Domain\Entity;
abstract class AbstractEntity {
protected $id;
public function getId() {
return $this->id;
}
public function setId($id) {
$this->id = $id;
return $this;
}
}
Now let’s define our Customer entity, which as a Name, Email Address, and Invoice Delivery Method:
// src/Domain/Entity/Customer.php
namespace CleanPhp\Invoicer\Domain\Entity;
class Customer extends AbstractEntity {
protected $name;
protected $email;
public function getName() {
return $this->name;
}
public function setName($name) {
$this->name = $name;
return $this;
}
public function getEmail() {
return $this->emailAddress;
}
public function setEmail($email) {
$this->email = $email;
return $this;
}
}
Next, let’s define our Order entity, which has a Many to One relationship with Customer, as well as an Order Number, Description, and Total Order Amount:
// src/Domain/Entity/Order.php
namespace CleanPhp\Invoicer\Domain\Entity;
class Order {
protected $customer;
protected $orderNumber;
protected $description;
protected $total;
public function getCustomer() {
return $this->customer;
}
public function setCustomer($customer) {
$this->customer = $customer;
return $this;
}
public function getOrderNumber() {
return $this->orderNumber;
}
public function setOrderNumber($orderNumber) {
$this->orderNumber = $orderNumber;
return $this;
}
public function getDescription() {
return $this->description;
}
public function setDescription($description) {
$this->description = $description;
return $this;
}
public function getTotal() {
return $this->total;
}
public function setTotal($total) {
$this->total = $total;
return $this;
}
}
Finally, our Invoice entity, which has a Many to One relationship with an Order, as well as an Invoice Date and Total Invoice Amount:
// src/Domain/Entity/Invoice.php
namespace CleanPhp\Invoicer\Domain\Entity;
class Invoice {
protected $order;
protected $invoiceDate;
protected $total;
public function getOrder() {
return $this->order;
}
public function setOrder(Order $order) {
$this->order = $order;
return $this;
}
public function getInvoiceDate() {
return $this->invoiceDate;
}
public function setInvoiceDate(\DateTime $invoiceDate) {
$this->invoiceDate = $invoiceDate;
return $this;
}
public function getTotal() {
return $this->total;
}
public function setTotal($total) {
$this->total = $total;
return $this;
}
}
These three classes complete our small Domain Model layer.
|
|
This would make a good place to commit your code to source control. If you’re just reading, but want to see the code in action, you can checkout the tag 01-domain-models: git clone https://github.com/mrkrstphr/cleanphp-example.git git checkout 01-domain-models |

Testing Our Domain Models
I’m going to make an executive decision at this point and decide not to write any tests for these models as they stand right now. Writing tests for simple getter and setter methods is pretty tedious, and if something is going to go wrong, it’s likely not going to happen here.
If you want to write these tests, go for it! You’ll likely be at least somewhat better off for doing so.
We’ll start writing tests next when we start building out our domain services for this application.
Domain Services
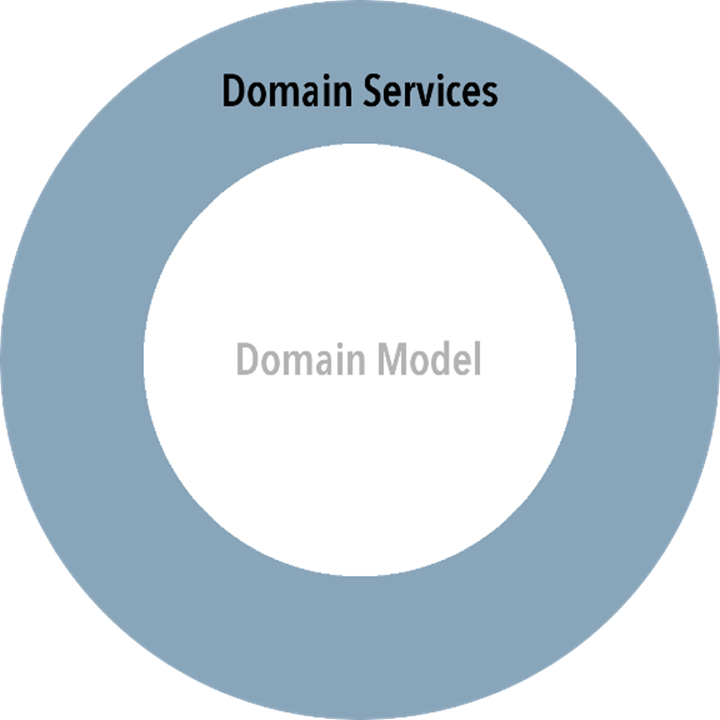
Remember that the Domain Services layer was next as we move outward from the Domain Model layer within the Onion/Clean Architecture. This layer will hold all the services and service contracts that the application will use. As the only thing deeper in the onion is the Domain Model layer, the Domain Services layer can only depend on the Domain Model layer (as well as PHP itself).
Our domain services layer will comprise of: * Repository Interfaces These interfaces will define how the real repositories will work. Since we can’t rely on any infrastructure at this point, we can’t actually code any concrete repositories yet. * Factories These factories will be responsible for creating domain objects based on our business rules. * Services These services will be responsible for implementing the rest of our business rules. They may rely on both the repositories and the factories to complete their work.
Let’s get started!
Setting up Repositories
We’re going to need to retrieve and persist data from our database, and we’ll do that by using repositories. Repositories live in the infrastructure layer of our application, but we’ll define them in the domain services layer. The infrastructure layer is meant to be highly swappable, so we’ll want to define some contracts for that layer to follow within our domain services layer.
Normally, we’d start by writing some tests that define the functionality of these repositories, but since we’re just going to have interfaces at this point, there would literally be nothing to test.
Generally, we’re going to want to be able to do the following operations for Customers, Orders and Invoices:
· Get by ID
· Get All
· Persist (Save)
· Begin
· Commit
Since this is common functionality, let’s go ahead and create a base RepositoryInterface to define this functionality:
// src/Domain/Repository/RepositoryInterface.php
namespace CleanPhp\Invoicer\Domain\Repository;
interface RepositoryInterface {
public function getById($id);
public function getAll();
public function persist($entity);
public function begin();
public function commit();
}
Now let’s create some interfaces that represent the actual entities, that extend and inherit the functionality of RepositoryInterface.
Customers
// src/Domain/Repository/CustomerRepositoryInterface.php
namespace CleanPhp\Invoicer\Domain\Repository;
interface CustomerRepositoryInterface
extends RepositoryInterface {
}
Orders
// src/Domain/Repository/OrderRepositoryInterface.php
namespace CleanPhp\Invoicer\Domain\Repository;
interface OrderRepositoryInterface
extends RepositoryInterface {
}
Invoices
// src/Domain/Repository/InvoiceRepositoryInterface.php
namespace CleanPhp\Invoicer\Domain\Repository;
interface InvoiceRepositoryInterface
extends RepositoryInterface {
}
These repositories each represent an entity, and define a contract that each concrete repository must follow. Additionally, we’ll use these interfaces to type-hint dependency injection in each instance where we need them, so that we can ensure our classes will get the correct functionality they need.
As part of our invoicing process, we need to find all orders that have not yet been invoiced. We can define this need by adding a method to the OrderRepositoryInterface:
// src/Domain/Repository/OrderRepositoryInterface.php
namespace CleanPhp\Invoicer\Domain\Repository;
interface OrderRepositoryInterface
extends RepositoryInterface {
public function getUninvoicedOrders();
}
This getUninvoicedOrders() method can be used to get all the orders when our invoicing service runs.
Invoice Factory
Invoices are created for Orders, and inherit some of their data, so it makes sense that we would encapsulate the creation of these Invoices into a factory service.
This simple factory should accept an Order object, and return an Invoice object to the caller:
public function createFromOrder(Order $order);
Let’s start by wring a test that’s going to define this service. We’ll use the awesome Peridot testing framework that follows a Behavior-Driven Development (BDD) approach to testing. We’ll also use the assertion library Leo made by the same group.
Let’s install the latest stable versions as a development dependency via Composer:
composer require --dev peridot-php/peridot peridot-php/leo
Once it’s installed, we can run it with the command:
./vendor/bin/peridot
If all goes well, you’ll see Peridot run it’s own tests. That’s great, but we want to run our tests. But before we do that, we’ll have to write them. Let’s start by creating a root level specs/ directory for our test specs to live in.
Let’s write our first test:
// specs/domain/service/invoice-factory.spec.php
use CleanPhp\Invoicer\Domain\Model\Invoice;
use CleanPhp\Invoicer\Domain\Model\Order;
use CleanPhp\Invoicer\Domain\Factory\InvoiceFactory;
describe('InvoiceFactory', function () {
describe('->createFromOrder()', function () {
it('should return an order object', function () {
$order = new Order();
$factory = new InvoiceFactory();
$invoice = $factory->createFromOrder($order);
expect($invoice)->to->be->instanceof(
'CleanPhp\Invoicer\Domain\Entity\Invoice'
);
});
});
});
This simple test just makes sure that our InvoiceFactory is returning an instance of an Invoice object.
If we run Peridot again, our test will be failing. So let’s go ahead and write the basic InvoiceFactory class and make this test pass!
We’ll start with the basic structure of the InvoiceFactory:
// src/Domain/Factory/InvoiceFactory.php
namespace CleanPhp\Invoicer\Domain\Factory;
use CleanPhp\Invoicer\Domain\Entity\Invoice;
use CleanPhp\Invoicer\Domain\Entity\Order;
class InvoiceFactory {
public function createFromOrder(Order $order) {
return new Invoice();
}
}
This is the minimal work needed to get our Peridot tests to pass, but our class obviously still isn’t work the way we want it to as it’s just returning an empty Invoice object. Let’s add a few more expectations to our test to define the behavior of this factory:
// specs/domain/factory/invoice-factory.spec.php
use CleanPhp\Invoicer\Domain\Entity\Invoice;
use CleanPhp\Invoicer\Domain\Entity\Order;
use CleanPhp\Invoicer\Domain\Factory\InvoiceFactory;
describe('InvoiceFactory', function () {
describe('->createFromOrder()', function () {
it('should return an order object', function () {
$order = new Order();
$factory = new InvoiceFactory();
$invoice = $factory->createFromOrder($order);
expect($invoice)->to->be->instanceof(
'CleanPhp\Invoicer\Domain\Entity\Invoice'
);
});
it('should set the total of the invoice', function () {
$order = new Order();
$order->setTotal(500);
$factory = new InvoiceFactory();
$invoice = $factory->createFromOrder($order);
expect($invoice->getTotal())->to->equal(500);
});
it('should associate the Order to the Invoice', function () {
$order = new Order();
$factory = new InvoiceFactory();
$invoice = $factory->createFromOrder($order);
expect($invoice->getOrder())->to->equal($order);
});
it('should set the date of the Invoice', function () {
$order = new Order();
$factory = new InvoiceFactory();
$invoice = $factory->createFromOrder($order);
expect($invoice->getInvoiceDate())
->to->loosely->equal(new \DateTime());
});
});
});
Not only do we want our InvoiceFactory to return an instance of an Invoice object, but it should also have its $total property set to the $total of the Order, as well as have the Order that it was generated for assigned to it, and finally, today’s date should be set as the $invoiceDate of theInvoice.
Now we have some pretty robust tests for what we want this factory to do! Let’s make these tests pass now by filling out the rest of the createFromOrder() method:
public function createFromOrder(Order $order) {
$invoice = new Invoice();
$invoice->setOrder($order);
$invoice->setInvoiceDate(new \DateTime());
$invoice->setTotal($order->getTotal());
return $invoice;
}
And with that, our InvoiceFactory is now complete and its tests passing.
Writing tests in this manner allows us to quickly define the behavior of a class and flesh out how it will work and relate to other objects. This falls into the realm of Behavior-Driven Development (BDD), which you can look into in more detail if it interests you. It goes hand-in-hand quite well with Domain-Driven Development and Test-Driven Development.
|
|
Peridot has a handy watcher plugin that allows for continuously running the tests as you make changes. We can install it by running: composer require --dev peridot-php/peridot-watcher-plugin After that, we’ll create a peridot.php file in the root directory that looks like: // peridot.php use Evenement\EventEmitterInterface; use Peridot\Plugin\Watcher\WatcherPlugin; return function(EventEmitterInterface $emitter) { $watcher = new WatcherPlugin($emitter); $watcher->track(__DIR__ . '/src'); }; Now we can use the --watch flag to run the tests continuously! ./vendor/bin/peridot specs/ --watch |
Invoicing Service
The biggest piece of our domain logic in this application is the invoicing process. We’re going to go collect all uninvoiced orders, once a month, and generate invoices for them. It’s our goal to do this independently of any framework, library, or other external service. This way, we can ensure that the core application is completely uncoupled from anything but itself, and it can easily be dropped into any framework and perform it’s function.
This service is going to use the OrderRepositoryInterface to collect the orders to invoice, and then use our InvoiceFactory to create the invoices for those orders. Let’s again start by writing some tests to define these behaviors:
// specs/domain/service/invoice-factory.spec.php
describe('InvoicingService', function () {
describe('->generateInvoices()', function () {
it('should query the repository for uninvoiced Orders');
it('should return an Invoice for each uninvoiced Order');
});
});
Things are a little trickier this time. Since we haven’t written any concrete repositories yet, we can’t use one to perform this test. Instead of writing and using a concrete repository, we’re going to mock one using the Prophecy library.
Luckily, Peridot also comes with a plugin to make integrating those a piece of cake. Let’s install it:
composer require --dev peridot-php/peridot-prophecy-plugin
And then add it to our peridot.php file:
// peridot.php
use Evenement\EventEmitterInterface;
use Peridot\Plugin\Prophecy\ProphecyPlugin;
use Peridot\Plugin\Watcher\WatcherPlugin;
return function(EventEmitterInterface $emitter) {
$watcher = new WatcherPlugin($emitter);
$watcher->track(__DIR__ . '/src');
new ProphecyPlugin($emitter);
};
Now, we can write a beforeEach() block that will get executed before each test to build us a mocked OrderRepositoryInterface:
// specs/domain/service/invoice-factory.spec.php
describe('InvoicingService', function () {
describe('->generateInvoices()', function () {
beforeEach(function () {
$this->repository = $this->getProphet()->prophesize(
'CleanPhp\Invoicer\Domain\Repository\OrderRepositoryInterface'
);
});
// ...
});
});
When we need it, $this->repository will hold an instance of a mocked repository. Now we can finish our first test:
it('should query the repository for uninvoiced Orders', function () {
$this->repository->getUninvoicedOrders()->shouldBeCalled();
$service = new InvoicingService($this->repository->reveal());
$service->generateInvoices();
});
We’re testing here that when we call the generateInvoices() method, we should expect that the InvoicingService will make a call to the getUninvoicedOrders() method of
OrderRepositoryInterface.
We’ll also want to add an afterEach() block to tell Prophecy to check the assertions it makes, like shouldBeCalled() as otherwise it won’t know exactly when it’s safe to check that assertion. We can do it in an afterEach() just to make it easy on us, but really we could add it anywhere within the test:
afterEach(function () {
$this->getProphet()->checkPrediections();
});
Of course, without any code, these tests should be failing, so let’s go fix that:
// src/Domain/Service/InvoicingService.php
namespace CleanPhp\Invoicer\Domain\Service;
use CleanPhp\Invoicer\Domain\Repository\OrderRepositoryInterface;
class InvoicingService {
protected $orderRepository;
public function __construct(OrderRepositoryInterface $orderRepository) {
$this->orderRepository = $orderRepository;
}
public function generateInvoices() {
$orders = $this->orderRepository->getUninvoicedOrders();
}
}
We’re simply doing exactly what our test expected: injecting an instance of
OrderRepositoryInterface and calling its getUninvoicedOrders() method when calling the generateUninvoicedOrders() method.
Our tests should now pass, so let’s dig deeper into the functionality of this service:
it('should return an Invoice for each uninvoiced Order', function () {
$orders = [(new Order())->setTotal(400)];
$invoices = [(new Invoice())->setTotal(400)];
$this->repository->getUninvoicedOrders()->willReturn($orders);
$this->factory->createFromOrder($orders[0])->willReturn($invoices[0]);
$service = new InvoicingService(
$this->repository->reveal(),
$this->factory->reveal()
);
$results = $service->generateInvoices();
expect($results)->to->be->a('array');
expect($results)->to->have->length(count($orders));
});
We’ve now brought the InvoiceFactory into the picture, and are testing that its createFromOrder method is called with the results of getUninvoicedOrders, meaning that each Order returned should be run through the InvoiceFactory to generate an Invoice.
We’re using the willReturn() method of Prophecy to instruct the Mock to return $orders whenever getUninvoicedOrders() is called, and that $invoices[0] should be returned when createFromOrder() is called with $orders[0] as an argument.
Finally, we’re doing some expectations after instantiating our object and calling the
generateInvoices() method to ensure that it is returning the proper data.
Since we’re now utilizing the InvoiceFactory, which we’ll need to mock as well, as we want to be able to test the InvoicingService in isolation without having to test the InvoiceFactory as well, so let’s add that mock to the beforeEach():
beforeEach(function () {
$this->repository = $this->getProphet()->prophesize(
'CleanPhp\Invoicer\Domain\Repository\OrderRepositoryInterface'
);
$this->factory = $this->getProphet()
->prophesize('CleanPhp\Invoicer\Domain\Factory\InvoiceFactory');
});
And we’ll have to update the other test to inject it as well, otherwise it will throw errors:
it('should query the repository for uninvoiced Orders', function () {
$this->repository->getUninvoicedOrders()->shouldBeCalled();
$service = new InvoicingService(
$this->repository->reveal(),
$this->factory->reveal()
);
$service->generateInvoices();
});
Our tests are, of course, failing as the code isn’t setup to meet the expectations of the tests, so let’s go finalize the InvoicingService:
// src/Domain/Service/InvoicingService.php
namespace CleanPhp\Invoicer\Domain\Service;
use CleanPhp\Invoicer\Domain\Factory\InvoiceFactory;
use CleanPhp\Invoicer\Domain\Repository\OrderRepositoryInterface;
class InvoicingService{
protected $orderRepository;
protected $invoiceFactory;
public function __construct(
OrderRepositoryInterface $orderRepository,
InvoiceFactory $invoiceFactory
) {
$this->orderRepository = $orderRepository;
$this->invoiceFactory = $invoiceFactory;
}
public function generateInvoices() {
$orders = $this->orderRepository->getUninvoicedOrders();
$invoices = [];
foreach ($orders as $order) {
$invoices[] = $this->invoiceFactory->createFromOrder($order);
}
return $invoices;
}
}
We’re now accepting an instance of InvoiceFactory in the constructor, and using it while looping the results of getUninvoicedOrders() to create an Invoice for each Order. When we’re done, we return this collection. Exactly as our behavior was defined in the test.
Our tests are passing, and our service is now complete.
|
|
This would make a good place to commit your code to source control. If you’re just reading, but want to see the code in action, you can checkout the tag 02-domain-services: git clone https://github.com/mrkrstphr/cleanphp-example.git git checkout 02-domain-services |
Wrapping it Up
This concludes the domain of our application. The domain model and domain services layers of our application are central to everything else. They contain our business logic, which is the portion of our application that will not change depending on which libraries or frameworks we decide to use, or how we choose to persist our database.
Everything that exists outside of these two layers will utilize them to complete the goals of the application.
We’re now ready to start building out the front-end portion of the application!
Zend Framework 2 Setup
We’re going to start building our project using Zend Framework 2. ZF2 is the second iteration of Zend Framework, and is a modular, event-based framework with an extensive set of libraries. It is, at least out of the box using the sample application, an MVC framework with support for various database systems.
While ZF2 isn’t my first choice in frameworks, it might be one someone lands upon when first looking for a framework, especially due to the incorrect assumption that it might actually be endorsed by or affiliated with PHP itself. This misconception likely stems from the fact that the current runtime for PHP is called the Zend Engine, and the two people who started it, Andi Gutmans and Zeev Suraski (Zeev + Andi = Zend), later started a company, Zend Technologies, which is responsible for Zend Framework.
Regardless, Zend Framework is not directly affiliated with nor endorsed by PHP.
Installing with Composer
We installed Composer in the previous chapter to setup our autoloader. Now we’re going to use it to pull down and configure the ZF Skeleton Application. Since you can’t clone a git repo into an existing, non-empty directory, we’re going to have to get silly for a minute in order to get this to work.
We’ll create our ZF Skeleton Application in a separate directory from our previous cleanphp/ directory:
cd /path/to/your/preferred/www
composer create-project \
--repository-url="http://packages.zendframework.com" \
-sdev zendframework/skeleton-application \
cleanphp-skeleton
This command will ask you if you want to “remove the existing VCS history.” When it does, enter “Y” to get rid of the .git directory.
You should now have a working copy of the ZF2 Skeleton application. Head to the public/ directory and fire up PHP’s built-in web server:
cd cleanphp-skeleton
php -S localhost:1337 -t public
Head to http://localhost:1337/ in your web browser, and you should see the results!
Combining the Code Bases
Now we have two separate projects, so we’ll want to move over the ZF2 specific code into our cleanphp/ directory. Something like this from the parent directory of both cleanphp* directories:
cp -R cleanphp-skeleton/config \
cleanphp-skeleton/data \
cleanphp-skeleton/public \
cleanphp-skeleton/module \
cleanphp-skeleton/init_autoloader.php \
cleanphp/
We’ll also want to make sure that Zend Framework is installed via Composer in this project:
composer require zendframework/zendframework
Now we can remove the cleanphp-skeleton/ directory.
rm -rf cleanphp-skeleton/
That was uncomfortable and awkward, so let’s get going with ZF2!
Cleaning up the Skeleton
Now it’s time to bend the ZF2 skeleton to our will. We’re just going to do some cosmetic stuff real quick to get the ZF2 branding out of the way.
First, let’s replace the module/Application/view/layout/layout.phtml file with:
<!doctype html>
<html lang="en">
<head>
<meta charset="utf-8">
<title>CleanPhp</title>
<meta name="viewport" content="width=device-width, initial-scale=1.0">
<meta http-equiv="X-UA-Compatible" content="IE=edge">
<link href="//maxcdn.bootstrapcdn.com/bootstrap/3.3.1/css/bootstrap.css"
media="screen" rel="stylesheet" type="text/css">
<link href="/css/application.css" media="screen"
rel="stylesheet" type="text/css">
</head>
<body>
<nav class="navbar navbar-default navbar-fixed-top" role="navigation">
<div class="container">
<div class="navbar-header">
<a class="navbar-brand" href="/">CleanPhp</a>
</div>
<div class="collapse navbar-collapse">
<ul class="nav navbar-nav">
<li>
<a href="/customers">Customers</a>
</li>
<li>
<a href="/orders">Orders</a>
</li>
<li>
<a href="/invoices">Invoices</a>
</li>
</ul>
</div>
</div>
</nav>
<div class="container">
<?= $this->content; ?>
<hr>
<footer>
<p>I'm the footer.</p>
</footer>
</div>
</body>
</html>
Here, we’re just ditching a lot of the ZF2 view helpers and layout and opting to use a CDN supplied version of Bootstrap. We can go ahead and entirely delete the public/css, public/fonts, public/img, and public/js folders.
We defined some links to some future pages in the header. Let’s go ahead and setup the routes for those in Zend Framework:
// module/Application/config/module.config.php
return [
// ...
'router' => [
'routes' => [
'home' => [
'type' => 'Zend\Mvc\Router\Http\Literal',
'options' => [
'route' => '/',
'defaults' => [
'controller' => 'Application\Controller\Index',
'action' => 'index',
],
],
],
'customers' => [
'type' => 'Segment',
'options' => [
'route' => '/customers',
'defaults' => [
'controller' => 'Application\Controller\Customers',
'action' => 'index',
],
],
],
'orders' => [
'type' => 'Segment',
'options' => [
'route' => '/orders',
'defaults' => [
'controller' => 'Application\Controller\Orders',
'action' => 'index',
],
],
],
'invoices' => [
'type' => 'Segment',
'options' => [
'route' => '/invoices',
'defaults' => [
'controller' => 'Application\Controller\Invoices',
'action' => 'index',
],
],
],
],
],
// ...
];
Now let’s replace the module/Application/views/application/index/index.phtml file with something generic, and not a ZF2 advertisement:
<div class="jumbotron">
<h1>Welcome to CleanPhp Invoicer!</h1>
<p>
This is the case study project for The Clean Architecture in PHP,
a book about writing excellent PHP code.
</p>
<p>
<a href="https://leanpub.com/cleanphp" class="btn btn-primary">
Check out the Book</a>
</p>
</div>
Now it’s an advertisement for this book. How nice! Things look a little off, though, so let’s add our public/css/application.css file to fix that:
body {padding-top: 70px; padding-bottom: 40px}
.navbar-brand {font-weight: bold}
div.page-header {margin-top: 0; padding-top: 0}
div.page-header h2 {margin-top: 0; padding-top: 0}
Now we’re ready to start configuring our database with Zend Framework.
|
|
This would make a good place to commit your code to source control. If you’re just reading, but want to see the code in action, you can checkout the tag 03-base-zf2: git clone https://github.com/mrkrstphr/cleanphp-example.git git checkout 03-base-zf2 |

Setting up Our Database
To setup our database and use it within Zend Framework, we’re going to follow the ZF2 Getting Started guide to ensure we do things the Zend way. I’m going to be brisk on my explanations of what we’re doing, so refer to this guide for more details if you are interested.
Let’s get started by creating our database. I’m going to use a sqlite3 database in these examples, as it’s painfully easy to setup (at least on a Unix/Linux environment), but if you’re a fan of MySQL or PostgreSQL and want to use one of them, that’s perfect.
|
|
If you’re using Debian/Ubuntu, installing sqlite is as simple as: sudo apt-get install sqlite3 php5-sqlite On Mac OS X, you can use Homebrew to install sqlite. |

Let’s quickly create our database, which we’ll create at data/database.db, via command line:
sqlite3 data/database.db
We’re now in the command line sqlite3 application. We can easily drop SQL queries in here and run them. Let’s create our tables:
CREATE TABLE customers (
id integer PRIMARY KEY,
name varchar(100) NOT NULL,
email varchar(100) NOT NULL
);
CREATE TABLE orders (
id integer PRIMARY KEY,
customer_id int REFERENCES customers(id) NOT NULL,
order_number varchar(20) NOT NULL,
description text NOT NULL,
total float NOT NULL
);
CREATE TABLE invoices (
id integer PRIMARY KEY,
order_id int REFERENCES orders(id) NOT NULL,
invoice_date date NOT NULL,
total float NOT NULL
);
You can run the .tables command to see the newly created tables, or .schema to see the schema definition.
Now let’s populate our customers table with a couple rows for test data:
INSERT INTO customers(name, email) VALUES('Acme Corp', 'ap@acme.com');
INSERT INTO customers(name, email) VALUES('ABC Company', 'invoices@abc.com');
Connecting to the Database
We want our ZF2 application to be able to connect to this database. Zend Framework has a set of configuration files located within config/autoload that get loaded automatically when the application is run. If the file ends with local.php, it is specific to that local environment. If the file ends with global.php, it is application specific, instead of environment specific.
Let’s create a db.local.php file in config/autoload to hold our database configuration:
return [
'db' => [
'driver' => 'Pdo_Sqlite',
'database' => __DIR__ . '/../../data/database.db',
],
];
This tells ZF2 that for our database, we want to use the Pdo_Sqlite driver, and that our database file is located at data/database.db, after doing some back tracking from the current file’s directory to get there.
|
|
Any *.local.php file is not supposed to be committed to source control. Instead, you should commit a *.local.php.dist explaining how the configuration file should be set up. This keeps secrets, such as database passwords, from being committed to source control and potentially leaked or exposed. Since we don’t have any secrets here, and in the interest of committing a workable app, I’m going to put this file in source control anyway. |

We’ve now done everything we need to do to tell ZF2 how to talk to our database. Now we just have to write some code to do it.
Table Data Gateway Pattern
Zend Framework 2 uses the Table Data Gateway Pattern, which we very briefly mentioned in Design Patterns, A Primer. In the Table Data Gateway Pattern, a single object acts as a gateway to a database table, handling the retrieving and persisting of all rows for that table. 1 This pattern is described in great detail in Martin Fowler’s Patterns of Enterprise Application Architecture.
Essentially, we’re going to have one object, a Data Table, which represents all operations on one of our Entity classes. We’re going to go ahead and make these classes implement our Repository Interfaces, so that they can fulfill the needed contract in our code.
We’ll place all these files within the src/Persistence/Zend directory as our Zend Persistence layer. Let’s start with an AbstractDataTable class nested under the DataTable/ directory that will define our generic database operations that the rest of our DataTable classes can inherit from:
// src/Persistence/Zend/DataTable/AbstractDataTable.php
namespace CleanPhp\Invoicer\Persistence\Zend\DataTable;
use CleanPhp\Invoicer\Domain\Entity\AbstractEntity;
use CleanPhp\Invoicer\Domain\Repository\RepositoryInterface;
use Zend\Db\TableGateway\TableGateway;
use Zend\Stdlib\Hydrator\HydratorInterface;
abstract class AbstractDataTable implements RepositoryInterface {
protected $gateway;
protected $hydrator;
public function __construct(
TableGateway $gateway,
HydratorInterface $hydrator
) {
$this->gateway = $gateway;
$this->hydrator = $hydrator;
}
public function getById($id) {
$result = $this->gateway
->select(['id' => intval($id)])
->current();
return $result ? $result : false;
}
public function getAll() {
$resultSet = $this->gateway->select();
return $resultSet;
}
public function persist(AbstractEntity $entity) {
$data = $this->hydrator->extract($entity);
if ($this->hasIdentity($entity)) {
$this->gateway->update($data, ['id' => $entity->getId()]);
} else {
$this->gateway->insert($data);
$entity->setId($this->gateway->getLastInsertValue());
}
return $this;
}
public function begin() {
$this->gateway->getAdapter()
->getDriver()->getConnection()->beginTransaction();
return $this;
}
public function commit() {
$this->gateway->getAdapter()
->getDriver()->getConnection()->commit();
return $this;
}
protected function hasIdentity(AbstractEntity $entity) {
return !empty($entity->getId());
}
}
We’re defining our basic database operations - the ones required by our RepositoryInterface that all other repositories inherit from. These methods are mostly just wrappers around Zend’s TableGateway (that we’ll take a look at in just a minute).
The only interesting piece we have here is the hasIdentity() method, which just (loosely) determines if our entity had already been persisted, so that we know whether we’re doing an insert() or update() operation. We’re relying on the presence of an ID here, which might not always work. It’s good enough for now.
TableGateway
The first thing that our AbstractDataTable requires is an instance of TableGateway. The TableGateway is Zend’s workhorse that does all the database heavy lifting. As you can see by looking at AbstractDataTable, all of our operations live off one of it’s methods.
We’re essentially going to use Zend’s concrete implementation, just configured to work with our own tables. We’ll define those when we worry about actually instantiating a DataTable.
Hydrators
The second thing that wants to be injected into the AbstractDataTable is an instance of Zend’s HydratorInterface. A hydrator is responsible for hydrating an object, meaning, filling out it’s attributes with values. In our case, we’re going from an array of data to a hydrated entity (think posted form data).
Zend’s hydrators are also responsible for data extraction, which is the opposite of hydrating: we take data from a hydrated object and store it in an array representation, which is necessary for Zend’s database update operations. You can see how it’s used in the persist() method above.
For the most part, we’ll use a hydrator provided by Zend called the ClassMethods hydrator. This hydrator scans the object for set and get methods, and uses them to determine how to hydrate or extract that object.
For instance, if an object has a setAmount() method, the hydrator will look for an amount key in the array and, if found, pass the value at that key to the setAmount() method to hydrate that information to the object.
Likewise, if an object has a getAmount() method, the hydrator calls it to get the value and adds an element to the resulting array with the key of amount and the value returned from getAmount().
In some instances, we’ll use the ClassMethods hydrator directly. In others, we’ll wrap this hydrator to provide some additional functionality to it.
Customer DataTable
Let’s define our CustomerTable implementation:
// src/Persistence/Zend/DataTable/CustomerTable.php
namespace CleanPhp\Invoicer\Persistence\Zend\DataTable;
use CleanPhp\Invoicer\Domain\Repository\CustomerRepositoryInterface;
class CustomerTable extends AbstractDataTable
implements CustomerRepositoryInterface
{
}
The CustomerTable class simply implements the AbstractDataTable class. Since the
CustomerRepositoryInterface defines no additional functionality, we can just use the AbstractDataTable as is.
Order DataTable
Our OrderTable will look pretty much the same as our CustomerTable:
// src/Persistence/Zend/DataTable/OrderTable.php
namespace CleanPhp\Invoicer\Persistence\Zend\DataTable;
use CleanPhp\Invoicer\Domain\Repository\OrderRepositoryInterface;
class OrderTable extends AbstractDataTable
implements OrderRepositoryInterface
{
public function getUninvoicedOrders()
{
return [];
}
}
Our OrderRepositoryInterface defines an extra method that none of the other interfaces have: getUninvoicedOrders(). We’ll worry about defining this functionality later once we start using it.
Invoice DataTable
Finally, or InvoiceTable, much the same:
// src/Persistence/Zend/DataTable/InvoiceTable.php
namespace CleanPhp\Invoicer\Persistence\Zend\DataTable;
use CleanPhp\Invoicer\Domain\Repository\InvoiceRepositoryInterface;
class InvoiceTable extends AbstractDataTable
implements InvoiceRepositoryInterface
{
}
Table Gateway Factory
Our Data Tables need to be injected with an instance of a TableGateway configured for that particular model. In the ZF Getting Started docs, they define a TableGateway for each Data Table being defined. We’ll create one dynamically by writing a factory to do so:
// src/Persistence/Zend/TableGateway/TableGatewayFactory.php
namespace CleanPhp\Invoicer\Persistence\Zend\TableGateway;
use Zend\Db\Adapter\Adapter;
use Zend\Db\ResultSet\HydratingResultSet;
use Zend\Db\TableGateway\TableGateway;
use Zend\Stdlib\Hydrator\HydratorInterface;
class TableGatewayFactory {
public function createGateway(
Adapter $dbAdapter,
HydratorInterface $hydrator,
$object,
$table
) {
$resultSet = new HydratingResultSet($hydrator, $object);
return new TableGateway($table, $dbAdapter, null, $resultSet);
}
}
Our factory requires an instance of the Zend Database Adapter, which we’ll configure in just a bit, as well as an instance of the Hydrator to use. Finally, it accepts an instance of the object that represents the data table, and the name of the database table where the data is stored.
For more information on how this works, see the Zend Getting Started Guide.
Configuring Zend Framework
Our last step of setting up the database is to configure Zend Framework to use these new Data Tables. Let’s start by defining the CustomerTable in the service manager. We’ll define this in the global.php config file, although in a real application, we’d probably find a much better place to put this:
// config/autoload/global.php
use CleanPhp\Invoicer\Domain\Entity\Customer;
use CleanPhp\Invoicer\Persistence\Zend\DataTable\CustomerTable;
use CleanPhp\Invoicer\Persistence\Zend\TableGateway\TableGatewayFactory;
use Zend\Stdlib\Hydrator\ClassMethods;
return [
'service_manager' => [
'factories' => [
'CustomerTable' => function($sm) {
$factory = new TableGatewayFactory();
$hydrator = new ClassMethods();
return new CustomerTable(
$factory->createGateway(
$sm->get('Zend\Db\Adapter\Adapter'),
$hydrator,
new Customer(),
'customers'
),
$hydrator
);
},
]
]
];
We use our TableGatewayFactory to create a TableGateway instance to provide to our
CustomerTable. We’re also passing an instance of the ClassMethods hydrator, as well as a Customer object and the name of the customers table.
Both the TableGatewayFactory and the CustomerTable need an instance of our hydrator, so we declare that before-hand and provide it as needed to each class.
The only new piece here is the Zend Db Adapter.
We’ll need to configure that in the same file:
// config/autoload/global.php
// ...
return [
'service_manager' => [
'factories' => [
'Zend\Db\Adapter\Adapter' => 'Zend\Db\Adapter\AdapterServiceFactory',
// ...
],
],
];
This tells the service manager to use the AdapterServiceFactory provided by Zend to give us an instance of Zend\Db\Adapter\Adapter when needed. If you want to understand how all this works, take a look at the ZF docs for more information, or dive into Zend’s source code if you’re feeling extra adventurous.
Finally, we’ll setup a nearly identical entry for both the OrderTable and InvoiceTable:
// config/autoload/global.php
use CleanPhp\Invoicer\Domain\Entity\Customer;
use CleanPhp\Invoicer\Domain\Entity\Invoice;
use CleanPhp\Invoicer\Domain\Entity\Order;
use CleanPhp\Invoicer\Persistence\Zend\DataTable\CustomerTable;
use CleanPhp\Invoicer\Persistence\Zend\DataTable\InvoiceTable;
use CleanPhp\Invoicer\Persistence\Zend\DataTable\OrderTable;
use CleanPhp\Invoicer\Persistence\Zend\TableGateway\TableGatewayFactory;
use Zend\Stdlib\Hydrator\ClassMethods;
return [
'service_manager' => [
'factories' => [
// ...
'InvoiceTable' => function($sm) {
$factory = new TableGatewayFactory();
$hydrator = new ClassMethods();
return new InvoiceTable(
$factory->createGateway(
$sm->get('Zend\Db\Adapter\Adapter'),
$hydrator,
new Invoice(),
'invoices'
),
$hydrator
);
},
'OrderTable' => function($sm) {
$factory = new TableGatewayFactory();
$hydrator = new ClassMethods();
return new OrderTable(
$factory->createGateway(
$sm->get('Zend\Db\Adapter\Adapter'),
$hydrator,
new Order(),
'orders'
),
$hydrator
);
},
],
],
];
Wrapping it Up
We now have all of our database tables configured and ready to use with Zend Framework 2, as well as our database configured, ready, and loaded with some dummy Customer data.
Let’s move forward!
|
|
This would make a good place to commit your code to source control. If you’re just reading, but want to see the code in action, you can checkout the tag 04-zf2-database-setup: git clone https://github.com/mrkrstphr/cleanphp-example.git git checkout 04-zf2-database-setup |
1. http://martinfowler.com/eaaCatalog/tableDataGateway.html↩
Our Application in Zend Framework 2
Now that we have Zend Framework configured and ready to rock, as well as our database setup and configured, we can start actually using it.
Let’s start with customer management. We stubbed out a route, but when we navigate to that route, we’re going to get a sad error message from ZF2:
A 404 error occurred Page not found. The requested controller could not be mapped to an existing controller class.
Controller: ApplicationControllerCustomers (resolves to invalid controller class or alias: ApplicationControllerCustomers) No Exception available
This makes sense as we defined a route to point to a Customers controller, but didn’t bother creating that controller. So let’s do that.
Customer Management
Let’s start building out our CustomersController::indexAction(), which will display a grid of all of our customers.
|
|
I spent a lot of time trying to figure out how to unit test controllers in Zend Framework. I’m going to call it: it’s impossible. Depending on the action, you need to either bootstrap or mock four to forty-four different services, plugins, etc. Zend provides a great tutorial on testing their controllers. They call it unit testing, but that can only be true if they mean the whole ZF2 ecosystem as a unit. As such, I’m going to disregard tests for these controllers. If this were real life, I’d bite the bullet and write the integration tests (which are important too). For the sake of this book, that’s just too much to bother. |

Let’s being our indexAction():
// modules/Application/src/Application/Controller/CustomersController.php
namespace Application\Controller;
use CleanPhp\Invoicer\Domain\Repository\CustomerRepositoryInterface;
use Zend\Mvc\Controller\AbstractActionController;
class CustomersController extends AbstractActionController {
public $customerRepository;
public function __construct(
CustomerRepositoryInterface $customers
) {
$this->customerRepository = $customers;
}
public function indexAction() {
return [
'customers' => $this->customerRepository->getAll()
];
}
}
We have a new CustomersController class with an indexAction() method. An instance of CustomerRepositoryInterface is injected in, and later used by the action to call the getAll() method. We return the result of that method in an array, keyed at customers.
Now we need a proper view to represent the indexAction(), and we should see our data on the screen. Let’s drop that view file in:
<!-- module/Application/views/application/customers/index.phtml -->
<div class="page-header clearfix">
<h2 class="pull-left">Customers</h2>
<a href="/customers/new" class="btn btn-success pull-right">
Create Customer</a>
</div>
<table class="table">
<thead>
<tr>
<th>#</th>
<th>Name</th>
<th>Email</th>
</tr>
</thead>
<?php foreach ($this->customers as $customer): ?>
<tr>
<td>
<a href="/customers/edit/<?= $customer->getId() ?>">
<?= $customer->getId() ?></a>
</td>
<td><?= $customer->getName() ?></td>
<td><?= $customer->getEmail() ?></td>
</tr>
<?php endforeach; ?>
</table>
Lastly, we’ll need to configure ZF2 to know that CustomersController is the Customers controller we referenced in the route. If if we had called it CustomersController in the route, ZF2 still wouldn’t know what we’re talking about as the string here is simply the key within the controller service locator.
In the controllers section of the module config file, we’ll add an entry for our new controller:
// module/Application/config/module.config.php
return [
// ...
'controllers' => [
'invokables' => [
'Application\Controller\Index' =>
'Application\Controller\IndexController'
],
'factories' => [
'Application\Controller\Customers' => function ($sm) {
return new \Application\Controller\CustomersController(
$sm->getServiceLocator()->get('CustomerTable')
);
},
],
],
// ...
];
Unlike the main IndexController, this CustomersController entry will be registered with ZF as a factory, so that it’s not just instantiated outright, but allows us to bake in logic about how it’s instantiated, which allows us to inject the proper dependencies. We’re using the entry we defined in the last chapter for CustomerTable to grab our Customer Data Table, which implements the CustomerRepositoryInterface and satisfies the type-hint on the constructor of the CustomersController.
So now if we navigate to /customers in our beloved browser, we should see all of our customers from our sqlite database rendered on to the screen. Success!
|
|
This would make a good place to commit your code to source control. If you’re just reading, but want to see the code in action, you can checkout the tag 05-viewing-customers: git clone https://github.com/mrkrstphr/cleanphp-example.git git checkout 05-viewing-customers |
Creating Customers
In our HTML, we have a button for creating new customers that brings the user to the route /customers/new. At this route, we’ll render a form that, when correctly filled out, will then post back to the same route where we’ll persist the new information to the database as a new customer.
Let’s start building out our CustomersController->newAction() to handle simple GET requests.
CustomersController->newAction()
Let’s start building out our newAction() and the corresponding view file:
// module/Application/src/Application/Controllers/CustomersController.php
namespace Application\Controller;
use CleanPhp\Invoicer\Domain\Repository\CustomerRepositoryInterface;
use Zend\Mvc\Controller\AbstractActionController;
class CustomersController extends AbstractActionController {
// ...
public function newAction() {
}
}
This simple controller action is all we initially need. Let’s build out our view:
<!-- module/Application/view/application/customers/new.phtml -->
<div class="page-header clearfix">
<h2>New Customer</h2>
</div>
<form role="form" action="" method="post">
<div class="form-group">
<label for="name">Name:</label>
<input type="text" class="form-control" name="name" id="name"
placeholder="Enter Name">
</div>
<div class="form-group">
<label for="email">Email:</label>
<input type="text" class="form-control" name="email" id="email"
placeholder="Enter Email">
</div>
<button type="submit" class="btn btn-primary">Save</button>
</form>
Next, we’ll need to update our routing to handle /customers/new:
// module/Application/config/module.config.php
return [
'router' => [
'routes' => [
// ...
'customers' => [
// ...
'may_terminate' => true,
'child_routes' => [
'create' => [
'type' => 'Segment',
'options' => [
'route' => '/new',
'defaults' => [
'action' => 'new',
],
]
],
]
],
// ...
],
],
// ...
];
This simple child route will combine /customers of the parent route, with /new of the child route to give us our /customers/new route, which will point to the newAction() of our CustomersController().
Now if we click on the Create Customer link, we should see our new form rendered. Now we just have to make this form do something.
CustomerInputFilter
We’re going to use Zend’s InputFilter to validate and sanitize our input. You can read more about Zend’s Input Filters in their documentation, but essentially, they give us a set of classes to validate and sanitize input data.
We’re going to drop our InputFilters into the src/ directory, as we’ll want to use them when we decide to switch away from Zend Framework. Otherwise, we’d have to build a whole new solution for validating input data, which would be fine, but it’s nice not to have to do that at the same time.
We’ll start by writing a spec to describe the behavior we want. First, we’ll need an instance of our soon-to-be new CustomerInputFilter for testing:
// specs/input-filter/customer.spec.php
use CleanPhp\Invoicer\Service\InputFilter\CustomerInputFilter;
describe('InputFilter\Customer', function () {
beforeEach(function () {
$this->inputFilter = new CustomerInputFilter();
});
describe('->isValid()', function () {
// ...
});
});
We’ll be interested in testing the isValid() method, which Zend provides to determine whether an InputFilter’s data is valid. We’ll also use the setData() method to supply the InputFilter with some data to test.
Let’s start with testing validity of the customer name:
it('should require a name', function () {
$isValid = $this->inputFilter->isValid();
$error = [
'isEmpty' => 'Value is required and can\'t be empty'
];
$messages = $this->inputFilter
->getMessages()['name'];
expect($isValid)->to->equal(false);
expect($messages)->to->equal($error);
});
Last, we’ll test the validity of the email address. Here, we’re not particularly worried about the exact messages ZF2 returns when we have invalid data, just that we get some kind of array of errors back, rather than null:
it('should require an email', function () {
$isValid = $this->inputFilter->isValid();
$error = [
'isEmpty' => 'Value is required and can\'t be empty'
];
$messages = $this->inputFilter
->getMessages()['email'];
expect($isValid)->to->equal(false);
expect($messages)->to->equal($error);
});
it('should require a valid email', function () {
$scenarios = [
[
'value' => 'bob',
'errors' => []
],
[
'value' => 'bob@bob',
'errors' => []
],
[
'value' => 'bob@bob.com',
'errors' => null
]
];
foreach ($scenarios as $scenario) {
$this->inputFilter->setData([
'email' => $scenario['value']
])->isValid();
$messages = $this->inputFilter
->getMessages()['email'];
if (is_array($messages)) {
expect($messages)->to->be->a('array');
expect($messages)->to->not->be->empty();
} else {
expect($messages)->to->be->null();
}
}
});
|
|
We can add some more robust data to the list of tested $scenarios if we want to more fully test the email RFC for valid emails, but we can also trust that ZF2 handles all the cases pretty well. We just want to make sure that our CustomerInputFilter is setting up the validation rules correctly. |

Now let’s write a new InputFilter class for Customer data:
// src/Service/InputFilter/CustomerInputFilter.php
namespace CleanPhp\Invoicer\Service\InputFilter;
use Zend\InputFilter\Input;
use Zend\InputFilter\InputFilter;
use Zend\Validator\EmailAddress;
class CustomerInputFilter extends InputFilter {
public function __construct() {
$name = (new Input('name'))
->setRequired(true);
$email = (new Input('email'))
->setRequired(true);
$email->getValidatorChain()->attach(
new EmailAddress()
);
$this->add($name);
$this->add($email);
}
}
Posting Customer Data
Our next step is to utilize this CustomerInputFilter in our CustomersController. We’ll want to do this when we receive a POST request only, and if we receive validation errors, we should report those back to the user. Let’s start by writing a spec of our intended behavior.
First, we’ll need to inject an instance of the CustomerInputFilter into the CustomersController as part of the test:
// module/Application/src/Application/Controller/CustomersController.php
namespace Application\Controller;
use CleanPhp\Invoicer\Domain\Repository\CustomerRepositoryInterface;
use CleanPhp\Invoicer\Service\InputFilter\CustomerInputFilter;
use Zend\Mvc\Controller\AbstractActionController;
class CustomersController extends AbstractActionController {
protected $customerRepository;
protected $inputFilter;
public function __construct(
CustomerRepositoryInterface $customers,
CustomerInputFilter $inputFilter
) {
$this->customerRepository = $customers;
$this->inputFilter = $inputFilter;
}
// ...
}
Now we can update the newAction() to handle a POST request:
// module/Application/src/Application/Controller/CustomersController.php
namespace Application\Controller;
use CleanPhp\Invoicer\Domain\Repository\CustomerRepositoryInterface;
use CleanPhp\Invoicer\Service\InputFilter\CustomerInputFilter;
use Zend\Mvc\Controller\AbstractActionController;
class CustomersController extends AbstractActionController {
// ...
public function newAction() {
if ($this->getRequest()->isPost()) {
$this->inputFilter->setData($this->params()->fromPost());
if ($this->inputFilter->isValid()) {
} else {
}
}
}
}
First, we determine if the request is a POST request. If it is, we supply our InputFilter with the posted form data, then check to see if the InputFilter is valid, given that data.
We have two remaining paths to implement:
1. The data is valid
2. The data is invalid
When the data is valid, we want to persist it to our repository. However, the data coming in from the POST is a giant array. We need to be able to persist an instance of Customer. The best way to handle this is to hydrate a Customer object with the POST data. To do that, we’ll need to inject an instance of a HydratorInterface into the controller:
// module/Application/src/Application/Controller/CustomersController.php
namespace Application\Controller;
use CleanPhp\Invoicer\Domain\Repository\CustomerRepositoryInterface;
use CleanPhp\Invoicer\Service\InputFilter\CustomerInputFilter;
use Zend\Mvc\Controller\AbstractActionController;
use Zend\StdLib\Hydrator\HydratorInterface;
class CustomersController extends AbstractActionController {
protected $customerRepository;
protected $inputFilter;
public function __construct(
CustomerRepositoryInterface $customers,
CustomerInputFilter $inputFilter,
HydratorInterface $hydrator
) {
$this->customerRepository = $customers;
$this->inputFilter = $inputFilter;
$this->hydrator = $hydrator;
}
// ...
}
We’ll also want to update our controller config to inject these two new objects that the CustomersController needs:
// module/Application/config/module.config.php
use CleanPhp\Invoicer\Service\InputFilter\CustomerInputFilter;
use Zend\Stdlib\Hydrator\ClassMethods;
return [
// ...
'controllers' => [
'invokables' => [
'Application\Controller\Index' =>
'Application\Controller\IndexController'
],
'factories' => [
'Application\Controller\Customers' => function ($sm) {
return new \Application\Controller\CustomersController(
$sm->getServiceLocator()->get('CustomerTable'),
new CustomerInputFilter(),
new ClassMethods()
);
},
],
],
// ...
];
Next, we’re going to use the hydrator to build a Customer object, and then persist that customer object using our CustomerRepository:
public function newAction() {
if ($this->getRequest()->isPost()) {
$this->inputFilter->setData($this->params()->fromPost());
if ($this->inputFilter->isValid()) {
$customer = $this->hydrator->hydrate(
$this->inputFilter->getValues(),
new Customer()
);
$this->customerRepository->begin()
->persist($customer)
->commit();
} else {
}
}
}
We’ll also need a use statement for the Customer class at the top of the file.
At this point, we can enter a new Customer in the browser and have it persisted to the database. But afterward, the user is dumped back to the New Customer page with no indication that their save was successful.
Let’s add a redirect to the /customers page, as well as a flash message alerting them that the save was successful:
public function newAction() {
if ($this->getRequest()->isPost()) {
$this->inputFilter->setData($this->params()->fromPost());
if ($this->inputFilter->isValid()) {
// ...
$this->flashMessenger()->addSuccessMessage('Customer Saved');
$this->redirect()->toUrl('/customers');
} else {
}
}
}
If you give it a shot in the browser, you should now be redirected to the /customers page. In order to get the flash message to show up, we’ll need to setup our layout.phtml file to render flash messages. Zend provides a helper to easily display these flash messages, but it looks terrible. We’ll create our own partial file to render them, and then include that in our layout.phtml file.
<!-- view/application/partials/flash-messages.phtml -->
<?php
$flash = $this->flashMessenger();
$flash->setMessageOpenFormat('<div%s role="alert">
<button type="button" class="close"
data-dismiss="alert" aria-label="Close">
<span aria-hidden="true">×</span>
</button>
<div>')
->setMessageSeparatorString('</div><div>')
->setMessageCloseString('</div></div>');
?>
<?= $this->flashMessenger()->render(
'success',
['alert', 'alert-dismissible', 'alert-success']
) ?>
This is a bunch of bootstrapping to style the existing Zend helper, then using that helper to generate the messages.
Let’s include it in the layout.phtml file:
<!-- ... ->
<div class="container">
<?= $this->partial('application/partials/flash-messages') ?>
<?= $this->content; ?>
<hr>
<footer>
<p>I'm the footer.</p>
</footer>
</div>
<!-- ... -->
Now our flash message should be rendered when we create new customers.
Handling Validation Errors
On InputFilter->isValid() failure, we’ll want to do two things: hydrate and return a Customer object with the submitted data, so we can persist it to the form, and return the validation error messages so we can show them to the user.
We’ll use the already injected HydratorInterface, but this time, instead of hydrating sanitized data from the InputFilter, we’re going to hydrate the data directly posted:
public function newAction() {
$viewModel = new ViewModel();
$customer = new Customer();
if ($this->getRequest()->isPost()) {
$this->inputFilter->setData($this->params()->fromPost());
if ($this->inputFilter->isValid()) {
$this->hydrator->hydrate(
$this->inputFilter->getValues(),
$customer
);
$this->customerRepository->begin()
->persist($customer)
->commit();
$this->flashMessenger()->addSuccessMessage('Customer Saved');
$this->redirect()->toUrl('/customers');
} else {
$this->hydrator->hydrate(
$this->params()->fromPost(),
$customer
);
}
}
$viewModel->setVariable('customer', $customer);
return $viewModel;
}
Don’t forget to drop a use statement for Zend\View\Model\ViewModel at the top of the file.
We’ve started by declaring a new Customer object that gets passed along to the view. We’ve updated our valid clause to use this customer, rather than instantiating it’s own. We’ve also updated our else condition to hydrate this object with data directly from the POST.
Since we’re now passing off customer details to the view, we’ll need to update our view file to use these values when generating the form, so that they’ll show the bad data when we fail validation:
<!-- module/Application/view/application/customers/new.phtml -->
<div class="page-header clearfix">
<h2>New Customer</h2>
</div>
<form role="form" action="" method="post">
<div class="form-group">
<label for="name">Name:</label>
<input type="text" class="form-control" name="name" id="name"
placeholder="Enter Name" value="<?= $this->customer->getName() ?>">
</div>
<div class="form-group">
<label for="email">Email:</label>
<input type="text" class="form-control" name="email" id="email"
placeholder="Enter Email" value="<?= $this->customer->getEmail() ?>">
</div>
<button type="submit" class="btn btn-primary">Save</button>
</form>
We’re now using the supplied $customer to set the value for each input. On GET, these values will be empty, but on a failed POST, they’ll contain the user submitted data.
Now, let’s take care of showing the validation messages. First, we’ll start by making sure they get passed off to the view in the newAction():
public function newAction() {
$viewModel = new ViewModel();
$customer = new Customer();
if ($this->getRequest()->isPost()) {
// ...
if ($this->inputFilter->isValid()) {
// ...
} else {
$this->hydrator->hydrate(
$this->params()->fromPost(),
$customer
);
$viewModel->setVariable('errors', $this->inputFilter->getMessages());
}
}
// ...
return $viewModel;
}
Now we can render these errors in the view file. To do that, we’re going to make a custom View Helper to render the error messages, if present, for any given input field.
View Helpers
View Helpers in Zend Framework are reusable classes that can accept data and generate HTML. As long as they are configured properly within the service manager, ZF2 takes care of instantiating them for you when you use them in a view.
Using View Helpers involves invoking their name from the $this object variable within the view:
<?= $this->helperName('some data') ?>
We’ll create a View Helper to help us display validation messages returned to the view. Our View Helper will live in the module/Application/src/View/Helper directory, and we’ll call it ValidationErrors.php:
namespace Application\View\Helper;
use Zend\View\Helper\AbstractHelper;
class ValidationErrors extends AbstractHelper {
public function __invoke($element) {
if ($errors = $this->getErrors($element)) {
return '<div class="alert alert-danger">' .
implode('. ', $errors) .
'</div>';
}
return '';
}
protected function getErrors($element) {
if (!isset($this->getView()->errors)) {
return false;
}
$errors = $this->getView()->errors;
if (isset($errors[$element])) {
return $errors[$element];
}
return false;
}
}
This view helper will accept an element, which we use to lookup errors with. If we find some, we return them rendered in pretty HTML. The errors for each element are an array (to allow for multiple errors), so we’ll simply implode them and separate them with a period.
Next, we need to let Zend know about this view helper using it’s service locator config in module.config.php:
return [
// ...
'view_helpers' => [
'invokables' => [
'validationErrors' => 'Application\View\Helper\ValidationErrors',
]
],
// ...
];
Finally, we can update the view file to use this new helper and display any validation error messages for each field:
<!-- module/Application/view/application/customers/new.phtml -->
<div class="page-header clearfix">
<h2>New Customer</h2>
</div>
<form role="form" action="" method="post">
<div class="form-group">
<label for="name">Name:</label>
<input type="text" class="form-control" name="name" id="name"
placeholder="Enter Name" value="<?= $this->customer->getName() ?>">
<?= $this->validationErrors('name') ?>
</div>
<div class="form-group">
<label for="email">Email:</label>
<input type="text" class="form-control" name="email" id="email"
placeholder="Enter Email" value="<?= $this->customer->getEmail() ?>">
<?= $this->validationErrors('email') ?>
</div>
<button type="submit" class="btn btn-primary">Save</button>
</form>
If we submit the form without any data now, or with data that doesn’t meet our validation requirements, such as an invalid email, we should get validation error messages rendered under each field. Any data we do enter should also be preserved in the input field.
|
|
This would make a good place to commit your code to source control. If you’re just reading, but want to see the code in action, you can checkout the tag 06-creating-customers: git clone https://github.com/mrkrstphr/cleanphp-example.git git checkout 06-creating-customers |
Editing Customers
Our next step is to implement the editing of existing customers. Since this code is going to be very similar to our create customers code, we’ll use the same action and modify it slightly to handle both new and existing Customers.
Let’s first start by refactoring our newAction() to be newOrEditAction(), and make sure it still works before continuing. Let’s start with the CustomersController:
// module/Application/src/Application/Controller/CustomersController.php
// ...
class CustomersController extends AbstractActionController {
// ...
public function newOrEditAction() {
// ...
}
}
Next, we’ll update the routing config to point to this new action, and also add the edit action while we’re at it:
// module/Application/config/module.config.php
return [
'router' => [
'routes' => [
// ...
'customers' => [
'type' => 'Segment',
'options' => [/* ... */],
'may_terminate' => true,
'child_routes' => [
'new' => [
'type' => 'Segment',
'options' => [
'route' => '/new',
'constraints' => [
'id' => '[0-9]+',
],
'defaults' => [
'action' => 'new-or-edit',
],
]
],
'edit' => [
'type' => 'Segment',
'options' => [
'route' => '/edit/:id',
'constraints' => [
'id' => '[0-9]+',
],
'defaults' => [
'action' => 'new-or-edit',
],
]
],
]
],
// ...
],
],
];
Finally, let’s rename our view/application/customers/new-or-edit.phtml file to
module/Application/view/application/customers/new-or-edit.phtml. At this point, our Create Customer button and action should still work. If we click on the id of a row in the indexAction(), we should also get a form in the browser, just missing our data. Let’s fix that.
The first thing we’ll want to do is check for an ID passed via the URL. If we have one, we should get a Customer object from the CustomerRepository. If there is no ID, we should instantiate a new Customer object just like we currently are:
public function newOrEditAction() {
$id = $this->params()->fromRoute('id');
$customer = $id ? $this->customerRepository->getById($id) : new Customer();
// ...
}
This simple change should be all we need to support editing Customers. Give it a try. Sweet, huh?
We want to do two more things:
1. Link to the Edit Customer page after a successful save.
2. Show Edit Customer as the title instead of New Customer when editing
The first one is easy; we change the redirect line in newOrEditAction() to:
$this->redirect()->toUrl('/customers/edit/' . $customer->getId());
And changing the title in the view is pretty easy, too:
<div class="page-header clearfix">
<h2>
<?= !empty($this->customer->getId()) ? 'Edit' : 'New' ?>
Customer
</h2>
</div>
We simply check to see if the $customer has an ID to determine if it is an edit or add operation.
Customer Management is now complete!
|
|
This would make a good place to commit your code to source control. If you’re just reading, but want to see the code in action, you can checkout the tag 06-editing-customers: git clone https://github.com/mrkrstphr/cleanphp-example.git git checkout 06-editing-customers |
Order Management
Let’s move on to orders. We’re going to start by hand-crafting a List Orders view, much the same way we created a List Customers view. We already defined our basic route for /orders earlier in this chapter, so let’s continue that by creating our controller that will be served by this route.
For our indexAction(), we simply want to get an a collection of all Orders stored within the database. The controller will use an implementation of the OrderRepositoryInterface, injected via the constructor, and it’s getAll() method to get the orders.
// module/Application/src/Application/Controller/OrdersController.php
namespace Application\Controller;
use CleanPhp\Invoicer\Domain\Repository\OrderRepositoryInterface;
use Zend\Mvc\Controller\AbstractActionController;
class OrdersController extends AbstractActionController {
protected $orderRepository;
public function __construct(OrderRepositoryInterface $orders) {
$this->orderRepository = $orders;
}
public function indexAction() {
return [
'orders' => $this->orderRepository->getAll()
];
}
}
To use this controller, we’ll need to configure it in the controller service config. We can do so right after the Customers controller definition:
// module/Application/config/module.config.php
return [
// ...
'controllers' => [
// ...
'Application\Controller\Orders' => function ($sm) {
return new \Application\Controller\OrdersController(
$sm->getServiceLocator()->get('OrderTable')
);
},
],
// ...
];
Finally, let’s drop in a view file to render our list of orders:
<!-- module/Application/views/application/orders/index.php -->
<div class="page-header clearfix">
<h2 class="pull-left">Orders</h2>
<a href="/orders/new" class="btn btn-success pull-right">
Create Order</a>
</div>
<table class="table table-striped clearfix">
<thead>
<tr>
<th>#</th>
<th>Order Number</th>
<th>Customer</th>
<th>Description</th>
<th class="text-right">Total</th>
</tr>
</thead>
<?php foreach ($this->orders as $order): ?>
<tr>
<td>
<a href="/orders/view/<?= $this->escapeHtmlAttr($order->getId()) ?>">
<?= $this->escapeHtml($order->getId()) ?></a>
</td>
<td><?= $this->escapeHtml($order->getOrderNumber()) ?></td>
<td>
<a href="/customers/edit/<?=
$this->escapeHtmlAttr($order->getCustomer()->getId()) ?>">
<?= $this->escapeHtml($order->getCustomer()->getName()) ?></a>
</td>
<td><?= $this->escapeHtml($order->getDescription()) ?></td>
<td class="text-right">
$ <?= number_format($order->getTotal(), 2) ?>
</td>
</tr>
<?php endforeach; ?>
</table>
If you refresh, you should see an empty grid! If we manually drop a couple orders in the database, we should see some data show up. And a big fat error, because we’re trying to access the Customer associated to the Order, but we haven’t actually hydrated one.
This is where we start to see the pitfalls of ZF2’s Data Table Gateway. But for the sake of getting something done, let’s continue on.
Hydrating the Related Customer
In order to hydrate the Customer related to an Order, we’ll have to build a custom hydrator. To do so, we’ll simply wrap Zend’s ClassMethods hydrator that we’re already using, and add some additional functionality to it.
We’ll start by writing a spec to describe the functionality we need:
// specs/hydrator/order.spec.php
use CleanPhp\Invoicer\Domain\Entity\Order;
use CleanPhp\Invoicer\Persistence\Hydrator\OrderHydrator;
use Zend\Stdlib\Hydrator\ClassMethods;
describe('Persistence\Hydrator\OrderHydrator', function () {
beforeEach(function() {
$this->hydrator = new OrderHydrator(new ClassMethods());
});
describe('->hydrate()', function () {
it('should perform basic hydration of attributes', function () {
$data = [
'id' => 100,
'order_number' => '20150101-019',
'description' => 'simple order',
'total' => 5000
];
$order = new Order();
$this->hydrator->hydrate($data, $order);
expect($order->getId())->to->equal(100);
expect($order->getOrderNumber())->to->equal('20150101-019');
expect($order->getDescription())->to->equal('simple order');
expect($order->getTotal())->to->equal(5000);
});
});
});
If first test case is to make sure that our OrderHydrator performs basic hydration of our scalar type values. We’ll be passing off this work to the ClassMethods hydrator since it’s pretty good at it. Next, we’ll need to handle our use case for persisting a Customer object on the Order:
use CleanPhp\Invoicer\Domain\Entity\Customer;
use CleanPhp\Invoicer\Domain\Entity\Order;
use CleanPhp\Invoicer\Persistence\Hydrator\OrderHydrator;
use Zend\Stdlib\Hydrator\ClassMethods;
describe('Persistence\Hydrator\OrderHydrator', function () {
beforeEach(function() {
$this->repository = $this->getProphet()->prophesize(
'CleanPhp\Invoicer\Domain\Repository\CustomerRepositoryInterface'
);
$this->hydrator = new OrderHydrator(
new ClassMethods(),
$this->repository->reveal()
);
});
describe('->hydrate()', function () {
// ...
it('should hydrate a Customer entity on the Order', function () {
$data = [
'customer_id' => 500
];
$customer = (new Customer())->setId(500);
$order = new Order();
$this->repository->getById(500)
->shouldBeCalled()
->willReturn($customer);
$this->hydrator->hydrate($data, $order);
expect($order->getCustomer())->to->equal($customer);
$this->getProphet()->checkPredictions();
});
});
});
We’ve added a dependency to our hydrator for an instance of CustomerRepositoryInterface. We’ll use this to query for the customer record when we find a customer_id value in the data being hydrated. This is now mocked and injected into the constructor.
Our test verifies that this properly occurs by checking the value of $order->getCustomer() and making sure that its the same customer that we mocked CustomerRepository to return.
Now let’s build this class and make our tests work!
// src/Persistence/Hydrator/OrderHydrator.php
namespace CleanPhp\Invoicer\Persistence\Hydrator;
use CleanPhp\Invoicer\Domain\Repository\CustomerRepositoryInterface;
use Zend\Stdlib\Hydrator\HydratorInterface;
class OrderHydrator implements HydratorInterface {
protected $wrappedHydrator;
protected $customerRepository;
public function __construct(
HydratorInterface $wrappedHydrator,
CustomerRepositoryInterface $customerRepository
)
{
$this->wrappedHydrator = $wrappedHydrator;
$this->customerRepository = $customerRepository;
}
public function extract($object) { }
public function hydrate(array $data, $order) {
$this->wrappedHydrator->hydrate($data, $order);
if (isset($data['customer_id'])) {
$order->setCustomer(
$this->customerRepository->getById($data['customer_id'])
);
}
return $order;
}
}
This simple functionality works just like we drew it up in our tests. We use the ClassMethods() hydrator to do most of the work for us. When a customer_id value is present, we query our CustomerRepository for that customer and set it on the Order object. Our tests should now pass!
This eagerly loading of relationships wouldn’t always be ideal. What if we don’t need the Customer for the current use case? One great way to implement some lazy loading of these resources, which would only load the Customer if we requested it in client code, would be to use Marco Pivetta’s awesome ProxyManager library, which allows us to use Proxy classes instead of Entities directly, and lazily load related resources. Check out his library if you’re interested. Another solution, which we’ll explore later, is to just use a better persistence library, such as Doctrine ORM.
For now, however, we can use this new OrderHydrator in our OrderTable by modifying the service locator definition for OrderTable to use OrderHydrator instead of class methods:
// config/autoload/global.php
return [
// ...
'service_manager' => [
'factories' => [
// ...
'OrderHydrator' => function ($sm) {
return new OrderHydrator(
new ClassMethods(),
$sm->get('CustomerTable')
);
},
// ...
'OrderTable' => function($sm) {
$factory = new TableGatewayFactory();
$hydrator = $sm->get('OrderHydrator');
return new OrderTable(
$factory->createGateway(
$sm->get('Zend\Db\Adapter\Adapter'),
$hydrator,
new Order(),
'orders'
),
$hydrator
);
},
],
// ...
],
// ...
];
We declare a new entry in the service locator for OrderHydrator, so that we can use it wherever we need it. Our first use of it is in the definition for OrderTable in the service locator which now, instead of ClassMethods as it was previously using, it now uses OrderHydrator.
If we refresh our /orders page, we should now see our test Order with the associated Customer rendered to the page, error free.
To recap: when call OrderTable->getAll(), we’re hydrating all Orders in the database, as well as eagerly loading the associated Customer. When we render these to the page, and call Order->getCustomer(), we’re using that eagerly loaded Customer object to render the name and ID of the customer to the page.
Our last step is to implement the extract() method of our hydrator that we left blank. For this, we’re simply going to pass off work to the ClassMethods->extract() method as we don’t have a specific use case for anything else right now.
// src/Persistence/Hydrator/OrderHydrator.php
namespace CleanPhp\Invoicer\Persistence\Hydrator;
use CleanPhp\Invoicer\Domain\Repository\CustomerRepositoryInterface;
use Zend\Stdlib\Hydrator\HydratorInterface;
class OrderHydrator implements HydratorInterface {
// ...
public function extract($object) {
return $this->wrappedHydrator->extract($object);
}
// ...
}
If you want to write a spec for this, feel free. It’s simple enough that I’ll assume the Zend developers have tested it enough for us and that we didn’t mess up such a simple call.
Viewing Orders
Let’s work on the view page for Orders now. First thing we’ll want to do is setup a route. We’ll adapt our existing /orders route to optionally allow an /action and /:id to handle all this magic in one.
Another option would be to add an explicit child route for /view/:id. Either way will result in a 404 if a user navigates to a sub route that doesn’t exist, such as /orders/steal-all-the-gold.
// module/Application/config/module.config.php
return [
// ...
'router' =>
'routes' => [
// ...
'orders' => [
'type' => 'Segment',
'options' => [
'route' => '/orders[/:action[/:id]]',
'defaults' => [
'controller' => 'Application\Controller\Orders',
'action' => 'index',
],
],
],
// ...
],
]
];
Now, we need a controller action to serve this route in our OrdersController:
public function viewAction() {
$id = $this->params()->fromRoute('id');
$order = $this->orderRepository->getById($id);
return [
'order' => $order
];
}
The viewAction() is pretty simple: we grab the ID from the route params, query for that Order from the $orderRepository that was injected into the controller, and return it to the view.
Finally, we’ll need a view file to display our Order data:
<!-- module/Application/views/application/orders/view.phtml -->
<div class="page-header clearfix">
<h2>Order #<?= $this->escapeHtml($this->order->getOrderNumber()) ?></h2>
</div>
<table class="table table-striped">
<thead>
<tr>
<th colspan="2">Order Details</th>
</tr>
</thead>
<tr>
<th>Customer:</th>
<td>
<a href="/customers/edit/<?=
$this->escapeHtmlAttr($this->order->getCustomer()->getId()) ?>">
<?= $this->escapeHtml($this->order->getCustomer()->getName()) ?></a>
</td>
</tr>
<tr>
<th>Description:</th>
<td><?= $this->escapeHtml($this->order->getDescription()) ?></td>
</tr>
<tr>
<th>Total:</th>
<td>$ <?= number_format($this->order->getTotal(), 2) ?></td>
</tr>
</table>
This simple view is just using a table to dump out details about our Order, and provides a link back to the Customer record. It’s super simple. But what happens when we navigate to an ID that doesn’t exist in the database? We’ll get a giant error.
Let’s handle this case by throwing a 404:
$order = $this->orderRepository->getById($id);
if (!$order) {
$this->getResponse()->setStatusCode(404);
return null;
}
If we don’t get an Order object back (and instead get null), we simply grab the response stored on the object, set it’s status to 404, and return (to halt further processing).
We can check this in the browser by navigation to an Order ID that doesn’t exist.
Creating Orders
Creating an Order will be very similar to creating a Customer.
We’ll start by writing a spec for our OrderFilter, which we’ll use to validate our form data:
// specs/input-filter/order.spec.php
use CleanPhp\Invoicer\Service\InputFilter\OrderInputFilter;
describe('InputFilter\Order', function () {
beforeEach(function () {
$this->inputFilter = new OrderInputFilter();
});
describe('->isValid()', function () {
// ...
});
});
We’re simply setting up an instance of our new OrderInputFilter so it’s available to specs. We’ll have to test each form element within the ->isValid() block, so let’s start by testing the customer_id:
it('should require a customer.id', function () {
$isValid = $this->inputFilter->isValid();
$error = [
'id' => [
'isEmpty' => 'Value is required and can\'t be empty'
]
];
$customer = $this->inputFilter
->getMessages()['customer'];
expect($isValid)->to->equal(false);
expect($customer)->to->equal($error);
});
For customer_id, we’re just interested in making sure it was provided. In the future, we could, and should, also validate that the provided value is actually a customer in the database.
When we build our form, instead of using the database value (customer_id), we’re going to use our entity relationships, which means that we’ll be looking for customer[id] via the POST data, so our input filter is going to treat customer as an array.
We’re testing here using the logic of the Required validator in Zend framework. Obviously, if we ever switch our validation library, we’ll have to update the specs to the format they provide.
On to orderNumber:
it('should require an order number', function () {
$isValid = $this->inputFilter->isValid();
$error = [
'isEmpty' => 'Value is required and can\'t be empty'
];
$orderNo = $this->inputFilter
->getMessages()['orderNumber'];
expect($isValid)->to->equal(false);
expect($orderNo)->to->equal($error);
});
Here, we’re simply validating that the orderNumber value was provided. Again, we’re using the language of the domain, orderNumber, instead of the database column of order_number.
We also want to make sure it falls within our constraints of being exactly 13 characters in length:
it('should require order numbers be 13 chars long', function () {
$scenarios = [
[
'value' => '124',
'errors' => [
'stringLengthTooShort' =>
'The input is less than 13 characters long'
]
],
[
'value' => '20001020-0123XR',
'errors' => [
'stringLengthTooLong' =>
'The input is more than 13 characters long'
]
],
[
'value' => '20040717-1841',
'errors' => null
]
];
foreach ($scenarios as $scenario) {
$this->inputFilter = new OrderInputFilter();
$this->inputFilter->setData([
'orderNumber' => $scenario['value']
])->isValid();
$messages = $this->inputFilter
->getMessages()['orderNumber'];
expect($messages)->to->equal($scenario['errors']);
}
});
The $scenarios variable lists several different scenarios to test, and which errors we would expect in each scenario.
Next, we’ll test the description:
it('should require a description', function () {
$isValid = $this->inputFilter->isValid();
$error = [
'isEmpty' => 'Value is required and can\'t be empty'
];
$messages = $this->inputFilter
->getMessages()['description'];
expect($isValid)->to->equal(false);
expect($messages)->to->equal($error);
});
Finally, we’ll test the total, and ensure that it’s a floating point number value:
it('should require a total', function () {
$isValid = $this->inputFilter->isValid();
$error = [
'isEmpty' => 'Value is required and can\'t be empty'
];
$messages = $this->inputFilter
->getMessages()['total'];
expect($isValid)->to->equal(false);
expect($messages)->to->equal($error);
});
it('should require total to be a float value', function () {
$scenarios = [
[
'value' => 124,
'errors' => null
],
[
'value' => 'asdf',
'errors' => [
'notFloat'
=> 'The input does not appear to be a float'
]
],
[
'value' => 99.99,
'errors' => null
]
];
foreach ($scenarios as $scenario) {
$this->inputFilter = new OrderInputFilter();
$this->inputFilter->setData([
'total' => $scenario['value']
])->isValid();
$messages = $this->inputFilter
->getMessages()['total'];
expect($messages)->to->equal($scenario['errors']);
}
});
We provide a list of scenarios again, and check each one of them to make sure we get the expected error messages, or no error messages in the case of valid input.
Now that we’ve defined our spec, let’s go ahead and write the Input Filter:
// src/Service/InputFilter/OrderInputFilter.php
namespace CleanPhp\Invoicer\Service\InputFilter;
use Zend\I18n\Validator\IsFloat;
use Zend\InputFilter\Input;
use Zend\InputFilter\InputFilter;
use Zend\Validator\StringLength;
class OrderInputFilter extends InputFilter {
public function __construct() {
$customer = (new InputFilter());
$id = (new Input('id'))
->setRequired(true);
$customer->add($id);
$orderNumber = (new Input('orderNumber'))
->setRequired(true);
$orderNumber->getValidatorChain()->attach(
new StringLength(['min' => 13, 'max' => 13])
);
$description = (new Input('description'))
->setRequired(true);
$total = (new Input('total'))
->setRequired(true);
$total->getValidatorChain()->attach(new IsFloat());
$this->add($customer, 'customer');
$this->add($orderNumber);
$this->add($description);
$this->add($total);
}
}
These validation rules match what we specified in our tests, which should be passing with this code in place.
The only thing special of note here is that we’re nesting an InputFilter for customer[id] and adding the $customer filter as a named InputFilter of customer, so that Zend understands the nested data we’re returning in the POST and validates it properly.
OrdersController::newAction()
Now that we have a OrderInputFilter, we can start work on our newAction() for the OrdersController.
When creating a new order, we’ll need to supply a list of Customers to the view to allow the user to select which Customer the Order belongs to. To do so, we’ll have an inject an instance of CustomerRepositoryInterface into the controller.
// module/Application/src/Application/Controller/OrdersController.php
namespace Application\Controller;
use CleanPhp\Invoicer\Domain\Repository\CustomerRepositoryInterface;
use CleanPhp\Invoicer\Domain\Repository\OrderRepositoryInterface;
use Zend\Mvc\Controller\AbstractActionController;
class OrdersController extends AbstractActionController {
protected $orderRepository;
protected $customerRepository;
public function __construct(
OrderRepositoryInterface $orderRepository,
CustomerRepositoryInterface $customerRepository
) {
$this->orderRepository = $orderRepository;
$this->customerRepository = $customerRepository;
}
// ...
}
We’ll need to update our controller config to pass it an instance of CustomerRepositoryInterface:
// module/Application/config/module.config.php
return [
// ...
'controllers' => [
// ...
'factories' => [
// ...
'Application\Controller\Orders' => function ($sm) {
return new \Application\Controller\OrdersController(
$sm->getServiceLocator()->get('OrderTable'),
$sm->getServiceLocator()->get('CustomerTable')
);
},
],
],
// ...
];
Now that we have an instance of CustomerRepositoryInterface, we can use it to supply the view with a list of Customers to select and create an Order for:
public function newAction() {
$viewModel = new ViewModel();
$order = new Order();
$viewModel->setVariable(
'customers',
$this->customerRepository->getAll()
);
$viewModel->setVariable('order', $order);
return $viewModel;
}
This should be the minimal code we need for the GET action to work. Don’t forget to add some use statements for the Order and Zend\View\Model\ViewModel class.
Let’s create the order.phtml file:
<!-- module/Application/view/application/orders/new.phtml -->
<div class="page-header clearfix">
<h2>Create Order</h2>
</div>
<form role="form" action="" method="post">
<div class="form-group">
<label for="customer_id">Customer:</label>
<select class="form-control" name="customer[id]" id="customer_id">
<option value=""></option>
<?php foreach ($this->customers as $customer): ?>
<option value="<?= $this->escapeHtmlAttr($customer->getId()) ?>"<?=
!is_null($this->order->getCustomer()) &&
$this->order->getCustomer()->getId() == $customer->getId() ?
' selected="selected"' : '' ?>>
<?= $this->escapeHtml($customer->getName()) ?>
</option>
<?php endforeach; ?>
</select>
<?= $this->validationErrors('customer.id') ?>
</div>
<div class="form-group">
<label for="orderNumber">Order Number:</label>
<input type="text" class="form-control" name="orderNumber"
id="order_number" placeholder="Enter Order Number"
value="<?= $this->escapeHtmlAttr($this->order->getOrderNumber()) ?>">
<?= $this->validationErrors('orderNumber') ?>
</div>
<div class="form-group">
<label for="description">Description:</label>
<input type="text" class="form-control" name="description"
id="description" placeholder="Enter Description"
value="<?= $this->escapeHtmlAttr($this->order->getDescription()) ?>">
<?= $this->validationErrors('description') ?>
</div>
<div class="form-group">
<label for="total">Total:</label>
<input type="text" class="form-control" name="total"
id="total" placeholder="Enter Total"
value="<?= $this->escapeHtmlAttr($this->order->getTotal()) ?>">
<?= $this->validationErrors('total') ?>
</div>
<button type="submit" class="btn btn-primary">Save</button>
</form>
We use the $order object supplied by the ViewModel to populate the form. Of course, at this point we don’t have any data to populate it with. We use the $customers to provide the select options for the Customer drop down.
If we hit up /orders/new in our browser, we’ll see our hard work. When we click the Save button, the page looks the same. It’s probably time to handle the POST data.
Handling POST Data
To facilitate saving the posted data, we’ll need an instance of our OrderInputFilter injected to the controller so we can use it to validate the POST data, and an instance of our OrderHydrator to hydrate the data:
// module/Application/src/Application/Controller/OrdersController.php
namespace Application\Controller;
use CleanPhp\Invoicer\Domain\Entity\Order;
use CleanPhp\Invoicer\Domain\Repository\CustomerRepositoryInterface;
use CleanPhp\Invoicer\Domain\Repository\OrderRepositoryInterface;
use CleanPhp\Invoicer\Persistence\Hydrator\OrderHydrator;
use CleanPhp\Invoicer\Service\InputFilter\OrderInputFilter;
use Zend\Mvc\Controller\AbstractActionController;
use Zend\View\Model\ViewModel;
class OrdersController extends AbstractActionController {
protected $orderRepository;
protected $customerRepository;
protected $inputFilter;
protected $hydrator;
public function __construct(
OrderRepositoryInterface $orderRepository,
CustomerRepositoryInterface $customerRepository,
OrderInputFilter $inputFilter,
OrderHydrator $hydrator
) {
$this->orderRepository = $orderRepository;
$this->customerRepository = $customerRepository;
$this->inputFilter = $inputFilter;
$this->hydrator = $hydrator;
}
// ...
}
If this seems like a lot to inject into the controller, it just might be. A solution might be to break this controller up into multiple controllers with smaller responsibilities/less actions. Or you could investigate a different pattern, like Paul Jones’ Action-Domain-Responder. For now, I’ll stick with this one controller.
Next, let’s update our controllers config to inject in an OrderInputFilter:
// module/Application/config/module.config.php
use CleanPhp\Invoicer\Service\InputFilter\OrderInputFilter;
return [
// ...
'controllers' => [
'invokables' => [
'Application\Controller\Index' =>
'Application\Controller\IndexController'
],
'factories' => [
// ...
'Application\Controller\Orders' => function ($sm) {
return new \Application\Controller\OrdersController(
$sm->getServiceLocator()->get('OrderTable'),
$sm->getServiceLocator()->get('CustomerTable'),
new OrderInputFilter(),
$sm->getServiceLocator()->get('OrderHydrator')
);
},
],
],
// ...
];
Now our OrdersController should have everything it needs to operate. Let’s update the newAction() to utilize these components to posted data:
public function newAction() {
$viewModel = new ViewModel();
$order = new Order();
if ($this->getRequest()->isPost()) {
$this->inputFilter
->setData($this->params()->fromPost());
if ($this->inputFilter->isValid()) {
$order = $this->hydrator->hydrate(
$this->inputFilter->getValues(),
$order
);
$this->orderRepository->begin()
->persist($order)
->commit();
$this->flashMessenger()->addSuccessMessage('Order Created');
$this->redirect()->toUrl('/orders/view/' . $order->getId());
} else {
$this->hydrator->hydrate(
$this->params()->fromPost(),
$order
);
$viewModel->setVariable(
'errors',
$this->inputFilter->getMessages()
);
}
}
$viewModel->setVariable(
'customers',
$this->customerRepository->getAll()
);
$viewModel->setVariable('order', $order);
return $viewModel;
}
This is very similar to how the newOrEditAction() worked in our CustomersController.
We check to see if the request was a POST. If it was, we load up our OrderInputFilter with the data from the post, then check to see if that data is valid. If it is, we hydrate an Order object with the filtered values, persist them to the OrderRepository, then store a flash message and redirect to the View Order page.
If the data is not valid, we again hydrate a customer object, but this time with the raw POST data, and store the validation errors on the view model to render in the view.
Next, we need to update our OrderHydrator to be able to handle customer[id] being sent in via POST data. When it encounters this data, we’ll want to instantiate a new Customer object and set the ID.
Let’s update our spec to handle this case:
// specs/hydrator/order-hydrator.spec.php
// ...
describe('Persistence\Hydrator\OrderHydrator', function () {
// ...
describe('->hydrate()', function () {
// ...
it('should hydrate the embedded customer data', function () {
$data = ['customer' => ['id' => 20]];
$order = new Order();
$this->hydrator->hydrate($data, $order);
assert(
$data['customer']['id'] === $order->getCustomer()->getId(),
'id does not match'
);
});
});
});
Let’s update our OrderHydrator to meet this spec:
// src/Persistence/Hydrator/OrderHydrator.php
namespace CleanPhp\Invoicer\Persistence\Hydrator;
use CleanPhp\Invoicer\Domain\Entity\Customer;
use CleanPhp\Invoicer\Domain\Repository\CustomerRepositoryInterface;
use Zend\Stdlib\Hydrator\HydratorInterface;
class OrderHydrator implements HydratorInterface {
protected $wrappedHydrator;
protected $customerRepository;
public function __construct(
HydratorInterface $wrappedHydrator,
CustomerRepositoryInterface $customerRepository
) {
$this->wrappedHydrator = $wrappedHydrator;
$this->customerRepository = $customerRepository;
}
public function extract($order) {
return $this->wrappedHydrator->extract($order);
}
public function hydrate(array $data, $order) {
$customer = null;
if (isset($data['customer'])) {
$customer = $this->wrappedHydrator->hydrate(
$data['customer'],
new Customer()
);
unset($data['customer']);
}
if (isset($data['customer_id'])) {
$customer = $this->customerRepository->getById($data['customer_id']);
}
$this->wrappedHydrator->hydrate($data, $order);
if ($customer) {
$order->setCustomer($customer);
}
return $order;
}
}
We’ll also need to convert the embedded Customer to a customer_id when extracting so that it properly saves to the database, so let’s add a spec for that, too:
// specs/hydrator/order-hydrator.spec.php
// ...
describe('Persistence\Hydrator\OrderHydrator', function () {
describe('->extract()', function () {
it('should extract the customer object', function () {
$order = new Order();
$order->setCustomer((new Customer())->setId(14));
$data = $this->hydrator->extract($order);
assert(
$order->getCustomer()->getId() === $data['customer_id'],
'customer_id is not correct'
);
});
});
]);
And we’ll make the corresponding changes to the OrderHydrator:
public function extract($object) {
$data = $this->wrappedHydrator->extract($object);
if (array_key_exists('customer', $data) &&
!empty($data['customer'])) {
$data['customer_id'] = $data['customer']->getId();
unset($data['customer']);
}
return $data;
}
If, when we extract the data using the ClassMethods hydrator, we find a customer key, we’ll extract the ID of the Customer object and save it as customer_id in the returned data.
If we test out the Order creation now, we should find that most everything works. Except we never get a validation message when we don’t select a Customer.
Since we have a nested InputFilter situation going on with customers[id], our simple check for errors on a single element won’t work.
We’re going to use a nice little library called Keyper that will allow us to grab a value nested within an array:
composer require vnn/keyper
Now let’s modify the ValidationErrors ViewHelper:
// module/Application/src/Application/View/Helper/ValidationErrors.php
protected function getErrors($element) {
if (!isset($this->getView()->errors)) {
return false;
}
$errors = Keyper::create($this->getView()->errors);
return $errors->get($element) ?: false;
}
Keyper will take care of getting our nested value customer.id from the multidimensional array for us. If you submit an empty form again, you should now get a validation error message.
And with this, order management is now complete!
|
|
This would make a good place to commit your code to source control. If you’re just reading, but want to see the code in action, you can checkout the tag 08-managing-orders: git clone https://github.com/mrkrstphr/cleanphp-example.git git checkout 08-managing-orders |
Invoice Management
Our last module of our sample project is Invoice management. We’re going to setup an index page for listing Invoices, just like the ones we setup for Customers and Orders. Let’s start with our InvoiceController, which will initially look just like our other two controllers:
// module/Application/src/Application/Controller/InvoicesController.php
namespace Application\Controller;
use CleanPhp\Invoicer\Domain\Repository\InvoiceRepositoryInterface;
use Zend\Mvc\Controller\AbstractActionController;
class InvoicesController extends AbstractActionController {
protected $invoiceRepository;
public function __construct(InvoiceRepositoryInterface $invoices) {
$this->invoiceRepository = $invoices;
}
public function indexAction() {
$invoices = $this->invoiceRepository->getAll();
return [
'invoices' => $invoices
];
}
}
Next, we’ll need to register the InvoiceController with the service locator:
// module/Application/config/module.config.php
return [
// ..
'controllers' => [
// ...
'factories' => [
// ...
'Application\Controller\Invoices' => function ($sm) {
return new \Application\Controller\InvoicesController (
$sm->getServiceLocator()->get('InvoiceTable')
);
}
],
],
];
Pretty standard stuff. We’ll also need to define the InvoiceTable now for our view file:
Let’s complete the indexAction() by providing the view file:
<div class="page-header clearfix">
<h2 class="pull-left">Invoices</h2>
<a href="/invoices/generate"
class="btn btn-success pull-right">
Generate Invoices</a>
</div>
<table class="table table-striped clearfix">
<thead>
<tr>
<th>#</th>
<th>Order Number</th>
<th>Invoice Date</th>
<th>Customer</th>
<th>Description</th>
<th class="text-right">Total</th>
</tr>
</thead>
<?php foreach ($this->invoices as $invoice): ?>
<tr>
<td>
<a href="/invoices/view/<?=
$this->escapeHtmlAttr($invoice->getId()) ?>">
<?= $this->escapeHtml($invoice->getId()) ?></a>
</td>
<td>
<?= $invoice->getInvoiceDate()->format('m/d/Y') ?>
</td>
<td>
<?= $this->escapeHtml($invoice->getOrder()->getOrderNumber()) ?>
</td>
<td>
<a href="/customers/edit/<?=
$this->escapeHtmlAttr(
$invoice->getOrder()->getCustomer()->getId()
) ?>">
<?= $this->escapeHtml(
$invoice->getOrder()->getCustomer()->getName()
) ?></a>
</td>
<td>
<?= $this->escapeHtml($invoice->getOrder()->getDescription()) ?>
</td>
<td class="text-right">
$ <?= number_format($invoice->getTotal(), 2) ?>
</td>
</tr>
<?php endforeach; ?>
</table>
If we visit /invoices in our browser, we should see our new, lovely, empty grid. If we manually create some invoices in the database and refresh again, we get a giant error. Zend returns a simple string representation of the invoice_date, instead of a hydrated DateTime object, so we now need to create an InvoiceHydrator
Invoice Hydration
We have two special needs for invoice hydration that fall out of the realm of Zend’s standard ClassMethods hydrator:
1. We need to be able to hydrate a DateTime object, as we setup our Invoice::$invoiceDate attribute to be an instance of DateTime. Unfortunately, Zend doesn’t provide any magical way for us to hydrate to these built-in objects.
2. We need to be able to hydrate the associated Invoice->$order Order relationship, so that we can do cool things on the View Invoice page, like displaying which Order the Invoice is for.
To handle the DateTime issue, we’re going to write a hydration strategy class to deal with it. Zend’s Hydrators have a concept of strategies built in. These strategies can be added to instances of hydrators to tell the hydrator how to handle a specific properties.
Going this route also affords us the luxury of reusing this for any other DateTime properties we need to handle.
We’ll extend the Zend\Stdlib\Hydrator\Strategy\DefaultStrategy class, which provides extensible extract() and hydrate() methods.
Let’s first define a spec for this strategy functionality:
// specs/hydrator/strategy/date.spec.php
use CleanPhp\Invoicer\Persistence\Hydrator\Strategy\DateStrategy;
describe('Peristence\Hydrator\Strategy\DateStrategy', function () {
beforeEach(function () {
$this->strategy = new DateStrategy();
});
describe('->hydrate()', function () {
it('should turn the string date into a DateTime object', function () {
$value = '2014-12-26';
$obj = $this->strategy->hydrate($value);
assert($obj->format('Y-m-d') === $value, 'incorrect datetime');
});
});
describe('->extract()', function () {
it('should turn the DateTime object into a string', function () {
$value = new DateTime('2014-12-28');
$string = $this->strategy->extract($value);
assert($string === $value->format('Y-m-d'));
});
});
});
We’re expecting that our hydrate() method will accept a string date/time representation and turn it into a proper DateTime object, and expecting that extract() will do the opposite, and turn a DateTime object into a string date/time representation.
Now let’s write the actual class:
// src/Persistence/Hydrator/Strategy/DateStrategy.php
namespace CleanPhp\Invoicer\Persistence\Hydrator\Strategy;
use DateTime;
use Zend\Stdlib\Hydrator\Strategy\DefaultStrategy;
class DateStrategy extends DefaultStrategy {
public function hydrate($value) {
if (is_string($value)) {
$value = new DateTime($value);
}
return $value;
}
public function extract($value) {
if ($value instanceof DateTime) {
$value = $value->format('Y-m-d');
}
return $value;
}
}
And so our spec requires, so our code does. This is pretty simple.
Now let’s spec out our actual InvoiceHydrator and figure out how it should work. We’ll start with the extract() method:
// specs/hydrator/invoice.spec.php
use CleanPhp\Invoicer\Domain\Entity\Invoice;
describe('Persistence\Hydrator\InvoiceHydrator', function () {
describe('->extract()', function () {
it('should perform simple extraction on the object', function () {
$invoice = new Invoice();
$invoice->setTotal(300.14);
$data = $this->hydrator->extract($invoice);
expect($data['total'])->to->equal($invoice->getTotal());
});
it('should extract a DateTime object to a string', function () {
$invoiceDate = new \DateTime();
$invoice = new Invoice();
$invoice->setInvoiceDate($invoiceDate);
$data = $this->hydrator->extract($invoice);
expect($data['invoice_date'])
->to->equal($invoice->getInvoiceDate()->format('Y-m-d'));
});
});
describe('->hydrate()', function () {
it('should perform simple hydration on the object', function () {
$data = ['total' => 300.14];
$invoice = $this->hydrator->hydrate($data, new Invoice());
expect($invoice->getTotal())->to->equal($data['total']);
});
it('should hydrate a DateTime object', function () {
$data = ['invoice_date' => '2014-12-13'];
$invoice = $this->hydrator->hydrate($data, new Invoice());
expect($invoice->getInvoiceDate()->format('Y-m-d'))
->to->equal($data['invoice_date']);
});
});
});
We’re doing four tests that the hydrator should do:
1. simple extraction on all properties
2. DateTime extraction on the invoice_date property
3. simple hydration on all attributes
4. DateTime hydration on the invoice_date attribute
To do this, we’ll rely on wrapping an instance of Zend’s ClassMethods hydrator, just like we did with the OrderHydrator, so let’s setup a beforeEach() condition to setup an instance of the hydrator for us:
// specs/hydrator/invoice.spec.php
use CleanPhp\Invoicer\Domain\Entity\Invoice;
use CleanPhp\Invoicer\Persistence\Hydrator\InvoiceHydrator;
use Zend\Stdlib\Hydrator\ClassMethods;
describe('Persistence\Hydrator\InvoiceHydrator', function () {
beforeEach(function () {
$this->hydrator = new InvoiceHydrator(new ClassMethods());
});
// ...
});
This satisfies the specs requirement to have an instance variable of $hydrator and injects our InvoiceHydrator with an instance of ClassMethods. Let’s give it a try and see if our spec passes:
// src/Persistence/Hydrator/InvoiceHydrator.php
namespace CleanPhp\Invoicer\Persistence\Hydrator;
use CleanPhp\Invoicer\Persistence\Hydrator\Strategy\DateStrategy;
use Zend\Stdlib\Hydrator\ClassMethods;
use Zend\Stdlib\Hydrator\HydratorInterface;
class InvoiceHydrator implements HydratorInterface {
protected $wrappedHydrator;
public function __construct(ClassMethods $wrappedHydrator) {
$this->wrappedHydrator = $wrappedHydrator;
$this->wrappedHydrator->addStrategy(
'invoice_date',
new DateStrategy()
);
}
public function extract($object) {
return $this->wrappedHydrator->extract($object);
}
public function hydrate(array $data, $object) {
return $this->wrappedHydrator->hydrate($data, $object);
}
}
First, in the constructor, we attach the DateStrategy to our $wrappedHydrator for the invoice_date column, so that the hydrator will use that strategy when it encounters the invoice_date property.
For both extract() and hydrate(), we’re simply passing off the work to Zend’s ClassMethods hydrator and returning the result, knowing that it will use our DateStrategy when appropriate.
Now, let’s handle Order hydration. Let’s start by writing specs:
// specs/hydrator/invoice.spec.php
// ...
use CleanPhp\Invoicer\Domain\Entity\Order;
// ...
describe('Persistence\Hydrator\InvoiceHydrator', function () {
beforeEach(function () {
$this->repository = $this->getProphet()
->prophesize(
'CleanPhp\Invoicer\Domain\Repository\\' .
'OrderRepositoryInterface'
);
$this->hydrator = new InvoiceHydrator(
new ClassMethods(),
$this->repository->reveal()
);
});
describe('->extract()', function () {
// ...
it('should extract the order object', function () {
$invoice = new Invoice();
$invoice->setOrder((new Order())->setId(14));
$data = $this->hydrator->extract($invoice);
expect($data['order_id'])
->to->equal($invoice->getOrder()->getId());
});
});
describe('->hydrate()', function () {
// ...
it('should hydrate an Order entity on the Invoice', function () {
$data = ['order_id' => 500];
$order = (new Order())->setId(500);
$invoice = new Invoice();
$this->repository->getById(500)
->shouldBeCalled()
->willReturn($order);
$this->hydrator->hydrate($data, $invoice);
expect($invoice->getOrder())->to->equal($order);
$this->getProphet()->checkPredictions();
});
it('should hydrate the embedded order data', function () {
$data = ['order' => ['id' => 20]];
$invoice = new Invoice();
$this->hydrator->hydrate($data, $invoice);
expect($invoice->getOrder()->getId())->to->equal($data['order']['id']);
});
});
});
The first thing we’re doing is injecting an instance of OrderRepositoryInterface into the InvoiceHydrator so that it can query for the necessary Order when hydrating. Next, we add a couple scenarios to extract() and hydrate().
For extract(), we want to make sure that, if there’s an Order on the Invoice, our extracted data should contain a key for order_id with the value of the Order object’s $id.
For hydrate(), we test two things:
1. If there is an order_id, we should query the database for that Order and assign it to the Invoice
2. If there is a nested order[id], we should hydrate an Order object with that data and assign it to the Invoice.
Let’s update our hydrator:
// src/Persistence/Hydrator/InvoiceHydrator.php
namespace CleanPhp\Invoicer\Persistence\Hydrator;
use CleanPhp\Invoicer\Domain\Entity\Order;
use CleanPhp\Invoicer\Domain\Repository\OrderRepositoryInterface;
use CleanPhp\Invoicer\Persistence\Hydrator\Strategy\DateStrategy;
use Zend\Stdlib\Hydrator\HydratorInterface;
class InvoiceHydrator implements HydratorInterface {
protected $wrappedHydrator;
private $orderRepository;
public function __construct(
HydratorInterface $wrappedHydrator,
OrderRepositoryInterface $orderRepository
) {
$this->wrappedHydrator = $wrappedHydrator;
$this->wrappedHydrator->addStrategy(
'invoice_date',
new DateStrategy()
);
$this->orderRepository = $orderRepository;
}
public function extract($object) {
$data = $this->wrappedHydrator->extract($object);
if (array_key_exists('order', $data) &&
!empty($data['order'])) {
$data['order_id'] = $data['order']->getId();
unset($data['order']);
}
return $data;
}
public function hydrate(array $data, $invoice) {
$order = null;
if (isset($data['order'])) {
$order = $this->wrappedHydrator->hydrate(
$data['order'],
new Order()
);
unset($data['order']);
}
if (isset($data['order_id'])) {
$order = $this->orderRepository->getById($data['order_id']);
}
$invoice = $this->wrappedHydrator->hydrate($data, $invoice);
if ($order) {
$invoice->setOrder($order);
}
return $invoice;
}
}
Last, we need to update the definition of our InvoiceTable in the service manager to use this new InvoiceHydrator:
// config/autoload/global.php
return [
// ...
'InvoiceHydrator' => function ($sm) {
return new InvoiceHydrator(
new ClassMethods(),
$sm->get('OrderTable')
);
},
// ...
'InvoiceTable' => function($sm) {
$factory = new TableGatewayFactory();
$hydrator = $sm->get('InvoiceHydrator');
return new InvoiceTable(
$factory->createGateway(
$sm->get('Zend\Db\Adapter\Adapter'),
$hydrator,
new Invoice(),
'invoices'
),
$hydrator
);
},
// ...
];
So we define a new entry of InvoiceHydrator to get our new hydrator, and then update the entry for InvoiceTable to use this new hydrator.
If we refresh our Invoice index page, we should now see data in the grid (assuming you manually entered some into sqlite). All of our specs should be passing, too.
We did it!
Generating Invoices
Creating Invoices is going to work a bit different than creating Customers and creating Orders. Instead of providing the user with a form to enter Invoice data, we’re going to look for uninvoiced Orders, using the OrderRepository::getUninvoicedOrders() method.
For our UI, when clicking on the Generate Invoices button, we’re going to display a page showing all Orders available for invoicing. At the bottom, we’ll include another Generate Invoices button which will take us to another action to actually generate those invoices.
Finally, when we’re done generating the invoices, we’ll drop the user on view that shows them the invoices were generated.
The first thing we’ll want to do is give our invoices route some more liberty to serve up any action we drop in the controller, just like we did for orders:
// module/Application/config/module.config.php
return [
// ...
'router' => [
'routes' => [
// ...
'invoices' => [
'type' => 'Segment',
'options' => [
'route' => '/invoices[/:action[/:id]]',
'defaults' => [
'controller' => 'Application\Controller\Invoices',
'action' => 'index',
],
],
],
],
],
// ...
];
In order for our InvoicesController to get the list of uninvoiced Orders, it will need an instance of the OrderRepositoryInterface, so let’s update the controller to specify that:
// module/Application/src/Application/Controller/InvoicesController.php
namespace Application\Controller;
use CleanPhp\Invoicer\Domain\Repository\InvoiceRepositoryInterface;
use CleanPhp\Invoicer\Domain\Repository\OrderRepositoryInterface;
use Zend\Mvc\Controller\AbstractActionController;
class InvoicesController extends AbstractActionController {
protected $invoiceRepository;
protected $orderRepository;
public function __construct(
InvoiceRepositoryInterface $invoices,
OrderRepositoryInterface $orders
) {
$this->invoiceRepository = $invoices;
$this->orderRepository = $orders;
}
// ...
}
Of course, to do this, we’ll need to update the controller configuration to pass in an instance of the interface:
// ...
return [
// ...
'controllers' => [
// ...
'factories' => [
// ...
'Application\Controller\Invoices' => function ($sm) {
return new \Application\Controller\InvoicesController(
$sm->getServiceLocator()->get('InvoiceTable'),
$sm->getServiceLocator()->get('OrderTable')
);
},
// ...
],
],
// ...
];
Let’s now work on our initial action that will present the list of uninvoiced orders to the user:
public function generateAction() {
return [
'orders' => $this->orderRepository->getUninvoicedOrders()
];
}
This simple action simply returns the uninvoiced orders. Nothing more; nothing less.
Let’s build our view:
<!-- view/application/invoices/generate.phtml -->
<h2>Generate New Invoices</h2>
<p>
The following orders are available to be invoiced.
</p>
<?php if (empty($this->orders)): ?>
<p class="alert alert-info">
There are no orders available for invoice.
</p>
<?php else: ?>
<table class="table table-striped clearfix">
<thead>
<tr>
<th>#</th>
<th>Order Number</th>
<th>Customer</th>
<th>Description</th>
<th class="text-right">Total</th>
</tr>
</thead>
<?php foreach ($this->orders as $order): ?>
<tr>
<td>
<a href="/orders/view/<?= $this->escapeHtmlAttr($order->getId()) ?>">
<?= $this->escapeHtml($order->getId()) ?></a>
</td>
<td><?= $this->escapeHtml($order->getOrderNumber()) ?></td>
<td>
<a href="/customers/edit/<?=
$this->escapeHtmlAttr($order->getCustomer()->getId()) ?>">
<?= $this->escapeHtml($order->getCustomer()->getName()) ?></a>
</td>
<td><?= $this->escapeHtml($order->getDescription()) ?></td>
<td class="text-right">
$ <?= number_format($order->getTotal(), 2) ?>
</td>
</tr>
<?php endforeach; ?>
</table>
<form action="/invoices/generate-process" method="post" class="text-center">
<button type="submit" class="btn btn-primary">Generate Invoices</button>
</form>
<?php endif; ?>
This pretty simple view first checks to see if we have any orders, and displays a helpful message if we don’t. If we do have orders, we loop them and display them in a table, much like we do in our index views.
|
|
Our table of orders is identical to the table in the orders index view. A better solution would be to store this code in a separate view file and load it using Zend’s partial view helper. Give it a shot. |
Next, we’ll want to implement the getUninvoicedOrders() method of the OrderRepository:
// src/Persistence/Zend/DataTable/OrderTable.php
namespace CleanPhp\Invoicer\Persistence\Zend\DataTable;
use CleanPhp\Invoicer\Domain\Repository\OrderRepositoryInterface;
class OrderTable extends AbstractDataTable
implements OrderRepositoryInterface
{
public function getUninvoicedOrders() {
return $this->gateway->select(
'id NOT IN(SELECT order_id FROM invoices)'
);
}
}
This method simply returns all orders where the ID is not in the invoices table.
If we visit /invoices/generate in our browser, we should see our view listing all the orders available for invoicing.
Next, we’ll see about implementing our second Generate Invoices button. We’ll first need to update the InvoiceController to accept an instance of the InvoicingService we wrote a couple chapters ago:
namespace Application\Controller;
use CleanPhp\Invoicer\Domain\Repository\InvoiceRepositoryInterface;
use CleanPhp\Invoicer\Domain\Repository\OrderRepositoryInterface;
use CleanPhp\Invoicer\Domain\Service\InvoicingService;
use Zend\Mvc\Controller\AbstractActionController;
class InvoicesController extends AbstractActionController {
protected $invoiceRepository;
protected $orderRepository;
protected $invoicing;
public function __construct(
InvoiceRepositoryInterface $invoices,
OrderRepositoryInterface $orders,
InvoicingService $invoicing
) {
$this->invoiceRepository = $invoices;
$this->orderRepository = $orders;
$this->invoicing = $invoicing;
}
// ...
}
Of course, we need to modify our controller config for this to work:
return [
// ...
'controllers' => [
// ...
'factories' => [
// ...
'Application\Controller\Invoices' => function ($sm) {
return new \Application\Controller\InvoicesController(
$sm->getServiceLocator()->get('InvoiceTable'),
$sm->getServiceLocator()->get('OrderTable'),
new InvoicingService(
$sm->getServiceLocator()->get('OrderTable'),
new InvoiceFactory()
)
);
},
// ...
],
],
// ...
];
We’ll use this InvoicingService in our generateAction():
public function generateProcessAction() {
$invoices = $this->invoicing->generateInvoices();
$this->invoiceRepository->begin();
foreach ($invoices as $invoice) {
$this->invoiceRepository->persist($invoice);
}
$this->invoiceRepository->commit();
return [
'invoices' => $invoices
];
}
Here, we loop through the invoices generated by the InvoicingService and persist them to the InvoiceRepository. Finally, we’ll return the list of generated invoices to the view.
Speaking of the view, let’s create that:
<div class="page-header">
<h2>Generated Invoices</h2>
</div>
<?php if (empty($this->invoices)): ?>
<p class="text-center">
<em>No invoices were generated.</em>
</p>
<?php else: ?>
<table class="table table-striped clearfix">
<thead>
<tr>
<th>#</th>
<th>Order Number</th>
<th>Invoice Date</th>
<th>Customer</th>
<th>Description</th>
<th class="text-right">Total</th>
</tr>
</thead>
<?php foreach ($this->invoices as $invoice): ?>
<tr>
<td>
<a href="/invoices/view/<?=
$this->escapeHtmlAttr($invoice->getId()) ?>">
<?= $this->escapeHtml($invoice->getId()) ?></a>
</td>
<td>
<?= $invoice->getInvoiceDate()->format('m/d/Y') ?>
</td>
<td>
<?= $this->escapeHtml($invoice->getOrder()->getOrderNumber()) ?>
</td>
<td>
<a href="/customers/edit/<?=
$this->escapeHtmlAttr(
$invoice->getOrder()->getCustomer()->getId()
) ?>">
<?= $this->escapeHtml(
$invoice->getOrder()->getCustomer()->getName()
) ?></a>
</td>
<td>
<?= $this->escapeHtml($invoice->getOrder()->getDescription()) ?>
</td>
<td class="text-right">
$ <?= number_format($invoice->getTotal(), 2) ?>
</td>
</tr>
<?php endforeach; ?>
</table>
<?php endif; ?>
This view will show the user all the invoices generated on an invoicing run. It looks just like our Invoice index view.
|
|
Our table of invoices is identical to the table in the invoice index view. A better solution would be to store this code in a separate view file and load it using Zend’s partial view helper. Give it a shot. |
The last thing we have to do is setup our View Invoice action.
Viewing Invoices
Let’s create a viewAction(). We’ll steal from the OrderController and modify it:
// module/Application/src/Application/Controller/InvoicesController.php
public function viewAction() {
$id = $this->params()->fromRoute('id');
$invoice = $this->invoiceRepository->getById($id);
if (!$invoice) {
$this->getResponse()->setStatusCode(404);
return null;
}
return [
'invoice' => $invoice,
'order' => $invoice->getOrder()
];
}
And a simple view:
<!-- module/Application/view/application/invoices/view.phtml -->
<div class="page-header clearfix">
<h2>Invoice #<?= $this->escapeHtml($this->invoice->getId()) ?></h2>
</div>
<table class="table table-striped">
<thead>
<tr>
<th colspan="2">Invoice Details</th>
</tr>
</thead>
<tr>
<th>Customer:</th>
<td>
<a href="/customers/edit/<?=
$this->escapeHtmlAttr($this->order->getCustomer()->getId()) ?>">
<?= $this->escapeHtml($this->order->getCustomer()->getName()) ?></a>
</td>
</tr>
<tr>
<th>Order:</th>
<td>
<a href="/orders/view/<?=
$this->escapeHtmlAttr($this->order->getId()) ?>">
<?= $this->escapeHtml($this->order->getOrderNumber()) ?></a>
</td>
</tr>
<tr>
<th>Description:</th>
<td><?= $this->escapeHtml($this->order->getDescription()) ?></td>
</tr>
<tr>
<th>Total:</th>
<td>$ <?= number_format($this->invoice->getTotal(), 2) ?></td>
</tr>
</table>
And with this, we’ve completed the sample application.
|
|
This would make a good place to commit your code to source control. If you’re just reading, but want to see the code in action, you can checkout the tag 09-invoicing: git clone https://github.com/mrkrstphr/cleanphp-example.git git checkout 09-invoicing |
Doctrine 2
We have a working, functional app written in Zend Framework 2 that satisfies our business requirements. Let’s say for some reason that we wanted to try a different approach to interacting with the database. Maybe we’re about to scale up and add many more features and have decided that we need an easier solution for interacting with the database.
Whatever the reason is, let’s say that we have done extensive research and have settled on using Doctrine ORM.
Doctrine is a Data Mapper based Object Relational Mapping (ORM) library. Essentially, Doctrine allows us to map database tables and columns to PHP objects and attributes, and manipulate data as if we were simply manipulating objects.
The Doctrine ORM project is built on top of the Doctrine DBAL (Database Abstraction Layer) project, and utilizes the Doctrine Common project as well. We’ll get these tools simply by requiring the doctrine/orm library via Composer. We’ll also need symfony/yaml as we’re going to be writing some mapping files in YAML:
composer require doctrine/orm symfony/yaml
Rebuilding the Persistence Layer
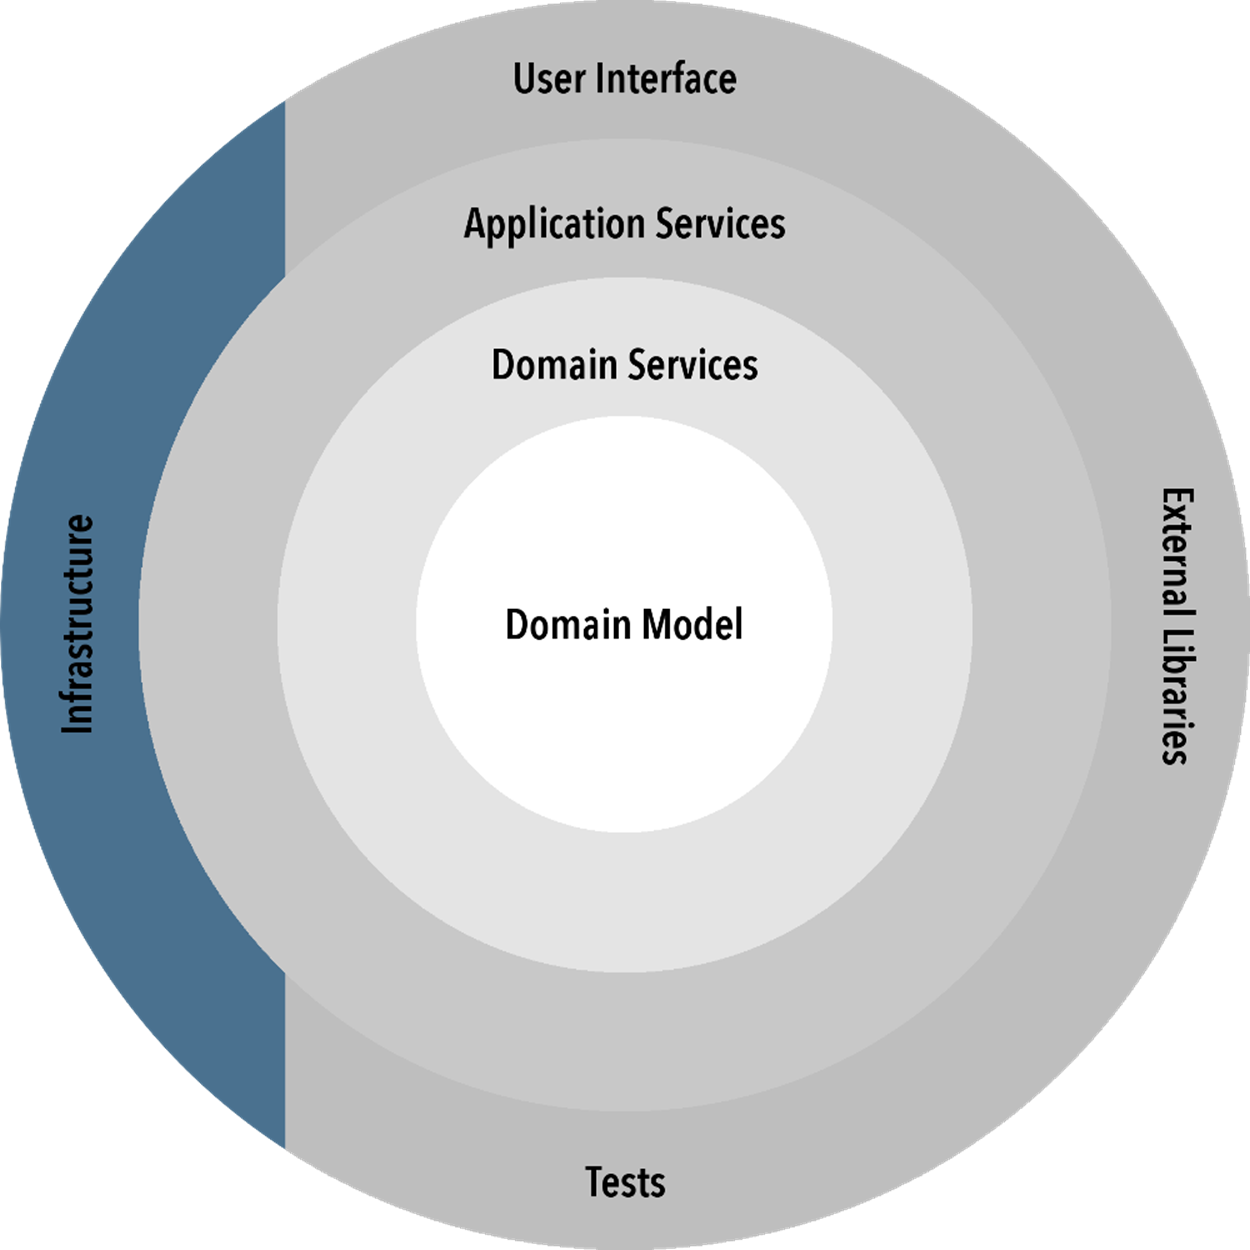
Our goal is to swap out the persistence library, which is part of our infrastructure layer. Remember that this layer of the onion diagram has nothing dependent upon it, meaning that we should be able to entirely swap out this layer without having to touch any other layers of the application.
Okay, I lied; there is one piece of the ZF2 app we’ll need to tweak: the configuration files. These files are the social lubricant that gets the two layers talking. Without it, ZF2 simply wouldn’t be able to use Doctrine. These two layers are pretty unique; every other layer just relies on interfaces and dependency injection to make them work together. But config is necessary whenever a database or third party service is involved.
So let’s see how well we did earlier when we set up these layers.
Creating Doctrine-based Repositories
We’ll need to implement the repository interfaces in our domain services layer using Doctrine. These concrete repositories will sit on top of and utilize Doctrine’s EntityManager object, which, along with the UnitofWork object, are the workhorses of Doctrine. In many cases, these repositories methods will simply be a proxy to the EntityManager itself.
Let’s start by creating an AbstractDoctrineRepository that will encapsulate the vast majority of the functionality that each individual repository can inherit from, much like we did with the Zend Data Tables:
// src/Persistence/Doctrine/Repository/AbstractDoctrineRepository.php
namespace CleanPhp\Invoicer\Persistence\Doctrine\Repository;
use CleanPhp\Invoicer\Domain\Entity\AbstractEntity;
use CleanPhp\Invoicer\Domain\Repository\RepositoryInterface;
use Doctrine\ORM\EntityManager;
abstract class AbstractDoctrineRepository implements RepositoryInterface {
protected $entityManager;
protected $entityClass;
public function __construct(EntityManager $em) {
if (empty($this->entityClass)) {
throw new \RuntimeException(
get_class($this) . '::$entityClass is not defined'
);
}
$this->entityManager = $em;
}
public function getById($id) {
return $this->entityManager->find($this->entityClass, $id);
}
public function getAll() {
return $this->entityManager->getRepository($this->entityClass)
->findAll();
}
public function getBy(
$conditions = [],
$order = [],
$limit = null,
$offset = null
) {
$repository = $this->entityManager->getRepository(
$this->entityClass
);
$results = $repository->findBy(
$conditions,
$order,
$limit,
$offset
);
return $results;
}
public function persist(AbstractEntity $entity) {
$this->entityManager->persist($entity);
return $this;
}
public function begin() {
$this->entityManager->beginTransaction();
return $this;
}
public function commit() {
$this->entityManager->flush();
$this->entityManager->commit();
return $this;
}
}
This class has a member named $entityClass, which must be supplied with the fully qualified name of the Entity class that the repository will be managing. To ensure this requirement is met, we check it in the constructor and throw an exception if no string is provided. Each subclass will be required to provide a value for this member variable.
Additionally, the constructor accepts an instance of Doctrine’s EntityManager, which we use extensively in the rest of the methods to get the work done.
Each of the additional methods simply implements a method of the interface, and uses the EntityManager to retrieve and persist data as necessary.
With this abstract class in place, we can start to implement some concrete repositories.
CustomerRepository
// src/Persistence/Doctrine/Repository/CustomerRepository.php
namespace CleanPhp\Invoicer\Persistence\Doctrine\Repository;
use CleanPhp\Invoicer\Domain\Repository\CustomerRepositoryInterface;
class CustomerRepository extends AbstractDoctrineRepository
implements CustomerRepositoryInterface {
protected $entityClass = 'CleanPhp\Invoicer\Domain\Entity\Customer';
}
Since we don’t have any custom methods outside of what AbstractDoctrineRepository defines, we’re done!
OrderRepository
// src/Persistence/Doctrine/Repository/OrderRepository.php
namespace CleanPhp\Invoicer\Persistence\Doctrine\Repository;
use CleanPhp\Invoicer\Domain\Repository\OrderRepositoryInterface;
use Doctrine\ORM\Query\Expr\Join;
class OrderRepository extends AbstractDoctrineRepository
implements OrderRepositoryInterface {
protected $entityClass = 'CleanPhp\Invoicer\Domain\Entity\Order';
public function getUninvoicedOrders() {
$builder = $this->entityManager->createQueryBuilder()
->select('o')
->from($this->entityClass, 'o')
->leftJoin(
'CleanPhp\Invoicer\Domain\Entity\Invoice',
'i',
Join::WITH,
'i.order = o'
)
->where('i.id IS NULL');
return $builder->getQuery()->getResult();
}
}
The OrderRepositoryInterface specifies an additional method to retrieve all orders without invoices, so we have implemented that functionality using Doctrine’s QueryBuilder class, which allows us to define queries against entity objects. Note that this is a bit different from doing queries against a database schema: we’re using the language of the domain, not the database. This query language is called Doctrine Query Language (DQL).
Doctrine provides extensive documentation for the QueryBuilder class if you are interested more details.
Invoice Repository
The InvoiceRepository is another simple subclass that requires no further customization:
// src/Persistence/Doctrine/Repository/InvoiceRepository.php
namespace CleanPhp\Invoicer\Persistence\Doctrine\Repository;
use CleanPhp\Invoicer\Domain\Repository\InvoiceRepositoryInterface;
class InvoiceRepository extends AbstractDoctrineRepository
implements InvoiceRepositoryInterface {
protected $entityClass = 'CleanPhp\Invoicer\Domain\Entity\Invoice';
}
Entity Mapping
Doctrine relies on mapping files to gain information about the database schema and how to map that database schema to the entity objects. Doctrine is an example over configuration over convention. Other ORMs, especially ones that use the ActiveRecord pattern, require way less configuration, but also make deep assumptions about the database.
There are three methods we can use to generate these mappings:
1. DocBlock class annotations on the entities themselves
2. XML Mapping Files
3. YAML Mapping Files
The first option is by far the most common, and is even a recommended standard by Symfony. The second option is for super enterprise people, and the third option is the one we’re going to go with.
I have two reasons for not using DocBlocks:
· it leaks persistence information into the domain layer, and the domain layer should not be concerned with how the data is persisted
· it makes the code rely on comments to function properly. I’m a strong believer that comments should not have a direct effect on how code behaves at runtime.
The second complaint mostly goes away if PHP ever implements true annotations in the language, but for now, it’s a giant code smell for me.
I have one reason for not using XML: it’s XML.
Really, though, go with whatever method you think is best. It’s small potatoes in the grand scheme of things, and none of the three methods will affect how the repositories work.
We’ll store these mapping files in in the Persistence/Doctrine/Mapping folder.
Customers.dcm.yml
This file, CleanPhp.Invoicer.Domain.Entity.Customer.dcm.yml dictates mapping information for the Customer entity:
CleanPhp\Invoicer\Domain\Entity\Customer:
type: entity
table: customers
id:
id:
type: bigint
generator:
strategy: IDENTITY
fields:
name:
length: 100
email:
length: 50
Order.dcm.yml
This file, CleanPhp.Invoicer.Domain.Entity.Order.dcm.yml dictates mapping information for the Order entity:
CleanPhp\Invoicer\Domain\Entity\Order:
type: entity
table: orders
id:
id:
type: bigint
generator:
strategy: IDENTITY
fields:
orderNumber:
column: order_number
length: 20
description:
total:
type: decimal
precision: 10
scale: 2
manyToOne:
customer:
targetEntity: CleanPhp\Invoicer\Domain\Entity\Customer
inversedBy: orders
Invoice.dcm.yml
This file, CleanPhp.Invoicer.Domain.Entity.Invoice.dcm.yml dictates mapping information for the Invoice entity:
CleanPhp\Invoicer\Domain\Entity\Invoice:
type: entity
table: invoices
id:
id:
type: bigint
generator:
strategy: IDENTITY
fields:
invoiceDate:
column: invoice_date
type: date
total:
type: decimal
precision: 10
scale: 2
manyToOne:
order:
targetEntity: CleanPhp\Invoicer\Domain\Entity\Order
inversedBy: invoices
|
|
This would make a good place to commit your code to source control. If you’re just reading, but want to see the code in action, you can checkout the tag 10-doctrine-repo-mappings: git clone https://github.com/mrkrstphr/cleanphp-example.git git checkout 10-doctrine-repo-mappings |

Integrating Zend Framework and Doctrine
The next step is to wire up Zend Framework and Doctrine to work together. This turns out to be pretty simple thanks to DoctrineOrmModule, a ZF2 module written by the Doctrine team to integrate the two projects.
We’ll grab the latest version with Composer:
composer require doctrine/doctrine-orm-module
DoctrineOrmModule will bring all the necessary Doctrine dependencies along with it. Now we just have to configure this module within Zend Framework and we’re ready to use it.
The first thing we’ll want to do is enable the DoctrineORMModule and DoctrineModule (a dependency of DoctrineORMModule):
// config/application.config.php
return [
'modules' => [
'DoctrineModule',
'DoctrineORMModule',
'Application',
],
// ...
];
Next, we’ll drop in a global configuration file to define the basics of the Doctrine setup, including which mapping driver to use, where to find the entities, and where to find the mapping files:
// config/autoload/db.global.php
return [
'doctrine' => [
'driver' => [
'orm_driver' => [
'class' => 'Doctrine\ORM\Mapping\Driver\YamlDriver',
'cache' => 'array',
'paths' => [
realpath(__DIR__ . '/../../src/Domain/Entity'),
realpath(__DIR__ . '/../../src/Persistence/Doctrine/Mapping')
],
],
'orm_default' => [
'drivers' => ['CleanPhp\Invoicer\Domain\Entity' => 'orm_driver']
]
],
],
];
We’ll also modify db.local.php file to setup the database connection information for DoctrineModule. This is the same information we had previously, just modified slightly to fit the format expected by DoctrineModule:
// config/autoload/db.local.php
return [
'doctrine' => [
'connection' => [
'orm_default' => [
'driverClass' => 'Doctrine\DBAL\Driver\PDOSqlite\Driver',
'params' => [
'path' => __DIR__ . '/../../data/database.db',
]
]
],
],
];
And that’s it! Zend Framework is now configured to use Doctrine, so let’s start using it.
Injecting the New Repositories
The only thing left to do is to start using Doctrine. We’ll want to inject these new repositories into the controllers so they can start using them.
Rather than put a bunch of duplicated code in the service config, we’re going to create a Zend ServiceManager Factory that will be responsible for instantiating all of the Repositories.
// src/Persistence/Doctrine/Repository/RepositoryFactory;
namespace CleanPhp\Invoicer\Persistence\Doctrine\Repository;
use RuntimeException;
use Zend\ServiceManager\FactoryInterface;
use Zend\ServiceManager\ServiceLocatorInterface;
class RepositoryFactory implements FactoryInterface {
public function createService(ServiceLocatorInterface $sl) {
$class = func_get_arg(2);
$class = 'CleanPhp\Invoicer\Persistence\Doctrine\Repository\\' . $class;
if (class_exists($class, true)) {
return new $class(
$sl->get('Doctrine\ORM\EntityManager')
);
}
throw new RuntimeException(
'Unknown Repository requested: ' . $class
);
}
}
This factory simply does a string replace on the passed service locator key (which thanks to ZF2 is hidden within func_get_args()) to normalize it into the fully qualified namespace for the requested repository, instantiates the resulting class, and returns the instantiated object.
If the factory can’t find the class for the requested repository, it throws a RuntimeException.
Next, we’ll make a couple entries in the service config to utilize this RepositoryFactory when any of the new Doctrine-base repositories are requested:
// config/autoload/global.php
return [
'service_config' => [
'factories' => [
'OrderHydrator' => function ($sm) {
return new OrderHydrator(
new ClassMethods(),
$sm->get('CustomerRepository')
);
},
'CustomerRepository' =>
'CleanPhp\Invoicer\Persistence\Doctrine\Repository\RepositoryFactory',
'InvoiceRepository' =>
'CleanPhp\Invoicer\Persistence\Doctrine\Repository\RepositoryFactory',
'OrderRepository' =>
'CleanPhp\Invoicer\Persistence\Doctrine\Repository\RepositoryFactory',
]
]
];
Finally, we’ll update the controller config to inject these new repositories into the controllers:
// module/Application/config/module.config.php
return [
// ...
'controllers' => [
'invokables' => [
'Application\Controller\Index' =>
'Application\Controller\IndexController'
],
'factories' => [
'Application\Controller\Customers' => function ($sm) {
return new \Application\Controller\CustomersController(
$sm->getServiceLocator()->get('CustomerRepository'),
new CustomerInputFilter(),
new ClassMethods()
);
},
'Application\Controller\Invoices' => function ($sm) {
return new \Application\Controller\InvoicesController(
$sm->getServiceLocator()->get('InvoiceRepository'),
$sm->getServiceLocator()->get('OrderRepository'),
new InvoicingService(
$sm->getServiceLocator()->get('OrderRepository'),
new InvoiceFactory()
)
);
},
'Application\Controller\Orders' => function ($sm) {
return new \Application\Controller\OrdersController(
$sm->getServiceLocator()->get('OrderRepository'),
$sm->getServiceLocator()->get('CustomerRepository'),
new OrderInputFilter(),
$sm->getServiceLocator()->get('OrderHydrator')
);
},
],
],
// ...
];
|
|
This would make a good place to commit your code to source control. If you’re just reading, but want to see the code in action, you can checkout the tag 11-doctrine-integration: git clone https://github.com/mrkrstphr/cleanphp-example.git git checkout 11-doctrine-integration |
Updating the Hydrators
The last update we need to make to the persistence layer is updating the hydrators to work with Doctrine. Doctrine handles the actual hydration pretty well. In fact, we don’t need the InvoiceHydrator anymore. We can go ahead and delete that, which means we can also delete the DateStrategystrategy we built.
We’ll also make some updates to the OrderHydrator, first starting with the specs:
// specs/hydrator/order.spec.php
use CleanPhp\Invoicer\Domain\Entity\Customer;
use CleanPhp\Invoicer\Domain\Entity\Order;
use CleanPhp\Invoicer\Persistence\Hydrator\OrderHydrator;
use Zend\Stdlib\Hydrator\ClassMethods;
describe('Persistence\Hydrator\OrderHydrator', function () {
beforeEach(function() {
$this->repository = $this->getProphet()->prophesize(
'CleanPhp\Invoicer\Domain\Repository\CustomerRepositoryInterface'
);
$this->hydrator = new OrderHydrator(
new ClassMethods(),
$this->repository->reveal()
);
});
describe('->hydrate()', function () {
it('should perform basic hydration of attributes', function () {
$data = [
'id' => 100,
'order_number' => '20150101-019',
'description' => 'simple order',
'total' => 5000
];
$order = new Order();
$this->hydrator->hydrate($data, $order);
expect($order->getId())->to->equal(100);
expect($order->getOrderNumber())->to->equal('20150101-019');
expect($order->getDescription())->to->equal('simple order');
expect($order->getTotal())->to->equal(5000);
});
it('should hydrate the embedded customer data', function () {
$data = ['customer' => ['id' => 20]];
$order = new Order();
$this->repository->getById(20)->willReturn((new Customer())->setId(20));
$this->hydrator->hydrate($data, $order);
assert(
$data['customer']['id'] === $order->getCustomer()->getId(),
'id does not match'
);
});
});
describe('->extract()', function () {
// ...
});
});
We’ve removed the test case should hydrate a Customer entity on the Order and updated the should hydrate the embedded customer data test case to expect the repository to be used to query for the Customer.
We don’t need the hydration of the customer via customer_id as that’s not the way Doctrine provides the data, and Doctrine takes care of the hydration for us.
As Doctrine’s UnitOfWork needs to know about all existing entities, otherwise it tries to re-INSERT them, we’ve updated the hydrator to query for the customer by ID if it encounters an ID. Another way we could solve this problem is to use the EntityManager::merge() method to make Doctrine aware of the entity.
Let’s make the corresponding changes to the OrderHydrator:
// src/Persistence/Hydrator/OrderHydrator.php
namespace CleanPhp\Invoicer\Persistence\Hydrator;
use CleanPhp\Invoicer\Domain\Entity\Order;
use CleanPhp\Invoicer\Domain\Repository\CustomerRepositoryInterface;
use Zend\Stdlib\Hydrator\HydratorInterface;
class OrderHydrator implements HydratorInterface {
// ...
public function hydrate(array $data, $order) {
if (isset($data['customer'])
&& isset($data['customer']['id'])) {
$data['customer'] = $this->customerRepository->getById(
$data['customer']['id']
);
}
return $this->wrappedHydrator->hydrate(
$data,
$order
);
}
}
Now if we start clicking around the application, it should continue to work! It looks, from a UI and interaction perspective, like nothing has changed. Under the hood, however, we’re using an entirely different database architecture.
That’s very powerful.
|
|
This would make a good place to commit your code to source control. If you’re just reading, but want to see the code in action, you can checkout the tag 12-doctrine-hydrators: git clone https://github.com/mrkrstphr/cleanphp-example.git git checkout 12-doctrine-hydrators |
Summary
The application is now using Doctrine for its underlying database abstraction layer. We didn’t have to change any application code in the process, as the application code relied only on interfaces and dependency injection. Since what is injected works as it should, the application continues to function without further modifications.
We also have the benefit of having to write much less code to get database interaction to work. In most cases, we’re simply proxying off to Doctrine’s EntityManager to do the work for us.
Switching to Laravel
We’re going to try a much larger undertaking for our next experiment. Up until now, we’ve used Zend Framework 2 for our controller services + view layer of the application. Zend Framework 2 is great, if not over complicated, but everyone seems to love Laravel, so let’s stop fighting against the current.
The application layer is the biggest part of our application. In a real application, it would house dozens upon dozens of controllers, hundreds of views, and many, many routes and configuration.
Our goal this entire time has been to lean on the framework as little as possible. This was the purpose of our domain model and domain services layers.
While we will have to rewrite, or at least tweak, all of our controllers and views, we should not have to touch any of our domain, persistence, and business logic. If we find ourselves dipping into those layers as part of switching frameworks, then we’ve done something very wrong.
Let’s get started.
Setting up Laravel
Let’s get started by setting up a new Laravel project. Once we have the source code downloaded, we’ll go ahead and move our existing core (located in src/), to the Laravel project.
For the most part, we’ll follow the official Laravel docs.
Let’s start by creating a new Laravel project at cleanphp-laravel and then running the artisan fresh command to purge some of the scaffolding we don’t need:
composer create-project laravel/laravel --prefer-dist cleanphp-laravel
cd cleanphp-laravel
php artisan fresh
Next, we’ll copy over some of our code from our original project, starting with the .git directory to retain our source control history, as well as the src/ and specs/ directories, and the Peridot configuration file, peridot.php.
We’re going to rename src/ to core/ (for no real good reason other than src is short for “source” and we have a lot of source code outside of this directory):
cp -R ../cleanphp-example/.git .
cp -R ../cleanphp-example/src ../cleanphp-example/specs \
../cleanphp-example/peridot.php .
git mv src core
Let’s also add an entry to the autoload section of composer.json to autoload code in our core/ directory:
"autoload": {
"classmap": [
"database"
],
"psr-4": {
"App\\": "app/",
"CleanPhp\\Invoicer\\": "core/"
}
},
This requires us to reload the Composer autoloader so that it contains the autoload specification for this new entry:
composer dump-autoload
We’ll also want to bring our database along with us:
cp -R ../cleanphp-example/data/database.db storage/database.db
git mv data/database.db storage/database.db
Next, let’s grab our application.css file from the old project and move it over, and remove some of the CSS and fonts that come default with Laravel:
mkdir public/css
cp ../cleanphp-example/public/css/application.css public/css/
rm -rf public/css/app.css public/favicon.ico public/fonts
If we run git status, we’ll see that we created a mess of our source control by moving all of these things around. Let’s go add some of the important Laravel code, and remove some of the ZF2 stuff we no longer need:
git add .gitignore app/ artisan bootstrap/ \
composer.* config/ public/index.php resources/ \
server.php storage/
git rm -rf data/ init_autoloader.php module/
This Laravel application should now be ready for us to start porting over some of the code from our ZF2 project. Let’s fire up the development server and have a look in the browser:
php artisan serve
If we visit http://localhost:8000 in the browser, we should see the Laravel welcome page.
If you run git status again, you’ll notice we still have some uncommitted files. We can ignore those for now, or go ahead and get rid of them.
Our last step is to get Peridot installed again and verify that our specs are all still passing:
composer require --dev peridot-php/peridot peridot-php/leo \
peridot-php/peridot-watcher-plugin peridot-php/peridot-prophecy-plugin
And run Peridot:
./vendor/bin/peridot specs/
Whoops! Looks like our specs are failing due to missing ZF2 dependencies. We’ll fix that in a bit.
|
|
This would make a good place to commit your code to source control. If you’re just reading, but want to see the code in action, you can checkout the tag 13-laravel-setup: git clone https://github.com/mrkrstphr/cleanphp-example.git git checkout 13-laravel-setup |
Configuring Doctrine
Next up, we’re going to configure Doctrine. By default, Laravel uses Eloquent ORM. We’ll opt to keep using Doctrine for now to limit how much code we’ll need to rewrite.
To use Doctrine, we’ll need to install a third party provider to make the two projects talk. In the course of writing this book, I reviewed several of these “bridge” libraries. Unfortunately, all of them either only worked for Laravel 4, depended on broken or non existent versions or commits of Doctrine, or only supported XML or Annotation based mapping files.
So I quickly wrote a very minimal library to integrate the two projects. We’ll use this in our examples, but please don’t use it in production. Bad things may very well happen.
To hopefully prevent public usage, this library was not published on Packagist, so we’ll have to manually add a repository to the composer.json file:
"repositories": [
{
"type": "vcs",
"url": "https://github.com/mrkrstphr/laravel-indoctrinated.git"
}
],
"require": {
"laravel/framework": "5.0.*",
"mrkrstphr/laravel-indoctrinated": "dev-master"
},
Run composer update to install this new repository, which will bring along with it doctrine/orm and its dependencies.
Once that’s installed, we’ll need to add the new provider to the array of providers located at config/app.php:
return [
'providers' => [
// ...
'Mrkrstphr\LaravelIndoctrinated\DoctrineOrmServiceProvider'
],
// ...
];
Next, we’ll run a command to publish this provider, which generates a sample config file for us:
php artisan vendor:publish \
--provider "Mrkrstphr\LaravelIndoctrinated\DoctrineOrmServiceProvider"
Now let’s modify our config file located at config/doctrine.php:
return [
// database connection information is managed in Laravel's
// config/database.php file
'mappings' => [
'type' => 'yaml',
'paths' => [__DIR__ . '/../core/Persistence/Doctrine/Mapping']
],
];
As the config file says, our database connection information will be managed by Laravel. Let’s change the config/database.php file as follows:
return [
'default' => 'sqlite',
'connections' => [
'sqlite' => [
'driver' => 'sqlite',
'database' => storage_path() . '/database.db',
]
]
];
We now have Laravel configured to talk to Doctrine and setup to use our database.db sqlite database.
|
|
This would make a good place to commit your code to source control. If you’re just reading, but want to see the code in action, you can checkout the tag 14-laravel-doctrine: git clone https://github.com/mrkrstphr/cleanphp-example.git git checkout 14-laravel-doctrine |
Setting up the Dashboard
By default, Laravel sets up a WelcomeController located at
app/Http/Controllers/WelcomeController.php. Let’s rename this to DashboardController.php and modify its contents:
// app/Http/Controllers/DashboardController.php
namespace App\Http\Controllers;
class DashboardController extends Controller {
public function indexAction() {
return view('dashboard');
}
}
Let’s also move the resources/views/welcome.blade.php template file to dashboard.blade.php and copy over our dashboard.phtml from our previous code:
@extends('layouts.layout')
@section('content')
<div class="jumbotron">
<h1>Welcome to CleanPhp Invoicer!</h1>
<p>
This is the case study project for The Clean Architecture
in PHP, a book about writing excellent PHP code.
</p>
<p>
<a href="https://leanpub.com/cleanphp" class="btn btn-primary">
Check out the Book</a>
</p>
</div>
@stop
Laravel ships with a templating engine called Blade. In the example above, we have a Blade template that extends another template named layouts.layout, which will be our overall layout. Next, we define a section named content with the actual content of our template.
Let’s create the layout now so that we can see how Blade merges the two. We’ll place this at resources/views/layouts/layout.blade.php:
<!doctype html>
<html lang="en">
<head>
<meta charset="utf-8">
<title>CleanPhp</title>
<meta name="viewport" content="width=device-width, initial-scale=1.0">
<meta http-equiv="X-UA-Compatible" content="IE=edge">
<link href="//maxcdn.bootstrapcdn.com/bootstrap/3.3.1/css/bootstrap.min.css"
media="screen" rel="stylesheet" type="text/css">
<link href="/css/application.css" media="screen"
rel="stylesheet" type="text/css">
</head>
<body>
<nav class="navbar navbar-default navbar-fixed-top" role="navigation">
<div class="container">
<div class="navbar-header">
<a class="navbar-brand" href="/">CleanPhp</a>
</div>
<div class="collapse navbar-collapse">
<ul class="nav navbar-nav">
<li>
<a href="/customers">Customers</a>
</li>
<li>
<a href="/orders">Orders</a>
</li>
<li>
<a href="/invoices">Invoices</a>
</li>
</ul>
</div>
</div>
</nav>
<div class="container">
<?php if (Session::has('success')): ?>
<div class="alert alert-success"><?= Session::get('success') ?></div>
<?php endif; ?>
@yield('content')
<hr>
<footer>
<p>I'm the footer.</p>
</footer>
</div>
</body>
</html>
This layout file is largely the same as our layout in ZF2. We’re using Blade to render the area named content, which was defined in our dashboard.blade.php template file, at a specific spot. Each of our templates going forward will define this content section.
We’re also using Laravel’s Session facade to grab data from the session, namely our flash message for when we need to alert the user to something awesome happening (we’ll get to that in a bit when we start working on the other controllers).
The last thing we need to update is our route for the dashboard. Laravel routes are stored in the app/Http/routes.php file. Currently, the only route defined is still pointing at the defunct WelcomeController. Let’s fix that:
Route::get('/', 'DashboardController@indexAction');
Now we’re instructing Laravel to render the DashboardController::indexAction() when a GET request is made to /.
Try it out in your browser. You should see our lovely dashboard, back in action!
|
|
This would make a good place to commit your code to source control. If you’re just reading, but want to see the code in action, you can checkout the tag 15-laravel-dashboard: git clone https://github.com/mrkrstphr/cleanphp-example.git git checkout 15-laravel-dashboard |
Customer Management
Now let’s move on to managing customers. We’ll start this time by defining the routes we need for the CustomersController:
// app/Http/routes.php
// ...
Route::get('/customers', 'CustomersController@indexAction');
Route::match(
['get', 'post'],
'/customers/new',
'CustomersController@newOrEditAction'
);
Route::match(
['get', 'post'],
'/customers/edit/{id}',
'CustomersController@newOrEditAction'
);
These new routes are set up to the actions we laid out in Zend Framework 2. So let’s copy over our CustomersController with the necessary changes to make it work for Laravel.
We’ll start by defining our basic controller:
// app/Http/Controllers/CustomersController.php
namespace App\Http\Controllers;
use CleanPhp\Invoicer\Domain\Repository\CustomerRepositoryInterface;
class CustomersController extends Controller {
private $customerRepository;
public function __construct(
CustomerRepositoryInterface $customerRepository
) {
$this->customerRepository = $customerRepository;
}
// ...
}
This basic controller looks almost exactly like it did in ZF2, although missing some dependencies (for now), and has been moved to a new namespace App\Http\Controllers.
Laravel ships with a very powerful Service Container that handles dependency injection very well. When CustomersController is instantiated, it will automatically search the container for CustomerRepositoryInterface and load it if found. If not found, it will try to instantiate the object, although in our case, it will not try to instantiate an interface.
So the next thing we need to do is get an entry for CustomerRepositoryInterface into the service container. We’ll do so in the app/Providers/AppServiceProvider.php file:
// app/Providers/AppServiceProvider.php
namespace App\Providers;
use CleanPhp\Invoicer\Domain\Repository\CustomerRepositoryInterface;
use CleanPhp\Invoicer\Persistence\Doctrine\Repository\CustomerRepository;
use Illuminate\Support\ServiceProvider;
class AppServiceProvider extends ServiceProvider {
public function register() {
$this->app->bind(
CustomerRepositoryInterface::class,
function ($app) {
return new CustomerRepository(
$app['Doctrine\ORM\EntityManagerInterface']
);
}
);
}
}
We bind an entry into the service manager with the fully qualified namespace name of CustomerRepositoryInterface, using the ::class keyword off that object (if we refactor this class and rename it, we won’t have to worry about missing some string-based references). When invoked, this entry will return an instantiated CustomerRepository, passing along an instance of Doctrine’s EntityManager, which comes from the Doctrine provider we setup earlier.
This is all we need to do to take care of the instantiate of the controller. Laravel takes care of the rest!
Let’s move on to creating the Customer listing.
Customer Listing
We’ll start with the listing of customers (the /customers route, which translates to indexAction()
Let’s add our indexAction() to CustomersController:
public function indexAction() {
$customers = $this->customerRepository->getAll();
return view('customers/index', ['customers' => $customers]);
}
Just like in ZF2, we’re pulling all the customers out of the CustomersRepository, and passing them along to the view. We’re using Laravel’s view() helper to define the template to render and the data to provide to it.
Let’s create our view resources/views/customers/index.blade.php:
@extends('layouts.layout')
@section('content')
<div class="page-header clearfix">
<h2 class="pull-left">Customers</h2>
<a href="/customers/new" class="btn btn-success pull-right">
Create Customer</a>
</div>
<table class="table">
<thead>
<tr>
<th>#</th>
<th>Name</th>
<th>Email</th>
</tr>
</thead>
<?php foreach ($customers as $customer): ?>
<tr>
<td>
<a href="/customers/edit/{{{ $customer->getId() }}}">
{{{ $customer->getId() }}}</a>
</td>
<td>{{{ $customer->getName() }}}</td>
<td>{{{ $customer->getEmail() }}}</td>
</tr>
<?php endforeach; ?>
</table>
@stop
Just like in our dashboard.blade.php, we’re stating that this template extends
layouts/layout.blade.php and we’re defining a section named “content” with our actual view.
New here is the usage of Blades templating syntax. Instead of using echo statements, we’re wrapping the variable we want printed with {{{ }}}, which is Laravel’s escape and output syntax. This protects us against XSS injections by filtering user input data.
Now if we navigate to the Customers page, or manually visit /customers, we should see a populated grid of our customers.
Adding and Editing Customers
Next, we’ll recreate our ability to add and edit customers. We’ll need a few more dependencies to make this happen, namely our CustomerInputFilter and Customer object hydrator.
These classes exist in our core/ directory, but they are dependent upon some Zend Framework libraries. We purposefully put these classes in the src/ directory when working in ZF2, instead of putting them within the module/ directory structure so that we could reuse them.
ZF2 is organized as a collection of components. Namely, we’ll need the Zend InputFilter and Zend StdLib (which houses the hydration classes) components. Unfortunately, ZF2 isn’t as modular as it sets itself up to be. These two libraries actually depend on the Zend ServiceManager and Zend I18N libraries, but they don’t state it in their composer.json file’s require block.
This is quite a bit of hogwash. We’ll need to require all these libs:
composer require zendframework/zend-inputfilter \
zendframework/zend-servicemanager \
zendframework/zend-i18n \
zendframework/zend-stdlib
Once we have our Laravel application up and running, we’ll probably want to refactor away these components to use their Laravel counterparts.
Another benefit at this point is that our Peridot tests should pass now with these dependencies in place:
./vendor/bin/peridot specs
Now that we have these dependencies, we can inject them into the CustomersController constructor:
// app/Http/Controllers/CustomersController.php
namespace App\Http\Controllers;
use CleanPhp\Invoicer\Domain\Repository\CustomerRepositoryInterface;
use CleanPhp\Invoicer\Service\InputFilter\CustomerInputFilter;
use Zend\Stdlib\Hydrator\HydratorInterface;
class CustomersController extends Controller {
protected $customerRepository;
protected $inputFilter;
protected $hydrator;
public function __construct(
CustomerRepositoryInterface $customerRepository,
CustomerInputFilter $inputFilter,
HydratorInterface $hydrator
) {
$this->customerRepository = $customerRepository;
$this->inputFilter = $inputFilter;
$this->hydrator = $hydrator;
}
// ...
}
Laravel knows to simply instantiate the CustomerInputFilter, but it can’t instantiate an interface, so we need to tell it what to do with HydratorInterface. Let’s instruct it to instantiate Zend’s ClassMethods hydrator to meet this dependency:
use Zend\Stdlib\Hydrator\ClassMethods;
use Zend\Stdlib\Hydrator\HydratorInterface;
class AppServiceProvider extends ServiceProvider {
public function register() {
$this->app->bind(HydratorInterface::class, function ($app) {
return new ClassMethods();
});
// ...
}
}
Now when faced with a request for a HydratorInterface, Laravel will simply instantiate ClassMethods.
Let’s implement the newOrEditAction():
// app/Http/Controllers/CustomersController.php
public function newOrEditAction(Request $request, $id = '') {
$viewModel = [];
$customer = $id ? $this->customerRepository->getById($id) : new Customer();
if ($request->getMethod() == 'POST') {
$this->inputFilter->setData($request->request->all());
if ($this->inputFilter->isValid()) {
$this->hydrator->hydrate(
$this->inputFilter->getValues(),
$customer
);
$this->customerRepository
->begin()
->persist($customer)
->commit();
Session::flash('success', 'Customer Saved');
return new RedirectResponse(
'/customers/edit/' . $customer->getId()
);
} else {
$this->hydrator->hydrate(
$request->request->all(),
$customer
);
$viewModel['error'] = $this->inputFilter->getMessages();
}
}
$viewModel['customer'] = $customer;
return view('customers/new-or-edit', $viewModel);
}
So there’s a lot going on here, however it’s nearly identical to our ZF2 code for the same action. Let’s step through it:
1. As we have a variable {id} in our route, Laravel is kind enough to pass that along as an argument to the action. We’re also asking for an instance of Illuminate\Http\Request, and Laravel is happy to oblige.
2. We setup an empty “ViewModel” array variable and use that throughout the method to collect data to pass along to the view, which we do at the very end using Laravel’s view() helper.
3. If we have an ID, we utilize the CustomerRepository to retrieve that Customer from the database, otherwise we instantiate an empty Customer object.
4. If the request is a GET request, we simply add the $customer to the $viewModel and carry on.
5. If the request is a POST, we populate the CustomerInputFilter with the posted data, and then check to see if the input filter is valid.
6. If the input is valid, we hydrate the $customer object with the posted values, persist it to the repository, setup a flash success message using Laravel’s Session facade, and redirect to the edit page for the Customer.
7. If the input is not valid, we hydrate the customer with the raw posted data, store the validation error messages in the $viewModel, and carry on.
For this to work, we’ll need to add a couple more use statements to the top of the controller (I recommend alphabetizing them):
use CleanPhp\Invoicer\Domain\Entity\Customer;
use Illuminate\Http\Request;
use Illuminate\Support\Facades\Session;
use Symfony\Component\HttpFoundation\RedirectResponse;
Now, of course, we need to setup the template file customers/new-or-edit that’s referenced in the action:
<!-- resources/views/customers/new-or-edit.blade.php -->
@extends('layouts.layout')
@section('content')
<div class="page-header clearfix">
<h2>
<?= !empty($customer->getId()) ? 'Edit' : 'New' ?>
Customer
</h2>
</div>
<form role="form" action="" method="post">
<input type="hidden" name="_token" value="<?= csrf_token(); ?>">
<div class="form-group">
<label for="name">Name:</label>
<input type="text" class="form-control" name="name" id="name"
placeholder="Enter Name" value="<?= $customer->getName() ?>">
@include(
'validation-errors',
['name' => 'name', 'errors' => isset($error) ? $error : []]
)
</div>
<div class="form-group">
<label for="email">Email:</label>
<input type="text" class="form-control" name="email" id="email"
placeholder="Enter Email" value="<?= $customer->getEmail() ?>">
@include(
'validation-errors',
['name' => 'email', 'errors' => isset($error) ? $error : []]
)
</div>
<button type="submit" class="btn btn-primary">Save</button>
</form>
@stop
Again, we’re using the Blade templating language, but otherwise this template is nearly verbatim from our ZF2 project.
Some differences:
1. We’re setting up a CSRF token so that Laravel can validate the POST as authentic.
2. We’re using a partial instead of a view helper to show the validation error messages for a particular element.
We’ll need to setup that partial in order for this to work, so let’s do that now:
<!-- resources/views/validation-errors.blade.php -->
<?php if ($errors): $errors = \Vnn\Keyper\Keyper::create($errors) ?>
<?php if ($errors->get($name)): ?>
<div class="alert alert-danger">
<?= implode('. ', $errors->get($name)) ?>
</div>
<?php endif; ?>
<?php endif; ?>
As we did with our ZF2 ViewHelper, we’re using Keyper to easily check for nested error messages. If we have any error messages for the input, we implode them with a period, then format them nicely with some Bootstrap styles.
Let’s make sure we have Keyper installed for this to work:
composer require vnn/keyper
With this in place, we now have the ability to add and edit Customers again!
|
|
This would make a good place to commit your code to source control. If you’re just reading, but want to see the code in action, you can checkout the tag 16-laravel-customers: git clone https://github.com/mrkrstphr/cleanphp-example.git git checkout 16-laravel-customers |
Order Management
Let’s keep rolling right into Orders. Again, we’ll start by defining our routes, which are taken and adapted from our ZF2 application:
// app/Http/routes.php
// ...
Route::get('/orders', 'OrdersController@indexAction');
Route::match(['get', 'post'], '/orders/new', 'OrdersController@newAction');
Route::get('/orders/view/{id}', 'OrdersController@viewAction');
We’ll start with our indexAction().
Listing Orders
Let’s create our OrdersController with its indexAction():
// app/Http/Controllers/OrdersController.php
namespace App\Http\Controllers;
use CleanPhp\Invoicer\Domain\Repository\CustomerRepositoryInterface;
use CleanPhp\Invoicer\Domain\Repository\OrderRepositoryInterface;
use CleanPhp\Invoicer\Persistence\Hydrator\OrderHydrator;
use CleanPhp\Invoicer\Service\InputFilter\OrderInputFilter;
class OrdersController extends Controller {
protected $orderRepository;
protected $customerRepository;
protected $inputFilter;
protected $hydrator;
public function __construct(
OrderRepositoryInterface $orderRepository,
CustomerRepositoryInterface $customerRepository,
OrderInputFilter $inputFilter,
OrderHydrator $hydrator
) {
$this->orderRepository = $orderRepository;
$this->customerRepository = $customerRepository;
$this->inputFilter = $inputFilter;
$this->hydrator = $hydrator;
}
public function indexAction() {
$orders = $this->orderRepository->getAll();
return view('orders/index', ['orders' => $orders]);
}
}
Again, we’ll have to inform Laravel of what concrete class to instantiate for
CustomerRepositoryInterface:
// app/Providers/AppServiceProvider.php
public function register() {
// ...
$this->app->bind(
OrderRepositoryInterface::class,
function ($app) {
return new OrderRepository(
$app['Doctrine\ORM\EntityManagerInterface']
);
}
);
}
Also make sure to drop the required use statements at the top:
use CleanPhp\Invoicer\Domain\Repository\OrderRepositoryInterface;
use CleanPhp\Invoicer\Persistence\Doctrine\Repository\OrderRepository;
Last, let’s add our order index file
<!-- resources/views/orders/index.blade.php -->
@extends('layouts.layout')
@section('content')
<div class="page-header clearfix">
<h2 class="pull-left">Orders</h2>
<a href="/orders/new" class="btn btn-success pull-right">
Create Order</a>
</div>
<table class="table table-striped clearfix">
<thead>
<tr>
<th>#</th>
<th>Order Number</th>
<th>Customer</th>
<th>Description</th>
<th class="text-right">Total</th>
</tr>
</thead>
<?php foreach ($orders as $order): ?>
<tr>
<td>
<a href="/orders/view/{{{ $order->getId() }}}">
{{{ $order->getId() }}}</a>
</td>
<td>{{{ $order->getOrderNumber() }}}</td>
<td>
<a href="/customers/edit/{{{ $order->getCustomer()->getId() }}}">
{{{ $order->getCustomer()->getName() }}}</a>
</td>
<td>{{{ $order->getDescription() }}}</td>
<td class="text-right">
$ {{ number_format($order->getTotal(), 2) }}
</td>
</tr>
<?php endforeach; ?>
</table>
@stop
And now we have the ability to list orders.
Viewing Orders
Listing orders was easy, and viewing orders should be just as easy. Let’s start with the controller action:
// app/Http/Controllers/OrdersController.php
public function viewAction($id) {
$order = $this->orderRepository->getById($id);
if (!$order) {
return new Response('', 404);
}
return view('orders/view', ['order' => $order]);
}
We’ve introduced a new object Response, so let’s make sure we add a use statement for it at the top of the file:
use Illuminate\Http\Response;
And then swiftly on to the template:
<!-- resources/views/orders/view.blade.php -->
@extends('layouts.layout')
@section('content')
<div class="page-header clearfix">
<h2>Order #{{{ $order->getOrderNumber() }}}</h2>
</div>
<table class="table table-striped">
<thead>
<tr>
<th colspan="2">Order Details</th>
</tr>
</thead>
<tr>
<th>Customer:</th>
<td>
<a href="/customers/edit/{{{ $order->getCustomer()->getId() }}}">
{{{ $order->getCustomer()->getName() }}}</a>
</td>
</tr>
<tr>
<th>Description:</th>
<td>{{{ $order->getDescription() }}}</td>
</tr>
<tr>
<th>Total:</th>
<td>$ {{{ number_format($order->getTotal(), 2) }}}</td>
</tr>
</table>
@stop
Pretty much the same stuff we’ve been doing. And it works!
Adding Orders
Let’s work on adding orders, now. The controller action:
// app/Http/Controllers/OrdersController.php
public function newAction(Request $request) {
$viewModel = [];
$order = new Order();
if ($request->getMethod() == 'POST') {
$this->inputFilter
->setData($request->request->all());
if ($this->inputFilter->isValid()) {
$order = $this->hydrator->hydrate(
$this->inputFilter->getValues(),
$order
);
$this->orderRepository
->begin()
->persist($order)
->commit();
Session::flash('success', 'Order Saved');
return new RedirectResponse(
'/orders/view/' . $order->getId()
);
} else {
$this->hydrator->hydrate(
$request->request->all(),
$order
);
$viewModel['error'] = $this->inputFilter->getMessages();
}
}
$viewModel['customers'] = $this->customerRepository->getAll();
$viewModel['order'] = $order;
return view('orders/new', $viewModel);
}
This action is nearly identical to the CustomersController::newOrEditAction(), so if you want an explanation of what is going on, go check out that section. The only new thing we’ve added is querying for the list of Customers so that the user can select which Customer the Order is for.
We’ve added quite a few new objects here, so let’s add them to the use statement block:
use CleanPhp\Invoicer\Domain\Entity\Order;
use Illuminate\Http\Request;
use Illuminate\Support\Facades\Session;
use Symfony\Component\HttpFoundation\RedirectResponse;
Next, the template:
<!-- resources/views/orders/new.blade.php -->
@extends('layouts.layout')
@section('content')
<div class="page-header clearfix">
<h2>Create Order</h2>
</div>
<form role="form" action="" method="post">
<input type="hidden" name="_token" value="<?= csrf_token(); ?>">
<div class="form-group">
<label for="customer_id">Customer:</label>
<select class="form-control" name="customer[id]" id="customer_id">
<option value=""></option>
<?php foreach ($customers as $customer): ?>
<option value="{{{ $customer->getId() }}}"<?=
!is_null($order->getCustomer()) &&
$order->getCustomer()->getId() == $customer->getId() ?
' selected="selected"' : '' ?>>
{{{ $customer->getName() }}}
</option>
<?php endforeach; ?>
</select>
@include(
'validation-errors',
['name' => 'customer.id', 'errors' => isset($error) ? $error : []]
)
</div>
<div class="form-group">
<label for="orderNumber">Order Number:</label>
<input type="text" class="form-control" name="orderNumber"
id="order_number" placeholder="Enter Order Number"
value="{{{ $order->getOrderNumber() }}}">
@include(
'validation-errors',
['name' => 'orderNumber', 'errors' => isset($error) ? $error : []]
)
</div>
<div class="form-group">
<label for="description">Description:</label>
<input type="text" class="form-control" name="description"
id="description" placeholder="Enter Description"
value="{{{ $order->getDescription() }}}">
@include(
'validation-errors',
['name' => 'description', 'errors' => isset($error) ? $error : []]
)
</div>
<div class="form-group">
<label for="total">Total:</label>
<input type="text" class="form-control" name="total"
id="total" placeholder="Enter Total"
value="{{{ $order->getTotal() }}}">
@include(
'validation-errors',
['name' => 'total', 'errors' => isset($error) ? $error : []]
)
</div>
<button type="submit" class="btn btn-primary">Save</button>
</form>
@stop
The new thing here is the select box for selecting the Customer for the Order. We simply loop through the provided array of customers and output an <option> for each one, just as we did in the ZF2 application.
This concludes Order Management!
|
|
This would make a good place to commit your code to source control. If you’re just reading, but want to see the code in action, you can checkout the tag 17-laravel-orders: git clone https://github.com/mrkrstphr/cleanphp-example.git git checkout 17-laravel-orders |
Invoice Management
As before, let’s start with the routes:
// app/Http/routes.php
// ...
Route::get('/invoices', 'InvoicesController@indexAction');
Route::get('/invoices/view/{id}', 'InvoicesController@viewAction');
Route::get('/invoices/new', 'InvoicesController@newAction');
Route::post('/invoices/generate', 'InvoicesController@generateAction');
And stub out our InvoicesController:
namespace App\Http\Controllers;
use CleanPhp\Invoicer\Domain\Repository\InvoiceRepositoryInterface;
use CleanPhp\Invoicer\Domain\Repository\OrderRepositoryInterface;
use CleanPhp\Invoicer\Domain\Service\InvoicingService;
class InvoicesController extends Controller {
protected $invoiceRepository;
protected $orderRepository;
protected $invoicing;
public function __construct(
InvoiceRepositoryInterface $invoices,
OrderRepositoryInterface $orders,
InvoicingService $invoicing
) {
$this->invoiceRepository = $invoices;
$this->orderRepository = $orders;
$this->invoicing = $invoicing;
}
}
We’ll also need to let Laravel know what to instantiate for InvoiceRepositoryInterface:
// app/Providers/AppServiceProvider.php
public function register() {
// ...
$this->app->bind(
InvoiceRepositoryInterface::class,
function ($app) {
return new InvoiceRepository(
$app['Doctrine\ORM\EntityManagerInterface']
);
}
);
}
And let’s not forget the two new use statements at the top of the file:
use CleanPhp\Invoicer\Domain\Repository\InvoiceRepositoryInterface;
use CleanPhp\Invoicer\Persistence\Doctrine\Repository\InvoiceRepository;
Listing Invoices
The indexAction() will look terribly familiar:
// app/Http/Controllers/InvoicesController.php
public function indexAction() {
$invoices = $this->invoiceRepository->getAll();
return view('invoices/index', ['invoices' => $invoices]);
}
As well as the view:
<!-- resources/views/invoices/index.blade.php -->
@extends('layouts.layout')
@section('content')
<div class="page-header clearfix">
<h2 class="pull-left">Invoices</h2>
<a href="/invoices/new" class="btn btn-success pull-right">
Generate Invoices</a>
</div>
<table class="table table-striped clearfix">
<thead>
<tr>
<th>#</th>
<th>Order Number</th>
<th>Invoice Date</th>
<th>Customer</th>
<th>Description</th>
<th class="text-right">Total</th>
</tr>
</thead>
<?php foreach ($invoices as $invoice): ?>
<tr>
<td>
<a href="/invoices/view/{{{ $invoice->getId() }}}">
{{{ $invoice->getId() }}}</a>
</td>
<td>
{{{ $invoice->getInvoiceDate()->format('m/d/Y') }}}
</td>
<td>{{{ $invoice->getOrder()->getOrderNumber() }}}</td>
<td>
<a href="/customers/edit/{{{ $invoice->getOrder()
->getCustomer()->getId() }}}">
{{{ $invoice->getOrder()->getCustomer()->getName() }}}</a>
</td>
<td>{{{ $invoice->getOrder()->getDescription() }}}</td>
<td class="text-right">
$ {{{ number_format($invoice->getTotal(), 2) }}}
</td>
</tr>
<?php endforeach; ?>
</table>
@stop
I’m running out of things to say after these code snippets.
Generating Invoices
Our next step is generating new invoices. We’ll start with the /invoices/new route which resolves to the newAction():
// app/Http/Controllers/InvoicesController.php
public function newAction() {
return view('invoices/new', [
'orders' => $this->orderRepository->getUninvoicedOrders()
]);
}
This simple action just grabs all uninvoiced orders and supplies them to the view template:
<!-- resources/views/invoices/new.blade.php -->
@extends('layouts.layout')
@section('content')
<h2>Generate New Invoices</h2>
<p>
The following orders are available to be invoiced.
</p>
<?php if (empty($orders)): ?>
<p class="alert alert-info">
There are no orders available for invoice.
</p>
<?php else: ?>
<table class="table table-striped clearfix">
<thead>
<tr>
<th>#</th>
<th>Order Number</th>
<th>Customer</th>
<th>Description</th>
<th class="text-right">Total</th>
</tr>
</thead>
<?php foreach ($orders as $order): ?>
<tr>
<td>
<a href="/orders/view/{{{ $order->getId() }}}">
{{{ $order->getId() }}}</a>
</td>
<td>{{{ $order->getOrderNumber() }}}</td>
<td>
<a href="/customers/edit/{{{ $order->getCustomer()->getId() }}}">
{{{ $order->getCustomer()->getName() }}}</a>
</td>
<td>{{{ $order->getDescription() }}}</td>
<td class="text-right">
$ {{{ number_format($order->getTotal(), 2) }}}
</td>
</tr>
<?php endforeach; ?>
</table>
<form action="/invoices/generate" method="post" class="text-center">
<input type="hidden" name="_token" value="<?= csrf_token(); ?>">
<button type="submit" class="btn btn-primary">Generate Invoices</button>
</form>
<?php endif; ?>
@stop
The view shows the uninvoiced orders, if any, and provides a button to generate invoices for those orders.
So let’s work that action:
// app/Http/Controllers/InvoicesController.php
public function generateAction() {
$invoices = $this->invoicing->generateInvoices();
$this->invoiceRepository->begin();
foreach ($invoices as $invoice) {
$this->invoiceRepository->persist($invoice);
}
$this->invoiceRepository->commit();
return view('invoices/generate', ['invoices' => $invoices]);
}
This, like all the code in this chapter, is stolen directly from the ZF2 project, and modified slightly for Laravel. Let’s finish off with the view, which shows a list of the generated invoices:
<!-- resources/views/invoices/generate.blade.php -->
@extends('layouts.layout')
@section('content')
<div class="page-header">
<h2>Generated Invoices</h2>
</div>
<?php if (empty($invoices)): ?>
<p class="text-center">
<em>No invoices were generated.</em>
</p>
<?php else: ?>
<table class="table table-striped clearfix">
<thead>
<tr>
<th>#</th>
<th>Order Number</th>
<th>Invoice Date</th>
<th>Customer</th>
<th>Description</th>
<th class="text-right">Total</th>
</tr>
</thead>
<?php foreach ($invoices as $invoice): ?>
<tr>
<td>
<a href="/invoices/view/{{{ $invoice->getId() }}}">
{{{ $invoice->getId() }}}</a>
</td>
<td>
{{{ $invoice->getInvoiceDate()->format('m/d/Y') }}}
</td>
<td>{{{ $invoice->getOrder()->getOrderNumber() }}}</td>
<td>
<a href="/customers/edit/{{{ $invoice->getOrder()
->getCustomer()->getId() }}}">
{{{ $invoice->getOrder()->getCustomer()->getName() }}}</a>
</td>
<td>{{{ $invoice->getOrder()->getDescription() }}}</td>
<td class="text-right">
$ {{{ number_format($invoice->getTotal(), 2) }}}
</td>
</tr>
<?php endforeach; ?>
</table>
<?php endif; ?>
@stop
And viola, invoice generation.
Viewing Invoices
The last stop on our Laravel journey is to view an individual invoice. Let’s start with the viewAction():
// app/Http/Controllers/InvoicesController.php
public function viewAction($id) {
$invoice = $this->invoiceRepository->getById($id);
if (!$invoice) {
return new Response('', 404);
}
return view('invoices/view', [
'invoice' => $invoice,
'order' => $invoice->getOrder()
]);
}
Let’s make sure Response is part of the use statements:
use Illuminate\Http\Response;
And next, our view:
<!-- resources/views/invoices/view.blade.php -->
@extends('layouts.layout')
@section('content')
<div class="page-header clearfix">
<h2>Invoice #{{{ $invoice->getId() }}}</h2>
</div>
<table class="table table-striped">
<thead>
<tr>
<th colspan="2">Invoice Details</th>
</tr>
</thead>
<tr>
<th>Customer:</th>
<td>
<a href="/customers/edit/{{{ $order->getCustomer()->getId() }}}">
{{{ $order->getCustomer()->getName() }}}</a>
</td>
</tr>
<tr>
<th>Order:</th>
<td>
<a href="/orders/view/{{{ $order->getId() }}}">
{{{ $order->getOrderNumber() }}}</a>
</td>
</tr>
<tr>
<th>Description:</th>
<td>{{{ $order->getDescription() }}}</td>
</tr>
<tr>
<th>Total:</th>
<td>$ {{{ number_format($invoice->getTotal(), 2) }}}</td>
</tr>
</table>
@stop
And viewing invoices, and all invoice functionality, is complete.
|
|
This would make a good place to commit your code to source control. If you’re just reading, but want to see the code in action, you can checkout the tag 18-laravel-invoices: git clone https://github.com/mrkrstphr/cleanphp-example.git git checkout 18-laravel-invoices |
Next Steps
If this were a real project, I’d recommend a few things:
1. Test this application layer. Test it through and through. These will likely be integration tests, or full system tests, as unit testing controllers in any framework, except maybe something like Silex, is near impossible.
2. Ditch the ZF2 components and use the Laravel counterparts. ZF2 isn’t component based, no matter how hard they try to pretend, and we were forced to bring along the kitchen sink just to use two tiny little slivers of the framework.
3. Fully embrace Blade, or don’t. We kind of went half-and-half in the examples. I’d opt for not using blade; it’s just weird.
Summary
This was a lot of work. A lot of tedious work. If we were switching from ZF2 to Laravel in a real, large application, this would have been a lot more work.
Is this feasible? It definitely is, as we’ve seen here, but it’s a huge undertaking. One that most certainly will lead to bugs and issues not present in the old system – especially since we didn’t write any tests for this layer. As testing this layer can be quite complicated, I left it out of this book. However, having a full suite of tests for each layer will aid greatly in detecting and fixing issues early in the process.
Switching frameworks is incredibly laborious. Do so sparingly, and spend a lot of time evaluating your framework choice up front, so that hopefully you’ll never have a need to switch. Further, write code intelligently and favor highly decoupled components. It will only make your application better in the long run.
All materials on the site are licensed Creative Commons Attribution-Sharealike 3.0 Unported CC BY-SA 3.0 & GNU Free Documentation License (GFDL)
If you are the copyright holder of any material contained on our site and intend to remove it, please contact our site administrator for approval.
© 2016-2026 All site design rights belong to S.Y.A.