PHP, MySQL, JavaScript & HTML5 All-in-One For Dummies (2013)
Book III: JavaScript
Chapter 4: Reacting to Events with JavaScript and jQuery
In This Chapter
![]() Understanding events
Understanding events
![]() Using JavaScript with forms
Using JavaScript with forms
![]() Responding to mouse clicks and hovering
Responding to mouse clicks and hovering
![]() Counting characters and disabling a form field
Counting characters and disabling a form field
Events are things that happen. For example, the sun rising is an event. The sun setting is an event. You can choose to react to those events. For example, when the sun rises, you might get out of bed — or you might not. When the sun sets, you might turn on a light or might go to bed.
When it comes to web programming, events are the things that happen in a web page. For example, a user might move the mouse over a button, click a button, or submit a form. Like the example of the sun rising, you can choose to react to the event or you can ignore it. If all you wanted to do was ignore events, then this would be a really, really short chapter. But you probably want to react to events, and we show you how to do so for some common scenarios.
Understanding Events
In general, there are four types of events that you’ll be concerned about:
![]() Form events: Includes things like selecting a check box or submitting the form itself. Reacting to form events is one of the most common things that JavaScript programmers do.
Form events: Includes things like selecting a check box or submitting the form itself. Reacting to form events is one of the most common things that JavaScript programmers do.
![]() Mouse events: This can be anything from a mouse click to mouse movements on the page. That’s right; you can actually track where the mouse is on a page and react to it.
Mouse events: This can be anything from a mouse click to mouse movements on the page. That’s right; you can actually track where the mouse is on a page and react to it.
![]() Keyboard events: Things that happen through the keyboard, like a key press, are considered keyboard events.
Keyboard events: Things that happen through the keyboard, like a key press, are considered keyboard events.
![]() Page events: Things like the page loading or unloading are considered page events. You'll be happy to know that you've already been reacting to the page load event through the jQuery ready() function.
Page events: Things like the page loading or unloading are considered page events. You'll be happy to know that you've already been reacting to the page load event through the jQuery ready() function.
Speaking of jQuery, this chapter concentrates largely on using jQuery for working with events. Using jQuery saves a lot of compatibility headaches that come into play when you start trying to make your JavaScript code work across browsers.
Working with Forms
Previous chapters of the book show a form being created and styling that form with CSS. Now it’s time to learn how to work with that form using JavaScript. A frequent way to use JavaScript with forms is to provide validation of the form as users fill it out or before it gets submitted to the server.
Adding a Submit Handler
jQuery includes a function that automatically watches for a form to be submitted.
Listing 4-1 shows HTML for a form used earlier in the book. We've taken the liberty of adding jQuery to the <head> section of the form.
Listing 4-1: A Simple Form
<!doctype html>
<html>
<head>
<title>A Basic Form</title>
<script type="text/javascript"
src="http://ajax.aspnetcdn.com/ajax/jQuery/jquery-1.8.1.min.js">
</script>
<style type="text/css">
.form-field {
clear: both;
padding: 10px;
width: 350px;
}
.form-field label {
float: left;
width: 150px;
text-align: right;
}
.form-field input {
float: right;
width: 150px;
text-align: left;
}
#submit {
text-align: center;
}
</style>
</head>
<body>
<h1>A Basic Form</h1>
<hr>
<form action="#">
<fieldset>
<legend>Form Information</legend>
<div class="form-field">
<label for="username">Name:</label>
<input type="text" id="username" name="username">
</div>
<div class="form-field">
<label for="email">E-mail Address:</label>
<input type="text" id="username" name="email">
</div>
<div class="form-field">
<input id="submit" type="submit" name="submit" value="Send Form">
</div>
</fieldset>
</form>
</body>
</html>
A page viewed in a browser looks like that in Figure 4-1.
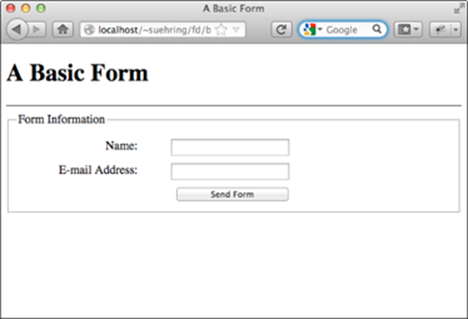
Figure 4-1: A basic web form.
Right now, when you click Send Form nothing happens. Change that by following these steps.
1. Open your text editor.
2. In the editor, place the following code:
<!doctype html>
<html>
<head>
<title>A Basic Form</title>
<script type="text/javascript"
src="http://ajax.aspnetcdn.com/ajax/jQuery/jquery-1.8.1.min.js">
</script>
<style type="text/css">
.form-field {
clear: both;
padding: 10px;
width: 350px;
}
.form-field label {
float: left;
width: 150px;
text-align: right;
}
.form-field input {
float: right;
width: 150px;
text-align: left;
}
#submit {
text-align: center;
}
</style>
</head>
<body>
<h1>A Basic Form</h1>
<hr>
<form action="#">
<fieldset>
<legend>Form Information</legend>
<div class="form-field">
<label for="username">Name:</label>
<input type="text" id="username" name="username">
</div>
<div class="form-field">
<label for="email">E-mail Address:</label>
<input type="text" id="username" name="email">
</div>
<div class="form-field">
<input id="submit" type="submit" name="submit" value="Send Form">
</div>
</fieldset>
</form>
</body>
</html>
3. Save the form as form1.html in your document root.
4. View the page in a web browser at http://localhost/form1.html.
You should see a page like the one in Figure 4-1.
5. Now add the following code, just after the closing </form> tag and before the closing </body> tag.
<script type="text/javascript">
$(document).ready(function() {
$("form").submit(function() {
alert("You submitted the form");
return false;
});
});
</script>
6. Save the file, again as form1.html.
7. View the page in a browser; you can also reload the page with Ctrl+R or Command+R if you left it open from a previous step.
8. Click Send Form.
You should receive an alert like the one shown in Figure 4-2.
Figure 4-2: This alert confirms that the input is submitted.
You’ve added a submit event handler. Look at the code.
$(document).ready(function() {
$("form").submit(function() {
alert("You submitted the form");
return false;
});
});
The code begins with the ready() function, which you've seen before. Next up, you select the form by selecting all <form> elements on the page. If there was more than one form you'd likely want to give the form a name or ID so that you could select the right one, but for this example, simply selecting by element works.
Next up, the submit() function is called and another function is created within it. The function's main task is to display an alert, which you saw.
The second line within the function, return false, is interesting for forms. When you use return false in a form submit event, you essentially prevent the form from submitting to the server. Therefore, you'd only want to do this for specific reasons, like when the form isn't valid such as when the user hasn't filled out all the required fields.
When you add return false, you're preventing the default action. Because the default action of the form is to submit to the server, adding return false prevents that default action from occurring. Another way to prevent the default action is with the jQuery preventDefault() function. You use preventDefault in certain circumstances where return false doesn't do what you want. Changing the JavaScript from the preceding example to use both preventDefault and return false looks like this:
$(document).ready(function() {
$("form").submit(function(event) {
alert("You submitted the form");
event.preventDefault();
return false;
});
});
Checking for blank fields
Though we include an entire chapter on validation (Book VI, Chapter 2), here we provide a sneak peek at validating a form, at least checking for blank fields. Consider the form from earlier in the chapter and shown in Figure 4-1. Say that the Name field was required; that means the user needs to fill something out in order for the form to be sent to the server.
You can change the JavaScript to make sure that the field has been filled in. Recall that the ID of the Name field is "username". jQuery can select that pretty easily, and then it's a matter of getting the value for the field. For that, you can use jQuery's val() function. Finally, all you need to do is put the whole thing in an if statement to make sure the value isn't empty.
The code looks like this:
$(document).ready(function() {
$("form").submit(function(event) {
if ($("#username").val() == "") {
alert("Name can't be blank");
event.preventDefault();
return false;
}
});
});
You can try this out by replacing the JavaScript from the earlier example with that code. If you attempt to submit the form without filling anything out in the Name field, you’ll receive an alert like the one in Figure 4-3.
Figure 4-3: Basic validation on a form.
This form validation is very basic. For instance, you could just place a single empty space in that field and it would be valid. In Book VI, you see much more about JavaScript validation and server-side validation too.
Monitoring Mouse Events
You can watch for and react to mouse events with JavaScript. This section looks at how to do both.
Capturing mouse clicks
A common thing to do is capture mouse click events with JavaScript. For example, when a person clicks on an image or clicks a form element, you can react to it to load a different image or select other form elements.
Imagine you’ve set up a car shop where people can get their cars customized with a few upgrades. You specialize in adding fog lights, leather trim, and DVD players. People can come to your website and choose a trim level. Figure 4-4 shows a sample page for where users select their options.
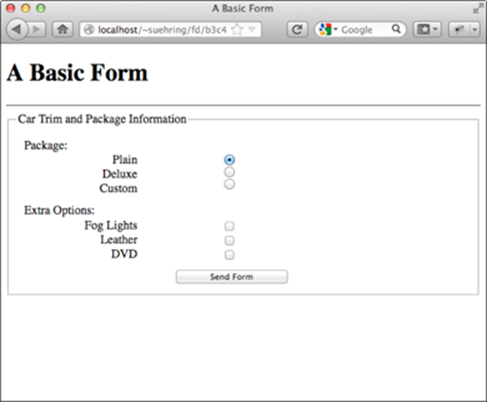
Figure 4-4: Choosing a trim level.
If people choose the Deluxe package, the form should check all the Extra Options check boxes. If people choose the Plain package, all the options should uncheck. Finally, if people choose an individual option in the Extra Options list, then the Custom package should be checked. This can all be accomplished with a few lines of JavaScript and jQuery.
Listing 4-2 shows the HTML, CSS, and JavaScript to create the desired behavior.
Listing 4-2: Creating a Custom Form
<!doctype html>
<html>
<head>
<title>A Basic Form</title>
<script type="text/javascript"
src="http://ajax.aspnetcdn.com/ajax/jQuery/jquery-1.8.1.min.js">
</script>
<style type="text/css">
.form-field {
clear: both;
padding: 10px;
width: 350px;
}
.form-field label {
float: left;
width: 150px;
text-align: right;
}
.form-field input {
float: right;
width: 150px;
text-align: left;
}
#submit {
text-align: center;
}
</style>
</head>
<body>
<h1>A Basic Form</h1>
<hr>
<form action="#">
<fieldset>
<legend>Car Trim and Package Information</legend>
<div class="form-field">
<div>Package: </div>
<input id="plain" type="radio" name="trim"
value="plain">
<label for="plain">Plain</label>
<input id="deluxe" type="radio" name="trim"
value="deluxe">
<label for="deluxe">Deluxe</label>
<input id="custom" type="radio" name="trim"
value="custom">
<label for="custom">Custom</label>
</div>
<div class="form-field">
<div>Extra Options:</div>
<input type="checkbox" id="foglights" name="option"
value="foglights">
<label for="foglights">Fog Lights</label>
<input type="checkbox" id="leather" name="option"
value="leather">
<label for="leather">Leather</label>
<input type="checkbox" id="dvd" name="option"
value="dvd">
<label for="dvd">DVD</label>
</div>
<div class="form-field">
<input id="submit" type="submit" name="submit" value="Send Form">
</div>
</fieldset>
</form>
<script type="text/javascript">
$(document).ready(function() {
$("input[name='trim']").click(function(event) {
if ($(this).val() == "deluxe") {
$("input[name='option']").attr("checked",true);
} else if ($(this).val() == "plain") {
$("input[name='option']").attr("checked",false);
}
});
$("input[name='option']").click(function(event) {
$("#custom").attr("checked","checked");
});
});
</script>
</body>
</html>
Notice that the Cascading Style Sheet (CSS) is the same from that of Listing 4-1. The HTML is straightforward, insofar as it sets up the form that you see in Figure 4-4. The JavaScript is where things get interesting. The first thing the JavaScript does is put everything into the ready()function. You've seen that numerous times already; no need for further explanation there.
The second thing in the JavaScript is a selector that is attached to the click() event. This selector is a bit more complex than those you've seen previously:
$("input[name='trim']")
That selector looks for all <input> elements on the page but then uses a filter to obtain only those input elements that have the name of "trim". In this case, those elements correspond to the radio buttons on the form. Notice here the use of two different quotation marks. The overall selector is enclosed in double-quotes while the word trim is enclosed in single quotes. You do this because otherwise jQuery would get quite confused and think you meant to close the selector.
The selector is chained to the click() function that handles click events. Within the click() function, the value of the item that was clicked is examined:
if ($(this).val() == "deluxe") {
That's done through the $(this) selector and the val() function. If that value is "deluxe", then all the check boxes are checked with this line:
$("input[name='option']").attr("checked",true);
That line again uses a selector and filter, but this time gets all the check boxes with the name "option". The selected check boxes are then checked, thanks to the attr() function that the preceding chapter explains.
An else if is then used to see if the Plain radio button was selected:
else if ($(this).val() == "plain") {
If that radio button is selected, then the 'option' check boxes are unchecked.
$("input[name='option']").attr("checked",false);
After that click event handler is closed, another one is created. This time, the handler is connected to the check boxes:
$("input[name='option']").click(function(event) {
If someone clicks on one of the check boxes, whether to check it or uncheck it, you need to enable the “Custom” radio button. That’s accomplished with this line:
$("#custom").attr("checked","checked");
You can try this out with the code from Listing 4-2. When you select Deluxe, the check boxes will automatically check and if you select Plain, they’ll uncheck. Clicking any of the check boxes individually results in the Custom radio button becoming selected.
While this example shows how to work with forms and the click event, you can actually attach a click event handler to any element on the page. See http://api.jquery.com/click for more information on the click event handler in jQuery.
Watching mouse movements
There are several interesting items surrounding the movement of the mouse or pointing device. For instance, you can change an element when the mouse hovers over it or when the mouse leaves the element. This section shows a hover event handler, which handles both the hover over and when the mouse leaves the element.
 You can emulate the hover event handler through CSS although support for the CSS :hover pseudoclass is not available on older browsers.
Listing 4-3 shows the HTML for this example.
Listing 4-3: Creating Three Boxes in HTML
<!doctype html>
<html>
<head>
<title>Hover</title>
<script type="text/javascript"
src="http://ajax.aspnetcdn.com/ajax/jQuery/jquery-1.8.1.min.js">
</script>
<style type="text/css">
.box {
margin: 50px;
padding: 30px;
width: 50px;
border: 3px solid black;
}
.colorBox {
background-color: #abacab;
}
</style>
</head>
<body>
<h1>Hover</h1>
<hr>
<br />
<br />
<br />
<span class="box">Box 1</span>
<span class="box">Box 2</span>
<span class="box">Box 3</span>
</body>
</html>
Pages viewed in a browser look like the one in Figure 4-5.
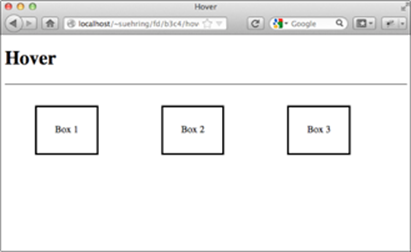
Figure 4-5: HTML for a hover effect.
For the hover effect, you add JavaScript to make it so that when a box is hovered over with the mouse, the background color changes.
To create this effect, the following JavaScript is employed within the page, at its usual location just above the closing </body> tag.
<script type="text/javascript">
$(document).ready(function() {
$(".box").hover(
//Hover over
function() {
$(this).addClass("colorBox");
},
//Hover out
function() {
$(this).removeClass("colorBox");
}
);
});
This code places everything in the jQuery ready() function, as usual. Next, all items with a class of "box" are selected and the hover() function is chained to them:
$(".box").hover(
The hover() function takes two arguments: what to do when the hover is in effect and what to do when the hover is done. So each of those functions is created. The first one adds a class called "colorBox", which merely changes the background color to a shade of gray; the CSS for that was in Listing 4-3. The second function, applied when the mouse moves out of the selected element, removes the class "colorBox", as shown here.
//Hover over
function() {
$(this).addClass("colorBox");
},
//Hover out
function() {
$(this).removeClass("colorBox");
}
);
The result, with the mouse hovering over the element labeled Box 2, is shown in Figure 4-6. The box turns gray (#abacab).
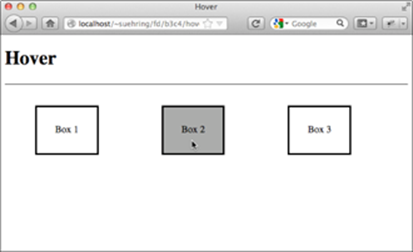
Figure 4-6: Hovering over an element.
Reacting to Keyboard Events
Just as you can react to mouse events, so too can you react to keyboard events. Things like watching when a certain key is pressed, or more generically, just counting the number of times the keys are pressed, can all be done with JavaScript. This section looks at two examples of JavaScript to react to keyboard events.
Counting characters
If you’ve used Twitter, you’ve seen an example of a textbox that counts down while you type. Many contact forms also include similar functions, where you can type your message only up to a certain number of characters.
Listing 4-4 shows some example HTML for creating a small text box, called a text area in HTML parlance.
Listing 4-4: Creating an HTML textarea
<!doctype html>
<html>
<head>
<title>Hover</title>
<script type="text/javascript"
src="http://ajax.aspnetcdn.com/ajax/jQuery/jquery-1.8.1.min.js">
</script>
</head>
<body>
<h1>Keyup</h1>
<hr>
<form action="#">
<textarea rows="10" cols="20" id="message" name="message">
</textarea>
<p>Characters remaining: <span id="remaining">50</span></p>
</form>
</body>
</html>
Pages viewed in a browser look like Figure 4-7.
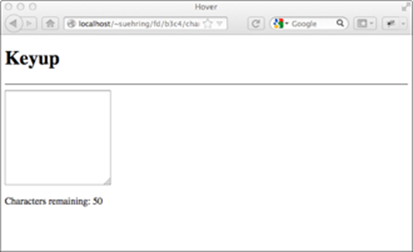
Figure 4-7: A small text area for input.
Adding JavaScript to count characters looks like this:
<script type="text/javascript">
$(document).ready(function() {
var maxCharacters = 50;
$("#message").on("keyup",function() {
var currentVal = $("#message").val().length;
var totalRemaining = maxCharacters - currentVal;
$("#remaining").text(totalRemaining);
});
});
</script>
This JavaScript first sets a variable with the maximum number of characters allowed, 50. Then the element with the ID of "message" is selected. A event handler is attached to the selected element. The event handler is attached with the on() function, which is a generic event handler. The event handlers you've seen so far are all so common that the folks at jQuery created specific functions to handle them. So things like submit(), click(), and hover() all have their own events.
However, all other events are attached using the on() function. The first argument to the on() function is the name of the event to watch for. In this case, you want to watch for the "keyup" event to know when a key is pressed and then released.
The first thing you do once the keyup event fires is to count the number of characters in the text field. That’s accomplished with this line of code:
var currentVal = $("#message").val().length;
Now you know the maximum characters allowed, 50, and you know the current number of characters in the field. Next up: math.
You need to subtract the current number of characters in the variable currentVal from the maximum allowed characters in the variable maxCharacters. The result will be placed in a new variable called totalRemaining.
var totalRemaining = maxCharacters - currentVal;
The last thing to do is place that value into the <span> element that shows the characters remaining:
$("#remaining").text(totalRemaining);
Now when you type into the textarea, the number of characters remaining counts down. Figure 4-8 shows an example.
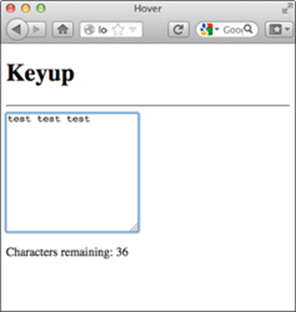
Figure 4-8: Showing remaining characters.
Now you know how they do this on Twitter! However, if you type a whole bunch into the form you’ll notice that you can actually continue typing past the 50 characters. The counter will go into negative numbers (see Figure 4-9).
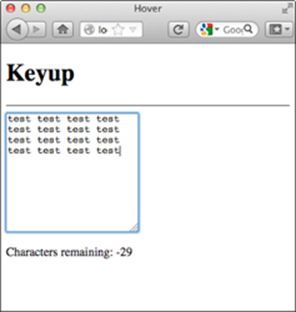
Figure 4-9: Entering characters past the limit.
 Because you end up checking the number of characters in your PHP program anyway, it isn’t the end of the world if a user goes past the maximum allowed. You can also prevent users from submitting the form. We tell you how to do those things Book VI.
Preventing character input
You can use JavaScript to disable a form field. For example, many sites use a shipping and billing address combination whereby the user clicks a check box to indicate that the billing address is the same as the shipping address.
Listing 4-5 shows an HTML snippet for such a page.
Listing 4-5: A Shipping Info Page
<!doctype html>
<html>
<head>
<title>Prevent</title>
<script type="text/javascript"
src="http://ajax.aspnetcdn.com/ajax/jQuery/jquery-1.8.1.min.js">
</script>
</head>
<body>
<h1>Shopping Info</h1>
<hr>
<form action="#">
Billing Address same as Shipping Address:
<input type="checkbox" name="billingAddress" id="billingAddress">
<br />
<br />
Street Address:
<input class="baddr" type="text" name="street" id="street">
<br />
<br />
City:
<input class="baddr" type="text" name="city" id="city">
</form>
</body>
</html>
A page viewed in a browser looks like that in Figure 4-10.
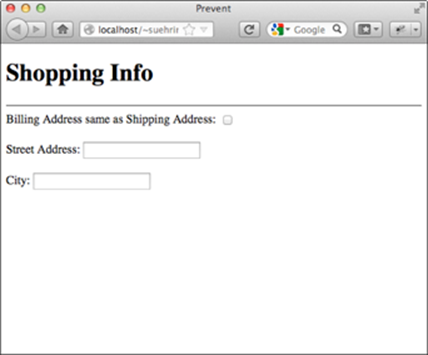
Figure 4-10: A snippet for a billing info page.
In reality, a billing info page would capture more information, like the state and ZIP code for starters, but this gives you a bit of an idea of the type of page you’re setting up for this example.
Adding JavaScript to disable those textboxes looks like this:
$(document).ready(function() {
$("#billingAddress").click(function() {
if ($("#billingAddress").attr("checked") == "checked") {
$(".baddr").val("");
$(".baddr").attr("disabled","disabled");
} else if ($("#billingAddress").attr("checked") == undefined) {
$(".baddr").removeAttr("disabled");
}
});
});
The code begins with the ready() function, of course. After that, a click event handler is added to the check box. If the billingAddress check box is checked, then the values from the form fields are cleared and those form fields are disabled. If the billingAddress check box is unchecked, then the disabled attribute is removed, thanks to the removeAttr() function.
Note in this example the use of classes on the text fields to be disabled. Using classes, called "baddr" for this example, makes it easy to group them for a jQuery selector.
All materials on the site are licensed Creative Commons Attribution-Sharealike 3.0 Unported CC BY-SA 3.0 & GNU Free Documentation License (GFDL)
If you are the copyright holder of any material contained on our site and intend to remove it, please contact our site administrator for approval.
© 2016-2026 All site design rights belong to S.Y.A.