PHP, MySQL, JavaScript & HTML5 All-in-One For Dummies (2013)
Book II: HTML and CSS
Chapter 1: Creating a Basic Page with HTML
In This Chapter
![]() Getting the 411 on HTML and web pages
Getting the 411 on HTML and web pages
![]() Putting HTML tags into the correct section
Putting HTML tags into the correct section
![]() Integrating images and links into your page
Integrating images and links into your page
![]() Ensuring that your HTML is valid
Ensuring that your HTML is valid
HyperText Markup Language (HTML) is the language of the web. When you go to a web page in your web browser such as Internet Explorer, Firefox, or Safari, the browser downloads and displays HTML.
At its heart, HTML is just a document, much the same as a document you’d make in a word processor. A program like Microsoft Word is used to view word processor documents because it knows how to read and display them. Likewise, when it comes to the web, the web browser is the program that knows how to read and display documents created with HTML.
Word processor documents can be created and read with a single program. On the other hand, HTML documents need different programs for creation and reading; you can’t create HTML documents with a browser. You create HTML documents using a program called an editor. This editor can be as simple as the Notepad program that comes with Microsoft Windows or as complex as Eclipse or Microsoft Visual Studio. You can typically use the same program to create HTML documents that you use to create PHP programs.
This chapter describes HTML documents and shows how to build an HTML page that you can view through a web browser using the most current version, HTML5.
Understanding the HTML Building Blocks
HTML documents being just documents, they can be stored on any computer. For instance, an HTML document can be stored in the Documents folder on your computer. However, you’d be the only one who could view that HTML document on your computer. To solve that problem, web documents or pages are typically stored on a computer with more resources, known as a web server. Storing the document on a web server enables other people to view the document.
 A web server is a computer that runs special software that knows how to send (or serve) web pages to multiple people at the same time.
HTML documents are set up in a specific order, with certain parts coming before others. They’re structured like this so that the web browser knows how to read and display them. When you create an HTML document, it’s expected that you’ll follow this structure and set up your document so the browser can read it.
Document types
Web browsers can display several types of documents, not just HTML, so when creating a web document the first thing you do is tell the browser what type of document is coming. You declare the type of document with a special line of HTML at the top of the document.
Web browsers can usually read documents in many formats, including HTML, XML, XHTML, SVG, and others. Each of these documents lives by different rules and is set up differently. The document type tells the browser what rules to follow when displaying the document.
 In technical terms, the document type is called the Document Type Declaration, or DTD for short.
In prior versions of HTML, developers needed to constantly copy and paste the document type into the document because it was both long and complicated. With the release of the latest version of HTML, called HTML5, the document type has been greatly simplified. The document type for HTML5 is
<!doctype html>
This will be the first line of every HTML document that you create, before anything else. Any time you need to display HTML, you include a document type, sometimes called a doctype.
 You may be tempted to use <!doctype html5>, but there is no version number associated with the HTML5 document type. When the next version of HTML comes out, you won't have to go back and update all your document types to HTML6 (unless, of course, they change the document type definition again!).
You may see the other, older document types in your career as an HTML developer. They include:
HTML 4.01 Strict <!DOCTYPE HTML PUBLIC "-//W3C//DTD HTML 4.01//EN"
"http://www.w3.org/TR/html4/strict.dtd">
HTML 4.01 Transitional <!DOCTYPE HTML PUBLIC "-//W3C//DTD HTML 4.01 Transitional//EN"
"http://www.w3.org/TR/html4/loose.dtd">
XHTML 1.0 Strict <!DOCTYPE html PUBLIC "-//W3C//DTD XHTML 1.0 Strict//EN"
"http://www.w3.org/TR/xhtml1/DTD/xhtml1-strict.dtd">
XHTML 1.1 DTD <!DOCTYPE html PUBLIC "-//W3C//DTD XHTML 1.1//EN"
"http://www.w3.org/TR/xhtml11/DTD/xhtml11.dtd">
Other document types exist as well, and most of them are similarly complex and difficult to remember. If you see these document types on a web page, you’ll know that the page may use slightly different syntax to create its HTML document.
HTML documents are made up of letters and words enclosed in angle brackets, sometimes called less-than or greater-than signs:
< >
For example, here’s the main element in an HTML document, also called the root element:
<html>
Typically, HTML elements have both opening and closing tags. Elements are closed with a front-slash in front of the element name. Seeing <html> in the document means that later on the document will have </html> to close that element. It is said that everything in between the opening<html> and closing </html> makes up the document and is wrapped inside of those elements.
Sections of an HTML Document
HTML documents use a specific structure. This structure enables the document to be read by a web browser. You’ll now see the three main parts of an HTML document.
Up until now you may have been thinking of HTML as creating documents. What’s the difference between an HTML document and an HTML page? Nothing. The two terms are interchangeable.
Before going into each section of the document, it’ll be useful to see the whole thing, so without further delay, Listing 1-1 shows an entire HTML document.
Listing 1-1: A Basic Web Page
<!doctype html>
<html>
<head>
<title>My First Document</title>
</head>
<body>
<div>My Web Page</div>
</body>
</html>
If you view this document in a web browser, you receive a page that has a title in the browser’s title bar or tab bar and text that states:
My Web Page
Later sections in the chapter explain how to enhance this page with more HTML elements and more text.
The root element
Though not a section of an HTML document, the root element is what wraps around the entire document, appearing as the first thing after the doctype and the last thing in the document.
The root element is opened with:
<html>
The root element is closed with:
</html>
The head section and title element
The head section of a document contains information about the document itself. The head section is opened with:
<head>
The head section is closed with:
</head>
The head section should not be confused with a header or menu on a page itself. The head section is a behind-the-scenes element of a page.
The head section can contain a lot of information about the page. This information includes things like the title of the page, the language of the page (English, Spanish, French, Swedish, and so on), whether the page contains style information or additional helper programs, and other such things common to the page.
These descriptive elements in the head section are sometimes called meta elements because they’re common to the entire page or describe the page itself.
You should always have a title element inside the head section. The title element is what shows up in the title bar of the web browser or as the title of the tab in the web browser, shown in Figure 1-1.
![]()
Figure 1-1: The title element shows up in the tab or title bar of the web browser.
What makes a good title element?
Title elements should be descriptive of the page contents but not overly so. Frequently a title tag may have the site name along with something descriptive about the page itself. For example, www.braingia.org has "Steve Suehring – Official Site and Blog," and then navigating to a given page, say the Books page, results in the title changing to "Books | Steve Suehring – Official Site and Blog." The title is therefore both descriptive of the page as well as the site.
Page titles are used by search engines like Google as one factor to help determine whether your page is relevant, therefore placing it higher in the search results. Google, for example, displays up to 66 characters of the title tag. So keeping the title short but sweet is key.
The body section
The body section is the heart of a web page. It’s where you place all the text and images for the page. Essentially everything that you see when you view a page (with the exception of the title) is found within the body section.
The body section opens with:
<body>
The body section closes with:
</body>
Just like the head section can contain other elements like the title and meta information, the body section can contain several HTML elements as well. For example, inside the body section you find all the link and image elements along with paragraphs, tables, and whatever else is necessary to display the page.
Later in this chapter, you see how to add links and images to a page. Next you learn about the basic page elements found on a web page.
Creating Good HTML
A good web page is structured in a logical order. This means that you place elements in a certain order so that they can be read properly by a web browser and that any time you open an element you also close that element using the corresponding tag that includes angle brackets and a forward slash. Doing so ensures that the page will display like you want it to when viewed in any web browser. Later in this chapter, you see how to check your HTML document to make sure it’s structured correctly, but here we tell you how to choose the appropriate elements for your needs.
Using the appropriate elements
Web pages frequently use several page elements, sometimes called tags. Table 1-1 describes some of these elements.
Table 1-1 Common HTML Elements
|
Element |
Description |
Typical Use |
|
<a> |
Anchor |
Creates a link to another page or a section of the same document. |
|
<br> |
Line break |
Enters a line break or return character. |
|
<div> |
A section of a page |
Creates overall areas or logical divisions on a page, such as a heading/menu section, a content area, or a footer. |
|
<form> |
Web form |
Creates a web form to accept user input. Covered in Chapter 3 of this minibook. |
|
<h1> through <h6> |
Heading |
Creates a container for a heading, such as heading text. |
|
<hr> |
Hard rule |
Creates a horizontal line. |
|
<img> |
Image |
A container for an image. |
|
<input> |
Input |
An element to accept user input. Covered in Chapter 3 of this minibook. |
|
<link> |
Resource link |
Links to a resource for the page; not to be confused with an anchor element. |
|
<p> |
A paragraph in a page |
Creates textual paragraphs or other areas and containers for text. |
|
<script> |
A script tag |
Denotes a web script or program. Also frequently found in the head section. |
|
<span> |
Span |
Creates a container for an element. Frequently used in conjunction with styling information. |
Related to the structure or layout of the elements is a concept called semantic markup, which is a fancy term to say that you always use the right element at the right time. In other words, you use the right kind of element to hold text and the right kind of element to add line breaks to a page. Consider these benefits of semantic markup:
![]() Improves search results. A primary benefit of semantic markup is that visitors and search engines alike can find the information they need.
Improves search results. A primary benefit of semantic markup is that visitors and search engines alike can find the information they need.
![]() Simplifies maintenance. A secondary benefit to semantic markup is that it makes maintenance easier later on.
Simplifies maintenance. A secondary benefit to semantic markup is that it makes maintenance easier later on.
When a page is both semantically correct and valid HTML, it is said to be well-formed.
Putting text on a page
There are many ways to insert text into a web page and many elements that are appropriate for holding text. Heading elements such as <h1>, <h2>, through <h6>, are the correct place to put headings, while <p>, <span>, and <div> are appropriate containers for longer form text, such as paragraphs. Listing 1-2 shows a simple web page with two headings and some paragraphs.
Listing 1-2: A Web Page with Headings and Paragraphs
<!doctype html>
<html>
<head>
<title>My First Document</title>
</head>
<body>
<h1>My Web Page</h1>
<p>Welcome to my web page. Here you'll find all sorts of information about me.</p>
<h2>My Books</h2>
<p>You can find information on my books here as well.</p>
</body>
</html>
When viewed in a web browser, this page appears like Figure 1-2.
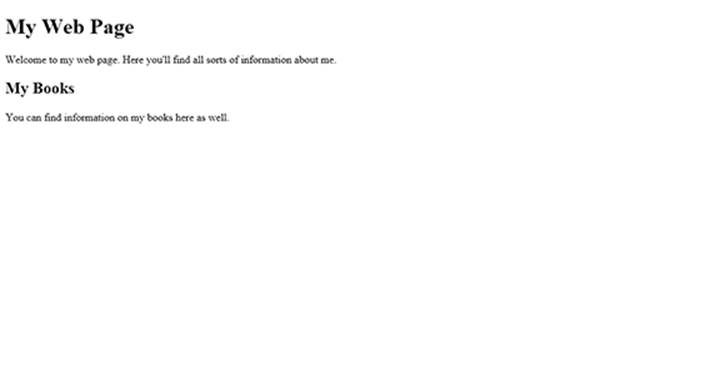
Figure 1-2: A simple web page with headings and paragraphs.
As you can see from Figure 1-2, the information on the page includes an <h1> element, followed by a paragraph, <p>. When the paragraph is closed with </p>, another heading element, this time an <h2>, is found. When the second heading is closed, </h2>, another paragraph is found.
It would've also been possible to substitute <div> elements in place of the paragraph elements on the page.
Creating your first page
Enough of us showing you HTML; it’s time for you to build a page. You can create HTML with any text editor; in fact, it often is better to use a plain text editor rather than an expensive HTML creation tool.
It’s important to note that you should use a text editor and not a word processor like Microsoft Word. Microsoft Word or a similar program like Pages on a Mac add all sorts of extra formatting information that get in the way of creating good HTML, even in their Save as HTML option.
Therefore, on Windows, use a program like Notepad. Even the Windows program Wordpad can place extra formatting information in it. When it comes to an HTML editor, the simpler the better.
The text editor included with Linux depends on the distribution of Linux you’re using. One of your humble book authors’ (that would be Steve) personal preference is for the command-line editor call Vi or Vim; a more graphical experience is typically found with a program called gEdit — the default text editor for Ubuntu.
Mac includes a program called TextEdit that can be used for creating plain text documents — but be careful: The TextEdit program will attempt to save files in Rich Text Format (RTF) by default. When creating or saving files with TextEdit, select Plain Text from the File Format drop-down menu.
This chapter focuses on the basics. Don’t worry that your web page doesn’t look stylish. The next chapter explains how to style your page with Cascading Style Sheets, or CSS.
Follow these steps to create your page:
1. Open your text editor.
See the preceding discussion about text editors. You want a text editor that allows plain text without extra information.
2. In the text editor, enter the following HTML.
<!doctype html>
<html>
<head>
<title>My First Web Page</title>
</head>
<body>
<h1>My web page!</h1>
<p>Hello world, welcome to my web site</p>
</body>
</html>
3. Save the file as firstpage.html.
Save the file exactly as named, using lowercase throughout the name. Later in the chapter, you can practice validating this file.
Apache, the web server used to send the files to your browser, is case sensitive for filenames, so sticking with lowercase will save you lots of headaches. Make sure the extension is .html and not .txt or another extension. Save the file to your document root, which is discussed in Book I. The document root location depends on how you've installed Apache and on what type of system you're using.
If you’re using a hosting provider, then this is the point where you upload the file to their system.
4. Open your web browser to load the page.
In the web browser, point to http://localhost/firstpage.html. When you do so, you'll see a page like Figure 1-3.
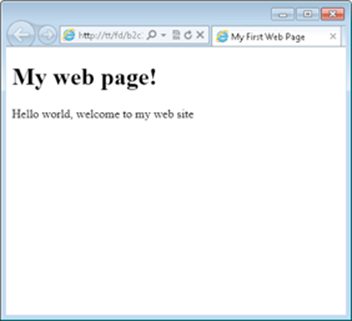
Figure 1-3: Your first page, viewed through a browser.
Choosing block-level or inline elements
When you’re considering which type of element to add to your page, think about whether you’d like it to extend across the width of the page.
![]() Block-level elements: Both <div> and <p> elements are known as block-level elements. A block-level element displays across the entire width of the page; nothing can appear next to or alongside a block-level element. Essentially, think of block-level elements as having a carriage return after them.
Block-level elements: Both <div> and <p> elements are known as block-level elements. A block-level element displays across the entire width of the page; nothing can appear next to or alongside a block-level element. Essentially, think of block-level elements as having a carriage return after them.
![]() Inline elements: Certain elements, primarily the <span> element, are considered inline elements, which means that other elements can appear next to them. In other words, inline elements don't have a carriage return after them.
Inline elements: Certain elements, primarily the <span> element, are considered inline elements, which means that other elements can appear next to them. In other words, inline elements don't have a carriage return after them.
Inserting line breaks and spaces
There are times when you create a page and want to insert a line break. To accomplish this action in a word processor, you simply press the Enter or Return key on the keyboard. Things are not so simple in HTML. No matter how many times you press Enter in an HTML document, the text will still display on the same line in the web browser. Consider the code in Listing 1-3. It’s the same HTML as Listing 1-2, but has five extra carriage returns inserted.
Listing 1-3: Trying to Insert Carriage Returns into HTML
<!doctype html>
<html>
<head>
<title>My First Document</title>
</head>
<body>
<h1>My Web Page</h1>
<p>Welcome to my web page. Here you'll find all sorts of information about me.</p>
<h2>My Books</h2>
<p>You can find information on my books here as well.</p>
</body>
</html>
When viewed through a web browser, the output is the same as Figure 1-2 earlier in the chapter. You see no blank lines between the first paragraph and the second heading.
The same thing happens to extra spaces in HTML. No matter how many times you press the space bar on the keyboard in a web document, the most you’ll ever get is a single space. (We tell you more about how to add spaces at the end of this section.)
The <br> tag is used to insert line breaks into web pages. Look at the code in Listing 1-4. Instead of using the Enter key (or Return on a Mac), the <br> tag is used to add carriage returns:
Listing 1-4: Using <br> for Line Breaks
<!doctype html>
<html>
<head>
<title>My First Document</title>
</head>
<body>
<h1>My Web Page</h1>
<p>Welcome to my web page. Here you'll find all sorts of information
about me.</p>
<br>
<br>
<br>
<br>
<br>
<h2>My Books</h2>
<p>You can find information on my books here as well.</p>
</body>
</html>
When viewed in a browser, the desired effect is shown, as illustrated in Figure 1-4.
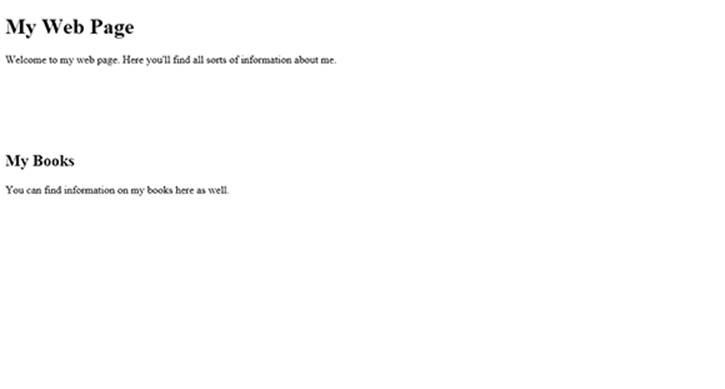
Figure 1-4: Using <br> to insert carriage returns.
You'll sometimes see an extra slash in some tags like <br> so they'll be written as <br />. This is a holdover from XHTML but is not necessary for HTML5.
While we’re on the subject, you’ll also notice that <br> doesn’t have a closing partner, like a </br>. That’s ok. You can use <br> as-is, without worrying about having to close it.
Adding spaces to HTML is accomplished with the entity sometimes written as . However, there are better ways to accomplish spacing in HTML, chiefly through the use of Cascading Style Sheets (CSS). Therefore, the use of the entity won't be covered in favor of the more common and more widely supported method through CSS — the topic in Chapter 2 of this minibook.
Making your document easier to maintain
Developers frequently use comments to note behind-the-scenes information about the page or about their code, and comments don’t display on the web page. For example, a comment in a web page might be something like “I added this on 10/19/2012” or “Added in support of our sales initiative.” If you visit the web page, you can see those comments only by looking at the page’s HTML file.
HTML comments are opened with this syntax:
<!--
HTML comments are closed with this syntax:
-->
Everything that appears from the beginning <!-- to the first --> is considered part of the comment. Listing 1-5 contains an example HTML document with a comment.
Listing 1-5: Adding an HTML Comment
<!doctype html>
<html>
<head>
<title>My First Document</title>
</head>
<body>
<h1>My Web Page</h1>
<p>Welcome to my web page. Here you'll find all sorts of information
about me.</p>
<!-- Adding information about my books 10/1/2012 -->
<h2>My Books</h2>
<p>You can find information on my books here as well.</p>
</body>
</html>
 HTML comments are visible by the world and should never be used to store any information considered privileged or private.
HTML comments can span multiple lines, as in the example in Listing 1-6:
Listing 1-6: A Multi-line Comment
<!doctype html>
<html>
<head>
<title>My First Document</title>
</head>
<body>
<h1>My Web Page</h1>
<p>Welcome to my web page. Here you'll find all sorts of information
about me.</p>
<!--
Adding information about my books
Date: 10/1/2012
-->
<h2>My Books</h2>
<p>You can find information on my books here as well.</p>
</body>
</html>
In this comment, you can see that the actual text of the comment is indented, which brings up another important point: It’s helpful to use indentation when creating documents. Documents are easier to read and maintain later when elements are indented, so that way you can clearly see visually which elements are “inside” of which other elements.
Adding lists and tables
Lists and tables help to represent certain types of information. For example, a list of trees in Steve’s yard is best represented with a list like this:
Pine
Oak
Elm
But if he wants to include more information about the trees, a table is a better format:
|
Tree Type |
Description |
|
Pine |
A common tree in my yard. |
|
Oak |
There are a few oaks in my yard. |
|
Elm |
I have one Elm in my yard but it’s too close to the house. |
HTML has tags to create both lists and tables. Table 1-2 describes a variety of such elements.
Table 1-2 Common List and Table Elements in HTML
|
Element |
Type |
Description |
|
<li> |
List Item |
Used in conjunction with <ul> or <ol> to create lists of information. |
|
<ol> |
Order List |
An ordered list of information, used in conjunction with <li>. |
|
<table> |
Table |
Used with <tr>, <td>, and other elements to create a table for presenting information. |
|
<td> |
Table Cell |
Creates a cell in a table row. |
|
<th> |
Table Header |
A table cell that’s a heading. |
|
<tr> |
Table Row |
Creates a row of a table. |
|
<ul> |
Unordered List |
Related to <ol> and <li> to create lists of information. |
When building a list, you have two choices of the type of list to create: an ordered list or an unordered list. Ordered lists are used for things like making an outline, while unordered lists make up pretty much every other kind of list.
Listing 1-7 shows the HTML used to create a standard unordered list.
Listing 1-7: Creating an Unordered List
<!doctype html>
<html>
<head>
<title>An unordered list</title>
</head>
<body>
<ul>
<li>Pine</li>
<li>Oak</li>
<li>Elm</li>
</ul>
</body>
</html>
When viewed in a browser, this HTML results in a page like that in Figure 1-5.
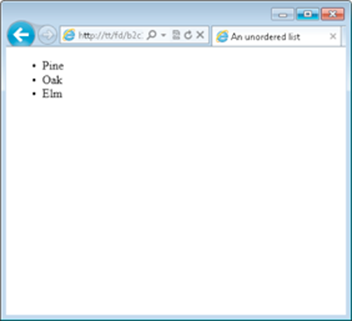
Figure 1-5: An unordered list.
The unordered list created in Listing 1-7 uses the default styling for the list, which adds bullets next to each item. You can also change the style of this bullet or not include one at all using CSS. You learn more about CSS in the next chapter.
Creating an ordered list means simply changing the <ul> element to <ol>. Doing so looks like this:
<ol>
<li>Pine</li>
<li>Oak</li>
<li>Elm</li>
</ol>
When viewed in a browser, the bullets from the preceding example are replaced with numbers, as in Figure 1-6.
Other types of lists, such as definition lists, exist but aren’t covered here.
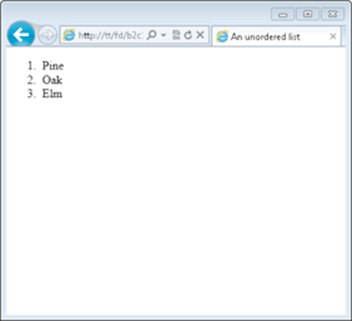
Figure 1-6: An ordered list.
Practicing Creating a Table
It’s time to create a page with a table. Follow these steps:
1. Open your text editor.
See the preceding exercise for more information on text editors.
2. In the text editor, create a new text document.
Most text editors will open with a blank or empty document to begin with. If you have anything in the document, clear it out before continuing.
3. Enter the following HTML:
<!doctype html>
<html>
<head>
<title>My First Web Page</title>
</head>
<body>
<h1>My Table</h1>
<table>
<tr>
<th>Airport Code</th>
<th>Common Name/City</th>
</tr>
<tr>
<td>CWA</td>
<td>Central Wisconsin Airport</td>
</tr>
<tr>
<td>ORD</td>
<td>Chicago O'Hare</td>
</tr>
<tr>
<td>LHR</td>
<td>London Heathrow</td>
</tr>
</table>
</body>
</htm>
4. Save the file as table.html.
Save the file, as you did for the preceding exercise, with a .html extension. The file should be saved in your document root. Refer to the preceding exercise or Book I for more information on finding your document root if you haven't already found it for that exercise.
5. View the file in your browser.
Open your web browser and type http://localhost/table.html into the address bar. Doing so will show a page like the one in Figure 1-7.
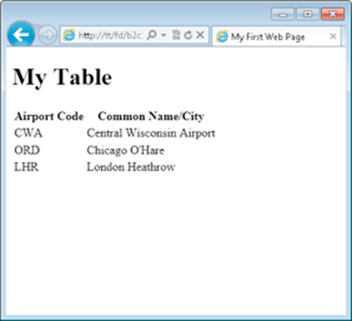
Figure 1-7: The table you created for this exercise.
Notice that the table doesn’t have any borders around it. If you’d like to add borders, keep working through this exercise. Otherwise, continue to the next section.
6. Open table.html in your text editor.
If you closed your text editor, open it again and load table.html.
7. Change the code in table.html to the following:
<!doctype html>
<html>
<head>
<title>My First Web Page</title>
</head>
<body>
<h1>My Table</h1>
<table border="1">
<tr>
<th>Airport Code</th>
<th>Common Name/City</th>
</tr>
<tr>
<td>CWA</td>
<td>Central Wisconsin Airport</td>
</tr>
<tr>
<td>ORD</td>
<td>Chicago O'Hare</td>
</tr>
<tr>
<td>LHR</td>
<td>London Heathrow</td>
</tr>
</table>
</body>
</html>
Note that the only change is to add a space and then border="1" within the <table> element.
8. Reload table.html in your browser.
If you closed your browser, reopen it and go to http://localhost/table.html. If your browser is still open, press Ctrl+R to refresh the page (Command+R on a Mac). You now see a border around the table, as in Figure 1-8.
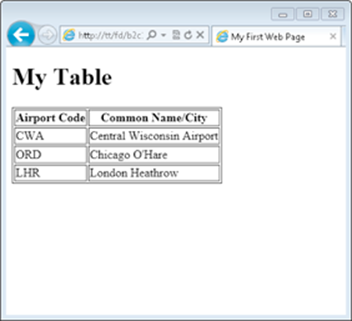
Figure 1-8: A table with borders around each cell.
This is a rather primitive way to add a border to a table. A better way to accomplish this task is by using CSS, which you learned about briefly in Book I. Chapter 2 of this minibook covers CSS in much more detail, too.
When you added border="1" to the <table> element, you added something called an attribute. An attribute helps to further describe or define the element or provides additional details about how that element should behave.
Including Links and Images on Your Web Page
What would the web be without links — and images too? Not much of web at all. Links are the items that you click on inside of web pages to connect to or load other pages, and when we talk about images, we mean both illustrations and photos. This section looks at how to add links and also images to your web page.
Adding links
Links are added with the <a>, or anchor element. The href attribute tells the anchor element the destination for the link. The destination can be just about anything, from another web page on the same site, to a different site, to a document or file, to another location within the same web page. The link itself can be added to just about anything on the page. For example, you might link each of the trees mentioned in the previous section to articles about each of those types of trees.
When something is linked, the browser typically gives visual feedback that there's a link by highlighting and underlining the linked area. You'll see an example of this shortly. Like other HTML elements, the <a> element has a corresponding closing </a> tag that is used to tell the browser when to stop highlighting and underlining the link.
Linking to other pages
Linking to other pages, whether on the same site or at a different site, is accomplished in the same way. For example, look at the following HTML:
<p>Here's a link to <a href="http://www.braingia.org">Steve Suehring's site</a></p>
This line uses a paragraph element <p> to create a sentence, "Here's a link to Steve Suehring's site." This being the web, you decide to actually provide a link so that visitors can click on certain words and be transported to that page. You do so with the <a> element along with the hrefattribute. In this case, the <a> element looks like this:
<a href="http://www.braingia.org">
The href attribute points to the URL http://www.braingia.org and is enclosed in quotation marks. The text that will be highlighted then appears, followed by the closing </a> tag.
Here’s an exercise for implementing this link.
1. Open your text editor.
You use your text editor to create a new file, so there should be nothing in the text editor except a blank document or file.
2. In the text editor, place the following HTML:
<!doctype html>
<html>
<head>
<title>Link</title>
</head>
<body>
<p>Here's a link to <a href="http://www.braingia.org">Steve Suehring's site</a></p>
</body>
</html>
3. Save the file as link.html.
The file should be saved to your document root with the name link.html.
4. Open your browser and view the page.
Open your web browser and point to http://localhost/link.html by entering that URL into the address bar. You'll see a page like that in Figure 1-9.
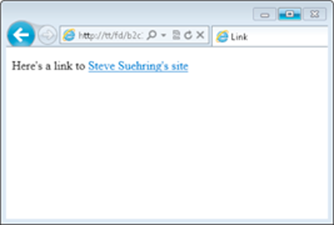
Figure 1-9: A page with a link.
Always close <a> elements with a corresponding closing </a> tag. A frequent mistake is to leave the <a> element open, resulting in all the text that follows to be highlighted as a link.
The example and exercise show how to link to a page on a different website. Creating a link to a page on the same site is accomplished in the same manner, but rather than including the Uniform Resource Identifier (URI) scheme and the hostname (the http://www.braingia.org part from this example), you can just link to the page itself.
If you've been following along with previous exercises, then you should have a page called table.html. Here's HTML to create a link to table.html. The preceding exercise's HTML is included so that you can see the overall context for the link:
<!doctype html>
<html>
<head>
<title>Link</title>
</head>
<body>
<p>A link to <a href="table.html">the table example</a></p>
</body>
</html>
Like before, the link is contained within a <p> element but note the href attribute now points merely to table.html.
Avoid spaces in filenames and in web URLs in general. Spaces are generally not friendly to URLs, in filenames, or in images. Though they can be worked around, you’ll have much more success if you always simply avoid spaces when naming things for the web.
Understanding absolute versus relative links
The link shown in the preceding example is called a relative link because it does not begin with either the Uniform Resource Identifier (URI) scheme (http://) or a beginning front slash (/). A relative link assumes that the target (table.html in the example) is in the same directory or folder as the document or page from which it's linked. In the case of the example, a relative link works because the current page, link.html, and the page being linked, table.html, both exist in the document root.
If both pages were not in the same directory (in other words, if table.html was in a folder called tables in the document root and the link.html file was in a folder called links in the document root), then you would need to create an absolute link. An absolute link tells the server exactly where to look to find the target. For example, an absolute link might look like /tables/table.html. This link tells the server that it needs to begin looking in its document root for a directory called tables and that it should then find a file called tables.html in the tables directory.
Use absolute links when you need to provide exact or absolute references to the target being linked. Use relative links when the resource being linked will always be found in the same place relative to the page linking to it. If the location of the page or the target changes, then relative links will stop working.
Linking within a page
Sometimes you want to link within the same page. You might do this on a particularly long page, where you have a table of contents at the top and then the full article lower down in the page.
Creating withinpage links uses the same <a> element that you've seen, this time with the name attribute. Listing 1-8 shows HTML to create a within-page anchor.
Listing 1-8: An In-Page Anchor
<!doctype html>
<html>
<head>
<title>Link</title>
</head>
<body>
<ul>
<li><a href="#pine">Pine</a></li>
<li><a href="#oak">Oak</a></li>
<li><a href="#elm">Elm</a></li>
</ul>
<p><a name="pine">Pine trees are abundant in my yard.</a><p>
<p><a name="oak">There are a few oak trees in my yard.</a><p>
<p><a name="elm">There's one elm in my yard.</a><p>
</body>
</html>
In Listing 1-8, the href tags added to each of the list items use a pound or hash sign (#). This is the key used to tell the browser that the resource will be found on the same page. Then later on in the HTML you see another <a> element, this time using the name attribute. That name attribute corresponds to each of the href attributes from earlier in the page.
That’s it! There’s nothing more to adding in-page links. You merely need to use the pound sign to indicate that the resource is found later on the page and then use the name attribute to make another element match that.
Opening links in a new window
Sometimes you want to make a link open in a new tab or a new window. When a visitor clicks a link that’s defined in such a way, the browser will open a new tab and load the linked resource in that new tab. The existing site will still be open in the visitor’s browser, too.
Don’t make every link open in a new window. You should do so only where it makes sense, as might be the case where a visitor is in the middle of a long process on your website and needs to link to reference another resource or site, like a directory of ZIP codes or a terms of service agreement. Also, whether the link opens in a new tab or a new window is dependent on the browser; you can’t control it.
This can be done by adding the target attribute to your <a> element with a special value, _blank. For example, an earlier example showed how to create a link to Steve's website, www.braingia.org. Recall that the link looked like this:
<a href="http://www.braingia.org">Steve Suehring's site</a>
To make this link open in a new window, you add the target="_blank" attribute/value pair to the element, so it looks like this:
<a href="http://www.braingia.org" target="_blank">Steve Suehring's site</a>
You can try this out by opening the link.html file from the earlier exercise and adding target="_blank" as shown. Note the use of the underscore preceding the word blank. When you save the file and reload that page (Ctrl+R or Command+R), the link won't look any different. However, clicking the link will open a new tab (or new window, depending on your browser and configuration).
Adding images
Images, such as photos or graphics, enhance the visual appeal of a web page. Images are usually embedded in a page, such as shown in Figure 1-10, where a photo of the cover of another of Steve’s books, MySQL Bible (John Wiley & Sons, Inc.), is shown.
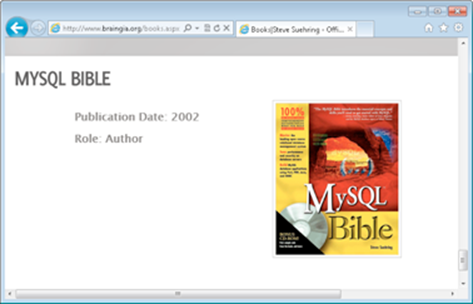
Figure 1-10: An image on a web page.
You can include images from anywhere, assuming that you have the legal rights to do so. In other words, you can store the image on your web server or you can include an image stored on someone else’s web server. (But we repeat: First, make sure you don’t violate any copyright!)
There’s also another, special type of image, called a background image. Background images provide the background for the page itself. Chapter 2 of this minibook covers background images.
Referencing the image location
Images are added with the <img> element. Just as with the <a> element, the <img> element uses an attribute to tell the browser more information about itself. The src attribute is used to tell the browser where to find the image. Earlier, in Figure 1-10, you see an image of a book cover. The HTML to bring that image into the page looks like this:
<img src="images/books_mysqlbible.gif">
As you can see, the <img> element adds the src attribute, which then references where to find the image on the web server.
You might notice that the <img> element doesn't have a closing </img> tag. That's because this element doesn't have its own content, unlike the <p> and <a> elements — which both need content to go within them and therefore need to be closed. You may sometimes see an element like <img> closed with /> instead of just >, as in the example. Both are acceptable and valid ways to close this type of element.
The <img> element should always have an alt attribute. The alt attribute tells search engines and assistive technologies about the image being used. When used with an <img> element, the alt attribute looks like this:
<img src="images/books_mysqlbible.gif" alt="MySQL Bible">
You should use a short description as the contents of the alt attribute. Using something like "MySQL Bible was a great book and everyone should've purchased one" doesn't describe the image, but "MySQL Bible" does.
Choosing good web images
When choosing an image for the web you need to look at more than just making sure no one blinked when the photo was taken. You should also consider the image’s height and width, the size of the file, and its format. Web browsers can view images formatted in numerous formats, including JPG, GIF, and PNG, as well as several others.
The height and width of the image are up to you and depend on the needs of your page. For example, Steve needed a special sized file in order to display the MySQL Bible book cover. He used image manipulation software in order to resize the image for his needs. Many image manipulation and image processing software programs are available. Adobe Photoshop and Gimp are among the most popular ones.
File size is arguably one of the most important aspects for your consideration when choosing an image. When you include large images, such as those taken at the high-quality setting with your digital camera, visitors have to download the file, which can take an extraordinarily long time depending on the speed of the visitors’ connection. If they’re visiting from a dial-up modem or slower connection, then an image that’s 4 megabytes (MB) may take 20 minutes to load! This is also true with today’s mobile devices, on which the speeds may be slower and a visitor using such a device may have to pay data download fees.
To get around this, you can resize your images using the aforementioned software. Resizing images to under 100 kilobytes (KB) is important. Another important aspect to consider is the sum of all images on the page. For example, if you have 15 images at 100KB each, then you’re requiring the visitor to download 1.5MB worth of images — which is likely too much for many visitors. If the page seems slow to load, they may go elsewhere rather than wait.
When you’re choosing an image format, know that if you choose one of the three formats mentioned earlier (JPG, GIF, and PNG), you ensure that the widest possible audience can view the image without needing special software to do so.
Keep the sum of all images in mind when sizing the images for your page so that the page downloads faster for the visitor.
Creating a page with an image
It’s time to create a page with an image so that you can see how and where an image fits within the larger whole of an HTML page. Follow these steps.
1. Open your text editor.
See the previous discussion about text editors.
2. In the text editor, enter the following HTML.
<!doctype html>
<html>
<head>
<title>A snowy picture</title>
</head>
<body>
<h1>A snowy picture</h1>
<p><img src="snow.jpg" alt="Early November Snow"></p>
</body>
</html>
When you create this HTML you need to use a photo or other picture of your own or you can use the snow.jpg file included in the companion content of this book. Regardless of the picture you choose, you need to place the file in the document root of the web server (discussed in Book I). Also, make sure that case (uppercase and lowercase) for the filename matches what you put in the src attribute. In other words, if your picture is called TheKids.JPG, then the src attribute should be "TheKids.JPG".
3. Save the file as image.html.
Save the file exactly as named, using lowercase throughout the name. The file should be saved to your document root, which is discussed in Book I. The document root location depends on how you’ve installed Apache and on what type of system you’re using. If you’re using a hosting provider, then this is the point where you upload the file to that host provider’s system.
4. Open your web browser to load the page.
In the web browser, point to http://localhost/image.html. When you do so, you'll see a page like Figure 1-11.
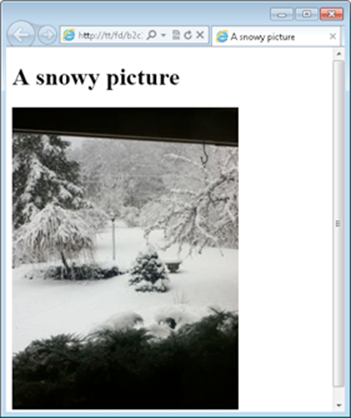
Figure 1-11: Adding an image to a page.
This HTML used an <img> element to load a photo called snow.jpg from the current directory. In other words, snow.jpg was in the same directory as the image.html page on the web server.
 Avoid spaces in image filenames, just as you would for regular files and other URLs. Remember also that URLs, files, and images are case sensitive.
Writing Valid HTML
When you create a web page with HTML, there are certain rules to follow in order to make sure that web browsers can read and display the page correctly. HTML and its rules are discussed in the first minibook included in this guide. The current version of the HTML specification is HTML version 5, known simply as HTML5.
The process of validating a page means that a specialized website examines the HTML code that you write and compares it to the specification for that version of HTML. In the case of the HTML that you’re writing for this book you are using HTML5.
The website used to validate HTML is called the W3C Markup Validation Service (frequently called the W3C Validator) and is operated by the World Wide Web Consortium (W3C). The W3C Validator is found at http://validator.w3.org and is free to use. Figure 1-12 shows the W3C Validator.
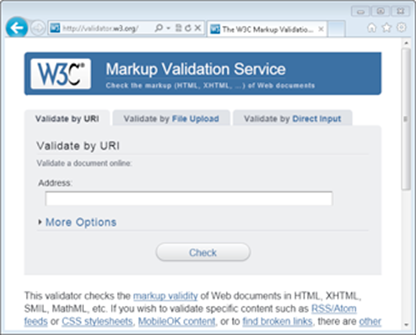
Figure 1-12: The W3C Markup Validation Service, sometimes simply called the Validator.
Validate your HTML in one of three ways:
![]() Providing a URL: You can enter a URL into the Validator and it will automatically retrieve the HTML at that URL and attempt to validate it. In order for the Validator to retrieve your HTML using this method, the page needs to be available to the public. This is usually not the case when you’ve installed a web server on your computer, as discussed in this book. If you’re using an external hosting provider, then your site and pages may be available to the Internet. In that case, you can enter the URL in the “Validate by URI” address box.
Providing a URL: You can enter a URL into the Validator and it will automatically retrieve the HTML at that URL and attempt to validate it. In order for the Validator to retrieve your HTML using this method, the page needs to be available to the public. This is usually not the case when you’ve installed a web server on your computer, as discussed in this book. If you’re using an external hosting provider, then your site and pages may be available to the Internet. In that case, you can enter the URL in the “Validate by URI” address box.
![]() Uploading a file: You can upload a file using the “Validate by File Upload” option. Using this method, you choose a file on your computer. That file is then uploaded to the Validator.
Uploading a file: You can upload a file using the “Validate by File Upload” option. Using this method, you choose a file on your computer. That file is then uploaded to the Validator.
![]() Pasting HTML into the Validator: This means copying the HTML from your text editor and pasting it into the “Validate by Direct Input” tab in the Validator. This option is typically the fastest and easiest method and it’s the one that we show in this section.
Pasting HTML into the Validator: This means copying the HTML from your text editor and pasting it into the “Validate by Direct Input” tab in the Validator. This option is typically the fastest and easiest method and it’s the one that we show in this section.
Validating Your HTML
If you’ve followed the exercises in this chapter, then you’ve built some HTML. The next exercise uses the W3C Validator to make sure that the HTML you’ve written is valid according to the HTML5 specification. Follow these steps:
1. Open firstpage.html using your text editor.
This page was the first one you created in this chapter. However, if you skipped that exercise, open any one of the HTML files that you created in this chapter.
2. Highlight/select all the HTML in the open file.
Use your mouse or pointing device to highlight all the HTML or press Ctrl+A on Windows or Command+A on Mac.
3. Copy the HTML to your clipboard.
Select Copy (found in the Edit menu in most text editors) or press Ctrl+C on Windows or Command+C on Mac to copy the highlighted HTML to the clipboard.
4. Open your web browser and navigate to the W3C Validator.
With the browser open, type http://validator.w3.org in the address or location bar in the browser and press Enter to go to the Validator.
5. Select Validate by Direct Input.
The Validate by Direct Input tab will be used to paste in the code in your clipboard.
6. Paste the HTML into the Validator.
Press Ctrl+V on Windows or Command+V on Mac to paste the HTML from the clipboard into the Enter the Markup to Validate box on the Validator page. If you’re using the HTML from firstpage.html, your screen should look similar to that in Figure 1-13.
7. Click Check.
Click the Check button on the Validator page to run the validation of your HTML. You should receive a page similar to that in Figure 1-14.

Figure 1-13: Pasting HTML into the Validator.
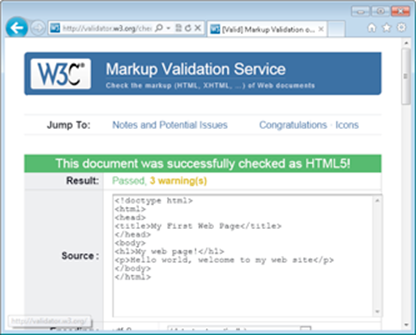
Figure 1-14: A valid HTML document passed through the Validator.
Notice the three warnings in this validation. Scrolling down reveals that one of the warnings is that the HTML5 validator is actually experimental at this time, though that may change by the time you read this. The other two warnings are related to language settings.
 It's good practice to include the character encoding, which helps the browser determine how to read the document, including what language is used for the HTML and the page. See http://www.w3.org/International/tutorials/tutorial-char-enc/#Slide0250 for more information on character encoding.
All materials on the site are licensed Creative Commons Attribution-Sharealike 3.0 Unported CC BY-SA 3.0 & GNU Free Documentation License (GFDL)
If you are the copyright holder of any material contained on our site and intend to remove it, please contact our site administrator for approval.
© 2016-2026 All site design rights belong to S.Y.A.