Learning PHP, MySQL, JavaScript, CSS & HTML5 (2014)
Chapter 10. Accessing MySQL Using PHP
If you worked through the previous chapters, you’re proficient in using both MySQL and PHP. In this chapter, you will learn how to integrate the two by using PHP’s built-in functions to access MySQL.
Querying a MySQL Database with PHP
The reason for using PHP as an interface to MySQL is to format the results of SQL queries in a form visible in a web page. As long as you can log into your MySQL installation using your username and password, you can also do so from PHP. However, instead of using MySQL’s command line to enter instructions and view output, you will create query strings that are passed to MySQL. When MySQL returns its response, it will come as a data structure that PHP can recognize instead of the formatted output you see when you work on the command line. Further PHP commands can retrieve the data and format it for the web page.
NOTE
To get you started, in this chapter I use the standard, procedural mysql function calls, so that you’ll be up and running quickly, and able to maintain older PHP code. However, the new object-oriented mysqli functions (the i stands for improved) are becoming the recommended way to interface with MySQL from PHP, so in the following chapter I’ll show you how to use these too (or instead, because the old functions have become deprecated and could be removed from PHP at some point).
The Process
The process of using MySQL with PHP is:
1. Connect to MySQL.
2. Select the database to use.
3. Build a query string.
4. Perform the query.
5. Retrieve the results and output them to a web page.
6. Repeat Steps 3 to 5 until all desired data has been retrieved.
7. Disconnect from MySQL.
We’ll work through these sections in turn, but first it’s important to set up your login details in a secure manner so people snooping around on your system have trouble getting access to your database.
Creating a Login File
Most websites developed with PHP contain multiple program files that will require access to MySQL and will thus need the login and password details. Therefore, it’s sensible to create a single file to store these and then include that file wherever it’s needed. Example 10-1 shows such a file, which I’ve called login.php. Type the example, replacing placeholder values (such as username) with the actual values you use for your MySQL database, and save it to the web development directory you set up in Chapter 2. We’ll be making use of the file shortly. The hostnamelocalhost should work as long as you’re using a MySQL database on your local system, and the database publications should work if you’re typing the examples I’ve used so far.
Example 10-1. The login.php file
<?php // login.php
$db_hostname = 'localhost';
$db_database = 'publications';
$db_username = 'username';
$db_password = 'password';
?>
The enclosing <?php and ?> tags are especially important for the login.php file in Example 10-1, because they mean that the lines between can be interpreted only as PHP code. If you were to leave them out and someone were to call up the file directly from your website, it would display as text and reveal your secrets. But, with the tags in place, all that person will see is a blank page. The file will correctly include in your other PHP files.
The $db_hostname variable will tell PHP which computer to use when connecting to a database. This is required, because you can access MySQL databases on any computer connected to your PHP installation, and that potentially includes any host anywhere on the Web. However, the examples in this chapter will be working on the local server. So, in place of specifying a domain such as mysql.myserver.com, you can just use the word localhost (or the IP address 127.0.0.1).
The database we’ll be using, $db_database, is the one called publications, which you probably created in Chapter 8, or the one you were provided with by your server administrator (in which case you have to modify login.php accordingly).
The variables $db_username and $db_password should be set to the username and password that you have been using with MySQL.
NOTE
Another benefit of keeping these login details in a single place is that you can change your password as frequently as you like and there will be only one file to update when you do, no matter how many PHP files access MySQL.
Connecting to MySQL
Now that you have the login.php file saved, you can include it in any PHP files that will need to access the database by using the require_once statement. This is preferable to an include statement, as it will generate a fatal error if the file is not found. And believe me, not finding the file containing the login details to your database is a fatal error.
Also, using require_once instead of require means that the file will be read in only when it has not previously been included, which prevents wasteful duplicate disk accesses. Example 10-2 shows the code to use.
Example 10-2. Connecting to a MySQL server
<?php
require_once 'login.php';
$db_server = mysql_connect($db_hostname, $db_username, $db_password);
if (!$db_server) die("Unable to connect to MySQL: " . mysql_error());
?>
This example runs PHP’s mysql_connect function, which requires three parameters: the hostname, username, and password of a MySQL server. Upon success it returns an identifier to the server; otherwise, FALSE is returned. Notice that the second line uses an if statement with the diefunction, which does what it sounds like and quits from PHP with an error message if $db_server is not TRUE.
The die message explains that it was not possible to connect to the MySQL database, and—to help identify why this happened—includes a call to the mysql_error function. This function outputs the error text from the last called MySQL function.
The database server pointer $db_server will be used in some of the following examples to identify the MySQL server to be queried. By using identifiers this way, we can connect to and access multiple MySQL servers from a single PHP program.
NOTE
The die function is great for when you are developing PHP code, but of course you will want more user-friendly error messages on a production server. In this case you won’t abort your PHP program, but format a message that will be displayed when the program exits normally, such as:
function mysql_fatal_error($msg)
{
$msg2 = mysql_error();
echo <<< _END
We are sorry, but it was not possible to complete
the requested task. The error message we got was:
<p>$msg: $msg2</p>
Please click the back button on your browser
and try again. If you are still having problems,
please <a href="mailto:admin@server.com">email
our administrator</a>. Thank you.
_END;
}
Selecting a database
Having successfully connected to MySQL, you are now ready to select the database that you will be using. Example 10-3 shows how to do this.
Example 10-3. Selecting a database
<?php
mysql_select_db($db_database)
or die("Unable to select database: " . mysql_error());
?>
The command to select the database is mysql_select_db. Pass it the name of the database you want and the server to which you connected. As with the previous example, a die statement has been included to provide an error message and explanation, should the selection fail—the only difference being that there is no need to retain the return value from the mysql_select_db function, as it simply returns either TRUE or FALSE. Therefore the PHP or statement was used, which means “if the previous command failed, do the following.” Note that for the or to work, there must be no semicolon at the end of the first line of code.
Building and executing a query
Sending a query to MySQL from PHP is as simple as issuing it using the mysql_query function. Example 10-4 shows you how to use it.
Example 10-4. Querying a database
<?php
$query = "SELECT * FROM classics";
$result = mysql_query($query);
if (!$result) die ("Database access failed: " . mysql_error());
?>
First, the variable $query is set to the query to be made. In this case, it is asking to see all rows in the table classics. Note that, unlike with MySQL’s command line, no semicolon is required at the tail of the query, because the mysql_query function is used to issue a complete query; it cannot be used for queries sent in multiple parts, one at a time. Therefore, MySQL knows the query is complete and doesn’t look for a semicolon.
This function returns a result that we place in the variable $result. Having used MySQL at the command line, you might think that the contents of $result will be the same as the result returned from a command-line query, with horizontal and vertical lines, and so on. However, this is not the case with the result returned to PHP. Instead, upon success, $result will contain a resource that can be used to extract the results of the query. You’ll see how to extract the data in the next section. Upon failure, $result contains FALSE. So the example finishes by checking $result. If it’s FALSE, it means that there was an error, and the die command is executed.
Fetching a result
Once you have a resource returned from a mysql_query function, you can use it to retrieve the data you want. The simplest way to do this is to fetch the cells you want, one at a time, using the mysql_result function. Example 10-5 combines and extends the previous examples into a program that you can type and run yourself to retrieve the returned results. I suggest that you save it in the same folder as login.php and give it the name query.php.
Example 10-5. Fetching results one cell at a time
<?php // query.php
require_once 'login.php';
$db_server = mysql_connect($db_hostname, $db_username, $db_password);
if (!$db_server) die("Unable to connect to MySQL: " . mysql_error());
mysql_select_db($db_database)
or die("Unable to select database: " . mysql_error());
$query = "SELECT * FROM classics";
$result = mysql_query($query);
if (!$result) die ("Database access failed: " . mysql_error());
$rows = mysql_num_rows($result);
for ($j = 0 ; $j < $rows ; ++$j)
{
echo 'Author: ' . mysql_result($result,$j,'author') . '<br>';
echo 'Title: ' . mysql_result($result,$j,'title') . '<br>';
echo 'Category: ' . mysql_result($result,$j,'category') . '<br>';
echo 'Year: ' . mysql_result($result,$j,'year') . '<br>';
echo 'ISBN: ' . mysql_result($result,$j,'isbn') . '<br><br>';
}
?>
The final 10 lines of code are the new ones, so let’s look at them. They start by setting the variable $rows to the value returned by a call to mysql_num_rows. This function reports the number of rows returned by a query.
Armed with the row count, we enter a for loop that extracts each cell of data from each row using the mysql_result function. The parameters supplied to this function are the resource $result, which was returned by mysql_query, the row number $j, and the name of the column from which to extract the data.
The results from each call to mysql_result are then incorporated within echo statements to display one field per line, with an additional line feed between rows. Figure 10-1 shows the result of running this program.
As you may recall, we populated the classics table with five rows in Chapter 8, and indeed, five rows of data are returned by query.php. But, as it stands, this code is actually extremely inefficient and slow, because a total of 25 calls are made to the function mysql_result in order to retrieve all the data, a single cell at a time. Luckily, there is a much better way of retrieving the data, which is getting a single row at a time using the mysql_fetch_row function.
NOTE
In Chapter 9, I talked about First, Second, and Third Normal Form, so you may have now noticed that the classics table doesn’t satisfy these, because both author and book details are included within the same table. That’s because we created this table before encountering normalization. However, for the purposes of illustrating access to MySQL from PHP, reusing this table avoids the hassle of typing in a new set of test data, so we’ll stick with it for the time being.
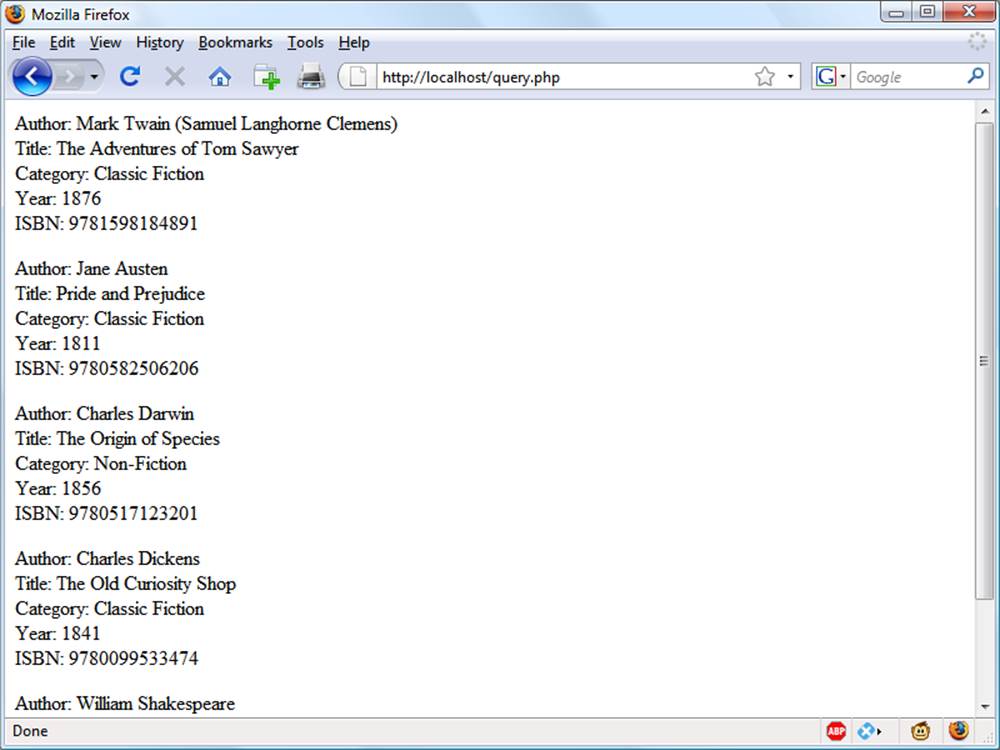
Figure 10-1. The output from the query.php program in Example 10-5
Fetching a row
It was important to show how you can fetch a single cell of data from MySQL, but now let’s look at a much more efficient method. Replace the for loop of query.php (in Example 10-5) with the new loop in Example 10-6, and you will find that you get exactly the same result that was displayed in Figure 10-1.
Example 10-6. Replacement for loop for fetching results one row at a time
<?php
for ($j = 0 ; $j < $rows ; ++$j)
{
$row = mysql_fetch_row($result);
echo 'Author: ' . $row[0] . '<br>';
echo 'Title: ' . $row[1] . '<br>';
echo 'Category: ' . $row[2] . '<br>';
echo 'Year: ' . $row[3] . '<br>';
echo 'ISBN: ' . $row[4] . '<br><br>';
}
?>
In this modified code, only one-fifth of the calls are made to a MySQL-calling function (a full 80% less), because each row is fetched in its entirety via the mysql_fetch_row function. This returns a single row of data in an array, which is then assigned to the variable $row.
All that’s necessary, then, is to reference each element of the array $row in turn (starting at an offset of 0). Therefore $row[0] contains the Author data, $row[1] the Title, and so on, because each column is placed in the array in the order in which it appears in the MySQL table. Also, by using mysql_fetch_row instead of mysql_result, you use substantially less PHP code and achieve much faster execution time, due to simply referencing each item of data by offset rather than by name.
Closing a connection
When you have finished using a database, you should close the connection. You do so by issuing the command in Example 10-7.
Example 10-7. Closing a MySQL server connection
<?php
mysql_close($db_server);
?>
We have to pass the identifier returned by mysql_connect back in Example 10-2, which we stored in the variable $db_server.
NOTE
All database connections are automatically closed when PHP exits, so it doesn’t matter that the connection wasn’t closed in Example 10-5. But in longer programs, where you may continually open and close database connections, you are strongly advised to close each one as soon as you’re finished accessing it.
A Practical Example
It’s time to write our first example of inserting data in and deleting it from a MySQL table using PHP. I recommend that you type Example 10-8 and save it to your web development directory using the filename sqltest.php. You can see an example of the program’s output in Figure 10-2.
NOTE
Example 10-8 creates a standard HTML form. Chapter 12 explains forms in detail, but in this chapter I take form handling for granted and just deal with database interaction.
Example 10-8. Inserting and deleting using sqltest.php
<?php // sqltest.php
require_once 'login.php';
$db_server = mysql_connect($db_hostname, $db_username, $db_password);
if (!$db_server) die("Unable to connect to MySQL: " . mysql_error());
mysql_select_db($db_database, $db_server)
or die("Unable to select database: " . mysql_error());
if (isset($_POST['delete']) && isset($_POST['isbn']))
{
$isbn = get_post('isbn');
$query = "DELETE FROM classics WHERE isbn='$isbn'";
if (!mysql_query($query, $db_server))
echo "DELETE failed: $query<br>" .
mysql_error() . "<br><br>";
}
if (isset($_POST['author']) &&
isset($_POST['title']) &&
isset($_POST['category']) &&
isset($_POST['year']) &&
isset($_POST['isbn']))
{
$author = get_post('author');
$title = get_post('title');
$category = get_post('category');
$year = get_post('year');
$isbn = get_post('isbn');
$query = "INSERT INTO classics VALUES" .
"('$author', '$title', '$category', '$year', '$isbn')";
if (!mysql_query($query, $db_server))
echo "INSERT failed: $query<br>" .
mysql_error() . "<br><br>";
}
echo <<<_END
<form action="sqltest.php" method="post"><pre>
Author <input type="text" name="author">
Title <input type="text" name="title">
Category <input type="text" name="category">
Year <input type="text" name="year">
ISBN <input type="text" name="isbn">
<input type="submit" value="ADD RECORD">
</pre></form>
_END;
$query = "SELECT * FROM classics";
$result = mysql_query($query);
if (!$result) die ("Database access failed: " . mysql_error());
$rows = mysql_num_rows($result);
for ($j = 0 ; $j < $rows ; ++$j)
{
$row = mysql_fetch_row($result);
echo <<<_END
<pre>
Author $row[0]
Title $row[1]
Category $row[2]
Year $row[3]
ISBN $row[4]
</pre>
<form action="sqltest.php" method="post">
<input type="hidden" name="delete" value="yes">
<input type="hidden" name="isbn" value="$row[4]">
<input type="submit" value="DELETE RECORD"></form>
_END;
}
mysql_close($db_server);
function get_post($var)
{
return mysql_real_escape_string($_POST[$var]);
}
?>
At over 80 lines of code, this program may appear daunting, but don’t worry—you’ve already covered many of them in Example 10-5, and what the code does is actually quite simple.
It first checks for any inputs that may have been made and then either inserts new data into the table classics of the publications database or deletes a row from it, according to the input supplied. Regardless of whether there was input, the program then outputs all rows in the table to the browser. So let’s see how it works.
The first section of new code starts by using the isset function to check whether values for all the fields have been posted to the program. Upon confirmation, each of the lines within the if statement calls the function get_post, which appears at the end of the program. This function has one small but critical job: fetching the input from the browser.
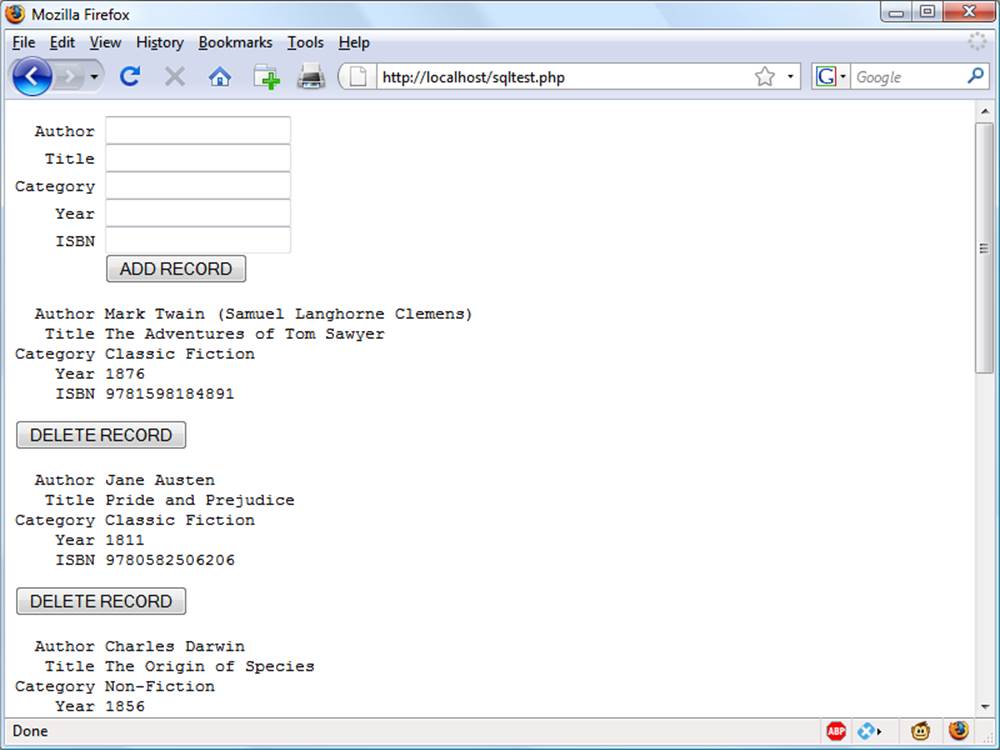
Figure 10-2. The output from Example 10-8, sqltest.php
The $_POST Array
I mentioned in an earlier chapter that a browser sends user input through either a GET request or a POST request. The POST request is usually preferred, and we use it here. The web server bundles up all of the user input (even if the form was filled out with a hundred fields) and puts in into an array named $_POST.
$_POST is an associative array, which you encountered in Chapter 6. Depending on whether a form has been set to use the POST or the GET method, either the $_POST or the $_GET associative array will be populated with the form data. They can both be read in exactly the same way.
Each field has an element in the array named after that field. So, if a form contained a field named isbn, the $_POST array contains an element keyed by the word isbn. The PHP program can read that field by referring to either $_POST['isbn'] or $_POST["isbn"] (single and double quotes have the same effect in this case).
If the $_POST syntax still seems complex to you, rest assured that you can just use the convention I’ve shown in Example 10-8, copy the user’s input to other variables, and forget about $_POST after that. This is normal in PHP programs: they retrieve all the fields from $_POST at the beginning of the program and then ignore it.
NOTE
There is no reason to write to an element in the $_POST array. Its only purpose is to communicate information from the browser to the program, and you’re better off copying data to your own variables before altering it.
So, back to the get_post function: it passes each item it retrieves through the mysql_real_escape_string function to strip out any characters that a hacker may have inserted in order to break into or alter your database.
Deleting a Record
Prior to checking whether new data has been posted, the program checks whether the variable $_POST['delete'] has a value. If so, the user has clicked on the DELETE RECORD button to erase a record. In this case, the value of $isbn will also have been posted.
As you’ll recall, the ISBN uniquely identifies each record. The HTML form appends the ISBN to the DELETE FROM query string created in the variable $query, which is then passed to the mysql_query function to issue it to MySQL. mysql_query returns either TRUE or FALSE, andFALSE causes an error message to be displayed explaining what went wrong.
If $_POST['delete']) is not set (and there is therefore no record to be deleted), $_POST['author']) and other posted values are checked. If they have all been given values, then $query is set to an INSERT INTO command, followed by the five values to be inserted. The variable is then passed to mysql_query, which upon completion returns either TRUE or FALSE. If FALSE is returned, an error message is displayed.
Displaying the Form
Next we get to the part of code that displays the little form at the top of Figure 10-2. You should recall the echo <<<_END structure from previous chapters, which outputs everything between the _END tags.
NOTE
Instead of the echo command, the program could also drop out of PHP using ?>, issue the HTML, and then reenter PHP processing with <?php. Whichever style used is a matter of programmer preference, but I always recommend staying within PHP code for these reasons:
§ It makes it very clear when debugging (and also for other users) that everything within a .php file is PHP code. Therefore, there is no need to go hunting for dropouts to HTML.
§ When you wish to include a PHP variable directly within HTML, you can just type it. If you had dropped back to HTML, you would have had to temporarily reenter PHP processing, output the variable, and then drop back out again.
The HTML form section simply sets the form’s action to sqltest.php. This means that when the form is submitted, the contents of the form fields will be sent to the file sqltest.php, which is the program itself. The form is also set up to send the fields as a POST rather than a GET request. This is because GET requests are appended to the URL being submitted to and can look messy in your browser. They also allow users to easily modify submissions and try to hack your server. Therefore, whenever possible, you should use POST submissions, which also have the benefit of hiding the posted data from view.
Having output the form fields, the HTML displays a Submit button with the name ADD RECORD and closes the form. Note the use of the <pre> and </pre> tags here, which have been used to force a monospaced font and allow all the inputs to line up neatly. The carriage returns at the end of each line are also output when inside <pre> tags.
Querying the Database
Next, the code returns to the familiar territory of Example 10-5 where, in the following four lines of code, a query is sent to MySQL asking to see all the records in the classics table. After that, $rows is set to a value representing the number of rows in the table and a for loop is entered to display the contents of each row.
I have altered the next bit of code to simplify things. Instead of using the <br> tags for line feeds in Example 10-5, I have chosen to use a <pre> tag to line up the display of each record in a pleasing manner.
After the display of each record, there is a second form that also posts to sqltest.php (the program itself) but this time contains two hidden fields: delete and isbn. The delete field is set to “yes” and isbn to the value held in $row[4], which contains the ISBN for the record. Then a Submit button with the name DELETE RECORD is displayed and the form is closed. A curly brace then completes the for loop, which will continue until all records have been displayed.
Finally, you see the definition for the function get_post, which we’ve already looked at. And that’s it—our first PHP program to manipulate a MySQL database. So, let’s check out what it can do.
Once you have typed the program (and corrected any typing errors), try entering the following data into the various input fields to add a new record for the book Moby Dick to the database:
Herman Melville
Moby Dick
Fiction
1851
9780199535729
Running the Program
When you have submitted this data using the ADD RECORD button, scroll down to the bottom of the web page to see the new addition. It should look like Figure 10-3.
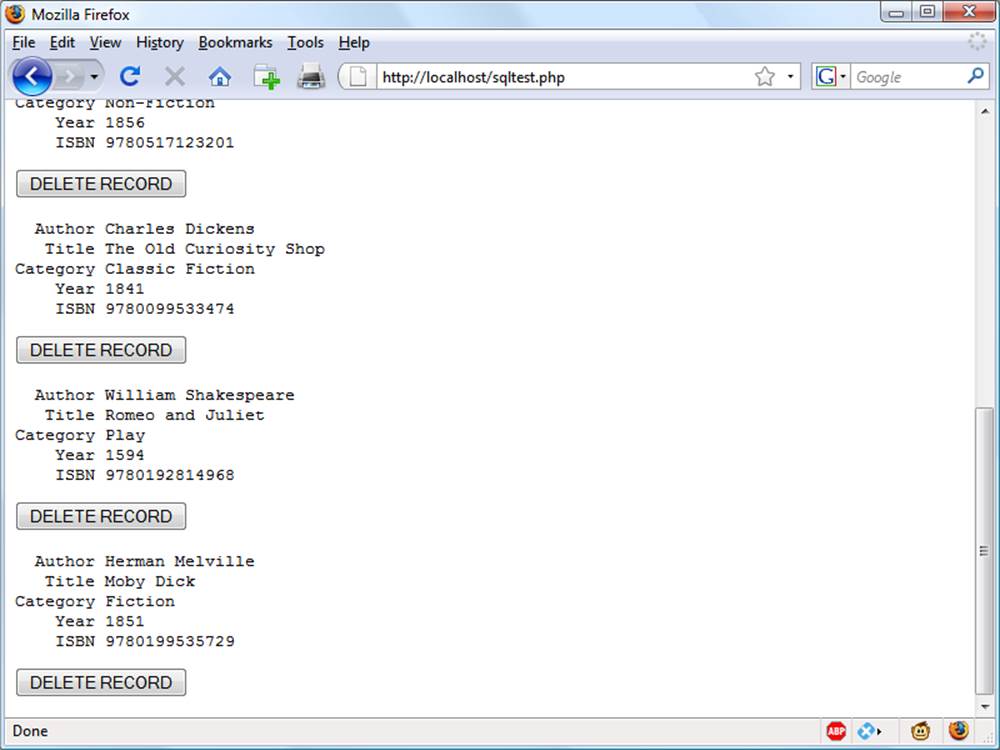
Figure 10-3. The result of adding Moby Dick to the database
Now let’s look at how deleting a record works by creating a dummy record. So try entering just the number 1 in each of the five fields and click on the ADD RECORD button. If you now scroll down, you’ll see a new record consisting just of 1s. Obviously this record isn’t useful in this table, so now click on the DELETE RECORD button and scroll down again to confirm that the record has been deleted.
NOTE
Assuming that everything worked, you are now able to add and delete records at will. Try doing this a few times, but leave the main records in place (including the new one for Moby Dick), as we’ll be using them later. You could also try adding the record with all 1s again a couple of times and note the error message that you receive the second time, indicating that there is already an ISBN with the number 1.
Practical MySQL
You are now ready to look at some practical techniques that you can use in PHP to access the MySQL database, including tasks such as creating and dropping tables; inserting, updating, and deleting data; and protecting your database and website from malicious users. Note that the following examples assume that you’ve created the login.php program discussed earlier in this chapter.
Creating a Table
Let’s assume you are working for a wildlife park and need to create a database to hold details about all the types of cats it houses. You are told that there are nine families of cats—Lion, Tiger, Jaguar, Leopard, Cougar, Cheetah, Lynx, Caracal, and Domestic—so you’ll need a column for that. Then each cat has been given a name, so that’s another column, and you also want to keep track of their ages, which is another. Of course, you will probably need more columns later, perhaps to hold dietary requirements, inoculations, and other details, but for now that’s enough to get going. A unique identifier is also needed for each animal, so you also decide to create a column for that called id.
Example 10-9 shows the code you might use to create a MySQL table to hold this data, with the main query assignment in bold text.
Example 10-9. Creating a table called cats
<?php
require_once 'login.php';
$db_server = mysql_connect($db_hostname, $db_username, $db_password);
if (!$db_server) die("Unable to connect to MySQL: " . mysql_error());
mysql_select_db($db_database)
or die("Unable to select database: " . mysql_error());
$query = "CREATE TABLE cats (
id SMALLINT NOT NULL AUTO_INCREMENT,
family VARCHAR(32) NOT NULL,
name VARCHAR(32) NOT NULL,
age TINYINT NOT NULL,
PRIMARY KEY (id)
)";
$result = mysql_query($query);
if (!$result) die ("Database access failed: " . mysql_error());
?>
As you can see, the MySQL query looks pretty similar to how you would type it directly in the command line, except that there is no trailing semicolon, as none is needed when you are accessing MySQL from PHP.
Describing a Table
When you aren’t logged into the MySQL command line, here’s a handy piece of code that you can use to verify that a table has been correctly created from inside a browser. It simply issues the query DESCRIBE cats and then outputs an HTML table with four headings—Column, Type,Null, and Key—underneath which all columns within the table are shown. To use it with other tables, simply replace the name cats in the query with that of the new table (see Example 10-10).
Example 10-10. Describing the table cats
<?php
require_once 'login.php';
$db_server = mysql_connect($db_hostname, $db_username, $db_password);
if (!$db_server) die("Unable to connect to MySQL: " . mysql_error());
mysql_select_db($db_database)
or die("Unable to select database: " . mysql_error());
$query = "DESCRIBE cats";
$result = mysql_query($query);
if (!$result) die ("Database access failed: " . mysql_error());
$rows = mysql_num_rows($result);
echo "<table><tr><th>Column</th><th>Type</th><th>Null</th><th>Key</th></tr>";
for ($j = 0 ; $j < $rows ; ++$j)
{
$row = mysql_fetch_row($result);
echo "<tr>";
for ($k = 0 ; $k < 4 ; ++$k)
echo "<td>$row[$k]</td>";
echo "</tr>";
}
echo "</table>";
?>
The output from the program should look like this:
Column Type Null Key
id smallint(6) NO PRI
family varchar(32) NO
name varchar(32) NO
age tinyint(4) NO
Dropping a Table
Dropping a table is very easy to do and is therefore very dangerous, so be careful. Example 10-11 shows the code that you need. However, I don’t recommend that you try it until you have been through the other examples, as it will drop the table cats and you’ll have to re-create it usingExample 10-9.
Example 10-11. Dropping the table cats
<?php
require_once 'login.php';
$db_server = mysql_connect($db_hostname, $db_username, $db_password);
if (!$db_server) die("Unable to connect to MySQL: " . mysql_error());
mysql_select_db($db_database)
or die("Unable to select database: " . mysql_error());
$query = "DROP TABLE cats";
$result = mysql_query($query);
if (!$result) die ("Database access failed: " . mysql_error());
?>
Adding Data
Let’s add some data to the table using the code in Example 10-12.
Example 10-12. Adding data to table cats
<?php
require_once 'login.php';
$db_server = mysql_connect($db_hostname, $db_username, $db_password);
if (!$db_server) die("Unable to connect to MySQL: " . mysql_error());
mysql_select_db($db_database)
or die("Unable to select database: " . mysql_error());
$query = "INSERT INTO cats VALUES(NULL, 'Lion', 'Leo', 4)";
$result = mysql_query($query);
if (!$result) die ("Database access failed: " . mysql_error());
?>
You may wish to add a couple more items of data by modifying $query as follows and calling up the program in your browser again:
$query = "INSERT INTO cats VALUES(NULL, 'Cougar', 'Growler', 2)";
$query = "INSERT INTO cats VALUES(NULL, 'Cheetah', 'Charly', 3)";
By the way, notice the NULL value passed as the first parameter? This is because the id column is of type AUTO_INCREMENT, and MySQL will decide what value to assign according to the next available number in sequence, so we simply pass a NULL value, which will be ignored.
Of course, the most efficient way to populate MySQL with data is to create an array and insert the data with a single query.
Retrieving Data
Now that some data has been entered into the cats table, Example 10-13 shows how you can check that it was correctly inserted.
Example 10-13. Retrieving rows from the cats table
<?php
require_once 'login.php';
$db_server = mysql_connect($db_hostname, $db_username, $db_password);
if (!$db_server) die("Unable to connect to MySQL: " . mysql_error());
mysql_select_db($db_database)
or die("Unable to select database: " . mysql_error());
$query = "SELECT * FROM cats";
$result = mysql_query($query);
if (!$result) die ("Database access failed: " . mysql_error());
$rows = mysql_num_rows($result);
echo "<table><tr> <th>Id</th> <th>Family</th><th>Name</th><th>Age</th></tr>";
for ($j = 0 ; $j < $rows ; ++$j)
{
$row = mysql_fetch_row($result);
echo "<tr>";
for ($k = 0 ; $k < 4 ; ++$k)
echo "<td>$row[$k]</td>";
echo "</tr>";
}
echo "</table>";
?>
This code simply issues the MySQL query SELECT * FROM cats and then displays all the rows returned. Its output is as follows:
Id Family Name Age
1 Lion Leo 4
2 Cougar Growler 2
3 Cheetah Charly 3
Here you can see that the id column has correctly auto-incremented.
Updating Data
Changing data that you have already inserted is also quite simple. Did you notice the spelling of Charly for the cheetah’s name? Let’s correct that to Charlie, as in Example 10-14.
Example 10-14. Renaming Charly the cheetah to Charlie
<?php
require_once 'login.php';
$db_server = mysql_connect($db_hostname, $db_username, $db_password);
if (!$db_server) die("Unable to connect to MySQL: " . mysql_error());
mysql_select_db($db_database)
or die("Unable to select database: " . mysql_error());
$query = "UPDATE cats SET name='Charlie' WHERE name='Charly'";
$result = mysql_query($query);
if (!$result) die ("Database access failed: " . mysql_error());
?>
If you run Example 10-13 again, you’ll see that it now outputs the following:
Id Family Name Age
1 Lion Leo 4
2 Cougar Growler 2
3 Cheetah Charlie 3
Deleting Data
Growler the cougar has been transferred to another zoo, so it’s time to remove him from the database; see Example 10-15.
Example 10-15. Removing Growler the cougar from the cats table
<?php
require_once 'login.php';
$db_server = mysql_connect($db_hostname, $db_username, $db_password);
if (!$db_server) die("Unable to connect to MySQL: " . mysql_error());
mysql_select_db($db_database)
or die("Unable to select database: " . mysql_error());
$query = "DELETE FROM cats WHERE name='Growler'";
$result = mysql_query($query);
if (!$result) die ("Database access failed: " . mysql_error());
?>
This uses a standard DELETE FROM query, and when you run Example 10-13, you can see that the row has been removed in the following output:
Id Family Name Age
1 Lion Leo 4
3 Cheetah Charlie 3
Using AUTO_INCREMENT
When using AUTO_INCREMENT, you cannot know what value has been given to a column before a row is inserted. Instead, if you need to know it, you must ask MySQL afterward using the mysql_insert_id function. This need is common: for instance, when you process a purchase, you might insert a new customer into a Customers table and then refer to the newly created CustId when inserting a purchase into the purchase table.
Example 10-12 can be rewritten as Example 10-16 to display this value after each insert.
Example 10-16. Adding data to table cats and reporting the insertion id
<?php
require_once 'login.php';
$db_server = mysql_connect($db_hostname, $db_username, $db_password);
if (!$db_server) die("Unable to connect to MySQL: " . mysql_error());
mysql_select_db($db_database)
or die("Unable to select database: " . mysql_error());
$query = "INSERT INTO cats VALUES(NULL, 'Lynx', 'Stumpy', 5)";
$result = mysql_query($query);
echo "The Insert Id was: " . mysql_insert_id();
if (!$result) die ("Database access failed: " . mysql_error());
?>
The contents of the table should now look like the following (note how the previous id value of 2 is not reused, as this could cause complications in some instances):
Id Family Name Age
1 Lion Leo 4
3 Cheetah Charlie 3
4 Lynx Stumpy 5
Using insert IDs
It’s very common to insert data in multiple tables: a book followed by its author, or a customer followed by his purchase, and so on. When doing this with an auto-increment column, you will need to retain the insert ID returned for storing in the related table.
For example, let’s assume that these cats can be “adopted” by the public as a means of raising funds, and that when a new cat is stored in the cats table, we also want to create a key to tie it to the animal’s adoptive owner. The code to do this is similar to that in Example 10-16, except that the returned insert ID is stored in the variable $insertID, and is then used as part of the subsequent query:
$query = "INSERT INTO cats VALUES(NULL, 'Lynx', 'Stumpy', 5)";
$result = mysql_query($query);
$insertID = mysql_insert_id();
$query = "INSERT INTO owners VALUES($insertID, 'Ann', 'Smith')";
$result = mysql_query($query);
Now the cat is connected to its “owner” through the cat’s unique ID, which was created automatically by AUTO_INCREMENT.
Using locks
A completely safe procedure for linking tables through the insert ID is to use locks (or transactions, as described in Chapter 9). It can slow down response time a bit when there are many people submitting data to the same table, but it can also be worth it. The sequence is:
1. Lock the first table (e.g., cats).
2. Insert data into the first table.
3. Retrieve the unique ID from the first table through mysql_insert_id.
4. Unlock the first table.
5. Insert data into the second table.
You can safely release the lock before inserting data into the second table, because the insert ID has been retrieved and is stored in a program variable. You could also use a transaction instead of locking, but that slows down the MySQL server even more.
Performing Additional Queries
OK, that’s enough feline fun. To explore some slightly more complex queries, we need to revert to using the customers and classics tables that you created in Chapter 8. There will be two customers in the customers table; the classics table holds the details of a few books. They also share a common column of ISBNs, called isbn, that we can use to perform additional queries.
For example, to display all of the customers along with the titles and authors of the books they have bought, you can use the code in Example 10-17.
Example 10-17. Performing a secondary query
<?php
require_once 'login.php';
$db_server = mysql_connect($db_hostname, $db_username, $db_password);
if (!$db_server) die("Unable to connect to MySQL: " . mysql_error());
mysql_select_db($db_database)
or die("Unable to select database: " . mysql_error());
$query = "SELECT * FROM customers";
$result = mysql_query($query);
if (!$result) die ("Database access failed: " . mysql_error());
$rows = mysql_num_rows($result);
for ($j = 0 ; $j < $rows ; ++$j)
{
$row = mysql_fetch_row($result);
echo "$row[0] purchased ISBN $row[1]:<br>";
$subquery = "SELECT * FROM classics WHERE isbn='$row[1]'";
$subresult = mysql_query($subquery);
if (!$subresult) die ("Database access failed: " . mysql_error());
$subrow = mysql_fetch_row($subresult);
echo " '$subrow[1]' by $subrow[0]<br>";
}
?>
This program uses an initial query to the customers table to look up all the customers and then, given the ISBN of the book each customer purchased, makes a new query to the classics table to find out the title and author for each. The output from this code should be as follows:
Mary Smith purchased ISBN 9780582506206:
'Pride and Prejudice' by Jane Austen
Jack Wilson purchased ISBN 9780517123201:
'The Origin of Species' by Charles Darwin
NOTE
Of course, although it wouldn’t illustrate performing additional queries, in this particular case you could also return the same information using a NATURAL JOIN query (see Chapter 8), like this:
SELECT name,isbn,title,author FROM customers
NATURAL JOIN classics;
Preventing SQL Injection
It may be hard to understand just how dangerous it is to pass user input unchecked to MySQL. For example, suppose you have a simple piece of code to verify a user, and it looks like this:
$user = $_POST['user'];
$pass = $_POST['pass'];
$query = "SELECT * FROM users WHERE user='$user' AND pass='$pass'";
At first glance, you might think this code is perfectly fine. If the user enters values of fredsmith and mypass for $user and $pass, respectively, then the query string, as passed to MySQL, will be as follows:
SELECT * FROM users WHERE user='fredsmith' AND pass='mypass'
This is all well and good, but what if someone enters the following for $user (and doesn’t even enter anything for $pass)?
admin' #
Let’s look at the string that would be sent to MySQL:
SELECT * FROM users WHERE user='admin' #' AND pass=''
Do you see the problem there? In MySQL, the # symbol represents the start of a comment. Therefore, the user will be logged in as admin (assuming there is a user admin), without having to enter a password. In the following, the part of the query that will be executed is shown in bold; the rest will be ignored.
SELECT * FROM users WHERE user='admin' #' AND pass=''
But you should count yourself very lucky if that’s all a malicious user does to you. At least you might still be able to go into your application and undo any changes the user makes as admin. But what about the case in which your application code removes a user from the database? The code might look something like this:
$user = $_POST['user'];
$pass = $_POST['pass'];
$query = "DELETE FROM users WHERE user='$user' AND pass='$pass'";
Again, this looks quite normal at first glance, but what if someone entered the following for $user?
anything' OR 1=1 #
This would be interpreted by MySQL as:
DELETE FROM users WHERE user='anything' OR 1=1 #' AND pass=''
Ouch—that SQL query will always be TRUE and therefore you’ve lost your whole users database! So what can you do about this kind of attack?
Well, the first thing is not to rely on PHP’s built-in magic quotes, which automatically escape any characters such as single and double quotes by prefacing them with a backslash (\). Why? Because this feature can be turned off; many programmers do so in order to put their own security code in place. So there is no guarantee that this hasn’t happened on the server you are working on. In fact, the feature was deprecated as of PHP 5.3.0 and has been removed in PHP 6.0.0.
Instead, you should always use the function mysql_real_escape_string for all calls to MySQL. Example 10-18 is a function you can use that will remove any magic quotes added to a user-inputted string and then properly sanitize it for you.
Example 10-18. How to properly sanitize user input for MySQL
<?php
function mysql_fix_string($string)
{
if (get_magic_quotes_gpc()) $string = stripslashes($string);
return mysql_real_escape_string($string);
}
?>
The get_magic_quotes_gpc function returns TRUE if magic quotes are active. In that case, any slashes that have been added to a string have to be removed, or the function mysql_real_escape_string could end up double-escaping some characters, creating corrupted strings.Example 10-19 illustrates how you would incorporate mysql_fix_string within your own code.
Example 10-19. How to safely access MySQL with user input
<?php
$user = mysql_fix_string($_POST['user']);
$pass = mysql_fix_string($_POST['pass']);
$query = "SELECT * FROM users WHERE user='$user' AND pass='$pass'";
function mysql_fix_string($string)
{
if (get_magic_quotes_gpc()) $string = stripslashes($string);
return mysql_real_escape_string($string);
}
?>
WARNING
Remember that you can use mysql_real_escape_string only when a MySQL database is actively open; otherwise, an error will occur.
Using Placeholders
Another way—this one virtually bulletproof—to prevent SQL injections is to use a feature called placeholders. The idea is to predefine a query using ? characters where the data will appear. Then, instead of calling a MySQL query directly, you call the predefined one, passing the data to it. This has the effect of ensuring that every item of data entered is inserted directly into the database and cannot be interpreted as SQL queries. In other words, SQL injections become impossible.
The sequence of queries to execute when using MySQL’s command line would be like that in Example 10-20.
Example 10-20. Using placeholders
PREPARE statement FROM "INSERT INTO classics VALUES(?,?,?,?,?)";
SET @author = "Emily Brontë",
@title = "Wuthering Heights",
@category = "Classic Fiction",
@year = "1847",
@isbn = "9780553212587";
EXECUTE statement USING @author,@title,@category,@year,@isbn;
DEALLOCATE PREPARE statement;
The first command prepares a statement called statement for inserting data into the classics table. As you can see, in place of values or variables for the data to insert, the statement contains a series of ? characters. These are the placeholders.
The next five lines assign values to MySQL variables according to the data to be inserted. Then the predefined statement is executed, passing these variables as parameters. Finally, the statement is removed, in order to return the resources it was using.
In PHP, the code for this procedure looks like Example 10-21 (assuming that you have created login.php with the correct details to access the database).
Example 10-21. Using placeholders with PHP
<?php
require 'login.php';
$db_server = mysql_connect($db_hostname, $db_username, $db_password);
if (!$db_server) die("Unable to connect to MySQL: " . mysql_error());
mysql_select_db($db_database)
or die("Unable to select database: " . mysql_error());
$query = 'PREPARE statement FROM "INSERT INTO classics VALUES(?,?,?,?,?)"';
mysql_query($query);
$query = 'SET @author = "Emily Brontë",' .
'@title = "Wuthering Heights",' .
'@category = "Classic Fiction",' .
'@year = "1847",' .
'@isbn = "9780553212587"';
mysql_query($query);
$query = 'EXECUTE statement USING @author,@title,@category,@year,@isbn';
mysql_query($query);
$query = 'DEALLOCATE PREPARE statement';
mysql_query($query);
?>
Once you have prepared a statement, until you deallocate it you can use it as often as you wish. Such statements are commonly used within a loop to quickly insert data into a database by assigning values to the MySQL variables and then executing the statement. This approach is more efficient than creating the entire statement from scratch on each pass through the loop.
Preventing HTML Injection
There’s another type of injection you need to concern yourself about—not for the safety of your own websites, but for your users’ privacy and protection. That’s cross-site scripting, also referred to as XSS.
This occurs when you allow HTML, or more often JavaScript code, to be input by a user and then displayed back by your website. One place this is common is in a comment form. What happens most often is that a malicious user will try to write code that steals cookies from your site’s users, allowing him or her to discover username and password pairs or other information. Even worse, the malicious user might launch an attack to download a Trojan onto a user’s computer.
But preventing this is as simple as calling the htmlentities function, which strips out all HTML markup codes and replaces them with a form that displays the characters, but does not allow a browser to act on them. For example, consider the following HTML:
<script src='http://x.com/hack.js'>
</script><script>hack();</script>
This code loads in a JavaScript program and then executes malicious functions. But if it is first passed through htmlentities, it will be turned into the following, totally harmless string:
<script src='http://x.com/hack.js'>
</script><script>hack();</script>
Therefore, if you are ever going to display anything that your users enter, either immediately or after storing it in a database, you need to first sanitize it with htmlentities. To do this, I recommend that you create a new function, like the first one in Example 10-22, which can sanitize for both SQL and XSS injections.
Example 10-22. Functions for preventing both SQL and XSS injection attacks
<?php
function mysql_entities_fix_string($string)
{
return htmlentities(mysql_fix_string($string));
}
function mysql_fix_string($string)
{
if (get_magic_quotes_gpc()) $string = stripslashes($string);
return mysql_real_escape_string($string);
}
?>
The mysql_entities_fix_string function first calls mysql_fix_string and then passes the result through htmlentities before returning the fully sanitized string. Example 10-23 shows your new “ultimate protection” version of Example 10-19.
Example 10-23. How to safely access MySQL and prevent XSS attacks
<?php
$user = mysql_entities_fix_string($_POST['user']);
$pass = mysql_entities_fix_string($_POST['pass']);
$query = "SELECT * FROM users WHERE user='$user' AND pass='$pass'";
function mysql_entities_fix_string($string)
{
return htmlentities(mysql_fix_string($string));
}
function mysql_fix_string($string)
{
if (get_magic_quotes_gpc()) $string = stripslashes($string);
return mysql_real_escape_string($string);
}
?>
Now that you have learned how to integrate PHP with MySQL and avoid malicious user input, the next chapter will explain how to use the improved MySQLi extension for your MySQL queries.
Questions
1. What is the standard PHP function for connecting to a MySQL database?
2. When is the mysql_result function not optimal?
3. Give one reason why using the POST form method is usually better than GET.
4. How can you determine the most recently entered value of an AUTO_INCREMENT column?
5. Which PHP function escapes a string, making it suitable for use with MySQL?
6. Which function can be used to prevent XSS injection attacks?
See Chapter 10 Answers in Appendix A for the answers to these questions.
All materials on the site are licensed Creative Commons Attribution-Sharealike 3.0 Unported CC BY-SA 3.0 & GNU Free Documentation License (GFDL)
If you are the copyright holder of any material contained on our site and intend to remove it, please contact our site administrator for approval.
© 2016-2026 All site design rights belong to S.Y.A.