PHP Solutions: Dynamic Web Design Made Easy, Third Edition (2014)
Chapter 9. Pages That Remember: Simple Login and Multipage Forms
The Web is a brilliant illusion. When you visit a well-designed website, you get a great feeling of continuity, as though flipping through the pages of a book or a magazine. Everything fits together as a coherent entity. The reality is quite different. Each part of an individual page is stored and handled separately by the web server. Apart from needing to know where to send the relevant files, the server has no interest in who you are. Each time a PHP script runs, the variables exist only in the server’s memory and are normally discarded as soon as the script finishes. Even variables in the $_POST and $_GET arrays have only a brief lifespan. Their value is passed once to the next script and then removed from memory unless you do something with it, such as storing the information in a hidden form field. Even then, it persists only if the form is submitted.
To get around these problems, PHP uses sessions. After briefly describing how sessions work, I’ll show you how you can use session variables to create a simple, file-based login system and pass information from one page to another without the need to use hidden form fields.
In this chapter, you’ll learn about the following:
· Understanding what sessions are and how to create them
· Creating a file-based login system
· Checking password strength with a custom-built class
· Setting a time limit for sessions
· Using sessions to keep track of information over multiple pages
What Sessions Are and How They Work
A session ensures continuity by storing a random identifier—the session ID—on the web server and as a cookie on the visitor’s computer. The web server uses the cookie to recognize that it’s communicating with the same person (or, to be more precise, with the same computer). Figures 9-1through 9-3 show the details of a simple session created in my local testing environment.
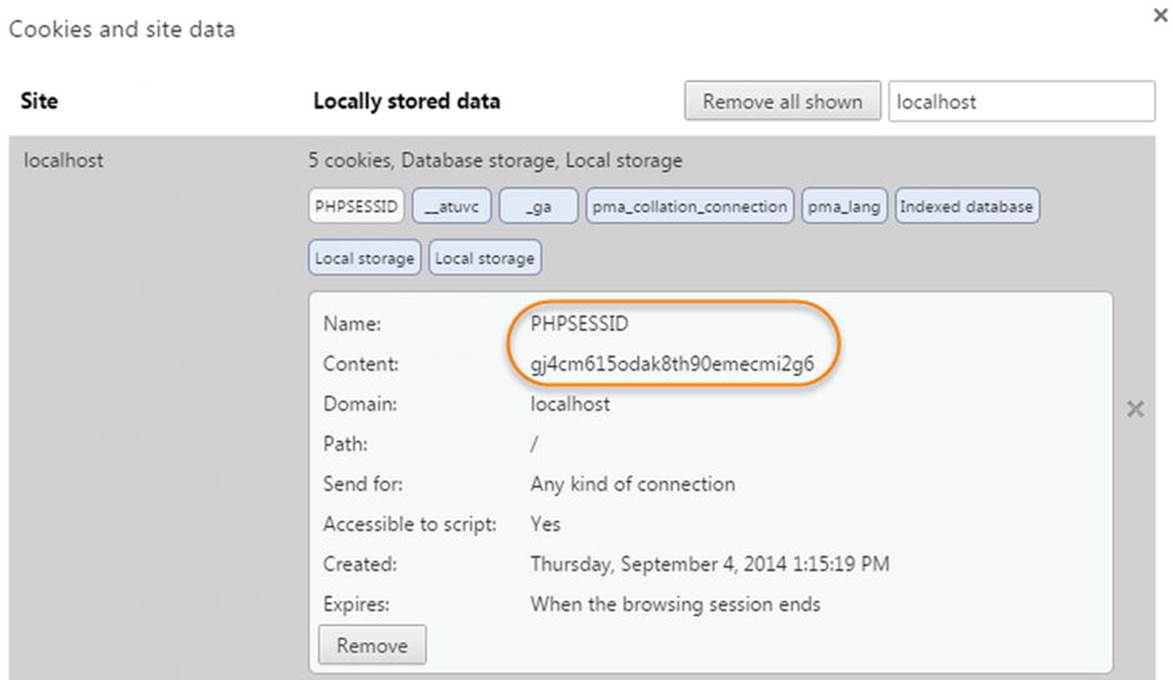
Figure 9-1. PHP sessions store a unique identifier as a cookie in the browser
As Figure 9-1 shows, the cookie stored in the browser is called PHPSESSID, and the content is a jumble of letters and numbers. This random string is the session’s ID.
A matching file, which contains the same jumble of letters and numbers as part of its filename, is created on the web server, as shown in Figure 9-2.
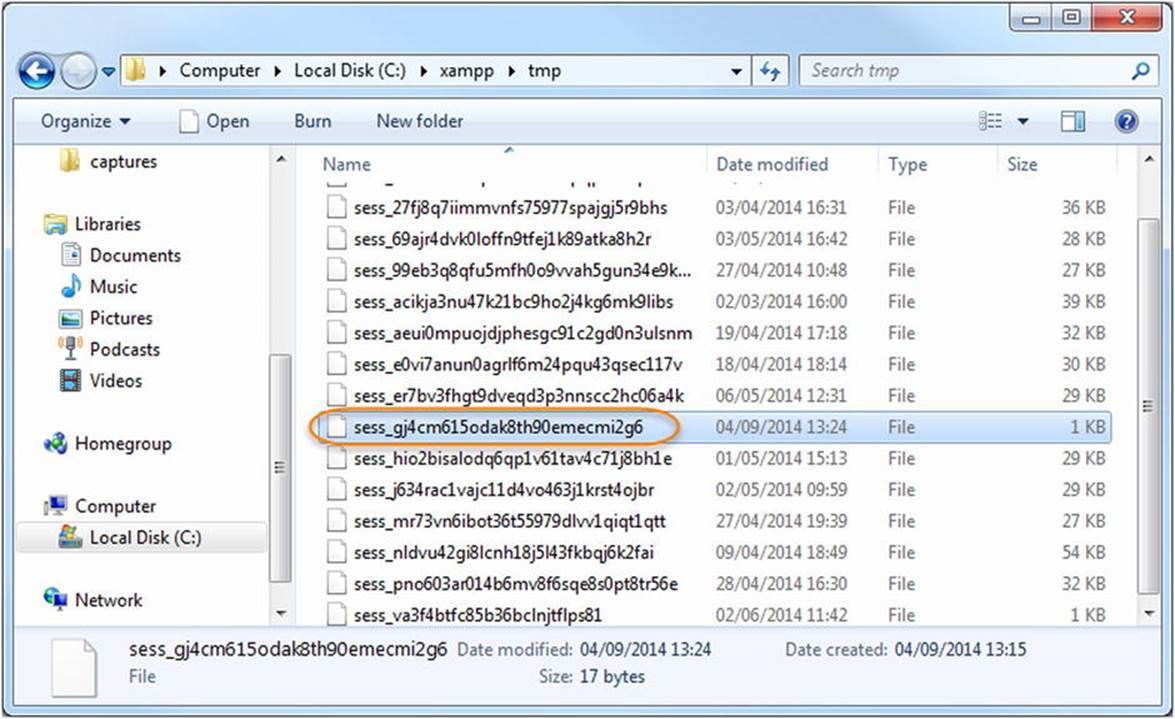
Figure 9-2. The content of the cookie identifies the session data stored on the web server
When a session is initiated, the server stores information in session variables that can be accessed by other pages as long as the session remains active (normally until the browser is closed). Because the session ID is unique to each visitor, the information stored in session variables cannot be seen by anyone else. This means sessions are ideal for user authentication, although they can be used for any situation where you want to preserve information for the same user when passing from one page to the next, such as with a multipage form or a shopping cart.
The only information stored on the user’s computer is the cookie that contains the session ID, which is meaningless by itself. This means private information cannot be exposed simply by examining the contents of this cookie.
The session variables and their values are stored on the web server. Figure 9-3 shows the contents of a simple session file. As you can see, it’s in plain text, and the content isn’t difficult to decipher. The session shown in the figure has one variable: name. The variable’s name is followed by a vertical pipe, then the letter “s”, a colon, a number, another colon, and the variable’s value in quotes. The “s” stands for string, and the number indicates how many characters the string contains. So, this session variable contains my name as a string that is five characters long.

Figure 9-3. The details of the session are stored on the server in plain text
This setup has several implications. The cookie containing the session ID normally remains active until the browser is closed. So, if several people share the same computer, they all have access to each other’s sessions unless they always close the browser before handing over to the next person, something over which you have no control. So, it’s important to provide a logout mechanism to delete both the cookie and the session variables, keeping your site secure. You can also create a timeout mechanism, which automatically prevents anyone from regaining access after a certain period of inactivity.
Storing session variables in plain text on the web server is not, in itself, a cause for concern. As long as the server is correctly configured, the session files cannot be accessed through a browser. Inactive files are also routinely deleted by PHP (in theory, the lifetime is 1,440 seconds—24 minutes, but this cannot be relied upon). Nevertheless, it should be obvious that, if an attacker manages to compromise the server or hijack a session, the information could be exposed. So, although sessions are generally secure enough for password protecting parts of a website or working with multipage forms, you should never use session variables to store sensitive information, such as passwords or credit card details. As you’ll see in “Using sessions to restrict access” later in this chapter, although a password is used to gain access to a protected site, the password itself is stored (preferably encrypted) in a separate location and not as a session variable.
Sessions are supported by default, so you don’t need any special configuration. However, sessions won’t work if cookies are disabled in the user’s browser. It is possible to configure PHP to send the session ID through a query string, but this is considered a security risk.
Creating PHP Sessions
Just put the following command in every PHP page that you want to use in a session:
session_start();
This command should be called only once in each page, and it must be called before the PHP script generates any output, so the ideal position is immediately after the opening PHP tag. If any output is generated before the call to session_start(), the command fails and the session won’t be activated for that page. (See “The ‘Headers already sent’ error” section later for an explanation).
Creating and Destroying Session Variables
You create a session variable by adding it to the $_SESSION superglobal array in the same way you would assign an ordinary variable. Say you want to store a visitor’s name and display a greeting. If the name is submitted in a login form as $_POST['name'], you assign it like this:
$_SESSION['name'] = $_POST['name'];
$_SESSION['name'] can now be used in any page that begins with session_start(). Because session variables are stored on the server, you should get rid of them as soon as they are no longer required by your script or application. Unset a session variable like this:
unset($_SESSION['name']);
To unset all session variables—for instance, when you’re logging someone out—set the $_SESSION superglobal array to an empty array, like this:
$_SESSION = [];
![]() Caution Do not be tempted to try unset($_SESSION). It works all right—but it’s a little too effective. It not only clears the current session but also prevents any further session variables from being stored.
Caution Do not be tempted to try unset($_SESSION). It works all right—but it’s a little too effective. It not only clears the current session but also prevents any further session variables from being stored.
Destroying a Session
By itself, unsetting all the session variables effectively prevents any of the information from being reused, but you should also invalidate the session cookie like this:
if (isset($_COOKIE[session_name()])) {
setcookie(session_name(), '', time()-86400, '/');
}
This uses the function session_name() to get the name of the session dynamically and resets the session cookie to an empty string and to expire 24 hours ago (86,400 is the number of seconds in a day). The final argument ('/') applies the cookie to the whole domain.
Finally, destroy the session with the following command:
session_destroy();
By destroying a session like this, there is no risk of an unauthorized person gaining access either to a restricted part of the site or to any information exchanged during the session. However, a visitor may forget to log out, so it’s not always possible to guarantee that thesession_destroy() command will be triggered, which is why it’s so important not to store sensitive information in a session variable.
![]() Caution You may find session_register() and session_unregister() in old scripts. These functions were removed from PHP 5.4 and are no longer available. Use $_SESSION['variable_name'] and unset($_SESSION['variable_name']) instead.
Caution You may find session_register() and session_unregister() in old scripts. These functions were removed from PHP 5.4 and are no longer available. Use $_SESSION['variable_name'] and unset($_SESSION['variable_name']) instead.
Regenerating the Session ID
When a user changes status, such as after logging in, it’s recommended as a security measure to regenerate the session ID. This changes the random string of letters and numbers that identify the session but preserves all the information stored in session variables. In PHP Pro Security, 2nd Edition (Apress, 2010, ISBN 978-1-4302-3318-3), Chris Snyder and Michael Southwell explain that “the goal of generating a fresh session ID is to remove the possibility, however slight, that an attacker with knowledge of the low-level security session might be able to perform high-security tasks.”
To regenerate the session ID, simply call session_regenerate_id() and redirect the user to another page or reload the same one.
The “Headers Already Sent” Error
Although using PHP sessions is very easy, there’s one problem that causes beginners a great deal of head banging. Instead of everything working the way you expect, you see the following message:
Warning: Cannot add header information - headers already sent
I’ve mentioned this problem several times before in conjunction with the header() function. It affects session_start() and setcookie() as well. In the case of session_start(), the solution is simple: make sure that you put it immediately after the opening PHP tag (or very soon thereafter), and check that there’s no whitespace before the opening tag.
Sometimes the problem occurs even if there is no whitespace ahead of the PHP tag. This is usually caused by editing software inserting the byte order mark (BOM) at the beginning of the script. If this happens, open your script editor’s preferences and disable the use of the BOM in PHP pages.
When using setcookie() to destroy the session cookie, however, it’s quite likely that you may need to send output to the browser before calling the function. In this case, PHP lets you save the output in a buffer using ob_start(). You then flush the buffer with ob_end_flush()after setcookie() has done its job. You’ll see how to do this in PHP Solution 9-2.
Using Sessions to Restrict Access
The first words that probably come to mind when thinking about restricting access to a website are “username” and “password.” Although these generally unlock entry to a site, neither is essential to a session. You can store any value as a session variable and use it to determine whether to grant access to a page. For instance, you could create a variable called $_SESSION['status'] and give visitors access to different parts of the site depending on its value, or no access at all if it hasn’t been set.
A little demonstration should make everything clear and will show you how sessions work in practice.
PHP Solution 9-1: A Simple Session Example
This should take only a few minutes to build, but you can also find the complete code in session_01.php, session_02.php, and session_03.php, in the ch09 folder.
1. Create a page called session_01.php in a new folder called sessions in the phpsols site root. Insert a form with a text field called name and a Submit button. Set the method to post and action to session_02.php. The form should look like this:
<form method="post" action="session_02.php">
<p>
<label for="name">Name:</label>
<input type="text" name="name" id="name">
</p>
<p>
<input type="submit" name="Submit" value="Submit">
</p>
</form>
2. In another page called session_02.php, insert this above the DOCTYPE declaration:
<?php
// initiate session
session_start();
// check that form has been submitted and that name is not empty
if ($_POST && !empty($_POST['name'])) {
// set session variable
$_SESSION['name'] = $_POST['name'];
}
?>
The inline comments explain what’s going on. The session is started, and as long as $_POST['name'] isn’t empty, its value is assigned to $_SESSION['name'].
3. Insert the following code between the <body> tags in session_02.php:
<?php
// check session variable is set
if (isset($_SESSION['name'])) {
// if set, greet by name
echo 'Hi, ' . $_SESSION['name'] . '. <a href="session_03.php">Next</a>';
} else {
// if not set, send back to login
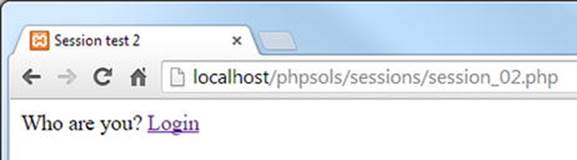
echo 'Who are you? <a href="session_01.php">Login</a>';
}
?>
If $_SESSION['name'] has been set, a welcome message is displayed along with a link to session_03.php. Otherwise, the page tells the visitor that it doesn’t recognize who’s trying to gain access and provides a link back to the first page.
![]() Caution Take care when typing the following line:
Caution Take care when typing the following line:
echo 'Hi, ' . $_SESSION['name'] . '. <a href="session03.php">Next</a>';
The first two periods (surrounding $_SESSION['name']) are the PHP concatenation operator. The third period (immediately after a single quote) is an ordinary period that will be displayed as part of the string.
4. Create session_03.php. Type the following above the DOCTYPE to initiate the session:
<?php session_start(); ?>
5. Insert the following code between the <body> tags of session_03.php:
<?php
// check whether session variable is set
if (isset($_SESSION['name'])) {
// if set, greet by name
echo 'Hi, ' . $_SESSION['name'] . '. See, I remembered your name!<br>';
// unset session variable
unset($_SESSION['name']);
// invalidate the session cookie
if (isset($_COOKIE[session_name()])) {
setcookie(session_name(), '', time()-86400, '/');
}
// end session
session_destroy();
echo '<a href="session_02.php">Page 2</a>';
} else {
// display if not recognized
echo "Sorry, I don't know you.<br>";
echo '<a href="session_01.php">Login</a>';
}
?>
If $_SESSION['name'] has been set, the page displays it, then unsets it and invalidates the current session cookie. By placing session_destroy() at the end of the first code block, the session and its associated variables cease to be available.
6. Load session_01.php into a browser, type your name in the text field, and click Submit.
7. You should see something like the following screenshot. At this stage, there is no apparent difference between what happens here and in an ordinary form.
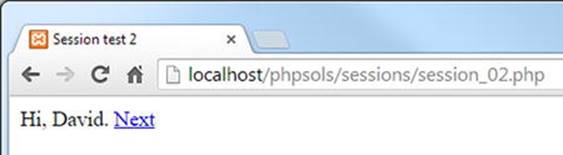
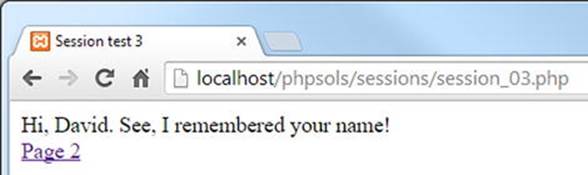
8. When you click Next, the power of sessions begins to show. The page remembers your name, even though the $_POST array is no longer available to it. If you’re using XAMPP as your testing setup, you’ll probably see something similar to the following screenshot.
However, with other setups, such as MAMP, you’re likely to get a “headers already sent” warning message like this:
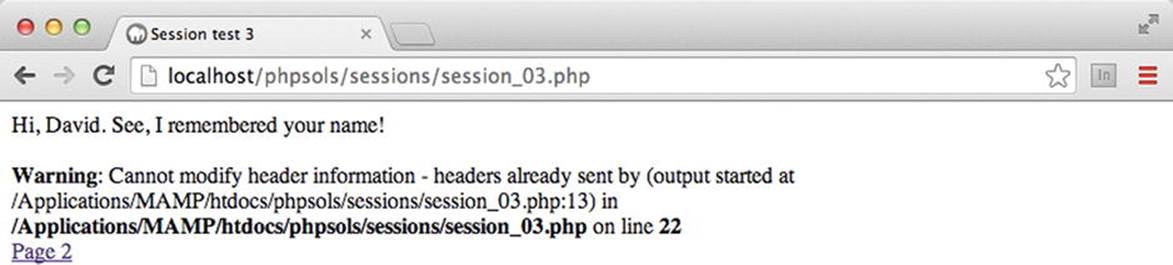
![]() Note As explained in Chapter 4, XAMPP doesn’t produce the warning about headers because it’s configured to buffer the first 4 KB of output. However, not all servers buffer output, so it’s important to fix this problem.
Note As explained in Chapter 4, XAMPP doesn’t produce the warning about headers because it’s configured to buffer the first 4 KB of output. However, not all servers buffer output, so it’s important to fix this problem.
9. Click the link to Page 2 (if you got an error message, it’s just below the message). The session has been destroyed, so this time session_02.php has no idea who you are.
10.Type the address of session_03.php in the browser address bar and load it. It, too, has no recollection of the session and displays an appropriate message.

Even if you didn’t get the warning message in step 8, you need to prevent it from happening when you deploy pages that rely on sessions to other servers. The error message not only looks bad, but it also means setcookie() can’t invalidate the session cookie. Even thoughsession_start() comes immediately after the opening PHP tag in session_03.php, the warning message is triggered by the DOCTYPE declaration, the <head>, and other HTML being output before setcookie().
PHP Solution 9-2: Buffering the Output with ob_start( )
Although you could put setcookie() in the PHP block above the DOCTYPE declaration, you would also need to assign the value of $_SESSION['name'] to an ordinary variable, because it ceases to exist after the session is destroyed. Rather than pull the whole script apart, the answer is to buffer the output with ob_start().
Continue working with session_03.php from the previous section.
1. Amend the PHP block above the DOCTYPE declaration like this:
<?php
session_start();
ob_start();
?>
This turns on output buffering and prevents output from being sent to the browser until the end of the script or until you specifically flush the output with ob_end_flush().
2. Flush the output immediately after invalidating the session cookie, like this:
// invalidate the session cookie
if (isset($_COOKIE[session_name()])) {
setcookie(session_name(), '', time()-86400, '/');
}
ob_end_flush();
3. Save session_03.php and test the sequence again. This time there should be no warning. More important, the session cookie is no longer valid.
Using File-based Authentication
As you have just seen, the combination of session variables and conditional statements lets you present completely different pages to a visitor depending on whether a session variable has been set. All you need to do is add a password-checking system and you have a basic user authentication system.
In PHP Solution 7-2 I showed you how to use the fopen() and fgetcsv() functions to generate a multidimensional associative array from a CSV file. You can now adapt that script to create a simple login system using sessions. Each person’s username and password are stored as comma-separated values in users.csv. The first line of the file contains the field headers that are used as the keys for each subarray. The contents of the file look like this:
name,password
david,codeslave
ben,bigboss
![]() Note The following PHP solutions assume there’s a copy of users.csv in the private folder that was set up in Chapter 7. Refer to Chapter 7 if you haven’t set up a folder for PHP to read and write files. If you create your own version of users.csv, there should be no space after the comma separating the username and password.
Note The following PHP solutions assume there’s a copy of users.csv in the private folder that was set up in Chapter 7. Refer to Chapter 7 if you haven’t set up a folder for PHP to read and write files. If you create your own version of users.csv, there should be no space after the comma separating the username and password.
PHP Solution 9-3: Building the Login Page
This PHP solution shows how to submit a username and password through the post method and then check the submitted values against those stored in an external text file. If a match is found, the script sets a session variable and then redirects the user to another page.
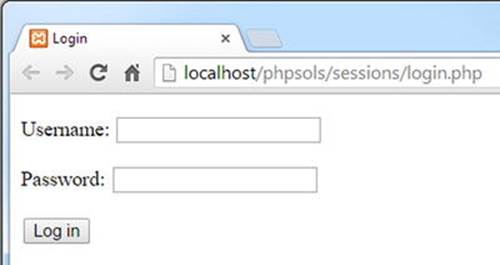
1. Create a file called login.php in the sessions folder, then insert a form with text input fields for username and password, plus a Submit button named login, like this (alternatively, use login_01.php in the ch09 folder):
<form method="post" action="">
<p>
<label for="username">Username:</label>
<input type="text" name="username" id="username">
</p>
<p>
<label for="pwd">Password:</label>
<input type="password" name="pwd" id="pwd">
</p>
<p>
<input name="login" type="submit" value="Log in">
</p>
</form>
It’s a simple form, nothing fancy:
2. Add the following code in a PHP block above the DOCTYPE declaration:
$error = '';
if (isset($_POST['login'])) {
session_start();
$username = $_POST['username'];
$password = $_POST['pwd'];
// location of usernames and passwords
$userlist = 'C:/private/users.csv';
// location to redirect on success
$redirect = 'http://localhost/phpsols/sessions/menu.php';
require_once '../includes/authenticate.php';
}
This initializes a variable called $error as an empty string. If the login fails, this will be used to display an error message informing the user of the reason for failure.
The conditional statement then checks whether the $_POST array contains an element named login. If it does, the form has been submitted, and the code inside the curly braces initiates a PHP session and stores the values passed through the $_POST array in$username and $password. Then it creates $userlist, which defines the location of the file that contains the registered usernames and passwords, and $redirect, the URL of the page the user will be sent to after successfully logging in.
Finally, the code inside the conditional statement includes authenticate.php, which you’ll create next.
![]() Note Adjust the value of $userlist to match the location in your own setup.
Note Adjust the value of $userlist to match the location in your own setup.
3. Create a file called authenticate.php in the includes folder. It will contain only PHP code, so strip out any HTML inserted by your script editor and insert the following code:
<?php
if (!file_exists($userlist) || !is_readable($userlist)) {
$error = 'Login facility unavailable. Please try later.';
} else {
$file = fopen($userlist, 'r');
// ignore the titles in the first row of the CSV file
$titles = fgetcsv($file);
// loop through the remaining lines
while (($data = fgetcsv($file)) !== false) {
// ignore if the first element is null
if (is_null($data[0])) {
continue;
}
// if username and password match, create session variable,
// regenerate the session ID, and break out of the loop
if ($data[0] == $username && $data[1] == $password) {
$_SESSION['authenticated'] = 'Jethro Tull';
session_regenerate_id();
break;
}
}
fclose($file);
}
This adapts the code that you used in getcsv.php in PHP Solution 7-2. The conditional statement checks for a nonexistent file or one that can’t be read. If there’s a problem with $userlist, the error message is created immediately.
Otherwise, the main code in the else block extracts the content of the CSV file by opening the file in read mode and using the fgetcsv() function to return an array of the data in each line. In PHP Solution 7-2, the values were stored in a multidimensional array containing the name and password of each registered user. This time, there’s no need to store them. All we’re interested in is finding a username/password pair that matches the values in $username and $password.
The first line in the CSV file contains the field titles. The script extracts them to a variable called $titles, but they’re never used. The while loop then examines the remaining lines. Each time the loop runs, it extracts the current line into to an array called $data. The first element contains the username, and the second contains the related password. If $data[0] is null, it probably means the current line is blank, so it’s skipped.
If both elements in the $data array match $username and $password, the script creates a variable called $_SESSION['authenticated'] and assigns it the name of one of the great folk-rock bands of the 1970s. There’s nothing magic about either of these (apart from Jethro Tull’s music); I’ve chosen the name and value of the variable arbitrarily. All that matters is a session variable is created. As soon as a match is found, the session ID is regenerated, and break exits the loop.
4. If the login is successful, the header() function needs to redirect the user to the URL stored in $redirect and then exit the script. Otherwise, an error message needs to be created, informing the user that the login failed. The complete script looks like this:
<?php
if (!file_exists($userlist) || !is_readable($userlist)) {
$error = 'Login facility unavailable. Please try later.';
} else {
$file = fopen($userlist, 'r');
// ignore the titles in the first row of the CSV file
$titles = fgetcsv($file);
// loop through the remaining lines
while (($data = fgetcsv($file)) !== false) {
// ignore if the first element is null
if (is_null($data[0])) {
continue;
}
// if username and password match, create session variable,
// regenerate the session ID, and break out of the loop
if ($data[0] == $username && $data[1] == $password) {
$_SESSION['authenticated'] = 'Jethro Tull';
session_regenerate_id();
break;
}
}
fclose($file);
// if the session variable has been set, redirect
if (isset($_SESSION['authenticated'])) {
header("Location: $redirect");
exit;
} else {
$error = 'Invalid username or password.';
}
}
5. In login.php, add the following short code block just after the opening <body> tag to display any error messages:
<body>
<?php
if ($error) {
echo "<p>$error</p>";
}
?>
<form method="post" action="">
The completed code is in login_02.php in the ch09 folder. Before you can test login.php, you need to create menu.php and restrict access with a session.
PHP Solution 9-4: Restricting Access to a Page with a Session
This PHP solution demonstrates how to restrict access to a page by checking for the existence of a session variable that indicates the user’s credentials have been authenticated. If the variable hasn’t been set, the header() function redirects the user to the login page.
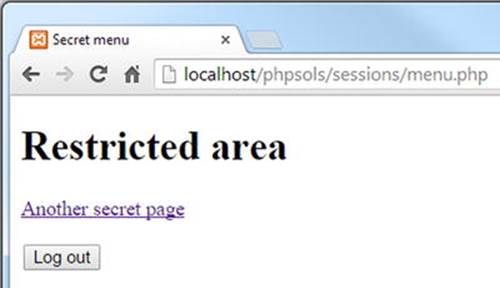
1. Create two pages in the sessions folder called menu.php and secretpage.php. It doesn’t matter what they contain, as long as they link to each other. Alternatively, use menu_01.php and secretpage_01.php in the ch09 folder.
2. Protect access to each page by inserting the following above the DOCTYPE declaration:
<?php
session_start();
// if session variable not set, redirect to login page
if (!isset($_SESSION['authenticated'])) {
header('Location: http://localhost/phpsols/sessions/login.php');
exit;
}
?>
After starting the session, the script checks if $_SESSION['authenticated'] has been set. If it hasn’t been, it redirects the user to login.php and exits. That’s all there is to it! The script doesn’t need to know the value of$_SESSION['authenticated'], although you could make doubly sure by amending line 4 like this:
if (!isset($_SESSION['authenticated']) || $_SESSION['authenticated']
!= 'Jethro Tull') {
This now also rejects a visitor if $_SESSION['authenticated'] has the wrong value.
3. Save menu.php and secretpage.php, then try to load either of them into a browser. You should always be redirected to login.php.
4. Enter a valid username and password from users.csv (the values are case-sensitive) in login.php, and then click Log in. You should be redirected immediately to menu.php, and the link to secretpage.php should also work.
You can check your code against menu_02.php and secretpage_02.php in the ch09 folder.
![]() Tip The login might fail if you create your own version of users.csv on Mac OS X. If that happens, add the following line at the top of authenticate.php, as described in “CSV files created on Mac OS” in Chapter 7:
Tip The login might fail if you create your own version of users.csv on Mac OS X. If that happens, add the following line at the top of authenticate.php, as described in “CSV files created on Mac OS” in Chapter 7:
ini_set('auto_detect_line_endings', true);
All you need to do to protect any page on your site is to add the eight lines of code in step 2 above the DOCTYPE declaration.
PHP Solution 9-5: Creating a Reusable Logout Button
As well as logging in to a site, users should be able to log out. This PHP solution shows how to create a logout button that can be inserted in any page.
Continue working with the files from the preceding section.
1. Create a logout button in the <body> of menu.php by inserting the following form:
<form method="post" action="">
<input name="logout" type="submit" value="Log out">
</form>
The page should look similar to the following screenshot:
2. You now need to add the script that runs when the logout button is clicked. Amend the code above the DOCTYPE declaration like this (the code is in menu_02.php):
<?php
session_start();
// if session variable not set, redirect to login page
if (!isset($_SESSION['authenticated'])) {
header('Location: http://localhost/phpsols/sessions/login.php');
exit;
}
// run this script only if the logout button has been clicked
if (isset($_POST['logout'])) {
// empty the $_SESSION array
$_SESSION = [];
// invalidate the session cookie
if (isset($_COOKIE[session_name()])) {
setcookie(session_name(), '', time()-86400, '/');
}
// end session and redirect
session_destroy();
header('Location: http://localhost/phpsols/sessions/login.php');
exit;
}
?>
This is the same code as in “Destroying a session” earlier in the chapter. The only differences are that it’s enclosed in a conditional statement so that it runs only when the logout button is clicked, and it uses header() to redirect the user to login.php.
3. Save menu.php and test it by clicking Log out. You should be redirected to login.php. Any attempt to return to menu.php or secretpage.php will bring you back to login.php.
4. You can put the same code in every restricted page, but PHP is all about saving work, not making it. It makes sense to turn this into an include file. Create a new file called logout.php in the includes folder. Cut and paste the new code from steps 1 and 2 into the new file, like this (it’s in logout.php in the ch09 folder):
<?php
// run this script only if the logout button has been clicked
if (isset($_POST['logout'])) {
// empty the $_SESSION array
$_SESSION = array();
// invalidate the session cookie
if (isset($_COOKIE[session_name()])) {
setcookie(session_name(), '', time()-86400, '/');
}
// end session and redirect
session_destroy();
header('Location: http://localhost/phpsols/sessions/login.php');
exit;
}
?>
<form method="post" action="">
<input name="logout" type="submit" value="Log out">
</form>
5. At the same point in menu.php from which you cut the code for the form, include the new file, as follows:
<?php include '../includes/logout.php'; ?>
Including the code from an external file like this means that there will be output to the browser before the calls to setcookie() and header(). So you need to buffer the output, as shown in PHP Solution 9-2.
6. Add ob_start(); immediately after the call to session_start() at the top of menu.php. There’s no need to use ob_end_flush() or ob_end_clean(). PHP automatically flushes the buffer at the end of the script if you haven’t already explicitly done so.
7. Save menu.php and test the page. It should look and work exactly the same as before.
8. Repeat steps 5 and 6 with secretpage.php. You now have a simple, reusable logout button that can be incorporated into any restricted page.
You can check your code against menu_04.php, secretpage_03.php, and logout.php in the ch09 folder.
Making Passwords More Secure
Although this file-based user authentication setup is adequate for restricting access to webpages, all the passwords are stored in plain text. For greater security, it’s advisable to encrypt passwords. For many years, it was recommended to use the MD5 or SHA-1 algorithms to encrypt passwords as a 32- or 40-digit hexadecimal number. One of their original strengths, speed, has turned out to be a major weakness. Automated scripts can process huge numbers of calculations per second in a brute force attack to determine the original value—not so much guessing as trying every possible combination.
PHP 5.5 introduced a much more robust system of encrypting and verifying passwords using two functions: password_hash() and password_verify(). To encrypt a password, just pass it to the password_hash() function, like this:
$encrypted = password_hash($password, PASSWORD_DEFAULT);
The second argument to password_hash() is a constant that leaves the choice of encryption method up to PHP, allowing you to keep up to date with what is considered the most secure method at the time.
![]() Note The password_hash() function has other options for advanced users. For details, see http://php.net/manual/en/function.password-hash.php. There’s also a FAQ (frequently asked questions) page about safe password hashing athttp://php.net/manual/en/faq.passwords.php.
Note The password_hash() function has other options for advanced users. For details, see http://php.net/manual/en/function.password-hash.php. There’s also a FAQ (frequently asked questions) page about safe password hashing athttp://php.net/manual/en/faq.passwords.php.
Using password_hash() performs one-way encryption. This means that even if your password file is exposed, no one will be able to work out what the passwords are. It also means that you have no way of converting an encrypted password back to its original value. In one respect, this is unimportant: when a user logs in, password_verify() checks the submitted value against the encrypted version. The disadvantage is that there is no way that you can send users password reminders if they forget them; you must generate a new password. Nevertheless, good security demands encryption.
ENABLING PASSWORD HASHING IN OLDER VERSIONS OF PHP
The password hashing functions are not available prior to PHP 5.5. However, if your server is running PHP 5.3.7 or later, or any version of PHP 5.4, you can enable the same functionality with the password_compat library.
To check whether password_compat will run on your version of PHP, download version-test.php from https://github.com/ircmaxell/password_compat. If it outputs Pass, include password.php to enable the password hashing functions in a script. This is a single file that can be downloaded from the lib folder at the same URL.
Once you have included password.php, the functions work exactly the same as in PHP 5.5 and later.
Encryption is no protection against the most common problem with passwords: ones that are easy to guess or that use common words. Many registration systems now enforce the use of stronger passwords by requiring a mixture of alphanumeric characters and symbols.
To improve the basic login system developed so far, you need to create a user registration form that checks the following:
· That the password and username contain a minimum number of characters
· That the password matches minimum strength criteria, such as containing a mixture of numbers, uppercase and lowercase characters, and symbols
· That the password matches a second entry in a confirmation field
· That the username isn’t already in use
PHP Solution 9-6: Creating a Password-strength Checker
This PHP solution shows how to create a class that checks whether a password meets certain requirements, such as no spaces, a minimum number of characters, and a combination of different types of characters. By default, the class checks only that the password has no spaces and contains a minimum number of characters. Optional methods allow you to set tougher conditions, such as using a combination of uppercase and lowercase characters, numbers, and nonalphanumeric symbols.
This PHP solution starts by building the user registration form that will also be used in PHP Solution 9-7.
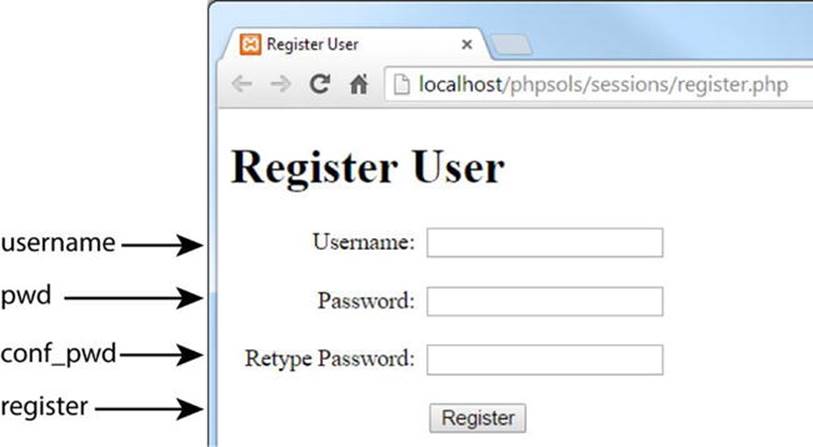
1. Create a page called register.php in the sessions folder and insert a form with three text input fields and a Submit button. Lay out the form and name the input elements as shown in the following screenshot. If you want to save time, use register_01.phpin the ch09 folder.
2. As always, you want the processing script to run only if the form has been submitted, so everything needs to be enclosed in a conditional statement that checks whether the name attribute of the Submit button is in the $_POST array. Then you need to check that the input meets your minimum requirements. Insert the following code in a PHP block above the DOCTYPE declaration:
if (isset($_POST['register'])) {
$username = trim($_POST['username']);
$password = trim($_POST['pwd']);
$retyped = trim($_POST['conf_pwd']);
require_once '../PhpSolutions/Authenticate/CheckPassword.php';
}
The code inside the conditional statement passes the input from the three text fields to trim() to remove whitespace from the beginning and end, and it assigns the results to simple variables. Next it includes the file that will contain the class that checks the password, which you’ll define next.
3. Create a new folder called Authenticate in the PhpSolutions folder. Then create a file called CheckPassword.php inside the new folder. It will contain only PHP script, so strip out any HTML and add the following code:
<?php
namespace PhpSolutions\Authenticate;
class CheckPassword {
protected $password;
protected $minimumChars;
protected $mixedCase = false;
protected $minimumNumbers = 0;
protected $minimumSymbols = 0;
protected $errors = [];
public function __construct($password, $minimumChars = 8) {
$this->password = $password;
$this->minimumChars = $minimumChars;
}
public function check() {
if (preg_match('/\s/', $this->password)) {
$this->errors[] = 'Password cannot contain spaces.';
}
if (strlen($this->password) < $this->minimumChars) {
$this->errors[] = "Password must be at least
$this->minimumChars characters.";
}
return $this->errors ? false : true;
}
public function getErrors() {
return $this->errors;
}
}
This defines the basic CheckPassword class, which initially checks only whether the password contains any spaces and whether it has the required minimum number of characters. You’ll add the other features shortly.
The file begins by declaring PhpSolutions\Authenticate as its namespace, and then defines the CheckPassword class with six protected properties. The first two are for the password and minimum number of characters. The $mixedCase,$minimumNumbers, and $minimumSymbols properties will be used to add strength to the password but are initially set to false or 0. The $errors property will be used to store an array of error messages if the password fails any of the checks.
The constructor method takes two arguments, the password and the minimum number of characters, and assigns them to the relevant properties. By default, the minimum number of characters is set to 8, making this an optional argument.
The check() method contains two conditional statements. The first uses preg_match() with a regular expression that searches for whitespace characters inside the password. The second conditional statement uses strlen(), which returns the length of a string and compares the result with $minimumChars.
If the password fails either test, or both, the $errors property contains at least one element, which PHP treats as intrinsically true. The final line in the check() method uses the $errors property as the condition with the ternary operator. If any errors are found, the check() method returns false, indicating that the password has failed validation. Otherwise, it returns true (see “Using the ternary operator” in Chapter 3 if you need a reminder of how this structure works).
The getErrors() public method simply returns the array of error messages.
4. Save CheckPassword.php and switch to register.php.
5. In register.php, add the following line immediately after the opening PHP tag to import the CheckPassword class:
use PhpSolutions\Authenticate\CheckPassword;
![]() Caution You must always import namespaced classes at the top level of a script. Attempting to import the class in a conditional statement generates a parse error.
Caution You must always import namespaced classes at the top level of a script. Attempting to import the class in a conditional statement generates a parse error.
6. Inside the conditional statement that executes the code after the form has been submitted, create a CheckPassword object, passing $password as the argument. Then call the check() method and handle the result like this:
require_once '../PhpSolutions/Authenticate/CheckPassword.php';
$checkPwd = new CheckPassword($password);
$passwordOK = $checkPwd->check();
if ($passwordOK) {
$result = ['Password OK'];
} else {
$result = $checkPwd->getErrors();
}
The second argument to the CheckPassword constructor is optional, so leaving it out sets the minimum number of characters to the default 8. The result of the check() method is assigned to $passwordOK. If it returns true, a single-element array reporting that the password is okay is assigned to $result. Otherwise, the getErrors() method is used to retrieve the array of errors from the $checkPwd object.
![]() Note Once testing is complete, the single-element array will be replaced by the script that registers the user. You need to use an array because the next step uses a foreach loop to display the outcome.
Note Once testing is complete, the single-element array will be replaced by the script that registers the user. You need to use an array because the next step uses a foreach loop to display the outcome.
7. Add the following PHP code block just above the form in the body of the page:
<h1>Register User</h1>
<?php
if (isset($result)) {
echo '<ul>';
foreach ($result as $item) {
echo "<li>$item</li>";
}
echo '</ul>';
}
?>
<form action="" method="post">
This displays the results of the password test as an unordered list after the form has been submitted.
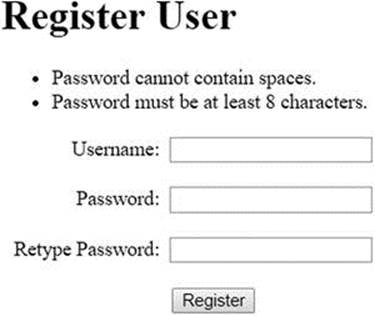
8. Save register.php and load it in a browser. Test the CheckPassword class by clicking the Register button without filling in any of the fields. You should see a message informing you that the password requires a minimum of 8 characters.
9. Try it with a password that contains 8 characters. You should see Password OK.
10.Try a password with at least 8 characters, but insert a space in the middle. You’ll be warned that no spaces are permitted.
11.Try one with fewer than 8 characters but with a space in the middle. You’ll see the following warnings:
12.Change the code in register.php to pass the optional second argument to the CheckPassword constructor, setting the minimum number of characters to 10:
$checkPwd = new CheckPassword($password, 10);
13.Save and test the page again. If you encounter any problems, compare your code with register_02.php in the ch09 folder and CheckPassword_01.php in the ch09/PhpSolutions/Authenticate folder.
14.Assuming that your code is working, add to the class definition in CheckPassword.php the public methods to set the password strength. Where you put them inside the class makes no difference technically (as long as they’re inside the curly braces), but my preference is to put public methods in the same order as they’re used. You need to set the options before calling the check() method, so insert the following code between the constructor and check() method definitions:
public function requireMixedCase() {
$this->mixedCase = true;
}
public function requireNumbers($num = 1) {
if (is_numeric($num) && $num > 0) {
$this->minimumNumbers = (int) $num;
}
}
public function requireSymbols($num = 1) {
if (is_numeric($num) && $num > 0) {
$this->minimumSymbols = (int) $num;
}
}
This code is pretty straightforward. The requireMixedCase() method takes no arguments and resets the $mixedCase property to true. The other two methods take one argument, check that it’s a number greater than 0, and assign it to the relevant property. The (int) casting operator ensures that it’s an integer. You first met the casting operator in PHP Solution 6-4 (see “Explicitly changing a data type” in Chapter 6 for a detailed explanation). The value of $num sets the minimum amount of numbers or nonalphanumeric symbols the password must contain. By default, the value is set to 1, making the argument optional.
15.The check() method needs to be updated to perform the necessary checks for these strength criteria. Amend the code like this:
public function check() {
if (preg_match('/\s/', $this->password)) {
$this->errors[] = 'Password cannot contain spaces.';
}
if (strlen($this->password) < $this->minimumChars) {
$this->errors[] = "Password must be at least
$this->minimumChars characters.";
}
if ($this->mixedCase) {
$pattern = '/(?=.*[a-z])(?=.*[A-Z])/';
if (!preg_match($pattern, $this->password)) {
$this->errors[] = 'Password should include uppercase
and lowercase characters.';
}
}
if ($this->minimumNumbers) {
$pattern = '/\d/';
$found = preg_match_all($pattern, $this->password, $matches);
if ($found < $this->minimumNumbers) {
$this->errors[] = "Password should include at least
$this->minimumNumbers number(s).";
}
}
if ($this->minimumSymbols) {
$pattern = "/[-!$%^&*(){}<>[\]'" . '"|#@:;.,?+=_\/\~]/';
$found = preg_match_all($pattern, $this->password, $matches);
if ($found < $this->minimumSymbols) {
$this->errors[] = "Password should include at least
$this->minimumSymbols nonalphanumeric character(s).";
}
}
return $this->errors ? false : true;
}
Each of the three new conditional statements is run only if the equivalent public method is called before the check() method. Each one stores a regular expression as $pattern and then uses preg_match() or preg_match_all() to test the password.
If the $mixedCase property is set to true, the regular expression and password are passed to preg_match() to look for at least one lowercase letter and one uppercase letter in any position in the password.
The $minimumNumbers and $minimumSymbols properties are set to 0 by default. If they’re reset to a positive number, the regular expression and password are passed to the preg_match_all() function to find how many times the regex matches. The function requires three arguments: the regex, the string to be searched, and a variable to store the matches; it returns the number of matches found. In this case, all you’re interested in is the number of matches. The variable that stores the matches is discarded.
The horrendous $pattern in the last conditional statement is actually a regex created by concatenating a single-quoted string to a double-quoted one. This is necessary to include single and double quotation marks in the permitted symbols. I have included most nonalphanumeric symbols on an English keyboard. If you want to add others, put them just before the final closing square bracket, like this:
$pattern = "/[-!$%^&*(){}<>[\]'" . '"|#@:;.,?+=_\/\~£¦]/';
16.Save CheckPassword.php and test the updated class by calling the new methods in register.php. For example, the following requires the password to have a minimum of ten characters, at least one uppercase and one lowercase letter, two numbers, and one nonalphanumeric symbol:
$checkPwd = new CheckPassword($password, 10);
$checkPwd->requireMixedCase();
$checkPwd->requireNumbers(2);
$checkPwd->requireSymbols();
$passwordOK = $checkPwd->check();
It doesn’t matter in which order you call the new methods, as long as they’re after the constructor and before the call to the check() method. Use a variety of combinations to enforce different strengths of password.
If necessary, check your code against register_03.php in the ch09 folder and CheckPassword_02.php in the ch09/PhpSolutions/Authenticate folder.
When developing the code for this chapter, I originally designed the password checker as a function. The basic code inside the function was the same, but I decided to convert it into a class to make it more flexible and easier to use. The problem with the function was that it needed a large number of arguments to set the different options, and it was difficult to remember which order they came in. There was also the difficulty of handling the result. If there were no errors, the function returned true; but if any errors were found, it returned the array of error messages. Since PHP treats an array with elements as implicitly true, this meant having to use the identical operator (three equal signs—see Table 3-5) to check whether the result was a Boolean true.
Converting the code to a class eliminated these problems. The public methods to set the options have intuitive names and can be set in any order—or not at all. And the result is always a Boolean true or false, because a separate method retrieves the array of error messages. It involved writing more code, but the improvements made it worthwhile.
PHP Solution 9-7: Creating a File-based User Registration System
This PHP solution creates a simple user registration system that encrypts passwords with the password_hash() function. It uses the CheckPassword class from PHP Solution 9-6 to enforce minimum strength requirements. Further checks ensure that the username contains a minimum number of characters and that the user has retyped the password correctly in a second field.
The user credentials are stored in a plain text file, which must be outside the web server’s document root. The instructions assume you have set up a private folder that PHP has write access to, as described in Chapter 7. It’s also assumed that you’re familiar with the “Appending content with fopen()” section in that chapter.
Continue working with the files from the preceding PHP solution. Alternatively, use register_03.php in the ch09 folder and CheckPassword_02.php in the ch09/PhpSolutions/Authenticate folder.
![]() Note The password hashing functions used in PHP Solutions 9-7 and 9-8 require a minimum of PHP 5.5. See “Enabling password hashing in older versions of PHP” earlier in this chapter for details of how to obtain the password_compat library.
Note The password hashing functions used in PHP Solutions 9-7 and 9-8 require a minimum of PHP 5.5. See “Enabling password hashing in older versions of PHP” earlier in this chapter for details of how to obtain the password_compat library.
1. Create a file called register_user_csv.php in the includes folder and strip out any HTML inserted by your script editor.
2. When using a namespaced class, the import statement must to be in the same file as where the class is used, even if it’s an include file. Cut the following line from the top of register.php and paste it into register_user_csv.php.
use PhpSolutions\Authenticate\CheckPassword;
3. Cut the following code from register.php and paste it into register_user_csv.php after the import statement (it doesn’t matter if your password strength settings are different):
require_once '../PhpSolutions/Authenticate/CheckPassword.php';
$checkPwd = new CheckPassword($password, 10);
$checkPwd->requireMixedCase();
$checkPwd->requireNumbers(2);
$checkPwd->requireSymbols();
$passwordOK = $checkPwd->check();
if ($passwordOK) {
$result = array('Password OK');
} else {
$result = $checkPwd->getErrors();
}
4. At the end of the remaining script above the DOCTYPE declaration in register.php, create a variable for the location of the text file that will be used to store the user credentials; include register_user_csv.php. The code in the PHP block at the top ofregister.php should now look like this:
if (isset($_POST['register'])) {
$username = trim($_POST['username']);
$password = trim($_POST['pwd']);
$retyped = trim($_POST['conf_pwd']);
$userfile = 'C:/private/encrypted.csv';
require_once '../includes/register_user_csv.php';
}
The CSV file for the user credentials doesn’t exist yet. It will be created automatically when the first user is registered. Amend the path to the private folder to match your own setup if necessary.
5. In register_user_csv.php, paste the code you cut from register.php in step 3 and amend the command that includes the class definition, like this:
require_once __DIR__ . '/../PhpSolutions/Authenticate/CheckPassword.php';
You need to adapt the relative path because register_user_csv.php is also an include file (see “Nesting include files” in Chapter 4).
6. Insert the code highlighted in bold immediately after the include command:
require_once __DIR__ . '/../PhpSolutions/Authenticate/CheckPassword.php';
$usernameMinChars = 6;
$errors = [];
if (strlen($username) < $usernameMinChars) {
$errors[] = "Username must be at least $usernameMinChars characters.";
}
if (preg_match('/\s/', $username)) {
$errors[] = 'Username should not contain spaces.';
}
$checkPwd = new CheckPassword($password, 10);
The first two lines of new code specify the minimum number of characters in the username and initialize an empty array for error messages. The rest of the new code checks the length of the username and tests whether it contains any spaces. The conditional statementsuse the same code as in the CheckPassword class.
7. Amend the code at the bottom of register_user_csv.php like this:
$passwordOK = $checkPwd->check();
if (!$passwordOK) {
$errors = array_merge($errors, $checkPwd->getErrors());
}
if ($password != $retyped) {
$errors[] = "Your passwords don't match.";
}
if ($errors) {
$result = $errors;
} else {
$result = ['All OK'];
}
This adds the logical Not operator to the conditional statement that tests the value of $passwordOK. If the password fails to validate, array_merge() is used to merge the result of $checkPwd->getErrors() with the existing $errors array.
The next conditional statement compares $password with $retyped and adds an error message to the $errors array if they don’t match.
If any errors are discovered, the final conditional statement assigns the $errors array to $result. Otherwise, a single-element array is assigned to $result, reporting that all is okay. Again, this is only for testing purposes. Once you have checked your code, the script that registers the user will replace the final conditional statement.
8. Save register_user_csv.php and register.php, then test the form again. Leave all the fields blank and click Register. You should see the following error messages:

o Try a variety of tests to make sure your validation code is working.
o If you have problems, compare your code with register_user_csv_01.php and register_04.php in the ch09 folder.
Assuming that your code is working, you’re ready to create the registration part of the script. Let’s pause to consider what the main script needs to do. First, you need to encrypt the password. Then, before writing the details to a CSV file, you must check whether the username is unique. This presents a problem regarding which mode to use with fopen().
![]() Note The various fopen() modes are described in Chapter 7.
Note The various fopen() modes are described in Chapter 7.
Ideally, you want the internal pointer at the beginning of the file so that you can loop through existing records. The r+ mode does this, but the operation fails unless the file already exists. You can’t use w+, because it deletes existing content. You can’t use x+ either, because it fails if a file of the same name already exists.
That leaves a+ and c+ as the only options with the flexibility you need: both create the file if necessary and let you read and write. They differ in where the internal pointer is placed when you open the file: a+ puts it at the end, whereas c+ puts it at the beginning. This makes c+ more useful for checking existing records, but a+ has the advantage of always appending new content at the end of the file. This avoids the danger of accidentally overwriting existing values. We’ll open the CSV file in a+ mode.
The file is empty the first time you run the script (you can tell because the filesize() function returns 0), so you can go ahead and write the details using fputcsv(). This is the counterpart of fgetcsv(), which was described in Chapter 7. Whereasfgetcsv() extracts the data from a CSV file one line at a time, fputcsv() creates a CSV record. It has two required arguments: the file reference and an array of values to be inserted as a CSV record. It also accepts optional arguments to set the delimiter and enclosure characters (see the online documentation at http://php.net/manual/en/function.fputcsv.php).
If filesize() doesn’t return 0, you need to reset the internal pointer and loop through the records to see if the username is already registered. If there’s a match, you break out of the loop and prepare an error message. If there isn’t a match by the end of the loop, you know it’s a new username that needs to be added to the file. Now that you understand the flow of the script, you can insert it into register_user_csv.php.
9. Delete the following code at the bottom of register_user_text.inc.php:
if ($errors) {
$result = $errors;
} else {
$result = ['All OK'];
}
10.Replace it with the following code:
if (!$errors) {
// encrypt password using default encryption
$password = password_hash($password, PASSWORD_DEFAULT);
// open the file in append mode
$file = fopen($userfile, 'a+');
// if filesize is zero, no names yet registered
// so just write the username and password to file as CSV
if (filesize($userfile) === 0) {
fputcsv($file, [$username, $password]);
$result = "$username registered.";
} else {
// if filesize is greater than zero, check username first
// move internal pointer to beginning of file
rewind($file);
// loop through file one line at a time
while (($data = fgetcsv($file)) !== false) {
if ($data[0] == $username) {
$result = "$username taken - choose a different username.";
break;
}
}
// if $result not set, username is OK
if (!isset($result)) {
// insert new CSV record
fputcsv($file, [$username, $password]);
$result = "$username registered.";
}
// close the file
fclose($file);
}
}
The preceding explanation and inline comments should help you follow the script.
11.The registration script stores the outcome in $result or the $errors array. Amend the code in the body of register.php to display the result or the error messages, as follows:
<?php
if (isset($result) || isset($errors)) {
echo '<ul>';
if (!empty($errors)) {
foreach ($errors as $item) {
echo "<li>$item</li>";
}
} else {
echo "<li>$result</li>";
}
echo '</ul>';
}
?>
This loops through the $errors array if it’s not empty. Otherwise, it displays the value of $result (a string) as a single bulleted item.
12.Save both register_user_csv.php and register.php and test the registration system. Try registering the same username more than once. You should see a message informing you that the username is taken and asking you to choose another.
13.Open encrypted.csv. You should see the usernames in plain text, but the passwords should have been encrypted. Even if you choose the same password for two different users, the encrypted version is different because password_hash() adds a random value known as a salt to the password before encrypting it. Figure 9-4 shows two users that were both registered with the password Codeslave&Ch09.

Figure 9-4. Using a salt produces completely different encryptions of the same password
If necessary, check your code against register_user_csv_02.php and register_05.php in the ch09 folder.
![]() Tip Most of the code in register_user_csv.php is generic. All you need to do to use it with any registration form is to define $username, $password, $retyped, and $userfile before including it and capture the results using $errors and $result. The only changes you might need to make to the external file are in setting the minimum number of characters in the username and setting parameters for the password strength. Those settings are defined at the top of the file, so they’re easy to access and adjust. Don’t forget, though, that the code relies onpassword_hash(), which requires a minimum of PHP 5.5. If your server uses an older version of PHP, you must include the password_compat library, as described in “Enabling password hashing in older versions of PHP” earlier in this chapter.
Tip Most of the code in register_user_csv.php is generic. All you need to do to use it with any registration form is to define $username, $password, $retyped, and $userfile before including it and capture the results using $errors and $result. The only changes you might need to make to the external file are in setting the minimum number of characters in the username and setting parameters for the password strength. Those settings are defined at the top of the file, so they’re easy to access and adjust. Don’t forget, though, that the code relies onpassword_hash(), which requires a minimum of PHP 5.5. If your server uses an older version of PHP, you must include the password_compat library, as described in “Enabling password hashing in older versions of PHP” earlier in this chapter.
Checking Encrypted Passwords with password_verify()
The password_verify() function does exactly what you expect: it verifies passwords that have been encrypted with password_hash(). It takes just two arguments, the submitted password and the encrypted version. If the submitted password is correct, the function returns true. Otherwise, it returns false.
PHP Solution 9-8: Using an Encrypted Login
Now that you have encrypted passwords, you need to change the login form to handle the new setup. All that’s necessary is to select the CSV file that contains the encrypted passwords and to use password_verify() to check the validity of the submitted password. Again, this relies on using PHP 5.5 or including the password_compat library in your script.
1. Open login.php from PHP Solution 9-3 or use login_02.php from the ch09 folder. Change the location of $userlist to use the encrypted passwords:
$userlist = 'C:/private/encrypted.csv';
2. Open includes/authenticate.php from PHP Solution 9-3 or use authenticate_01.php in the ch09 folder. The file of encrypted passwords doesn’t have titles in the first row, so delete the following comment and line of code:
// ignore the titles in the first row of the CSV file
$titles = fgetcsv($file);
3. Locate the following line:
if ($data[0] == $username && $data[1] == $password) {
4. Change it like this:
if ($data[0] == $username && password_verify($password, $data[1])) {
$password contains the submitted password, and $data[1] contains the encrypted version, so they’re passed as arguments to password_verify(), which returns true only if the password is correct.
5. Save login.php and test it. It should work the same as before, while being more secure. Check your code, if necessary, with login_03.php and authenticate_02.php in the ch09 folder.
PHP Solutions 9-3 to 9-8 build a simple yet effective user authentication system that doesn’t require a database backend. However, it does have its limitations. Above all, it’s essential that the CSV file containing the usernames and passwords be located outside the server root. Also, once you get more than a few records, querying a database is usually much faster than looping through a CSV file line by line. Chapter 17 covers user authentication with a database.
Keeping Encryption Up to Date
The major advantage of using the password hashing functions that were added in PHP 5.5 is that they’re designed to keep abreast of improvements in encryption technology. Instead of specifying a particular encryption standard, using PASSWORD_DEFAULT as the second argument topassword_hash() ensures that new registrations always use whatever is considered to be the most secure method at the time. Even if the default changes, existing passwords can still be verified by the password_verify() function because the encrypted password contains information that identifies how it was encrypted.
There’s also a function called password_needs_rehash() that checks whether the encrypted password needs to be updated to the current standard. It’s designed to be used when a user logs in to the site. The following code assumes that the submitted password is stored in$password, that the encrypted one is in $encrypted, and that you’re using the PHP default method of encryption.
if (password_verify($password, $encrypted) {
if (password_needs_rehash($encrypted, PASSWORD_DEFAULT)) {
$encrypted = password_hash($password, PASSWORD_DEFAULT);
// store the updated version of $encrypted
}
}
Performing this check every time a user logs in is almost certainly excessive. PHP’s policy is to change the default encryption only upon a full release, such as 5.7.0 or 7.0.0. The only exception to this is in an emergency when a critical security flaw is found in the current default. If you keep abreast of PHP developments, you can create a script that updates all stored passwords in a single operation whenever the default changes. If you don’t have the time to follow what’s happening in the PHP world, using password_needs_rehash() every time someone logs in should keep your site secure, even though it might slow down the login process.
Setting a Time Limit on Sessions
By default, PHP sets the lifetime of the session cookie on the user’s computer to 0, which keeps the session active until the user logs out or the browser is closed. You can make the session timeout earlier through a call to ini_set(), the function that allows you to change some PHP configuration directives on the fly. As soon as the session starts, pass the directive session.cookie_lifetime as the first argument and a string containing the number of seconds you want the cookie to remain active as the second argument. For example, you could limit the session cookie’s lifetime to 10 minutes like this:
session_start();
ini_set('session.cookie_lifetime', '600');
Although this is effective, it has two drawbacks. First, the expiration is set relative to the time on the server, not the user’s computer. If the user’s computer clock is wrong, the cookie might be out of date immediately, or it might persist much longer than you anticipate. The other problem is that the user might be automatically logged out without explanation. The next PHP solution offers an approach that is more user friendly.
PHP Solution 9-9: Ending a Session after a Period of Inactivity
This PHP solution shows how to end a session if a user doesn’t do anything within a specified period that triggers a page to load. When the session first starts, typically when the user logs in, the current time is stored in a session variable. Each time the user loads a page, the session variable is compared with the current time. If the difference is greater than a predetermined limit, the session and its variables are destroyed. Otherwise, the variable is updated to the current time.
These instructions assume you have set up the login system in PHP Solutions 9-3 to 9-8.
1. You need to store the current time after the user’s credentials have been authenticated but before the script redirects the user to the restricted part of the site. Locate the following section of code in authenticate.php (around lines 16–20) and insert the new code highlighted in bold as follows:
if ($data[0] == $username && password_verify($password, $data[1])) {
$_SESSION['authenticated'] = 'Jethro Tull';
$_SESSION['start'] = time();
session_regenerate_id();
break;
}
The time() function returns a current timestamp. By being stored in $_SESSION['start'] it becomes available to every page that begins with session_start().
2. When a session times out, just dumping a user unceremoniously back at the login screen isn’t very friendly, so it’s a good idea to explain what’s happened. In login.php, add the code highlighted in bold to the PHP block immediately after the opening <body> tag (around lines 22–27):
<?php
if ($error) {
echo "<p>$error</p>";
} elseif (isset($_GET['expired'])) { ?>
<p>Your session has expired. Please log in again.</p>
<?php } ?>
The message is shown if the URL contains a variable called expired in a query string.
3. Open menu.php, cut the code in the PHP block above the DOCTYPE declaration, and paste it into a new blank file.
4. Save the file as session_timeout.php in the includes folder, then edit the code like this:
<?php
session_start();
ob_start();
// set a time limit in seconds
$timelimit = 15;
// get the current time
$now = time();
// where to redirect if rejected
$redirect = 'http://localhost/phpsols/sessions/login.php';
// if session variable not set, redirect to login page
if (!isset($_SESSION['authenticated'])) {
header("Location: $redirect");
exit;
} elseif ($now > $_SESSION['start'] + $timelimit) {
// if timelimit has expired, destroy session and redirect
$_SESSION = [];
// invalidate the session cookie
if (isset($_COOKIE[session_name()])) {
setcookie(session_name(), '', time()-86400, '/');
}
// end session and redirect with query string
session_destroy();
header("Location: {$redirect}?expired=yes");
exit;
} else {
// if it's got this far, it's OK, so update start time
$_SESSION['start'] = time();
}
The inline comments explain what is going on, and you should recognize most of the elseif clause from PHP Solution 9-5. PHP measures time in seconds, and I’ve set $timelimit (in line 5) to a ridiculously short 15 seconds purely to demonstrate the effect. To set a more reasonable limit of, say, 15 minutes, change this later, like this:
$timelimit = 15 * 60; // 15 minutes
You could, of course, set $timelimit to 900, but why bother when PHP can do the hard work for you?
If the sum of $_SESSION['start'] plus $timelimit is less than the current time (stored as $now), you end the session and redirect the user to the login page. The line that performs the redirect adds a query string to the end of the URL, as follows:
http://localhost/phpsols/sessions/login.php?expired=yes
The code in step 2 takes no notice of the value of expired; adding yes as the value just makes it look more user friendly in the browser address bar.
If the script gets as far as the final else, it means that $_SESSION['authenticated'] has been set and that the time limit hasn’t been reached, so $_SESSION['start'] is updated to the current time, and the page displays as normal.
5. Include session_timeout.php above the DOCTYPE declaration in menu.php. The include command should be the only code in the PHP block:
<?php require_once '../includes/session_timeout.php'; ?>
<!DOCTYPE HTML>
6. Replace the code above the DOCTYPE declaration in secretpage.php in the same way.
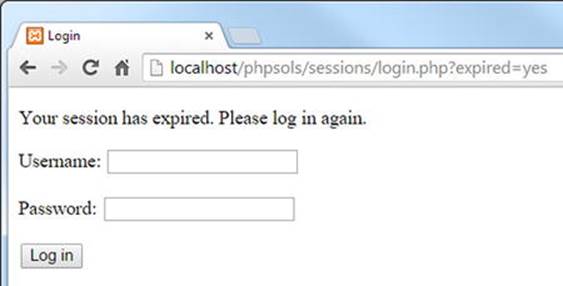
7. Save all the pages you have edited and load either menu.php or secretpage.php into a browser. If the page displays, click Log out. Then log back in and navigate back and forth between menu.php and secretpage.php. Once you have verified that the links work, wait 15 seconds or more and try to navigate back to the other page. You should be automatically logged out and presented with the following screen:
If necessary, check your code against authenticate_03.php, login_04.php, session_timeout.php, menu_05.php, and secretpage_04.php in the ch09 folder.
Passing Information Through Multipage Forms
Variables passed through the $_POST and $_GET arrays have only a fleeting existence. Once they have been passed to a page, they’re gone, unless you save their values in some way. The usual method of preserving information that’s passed from one form to another is to extract its value from the $_POST array and store it in a hidden field in HTML, like this:
<input type="hidden" name="address" id="address" value="<?= $_POST['address']; ?>">
As their name suggests, hidden fields are part of a form’s code, but nothing is displayed onscreen. Hidden fields are fine for one or two items, but say you have a survey that’s spread over four pages. If you have 10 items on a page, you need a total of 60 hidden fields (10 on the second page, 20 on the third, and 30 on the fourth). Session variables can save you all that coding. They can also make sure that visitors always start on the right page of a multipage form.
PHP Solution 9-10: Using Sessions for a Multipage Form
In this PHP solution you’ll build a script for use in multipage forms that gathers data from the $_POST array and assigns it to session variables. The script automatically redirects the user to the first page of the form if an attempt is made to access any other part of the form first.
1. Copy multiple_01.php, multiple_02.php, multiple_03.php, and multiple_04.php from the ch09 folder to the sessions folder. The first three pages contain simple forms that ask for the user’s name, age, and address. The action attribute of each <form> tag is empty, so the forms are self-processing, but they don’t yet contain any processing script. The final page is where the data from the first three pages will eventually be displayed.
2. Add the following code in a PHP block above the DOCTYPE declaration in multiple_01.php:
if (isset($_POST['next'])) {
session_start();
// set a variable to control access to other pages
$_SESSION['formStarted'] = true;
// set required fields
$required = 'first_name';
$firstPage = 'multiple_01.php';
$nextPage = 'multiple_02.php';
$submit = 'next';
require_once '../includes/multiform.php';
}
The name attribute of the Submit button is next, so the code in this block runs only if the form has been submitted. It initiates a session and creates a session variable that will be used to control access to the other form pages.
Next come four variables that will be used by the script that processes the multipage form:
o $required: This is an array of the name attributes of required fields in the current page. If only one field is required, a string can be used instead of an array. If no fields are required, it can be omitted.
o $firstPage: The filename of the first page of the form
o $nextPage: The filename of the next page in the form
o $submit: The name of the Submit button in the current page
Finally, the code includes the script that processes the multipage form.
3. Create a file called multiform.php in the includes folder. Delete any HTML markup and insert the following code:
<?php
if (!isset($_SESSION)) {
session_start();
}
$filename = basename($_SERVER['SCRIPT_FILENAME']);
$current = 'http://' . $_SERVER['HTTP_HOST'] . $_SERVER['PHP_SELF'];
Each page of the multipage form needs to call session_start(), but calling it twice on the same page generates an error, so the conditional statement first checks whether the $_SESSION superglobal variable is accessible. If it isn’t, it initiates the session for the page.
After the conditional statement, $_SERVER['SCRIPT_FILENAME'] is passed to the basename() function to extract the filename of the current page. This is the same technique that you used in PHP Solution 4-3.
$_SERVER['SCRIPT_FILENAME'] contains the path of the parent file, so when this script is included in multiple_01.php, the value of $filename will be multiple_01.php, not multiform.php.
The next line builds the URL for the current page from the string http:// and the values of $_SERVER['HTTP_HOST'], which contains the current domain name, and $_SERVER['PHP_SELF'], which contains the path of the current file minus the domain name. If you’re testing locally, when you load the first page of the multipage form $current is http://localhost/phpsols/sessions/multiple_01.php.
4. Now that you have both the name of the current file and its URL, you can use str_replace() to create the URLs for the first and next pages, like this:
$redirectFirst = str_replace($filename, $firstPage, $current);
$redirectNext = str_replace($filename, $nextPage, $current);
The first argument to str_replace() is the string you want to replace, the second is the replacement string, and the third is the target string. In step 2, you set $firstPage to multiple_01.php and $nextPage to multiple_02.php. As a result,$redirectFirst becomes http://localhost/phpsols/sessions/multiple_01.php, and $redirectNext is http://localhost/phpsols/sessions/multiple_02.php.
5. To prevent users from accessing the multipage form without starting at the beginning, add a conditional statement that checks the value of $filename. If it’s not the same as the first page, and $_SESSION['formStarted'] hasn’t been created, the header()function redirects to the first page, like this:
if ($filename != $firstPage && !isset($_SESSION['formStarted'])) {
header("Location: $redirectFirst");
exit;
}
6. The rest of the script loops through the $_POST array, checking for required fields that are blank and adding them to a $missing array. If nothing is missing, the header() function redirects the user to the next page of the multipage form. The complete script formultiform.php looks like this:
<?php
if (!isset($_SESSION)) {
session_start();
}
$filename = basename($_SERVER['SCRIPT_FILENAME']);
$current = 'http://' . $_SERVER['HTTP_HOST'] . $_SERVER['PHP_SELF'];
$redirectFirst = str_replace($filename, $firstPage, $current);
$redirectNext = str_replace($filename, $nextPage, $current);
if ($filename != $firstPage && !isset($_SESSION['formStarted'])) {
header("Location: $redirectFirst");
exit;
}
if (isset($_POST[$submit])) {
// create empty array for any missing fields
$missing = [];
// create $required array if not set
if (!isset($required)) {
$required = [];
} else {
// using casting operator to turn single string to array
$required = (array) $required;
}
// process the $_POST variables and save them in the $_SESSION array
foreach ($_POST as $key => $value) {
// skip submit button
if ($key == $submit) continue;
// assign to temporary variable and strip whitespace if not an array
$temp = is_array($value) ? $value : trim($value);
// if empty and required, add to $missing array
if (empty($temp) && in_array($key, $required)) {
$missing[] = $key;
} else {
// otherwise, assign to a variable of the same name as $key
$_SESSION[$key] = $temp;
}
}
// if no required fields are missing, redirect to next page
if (!$missing) {
header("Location: $redirectNext");
exit;
}
}
The code is very similar to that used in Chapter 5 to process the feedback form, so the inline comments should be sufficient to explain how it works. The conditional statement wrapped around the new code uses $_POST[$submit] to check if the form has been submitted. I have used a variable rather than hard-coding the name of the Submit button to make the code more flexible. Although this script is included in the first page only after the form has been submitted, it’s included directly in the other pages, so it’s necessary to add the conditional statement here.
The name and value of the Submit button are always included in the $_POST array, so the foreach loop uses the continue keyword to skip to the next item if the key is the same as the Submit button’s name. This avoids adding the unwanted value to the$_SESSION array. See “Breaking out of a loop” in Chapter 3 for a description of continue.
7. Add the following code in a PHP block above the DOCTYPE declaration in multiple_02.php:
$firstPage = 'multiple_01.php';
$nextPage = 'multiple_03.php';
$submit = 'next';
require_once '../includes/multiform.php';
This sets the values of $firstPage, $nextPage, and $submit and includes the processing script you have just created. The form on this page contains only one field, which is optional, so the $required variable isn’t needed. The processing script automatically creates an empty array if it isn’t set in the main page.
8. In multiple_03.php, add the following in a PHP code block above the DOCTYPE declaration:
// set required fields
$required = ['city', 'country'];
$firstPage = 'multiple_01.php';
$nextPage = 'multiple_04.php';
$submit = 'next';
require_once '../includes/multiform.php';
Two fields are required, so their name attributes are listed as an array and assigned to $required. The other code is the same as in the previous page.
9. Add the following code above the <form> tag in multiple_01.php, multiple_02.php, and multiple_03.php:
<?php if (isset($missing)) { ?>
<p> Please fix the following required fields:</p>
<ul>
<?php
foreach ($missing as $item) {
echo "<li>$item</li>";
}
?>
</ul>
<?php } ?>
This displays a list of required items that haven’t yet been filled in.
10.In multiple_04.php, add the following code in a PHP block above the DOCTYPE declaration to redirect users to the first page if they didn’t enter the form from there:
session_start();
if (!isset($_SESSION['formStarted'])) {
header('Location: http://localhost/phpsols/sessions/multiple_01.php');
exit;
}
11.In the body of the page, add the following code to the unordered list to display the results:
<ul>
<?php
$expected = ['first_name', 'family_name', 'age',
'address', 'city', 'country'];
// unset the formStarted variable
unset($_SESSION['formStarted']);
foreach ($expected as $key) {
echo "<li>$key: $_SESSION[$key]</li>";
// unset the session variable
unset($_SESSION[$key]);
}
?>
</ul>
This lists the name attributes of the form fields as an array and assigns the array to $expected. This is a security measure to ensure you don’t process bogus values that might have been injected into the $_POST array by a malicious user.
The code then unsets $_SESSION['formStarted'] and loops through the $expected array using each value to access the relevant element of the $_SESSION array and display it in the unordered list. The session variable is then deleted. Deleting the session variables individually leaves intact any other session-related information.
12.Save all the pages, then try to load one of the middle pages of the form, or the last one, into a browser. You should be taken to the first page. Click Next without filling in either field. You’ll be asked to fill in the first_name field. Fill in the required fields and clickNext on each page. The results should be displayed on the final page, as shown in Figure 9-5.
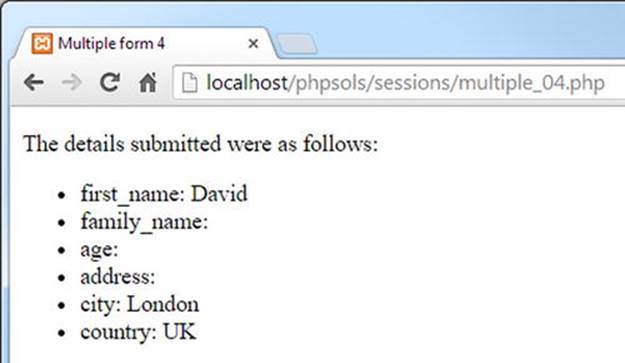
Figure 9-5. The session variables preserved the input from multiple pages
You can check your code against multiple_01_done.php, multiple_02_done.php, multiple_03_done.php, multiple_04_done.php, and multiform.php in the ch09 folder.
This is just a simple demonstration of a multipage form. In a real-world application, you would need to preserve the user input when required fields are left blank.
The script in multiform.php can be used with any multipage form by creating $_SESSION['formStarted'] on the first page after the form has been submitted, and by using $required, $firstPage, $nextPage, and $submit on each page. Use the $missing array to handle required fields that aren’t filled in.
Chapter Review
If you started this book with little or no knowledge of PHP, you’re no longer in the beginners’ league, but rather are leveraging the power of PHP in a lot of useful ways. Hopefully, by now you’ll have begun to appreciate that the same or similar techniques crop up again and again. Instead of just copying code, you should start to recognize techniques that you can adapt to your needs and then experiment on your own.
The rest of this book continues to build on your knowledge but brings a new factor into play: the MySQL relational database (and its drop-in replacement, MariaDB), which will take your PHP skills to a higher level. The next chapter offers an introduction to MySQL and shows you how to set it up for the remaining chapters.