PHP Solutions: Dynamic Web Design Made Easy, Third Edition (2014)
Chapter 7. Using PHP to Manage Files
PHP has a huge range of functions designed to work with the server’s file system, but finding the right one for the job isn’t always easy. This chapter cuts through the tangle to show you some practical uses of these functions, such as reading and writing text files to store small amounts of information without a database. Loops play an important role in inspecting the contents of the file system, so you’ll also explore some of the Standard PHP Library (SPL) iterators that are designed to make loops more efficient.
As well as opening local files, PHP can read public files, such as news feeds, on other servers. News feeds are normally formatted as XML (Extensible Markup Language). In the past, extracting information from an XML file was a tortuous process, but that’s no longer the case thanks to the very aptly named SimpleXML. In this chapter, you’ll see how to create a drop-down menu that lists all images in a folder, to create a function to select files of a particular type from a folder, to pull in a live news feed from another server, and to prompt a visitor to download an image or PDF file rather than open it in the browser. As an added bonus, you’ll learn how to change the time zone of a date retrieved from another website.
This chapter covers the following subjects:
· Reading and writing files
· Listing the contents of a folder
· Inspecting files with the SplFileInfo class
· Controlling loops with SPL iterators
· Using SimpleXML to extract information from an XML file
· Consuming an RSS feed
· Creating a download link
Checking that PHP Can Open a File
As I explained in the previous chapter, PHP runs on most Linux servers as nobody or apache. Consequently, a folder must have minimum access permissions of 755 for scripts to open a file. To create or alter files, you normally need to set global access permissions of 777, the least secure setting. If PHP is configured to run in your own name, you can be more restrictive, because your scripts can create and write to files in any folder for which you have read, write, and execute permissions. On a Windows server you need write permission to create or update a file. If you need assistance with changing permissions, consult your hosting company.
Configuration Settings that Affect File Access
Hosting companies can impose further restrictions on file access through php.ini. To find out what restrictions have been imposed, run phpinfo() on your website and check the settings in the Core section. Table 7-1 lists the settings you need to check. Unless you run your own server, you normally have no control over these settings.
Table 7-1. PHP configuration settings that affect file access
|
Directive |
Default value |
Description |
|
allow_url_fopen |
On |
Allows PHP scripts to open public files on the Internet |
|
allow_url_include |
Off |
Controls the ability to include remote files |
The settings in Table 7-1 both control access to files through a URL (as opposed to the local file system), but there’s an important difference between them. The first one, allow_url_fopen, allows you to read remote files but not to include them directly in your scripts. This is generally safe, so the default is for it to be enabled. If allow_url_fopen is disabled on your website, you cannot access useful external data sources, such as news feeds and public XML documents.
On the other hand, allow_url_include lets you include remote files directly in your scripts. This is a major security risk, so the default is for allow_url_include to be disabled.
![]() Tip If your hosting company has disabled allow_url_fopen, ask for it to be enabled. Otherwise, you won’t be able to use PHP Solution 7-5. But don’t get the names mixed up: allow_url_include should always be turned off in a hosting environment.
Tip If your hosting company has disabled allow_url_fopen, ask for it to be enabled. Otherwise, you won’t be able to use PHP Solution 7-5. But don’t get the names mixed up: allow_url_include should always be turned off in a hosting environment.
Prior to PHP 5.4, some servers placed restrictions on access to local files. These restrictions have now been removed. Access to files on the local file system is controlled by the permissions set on each file and folder.
Creating a File Storage Folder for Local Testing
Storing data inside your site root is highly insecure, particularly if you need to set global access permissions on the folder. If you have access to a private folder outside the site root, create your data store as a subfolder and give it the necessary permissions.
For the purposes of this chapter, I suggest that Windows users create a folder called private on their C drive.
Mac users should create a private folder inside their home folder. If necessary, set Read & Write permissions in the folder’s info panel as described in the previous chapter.
If you’re testing on Linux, you also need to make sure the web server has read and write permissions for the private folder.
Reading and Writing Files
The ability to read and write files has a wide range of applications. For example, you can open a file on another website, read the contents into your server’s memory, extract information using string and XML manipulation functions, and then write the results to a local file. You can also query a database on your own server and output the data as a text or CSV (comma-separated values) file. You can even generate files in Open Document Format or as Microsoft Excel spreadsheets. But first, let’s look at the basic operations.
![]() Tip If you subscribe to the lynda.com Online Training Library, you can learn how to export data from a database to various formats, such as Microsoft Excel and Word, in my Exporting Data to Files with PHP course (www.lynda.com/PHP-tutorials/Exporting-Data-Files-PHP/158375-2.html).
Tip If you subscribe to the lynda.com Online Training Library, you can learn how to export data from a database to various formats, such as Microsoft Excel and Word, in my Exporting Data to Files with PHP course (www.lynda.com/PHP-tutorials/Exporting-Data-Files-PHP/158375-2.html).
Reading Files in a Single Operation
PHP has three functions that read the contents of a text file in a single operation.
· readfile() opens a file and directly outputs its contents.
· file_get_contents() reads the whole contents of a file into a single string but doesn’t generate direct output.
· file() reads each line into an array.
PHP Solution 7-1: Getting the Contents of a Text File
This PHP solution demonstrates the difference between using readfile(), file_get_contents(), and file() to access the contents of a file.
1. Copy sonnet.txt to your private folder. It’s a text file that contains Shakespeare’s Sonnet 116.
2. Create a new folder called filesystem in your phpsols site root, then create a PHP file called get_contents.php in the new folder. Insert the following code inside a PHP block (get_contents_01.php in the ch07 folder shows the code embedded in a webpage, but you can use just the PHP code for testing purposes):
readfile('C:/private/sonnet.txt');
If you’re on a Mac, amend the path name like this, using your own Mac username:
readfile('/Users/username/private/sonnet.txt');
If you’re testing on Linux or on a remote server, amend the path name accordingly.
![]() Note For brevity, the remaining examples in this chapter show only the Windows path name.
Note For brevity, the remaining examples in this chapter show only the Windows path name.
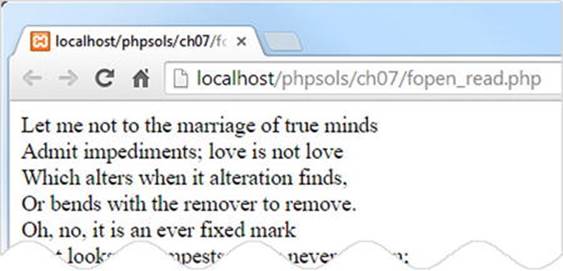
3. Save get_contents.php and view it in a browser. You should see something similar to the following screenshot. The browser ignores the line breaks in the original text and displays Shakespeare’s sonnet as a solid block.
![]() Tip If you see an error message, check that you typed the code correctly and that the correct file and folder permissions have been set on a Mac or Linux.
Tip If you see an error message, check that you typed the code correctly and that the correct file and folder permissions have been set on a Mac or Linux.
4. PHP has a function called nl2br() that converts newline characters to <br/> tags. Change the code in get_contents.php like this (it’s in get_contents_02.php):
nl2br(readfile('C:/private/sonnet.txt'));
![]() Note nl2br() inserts a trailing slash before the closing angle bracket of <br/> for compatibility with XHTML. The trailing slash is optional in HTML5. Both <br/> and <br> are valid.
Note nl2br() inserts a trailing slash before the closing angle bracket of <br/> for compatibility with XHTML. The trailing slash is optional in HTML5. Both <br/> and <br> are valid.
5. Save get_contents.php and reload it in your browser. The output is still a solid block of text. When you pass one function as an argument to another one like this, the result of the inner function is normally passed to the outer one, performing both operations in a single expression. So, you would expect the file’s contents to be passed to nl2br() before being displayed in the browser. However, readfile() outputs the file’s contents immediately. By the time it’s finished, there’s nothing for nl2br() to insert <br/> tags into. The text is already in the browser.
![]() Note When two functions are nested like this, the inner function is executed first, and the outer function processes the result. But the return value of the inner function needs to be meaningful as an argument to the outer function. The return value of readfile() is the number of bytes read from the file. Even if you add echo at the beginning of the line, all you get is 594 added to the end of text. Nesting functions doesn’t work in this case, but it’s often a very useful technique, avoiding the need to store the result of the inner function in a variable before processing it with another function.
Note When two functions are nested like this, the inner function is executed first, and the outer function processes the result. But the return value of the inner function needs to be meaningful as an argument to the outer function. The return value of readfile() is the number of bytes read from the file. Even if you add echo at the beginning of the line, all you get is 594 added to the end of text. Nesting functions doesn’t work in this case, but it’s often a very useful technique, avoiding the need to store the result of the inner function in a variable before processing it with another function.
6. Instead of readfile(), you need to use file_get_contents() to convert the newline characters to <br/> tags. Whereas readfile() simply outputs the content of a file, file_get_contents() returns the contents of a file as a single string. It’s up to you to decide what to do with it. Amend the code like this (or use get_contents_03.php):
echo nl2br(file_get_contents('C:/private/sonnet.txt'));
7. Reload the page in a browser. Each line of the sonnet is now on a line of its own.
8. The advantage of file_get_contents() is that you can assign the file contents to a variable and process it in some way before deciding what to do with it. Change the code in get_contents.php like this (or use get_contents_04.php) and load the page into a browser:
$sonnet = file_get_contents('C:/private/sonnet.txt');
// replace new lines with spaces
$words = str_replace("\r\n", ' ', $sonnet);
// split into an array of words
$words = explode(' ', $words);
// extract the first nine array elements
$first_line = array_slice($words, 0, 9);
// join the first nine elements and display
echo implode(' ', $first_line);
This stores the contents of sonnet.txt in a variable called $sonnet, which is passed to str_replace(), which then replaces the carriage return and newline characters with a space and stores the result as $words.
![]() Note See “Using escape sequences inside double quotes” in Chapter 3 for an explanation of "\r\n"). The text file was created in Windows, so line breaks are represented by a carriage return and newline character. Files created on Mac OS X and Linux use only a newline character ("\n").
Note See “Using escape sequences inside double quotes” in Chapter 3 for an explanation of "\r\n"). The text file was created in Windows, so line breaks are represented by a carriage return and newline character. Files created on Mac OS X and Linux use only a newline character ("\n").
Then $words is passed to the explode() function. This alarmingly named function “blows apart” a string and converts it into an array, using the first argument to determine where to break the string. In this case a space is used, so the contents of the text file are split into an array of words.
The array of words is then passed to the array_slice() function, which takes a slice out of an array starting from the position specified in the second argument. The third argument specifies the length of the slice. PHP counts arrays from 0, so this extracts the first nine words.
Finally, implode() does the opposite of explode(), joining the elements of an array and inserting the first argument between each one. The result is displayed by echo, producing the following outcome:
Instead of displaying the entire contents of the file, the script now displays only the first line. The full string is still stored in $sonnet.
9. However, if you want to process each line individually, it’s simpler to use file(), which reads each line of a file into an array. To display the first line of sonnet.txt, the previous code can be simplified to this (see get_contents_05.php):
$sonnet = file('C:/private/sonnet.txt');
echo $sonnet[0];
10.In fact, if you don’t need the full array, you can access a single line directly by adding its index number in square brackets after the call to the file() function. The following code displays the eleventh line of the sonnet (see get_contents_06.php):
echo file('C:/private/sonnet.txt')[10];
![]() Note Directly accessing an array element that’s the result of a function like this is a technique known as “array dereferencing.” It was introduced in PHP 5.4. The code in get_contents_06.php won’t work in older versions of PHP.
Note Directly accessing an array element that’s the result of a function like this is a technique known as “array dereferencing.” It was introduced in PHP 5.4. The code in get_contents_06.php won’t work in older versions of PHP.
Of the three functions we’ve just explored, readfile() is probably the least useful. It simply reads the contents of a file and dumps it directly into the output. You can’t manipulate the file content or extract information from it. However, a practical use ofreadfile() is to force a file to be downloaded, as you’ll see later in this chapter.
The other two functions, file_get_contents() and file(), are more useful because you can capture the contents in a variable that is ready for reformatting or extracting information. The only difference is that file_get_contents() reads the contents into a single string, whereas file() generates an array in which each element corresponds to a line in the file.
![]() Tip The file() function preserves newline characters at the end of each array element. If you want to strip the newline characters, pass the constant FILE_IGNORE_NEW_LINES as the second argument to the function. You can also skip empty lines by usingFILE_SKIP_EMPTY_LINES as the second argument. To remove newline characters and skip empty lines, separate the two constants with a vertical pipe, like this: FILE_IGNORE_NEW_LINES | FILE_SKIP_EMPTY_LINES.
Tip The file() function preserves newline characters at the end of each array element. If you want to strip the newline characters, pass the constant FILE_IGNORE_NEW_LINES as the second argument to the function. You can also skip empty lines by usingFILE_SKIP_EMPTY_LINES as the second argument. To remove newline characters and skip empty lines, separate the two constants with a vertical pipe, like this: FILE_IGNORE_NEW_LINES | FILE_SKIP_EMPTY_LINES.
Although we’ve tested file_get_contents() and file() only with a local text file, they can also retrieve the contents from public files on other domains. This makes them very useful for accessing information on other webpages, although extracting the information usually requires a solid understanding of string functions and the Document Object Model (DOM).
The disadvantage of file_get_contents() and file() is that they read the whole file into memory. With very large files, it’s preferable to use functions that process only a part of a file at a time. We’ll look at those next.
Opening and Closing Files for Read/Write Operations
The functions we have looked at so far do everything in a single pass. However, PHP also has a set of functions that allow you to open a file, read it and/or write to it, and then close the file. The file can be either on the local file system or a publicly available file on a different domain.
The following are the most important functions used for this type of operation:
· fopen(): Opens a file
· fgets(): Reads the contents of a file, normally one line at a time
· fgetcsv(): Gets the current line from a CSV file and converts it into an array
· fread(): Reads a specified amount of a file
· fwrite(): Writes to a file
· feof(): Determines whether the end of the file has been reached
· rewind(): Moves the internal pointer back to the top of the file
· fseek(): Moves the internal pointer to a specific location in the file
· fclose(): Closes a file
The first of these, fopen(), offers a bewildering choice of options for how the file is to be used once it’s open: fopen() has one read-only mode, four write-only modes, and five read/write modes. There are so many because they give you control over whether to overwrite the existing content or append new material. At other times, you may want PHP to create a file if it doesn’t already exist.
Each mode determines where to place the internal pointer when it opens the file. It’s like the cursor in a word processor: PHP starts reading or writing from wherever the pointer happens to be when you call fread() or fwrite().
Table 7-2 guides you through all the options.
Table 7-2. Read/write modes used with fopen()
|
Type |
Mode |
Description |
|
Read-only |
r |
Internal pointer initially placed at beginning of file. |
|
Write-only |
w |
Existing data deleted before writing. Creates a file if it doesn’t already exist. |
|
a |
Append mode. New data added at end of file. Creates a file if it doesn’t already exist. |
|
|
c |
Existing content is preserved, but the internal pointer is placed at the beginning of the file. Creates a file if it doesn’t already exist. |
|
|
x |
Creates a file only if it doesn’t already exist. Fails if there’s already a file with the same name. |
|
|
Read/write |
r+ |
Read/write operations can take place in either order and begin wherever the internal pointer is at the time. Pointer initially placed at beginning of file. File must already exist for operation to succeed. |
|
w+ |
Existing data deleted. Data can be read back after writing. Creates a file if it doesn’t already exist. |
|
|
a+ |
Opens a file ready to add new data at end of file. Also permits data to be read back after internal pointer has been moved. Creates a file if it doesn’t already exist. |
|
|
c+ |
Existing content is preserved, and the internal pointer is placed at the beginning of the file. Creates a new file if it doesn’t already exist. |
|
|
x+ |
Creates a new file, but fails if a file of the same name already exists. Data can be read back after writing. |
Choose the wrong mode, and you could end up deleting valuable data. You also need to be careful about the position of the internal pointer. If the pointer is at the end of the file, and you try to read the contents, you end up with nothing. On the other hand, if the pointer is at the beginning of the file, and you start writing, you overwrite the equivalent amount of existing data. “Moving the internal pointer” later in this chapter explains this in more detail.
You work with fopen() by passing it the following two arguments:
· The path to the file you want to open, or URL if the file is on a different domain
· A string containing one of the modes listed in Table 7-2
The fopen() function returns a reference to the open file, which can then be used with the other read/write functions. This is how you would open a text file for reading:
$file = fopen('C:/private/sonnet.txt', 'r');
Thereafter, you pass $file as the argument to other functions, such as fgets() and fclose(). Things should become clearer with a few practical demonstrations. Rather than building the files yourself, you’ll probably find it easier to use the files in the ch07 folder. I’ll run quickly through each mode.
![]() Note Mac and Linux users need to adjust the path to the private folder in the example files to match their setup.
Note Mac and Linux users need to adjust the path to the private folder in the example files to match their setup.
Reading a File with fopen( )
The file fopen_read.php contains the following code:
// store the pathname of the file
$filename = 'C:/private/sonnet.txt';
// open the file in read-only mode
$file = fopen($filename, 'r');
// read the file and store its contents
$contents = fread($file, filesize($filename));
// close the file
fclose($file);
// display the contents with <br/> tags
echo nl2br($contents);
If you load this into a browser, you should see the following output:
The result is identical to using file_get_contents() in get_contents_03.php. Unlike file_get_contents(), the function fread() needs to know how much of the file to read. You need to supply a second argument indicating the number of bytes. This can be useful if you want, say, only the first 100 or so characters from a very big file. However, if you want the whole file, you need to pass the file’s path name to filesize() to get the correct figure.
The other way to read the contents of a file with fopen() is to use fgets(), which retrieves one line at a time. This means you need to use a while loop in combination with feof() to read right to the end of the file. The code in fopen_readloop.php looks like this:
$filename = 'C:/private/sonnet.txt';
// open the file in read-only mode
$file = fopen($filename, 'r');
// create variable to store the contents
$contents = '';
// loop through each line until end of file
while (!feof($file)) {
// retrieve next line, and add to $contents
$contents .= fgets($file);
}
// close the file
fclose($file);
// display the contents
echo nl2br($contents);
The while loop uses fgets() to retrieve the contents of the file one line at a time—!feof($file) is the same as saying “until the end of $file”—and stores them in $contents.
Using fgets() is very similar to using the file() function in that it handles one line at a time. The difference is that you can break out of the loop with fgets() once you have found the information you’re looking for. This is a significant advantage if you’re working with a very large file. The file() function loads the entire file into an array, consuming memory.
PHP Solution 7-2: Extracting data from a CSV file
Text files can be used as a flat-file database, where each record is stored in a single line with a comma, tab, or other delimiter between each field. This type of file is called a CSV file. Usually, CSV stands for comma-separated values, but it can also mean character-separated values when a tab or different delimiter is used. This PHP solution shows how to extract the values from a CSV file into a multidimensional associative array using fopen() and fgetcsv().
1. Copy users.csv from the ch07 folder to your private folder. The file contains the following data as comma-separated values:
name,password
david,codeslave
ben,bigboss
The first line consists of titles for the data in the rest of the file. There are just two lines of data, each containing a name and password. This file will also be used in Chapter 9 to create a simple file-based login system.
![]() Caution When storing data as comma-separated values, there should be no space after the comma. If you add a space, it’s considered to be the first character of a data field. Each line in a CSV file must have the same number of items.
Caution When storing data as comma-separated values, there should be no space after the comma. If you add a space, it’s considered to be the first character of a data field. Each line in a CSV file must have the same number of items.
2. Create a file called getcsv.php in the filesystem folder and use fopen() to open users.csv in read mode:
$file = fopen('C:/private/users.csv', 'r');
3. Use fgetcsv() to extract the first line from the file as an array, then assign it to a variable called $titles:
$titles = fgetcsv($file);
This creates $titles as an array containing the values from the first line (name and password).
The fgetcsv() function requires a single argument, the reference to the file you have opened. It also accepts up to four optional arguments:
· The maximum length of the line: The default value is 0, which means no limit
· The delimiter between fields: Comma is the default.
· The enclosure character: If fields contain the delimiter as part of the data, they must be enclosed in quotes. Double quotes are the default.
· The escape character: The default is a backslash.
The CSV file that we’re using doesn’t require any of the optional arguments to be set.
4. On the next line, initialize an empty array for the values that will be extracted from the CSV data:
$users = [];
5. After extracting values from a line, fgetcsv() moves to the next line. To get the remaining data from the file, you need to create a loop. In fopen_readloop.php, !feof($file) was used as the condition. This time, assign the return value of fgetcsv() to a variable in the condition, like this:
while (($data = fgetcsv($file)) !== false) {
$users[] = array_combine($titles, $data);
}
Note that the statement that assigns the return value from fgetcsv() is enclosed in a separate pair of parentheses and then compared to false using the not identical operator (!==). This has the effect of running the loop until fgetcsv() produces no more data.
The code inside the loop uses the array_combine() function to generate an associative array, which is added to the $users array. This function requires two arguments, both of which must be arrays with the same number of elements. The two arrays are merged, drawing the keys for the resulting associative array from the first argument and the values from the second one.
6. Close the CSV file:
fclose($file);
7. To inspect the result, use print_r(). Surround it with <pre> tags to make the output easier to read:
echo '<pre>';
print_r($users);
echo '</pre>';
8. Save getcsv.php and load it in a browser. You should see the result shown in Figure 7-1.
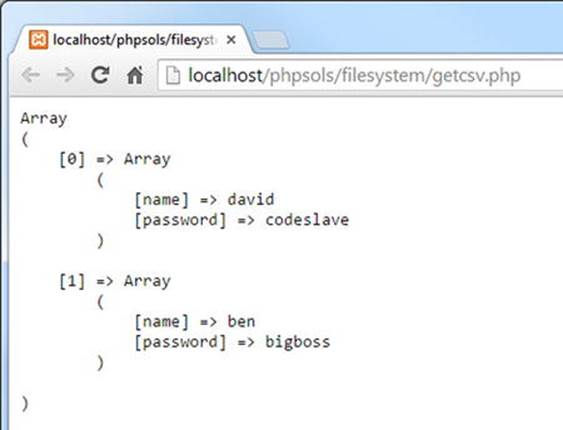
Figure 7-1. The CSV data has been converted into a multidimensional associative array
9. This works well with users.csv, but the script can be made more robust. If fgetcsv() encounters a blank line, it returns an array containing a single null element, which generates an error when passed as an argument to array_combine(). Amend thewhile loop by adding the conditional statement highlighted in bold:
while (($data = fgetcsv($file)) !== false) {
if (count($data) == 1 && is_null($data[0])) {
continue;
}
$users[] = array_combine($titles, $data);
}
The conditional statement uses the count() method to find out how many elements are in the array. If there’s only one, and the value of the first element is null, the continue keyword returns to the top of the loop without executing the next line.
You can check your code against getcsv.php in the ch07 folder.
CSV FILES CREATED ON MAC OS
PHP often has difficulty detecting the line endings in CSV files created on Mac operating systems. If fgetcsv() fails to extract data correctly from a CSV file, add the following line of code at the top of the script:
ini_set('auto_detect_line_endings', true);
This has a marginal effect on performance, so it should be used only if Mac line endings cause problems with CSV files.
Replacing Content with fopen( )
The first of the write-only modes (w) deletes any existing content in a file, so it’s useful for working with files that need to be updated frequently. You can test the w mode with fopen_write.php, which has the following PHP code above the DOCTYPE declaration:
<?php
// if the form has been submitted, process the input text
if (isset($_POST['putContents'])) {
// open the file in write-only mode
$file = fopen('C:/private/write.txt', 'w');
// write the contents
fwrite($file, $_POST['contents']);
// close the file
fclose($file);
}
?>
When the form in the page is submitted, this code writes the value of $_POST['contents'] to a file called write.txt. The fwrite()function takes two arguments: the reference to the file and whatever you want to write to it.
![]() Note You may come across fputs() instead of fwrite(). The two functions are identical: fputs() is a synonym for fwrite().
Note You may come across fputs() instead of fwrite(). The two functions are identical: fputs() is a synonym for fwrite().
If you load fopen_write.php into a browser, type something into the text area, and click Write to file, PHP creates write.txt and inserts whatever you typed into the text area. Since this is just a demonstration, I’ve omitted any checks to make sure that the file was successfully written. Open write.txt to verify that your text has been inserted. Now, type something different into the text area and submit the form again. The original content is deleted from write.txt and replaced with the new text. The deleted text is gone forever.
Appending Content with fopen( )
The append mode not only adds new content at the end, preserving any existing content, but it can also create a new file if it doesn’t already exist. The code in fopen_append.php looks like this:
// open the file in append mode
$file = fopen('C:/private/append.txt', 'a');
// write the contents followed by a new line
fwrite($file, $_POST['contents'] . PHP_EOL);
// close the file
fclose($file);
Notice that I have concatenated PHP_EOL after $_POST['contents']. This is a PHP constant that represents a new line using the correct characters for the operating system. On Windows, it inserts a carriage return and newline character, but on Macs and Linux only a newline character.
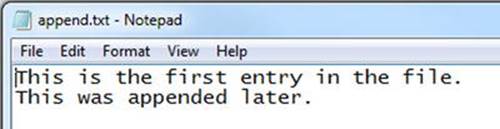
If you load fopen_append.php into a browser, type some text, and submit the form, it creates a file called append.txt in the private folder and inserts your text. Type something else and submit the form again; the new text should be added to the end of the previous text, as shown in the following screenshot.
We’ll come back to append mode in Chapter 9.
Locking a File Before Writing
The purpose of using fopen() with c mode is to give you the opportunity to lock the file with flock() before modifying it.
The flock() function takes two arguments: the file reference and a constant specifying how the lock should operate. There are three types of operation:
· LOCK_SH acquires a shared lock for reading
· LOCK_EX acquires an exclusive lock for writing
· LOCK_UN releases the lock
To lock a file before writing to it, open the file in c mode and immediately call flock(), like this:
// open the file in c mode
$file = fopen('C:/private/lock.txt', 'c');
// acquire an exclusive lock
flock($file, LOCK_EX);
This opens the file, or creates it if it doesn’t already exist, and places the internal pointer at the beginning of the file. This means you need to move the pointer to the end of the file or delete the existing content before you can start writing with fwrite().
To move the pointer to the end of the file, use the fseek() function, like this:
// move to end of file
fseek($file, 0, SEEK_END);
Alternatively, delete the existing contents by calling ftruncate():
// delete the existing contents
ftruncate($file, 0);
After you have finished writing to the file, you must unlock it manually before calling fclose():
// unlock the file before closing
flock($file, LOCK_UN);
fclose($file);
![]() Caution According to the documentation for flock(), the file is no longer automatically unlocked when the file is closed (see http://php.net/manual/en/function.flock.php). Even if you can reopen the file, it remains locked to other users and processes.
Caution According to the documentation for flock(), the file is no longer automatically unlocked when the file is closed (see http://php.net/manual/en/function.flock.php). Even if you can reopen the file, it remains locked to other users and processes.
Preventing Overwriting an Existing File
Unlike other write modes, x mode won’t open an existing file. It only creates a new file ready for writing. If a file of the same name already exists, fopen() returns false, preventing you from overwriting it. The processing code in fopen_exclusive.php looks like this:
// create a file ready for writing only if it doesn't already exist
// error control operator prevents error message from being displayed
if ($file = @ fopen('C:/private/once_only.txt', 'x')) {
// write the contents
fwrite($file, $_POST['contents']);
// close the file
fclose($file);
} else {
$error = 'File already exists, and cannot be overwritten.';
}
Attempting to write to an existing file in x mode generates a series of PHP error messages. Wrapping the write and close operations in a conditional statement deals with most of them, but fopen() still generates a warning. The error control operator (@) in front of fopen() suppresses the warning.
Load fopen_exclusive.php into a browser, type some text, and click Write to file. The content should be written to once_only.txt in your target folder.
If you try it again, the message stored in $error is displayed above the form.
Combined Read/Write Operations with fopen( )
By adding a plus sign (+) after any of the previous modes, the file is opened for both reading and writing. You can perform as many read or write operations as you like—and in any order—until the file is closed. The difference between the combined modes is as follows:
· r+: The file must already exist; a new one will not be automatically created. The internal pointer is placed at the beginning, ready for reading existing content.
· w+: Existing content is deleted, so there is nothing to read when the file is first opened.
· a+: The file is opened with the internal pointer at the end, ready to append new material, so the pointer needs to be moved back before anything can be read.
· c+: The file is opened with the internal pointer at the beginning.
· x+: Always creates a new file, so there’s nothing to read when the file is first opened.
Reading is done with fread() or fgets() and writing with fwrite(), exactly the same as before. What’s important is to understand the position of the internal pointer.
Moving the Internal Pointer
Reading and writing operations always start wherever the internal pointer happens to be, so you normally want it to be at the beginning of the file for reading, and at the end of the file for writing.
To move the pointer to the beginning, pass the file reference to rewind() like this:
rewind($file);
To move the pointer to the end of a file use fseek() like this:
fseek($file, 0, SEEK_END);
You can also use fseek() to move the internal pointer to a specific position or relative to its current position. For details, see http://php.net/manual/en/function.fseek.php.
![]() Tip In append mode (a or a+), content is always written to the end of the file regardless of the pointer’s current position.
Tip In append mode (a or a+), content is always written to the end of the file regardless of the pointer’s current position.
Exploring the File System
PHP’s file system functions can also open directories (folders) and inspect their contents. You put one of these functions to practical use in PHP Solution 6-6 by using scandir() to create an array of existing filenames in the images folder and looping through the array to create a unique name for an uploaded file. From the web developer’s point of view, other practical uses of the file system functions are building drop-down menus that display the contents of a folder and creating a script that prompts a user to download a file, such as an image or PDF document.
Inspecting a Folder with Scandir( )
Let’s take a closer look at the scandir() function, which you used in PHP Solution 6-6. It returns an array consisting of the files and folders within a specified folder. Just pass the path name of the folder (directory) as a string to scandir() and store the result in a variable like this:
$files = scandir('../images');
You can examine the result by using print_r() to display the contents of the array, as shown in the following screenshot (the code is in scandir.php in the ch07 folder):
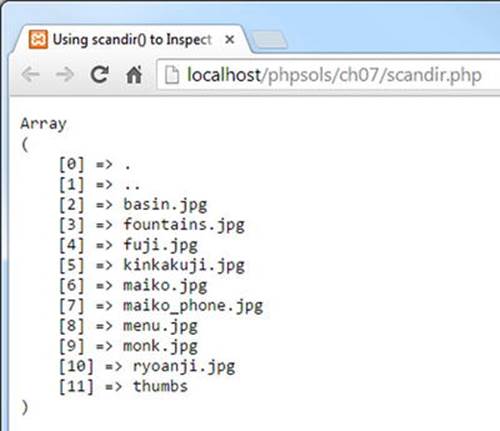
The array returned by scandir() doesn’t contain just files. The first two items are known as dot files, which represent the current and parent folders. The final item is a folder called thumbs.
The array contains only the names of each item. If you want more information about the contents of a folder, it’s better to use the FilesystemIterator class.
Inspecting the Contents of a Folder with FilesystemIterator
The FilesystemIterator class is part of the Standard PHP Library (SPL). In spite of its name, SPL is not an external library or framework; it’s a core part of PHP. Among its features is a collection of specialized iterators that create sophisticated loops with very little code.
The FilesystemIterator class was added in PHP 5.3. It adds new features to the original DirectoryIterator class, which lets you loop through the contents of a directory or folder.
Because it’s a class, you instantiate a FilesystemIterator object with the new keyword and pass the path of the folder you want to inspect to the constructor, like this:
$files = new FilesystemIterator('../images');
Unlike scandir(), this doesn’t return an array of filenames, so you can’t use print_r() to display its contents. Instead, it creates an object that gives you access to everything inside the folder. To display the filenames, use a foreach loop like this (the code is initerator_01.php in the ch07 folder):
$files = new FilesystemIterator('../images');
foreach ($files as $file) {
echo $file . '<br>';
}
This produces the following result:
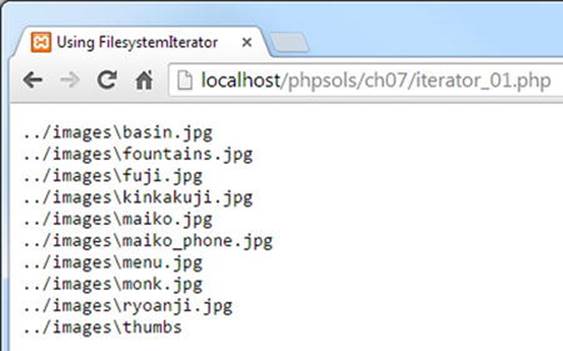
The following observations can be made about this output:
· The dot files representing the current and parent folders are omitted.
· The value displayed represents the relative path to the file rather than just the filename.
· Because the screenshot was taken on Windows, a backslash is used in the relative path.
In most circumstances, the backslash is unimportant, because PHP accepts either forward- or backslashes in Windows paths. However, if you want to generate URLs from the output of FilesystemIterator, there’s an option to use Unix-style paths. One way to set the option is to pass a constant as the second argument to FilesystemIterator(), like this (see iterator_02.php):
$files = new FilesystemIterator('../images', FilesystemIterator::UNIX_PATHS);
Alternatively, you can invoke the setFlags() method on the FilesystemIterator object like this (see iterator_03.php):
$files = new FilesystemIterator('../images');
$files->setFlags(FilesystemIterator::UNIX_PATHS);
Both produce the output shown in the following screenshot.
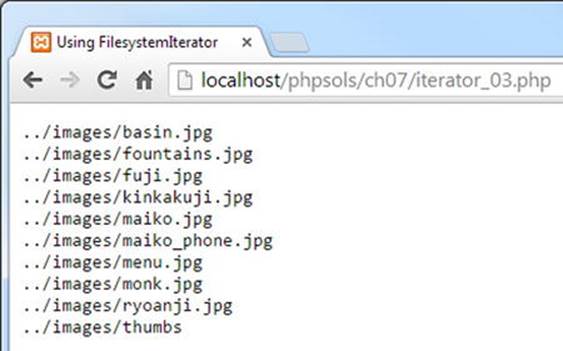
Of course, this won’t make any difference on Mac OS X or Linux, but setting this option makes your code more portable.
![]() Tip The constants used by SPL classes are all class constants. They’re always prefixed by the class name and the scope resolution operator (two colons). Lengthy names like this make it really worthwhile to use an editing program with PHP code hints and code completion.
Tip The constants used by SPL classes are all class constants. They’re always prefixed by the class name and the scope resolution operator (two colons). Lengthy names like this make it really worthwhile to use an editing program with PHP code hints and code completion.
Although it’s useful to be able to display the relative paths of the folder’s contents, the real value of using the FilesystemIterator class is that each time the loop runs, it gives you access to an SplFileInfo object. The SplFileInfo class has nearly 30 methods that can be used to extract useful information about files and folders. Table 7-3 lists a selection of the most useful SplFileInfo methods.
Table 7-3. File information accessible through SplFileInfo methods
|
Method |
Returns |
|
getFilename() |
The name of the file |
|
getPath() |
The current object’s relative path minus the filename, or minus the folder name if the current object is a folder |
|
getPathName() |
The current object’s relative path, including the filename or folder name, depending on the current type |
|
getRealPath() |
The current object’s full path, including filename if appropriate |
|
getSize() |
The size of the file or folder in bytes |
|
isDir() |
True, if the current object is a folder (directory) |
|
isFile() |
True, if the current object is a file |
|
isReadable() |
True, if the current object is readable |
|
isWritable() |
True, if the current object is writable |
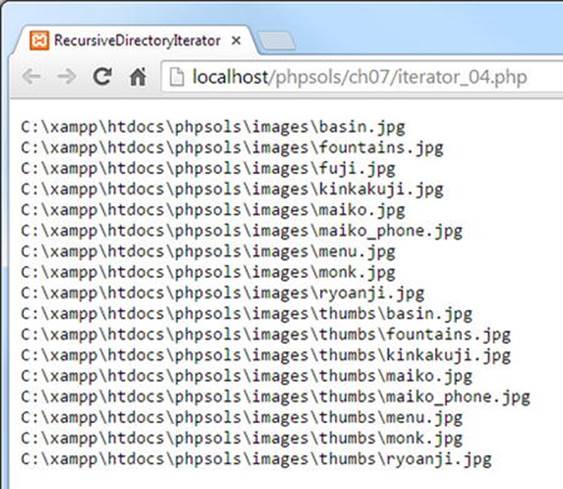
To access the contents of subfolders, use the RecursiveDirectoryIterator class. This burrows down through each level of the folder structure, but you need to use it in combination with the curiously named RecursiveIteratorIterator, like this (the code is initerator_04.php):
$files = new RecursiveDirectoryIterator('../images');
$files->setFlags(RecursiveDirectoryIterator::SKIP_DOTS);
$files = new RecursiveIteratorIterator($files);
foreach ($files as $file) {
echo $file->getRealPath() . '<br>';
}
![]() Note By default, the RecursiveDirectoryIterator includes the dot files that represent the current and parent folders. To exclude them, you need to pass the class’s SKIP_DOTS constant as the second argument to the constructor method or use the setFlags() method
Note By default, the RecursiveDirectoryIterator includes the dot files that represent the current and parent folders. To exclude them, you need to pass the class’s SKIP_DOTS constant as the second argument to the constructor method or use the setFlags() method
As the following screenshot shows, the RecursiveDirectoryIterator inspects the contents of all subfolders, revealing the contents of the thumbs folder, in a single operation:
What if you want to find only certain types of files? Cue another iterator. . .
Restricting File Types with the RegexIterator
The RegexIterator acts as a wrapper to another iterator, filtering its contents using a regular expression (regex) as a search pattern. Let’s say you want to find the text and CSV files in the ch07 folder. The regex used to search for .txt and .csv filename extensions looks like this:
'/\.(?:txt|csv)$/i'
This regex matches those two filename extensions in a case-insensitive manner. The code in iterator_05.php looks like this:
$files = new FilesystemIterator('.');
$files = new RegexIterator($files, '/\.(?:txt|csv)$/i');
foreach ($files as $file) {
echo $file->getFilename() . '<br>';
}
The first line passes a dot to the FilesystemIterator constructor, which tells it to inspect the current folder.
The original $files object is then passed as the first argument to the RegexIterator constructor, with the regex as the second argument, and the filtered set is reassigned to $files. Inside the foreach loop, the getFilename() method retrieves the file’s name. The result is this:
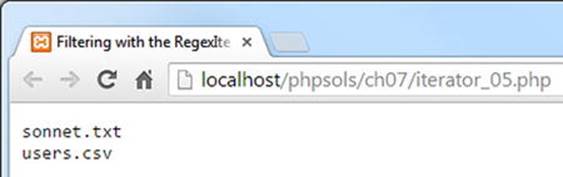
Only the text and CSV files are now listed. All the PHP files have been ignored.
![]() Tip As you progress through this book, you’ll see I make frequent use of regexes. They’re a useful tool to add to your skill set.
Tip As you progress through this book, you’ll see I make frequent use of regexes. They’re a useful tool to add to your skill set.
I expect that by this stage, you might be wondering if this can be put to any practical use. Let’s build a drop-down menu of images in a folder.
PHP Solution 7-3: Building a Drop-Down Menu of Files
When you work with a database, you often need a list of images or other files in a particular folder. For instance, you may want to associate a photo with a product detail page. Although you can type the name of the image into a text field, you need to make sure that the image is there and that you spell its name correctly. Get PHP to do the hard work by building a drop-down menu automatically. It’s always up-to-date, and there’s no danger of misspelling the name.
1. Create a PHP page called imagelist.php in the filesystem folder. Alternatively, use imagelist_01.php in the ch07 folder.
2. Create a form inside imagelist.php and insert a <select> element with just one <option>, like this (the code is already in imagelist_01.php):
<form method="post" action="">
<select name="pix" id="pix">
<option value="">Select an image</option>
</select>
</form>
This <option> is the only static element in the drop-down menu.
3. Amend the <select> element in the form like this:
<select name="pix" id="pix">
<option value="">Select an image</option>
<?php
$files = new FilesystemIterator('../images');
$images = new RegexIterator($files, '/\.(?:jpg|png|gif)$/i');
foreach ($images as $image) {
$filename = $image->getFilename();
?>
<option value="<?= $filename; ?>"><?= $filename; ?></option>
<?php } ?>
</select>
Make sure that the path to the images folder is correct for your site’s folder structure. The regex used as the second argument to the RegexIterator constructor matches case-insensitive files with the filename extensions .jpg, .png, and .gif.
The foreach loop simply gets the filename of the current image and inserts it into the <option> element.
Save imagelist.php and load it into a browser. You should see a drop-down menu listing all the images in your images folder, as shown in Figure 7-2.
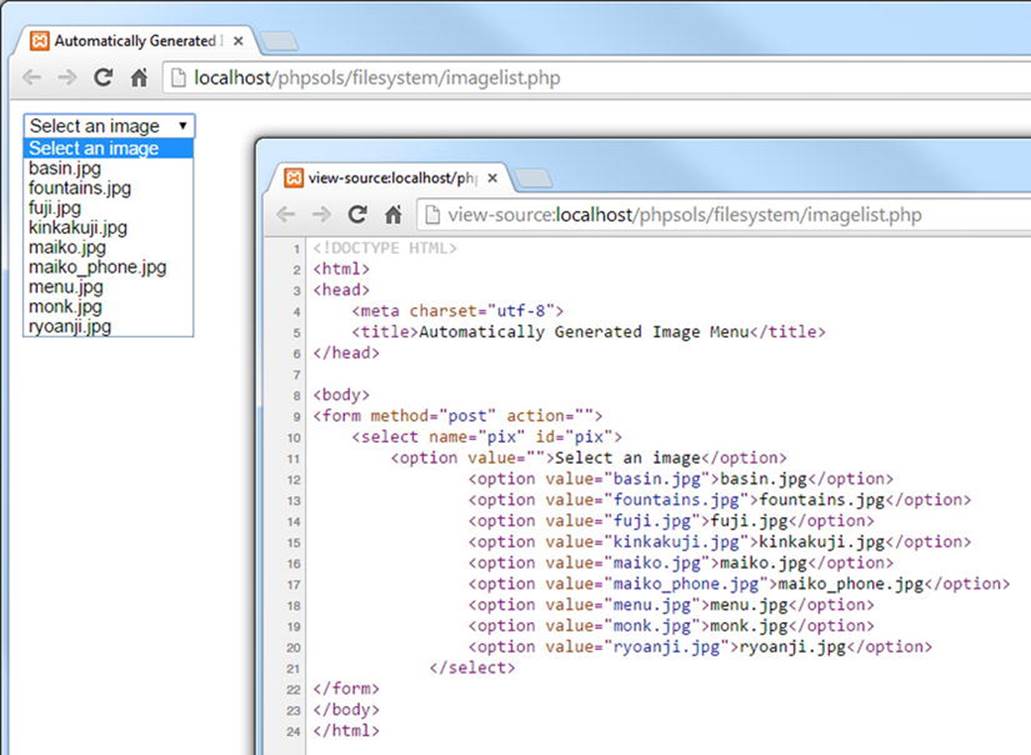
Figure 7-2. PHP makes light work of creating a drop-down menu of images in a specific folder
When incorporated into an online form, the filename of the selected image appears in the $_POST array and is identified by the name attribute of the <select> element—in this case, $_POST['pix']. That’s all there is to it!
You can compare your code with imagelist_02.php in the ch07 folder.
PHP Solution 7-4: Creating a Generic File Selector
The previous PHP solution relies on an understanding of regular expressions. Adapting it to work with other filename extensions isn’t difficult, but you need to be careful that you don’t accidentally delete a vital character. Unless regexes are your specialty, it’s probably easier to wrap the code in a function that can be used to inspect a specific folder and create an array of filenames of specific types. For example, you might want to create an array of PDF document filenames or one that contains both PDFs and Word documents. Here’s how you do it.
1. Create a new file called buildlist.php in the filesystem folder. The file will contain only PHP code, so delete any HTML inserted by your editing program.
2. Add the following code to the file:
function buildFileList($dir, $extensions) {
if (!is_dir($dir) || !is_readable($dir)) {
return false;
} else {
if (is_array($extensions)) {
$extensions = implode('|', $extensions);
}
}
}
This defines a function called buildFileList(), which takes two arguments:
· $dir: The path to the folder from which you want to get the list of filenames.
· $extensions: This can be either a string containing a single filename extension or an array of filename extensions. To keep the code simple, the filename extensions should not include a leading period.
The function begins by checking whether $dir is a folder and is readable. If it isn’t, the function returns false, and no more code is executed.
If $dir is okay, the else block is executed. It also begins with a conditional statement that checks whether $extensions is an array. If it is, it’s passed to implode(), which joins the array elements with a vertical pipe (|) between each one. A vertical pipe is used in regexes to indicate alternative values. Let’s say the following array is passed to the function as the second argument:
['jpg', 'png', 'gif']
The conditional statement converts it to jpg|png|gif. So, this looks for jpg, or png, or gif. However, if the argument is a string, it remains untouched.
3. You can now build the regex search pattern and pass both arguments to the FilesystemIterator and RegexIterator, like this:
function buildFileList($dir, $extensions) {
if (!is_dir($dir) || !is_readable($dir)) {
return false;
} else {
if (is_array($extensions)) {
$extensions = implode('|', $extensions);
}
$pattern = "/\.(?:{$extensions})$/i";
$folder = new FilesystemIterator($dir);
$files = new RegexIterator($folder, $pattern);
}
}
The regex pattern is built using a string in double quotes and wrapping $extensions in curly braces to make sure it’s interpreted correctly by the PHP engine. Take care when copying the code. It’s not exactly easy to read.
4. The final section of the code extracts the filenames to build an array, which is sorted and then returned. The finished function definition looks like this:
function buildFileList($dir, $extensions) {
if (!is_dir($dir) || !is_readable($dir)) {
return false;
} else {
if (is_array($extensions)) {
$extensions = implode('|', $extensions);
}
$pattern = "/\.(?:{$extensions})$/i";
$folder = new FilesystemIterator($dir);
$files = new RegexIterator($folder, $pattern);
$filenames = [];
foreach ($files as $file) {
$filenames[] = $file->getFilename();
}
natcasesort($filenames);
return $filenames;
}
}
This initializes an array and uses a foreach loop to assign the filenames to it with the getFilename() method. Finally, the array is passed to natcasesort(), which sorts it in a natural, case-insensitive order. What “natural” means is that strings that contain numbers are sorted in the same way as a person would. For example, a computer normally sorts img12.jpg before img2.jpg, because the 1 in 12 is lower than 2. Using natcasesort() results in img2.jpg preceding img12.jpg.
5. To use the function, use as arguments the path to the folder and the filename extensions of the files you want to find. For example, you could get all Word and PDF documents from a folder like this:
$docs = buildFileList('folder_name', ['doc', 'docx', 'pdf']);
The code for the buildFileList() function is in buildlist.php in the ch07 folder.
Accessing Remote Files
Reading, writing, and inspecting files on your local computer or on your own website is useful. But allow_url_fopen also gives you access to publicly available documents anywhere on the Internet. You can’t directly include files from other servers—not unless allow_url_includeis on—but you can read the content, save it to a variable, and manipulate it with PHP functions before incorporating it in your own pages or saving the information to a database. You can also write to documents on a remote server as long as the owner sets the appropriate permissions.
A word of caution is in order here. When extracting material from remote sources for inclusion in your own pages, there’s a potential security risk. For example, a remote page might contain malicious scripts embedded in <script> tags or hyperlinks. Unless the remote page supplies data in a known format from a trusted source—such as product details from the Amazon.com database, weather information from a government meteorological office, or a newsfeed from a newspaper or broadcaster—sanitize the content by passing it to htmlentities() (see PHP Solution 5-2). As well as converting double quotes to ", htmlentities() converts < to < and > to >. This displays tags in plain text, rather than treating them as HTML.
If you want to permit some HTML tags, use the strip_tags() function instead. If you pass a string to strip_tags(), it returns the string with all HTML tags and comments stripped out. It also removes PHP tags. A second, optional argument is a list of tags that you want preserved. For example, the following strips out all tags except paragraphs and first- and second-level headings:
$stripped = strip_tags($original, '<p><h1><h2>');
![]() Tip For an in-depth discussion of security issues, see Pro PHP Security, 2nd Edition by Chris Snyder and Michael Southwell (Apress, 2010, ISBN: 978-1-4302-3318-3).
Tip For an in-depth discussion of security issues, see Pro PHP Security, 2nd Edition by Chris Snyder and Michael Southwell (Apress, 2010, ISBN: 978-1-4302-3318-3).
Consuming News and Other RSS Feeds
Some of the most useful remote sources of information that you might want to incorporate in your sites come from RSS feeds. RSS stands for Really Simple Syndication, and it’s a dialect of XML. XML is similar to HTML in that it uses tags to mark up content. Instead of defining paragraphs, headings, and images, XML tags are used to organize data in a predictable hierarchy. XML is written in plain text, so it’s frequently used to share information between computers that might be running on different operating systems.
Figure 7-3 shows the typical structure of an RSS 2.0 feed. The whole document is wrapped in a pair of <rss> tags. This is the root element, similar to the <html> tags of a webpage. The rest of the document is wrapped in a pair of <channel> tags, which always contain the following three elements that describe the RSS feed: <title>, <description>, and <link>.
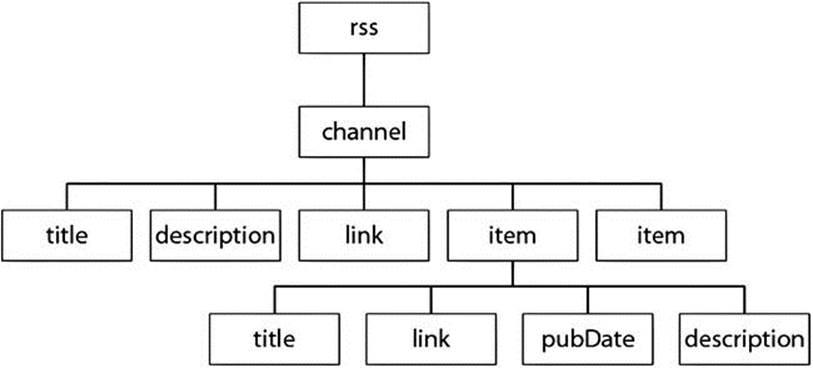
Figure 7-3. The main contents of an RSS feed are in the item elements
In addition to the three required elements, the <channel> can contain many other elements, but the interesting material is to be found in the <item> elements. In the case of a news feed, this is where the individual news items can be found. If you’re looking at the RSS feed from a blog, the <item> elements normally contain summaries of the blog posts.
Each <item> element can contain several elements, but those shown in Figure 7-3 are the most common, and usually the most interesting:
· <title>: The title of the item
· <link>: The URL of the item
· <pubDate>: Date of publication
· <description>: Summary of the item
This predictable format makes it easy to extract the information from an RSS feed using SimpleXML.
![]() Note You can find the full RSS specification at www.rssboard.org/rss-specification. Unlike most technical specifications, it’s written in plain language and is easy to read.
Note You can find the full RSS specification at www.rssboard.org/rss-specification. Unlike most technical specifications, it’s written in plain language and is easy to read.
Using SimpleXML
As long as you know the structure of an XML document, SimpleXML does what it says on the tin: it makes extracting information from XML simple. The first step is to pass the URL of the XML document to simplexml_load_file(). You can also load a local XML file by passing the path as an argument. For example, this gets the world news feed from the BBC:
$feed = simplexml_load_file('http://feeds.bbci.co.uk/news/world/rss.xml');
This creates an instance of the SimpleXMLElement class. All the elements in the feed can now be accessed as properties of the $feed object by using the names of the elements. With an RSS feed, the <item> elements can be accessed as $feed->channel->item.
To display the <title> of each <item>, create a foreach loop like this:
foreach ($feed->channel->item as $item) {
echo $item->title . '<br>';
}
If you compare this with Figure 7-3, you can see that you access elements by chaining the element names with the -> operator until you reach the target. Since there are multiple <item> elements, you need to use a loop to tunnel further down. Alternatively, use array notation, like this:
$feed->channel->item[2]->title
This gets the <title> of the third <item> element. Unless you want only a specific value, it’s simpler to use a loop.
With that background out of the way, let’s use SimpleXML to display the contents of a news feed.
PHP Solution 7-5: Consuming an RSS news feed
This PHP solution shows how to extract the information from a live news feed using SimpleXML and then display it in a webpage. It also shows how to format the <pubDate> element to a more user-friendly format and how to limit the number of items displayed using theLimitIterator class.
1. Create a new page called newsfeed.php in the filesystem folder. This page will contain a mixture of PHP and HTML.
2. The news feed chosen for this PHP solution is BBC World News. A condition of using most news feeds is that you acknowledge the source. So add The Latest from BBC News formatted as an <h1> heading at the top of the page.
![]() Note For the terms and conditions of using a BBC news feed on your own site, see www.bbc.co.uk/news/10628494#mysite and www.bbc.co.uk/terms/additional_rss.shtml.
Note For the terms and conditions of using a BBC news feed on your own site, see www.bbc.co.uk/news/10628494#mysite and www.bbc.co.uk/terms/additional_rss.shtml.
3. Create a PHP block below the heading and add the following code to load the feed:
$url = 'http://feeds.bbci.co.uk/news/world/rss.xml';
$feed = simplexml_load_file($url);
4. Use a foreach loop to access the <item> elements and display the <title> of each one:
foreach ($feed->channel->item as $item) {
echo $item->title . '<br>';
}
5. Save newsfeed.php and load the page in a browser. You should see a long list of news items similar to Figure 7-4.
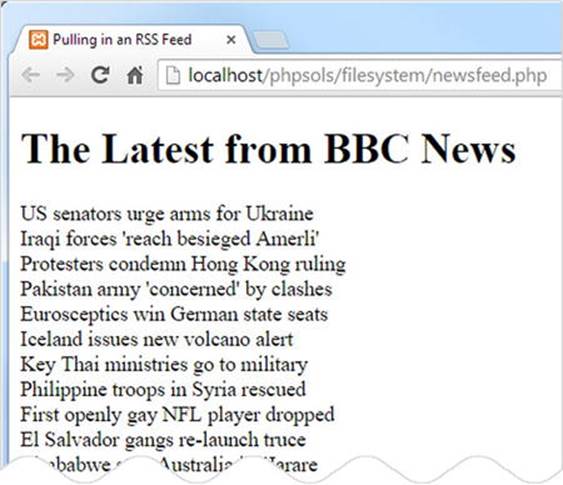
Figure 7-4. The news feed contains a large number of items
6. The normal feed often contains 50 or more items. That’s fine for a news site, but you probably want a shorter selection in your own site. Use another SPL iterator to select a specific range of items. Amend the code like this:
$url = 'http://feeds.bbci.co.uk/news/world/rss.xml';
$feed = simplexml_load_file($url, 'SimpleXMLIterator');
$filtered = new LimitIterator($feed->channel->item, 0 , 4);
foreach ($filtered as $item) {
echo $item->title . '<br>';
}
To use SimpleXML with an SPL iterator, you need to supply the name of the SimpleXMLIterator class as the second argument to simplexml_load_file(). You can then pass the SimpleXML element you want to affect to an iterator constructor.
In this case, $feed->channel->item is passed to the LimitIterator constructor. The LimitIterator takes three arguments: the object you want to limit, the starting point (counting from 0), and the number of times you want the loop to run. This code starts at the first item and limits the number of items to four.
The foreach loop now loops over the $filtered result. If you test the page again, you’ll see just four titles, as shown in Figure 7-5. Don’t be surprised if the selection of headlines is different from before. The BBC News website is updated every minute.
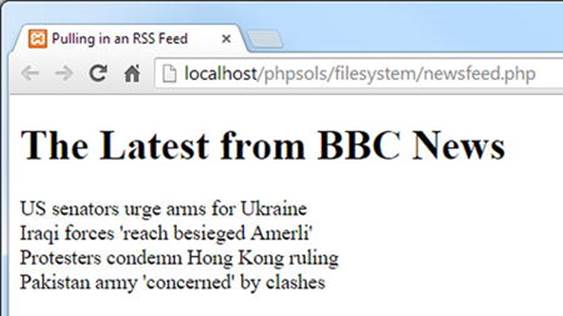
Figure 7-5. The LimitIterator restricts the number of items displayed
7. Now that you have limited the number of items, amend the foreach loop to wrap the <title> elements in a link to the original article, then display the <pubDate> and <description> items. The loop looks like this:
foreach ($filtered as $item) { ?>
<h2><a href="<?= $item->link; ?>"><?= $item->title;?></a></h2>
<p class="datetime"><?php echo $item->pubDate; ?></p>
<p><?php echo $item->description; ?></p>
<?php } ?>
8. Save the page and test it again. The links take you directly to the relevant news story on the BBC website. The news feed is now functional, but the <pubDate> format follows the format laid down in the RSS specification, as shown in the next screenshot:

9. To format the date and time in a more user-friendly way, pass $item->pubDate to the DateTime class constructor, then use the DateTime format() method to display it. Change the code in the foreach loop, like this:
<p class="datetime"><?php $date = new DateTime($item->pubDate);
echo $date->format('M j, Y, g:ia'); ?></p>
This reformats the date as below:

The mysterious PHP formatting strings for dates are explained in Chapter 14.
10.That looks a lot better, but the time is still expressed in GMT (London time). If most of your site’s visitors live on the east coast of the United States, you probably want to show the local time. That’s no problem with a DateTime object. Use the setTimezone()method to change to New York time. You can even automate the display of EDT (Eastern Daylight Time) or EST (Eastern Standard Time) depending on whether daylight saving time is in operation. Amend the code like this:
<p class="datetime"><?php $date = new DateTime($item->pubDate);
$date->setTimezone(new DateTimeZone('America/New_York'));
$offset = $date->getOffset();
$timezone = ($offset == -14400) ? ' EDT' : ' EST';
echo $date->format('M j, Y, g:ia') . $timezone; ?></p>
To create a DateTimeZone object, pass to it as an argument one of the time zones listed at http://php.net/manual/en/timezones.php. This is the only place that the DateTimeZone object is needed, so it has been created directly as the argument to the setTimezone() method.
There isn’t a dedicated method that tells you whether daylight saving time is in operation, but the getOffset() method returns the number of seconds the time is offset from Coordinated Universal Time (UTC). The following line determines whether to display EDT or EST:
$timezone = ($offset == -14400) ? ' EDT' : ' EST';
This uses the value of $offset with the ternary operator. In summer, New York is four hours behind UTC (–14440 seconds). So, if $offset is –14400, the condition equates to true, and EDT is assigned to $timezone. Otherwise, EST is used.
Finally, the value of $timezone is concatenated to the formatted time. The string used for $timezone has a leading space to separate the time zone from the time. When the page is loaded, the time is adjusted to the east coast of the United States, like this:

11.All the page needs now is smartening up with CSS. Figure 7-6 shows the finished news feed styled with newsfeed.css in the styles folder.
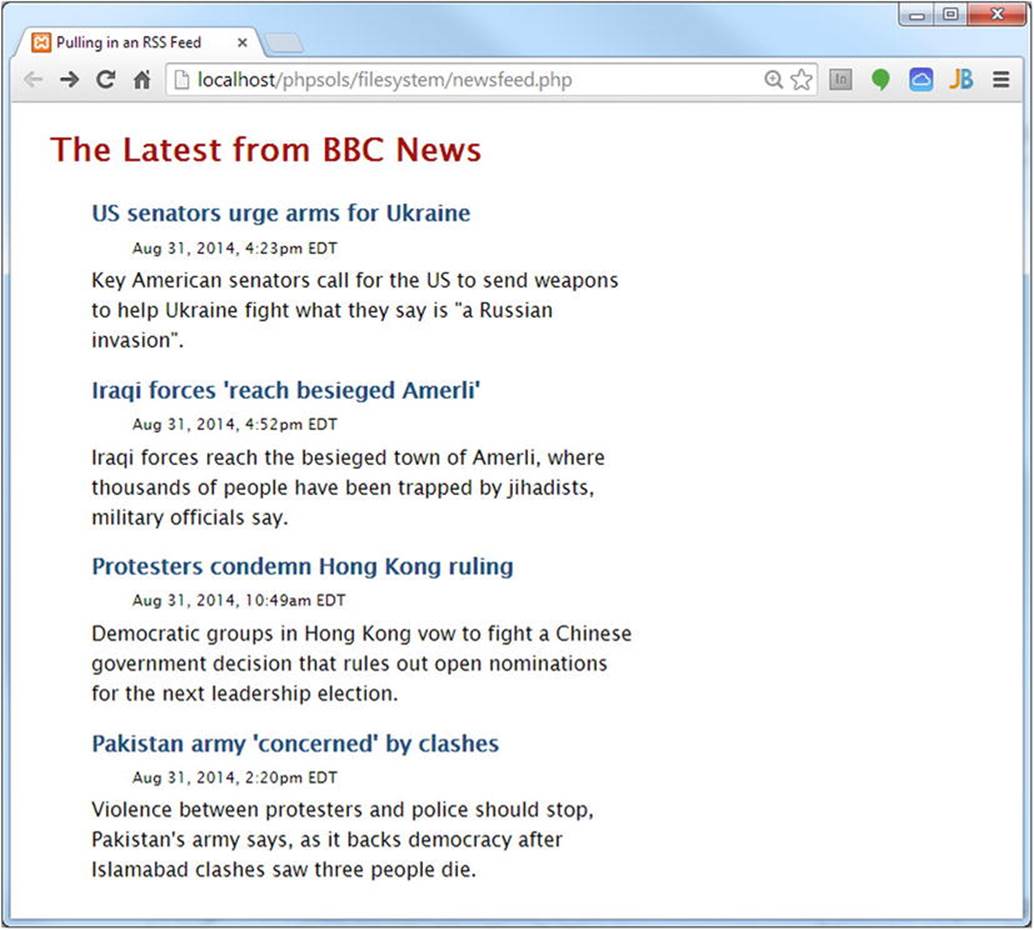
Figure 7-6. The live news feed requires only a dozen lines of PHP code
![]() Tip If you have a subscription to the lynda.com Online Training Library, you can learn more about SPL and SimpleXML in my course Up and Running with the Standard PHP Library (www.lynda.com/PHP-tutorials/Up-Running-Standard-PHP-Library/175038-2.html).
Tip If you have a subscription to the lynda.com Online Training Library, you can learn more about SPL and SimpleXML in my course Up and Running with the Standard PHP Library (www.lynda.com/PHP-tutorials/Up-Running-Standard-PHP-Library/175038-2.html).
Although I have used the BBC news feed for this PHP solution, it should work with any RSS 2.0 feed. For example, you can try it locally with http://rss.cnn.com/rss/edition.rss. Using a CNN news feed in a public website requires permission from CNN. Always check with the copyright holder for terms and conditions before incorporating a feed into a website.
Creating a Download Link
A question that crops up regularly in online forums is, “How do I create a link to an image (or PDF file) that prompts the user to download it?” The quick solution is to convert the file into a compressed format, such as ZIP. This frequently results in a smaller download, but the downside is that inexperienced users may not know how to unzip the file, or they may be using an older operating system that doesn’t include an extraction facility. With PHP file system functions, it’s easy to create a link that automatically prompts the user to download a file in its original format.
PHP Solution 7-6: Prompting a User to Download an Image
This PHP solution sends the necessary HTTP headers and uses readfile() to output the contents of a file as a binary stream, forcing the browser to download it.
1. Create a PHP file called download.php in the filesystem folder. The full listing is given in the next step. You can also find it in download.php in the ch07 folder.
2. Remove any default code created by your script editor and insert the following code:
<?php
// define error page
$error = 'http://localhost/phpsols/error.php';
// define the path to the download folder
$filepath = 'C:/xampp/htdocs/phpsols/images/';
$getfile = NULL;
// block any attempt to explore the filesystem
if (isset($_GET['file']) && basename($_GET['file']) == $_GET['file']) {
$getfile = $_GET['file'];
} else {
header("Location: $error");
exit;
}
if ($getfile) {
$path = $filepath . $getfile;
// check that it exists and is readable
if (file_exists($path) && is_readable($path)) {
// send the appropriate headers
header('Content-Type: application/octet-stream');
header('Content-Length: '. filesize($path));
header('Content-Disposition: attachment; filename=' . $getfile);
header('Content-Transfer-Encoding: binary');
// output the file content
readfile($path);
} else {
header("Location: $error");
}
}
The only two lines that you need to change in this script are highlighted in bold type. The first defines $error, a variable that contains the URL of your error page. The second line that needs to be changed defines the path to the folder where the download file is stored.
The script works by taking the name of the file to be downloaded from a query string appended to the URL and saving it as $getfile. Because query strings can be easily tampered with, $getfile is initially set to NULL. If you fail to do this, you could give a malicious user access to any file on your server.
The opening conditional statement uses basename() to make sure that an attacker cannot request a file, such as one that stores passwords, from another part of your file structure. As explained in Chapter 4, basename() extracts the filename component of a path, so if basename($_GET['file']) is different from $_GET['file'], you know there’s an attempt to probe your server. You can then stop the script from going any further by using the header() function to redirect the user to the error page.
After checking that the requested file exists and is readable, the script sends the appropriate HTTP headers and uses readfile() to send the file to the output buffer. If the file can’t be found, the user is redirected to the error page.
3. Test the script by creating another page; add a couple of links to download.php. Add a query string at the end of each link with file= followed by the name a file to be downloaded. You’ll find a page called getdownloads.php in the ch07 folder that contains the following two links:
<p><a href="download.php?file=maiko.jpg">Download image 1</a></p>
<p><a href="download.php?file=basin.jpg">Download image 2</a></p>
4. Click one of the links. Depending on your browser settings, the file will either be downloaded to your default downloads folder or you will be presented with a dialog box asking you what to do with the file.
I’ve demonstrated download.php with image files, but it can be used for any type of file, as the headers send the file as a binary stream.
![]() Caution This script relies on header() to send the appropriate HTTP headers to the browser. It is vital to ensure that there are no new lines or whitespace ahead of the opening PHP tag. If you have removed all whitespace and still get an error message saying “headers already sent,” your editor may have inserted invisible control characters at the beginning of the file. Some editing programs insert the byte order mark (BOM), which is known to cause problems with the header() function. Check your program preferences to make sure the option to insert the BOM is deselected.
Caution This script relies on header() to send the appropriate HTTP headers to the browser. It is vital to ensure that there are no new lines or whitespace ahead of the opening PHP tag. If you have removed all whitespace and still get an error message saying “headers already sent,” your editor may have inserted invisible control characters at the beginning of the file. Some editing programs insert the byte order mark (BOM), which is known to cause problems with the header() function. Check your program preferences to make sure the option to insert the BOM is deselected.
Chapter Review
The file system functions aren’t particularly difficult to use, but there are many subtleties that can turn a seemingly simple task into a complicated one. It’s important to check that you have the right permissions. Even when handling files in your own website, PHP needs permission to access any folder where you want to read files or write to them.
The SPL FilesystemIterator and RecursiveDirectoryIterator classes make it easy to examine the contents of folders. Used in combination with the SplFileInfo methods and the RegexIterator, you can quickly find files of a specific type within a folder or folder hierarchy.
When dealing with remote data sources, you need to check that allow_url_fopen hasn’t been disabled. One of the most common uses of remote data sources is to extract information from RSS news feeds or XML documents, a task that takes only a few lines of code thanks to SimpleXML.
In the next two chapters, we’ll put some of the PHP solutions from this chapter to further practical use when working with images and building a simple user-authentication system.