WordPress To Go - How To Build A WordPress Website On Your Own Domain, From Scratch, Even If You Are A Complete Beginner (2013)
IN-DEPTH GUIDE - DRILL DOWN TO THE WONDERS OF WORDPRESS
Lesson 15. The Power Of Plugins
‘Plugins’ is a term for a collection of additional (often free) pieces of software that provide extra functionality for WordPress websites. These are the ‘optional extras’ that you may, or may not, need to make your website behave as you want.
They are called ‘plugins’ because they do exactly that: if you install a stand-alone plugin, WordPress detects that it’s there and makes the connection with it automatically. You may have to configure a few parameters to tailor it to your requirements, but that’s all you have to do.
There are thousands of WordPress plugins available but, in this lesson, we’re just going to install a few of the ones that I consider essential. They are all free. I will explain what they do and how to use them as we go along.
First, I’ll show you how to install plugins in general. Then, I’ll list my recommended plugins and show you how to configure them.
How To Install Plugins
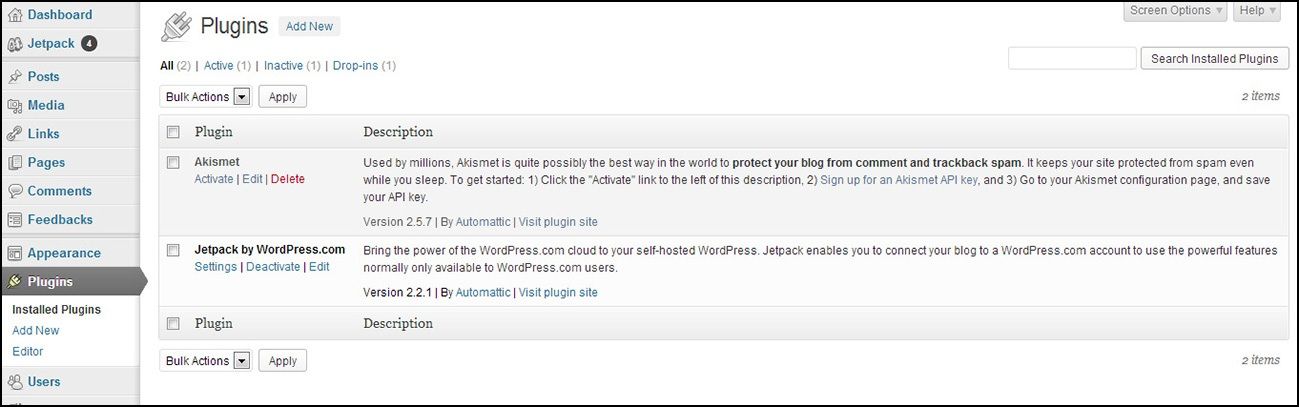
From the dashboard, click ‘Plugins’. You should see the list of currently installed plugins as in Figure 15.1:
To install any plugin, from the dashboard, click ‘Plugins’ then ‘Add New’ at the top of the screen. You can access the plugins you need several ways from here, but the quickest way is to click on the ‘Popular’ tab and see what comes up, as in Figure 15.2.
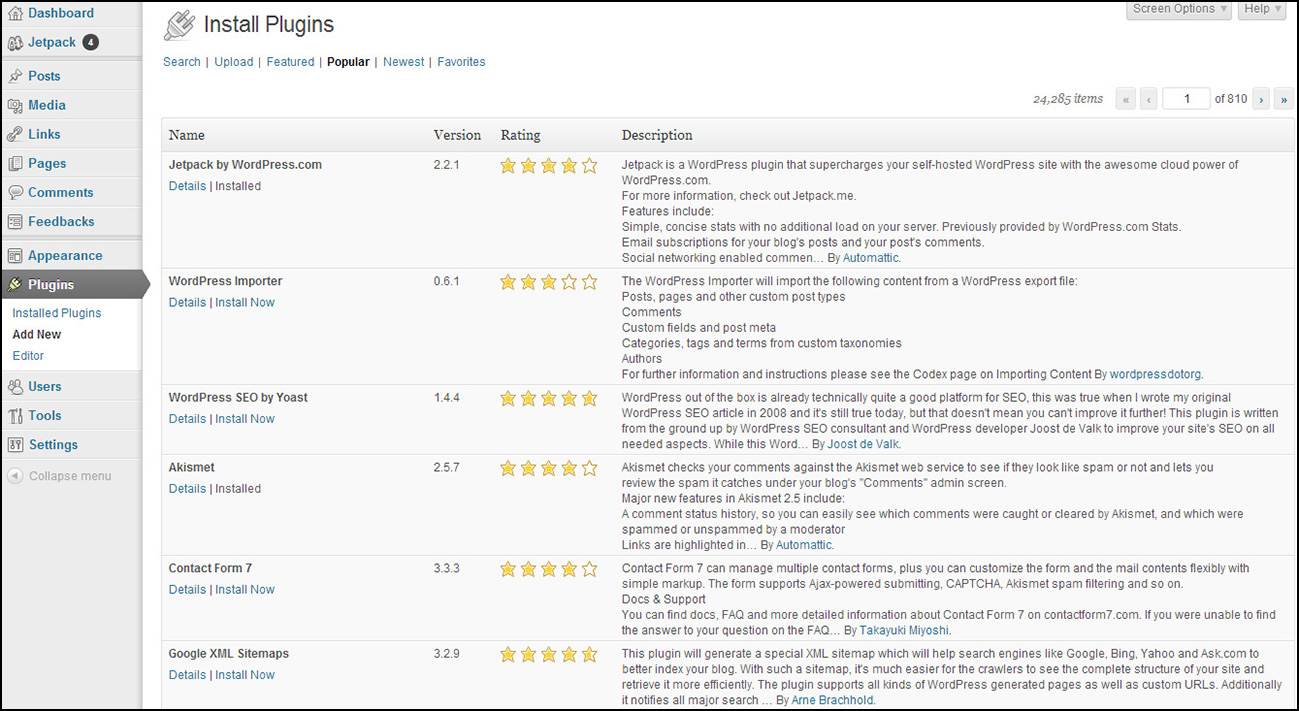
You will probably see some of the recommended plugins straight away.
To install a plugin, all you have to do is click on ‘Install Now’ on that plugin’s listing and confirm that you really do want to install the plugin. Then WordPress takes over, installs the plugin on your website automatically and then all you have to do is activate it.
You should repeat this step for all the recommended plugins that you can find on the first page of ‘Popular’.
If you can’t find the plugin on the ‘Popular’ page, then the other way of locating a plugin is to search for it. Instead of clicking on ‘Popular’, use the ‘Search’ box on the ‘Install Plugins’ page. Type the exact title of the plugin into the Search box and click ‘Search Plugins’. You may be presented with more than one choice so be sure to pick the one that has the exact title, and then install the plugin as above.
Recommended Plugins
So, the plugins I recommend are:
Google XML Sitemaps
This popular plugin provides a Google-compliant sitemap for your website.
What’s a sitemap? Well, it is a file called sitemap.xml that sits in the background on your website and which contains a complete list of all your website’s pages and posts and documents the connections between them.
The sitemap file is there for the benefit of the search engines, to help them find their way around your site and index it accordingly. Sitemaps are not really for human visitors!
Most professional websites have a sitemap and this plugin is considered to be essential for effective SEO.
The plugin updates the sitemap automatically every time you add, delete or edit something so, once installed, you don’t have to do a thing.
All In One SEO Pack
This, in my opinion, is another essential SEO plugin. It provides all the features you need to optimize your site’s pages to rank in the search engines for your chosen keywords.
When you install the ‘All In One SEO Pack’ plugin and activate it you will see a red warning prompt at the top of the screen asking you to configure the plugin. See below for instructions on how to do this.
Contact Form 7
Having somewhere on your site where your visitors can contact you is considered good practice and makes you look serious and trustworthy in your customers’, and the search engines’, eyes.
Simply sticking up an email address on your website is not a good idea because it will quickly be harvested by the spam phishers and your email address will rapidly become unusable.
This plugin provides a secure way for people to contact you privately and will provide the credibility you need to present a professional face to the world. Later in this lesson I will show you how to create a ‘Contact’ page.
___
OK, we’re nearly done. Just let’s finish by configuring the plugins we just installed. If the plugin doesn’t appear below, then the good news is that there’s nothing more to do on it!
Configure All In One SEO Pack
Click on the link on the red prompt message at the top of your website page and you’ll get to the options page for this plugin, as shown in Figure 15.3:
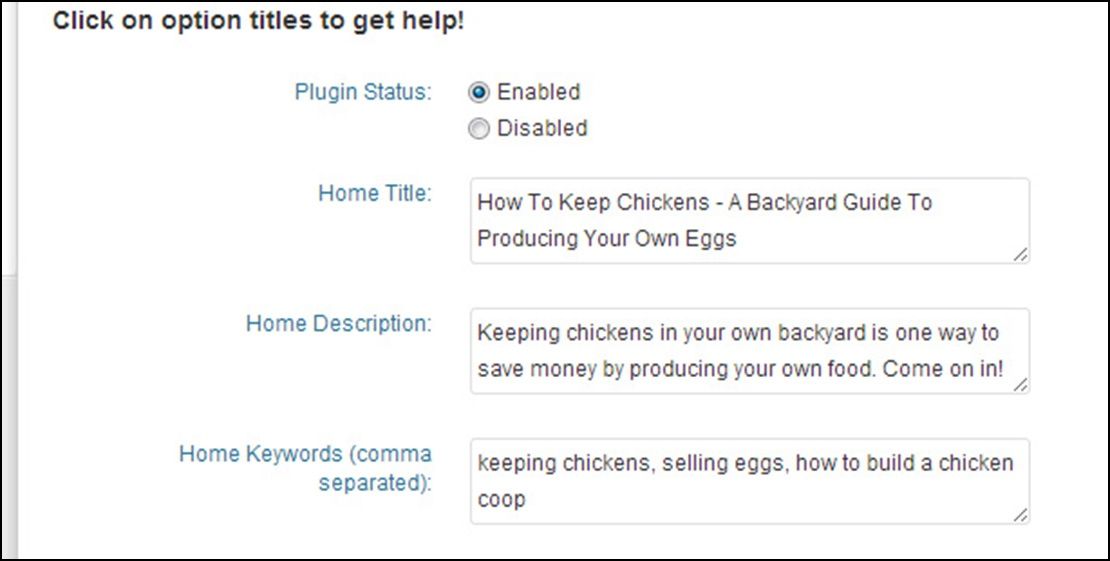
First, click the radio button next to Plugin Status, ‘Enabled’. Then look at the three boxes below entitled ‘Home Title’, ‘Home Description’ and ‘Home Keywords’. These are the boxes that tell the search engines what your site is all about.
The text you enter here will show up on the search results when your site appears on their listings. Figure 15.3 shows what I entered for my website.
Enter your text and scroll to the bottom of the page and click ‘Update Options’. There are a lot of other technical options available on this page and it is safe to leave the defaults as they are.
Now that you have installed this plugin you will notice that it has added some similar boxes to the individual Pages and Posts screens:
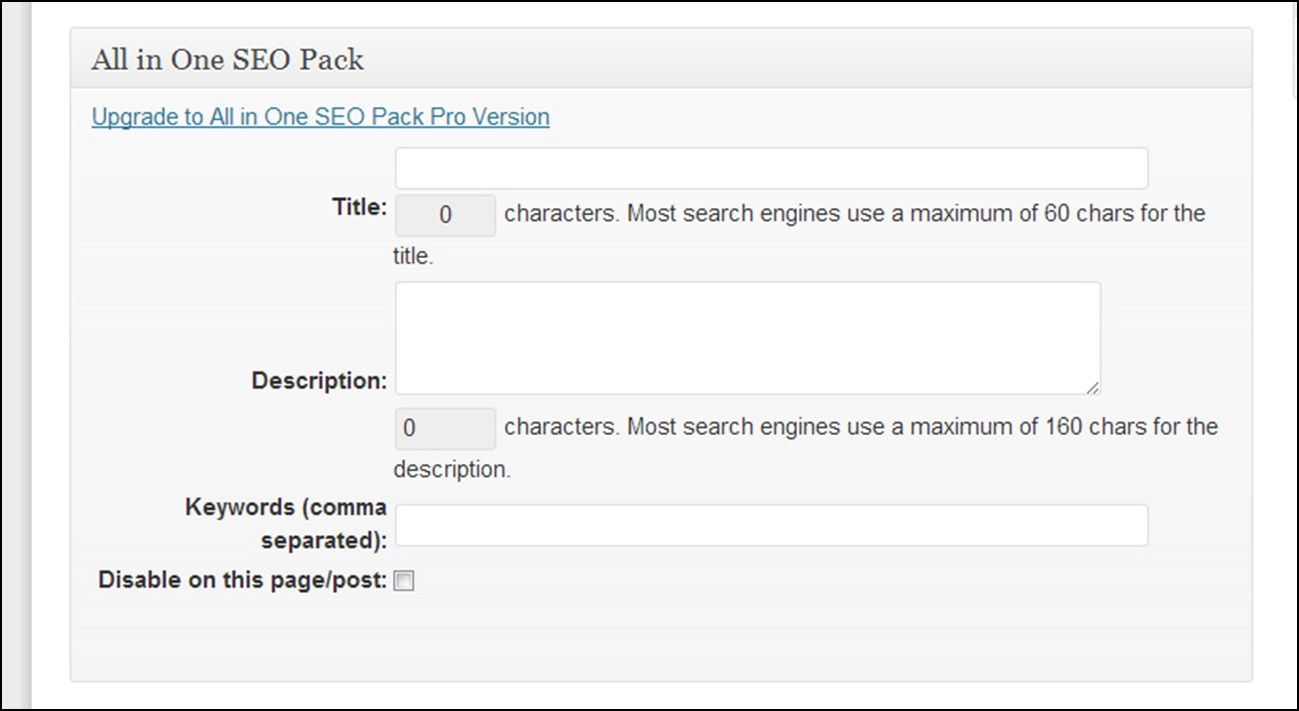
The fields ‘Title’, ‘Description’ and ‘Keywords’ shown in Figure 15.4 are what is known in tech-speak as ‘meta-data’. This information gets copied to the invisible background of your webpage and is provided solely for the search engines; your human visitors will not see this information.
It is good practice to fill these each time you add your pages and posts. I will cover this topic again in Lesson 18.
Configure Contact Form 7
From the dashboard, click ‘Plugins’ and click ‘Settings’ for ‘Contact Form 7’.
There is nothing really to change here, but it would be a good idea for you to check that the email address quoted on this page is the email you want your messages to be sent to. This will not appear on the contact page and will not be visible to anyone other than you. If necessary, change this email address and then click on ‘Save’.
Before leaving the page, copy the shortcode at the top of the page ([contact-form-7 id=“55” title=“Contact form 1”]) to your clipboard.
Add A Contact Page
Now, let’s quickly add a ‘Contact Us’ page. From the dashboard, click ‘Pages’, ‘Add New’. Enter a title such as ‘Contact Us’ and then paste the shortcode you just copied into the body of the page. You can add some surrounding text if you like, and then click ‘Publish’. Easy - you just got yourself a ‘Contact’ page.
While you are going through this exercise you may well see other plugins that look interesting and that you are tempted to install. By all means explore what’s available and install more plugins if you can see a use for them. My advice, when looking for plugins, is to choose only those with three or more stars and do not install a plugin that has not been tested with the version of WordPress that you are using.
You can find out more about a plugin by clicking on ‘Details’ against that plugin on the ‘Install Plugins’ page.
___
There are many, many more plugins that you can use and I leave you to discover and install them yourself. But a quick word of advice if this is the first WordPress website you have ever built. Don’t overload your website with plugins if you cannot justify that they are necessary for the functionality of your site.
Plugins can clutter up your site and slow it down and can, from time to time, conflict with one another. And, as with themes, plugins can become out of date and can stop working if the plugin’s author has not kept up to date with the current version of WordPress. So, take it step by step and be a little self-disciplined in your use of plugins, at least at first.
FAQ
What is the best plugin for keeping track of the number of visitors to my website?
‘Google Analytics’ is the system used by most professional webmasters and this provides an extensive breakdown of how many visitors your site attracts and where they come from.
To use Analytics you need to have a Google account (free, and easy to set up) and you have to sign up to Analytics. All this is explained in http://www.google.com/analytics/.
When you have added your website to your Google account, you are provided with a snippet of tracking code which you have to include on your website. This operates in the background and invisibly monitors your visitors so that Google can present you with a detailed breakdown of your website traffic. You can see the daily results of this by logging into your Google Analytics account.
There are various plugins which enable you to add the tracking code to your website and the one I currently favor is ‘Google Analytics for WordPress’. Search for this plugin as explained above, install it and copy and paste your tracking code as directed.
Having said all this, when you first get started Google Analytics may not be very useful because you may not actually be getting many visitors. So, you don’t need to rush into this until you have your site up and running (say, after a month or so).