WordPress To Go - How To Build A WordPress Website On Your Own Domain, From Scratch, Even If You Are A Complete Beginner (2013)
QUICK START GUIDE - YOUR OWN WEBSITE IN 8 EASY LESSONS
Lesson 2. Install Wordpress On Your Domain
What we’re going to do now is install the WordPress software on your domain and hosting account. The good news is that you only have to do this once, so just get through this step and you’re on your way to a great website!
I have given instructions here for Hostgator. If you have a hosting account with another provider, check whether they have the cPanel (stands for ‘control panel’) interface. If so, this set of instructions will likely apply to your host, too.
If you are with a different host and they don’t have cPanel, ask their Technical Support for instructions on how to install WordPress.
Install Wordpress With ‘Quickinstall’
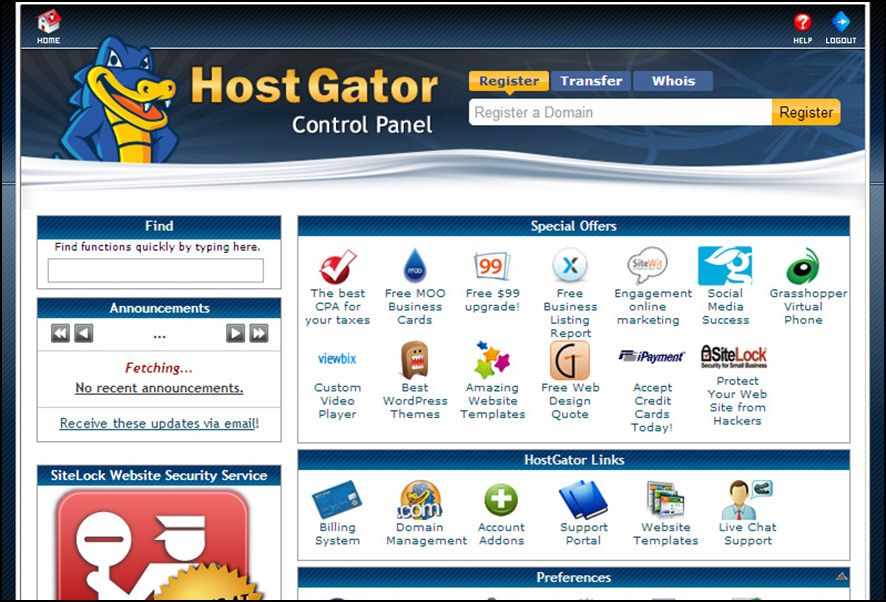
If you’re still with me, log in to Hostgator with the username and password that they emailed to you. You will be passed on to the cPanel interface (Figure 2.1). This is where you access all the resources and services that Hostgator provides for you.
Scroll down this page until you see the section headed ‘Software/Services’ (Figure 2.2).
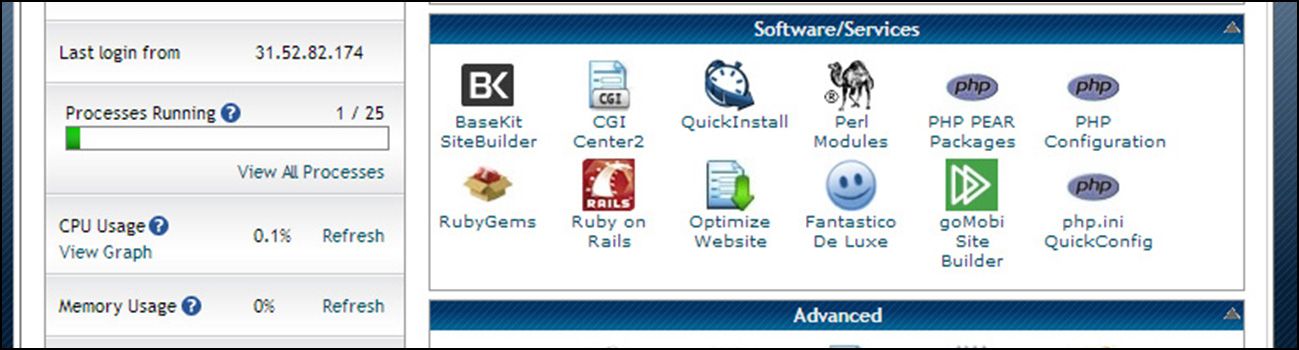
Click on ‘QuickInstall’ and then on the ‘WordPress’ link under ‘Blog Software’.
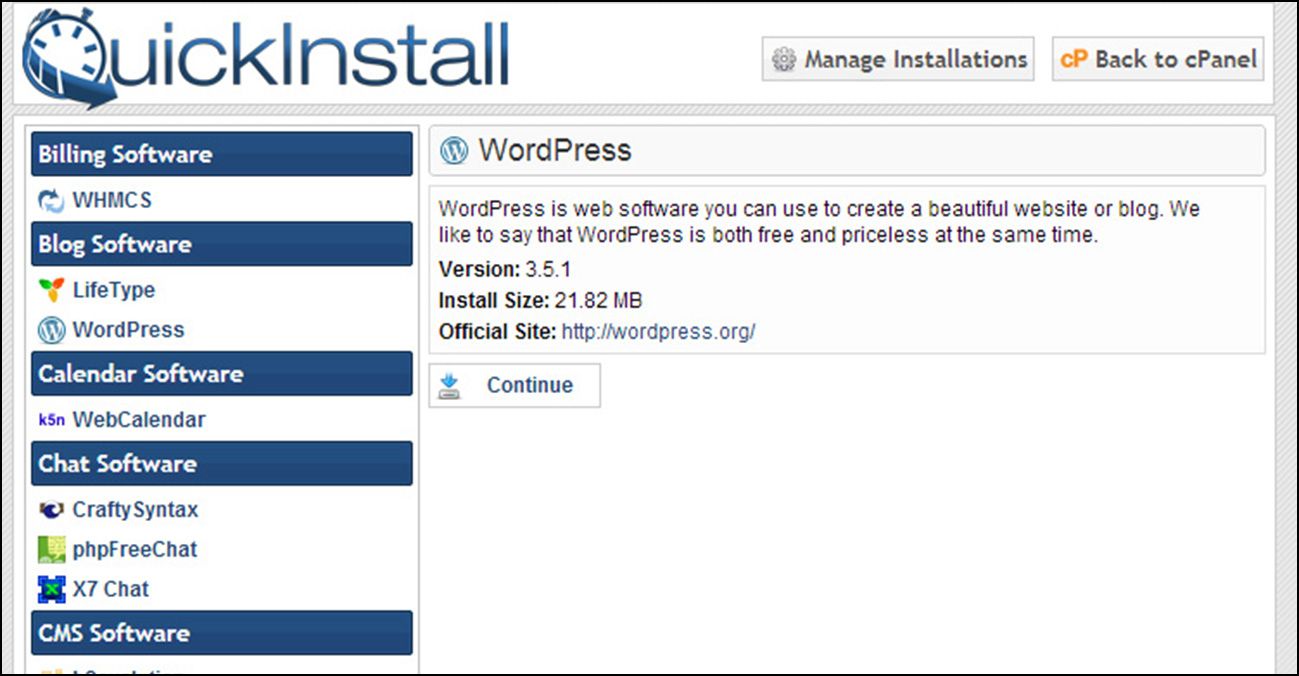
Then click ‘Continue’ and you’ll see a screen like the one in Figure 2.3. Enter the name of your domain alongside ‘http://’ and then enter your email, the title of your website and your first and last name. This is the minimum information WordPress needs to create a website. You can change any of this information later. Then click ‘Install Now!’ and wait for the script to finish.
Then it’s done. WordPress is installed on your domain - easy peasy! Check your email to get your WordPress username and password.
If all this went well, congratulations - you can now skip to the next lesson.
Install Wordpress With ‘Fantastico’
If you don’t have access to QuickInstall you can use the other tool called ‘Fantasico’ to install WordPress automatically. There are several versions of this tool so what you see may vary slightly from what I am showing you here, but most of it is self-explanatory.
First, click on the icon labeled ‘Fantastico’. You’ll see this screen in Figure 2.4:
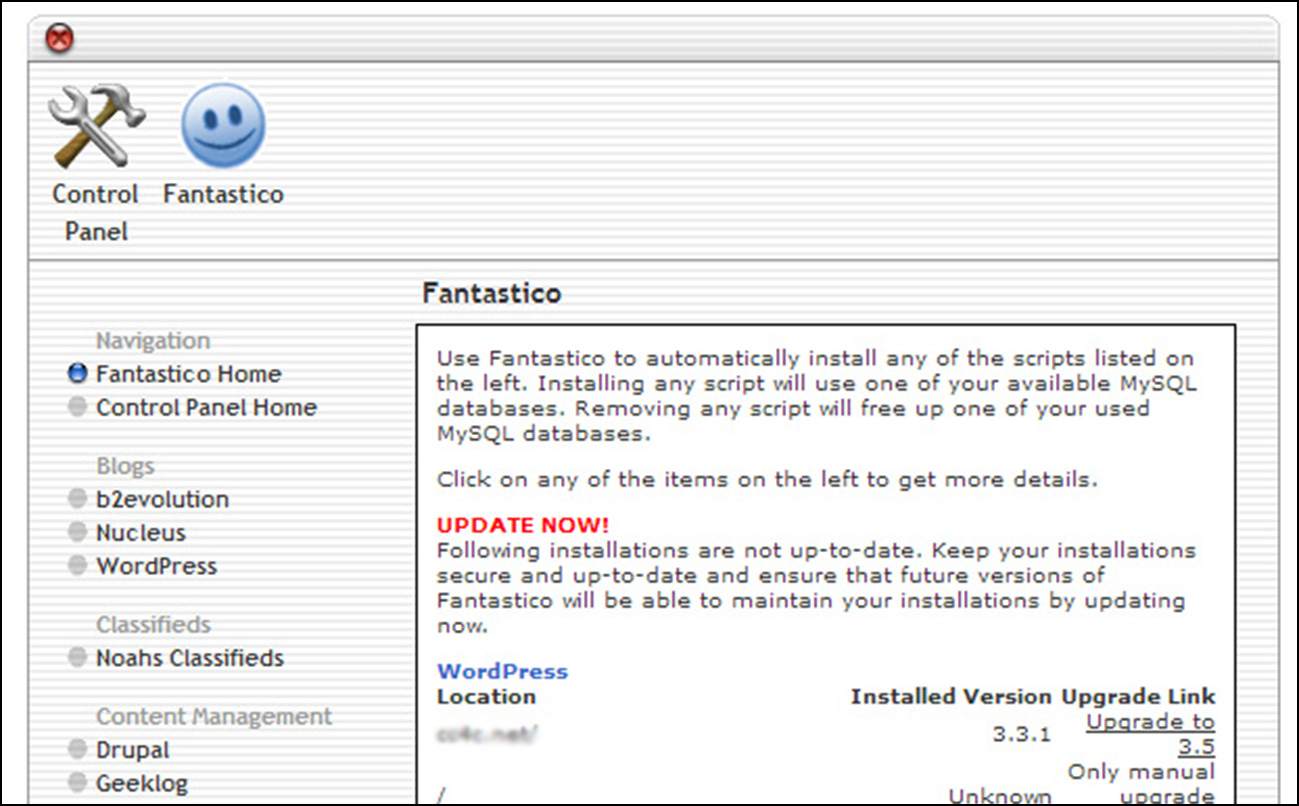
Click on ‘WordPress’ in the left panel. Then on the next screen click ‘New Installation’.
Click on your domain name in the drop-down box and then enter your administrator-username and password (can be anything but remember what you typed!), nickname, email address, site name and description. You can change any of these entries later when you log in to your WordPress website. Then click on the ‘Install WordPress’ button. Wait for a short while and it’s done!
Check your email for a confirmation that WordPress has been installed on your domain and save this (or print it out) for security purposes.
___
Congratulations! When you’ve completed this lesson you have an empty WordPress website on your domain just waiting for you to make it your own!
FAQ
Help! I installed WordPress but I’ve made a complete mess of everything and I want to start again. Can I uninstall WordPress on my domain?
Yes, you can. Log in to Hostgator’s cPanel and go back into QuickInstall (see Figure 2.3).
Click on the button at the top of the screen that says ‘Manage Installations’. You will see a small red cross to the right of your domain name. Click this and an option will appear labeled ‘Uninstall’.
Follow the prompts and your WordPress installation will disappear. You can then start over.