WordPress Responsive Theme Design (2015)
Chapter 5. Customizing Single Post Templates
In this chapter, we will work on post templates and their components, such as title, meta, and navigation. Single post templates are usually used for blog posts. They help us set up a basic layout that we can extend later with index templates and static pages.
We will cover the following topics:
· Customizing template elements
· Making template elements responsive
In order to understand all these template types, we can use the following image as a reference:
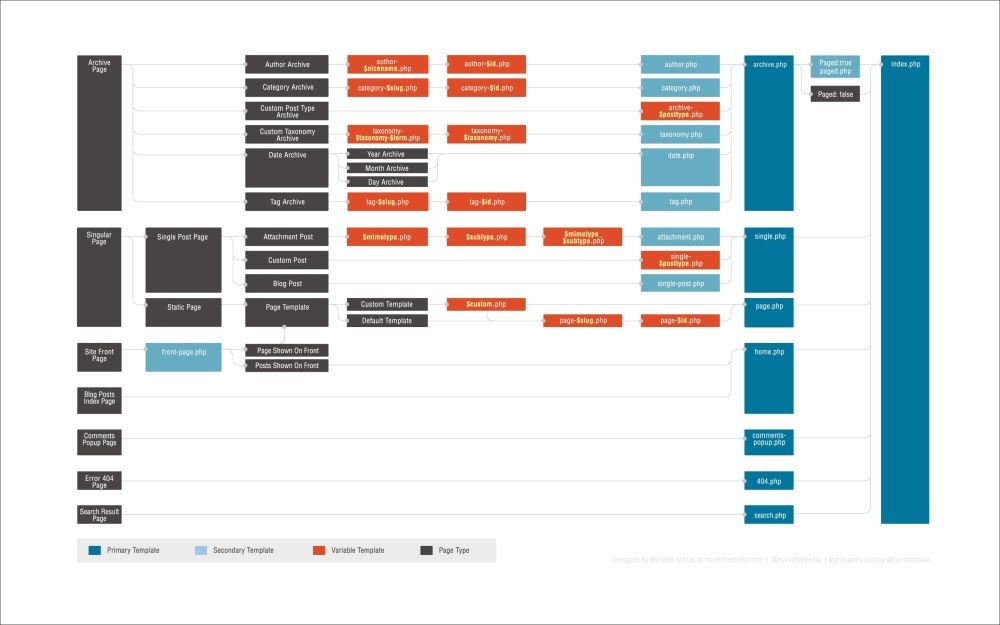
Source: http://codex.wordpress.org/images/9/96/wp-template-hierarchy.jpg
Analyzing single post templates
For single post templates, a single.php file is used as a start-up file, and it is only a bootstrap file. The content of a single.php file is as follows:
?php
/**
* The template for displaying all single posts.
*
* @package topcat
*/
get_header(); ?>
<div id="primary" class="content-area">
<main id="main" class="site-main" role="main">
<?php while ( have_posts() ) : the_post(); ?>
<?php get_template_part( 'content', 'single' ); ?>
<?php topcat_post_nav(); ?>
<?php
// If comments are open or we have at least one comment, load up the comment template
if ( comments_open() || get_comments_number() ) :
comments_template();
endif;
?>
<?php endwhile; // end of the loop. ?>
</main><!-- #main -->
</div><!-- #primary -->
<?php get_sidebar(); ?>
<?php get_footer(); ?>
At the beginning of the file, there is a call to the get_header() function, which calls the header.php file. In more detail, this function typically calls the HTML title, head, and other navigation elements that exist throughout the site—the items that should appear on every page in the header section.
Later on, we check whether there is a post with the while ( have_posts() ) : the_post(); code, and if there is, we load the content (part of the page from content-single.php) with the get_template_part( 'content', 'single' );code.
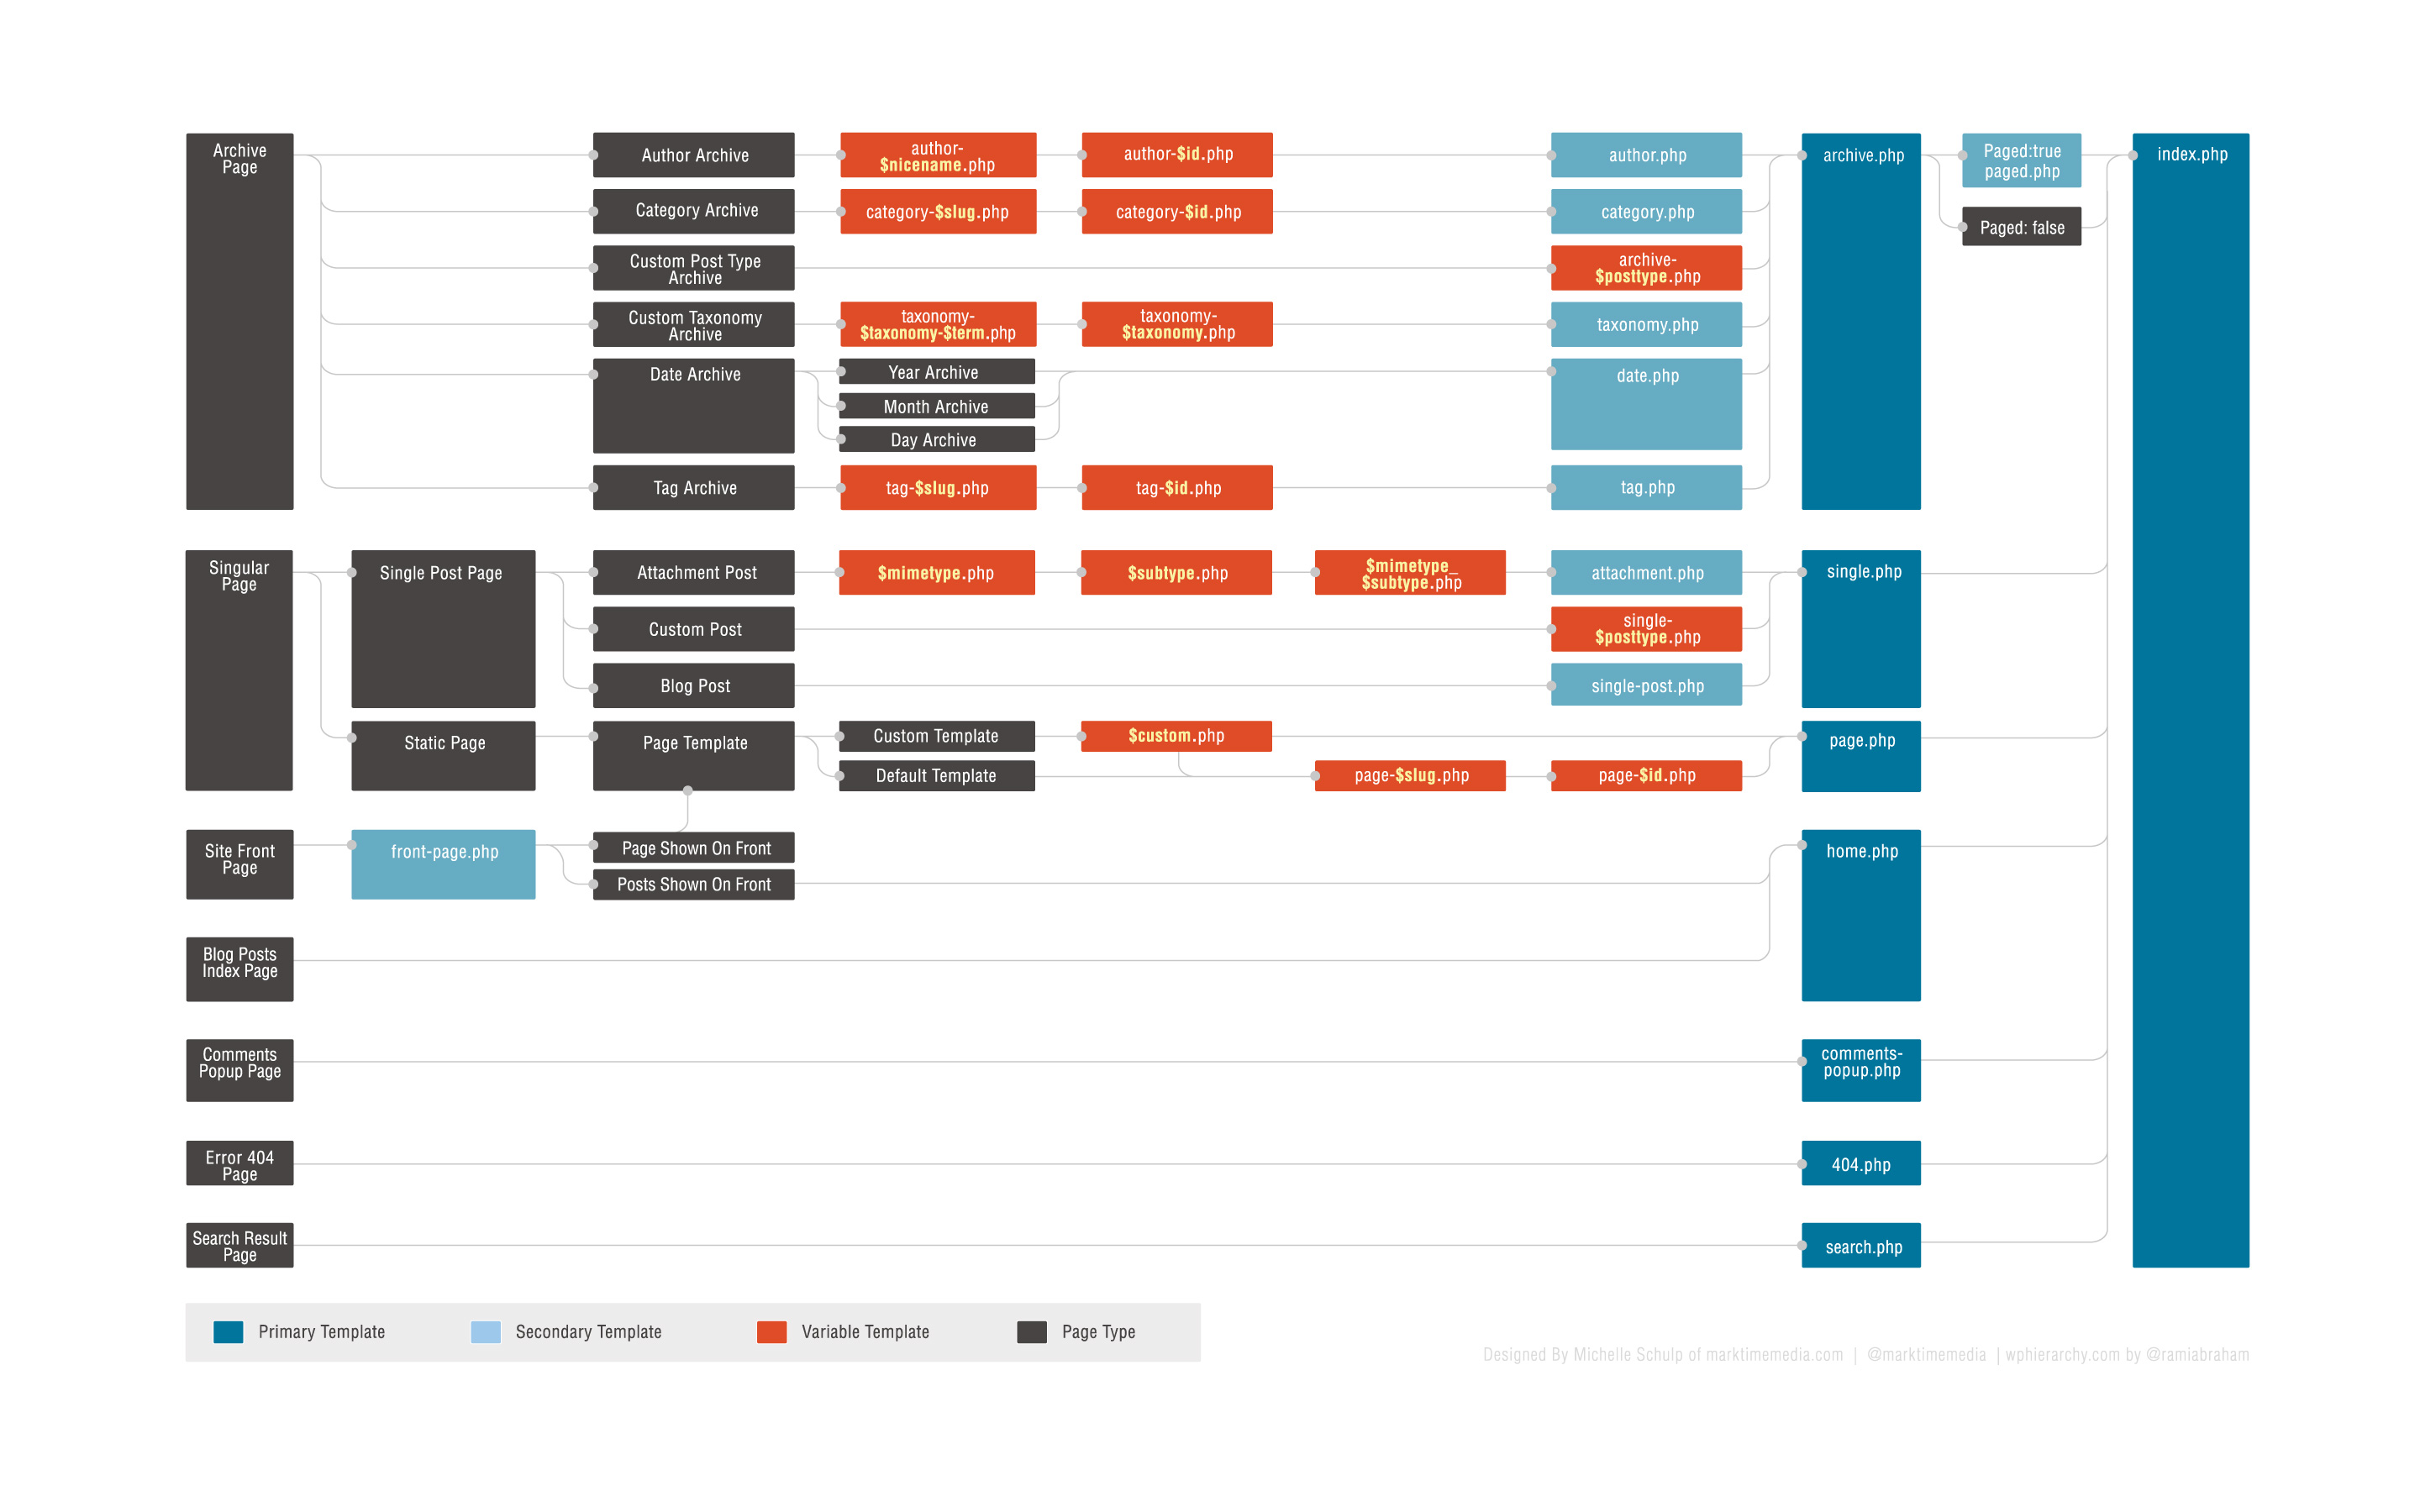
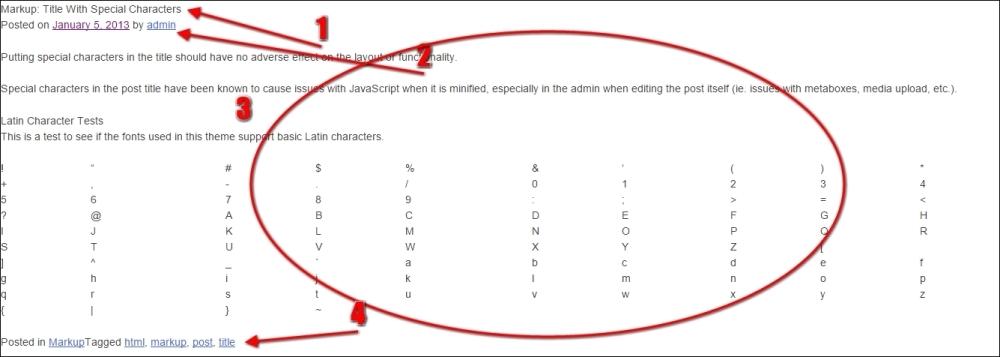
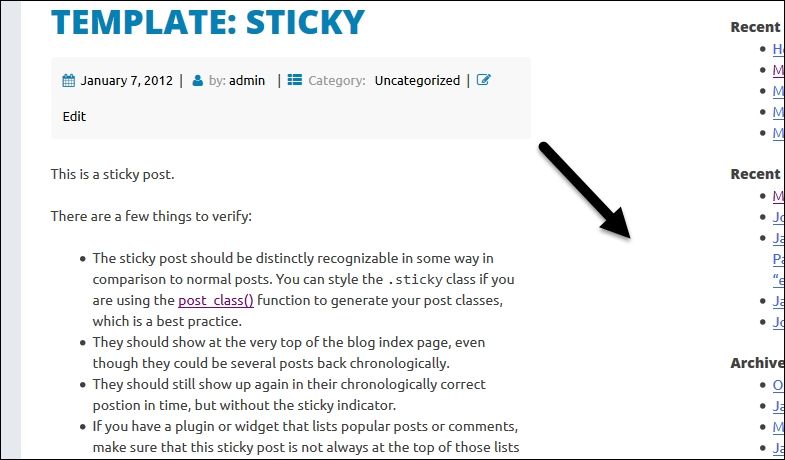
The following screenshot shows a sample page:
In order to better understand what content is, let's analyze the preceding image:
· The first section (#1) is the header
· The second section (#2) is the menu
· The third section (#3) is the sidebar
· The fourth section (#4) is the post navigation
· The fifth section (#5) is the content part
After this, we load the post navigation with the topcat_post_nav() function call and then load comments:
if ( comments_open() || get_comments_number() ) :
comments_template();
endif;
If comments are enabled and they exist (somebody has already posted a comment), we call the sidebar and the footer at the end of the code.
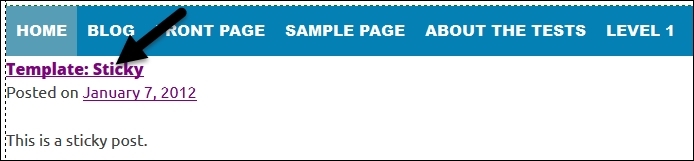
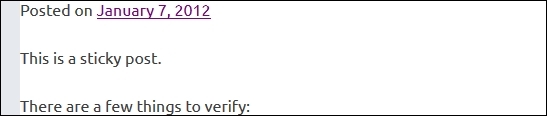
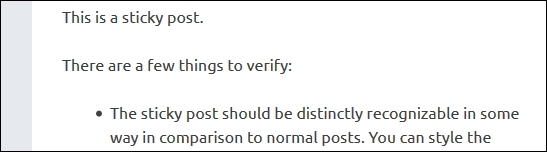
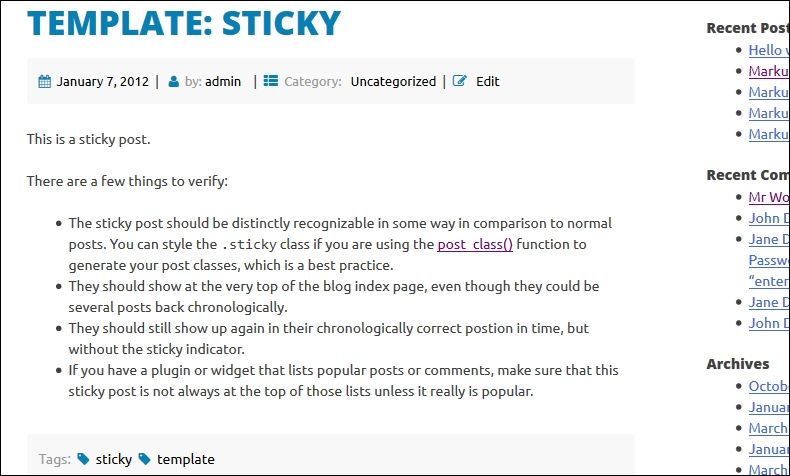
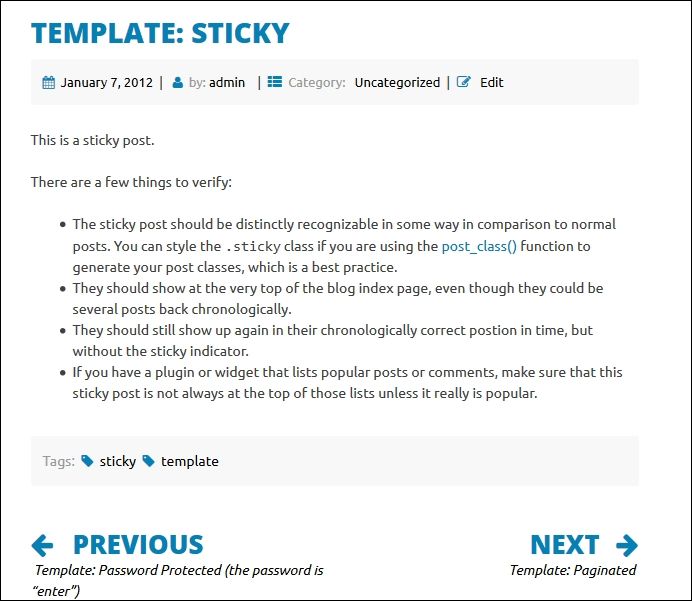
Note that for this section, we will use a Template: Sticky post. As this is the first post that appears under our navigation, it's easy to manage.
Tip
When you mark the post as a sticky post, it will always load first, no matter when it was created. After it is loaded, other posts will show up on the post's index page.
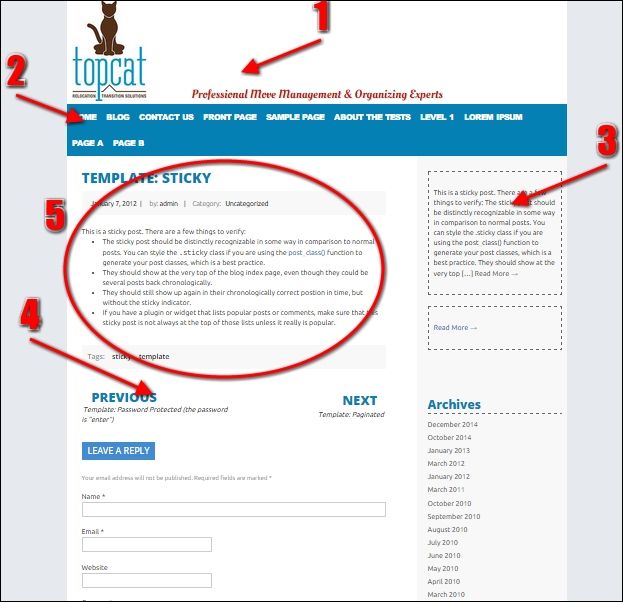
To make the post sticky, go to one of the posts in the Posts section in wpadmin and under the Publish section (top-right corner), check the Stick this post to the front page option.
We need to click on the Edit link in the Visibility: section (step#1) to see the Stick this post to the front page option (step#2), as you can see it here:
By default, the Visibility item of the Publish section is closed/collapsed.

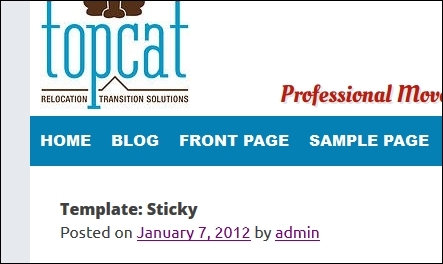
Since we are using "Theme unit test data," there is a post with the name Template: Sticky, which is already set to be sticky, as you can see it from the following image:
To find the Template: Sticky post in our database, we need to go to the Posts section of wpadmin and then search for it, as shown in the following screenshot (step#1):

As a result, we will get the post name shown in step #2 of the previous screenshot.
Note
If we are not sure whether the option is working, try unchecking the Stick this post to the front page option, check the main page (if that post is no more the first post on the page), and check it again (now it should be the first post again).
In WordPress, there is an option to enable/disable comments for each post. In order to see whether comments are enabled or disabled, we need to go to our post and then click on Screen Options on the header, as shown in the next screenshot:

Then, click on the discussion box, as shown here:

Tip
There is also an option named Allow comments to enable/disable comments on all posts in the general settings. This is under the Discussion section (Settings | Discussion).
After this, the Discussion section will appear under our editor section, and there we will see the option to enable/disable comments, as shown in the following image.

Analyzing the content-single.php file
Now that we've looked at single.php, which is the container for single pages of various types, let's look at content-single.php, which is where the post content itself gets rendered:
<article id="post-<?php the_ID(); ?>" <?php post_class(); ?>>
<header class="entry-header">
<?php the_title( '<h1 class="entry-title">', '</h1>' ); ?>
<div class="entry-meta">
<?php topcat_posted_on(); ?>
</div><!-- .entry-meta -->
</header><!-- .entry-header -->
<div class="entry-content">
<?php the_content(); ?>
<?php
wp_link_pages( array(
'before' => '<div class="page-links">' . __( 'Pages:', 'topcat' ),
'after' => '</div>',
) );
?>
</div><!-- .entry-content -->
<footer class="entry-footer">
<?php topcat_entry_footer(); ?>
</footer><!-- .entry-footer -->
</article><!-- #post-## -->
First, let's analyze what each part of our code renders visually on a single post page, and later on, we will analyze the rendered markup (HTML), too. For this, we need to go to http://localhost/topcat/title-with-special-characters/.
Tip
If you are not working on a localhost, please change the hostname localhost to the hostname of your environment.
The following code prints out the post title (#1 in the preceding image):
<?php the_title( '<h1 class="entry-title">', '</h1>' ); ?>
This code prints out the meta-information for a single post (#2 in the previous image):
<div class="entry-meta">
<?php topcat_posted_on(); ?>
</div>
The following code prints out the post content (#3 in the preceding image):
<div class="entry-content">
<?php the_content(); ?>
<?php
wp_link_pages( array(
'before' => '<div class="page-links">' . __( 'Pages:', 'topcat' ),
'after' => '</div>',
) );
?>
</div><!-- .entry-content -->
The following code prints out the footer (#4 in the previous image):
<footer class="entry-footer">
<?php topcat_entry_footer(); ?>
</footer><!-- .entry-footer -->
Now, let's analyze the rendered markup (HTML) that we got from our code, as there are a lot of other things going on under the hood.
In the first line of the content-single.php file, we have an article tag with an ID and class. The ID is created from the word post- and the post ID the_ID(); the class is generated from the post_class() function. The rendered HTML looks like this:
<article class="post-1241 post type-post status-publish format-standard hentry category-uncategorized tag-sticky-2 tag-template" id="post-1241">
As we can see from the preceding code, there are so many classes that we can utilize in order to reach our goals. These classes allow us to use CSS to target specific post types, posts, statuses, and formats in order to change the appearance of these posts, such as the following:
· post-1241: Access only the 1241 post
· post: Access all the posts
· type-post: Access the content of a type post
· status-publish: Access any content that has its status as published
· format-standard: Access any content that has the standard post format
Tip
In a sophisticated software, such as PhpStorm or NetBeans, you can easily inspect the function call just to see the declaration of the function or class. For example, we can right-click on the code on a post_class() call and go to Go To | Declaration. Then we will be able to see the insides of the function. Isn't that cool?
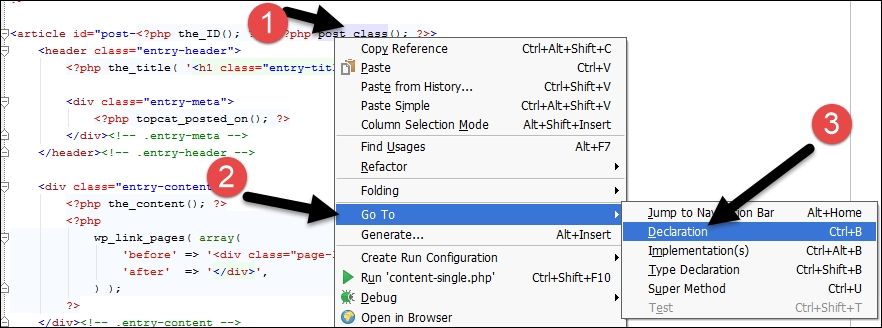
This is the screenshot from the PhpStorm IDE.
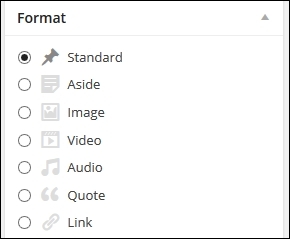
Post Format is a piece of metainformation that can be used by theme to customize its presentation of a post. The Post Formats feature provides a standardized list of formats that is available to all the themes that support the feature. Themes are not required to support every format on the list. In short, with a theme that supports Post Formats, a blogger can change the look of each post by choosing a Post Format from the radio button list.
Post Format (if supported by the theme) can be changed in the wpadmin page of each post or page. It can be found on the right-side widget called Format, as you can see from the following image:
The following is the result:
function post_class( $class = '', $post_id = null ) {// Separates classes with a single space, collates classes for post DIVecho 'class="' . join( ' ', get_post_class( $class, $post_id ) ) . '"';}
After code in article tag, we have the the_title() function, which prints the title on the screen and uses h1 with the entry-title class. Just after this, we have topcat_posted_on, which provides the date and by whom it was posted information, such as "Posted on January 7, 2012, by the admin." Later on, we have the the_content() call, which gets the posts content; after this, we have the wp_link_pages() function that provides the previous/next links (this is the previous/next page of a paginated post).
There are two reasons why you will like to use paginated posts:
· Page views are very important for Search Engine Optimization (SEO). If we split the posts into multiple pages, we will increase page views for our website and our website will rank better with search engines.
Note
A page view (PV) or page impression is a request to load a single HTML file (web page) of an Internet site. On the World Wide Web (WWW), a page request would result from a web surfer clicking on a link on another page pointing to the page in question. This can be contrasted with a hit, which refers to a request for any file from a web server. There may, therefore, be many hits per page view since an HTML page can be made up of multiple files. On balance, PV refer to a number of pages that are viewed or clicked on the site during the given time.
· If we have a lot of text in the post and there is a probability that users will not read the whole post at once, it would be better to split the post into multiple pages. So, readers can bookmark the page where they have stopped reading and continue later from there.
Then, we have the topcat_entry_footer() call for a function that is declared in inc/template-tags.php. Let's analyze the code now:
function topcat_entry_footer() {
if ( 'post' == get_post_type() ) {
$posttags = get_the_tags();
echo '<div class="tags-links">Tags:<span> ';
if ($posttags) {
foreach($posttags as $tag) {
echo '<i class=" fa fa-tag"></i>  ' .
'<a href="' . get_tag_link($tag->term_id) . '">' .
$tag->name . '</a>  ' ;
}
}
echo '</span><div>';
}
if ( ! is_single() && ! post_password_required() && ( comments_open() || get_comments_number() ) ) {
echo '<span class="comments-link">';
comments_popup_link( __( 'Leave a comment', 'topcat' ), __( '1 Comment', 'topcat' ), __( '% Comments', 'topcat' ) );
echo '</span>';
}
}
As we can see from the preceding code, we want to display the tags in the posts (as tags can only be assigned to posts not pages). Our code checks with the if statement whether the page is a post or not. If it's a post, it will print out categories and tags. Later on, it checks whether it's a single post page (which means it's not archived).
Tip
Archive posts/pages list or index a number of posts on a page, and usually, they display the post title, metacategories and meta tags, and excerpts from the content. Single post pages display everything mentioned previously, plus the full content instead of excerpts, and comments too if enabled.
Template improvements
We have analyzed the code and now it's the time to make our changes. As I said previously, a number of developers, including myself, now like to design in a browser. This is because when you interact more with your design, you get better ideas and want to improve more. On the other side, you should be careful not to go in the feature creep state.
Tip
Feature creep is a state where you or your customers feel like adding more features, and this road then doesn't end easily. My recommendation is to make changes only if you think they will improve the design and usability of the site, but at the same time, be careful about how many changes you make as you need to finish your project on time.
In our case, we need to finish our theme and submit it to WordPress.org as soon as we can. Later on, we can make changes and updates.
Header improvements
I have added a silver background color in order to distinguish the background from the content of the site. This change should be done in the style.css file's Content section by adding this code:
body{
background: none repeat scroll 0 0 #e6e9ed;
}
Now that we can clearly distinguish the sections, we should comment out the borders in content-sidebar.css:
.topcat_page /* border: 1px black dashed; */
.site-branding /* border: 1px #008000 dashed; */
.site-content .widget-area /* border: 1px red dashed;*/
After that, I have decided to give a little space to the header logo that looks like this:

As we can clearly see from the previous image, there is no space on the left side by the border. The solution is to add div with the logo-container class around our logo to header.php:
<div class="logo-container">
<?php if ( get_header_image() ) : ?>
<a href="<?php echo esc_url( home_url( '/' ) ); ?>" rel="home"><img src="<?php header_image(); ?>" width="<?php echo esc_attr( get_custom_header()->width ); ?>" height="<?php echo esc_attr( get_custom_header()->height ); ?>" alt=""></a>
<?php endif; // End header image check. ?>
</div>
I've put a logo-container class in our styles.css file in the new section 13.Header that I have created:
/*--------------------------------------------------------------
13. Header
--------------------------------------------------------------*/
.logo-container{padding: 0px 10px;}
With this change, our logo image is moved a little bit to the right:

Under the header section in styles.css, we can create another section 14.Colors where we can store our color palette values:
*--------------------------------------------------------------
14. Colors
--------------------------------------------------------------*/
/*our blue #0480b5; */
/*our blue light #579DB5; */
Note
The comments are added by me and they don't render anything, as they are here for the information purposes only.
After moving the logo, the site description doesn't look nice, as you can see it from the following image:
![]()
We can change that, too. In order to change the default look, we have to use the site-description class provided by the underscores theme, and with this code:
.site-description{
font: 400 24px/1.3 'Oleo Script', Helvetica, sans-serif;
color: #2B2B2B;
text-shadow: 2px 2px 0px rgba(0,0,0,0.1);
}
As we can see right now, I have added the new Oleo Script custom font, which was wp_enqueued in the functions.php file, as follows:
wp_enqueue_style( 'topcat-description-font', get_template_directory_uri() .'/css/oleo-script.css' );
Here is the final look of the header with all our changes:

The T size of the font in the content also doesn't seem good, so we can make it a bit smaller in the typography section:
body,
button,
input,
select,
textarea {
color: #404040;
font-family: Ubuntu, sans-serif;
font-size: 14px;
font-size: 1.4rem;
line-height: 1.5;
}
It will look a lot better with all the changes that we are going to do later in this book.
Implementing changes to the post template
We just made some nice changes to the header, and now we will make changes to content-sidebar.css, too.
The Posted on and following lines are right up against the grey background, as you can see it in the following image:
In the content-sidebar.css file, I have added padding: 30px; to the @media only screen and (min-width:769px)desktop media query, and now it looks a little bit better:
Note
The silver color on the left-hand side of the logo is the silver background that we just put in order to see the difference.
Now it's time to change our post title and meta tags. Here is the current look:
Note that I have intentionally taken a screenshot of the part of the logo and the menu in order to show you how small the entry title is. In order to make it bigger and match our design, we have to add this code to the typography section of the style.css file:
.entry-title{
color: #0480B5;
font-size: 2.8rem;
font-size: 28px;
text-transform: uppercase;
font-family: 'Open Sans', sans-serif;
}
Here, we used the color blue as color: #0480b5; and then we have made our fonts bigger by using the font-size: 28px; code. After this, we capitalized our fonts with text-transform: uppercase;, and finally, we made sure our Open Sans fonts were used in font-family: 'Open Sans', sans-serif;.
We also want to change how the title looks in normal, visited, hovered, and active states because our title is also a link. This requires adding the following code:
.entry-title a,
.entry-title a:visited,
.entry-title a:hover,
.entry-title a:active{
text-decoration: none;
color: #0480B5;
}
In this part of the code, we make sure that our title (which is a link too) looks the same in normal, visited, hovered, and active states. Here is the look after the change:

Styling post's metadata
Our next step is to style the metadata of the post (Posted on...). This data is in the content-single.php topcat_posted_on() function. If we go to the function's declaration, we can see all the code there. Let's make some changes in order to make the meta box looks better and have more information. From the original function, keep the $posted_on and $byline declarations and get the categories and the edit button from topcat_entry_footer function. This is because in a footer, we will only have to display tags.
Here is the code for the topcat_posted_on() function:
function topcat_posted_on() {
$time_string = '<time class="entry-date published updated" datetime="%1$s">%2$s</time>';
if ( get_the_time( 'U' ) !== get_the_modified_time( 'U' ) ) {
$time_string = '<time class="entry-date published" datetime="%1$s">%2$s</time><time class="updated" datetime="%3$s">%4$s</time>';
}
$time_string = sprintf( $time_string,esc_attr( get_the_date( 'c' ) ),esc_html( get_the_date() ),esc_attr( get_the_modified_date( 'c' ) ),esc_html( get_the_modified_date() ));
$posted_on = sprintf(_x( '%s', 'post date', 'topcat' ),'<i class="fa fa-calendar"></i> <a href="' . esc_url( get_permalink() ) . '" rel="bookmark" >' . $time_string . '</a>');
$byline = sprintf(_x( '<i class="fa fa-user"></i> '.'by: %s', 'post author', 'topcat' ),'<span class="author vcard"><a class="url fn n" href="' . esc_url( get_author_posts_url( get_the_author_meta( 'ID' ) ) ) . '">' . esc_html( get_the_author() ) . '</a></span>');
if ( 'post' == get_post_type() ) {echo '<span class="posted-on">' . $posted_on . '</span>| <span class="byline"> ' . $byline . '</span>| ' ;
/* translators: used between list items, there is a space after the comma */
$categories_list = get_the_category_list( __( ', ', 'topcat' ) );
if ( $categories_list && topcat_categorized_blog() ) {
echo '<i class="fa fa-th-list"></i> <span class="byline">'. __( 'Category: ', 'topcat' ) . '</span>' . '<span class="cat-links">'. $categories_list . '</span>';
}
echo edit_post_link(__( ' Edit ', topcat ), '| <i class="fa fa-pencil-square-o"></i> <span class="edit">', '</span>');}
}
Let's analyze the improvements we made:
1. We have first analyzed the PHP and HTML code, and later on, we have analyzed the CSS attached to this code. In the beginning, we processed the date/time code that is displayed on the posted on section.
2. Then, we have declared the $posted_on variable. We took off the Posted on words, as there is no point in having them there. <i class="fa fa-calendar"></i> is the code where we use font awesome icons, and in this case, we used a calendar icon.
3. After the $posted_on variable, we have a $byline declaration, and here, we printed the author information together again with <i class="fa fa-user">, which is a font awesome icon for the user.
4. In the third section, we outputted categories; before doing this, we had to check whether our post is a type post. If it is a type post, then we get a category or a list of categories that are assigned to this post with get_the_category_list().
5. After this, we have checked whether the list has returned categories and whether the post has more than one category with topcat_categorized_blog(). If the post has one or more categories associated with it, we print them out, again with <i class="fa fa-th-list">, which is a font awesome icon for a list, and I've seen it as a proper icon for the categories.
Tip
Note that you can put icons of your choice for this; although, again, I will recommend that you follow the book and make your changes later on.
At the end of the function, we have a code for the edit post link with <i class="fa fa-pencil-square-o">, which is a font awesome icon for editing. Now, we are going to make some CSS changes.
Since we have already analyzed the markup and PHP code, let's see what we did with CSS in order to accomplish our new look. As the post's meta has its own container, <div class="entry-meta">, we have edited it first in style.css file, and edited code is in the posts and pages section:
.entry-meta, .tags-links {
background: none repeat scroll 0 0 #F8F8F8;;
border-radius: 3px;
margin: 12px 0 24px;
overflow: hidden;
padding: 5px 12px;
}
.entry-meta span{
font-size: 13px;;
font-size: 1.3rem;
margin: 0 6px 0 0;
padding: 0;
}
Here, we have first defined a silver background by using background: none repeat scroll 0 0 #F8F8F8;, border-radius, margin, overflow, and padding. Then, for the child-element span, we have defined a font size margin and padding. After this, we have defined the styles for entry meta links, the author, and category links, as well as the tags that we have used in the footer of the post (we will cover this later):
.entry-meta a,
.entry-meta a:visited,
.entry-meta a:hover,
.entry-meta a:active
.author a,
.cat-links,
.tags-links a,
.tags-links a:visited
.tags-links a:hover,
.tags-links a:active
{
color: #000;
line-height: 2.8;
text-decoration: none;
}
Then, we have the .byline and .tag-links classes to set the default color as silver:
.byline, .tags-links { color: #999;}
As the last step, we will color our font awesome icons in blue:
.fa-calendar, .fa-user, .fa-th-list, .fa-pencil-square-o, .fa-tag{color: #0480B5;}
After the changes, this is how it all looks:

It looks pretty good now, right?
Content section
It doesn't look nice how the content is separated from the sidebar, as there is a lot of empty space in between:
To fix this, we should change the right margin in the .site-main class from:
.site-main {
margin: 0 25% 0 0;
}
To:
.site-main {
margin: 0 5% 0 0;
}
The .site-main class is located in content-sidebar.css.
Now the content looks a lot better, as you can see it here:
As we can see from the previous image, the link in the content post_class() function doesn't look appealing at all (just a default visited link color), and we can change this with only a simple code in style.css:
.entry-content a,
.entry-content a:visited
.entry-content a:hover,
.entry-content a:active
{
color: #0480B5;
line-height: 1.6;
text-decoration: none;
}
Here is what it looks like after our changes:
![]()
The post_class() link is in our blue color now and it's not underlined.
Now, if we just go back to the index page by clicking on the Home link in the menu and then go to the post with the name Markup: HTML Tags and Formatting, we will see more HTML elements that we can style.
Tip
This post and all the other posts/content in our project don't come with WordPress by default. We have loaded them by importing the Theme Unit Test Data from http://codex.wordpress.org/Theme_Unit_Test.
We will cover only some of them here, as there are so many of them. This is the look of our current headings:
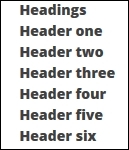
If we go to the typography (2.0) section of style.css, we will be able to see some headings we have already defined:
h1,
h2,
h3,
h4,
h5,
h6 {
clear: both;
font-family: 'Open Sans';
font-weight: 800;
color: #0480B5;
}
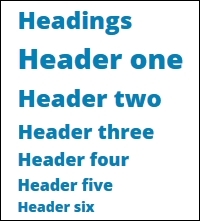
We should change the color to our blue (color: #0480B5;) to make everything the same, then we can style all the heading sizes separately:
h1{
font-size: 28px;
font-size: 2.8rem;
}
h2{
font-size: 24px;
font-size: 2.4rem;
}
h3{
font-size: 20px;
font-size: 2.0rem;
}
h4{
font-size: 18px;
font-size: 1.8rem;
}
h5{
font-size: 16px;
font-size: 1.6rem;
}
h6{
font-size: 14px;
font-size: 1.4rem;
}
Here is the new look of our headings:
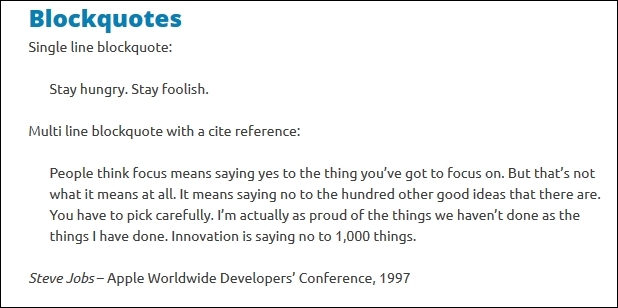
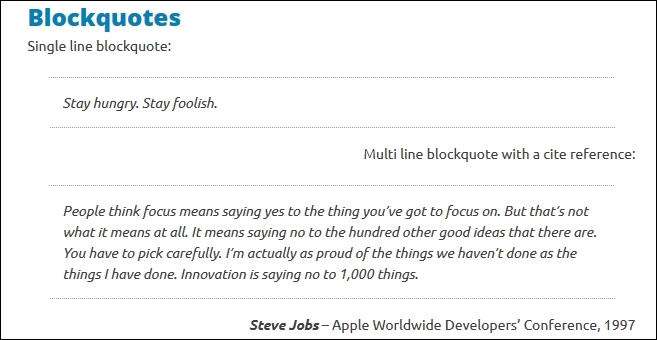
Under headings, we have a Blockquote that looks pretty basic:
So here, we will first define margin and padding and also add the dotted border at the top and bottom of the blockquote:
blockquote {
margin: 1.5rem 1.5rem;;
border-top: dotted 1px #999;
border-bottom: dotted 1px #999;
padding: 1em;
}
After this, we will style the p tag nested in blockquote:
blockquote p{
font-style: italic;
margin-bottom: auto;
}
We've made the fonts italic, and since the p element has some strange margin bottom, we have done a reset it here with margin-bottom: auto;.
We also want to make the author in the cite tag more visible; we can do this with:
cite{
font-weight: 600;
}
Since the citation is not nested in blockquote but in the next p tag, we would like to align it to the right:
blockquote + p{
width: 100%;
text-align: right;
}
Here is the look after all these changes:
Note
There are a number of HTML tags to style here, and since we have covered the basics and because it will take a lot of time to cover them all, we are going to move to the next part, that is, tags.
Tags
We have decided to display tags in a box just after the content.
In the last part of this chapter, we are going to work on navigation in post templates, and the code for this is located in the topcat_entry_footer() function, which is also located in the template-tags.php file.
Tip
Topcat_entry_footer() is the function that handles the footer for a single post, not a website footer.
I have changed the tag functionality with my own solution in the topcat_entry_footer() function of the template-tags.php file, and it looks like this:
if ( 'post' == get_post_type() ) {
$posttags = get_the_tags();
echo '<div class="tags-links">Tags:<span> ';
if ($posttags) {
foreach($posttags as $tag) {
echo '<i class=" fa fa-tag"></i>  ' .
'<a href="' . get_tag_link($tag->term_id) . '">' .
$tag->name . '</a>  ' ;
}
}
echo '</span><div>';
}
At first, we have checked whether the page is of type post, and then, we have loaded the tags in the $posttags variable with the get_the_tags() function. After this, we are looping trough the tags with the foreach loop as foreach($posttags as $tag), and in front of every tag, we have displayed a font awesome tag icon with the <i class=" fa fa-tag"></i> markup.
The .tags-links section has the same styles as that of .entry-meta:
.entry-meta, .tags-links {
background: none repeat scroll 0 0 #f8f8f8;
border-radius: 3px;
margin: 12px 0 24px;
overflow: hidden;
padding: 5px 12px;
}
We are also styling the links inside the .tags-links section with the same styles as the styles for .entry-meta links:
.entry-meta a,
.entry-meta a:visited,
.entry-meta a:hover,
.entry-meta a:active
.author a,
.cat-links,
.tags-links a,
.tags-links a:visited
.tags-links a:hover,
.tags-links a:active
{
color: #000;
line-height: 2.8;
text-decoration: none;
}
Finally, we will color .tags-links with the same markup as that of .byline:
.byline, .tags-links { color: #999;}
Here is the final look of the Tags: section:

Post navigation
As I have said previously, the final part in this chapter is post navigation or previous/next navigation. If we go to the single.php file and topcat_post_nav() function call, we will see this is the call to post navigation. This function is part of underscores theme and it's declared in the template-tags.php file:
As we can see, it looks pretty basic, but we are going to improve it. Here is the changed PHP code:

Let's analyze the changed code:
· The first part of the code was changed in the previous_post_link() function, where I added a font awesome markup, namely <i class="fa fa-arrow-left fa-3"> for the left arrow. Later on, we have changed the words from the Previous post link to Previous and added a <br /> tag after it. We have also applied the same changes to previous_post_link(), too.
Note
Note that I didn't change any CSS classes.
After this, all other changes that we are going to do are in styles.css file.
Firstly, we will add .fa-arrow-left and .fa-arrow-right to the line where all font awesome icons are being colored in our blue color:
.fa-calendar, .fa-user, .fa-th-list, .fa-pencil-square-o, .fa-tag, .fa-arrow-left, .fa-arrow-right{color: #0480B5;}
Because these arrow icons are really small, we are going to make them bigger with this code:
.fa-3
{
font-size: 26px !important;
font-size: 2.6rem !important;
}
Note
Note that I have added a .fa-3 class in the font awesome markup.
After this, we need to make all the fonts in the .nav-previous and .nav-next sections black and italic respectively. We are doing this because the titles of the next and previous blog posts need to be in this specific style in order to be identifiable:
.nav-previous,
.nav-next,
.nav-previous a,
.nav-next a,
.nav-previous a:visited,
.nav-previous a:hover,
.nav-previous a:active,
.nav-next a:visited,
.nav-next a:hover,
.nav-next a:active
{
color: #000;
font-style: italic;
}
Then, we need to style the Next and Prev words:
.meta-nav,
.meta-nav a,
.meta-nav a:visited,
.meta-nav a:hover,
.meta-nav a:active
{
color: #0480b5;
font-family: "Open Sans",sans-serif;
font-size: 26px;;
font-size: 2.6rem !important;
line-height: 26px;
text-transform: uppercase;
font-weight: 800;
padding: 10px;
font-style: normal;
}
As we can see in the preceding code, we've colored the words in blue; then, we have assigned to them a proper font and font size, and much more.
Note
We have used font-style: normal because of the previous declaration where we used font-style: italic.
Finally, with the following code, we are making sure that none of our links in this section are underlined:
.nav-links a,
.nav-links a:visited
.nav-links a:hover,
.nav-links a:active
{
text-decoration: none;
}
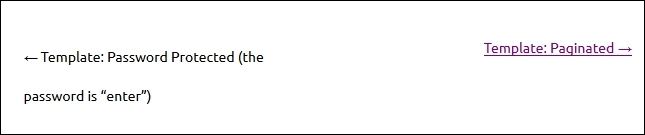
Here is the final look of our work:
Summary
In this chapter, we have focused on a single blog post page—starting from the top, working down through title and meta, then the content's HTML tags, and eventually to the footer of a single post. To accomplish all these changes, we have worked with the single.php, content-single.php, template-tags.php, styles.css, functions.php, and header.php files.
In the next chapter, we will work on the items that appear in the sidebar (widgets), and we will change the way comments appear in posts.