Foundation ActionScript 3, Second Edition (2014)
Chapter 3. Objects and Classes
This chapter covers how to do the following:
· Create objects and access properties
· Use the dynamic Object object
· Loop over objects
· Create a custom class with its methods and properties
· Define constructors and getter/setter methods
· Use packages and access modifiers
· Take advantage of inheritance and override methods
Now that you have an understanding of the fundamentals of the ActionScript 3.0 world, you can move on to looking at objects and classes. This is another of those important topics that needs to be covered before you can get to the really fun stuff.
In the real world, objects are all around you. As I sit writing this, I can see many objects: a glass, a television, a light switch, and (my most favorite object of them all) a shiny new MacBook Pro. (I was going to add my wife to the list, but then we’d get into the whole “men-see-women-as-objects” debate, and I’d end up sleeping on the sofa again.) In fact, we all live in a world full of objects.
Likewise, the ActionScript 3.0 world is full of objects. It may not have glasses or televisions, but it does have movie clips, text fields, sounds, and many more. Pretty much everything other than a primitive value that you can stuff in a variable in ActionScript 3.0 is an object. Languages that support this model are described as being object oriented.
There’s more to object-oriented programming in ActionScript 3.0 than mere objects. By the time you’re done with this chapter, your head will be buzzing with keywords: class, method, property, inheritance, and many more. If this list of keywords doesn’t scare you, you’re a far braver person than I was when I first started learning about object-oriented programming. I thought I’d never get all this stuff to stay in my head, until one day one of my lecturers explained object-oriented terminology in a way that I could understand by relating it to everyday life. What follows isn’t an exact replica of that story—unfortunately my university days predated the iPod by more than a few years—but hopefully it will serve the same purpose.
iPod Analogy
I’m a certified Apple addict, so let’s take an iPod as an example. It fits the definition of an object perfectly: it contains data (the list of tracks, the volume level, and so on), and it can perform actions based on that data (play a particular track, upload a new track, and so on). If my iPod were an ActionScript 3.0 object, the various bits of data I’ve mentioned would be the properties of that object. The properties of an object are unique to it—if my wife uploads a new Robbie Williams track to her iPod, the contents of my music library are left blissfully intact.
The actions my iPod can perform—play, pause, add a new track—would be the methods of the object. All other objects of the same type share these methods, but they operate on the unique properties of each individual object.
Somewhere in the world, there is a factory churning out the myriad iPod models that tempt us to spend hard-earned cash. Each iPod is created according to a blueprint, defining which properties a particular model of iPod has (along with the factory default values) and what actions it can perform. (A blueprint means that my iPod looks and works the same way as every other iPod of the same model.) It also has the same set of configurable options, which I can use to make my iPod unique. The blueprint given to the factory is a class, which is then used to create each individual IPod object, for instance.
Of course, there are lots of different iPod models on the market. I’m not talking about different capacities or colors (I consider them to be different property values for a single iPod model instead of separate models); I mean the different generations of the iPod, iPod Shuffle, and iPod Nano, which have significantly different features or functionality. All these different models share certain characteristics and functionality, probably using much of the same code, which is defined by a master iPod blueprint or class that every model of iPod extends. This shared functionality is known as inheritance (yes, just as you might inherit your granny’s nose or your grandfather’s eyes).
As much as I’m addicted to all things Apple, I fully acknowledge that it isn’t the only brand of portable music player in the world. All music players have a library of tracks they can play, pause, and skip. In that regard, one music player is pretty much the same as the others, even if the players don’t share any of the same basic code. In this case, you could say that all music player manufacturers agree that their devices will have certain properties and be able to perform certain actions, and that they’ll even use the same symbol for those actions (play, pause, and so on) so that you can pick up any music player and use it without having to know who created it or how it was written. You can do the same in the ActionScript 3.0 world with interfaces.
Working with Objects
Before you get your hands dirty and create your first class, let’s take a quick look at the difference between a class and an object. A class is the container that can hold many objects; objects can be classes for a movie clip or a text field, for example. Now let’s dwell slightly on the subject of objects. As I said earlier, everything in ActionScript 3.0 is an object—you may not have realized it, but you were creating new objects in every single example in the previous chapter. I touched on this briefly in the section on arrays, in which I told you that an array is really an object and that it has a length property that tells you how many values the array contains. You used it to loop over all the values in an array and do something useful with them.
In this case, Array is a class, and new instances of this class are created by using array literals, which consist of a comma-separated list of values enclosed in square brackets:
var myFavoriteFoods:Array = ["curry", "pizza", "pineapple"];
I’m creating a new instance of the Array class with the string values curry, pizza, and pineapple. I then store this object in the myFavoriteFoods variable. The new Array instance has all the characteristics and functionality defined by the Array class, which includes alength property and methods such as splice() and join().
Creating Objects using the New Operator
You can use the new operator in conjunction with a class’s constructor to create a new object of that type (or an instance of that class, in geek-speak). A constructor for a class always has the same name as the class itself and is a special function, which is automatically called when you create an instance of the class using the new operator. Taking the previous Array example, you can replace the array literal with an object created using the new operator:
var myFavoriteFoods:Array = new Array("curry", "pizza", "pineapple");
The results are exactly the same as the previous example: a new Array instance containing three elements with the specified values. You can also apply the same technique to String objects, which were created thus far using string literals:
var bookTitle:String = new String("Foundation ActionScript 3.0");
In both cases, the technique you choose is a matter of personal preference. Some developers will tell you that their way is the one true way, but as long as you’re consistent, it doesn’t really matter which one you choose.
What’s important is that you can use this technique to create instances of any ActionScript 3.0 class, whether they’re part of the Flash framework or ones you create individually.
There is one important caveat to this piece of advice: when creating an Array object using the new operator, the number and type of the parameters you provide can affect the nature of the array you get back. If you pass in a single numeric value, you get a new Array object with that number of empty elements instead of an Array object with a single element with the specified value. This can lead to hours of frustration and head scratching unless a kindly author takes the time to warn you in advance. My advice is to always use array literals unless you’re creating an empty array or a certain number of empty elements.
Accessing Properties and Calling Methods
I briefly touched on accessing properties and calling methods of an object using dot notation in the previous chapter (when I was talking about Array objects), and to be totally truthful there really isn’t much more to know. For completeness, though, I want to go through the motions.
The properties and methods of an object can be accessed using dot notation. You specify the name of the variable in which the object is stored, followed by a dot, and then followed by the name of the property you want to access or the method you want to call.
Let’s take a String as an example because it’s one you’re already familiar with from the previous chapter. String objects have lots of properties and methods, but I’ll concentrate on just two: the length property and the indexOf() method.
The length property of a String object gives you the number of characters that make up the string. Using this property, you might loop through all the characters in a string and output them using the trace() function:
var bookTitle:String = new String("Foundation ActionScript 3.0");
var titleLength:uint = bookTitle.length;
for (var i:uint = 0; I < titleLength; i++) {
trace("Character " + i + " : " + bookTitle.charAt(i));
}
The preceding example creates a String object and then loops through all the characters in that string using a for loop, outputting each character along with its index. Notice that you’re using bookTitle.length to loop through the string, so no matter how long the string is, all characters are processed.
If you enter the preceding code into the first frame of a Flash movie and run it, you should see the following in the Output panel:
Character 0: F
Character 1: o
Character 2: u
Character 3: n
Character 4: d
...
Character 22: t
Character 23:
Character 24: 3
Character 25: .
Character 26: 0
If you look closely at the code from the preceding example, you’ll see that I’m using a method of the bookTitle String object, charAt(), to get the character at a specified index.
The built-in classes in the Flash framework have lots of properties and methods, so I won’t attempt to go through them all here—that’s a job for a much thicker (and much less entertaining) ActionScript 3.0 reference book.
Copying Objects
The last chapter discussed passing objects by value vs. passing objects by reference in relation to arrays. Remember that primitive objects (numbers, strings, Booleans) are passed by value, whereas complex objects such as arrays are passed by reference. For example, if you have two variables of type Number and you copy a value from one to the other, subsequent changes to one of those values does not affect the other one:
var num1:Number = 256;
var num2:Number = num1;
trace(num1 + " vs " + num2); // 256 vs 256
num2 = num2 / 2;
trace(num1 + " vs " + num2); // 256 vs 128
This is true of all the primitive data types examined in the previous chapter. However, complex data types, such as an Array or an object derived from a custom class, are passed by reference, so multiple variables can be pointing to the same object in memory, and changes through one variable affect all other variables pointing to the same object. This is most evident when you try to create a copy of a complex object in the same way you would a primitive value:
var array1:Array = new Array("one","two","three");
var array2:Array = array1;
trace(array1 + " vs " + array2); // one,two,three vs one,two,three
array2[3] = "four";
trace(array1 + " vs " + array2); // one,two,three,four vs one,two,
three,four
From the preceding example, you can see that although in the code it looks as if you were only adding "four" to array2, it appeared in array1 as well because both variables point to the same array in memory.
If you really want to create a copy of an Array object, the quickest way is to use the Array object’s slice() method. The slice() method creates a new Array object based on an existing array. If you pass in parameters, it can copy a subset of the array, but if you don’t pass any parameters, you’ll just get a copy of the entire Array object:
var array1:Array = new Array("one","two","three");
var array2:Array = array1.slice();
trace(array1 + " vs " + array2); // one,two,three vs one,two,three
array2[3] = "four";
trace(array1 + " vs " + array2); // one,two,three vs one,two,three,four
That’s more like it!
Casting Objects to a Type
As stated previously, nearly everything in ActionScript 3.0 is an object, and all object instances inherit from Object. As such, a String variable is an Object instance, a Number variable is an Object instance, and a Boolean variable is an Object instance. Sometimes, all your code might know is that it is dealing with an Object instance of some sort and has to determine at runtime the type of object the instance stores—String, Number, or Boolean, for instance.
As an example, imagine that you needed to determine whether a variable held a valid value, but depending on the type of object the variable held, the definition of what was valid would change. For a Boolean variable, only true values would be valid. For a String variable, a valid value would be anything that wasn’t an empty string. For a Number variable, any positive value would be valid.
What you might do in this case is create a function that received an Object instance because that can be any of the types, and return true or false based on whether the value is valid. Of course, inside the function you need code that can find out the type of the variable passed in and return validity based on that type. Let’s look at one possible solution, and then discuss the syntax:
public function getIsValid(testObject:Object):Boolean {
if (testObject is String) {
var testString:String = (testObject as String);
return testString.length > 0;
} else if (testObject is Number) {
var testNumber:Number = (testObject as Number);
return testNumber > 0;
} else if (testObject is Boolean) {
return (testObject as Boolean);
}
return false;
}
There are two new operators introduced in the preceding code. The first is the operator is, which can be used to test whether an object is of a certain type, and will return either true or false. The first conditional (testObject is String) can be read aloud as, “IstestObject a String?” If it is, the block within the conditional is run.
The second new operator is as. This operator evaluates the operand on its left and determines whether it is of the data type specified on its right. If that is the case (that is, if testObject is a String), the expression evaluates to the object cast as the data type. If not, the expression evaluates to null.
Cast means that although the object was initially of one data type (Object), it can be assigned to a new variable of a different data type (String in this case). This is actually known as a downcast because the cast is going from a type higher up on the class hierarchy (Object) to one lower (String, which is a type of Object).
After you have cast the object and placed the result within a new variable, you can perform operations supported by the new data type. For String, you can retrieve its length property. For Number, you can check to see whether it is greater than zero. For Boolean, because that is the type returned by the function, you can simply return the argument cast as a Boolean.
There is one other way to cast, demonstrated in the following code:
public function getIsValid(testObject:Object):Boolean {
if (testObject is String) {
var testString:String = String(testObject);
return testString.length > 0;
} else if (testObject is Number) {
var testNumber:Number = Number(testObject);
return testNumber > 0;
} else if (testObject is Boolean) {
return Boolean(testObject);
}
return false;
}
In this case, you do not use the as operator; instead, the desired type is followed by the object wrapped in parentheses. The results for this and the previous example are the same, but there are some subtle differences between the two forms of casting. Whereas the as operator returnsnull if the object is not of the data type, the type wrapping the object form of casting will actually try to do an automatic conversion of the object to the new data type. For complex data types such as arrays, this process will throw a runtime error. For primitive data types, the conversion will occur according to a fixed set of rules. For instance, a String "1" cast as a Number will become the number 1. A String "hello" will become NaN, or “not a number.” Any nonzero Number when cast as a Boolean will become true. 0 will become false.
Sometimes, the automatic conversion that occurs with casting is what you want. Other times, it is merely a matter of downcasting an object you know is of a type, in which case the as operator works great. In fact, you could rewrite the function one more time without the is operator and rely solely on the as operator and its behavior of returning null for objects not of the specified type:
public function getIsValid(testObject:Object):Boolean {
var testString:String = (testObject as String);
if (testString) {
return testString.length > 0;
}
var testNumber:Number = (testObject as Number);
if (testNumber) {
return testNumber > 0;
}
return (testObject as Boolean);
}
Because as will return null if the object is not of the specified type, you can use the result in a conditional statement to test whether it exists (null evaluates to a Boolean false).
The method of testing type and casting can depend on the context of the code, but you can usually choose the method that works best for you.
Downcasting occurs when you cast an object to one of its subclasses. For example, if I had a class called Car that had a subclass of Wheel, I could downcast Wheel as type Car:
Wheel(new Car())
The Object Object
The base of all objects in ActionScript 3.0 is actually the Object class, which means it is possible to make what is referred to, though seemingly redundant, as an Object object. An instance of the Object class is the simplest sort of object you can make, with only a couple of properties and a handful of methods, which are inherited by every other class in the ActionScript 3.0 language, including Array, Number, String, and any custom class you create. Some of the more useful are hasOwnProperty(), which returns whether a property exists on an object (calling a property that doesn’t exist results in a runtime error), and toString(), which returns a string identifying the object. This last method is actually automatically invoked when you pass an object to the trace() function.
To create an Object instance, you can use the new operator with the constructor:
var myObject:Object = new Object();
Object instances are actually dynamic, which means that you can then assign whatever properties you need without worry of a compile-time error (this works only for Object instances, not for subclasses, such as Array and Number, and custom classes unless those classes have been specifically identified as dynamic):
var myObject:Object = new Object();
myObject.name = "Simple Object";
myObject.ID = 12345;
Just like an array, you can also create a new Object instance by assigning an object literal, which uses curly braces:
var myObject:Object = {};
You can even include the properties you want to define within this object literal by using a comma-separated list of name/value pairs, with the name and value separated by a colon:
var myObject:Object = { name:"SimpleObject", ID:12345 };
If there are more than one or two properties and you still want to use the object literal, I suggest actually breaking it up over multiple lines to make it more legible:
var myObject:Object = {
name: "SimpleObject",
ID: 12345
};
Object instances are very versatile, but you should be careful not to use them too often in your code because their dynamic nature prevents them from having any strong data typing and so hides errors that might have otherwise been caught by the compiler. For instance, the preceding example has a name and ID property, but there is nothing that forces the name to be a string, so an error in the code could actually assign an array for this value, causing larger issues and runtime errors. I usually use Object instances to hold references to other objects.
For instance, suppose that you have an application with a number of users and you want to store those users based on their IDs. In this case, an array is not a great way to store the users because the IDs might not be numbers. In this case, storing the collection of users in an object is a great alternative. Here is an example of how to set that up:
var user0:Object = {name:"John", ID:"A111"};
var user1:Object = {name:"Paul", ID:"A112"};
var user2:Object = {name:"George", ID:"A113"};
var user3:Object = {name:"Ringo", ID:"A114"};
var users:Object = {};
users[user0.ID] = user0;
users[user1.ID] = user1;
users[user2.ID] = user2;
users[user3.ID] = user3;
Four unique Object instances are created, each containing a name and ID property. You then create another new Object instance and assign it to the variable users. Using the IDs as the property names, you assign each user to a property in the users object. If this bracket notation syntax appears odd to you, consider that the three following lines are equivalent:
users[user0.ID] = user0;
users["A111"] = user0;
users.A111 = user0;
The benefit of using the first line in the code is that this line does not rely on hard-coding the ID value from the preceding line, so if you need to change that ID, you have to do so in only one place, not two.
Now you have a users object that stores all the users based on their IDs (the ID is referred to as the key in this scenario). If you ever want to retrieve a user, you can find that user using her ID to look her up in the users object:
trace(users["A111"]);
The lines in the preceding example could be easily condensed by using an array to hold the initial user objects and then looping through this array to populate the users object. This was avoided to keep the example very clear about what it was doing, but the example is not veryscalable as you gain many more users. If you are up to it, try to rewrite the preceding example using an array to see whether you can figure out how to optimize those lines using a loop. That will be a great segue into the next section on looping through objects.
Iterating Over Objects
Because an Object instance does not have a nice length property like an Array does, how do you loop through an object if you want to process every property value? The answer is to use one of the two for loop variations that were introduced (but not explored in depth) in the last chapter: the for in and for each loops. Either of these looping mechanisms allows you to loop through all the iterable properties in an object, which means any properties that have been defined in the class as those can be surfaced during a loop. For an Object instance, this is any property you assign. Let’s take a look at an example using the users object from the last section.
For in Loop
If you want to loop through all the users and output their names and IDs, you can first try it with the for in loop. This loop uses the following syntax:
for (var property:String in object) {
// loop statements
}
This syntax is handy when it is important to see the name of the property in the object in each iteration of the loop because that name will actually be accessible through the property variable (this variable can be named anything; often it is just the loop iterator i). Here is how you might trace out all IDs and names of the users:
for (var prop:String in users) {
trace(prop + ": " + users[prop].name);
}
Remember that the only properties defined on users were the IDs for each user, so using this loop will iterate over each of those properties (the IDs). In each loop iteration, prop holds the ID of the particular user being accessed. That user can be referenced using theobject[property] bracket notation, which is how you retrieve the name of the user in the loop example.
For each Loop
This works fine for the example, but a new looping mechanism introduced in ActionScript 3.0 is the for each loop. This loop works similarly to the for in loop, but instead of using the properties to iterate over an object, which are always cast as String, this loop allows you to iterate over the actual objects, whatever they may be, that are stored at each property. The following syntax is used:
for each (var iterator:DataType in object) {
// loop statements
}
Applied to the users example, you could trace out the names and IDs with the following:
for each (var user:Object in users) {
trace(user.ID + ": " + user.name);
}
This looping type has at least one con and one pro. The con is that you cannot access the name of the property (or key) as you iterate, as you could in the previous example with the prop value. However, the pro is that you can cast the iterator as whatever type the object contains. This works fantastically if you have assigned only a single type of instance to the object, such as numbers or arrays, because you can then access properties and methods of those objects without additional casting within the loop and will receive compile-time errors if there are problems. For theusers example, this benefit is not immediately apparent because the users object contains other Object objects without any strong data typing.
As an example of the loop’s benefits, though, consider the following:
for each (var user:User in users) {
user.sendNotification();
}
Here, you loop through all users, but in this scenario, you have a custom class created named User. You can type this into the loop and then call a specific method that belongs to User directly: sendNotification(). If, at a later time, the User code changes to require a token to be passed to sendNotification() or a message body, Flash will give you a nice compile-time error, letting you know that you need to update the code in the loop. This would not happen with the following code:
for (var prop:String in users) {
users[prop].sendNotification();
}
In this case, the type of the object is not known at compile time, so it would cause an error only at runtime for the user when the loop was run, perhaps even after you have deployed the application (this is one way that bugs slip by). You could avoid this by casting within the loop, but which of the following two loops would you like to see in your code?
for each (var user:User in users) {
user.sendNotification();
}
for (var prop:String in users) {
(users[prop] as User).sendNotification();
}
My vote’s for the first one!
Dictionaries vs Objects
Like objects, the Dictionary class lets you create a dynamic collection of properites as key-value pairs of data. However, instead of being bound to string key names, a Dictionary can associate a value with an object as the key. When an object is used as the key, the object’s identity is used to look up object using strick equality (===) for key comparison.
In most ways, the Dictionary class is exactly the same as objects. One difference is that you cannot use object literal syntax to create dictionaries – only array syntax or dot notation. Below, a dictionary is created using integers as the key, with the value as a string describing the error code.
import flash.utils.Dictionary;
var errorCode:Dictionary = new Dictionary();
errorCode[200] = "OK";
errorCode[301] = "Moved Permanently";
errorCode[401] = "Unauthorized";
errorCode[404] = "Not Found";
Removing a key from a dictionary is done the same way as objects, using the delete keyword:
var photos:Dictionary = new Dictionary();
photos["beach.jpg"] = "The first trip to the beach.";
photos["pool.jpg"] = "A personal pool party.";
delete photos["pool.jpg"];
Another great use for dictionaries is creating maps. For example, a dictionary could be used to graph relational data such as a friends list. Using user objects as the key, here the value of the dictionary are users friends, implemented as an array of user objects.
var friends:Dictionary = new Dictionary();
friends[user1] = [user2, user5];
friends[user2] = [user1, user3];
friends[user3] = [user2];
We can now use a user object as a key to lookup friends of that user. For example, here friends of user1 are returned as an array:
var userFriendList:Array = friends[user1];
Because objects can be used as keys, a Dictionary will retain a strong reference to the object. This means the object will not be eligible for garbage collection until it is removed from the Dictionary. weak keys won’t stop its key from being garbage collected.
Native JSON
JavaScript Object Notation (or JSON) is a lightweight data-interchange format that has become a popular alternative to XML due to its simple, efficient, readable syntax to declare Object literals.
Flash provides native JSON support through a JSON class that lets you import and export data. To export an object as a JSON-formatted string, call JSON.stringify() on the object:
var photos:Object = {
"title": "Audrey",
"images": [{
"name": "The first trip to the beach.",
"file": "beach.jpg"
}, {
"name": "A personal pool party.",
"file": "pool.jpg"
}]
};
var json:String = JSON.stringify(photos);
To import data, parse a string in JSON format to create an ActionScript object that represents that value:
var json:String = (<![CDATA[
{
"title": "Audrey",
"images": [{
"name": "The first trip to the beach.",
"file": "beach.jpg"
}, {
"name": "A personal pool party.",
"file": "pool.jpg"
}]
}
]]>).toString();
var photos:Object = JSON.parse(json)
Creating Your First Class
Assuming that you’ve been following along faithfully since the beginning, you’ve already created your first class, although you probably didn’t realize it at the time. In the very first chapter, in which I was discussing the different ways to integrate ActionScript 3.0 code into your projects, you created a class using the document class feature of Flash CC (hint: it was the stuff I told you to ignore until later).
From the iPod analogy, you know that a class is like a blueprint in which you define the methods and properties that instances of that class will have. I’ll get to how you create methods and properties in a moment, but for now, let’s look at a class definition with no methods or properties and conveniently ignore the fact that such a class is completely useless, literally:
public class IPod {
}
Yes, it really is that simple. Well, almost. There are a couple of things you need to worry about if you want to be able to actually use this class.
First, all classes in ActionScript 3.0 must be part of a package. You’ll look at packages in more detail later in the chapter, so for now, just think of them as collections of classes. Thankfully, there is a default package that you can use for your classes, and making the IPod class part of that package is as simple as wrapping the class definition in a package block:
package {
public class IPod {
}
}
The other thing you need to know is that class definitions must appear in a separate ActionScript 3.0 document, and that document must have the same name as the class name. This means that you can’t add the class definition to a frame of your Flash document using the Actions window in the Flash integrated development environment (IDE).
If you’re wondering what the public bit is all about, it is technically known as a class access control namespace attribute. That’s quite a mouthful, but in essence, it means that as an ActionScript 3.0 developer, you get to decide what other classes can make use of your class by using these access control attributes. Here, I used the public namespace attribute, which means that the IPod class is available to everything. There are three other namespace attributes—private, protected, and internal—which I’ll cover as part of the wider topic of namespaces in the “Controlling access to properties and methods” section later in the chapter.
To see that you’ve actually accomplished something with the preceding code (because on paper it doesn’t look like much), follow these steps to integrate it into a simple example:
1. Create a new ActionScript file, and save it with the name IPod.as in the project directory for this chapter. Enter the code listed previously and save the file.
When creating an ActionScript 3.0 class, the file name needs to be the same as the class name; otherwise, the ActionScript compiler will throw an error.
2. Create a new Flash file (ActionScript 3.0), and save it with the name IPodExample.fla in the project directory.
3. Select the first frame from the timeline, open the Actions panel, and enter the following code:
var myIPod:IPod = new IPod();
trace(myIPod);
4. Save the Flash document and test it by selecting Control ![]() Test movie from the main menu. If all goes according to plan, you should see the following in the Output panel:
Test movie from the main menu. If all goes according to plan, you should see the following in the Output panel:
[object IPod]
It’s not that profound, but what it does tell you is that you just created an instance of the IPod class you’ve just written. It doesn’t actually do anything yet; I’ll get to that shortly, but before you get there, I want to talk to you about the rules and general guidelines for choosing a name for your classes.
Choosing Suitable Names for your Classes
As with variable and function names, ActionScript 3.0 imposes some rules that you need to follow when naming your classes. Class names must
· Consist only of letters, digits, the underscore character, and the dollar symbol
· Not start with a number
· Not be a reserved word
· Be unique
Class names should be specified in camel case notation. This is the granddaddy of the notation you’ve adopted for variable and function names (modified camel case) and differs only in that the first letter of the first word is always uppercase (such as MotorCar or, as in the example,IPod.) The only other piece of guidance I want to share is that you should try to make your class names nouns; after all, nouns are things, and objects are also things.
Sorry if I’m getting a little repetitive with all these naming conventions; if there’s one thing you take away from this book (in addition to superior ActionScript 3.0 skills), it’s that consistent naming is important and will stop you from going insane. If it helps, this is the second-to-last time I’ll mention naming conventions in this book. Scout’s honor.
Adding Properties
So far, you created an IPod class and created an instance of it, but you’ve already discovered that it’s completely useless as it is. It’s like an annoying socialite factory capable of churning out an endless parade of celebrity wannabes who are famous just for being famous, despite being completely devoid of both substance and talent. I’m sure you can think of a few media personalities who fit this bill and you should refuse to let your IPod class become one of them.
Anyway, where was I? Ah, yes—properties. As discussed earlier, the class definition dictates what properties objects of that class will have, so it stands to reason that if you want IPod objects to have certain properties, you’ll have to add them to the class definition.
Let’s dig right in and give the IPod class a volumeLevel property. I figure that the appropriate data type is probably uint because I don’t know what a negative volume level might mean:
package {
public class IPod {
public var volumeLevel:uint = 10;
}
}
From the preceding example, you can see that property definitions look pretty similar to variable definitions, and that’s no accident—properties are essentially variables that belong to an object rather than floating in the global primordial soup. The property has been made public for the same reason the class itself is public: to tell the Flash Player that you want the volumeLevel property to be available to all and sundry.
If you look closely, you’ll see you were even able to give the property a default value, meaning that new IPod objects will automatically have their volume levels set to 10.
Every instance of the IPod class now has a volumeLevel property that can be set and read back. If you now modify the code on the first frame of the IPodExample.fla file, you can fiddle with the volume level of the IPod object created and stored in the myIPod variable:
var myIPod:IPod = new IPod();
trace(myIPod.volumeLevel);
If you test this in the Flash IDE, you’ll see the value 10, the default value for the volumeLevel property, in the Output panel. Just to prove you can also change the value of this property, add a line setting the volumeLevel to 11 so that it’s one level louder (and if you haven’t seenThis Is Spinal Tap, stay after class) and then trace the value out again:
var myIPod:IPod = new IPod ();
trace(myIPod.volumeLevel);
myIPod.volumeLevel = 11;
trace(myIPod.volumeLevel);
Testing the movie now should yield 11 in the Output panel.
Of course, you’re not just limited to a single property; objects can have as many properties as you like, and they can be of any data type. Let’s add some more likely looking properties to the class:
package {
public class IPod {
public var name:String = "";
public var volumeLevel:uint = 10;
public var tracks:Array;
public var currentTrack:uint = 0;
public var shuffle:Boolean = false;
}
}
Here you added a name property to hold the name given to the iPod (for example, "Steve's iPod"), a tracks array to hold all the music tracks, a currentTrack property so you can tell which track is being played and change it, and a shuffle property that indicates whether the tracks will be played in a random order.
Now instances of the IPod class can keep track of several different pieces of information. You can now make use of these properties:
var myIPod:IPod = new IPod ();
myIPod.name = "Steve's iPod";
myIPod.volumeLevel = 11;
myIPod.tracks = ["Guns 'n' Roses ![]() Estranged", "Muse –
Estranged", "Muse –
Super MassiveBlackholes",![]() "Evanescence - Good Enough"];
"Evanescence - Good Enough"];
myIPod.shuffle = true;
I gave my iPod a suitable name and then populated it with the names of some of my favorite songs (no poking fun at my taste in music!) using array literal notation. Go ahead and do the same with yours, although you should feel free to use different values. (Unless you’re some kind of copycat stalker; in that case, where have you been all my life? I’ve always wanted a stalker).
At the moment, testing this in the Flash IDE doesn’t produce any kind of output, but it’s worth doing anyway just to make sure that you haven’t committed any errors. What you need is for the IPod instance to be able to do something with the information it contains, which is where methods come in.
Adding Methods
As I mentioned at the start of this chapter, methods are basically functions that belong to an object. If you follow good object-oriented design principles, the method will be related to the purpose of your object, which is a long-winded way of saying that if you had a Pig class you wouldn’t give it a fly() method—that belongs with the Bird class.
You add method definitions to a class in much the same way you did with properties: by adding them to the class definition. Because they’re functions, you declare them using the function keyword as you would a regular function; but like properties, you need to specify an access attribute. I’ll deal with these in more detail later in the chapter, but for now, you can just make all your methods publicly available using the public access attribute.
Method names need to follow the same rules and guidelines as function names. I won’t bore you with yet another lecture on good naming practice. I trust that you can look up how functions are named in the previous chapter if you need a refresher.
The IPod class is currently bereft of any functionality at all, so let’s give it a play() method that outputs the name of the current track (if you were dealing with real music files instead of just track names, it would play the MP3):
package {
public class IPod {
public var name:String = "";
public var volumeLevel:uint = 10;
public var shuffle:Boolean = false;
public var currentTrack:uint = 0;
public var tracks:Array;
public function play():void {
trace("Playing: " + tracks[currentTrack]);
}
}
}
Now any instance of the IPod class will have a play() method that traces out the current track title in the Output panel. Let’s give that a try by modifying the code on the first frame of the IPodExample.fla file to call this method after all the properties of the object are set:
var myIPod:IPod = new IPod ();
myIPod.name = "Steve's iPod";
myIPod.volumeLevel = 11;
myIPod.tracks = ["Guns 'n' Roses - Estranged", "Muse –
Super MassiveBlackholes",![]() "Evanescence - Good Enough"];
"Evanescence - Good Enough"];
myIPod.shuffle = true;
myIPod.play();
If you test the movie now, you should see Playing: Guns ‘n’ Roses - Estranged in the Output panel. Hurrah, your first method is born!
Of course, just being able to play one track won’t help to sell millions of iPods (I don’t think even the mercurial Steve Jobs could get away with that one), so you need to add some more methods that might make the class a little more useful. Let’s start by giving the IPod class the capability to skip to the next track:
package {
public class IPod {
public var name:String = "";
public var volumeLevel:uint = 10;
public var shuffle:Boolean = false;
public var currentTrack:uint = 0;
public var tracks:Array;
public function play():void {
trace("Playing: " + tracks[currentTrack]);
}
public function next():void {
}
}
}
Remember that the IPod class has a shuffle attribute, so what you want to do is to choose a random track if it is set to true. To do this, you’ll use the Math.random() method, which will return a number between 0 and 1 that can be multiplied by the number of tracks and rounded down to the nearest whole number with the Math.floor() method (rounded down because the tracks array is zero indexed) to get a random track number:
...
public function next():void {
if (shuffle) {
currentTrack = Math.floor(Math.random() * tracks.length);
}
}
...
This isn’t true shuffle functionality because the equation you’re using to generate the next track number is random, meaning that you could get the same track several times in a row (which would get old in a hurry if the track in question was some kind of Robbie Williams compendium). To mimic the iPod’s shuffle mode, you’d need to clone the tracks array, sort all the tracks randomly, and then play through them in sequence. That’s quite tricky, however, and I didn’t want to distract you from learning about methods. If you’re feeling brave, feel free to have a stab at this yourself (maybe after you finish the book). Don’t be afraid to make mistakes.
By the way, I omitted the lines of code you created in the previous section because I get annoyed when programming books fill page after page with source code listings—not only does it waste trees, it also makes my eyes hurt trying to look for the one or two lines that have changed.
If the shuffle property is set to false, you can just increment the currentTrack property or reset it to zero if you’ve reached the end of the track listings:
...
public function next():void {
if (shuffle) {
currentTrack = Math.floor(Math.random() * tracks.length);
} else {
if (currentTrack == tracks.length - 1) {
currentTrack = 0;
} else {
currentTrack++;
}
}
}
...
Finally, you want to play the next track:
...
public function next():void {
if (shuffle) {
currentTrack = Math.floor(Math.random() * tracks.length);
} else {
if (currentTrack == tracks.length - 1) {
currentTrack = 0;
} else {
currentTrack++;
}
}
play();
}
...
To take the new method for a test drive, give the following steps a whirl:
1. In the IPodExample.fla file, draw a circle (or a fancy Next-type button if you’re more graphically oriented than I am) on the stage, select it, and convert it into a movie clip symbol by pressing F8. Name the symbol circle and click the OK button.
2. Now, select your new instance on the stage, and give it an instance name of nextButton in the Property inspector.
3. Add the following code to the first frame above the existing code:
import flash.events.MouseEvent;
nextButton.addEventListener(MouseEvent.CLICK, onNextButtonClick);
function onNextButtonClick(event:MouseEvent):void {
myIPod.next();
}
You haven’t gotten to event-based programming yet (that will have to wait until Chapter 6), but all this bit of code does is call the next() method of the myIPod object when the nextButton on the stage is clicked.
Go ahead and test the movie. Clicking the button should result in the track being changed randomly (because you set the shuffle property to true a while back).
There are still a few bits of functionality missing from the IPod class, so if you are feeling particularly adventurous, see whether you can add your own previous() method to skip backward through the track list and anything else you can think is missing.
Initializing Your Objects with a Constructor Method
When you create custom classes, most likely you will want to perform some initialization on instances when they are created, before there is any interaction through the properties and methods. Sometimes, this will be assigning values based on properties existing in the movie or application or instantiating more complex objects that aren’t as easily initialized in a property declaration. Any actions to be taken care of immediately when an object is created need to be handled within, or at least kicked off from, the class’s constructor.
A constructor is a special method of your class that is executed on each new instance of your class as it is created. It has the same name as the class to which it belongs, and the parameters of the constructor dictate what information needs to be provided when creating a new instance of that class. The idea is that you could use the constructor in conjunction with the parameters passed to it to initialize the object and its properties so that it’s ready to go to work.
In ActionScript 3.0, there can only ever be one constructor per class, which differs from some other languages; if you don’t write one, Flash creates a default constructor for you behind the scenes.
One of the problems with the IPod class at the moment is that once you’ve created a new instance, you have to initialize all the properties, one after the other. It would be much more convenient to allow a developer to pass in values for the name, volumeLevel, and shuffleproperties when creating a new IPod instance, assigning the default values only if no user-defined values are passed in. This will move the assigning of property values from the property declarations into the constructor. To keep things consistent (always a good idea), you’ll actually move all the property assignments to the constructor even currentTrack, which always defaults to 0.
Let’s create a simple constructor for the IPod class to accept parameters. Remember that a constructor is just a method that has the same name as the class. The only difference between its definition and any other method (well, other than the name) is that it cannot specify a return data type or return a value.
When creating a constructor, remember that it doesn’t work the same way as a method, so there is no return type.
package {
public class IPod {
public var name:String;
public var volumeLevel:uint;
public var shuffle:Boolean;
public var currentTrack:uint;
public var tracks:Array;
public function IPod(
name:String="",
volumeLevel:uint=10,
shuffle:Boolean=false
) {
this.name = name;
this.volumeLevel = volumeLevel;
this.shuffle = shuffle;
currentTrack = 0;
tracks = new Array();
}
...
}
Three parameters were added to the constructor that allow you to specify the name, volumeLevel, and shuffle values, which are then copied to the appropriate properties within the body of the constructor. Each of these three parameters is given a default value, so they are optional for a developer when creating a new instance. For instance, if I don’t specify the second parameter when creating a new IPod object, it will get the default volumeLevel of 10. In addition, you also instantiate the tracks array and assign 0 to currentTrack.
One new keyword introduced in the preceding code is this. Within a class, this refers to the instance of the class that is running the code. It is used here within the constructor because you are passing in local variables (in the parameters) that use the same names as the class properties. So you need some way to differentiate between the parameters and the properties, and this works perfectly for this purpose (you can name the passed-in parameters something slightly different if you like).
Now if I want to create a new IPod with a name of Steve's Shuffle and a volume level of 11, I can do so like this:
var myIPod:IPod = new IPod("Steve's Shuffle", 11);
trace(myIPod.name);
trace(myIPod.volumeLevel);
It’s good practice to make your constructors as flexible as possible and to make sure that the parameters are in a sensible order. I’ve decided that I’m most likely to want to set the name of an IPod instance when creating it, so I made that the first parameter of the constructor. Similarly, it’s unlikely that I’ll want to set the currentTrack property to anything other than the first track, so I’ve not included it in the constructor parameters. Being judicious when deciding what should become a constructor parameter and what should just be a property with a default value makes your classes much easier to understand.
Controlling Access to Properties and Methods
As it currently stands, all the properties and methods of the IPod class are publicly accessible, meaning that they can be read and modified from any other part of the code. This might not always be desired. For example, my iPod undoubtedly has a serial number that uniquely identifies that particular iPod, which you could store in a property names serialNumber. However, the serial number that Steve’s iPod was given when it was created cannot be changed, so you need some way of hiding the serialNumber variable from the outside world, which is where access attributes come in.
You’ve already met one access attribute, public, and defined what it means, but Table 3-1 provides a complete rundown of the access attributes available in ActionScript 3.0, along with their descriptions.
Table 3-1. Access attributes available in ActionScript 3.0
|
Access Attribute |
Description |
|
private |
Can be accessed only by methods of the class itself |
|
public |
Can be accessed from any other part of the code in the entire application in which the class exists |
|
protected |
Can be accessed only by methods of the class itself and any classes that extend this class |
|
internal |
Can be accessed by any class defined in the same package |
Some of these attributes (namely protected and internal) might not make too much sense at the moment because they are useful only when you’re dealing with inheritance and packages (not covered yet in this chapter).
Despite that, you can see that the private access attribute is a good candidate for the serialNumber property. The plan is to pass the serial number as a String into the constructor method, which can then set the value of the private serialNumber variable appropriately (remember that private variables are visible to methods of the class itself):
...
public var currentTrack:uint;
public var tracks:Array;
private var _serialNumber:String;
public function IPod(
serialNumber:String,
name:String="",
volumeLevel:uint=10,
shuffle:Boolean=false
) {
_serialNumber = serialNumber;
this.name = name;
this.volumeLevel = volumeLevel;
this.shuffle = shuffle;
currentTrack = 0;
tracks = new Array();
}
...
I chose to start the new _serialNumber property with an underscore character, which is common notation within ActionScript 3.0 files to mark a property as private. That way, it is very easy within the class to know which properties are private (contain an underscore) and which are public (no underscore). This also frees you from having to use this when assigning the property within the constructor because the name of the property now differs from the name of the parameter passed in.
I made this parameter mandatory (by not providing a default value for it in the method definition) because all iPods have serial numbers (with the possible exception of James Bond’s, but I’m guessing he’s not among the target audience for the application).
You’ll also need to change the code on the first frame of the IPodExample.fla file to pass in the extra parameter to the constructor method when creating an instance of the IPod class:
var myIPod:IPod = new IPod("A101", "Steve's Shuffle", 11);
trace(myIPod.name);
trace(myIPod.volumeLevel);
Perfect. If you try to trace out the value of the _serialNumber property of the myIPod object, you’ll get an error from the ActionScript 3.0 compiler, telling you that you cannot access a private property from outside the class. This demonstrates that the property, set as private, is not accessible to outside classes or code.
Adding Getter/Setter Methods
Hiding properties using the access modifiers is fine, but sometimes it isn’t enough. What if all you wanted to do was to make sure that when a property was set it was given a sensible value? What would it mean, for example, for the currentTrack property of an IPod instance to be set to be greater than the number of tracks in the tracks array? In fact, setting the currentTrack property at the moment doesn’t do anything at all; you certainly don’t get a nice message traced to the Output panel telling you which track is being played now.
You could, of course, make the currentTrack property private and create two public methods, getCurrentTrack() and setCurrentTrack(), which can be used to manipulate the value of that property. These are referred to as explicit getter/setter methods because they explicitly provide two methods for reading from and writing to a single property, respectively. I don’t know about you, but that just doesn’t feel right; ideally, I’d like currentTrack to still be a property but just be able to intervene whenever the value is being set. Thankfully, ActionScript 3.0 gives implicit getter/setter methods for that exact purpose.
Implicit getter/setter methods allow you to create properties that behave like functions. They come as a pair of methods with the same name, with the getter function being called whenever the property value is read, and the setter function being called whenever a value is assigned to the property. These methods are known as implicit getter/setter methods because they are methods that act, on the outside, like a single public property that in fact calls two separate read/write methods for a single private property.
A getter method looks almost like any other method of your class, except that it has the get keyword between the function keyword and the function name. The getter method cannot take any parameters and must return a value of the data type specified by the return type of the function, which will be the data type you want for your public property (in the case of the currentTrack property, this would be uint):
public function get propertyName():ReturnType {
// needs to return a value of the appropriate type
}
A setter method is similar, but it uses the set attribute in place of the get attribute, and it’s passed the new value assigned to the property as its one and only parameter. The data type of this parameter should be the same as the data type returned by the getter method. The return type of the setter method is always void:
public function set propertyName(value:Type):void {
// the new value for the property is in the value variable
}
Before you rush off and add a getter/setter pair to the IPod class, there’s one small issue: you can’t have a property and a method with the same name. This means that you’ll need to rename the old currentTrack property to something else so that you can create a getter/setter pair of that name. You’ll also want to make it private rather than public; otherwise, there’s nothing to stop other code from using the renamed public property instead of the getter/setter pairs, which rather defeats the purpose. As with _serialNumber, you will give the private property_currentTrack the underscore prefix to differentiate it from the public getter/setter methods.
Not all getter/setter methods need to relate to a private property of the class. They could be a convenient method of setting the value of several properties (think about a name getter/setter pair that splits the value into firstName and lastName properties, which might or might not be public) or not actually set any properties at all and just be functional.
With that in mind, go ahead and make the currentTrack property private and prefix an underscore to its name. Here I grouped it with _serialNumber because I like to keep my public and private properties separate:
package {
public class IPod {
public var name:String;
public var volumeLevel:uint;
public var shuffle:Boolean;
public var tracks:Array;
private var _serialNumber:String;
private var _currentTrack:uint;
public function IPod(
serialNumber:String,
name:String="",
volumeLevel:uint=10,
shuffle:Boolean=false
) {
_serialNumber = serialNumber;
this.name = name;
this.volumeLevel = volumeLevel;
this.shuffle = shuffle;
_currentTrack = 0;
tracks = new Array();
}
...
Now create the currentTrack getter/setter methods. The getter method just needs to return the value held in the private _currentTrack property, but you need to do something trickier with the setter method. The whole aim of this exercise was to prevent the currentTrackproperty from being greater than the number of tracks you have in the tracks array. You can use the Math.min() method to set the value to the smaller of the value passed in or the index of the last track in the tracks array (which is the length of the array minus one because arrays are zero indexed). Of course, you also need to make sure that the current track is not set to be less than 0, and the Math.max() method takes care of that. Normally, I put getter/setter methods at the end of a class definition (just personal preference), so you can see the methods after thenext() method:
...
public function next():void {
if (shuffle) {
currentTrack = Math.floor(Math.random() * tracks.length);
} else {
if (currentTrack == tracks.length - 1) {
currentTrack = 0;
} else {
currentTrack++;
}
}
play();
}
public function get currentTrack():uint {
return _currentTrack;
}
public function set currentTrack(value:uint):void {
value = Math.max(0, value);
value = Math.min(value, tracks.length - 1);
_currentTrack = value;
}
...
You can see this magic in action by changing the code on the first frame of the IPodExample.fla file to add a couple of tracks and then try setting the currentTrack property to 55 and see what you get:
var myIPod:IPod = new IPod("A101", "Steve's Shuffle", 10);
myIPod.tracks.push("Guns 'n' Roses - Estranged");
myIPod.tracks.push("Muse - Supermassive Black Hole");
myIPod.tracks.push("Evanescence - Good Enough");
trace(myIPod.currentTrack); // 0
myIPod.currentTrack = 55;
trace(myIPod.currentTrack); // 2
If you test this movie, you’ll see 0 and 2 in the Output panel in the Flash IDE, confirming that the getter/setter methods are working as planned.
Note that in the preceding example you are manipulating the tracks array directly by calling the push() method. This is possible because you have made the array publicly accessible. The problem is that it is then possible for any outside code to manipulate that array (arrays are passed by reference, so any manipulation of that array outside the class affects the array inside the class).
Here is a great example of when you should make a property private and instead provide either implicit or explicit getter/setter methods to allow for outside classes to manipulate data. Allowing access only through the getter/setter methods provides a way to ensure that only a class will directly alter its properties, which is generally good object-oriented programming practice. In fact, in nearly all cases, I make properties private or protected, and allow access only through getter/setter methods. For tracks, a good exercise is to make it private and perhaps provide addTrack() and –removeTrack() methods managed by the class.
Creating Read-Only Properties with Getter Methods
So far, I’ve discussed getter/setter methods used as a pair, but that doesn’t always have to be the case. Using just a getter method with no equivalent setter, you can create properties that are read-only from outside of your class. If some other part of the code attempts to assign a value to that property, the ActionScript 3.0 compiler will throw an error, and your project won’t compile.
This is a great way of exposing internal private properties to the outside world without allowing them to be changed, which would be ideal for the _serialNumber property you added to the IPod class a while back.
In the following code, the currentTrack getter/setter methods add a solitary serialNumber getter method that returns the value of the private _serialNumber property:
...
public function get currentTrack():uint {
return _currentTrack;
}
public function set currentTrack(value:uint):void {
value = Math.max(0, value);
value = Math.min(value, tracks.length - 1);
_currentTrack = value;
}
public function get serialNumber():String {
return _serialNumber;
}
...
Finally, you can rewrite the code in the first frame of the IPodExample.fla file to trace the –serialNumber of the iPod to the Output panel:
var myIPod:IPod = new IPod("A101", "Steve's iPod", 11);
trace(myIPod.serialNumber); // A101
Ta da! You can now get at the serial number of an IPod instance without being able to change its value. If you’re feeling adventurous, feel free to try setting the value of the serialNumber property and see what error you get from the ActionScript 3.0 compiler—it will help you to work out what’s going on the next time you get this error.
Static Properties and Methods
Grouping variables and functions together into logical objects is all well and good, but not all pieces of data or functionality belong to a particular instance of an object. Utility functions and pieces of data that don’t logically belong to a single instance of a class, but are nonetheless related to the class, can be added to the class as static properties and methods.
Static properties and methods are part of the class definition, but are identified by the static attribute being used as part of their definition:
public class StaticExample {
public static const PI:Number = 3.1415;
public static function doStaticStuff():void {
// take some actions
}
}
Technically, ActionScript 3.0 is somewhat flexible about the order of the attributes applied to a class or method. When looking at code that’s out there in the wild, you’ll sometimes see static specified before the access attribute and sometimes see them the other way around. It’s the collective meaning of the attributes that matters, not the order in which you specify them. However, you’ll make life easier for yourself if you pick a convention and stick to it.
When accessing a static property or calling a static method of a class, you don’t need to create an instance because the property is actually a part of the class, not of any individual object created from that class. Just use dot notation with the class name and the property or method name (as you did with Math.random() earlier in the chapter):
trace(StaticExample.PI);
StaticExample.doStuff();
Sometimes you have utility functions that don’t logically belong to a class at all. Take the Math class for example: you can’t create an instance of the Math class (what would “a math” be?) and it’s just used as a container for a whole bunch of mathematical constants and utility functions.
Oh, and you can even have static getter/setter methods if you think of a good use for them.
Taking Advantage of Inheritance
No, I won’t give you advice on how to invest granny’s millions (though I know a very grateful author who could take very good care of it for you). I’m talking about object-oriented inheritance.
Inheritance allows you to create new classes using an existing class as a foundation, adding or changing functionality as necessary. For example, a basic Car class might have a licensePlate property, and accelerate() and brake() methods, which every car has, and there’s no sense in duplicating all that stuff for every different type of car. Instead, the DeLorean class can extend the Car class and add its own functionality—a fluxCapacitor property and a travelThroughTime() method, for example.
The key to understanding inheritance is that it is an “is-a” relationship. A DeLorean is a Car; a Cat is a Mammal; and an Apple is a Fruit. Each of those subclasses is a specialization of its base class, adding in its own properties and methods yet inheriting the basic functionality. The idea of inheritance is to write common functionality once in the base class and then specialize that functionality for the different subclasses.
In ActionScript 3.0, you can specify that one class extends another using the extends keyword as part of the class definition:
public class SubClass extends BaseClass {
...
}
An instance of SubClass will now inherit all the features and functionality defined in BaseClass as if they were defined in SubClass itself.
In the constructor of your subclass, you can call a special method named super(), which invokes the base class’s constructor method. If you need to pass any parameters from the subclass constructor to the base class constructor, you can do it just as you would a normal method call:
public class SubClass extends BaseClass {
public function SubClass(someParam:String) {
super(someParam);
}
}
If you forget to call the super() method, the ActionScript 3.0 compiler will attempt to invoke the constructor of your base class with no arguments. If your base class is expecting to receive parameters (it has parameters that are not optional), the ActionScript 3.0 compiler will throw an error like this: 1203: No default constructor found in base class BaseClass.
If you ever get this error, make sure you’re calling the super() method in the subclasses constructor and passing the necessary parameters.
Relating this back to the IPod class analogy, you might say that there are different types of iPod. There’s the iPod Shuffle, the iPod Nano, and the regular photo iPod. Each of these types of iPod supports the same basic functionality set up in the IPod class, but they each add something extra. Let’s create a PhotoIPod class that has a collection of photos and the capability to cycle through them:
1. Create a new ActionScript file named PhotoIPod.as and save it in the project directory.
2. Create the basic class definition in the default package, remembering to extend the base IPod class along the way:
package {
public class PhotoIPod extends IPod {
}
}
3. Create a duplicate of the constructor method from IPod that takes the same parameters and passes them through to the super() method to let the base class initialize itself:
package {
public class PhotoIPod extends IPod {
public function PhotoIPod(
serialNumber:String,
name:String="",
volumeLevel:uint=10,
shuffle:Boolean=false
) {
super(
serialNumber,
name,
volumeLevel,
shuffle
);
}
}
}
4. Now you can start to add the extended functionality of the PhotoIPod class. The first thing you need is an array to keep the list of photos in and a property to keep track of the current photo:
package {
public class PhotoIPod extends IPod {
public var photos:Array;
public var currentPhoto:uint;
public function PhotoIPod(
serialNumber:String,
name:String="",
volumeLevel:uint=10,
shuffle:Boolean=false
) {
super(
serialNumber,
name,
volumeLevel,
shuffle
);
photos = new Array();
currentPhoto = 0;
}
}
}
I’ve been a bit lazy and just made the currentPhoto property public. If left like this, it would face the same problem as the currentTrack property that you added getter/setter methods for earlier—namely that something could set the currentPhoto property to be greater than the number of entries in the photos array. If this is nagging at your conscience as much as it is mine, feel free to embellish it with getter/setter methods.
5. Add a showPhoto() method that displays the title of the current photo from the photos array:
public function PhotoIPod(
serialNumber:String,
name:String="",
volumeLevel:uint=10,
shuffle:Boolean=false
) {
super(
serialNumber,
name,
volumeLevel,
shuffle
);
photos = new Array();
currentPhoto = 0;
}
public function showPhoto():void {
trace("Showing: " + photos[currentPhoto]);
}
6. Finally, add a nextPhoto() method to cycle through the photos sequentially, looping back around to the beginning if you get to the end:
public function showPhoto():void {
trace("Showing: " + photos[currentPhoto]);
}
public function nextPhoto():void {
if (currentPhoto == photos.length - 1) {
currentPhoto = 0;
} else {
currentPhoto++;
}
showPhoto();
}
With that done, you can create a new instance of the PhotoIPod, which can play music and view photos at the same time:
7. Save your IPodExample.fla file as PhotoIPodExample.fla.
8. Change the code on the first frame of the PhotoIPodExample.fla file to reflect the following changes in bold:
var myIPod:PhotoIPod = new PhotoIPod("A101", "Steve's iPod", 10);
myIPod.tracks.push("Guns 'n' Roses - Estranged");
myIPod.tracks.push("Muse - Supermassive Black Holes");
myIPod.tracks.push("Evanescence - Good Enough");
myIPod.photos.push("Steve with streamers on his head");
myIPod.photos.push("Nicki asleep by the fire");
myIPod.photos.push("Steve a little worse for wear");
myIPod.play();
myIPod.showPhoto();
It might not be clear that you have been using the tracks property without declaring it because after you have extended a class, you inherit all the public properties from that class. So in the preceding example, the PhotoIPod inherits the tracks property from the IPod class that it extended.
Feel free to add another button to the stage to cycle through the photos. Follow the same basic instructions as the button you added to skip through the music tracks, but call the nextPhoto() method instead.
Overriding Methods of the Base Class
Sometimes when extending a base class, you want to change or enhance some piece of functionality provided by that base class to suit the subclass. This is known as method overriding.
To override a method of a base class, you need to use the override attribute. Like the static attribute, it can go anywhere before the function name, but it’s probably best to put it before the access attribute, so you know up front which methods are being overridden in a class:
override public function methodName():void {
...
}
If you’re just embellishing the functionality of the base class (or you want to run some additional checks before the method is called) you can always use the super keyword to call the original method from the base class from within the override method:
override public function methodName():void {
super.methodName();
}
Instead of just calling a method named super(), as you did with the constructor, super is actually a reference to the base class object, and you just call the method of the same name on that object.
If you try to just use this.methodName() instead, you’ll be calling the same method again, which will call the same method again. Rinse; repeat. This is known as infinite recursion and it actually crashes the Flash Player and causes a lovely little warning dialog box to pop up on the user’s screen. Needless to say, this is not something to strive for.
Let’s take the simple Car vs. DeLorean example. You’ll probably want to override the Car class’s –forward() function to check not only the fuelLevel (which in the case of the DeLorean would be black-market plutonium bought from Libya) but also that a target date has been configured:
public class Car {
public var fuelLevel:uint = 100;
public function Car() {
}
public function forward() {
if (fuelLevel > 0) {
fuelLevel--;
}
}
}
So that’s the basic Car class. Next, you’ll tackle the DeLorean class, which has a target date that needs to be set before the car can go anywhere:
class DeLorean extends Car {
public var targetDate:Date;
public function DeLorean () {
super();
}
override public function forward():void {
if (targetDate != null) {
super.forward();
}
}
}
Here, you override the forward method of the Car class, calling it through the super object only if a target date has been set.
Using Packages to Group Your Classes
So far in this chapter, you’ve been putting all the classes into the default package. Although this may be okay for very simple examples that you’ll just throw away later, it’s not a good idea for code that has to be organized, maintained, or shared with others.
The reason why it’s not a good idea is that you can have only one class of a given name. So if everyone just dumps classes in the default package, the chance of a naming conflict is quite high (not to mention causing a staggering number of class files in a single directory). Instead of using the default package, you can use the packaging system in ActionScript 3.0 for the purpose it was intended: to organize the code into logical groups or packages, with a portion of package names being unique enough to differentiate the code from someone else’s.
In ActionScript 3.0, you create a package by surrounding your class definition in a package block:
package name {
...
}
The package name is made up of parts separated by a dot, or period. These parts of the package name must be mirrored by the directory structure in which the ActionScript 3.0 files are saved. For example, all the classes for this book are in the com.foundationAS3 package, which means that they are stored in the foundationAS3 subdirectory of the com directory within the main project directory. If you place an ActionScript 3.0 class file in a location that doesn’t match its package name, the ActionScript 3.0 compiler won’t be able to find it, and you’ll get an error.
Naming Your Packages
There are two primary benefits of placing your code in packages. The first is to ensure that your classes don’t clash with classes of the same name created by others. This means that the package name you choose for your classes needs to be unique—if everyone chooses the same package name, you’re no better off than you were when using the default package name.
The de facto method of ensuring unique package names is to reverse the domain name of the website belonging to the company producing the code or the client for whom the code is being written. Because domain names are registered and can be owned by only one entity at any one time, there’s very little chance of a naming conflict. Going forward, all the ActionScript 3.0 classes in this book will be within the com.foundationAS3 package.
Adobe has ignored this convention for the built-in Flash and Flex framework classes, which are spread across the flash and mx packages. Adobe did this to save you from having to type com.adobe before each package path, mindful that you’re likely to be using the built-in classes quite frequently.
The second benefit of packages is that they help you organize your classes into logical groups according to their functions. When I’m working on a project, any class that’s specific to that project goes within a package with the same name as the application, with any generic classes going into the top-level domain package. Going further, I then subdivide those classes according to their function, so utility classes will go in the utils package, and so on.
What you end up with is a structure that looks like the one shown in Figure 3-1.
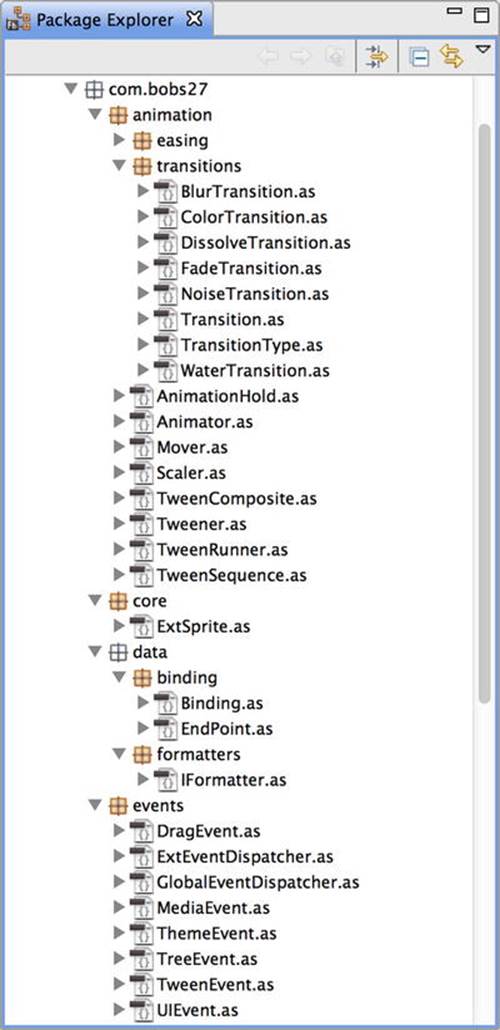
Figure 3-1. An example of a package structure for many classes
Figure 3-1 shows that you can quite happily mix classes and subpackages in the same package.
Having said all that, you are free to ignore all this good advice and organize your code any way you see fit. Package names need to conform to the same rules as class names, but should generally be lowercase to differentiate them from classes. Other than that, you can name and structure your packages however you like. Just be aware that putting all your classes for a professional project into a package named charlieBrown just for a laugh will probably get you fired. Don’t say I didn’t warn you.
Importing a Class from a Package
After you section your classes into logical packages, you’ll need to use the import statement to bring the classes into the class in which you want to make use of them. Actually, you need to do this only for classes that aren’t in the same package as the class you’re editing—classes in the same package are automatically available to you.
When adding import statements to your code, they should go inside the package block but outside of the class definition, and you need to use the full package path and class name for the class you want to import. If you had a class that needed to make use of the MovieClip class from the flash.display package, you’d need to do something like this:
package {
import flash.display.MovieClip;
class Example extends MovieClip {
...
}
}
Once the class has been imported, you can use just the class name to reference it in the code (with one small exception, which I’ll get to in a bit).
Importing a class doesn’t automatically mean that the class will be compiled into the resultant SWF file for your project. The ActionScript 3.0 compiler is smart enough to work out whether you’re making use of a class and exclude it if there’s no reference to that class in your code.
Importing all Classes in a Given Package
On a large project in which you have classes that use lots of classes from other packages, maintaining the import statements can become a task in itself. To help you combat this, you can use the asterisk symbol to include all the classes in a given package in a single import statement.
When you start looking at the display list in the next chapter, you’ll be using a lot of the classes from the flash.display package. Instead of importing each of these classes individually, you can import them all with a single import statement that uses the asterisk wildcard (*):
import flash.display.*;
This statement will import only classes directly in that package and will not include classes in any subpackages within the specified package, so you wouldn’t be able to import every single class that resides in the fl.motion.easing package by importing fl.motion.*.
Resolving Naming Conflicts among Imported Classes
When importing classes from multiple packages, there’s still a chance you will end up with two classes with the same name. When this happens, you won’t be able to use just the name of the class in your code because the ActionScript 3.0 compiler won’t be able to work out which of the classes with that name you mean.
In cases like this, you need to give the compiler a helping hand by specifying the full package name for the class wherever you use it, although you’ll still need to import the classes with an import statement:
com.foundationAS3.chp
Number.ClassName
Removing Dependency on Timeline Code
Now that you know all about classes and objects, I’ll do away with placing code on the timeline for the remainder of this book and use document classes instead.
When you specify a document class for a Flash movie, an instance of that class is created when the movie is played, and it represents the top-level MovieClip in your document (it could be a Sprite instead).
If you’re dealing with timeline keyframe animation and you need something to happen on a particular frame, my advice is to place that code in a method of a class and call that method from the frame.
There is a sneaky undocumented method that allows you to specify a function to be called when a particular frame is reached without having to put any code on the timeline: the addFrameScript() method of the MovieClip class. This method takes a frame number (starting at zero for the first frame) and a function reference, with the function you pass in being called when the movie enters the specified frame number.
That said, I don’t recommend using this for two reasons. The first is that the –addFrameScript() method is undocumented, so Adobe could remove it at any point, and your movies would break. The second reason is that if you’re shifting stuff around on the timeline (to tweak your animations, for example), you’ll have to remember to change the code in the class, too—at least if the code is on a frame, that frame will probably get shunted around with the animation.
Summary
The previous chapter was about basic building blocks; in this chapter, you learned how to put those building blocks together to build rooms. Classes are the foundation of everything you will do in your ActionScript 3.0 projects, so it was important that I covered them early on.
I’ve kept to the basics of object-oriented programming in ActionScript 3.0, covering just enough to get you through to the end of this book. Advanced topics have been left out to spare your gray matter from imploding—I’ll touch on them in the coming chapters where applicable, but I didn’t want to overload you with too much information at the get-go. If you are feeling like you need more, Object Oriented Actionscript 3.0, by Todd Yard, Peter Elst, and Sas Jacobs (friends of ED, 2009) is dedicated to this very subject.
Now, I promised you some fun stuff after these two chapters were over, and fun stuff you shall have. In the next chapter, you’ll look at how to create and manipulate graphics on the stage using the display list. See you there.
All materials on the site are licensed Creative Commons Attribution-Sharealike 3.0 Unported CC BY-SA 3.0 & GNU Free Documentation License (GFDL)
If you are the copyright holder of any material contained on our site and intend to remove it, please contact our site administrator for approval.
© 2016-2025 All site design rights belong to S.Y.A.