Programming Arduino Getting Started with Sketches (2012)
8
Data Storage
When you give values to variables, the Arduino board will remember those values only as long as the power is on. The moment that you turn the power off or reset the board, all that data is lost.
In this chapter, we look at some ways to hang on to that data.
Constants
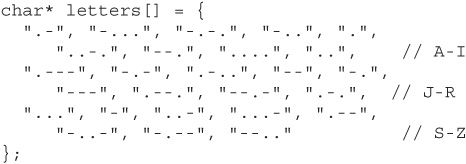
If the data that you want to store does not change, then you can just set the data up each time that the Arduino starts. An example of this approach is the case in the letters array in your Morse code translator of Chapter 5 (sketch 5-05).
You used the following code to define a variable of the correct size and fill it with the data that you needed:
You may remember that you did the calculation and decided that you had plenty of your meager 2K to spare. However, if memory was a bit tight, it would be far better to be able to store this data in the 32K of flash memory used to store programs, rather than the 2K of RAM. There is a means of doing this. It is a directive called PROGMEN; it lives in a library and is a bit awkward to use.
The PROGMEM Directive
To store your data in flash memory, you have to include the PROGMEM library as follows:
![]()
The purpose of this command is to tell the compiler to use the pgmspace library for this sketch. In this case, a library is a set of functions that someone else has written and that you can use in your sketches without having to understand all the details of how those functions work.
Because you are using this library, the PROGMEM keyword and the pgm_read_word function are available. You will use both in the sketches that follow.
This library is included as part of the Arduino software and is an officially supported Arduino library. A good collection of such official libraries is available, and many unofficial libraries, developed by people like you and made for others to use, are also available on the Internet. Such unofficial libraries must be installed into your Arduino environment. You will learn more about these libraries, as well as how to write your own libraries, in Chapter 11.
When using PROGMEM, you have to make sure that you use special PROGMEM-friendly data types. Unfortunately, that does not include an array of char arrays. You actually have to define a variable for each string using a PROGMEM string type and then put them all in a PROGMEM array type, like this:
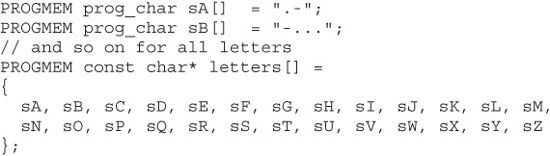
I have not listed sketch 8-01 here, as it is a little lengthy, but you may wish to load it and verify that it works the same way as the RAM-based version.
In addition to creating the data in a special way, you also have to read the data back a special way. Your code to get the code string for a Morse letter from the array has to be modified to look like this:
![]()
This uses a buffer variable into which the PROGMEM string is copied, so that it can be used as a regular char array. This needs to be defined as a global variable as follows:
![]()
This approach works only if the data is constant—that is, you are not going to change it while the sketch is running. In the next section, you will learn about using the EEPROM memory that is intended for storing persistent data that can be changed.
EEPROM
The ATMega328 at the heart of an Arduino Uno has a kilobyte of electrically erasable read-only memory (EEPROM). EEPROM is designed to remember its contents for many years. Despite its name, it is not really read-only. You can write to it.
The Arduino commands for reading and writing to EEPROM are just as awkward to use as the ones for using PROGMEM. You have to read and write to and from EEPROM one byte at a time.
The example of sketch 8-02 allows you to enter a single-digit letter code from the Serial Monitor. The sketch then remembers the digit and repeatedly writes it out on the Serial Monitor.
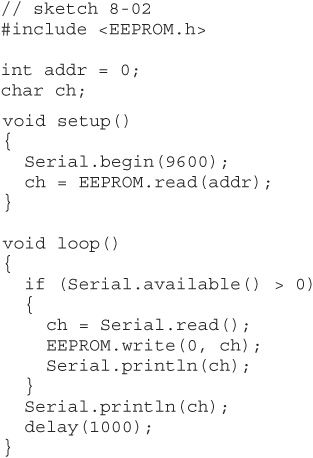
To try this sketch, open the Serial Monitor and enter a new character. Then unplug the Arduino and plug it back in. When you reopen the Serial Monitor, you will see that the letter has been remembered.
The function EEPROM.write takes two arguments. The first is the address, which is the memory location in EEPROM and should be between 0 and 1023. The second argument is the data to write at that location. This must be a single byte. A character is represented as eight bits, so this is fine, but you cannot directly store a 16-bit int.
Storing an int in EEPROM
To store a two-byte int in locations 0 and 1 of the EEPROM, you would have to do this:

The functions highByte and lowByte are useful for separating an int into two bytes. Figure 8-1 shows how this int is actually stored in the EEPROM.
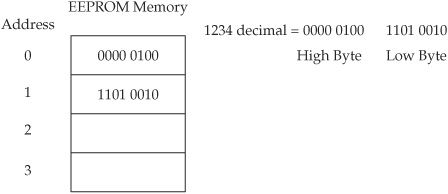
Figure 8-1 Storing a 16-bit integer in EEPROM
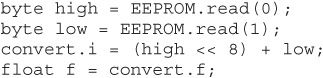
To read the int back out of EEPROM, you need to read the two bytes from the EEPROM and reconstruct the int, as follows:

The << operator is a bit shift operator that moves the eight high bytes to the top of the int and then adds in the low byte.
Storing a float in EEPROM (Unions)
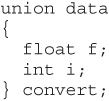
Storing a float in EEPROM is a little more tricky. To do this, you can use a feature of C called unions. These data structures are interesting in that they can be thought of as a way to make the same area of memory accessible to more than one variable. What is more, these variables are allowed to be of different types as long as they are the same size in bytes.
The following union definition allows both a float and an int to refer to the same two bytes of memory:
You can then put a float into the union as follows:
![]()
Then you can separate an integer into its two bytes for storage in EEPROM as follows:
![]()
Reading the float back out again requires you to do the reverse. First you assemble the two bytes into a single int, then you put the int into the union and pull it out again as a float.
Storing a String in EEPROM
Writing and reading character strings into the EEPROM are pretty straightforward; you just have to write each character at a time, as in the following example:
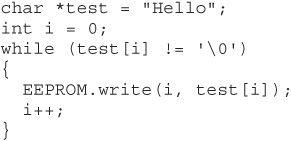
To read the string back into a character array, you can do something like this:

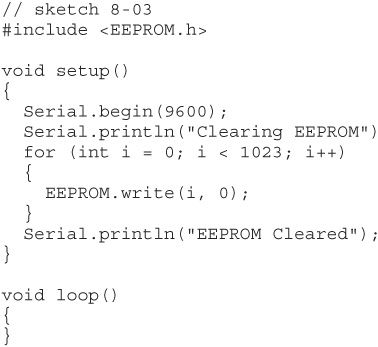
Clearing the Contents of EEPROM
When writing to EEPROM, remember that even uploading a new sketch will not clear the EEPROM, so you may have leftover values in there from a previous project. Sketch 8-03 resets all the contents of EEPROM to zeros:
Also be aware that you can write to an EEPROM location only about 100,000 times before it will become unreliable. So only write a value back to EEPROM when you really need to. EEPROM is also quite slow, taking about 3 milliseconds to write a byte.
Compression
When saving data to EEPROM or when using PROGMEM, you will sometimes find that you have more to save than you have room to save it. When this happens, it is worth finding the most efficient way of representing the data.
Range Compression
You may have a value for which on the face of it you need an int or a float that are both 16-bit. For example, to represent a temperature in degrees Celsius, you might use a float value such as 20.25. When you are storing that into EEPROM, life would be so much easier if you could fit it into a single byte, and you could store twice as much as if you used a float.
One way that you can do this is to change the data before you store it. Remember that a byte will allow you to store a positive number between 0 and 255. So if you only cared about the temperature to the nearest degree Celsius, then you could simply convert the float to an int and discard the part after the decimal point. The following example shows how to do this:
![]()
The variable tempFloat contains the floating point value. The (int) command is called a type cast and is used to convert a variable from one type to another compatible type. In this case, the type cast converts the float of (for example) 20.25 to an int that will simply truncate the number to 20.
If you know that the highest temperature that you care about is 60 degrees Celsius and that the lowest is 0 degrees Celsius, then you could multiply every temperature by 4 before converting it to a byte and saving it. Then when you read the data back from EEPROM, you can divide by 4 to get a value that has a precision of 0.25 of a degree.
The following code example (sketch 8-04) saves such a temperature into EEPROM, then reads it back and displays it in the Serial Monitor as proof:
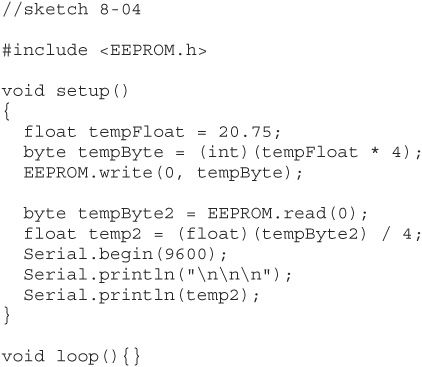
There are other means of compressing data. For instance, if you are taking readings that change slowly—again, changes in temperature are a good example of this—then you can record the first temperature at full resolution and then just record the changes in temperature from the previous reading. This change will generally be small and occupy fewer bytes.
Conclusion
You now know a little about how to make your data hang around after the power has gone off. In the next chapter, you will look at LCD displays.
All materials on the site are licensed Creative Commons Attribution-Sharealike 3.0 Unported CC BY-SA 3.0 & GNU Free Documentation License (GFDL)
If you are the copyright holder of any material contained on our site and intend to remove it, please contact our site administrator for approval.
© 2016-2026 All site design rights belong to S.Y.A.