Creating Apps in Kivy (2014)
Chapter 6. Kivy Storage
So far, every time you run your weather app, it asks you to search for a location. It would be much more convenient if it could store your last location and render it by default.
Kivy is a Python library, which means you have access to the full gamut of Python storage modules. You could use basic file I/O, compression, encryption, pickling, JSON, SQLite3, an external SQL or NoSQL database, or any number of online storage services.
Depending on the data being stored, these are certainly useful tools worth checking out. However, Kivy also provides a simple but powerful key/value storage API for storing local data. Its primary advantage is that because Kivy is aware of the module, it works across the wide variety of platforms that Kivy uses without having to take into account filesystem structure or other differences between various operating systems.
Maintaining a List of Locations
Before looking at storing the locations, update the app to have a Locations tab. This involves nothing you haven’t studied before, so you may want to think of it as an exercise. I’ll try to keep this section brief so as not to bore you with knowledge you already have. If you want to skip this section, you can download the example code from O’Reilly and proceed to the next section.
Here’s what you need to do, step by step. As mentioned, there is some example code for the more complicated steps. Note in advance that the ListView of locations behaves exactly like the ListView for search results, so you get to reuse a lot of functionality.
1. Add a new locations ObjectProperty on WeatherRoot for the new Locations widget.
2. Turn the args_converter into a module-level function instead of a method, and call it as main.locations_args_converter in the KV file for both ListViews.
3. Add the new Locations dynamic class in KV to actually render the list of locations in a ListView. See Example 6-1.
4. Add a Locations button to the CurrentWeather widget that calls a new show_locations method on WeatherRoot when pressed. As Example 6-2 shows, this method is very simple.
5. Update show_current_weather to additionally append a new LocationButton to the locations ListView. The new code is highlighted in Example 6-3.
Example 6-1. Locations class to store the list of locations you have searched for
<Locations@BoxLayout>:
orientation: "vertical"
locations_list: locations_list ![]()
ListView:
id: locations_list
adapter:
ListAdapter(
data=[],
cls=main.LocationButton,
args_converter=main.locations_args_converter) ![]()
BoxLayout:
orientation: "horizontal"
size_hint_y: None
height: "40dp"
Button: ![]()
text: "Add Location"
on_press: app.root.show_add_location_form()
![]()
This is a dynamic class, so the ObjectProperty is created dynamically.
![]()
Remember to also change this function call to a module-level function in AddLocationForm, where the same args_converter is used.
![]()
This Button was moved from the CurrentWeather widget, where it was replaced with a Button to render the Locations view.
Example 6-2. The simple show_locations method on WeatherRoot
def show_locations(self):
self.clear_widgets()
self.add_widget(self.locations)
Example 6-3. The new show_current_weather function
def show_current_weather(self, location=None):
self.clear_widgets()
if self.current_weather isNone:
self.current_weather = CurrentWeather()
if self.locations isNone: ![]()
self.locations = Factory.Locations()
if location isnotNone:
self.current_weather.location = location
if location notinself.locations.locations_list.adapter.data: ![]()
self.locations.locations_list.adapter.data.append(location)
self.locations.locations_list._trigger_reset_populate()
self.current_weather.update_weather()
self.add_widget(self.current_weather)
![]()
As with CurrentWeather, construct the widget if it doesn’t exist.
![]()
If a location was specified but it isn’t already in the adapter, add the data. This works because the args_converter expects a (city, country) tuple, which was passed into show_current_weather by the LocationButton.
Storing the Location List
As with most of Kivy, the Storage API is layered, with a generic API routing to different backend services. This is how, for example, Kivy is able to use different audio or video devices seamlessly, without any guidance from you.
However, with storage, you have to choose what kind of backend you will use. Kivy currently supports three options:
§ A DictStore that stores data in a Python dictionary in memory. This does not persist if the application closes.
§ A JsonStore that stores data in JSON format on the local filesystem.
§ A RedisStore that allows you to store data locally or remotely in a Redis filesystem.
The DictStore isn’t too useful to you, since the adapter is already storing data in memory on your behalf. The RedisStore might be useful if you wanted to sync data to a central database where you could access it from multiple devices. However, I’ll demo the JsonStore, which is more suitable to the use case at hand.
Constructing a JsonStore is very easy. In this case, you should build it as an instance property on the WeatherRoot class. This means you’ll have to override the __init__ method as shown in Example 6-4, first adding an import for from kivy.storage.jsonstore import JsonStore at the top of the file.
Example 6-4. Initializer for WeatherRoot
def __init__(self, **kwargs):
super(WeatherRoot, self).__init__(**kwargs) ![]()
self.store = JsonStore("weather_store.json")
![]()
Remember, Python 3 can use super without arguments. I can never remember which order the arguments go in, so Python 3 saves me a lot of trial and error!
Kivy permits multiple inheritance and automatic property assignment by never passing positional arguments into the __init__ method. Thus, you should accept arbitrary kwargs and pass them up to the parent class, just in case. Give the object a relative filename. The store should take care of ensuring it’s saved to a reasonable location that can be found again on different devices.
Then you can use the put method to store the known locations whenever a new one is added. Do this only when a new item is appended to the ListView inside the conditionals in show_current_weather. See Example 6-5.
Example 6-5. Putting a value to the store when a location is added
if location notinself.locations.locations_list.adapter.data:
self.locations.locations_list.adapter.data.append(location)
self.locations.locations_list._trigger_reset_populate()
self.store.put("locations",
locations=list(self.locations.locations_list.adapter.data))
NOTE
Note that put requires one positional key and then an arbitrary number of named values. Each value is passed as a keyword argument. In this case, I supplied only one argument, locations, where the value is a list of tuple objects. This serializes easily to JSON inside the store. If you call put again, it will overwrite all the values for that key, even if you specify different values.
Finally, if the store exists, load the data into the adapter after constructing the Locations object in show_current_weather, as shown in Example 6-6.
Example 6-6. Loading data from the store
if self.locations isNone:
self.locations = Factory.Locations()
if (self.store.exists('locations')):
locations = self.store.get("locations")['locations']
self.locations.locations_list.adapter.data.extend(locations)
Note that get returns a dictionary where the keys are any keyword arguments you passed into put for that key.
See if you can work out how to store the current location in the same key and, if it is set, render it when the application starts. Example 6-7 in show_current_weather and Example 6-8 in the WeatherRoot initializer demonstrate how simple this can be.
Example 6-7. Putting the current location
if location isnotNone:
self.current_weather.location = location
if location notinself.locations.locations_list.adapter.data:
self.locations.locations_list.adapter.data.append(location)
self.locations.locations_list._trigger_reset_populate()
self.store.put("locations",
locations=list(self.locations.locations_list.adapter.data),
current_location=location)
Example 6-8. Loading the current location and rendering
def __init__(self, **kwargs):
super(WeatherRoot, self).__init__(**kwargs)
self.store = JsonStore("weather_store.json")
if self.store.exists('locations'):
current_location = self.store.get("locations")["current_location"]
self.show_current_weather(current_location)
The User Settings Dialog
Kivy has built-in support for storing user settings backed by a configuration file. In fact, Kivy has a bunch of built-in configuration settings that the user can change. You don’t have to do anything to enable these; they’re already there. On your desktop machine, just press F1 to display the settings, as shown in Figure 6-1.
NOTE
The default settings are pretty technical and a bit overwhelming for the average user. Depending on your use case, you might want to leave them in, as I did in this chapter for pedagogical reasons. However, if you want to hide them, it’s as simple as adding a use_kivy_settings = False line to the WeatherApp class.
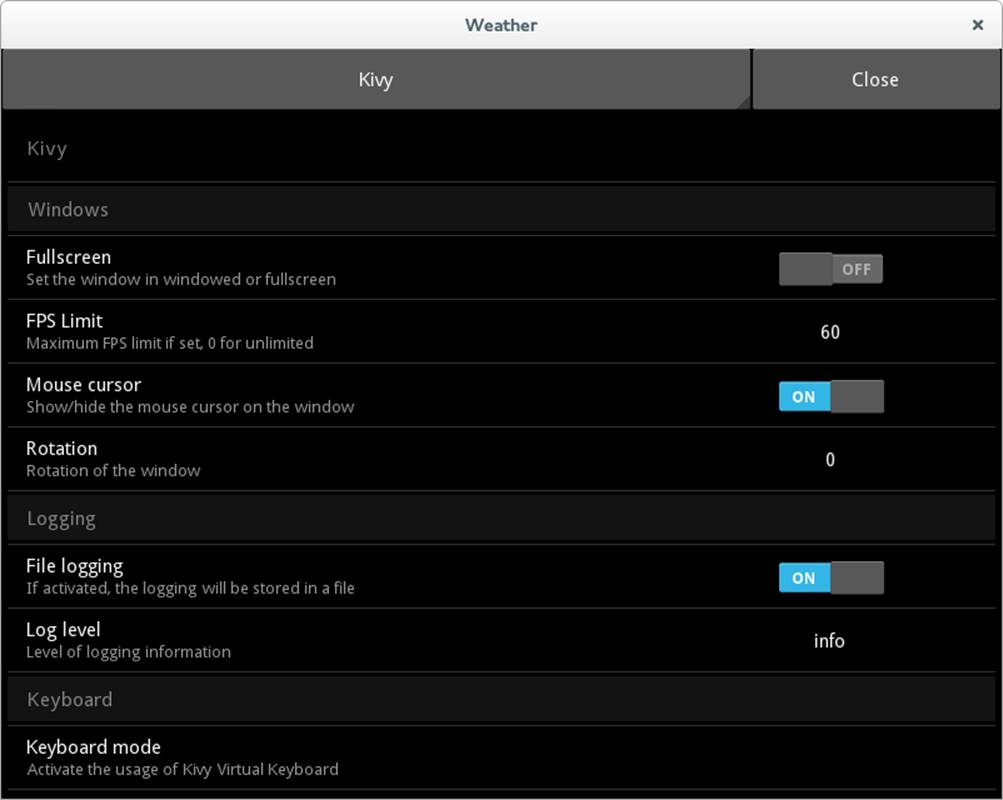
Figure 6-1. Kivy settings dialog
The Kivy settings are stored in a user-editable .ini file named after your application class, with the same name mangling used to guess the .kv filename. Thus, the settings for the WeatherApp class appear in weather.ini.
Don’t ship this file with your application. Instead, add a build_config method to your WeatherApp class. It will automatically generate the file the first time it is called. This method should set up the structure of the file and all default values for your app. Remember, an .ini file has sections with key/value pairs inside each section. For this example, I’ll just add one configuration setting: what system to render the temperatures in. Put it in the General section, as shown in build_config in Example 6-9.
The next step is to configure your settings panel to allow the user to change these settings. We must do this using JSON, for reasons I don’t understand (I would have used a KV language syntax).
The build_settings method in Example 6-9 demonstrates how to do this.
Example 6-9. Creating a settings panel and configuration management
classWeatherApp(App):
def build_config(self, config):
config.setdefaults('General', {'temp_type': "Metric"})
def build_settings(self, settings):
settings.add_json_panel("Weather Settings", self.config, data="""
[
{"type": "options",
"title": "Temperature System",
"section": "General",
"key": "temp_type",
"options": ["Metric", "Imperial"]
}
]"""
)
The key invocation here is the add_json_panel call, which accepts three arguments. The first is the title of the panel, as rendered in the settings dialog. It’s possible to have multiple settings panels, including the default Kivy panel you saw earlier. The second parameter is almost alwaysself.config, the configuration object that was set up in build_config. Finally, you can supply either filename or data as a keyword argument to load JSON data from a file or string.
The example uses the data argument and encodes the data inline. The options are straightforward, but fairly verbose considering that I am describing only one setting object.
The type defines how the setting is rendered. I chose options since I want to select between two choices. Other values type can take include:
§ bool
§ numeric
§ string
§ path
§ title (acts as a placeholder between sections)
The title is the user-readable label to give the setting inside the dialog. The section parameter maps directly to whatever section you specified in config.setdefaults, while key maps to a key inside the dictionary passed into that function. Finally, since this is an options setting, the actual options are specified in a JSON list.
If you run the program and press F1, you’re given a very simple settings panel, as shown in Figure 6-2.
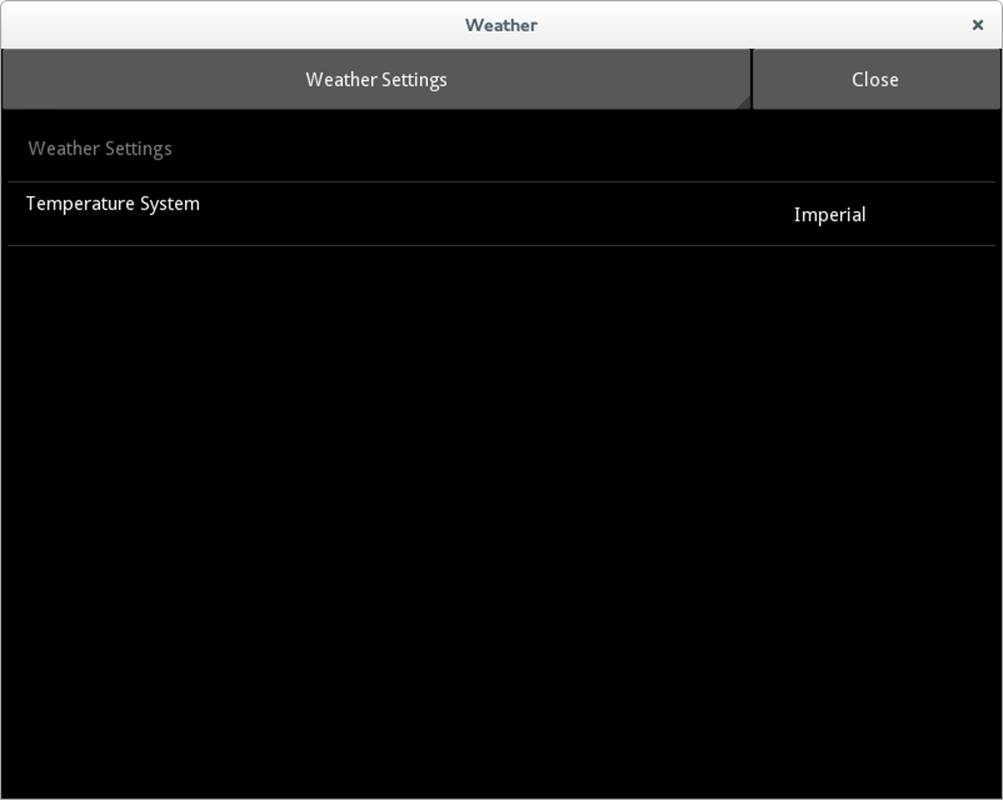
Figure 6-2. Temperature system setting
The setting is saved by default as soon as the user closes the dialog. The next time the program runs, the user’s choice is rendered instead of the default.
The next step, of course, is to actually use this setting in production. This requires some minor changes to update_weather so that you are requesting the appropriate units from Open Weather Map. See Example 6-10.
Example 6-10. Requesting data in the user’s selected measuring system
def update_weather(self):
config = WeatherApp.get_running_app().config ![]()
temp_type = config.getdefault("General", "temp_type", "metric").lower() ![]()
weather_template = "http://api.openweathermap.org/data/2.5/" +
"weather?q={},{}&units={}" ![]()
weather_url = weather_template.format(
self.location[0],
self.location[1],
temp_type) ![]()
request = UrlRequest(weather_url, self.weather_retrieved)
![]()
get_running_app is a static method that returns the singleton running app. Simply request the config variable from it.
![]()
getdefault returns the value stored in the configuration in the temp_type key under the General section. If that section or key doesn’t exist, it returns the default value, metric.
![]()
weather_template is changed to have the units passed in a format string instead of being hardcoded (removing hardcoded values should yield a tremendous sense of accomplishment).
![]()
The template string now needs to have three values substituted in the format call.
This should now be working fine, with one small bug. If you press F1 from the CurrentLocation view, it doesn’t update the display until update_weather is called, which requires you to select a different location.
Luckily, you can listen for changes by adding an on_config_change method to the WeatherApp class. This method calls update_weather immediately, as shown in Example 6-11. This example uses the “ask forgiveness rather than permission” approach to determine if the current root window has an update_weather function. I suspect this will be useful when we implement the Forecast tab in the next chapter.
Example 6-11. Updating weather on_config_change
def on_config_change(self, config, section, key, value):
if config isself.config andkey == "temp_type":
try:
self.root.children[0].update_weather()
exceptAttributeError:
pass
Last, add a button to display the settings window manually. Users don’t necessarily know that the F1 key will display the settings window. Kivy will map the menu button on Android devices to the settings window, but modern Android devices don’t have a menu key.
For brevity, I’m just going to throw a button on the Locations window to display settings. This isn’t exactly good interface design, but Example 6-12 will get the pertinent points across.
Example 6-12. A button to display the settings
Button:
text: "Settings"
on_press: app.open_settings()
File It All Away
I have to tell you, folks, I’m surprised at how easy this chapter was to write. I haven’t used the settings or storage APIs before. I knew from my experience with other Kivy APIs that it would be simple, but I was able to write, test, and document all these examples in a single day! I hope this chapter was as informative and fun for you as it was for me.
There are, as always, numerous activities you can try to extend your knowledge on your own. Try some of these, for example:
§ The code that updates the results list after the user searches for a location is very similar to the code that updates the list of locations when one is selected. I think this could be elegantly refactored into a single LocationListView class that has methods that take care of updating the data and calling the trigger_reset_populate function.
§ The Locations view has no way to remove a location once it’s added. Explore ways to solve this. Personally, I’d look at extending LocationButton to have a button inside it (yes, it is possible to have a button on a button) that connects to a remove token. Remember to update theJsonStore object, too.
§ I think it would be elegant if there were a version of ListAdapter that automatically stored its value inside a JsonStore object whenever it was updated. I wouldn’t be surprised if the Kivy team would accept a pull request with such an adapter if you were up for some open source contribution!
§ Add some more settings for fun. One thing you might try is conditionally rendering additional data (such as humidity or wind speed) depending on whether the user has requested it. Or you could set an option for how often the weather should be updated using the Clock object, if you did the last exercise in the previous chapter.