Beginning Lua Programming (2007)
Chapter 18. Carrying Lua with You
Lua's efficiency and small size make it highly suitable for use with the scaled-down resources of a handheld device. This chapter introduces the use of Lua in devices that function with Palm OS, such as PDAs (personal digital assistants) and mobile telephones. The focus will be on Plua, a port of Lua with a very nicely engineered binding to the Palm OS application programming interface. In this chapter, you learn how to do the following:
· Obtain and set up Plua on your Palm OS device
· Obtain and set up tools to develop Plua applications from your desktop
· Save your source code in various formats
· Develop Lua modules
· Generate artwork programmatically using turtle graphics
· Create programs with forms
The flexibility of the Plua package enables you to develop Lua applications right on your Palm device. Alternatively, with the freely available Palm OS Emulator or Simulator, you can build and test your Lua application from your desktop.
Getting Started with Plua
Plua was created by Márcio Migueletto de Andrade and is maintained and copyrighted by him. Currently, version 1.1 and the most recent beta release of version 2.0 are available. The earlier version was a port of Lua version 4.0, and the later version is a port of Lua 5.0. It is the later version, often referred to as Plua2, that's covered here. It is referred to as Plua in this chapter, unless it needs to be distinguished from its predecessor. Because you've been using Lua 5.1 in this book, review the differences between this and Lua 5.0 before developing your own applications with Plua. A summary of these changes can be found near the end of the Lua reference manual. In particular, be aware that in version 5.0 of Lua, there is no # operator and the vararg mechanism uses a table named arg.
Obtaining Plua
To obtain an official release of Plua2, you need to be a registered member of the Plua discussion group hosted at http://groups.yahoo.com/group/plua. Plua's author is active in this forum and maintains a directory named Plua in the Files section where official releases can be found. Additionally, the Plua community has placed many other contributions such as applications, tutorials, and libraries in other directories of this forum.
From the Plua directory in the Files section of the Yahoo Plua group site, locate and download the most recent plua zip file and examples zip file. Additionally, if a pluac zip file is available for your desktop operating system, you may want to download it as well. This package will allow you to build Plua applications that contain bitmaps and other resources.
Like many other applications, Plua uses MathLib for double-precision math functions. If you don't already have this library, visit www.radiks.net/~rhuebner/mathlib.html to download MathLib.zip.
Examining the Distribution Contents
Unzip the files you downloaded into a convenient location. For example, assuming you have downloaded plua-2.0b6.zip and are using the shell in Windows, the following commands work. Make the appropriate adjustments if the files you have downloaded are of a more recent version or you are on a different platform Replace /path/to with the location of the downloaded files.
c:
md plua2
cd plua2
7z x /path/to/plua-2.0b6.zip
7z x /path/to/pluac-2.0b6.windows.zip
7z x /path/to/plua-examples.zip
7z x /path/to/MathLib.zip
The zip files may be deleted at this point. The extraction process creates a number of subdirectories such as doc, examples, libkit, and prc. The prc subdirectory contains the following three files:
· The program plua2.prc file includes the Lua compiler, interpreter, library, and editor. If you develop applications directly on your Palm device, you will need to install this file.
· The plua2help.prc file provides online help for the library functions. This file is highly recommended if you develop program directly on your Palm device.
· The plua2rt.prc file includes the library and Lua interpreter and is the only file to be distributed with your application.
The doc subdirectory contains a file named pluadoc.htm that documents various aspects of Plua's use and libraries. Also included here is the Plua2 change log.
The examples subdirectory contains the following subdirectories:
· Aquario: This example demonstrates the use of animated graphics known as sprites. If you want to include graphics in your application, this is a good example to study.
· LuaCalc: This example implements a reverse polish notation (RPN) calculator.
· Demo: This contains the following three example programs:
· Demol: This program bundles the various controls that are available in the Plua library. These include check box, selector, button, label, slider, popup, list, and field controls. Make a point of running this program and referring to Demol.lua to see how controls are programmed and how an event loop is used within a program.
· Demo2: This demonstrates how various other standard Palm OS windows are invoked. These include the alert, confirmation, text input, color selection, date selection, and time selection windows.
· Life: This program implements a Palm version of the classic cellular automaton invention of John Conway. This is an adaptation of the script found in the Lua distribution.
The libkit subdirectory includes examples of extending Plua with libraries written in C. You'll need the Palm OS software development kit and a compiler capable of creating Palm executables to build these libraries. You'll want to be familiar with developing Plua applications before venturing into this domain.
Exploring Plua's Features
Using the Palm HotSync Manager, install plua2.prc and plua2help.prc from the prc subdirectory of the Plua2 distribution onto your Palm device. Also, if it isn't already on your device, install mathlib.prc. If you don't have a Palm device or would rather use your desktop or notebook computer to develop Plua applications, see “The Palm OS Emulator” later in this chapter. The instructions in this chapter still apply, except you'll be working with a computer mouse and keyboard rather than with a handheld device.
Running the Plua Application
You should place the Plua application into its own category if you have one available. Select Edit Categories from the main screen's upper right selector. Click the New button, type Lua in the text category name field, and tap the OK button. From the main screen menu, select Category and, using the category selector to the right of Plua2, choose the new category. Tap the Done button to approve the action. The online help library is not directly launchable, so it will not show up in this list. Figure 18-1 shows the Lua category screen.
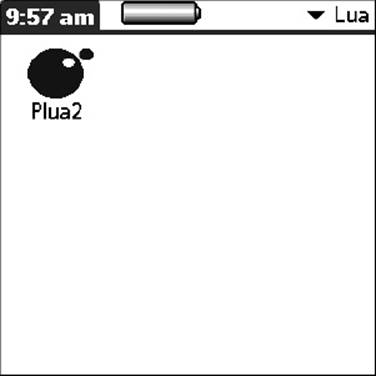
Figure 18-1
Try It Out
Creating Your First Plua Program
In this Try It Out, you tip your hat to Brian Kernighan and Dennis Ritchie, who first published a “Hello, world” program in the 1970s as a means to test the development environment.
1.Tap the Plua2 icon. You're presented with the screen shown in Figure 18-2.
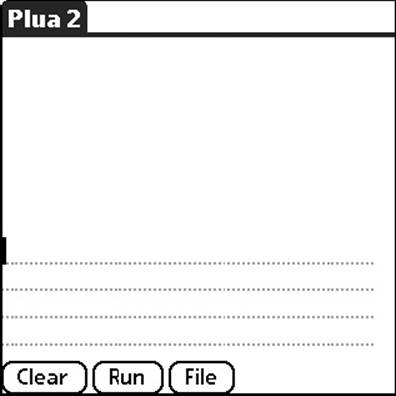
Figure 18-2
2.On the first dotted line, type the following:
print "Hello world”
3. Tap the Run button. The greeting appears in the area above the input section as shown in Figure 18-3. You can repeat the output by tapping the Run button more than once.
4. Tap the Clear button. The Lua code will be cleared from the input section.
5. Text in the output section does not automatically scroll when it becomes full, so it is convenient to have this area erased when you clear the input section. To enable this behavior, tap the Palm OS Menu icon (or, alternatively, tap the caption bar) and choose Preferences from the Options menu. Enable the Clear output check box and tap the Done button. Now when you tap the Clear button, both the program and its output are cleared.
How It Works
In this mode, you use Plua much like you do the interactive mode of the Lua interpreter when using a command shell on Windows or a Unix-type system. Unlike the standard Lua interpreter, however, nothing is submitted to the Plua interpreter until you tap the Run button. If you attempt to run an incomplete Lua program, you get an error message.
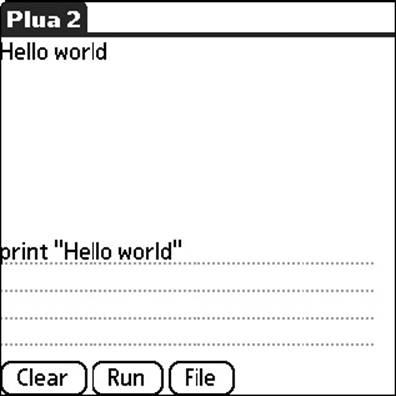
Figure 18-3
Saving Plua Programs
Tapping the File button in the Plua2 program presents a screen where you can create, edit, and run persistent Lua programs. Plua will process a source file in any of the standard ways that text can be saved on a Palm device: as a memo record, a doc file, a stream file, or a file on an expansion card. The particular format is selected from the pop-up menu in the upper-right part of the file screen. Each format has some advantages and disadvantages, as described here:
· All memo records on a Palm device belong to a single database. Each record has a fairly modest size restriction of between 4KB to 32KB of text depending on the version of the Palm operating system. A memo record is identified by its first line. Plua will consider as a source file a memo whose first line begins with two dashes, a space, a program name (which may include white-space), and the extension .lua., like this one:
-- Example.lua
The advantage of creating a Plua program as a memo record is that it can be edited within the Plua application. Additionally, while you're editing in Plua, an online help system is available that provides documentation for all supported functions and global variables.
· Doc files (not to be confused with word processed files with the .doc extension) are intended for larger quantities of text than a memo record can have. In fact, many books are available in this standard format. A number of editors, free and commercial, are available for handheld and desktop editing of doc files. The freely available SrcEdit editor is popular for handheld programming because it has amenities for developers such as brace and quote completion. If this program is present on your Palm device, Plua will launch it if you select a doc file and tap the Edit button. However, to return to the file screen, you will need to relaunch Plua.
· Stream programs use the File Stream library, a relatively recent addition to the Palm API. This may be a suitable format if you generate Plua source files programmatically.
· Storing source files in the virtual file system (VFS) of an expansion card may facilitate the transfer of programs from one device or platform to another. You'll see shortly that this source file format enables you to develop Plua programs from your desktop machine very easily.
Reading the Online Documentation
Plua comes with an online help system that covers the Lua core functions and global variables as well as functions provided by Plua. In the following Try It Out, you explore this handy interactive resource.
Try It Out
Calling for Help
1. In the Files screen of Plua, select Memo from the pop-up menu in the upper-right corner.
2. Tap the New button to create a new Plua program in the memo record format.
3. Type Example.lua in the New File Name field, and then tap the OK button.
4. From the program list, select Example.lua and tap the Edit button. Plua prepares the first line of the program for you. You can change the name, but don't introduce any spaces before the two dashes or add anything after the .lua extension.
5. Tap a line or two below the title line and enter the following:
print("Hello from Plua”)
6. Tap and drag your stylus to select the text print.
7. Tap the Palm OS Find icon. A help screen appears with documentation for the print function, as shown in Figure 18-4.
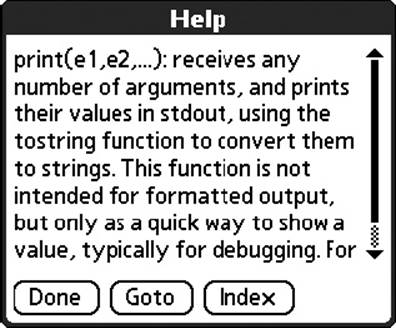
Figure 18-4
How It Works
Plua's online help system is available from the main screen as well. If you tap the Palm OS Find icon when no text is selected, you are presented with a scrolling list of all help topics. To jump to a topic from this list, select the full name of the topic as if this text was in an editor, then tap Goto. If the text you select is not found in the help system, nothing happens when you click the Find icon.
Using Palm OS Streams
The Palm operating system stores data in record-based flat databases. The file stream API is a layer on top of this that removes many of the difficulties of working with databases. As mentioned earlier, Plua can process source code stored as a stream. It also supports the usual reading and writing operations on streams.
In the following Try It Out, you will write a program in stream format. A stream editor on a Palm device is a specialized application that you might not have, so in this example you will use Plua itself to create the program.
Try It Out
Writing a Program with a Program
Write a simple Plua program that generates, in stream format, another simple Plua program.
1. Go to the File section of the Plua application.
2. Select Memo format from the pop-up menu in the upper right corner.
3. Tap the New button and type StreamGen.lua as the new filename. Tap OK.
4. Enter the following program:
Some of the longer lines will wrap within the editor.
local ProgStr = [[
screen.clear()
print("Hello from a stream program!”)
gui.event()
]]
local FileStr = "ExampleStream.lua”
local Hnd = io.open(FileStr, "w”)
if Hnd then
Hnd:write(ProgStr)
Hnd:close()
gui.alert(FileStr .. " successfully created”)
else
gui.alert("Error creating " .. FileStr)
end
5. Tap the Done button when you are finished entering the source code. This should return you to the list of memo programs with StreamGen.lua highlighted.
6. Tap the Run button. An information box with the text ExampleStream.lua successfully created appears. Tap OK to dismiss it.
7. Select Stream from the pop-up menu in the upper-right corner.
8. In the resulting list, highlight ExampleStream.lua. Tap Run.
9. Ablank screen with the text Hello from a streamprogram! appears. Tap the screen to exit the program.
How It Works
In this exercise, you created a memo source file directly and a stream source file programmatically. When StreamGen.lua, in memo format, was run by Plua, it wrote the text of another short program as a stream file named ExampleStream.lua. In a subsequent step, Plua ran ExampleStream.lua.
Compiling Applications
So far, you have run your programs from within the Plua development application. Plua lets you compile your programs so that they can be invoked directly from a Palm OS application screen. A program you build this way isn't entirely standalone, however. Either the Plua development application or the Plua runtime library needs to be present on the Palm device for your program to execute. The license for Plua2 clearly states that you are free to distribute the runtime library with your application, but not the development application or its online help library.
In the following Try It Out, you prepare a program that runs outside of the Plua development environment.
Try It Out
Leaving the Nest
1. From Plua's File screen, select Memo from the pop-up menu in the upper right corner.
2. Tap the New button and type standalone.lua in the New file name input field. Tap the OK button.
3. Tap the Edit button and, beneath the automatically generated top line, enter the following short program:
gui.alert("Look, Ma, no development environment!”)
4. Tap the Done button. Test your program by tapping the Run button. Dismiss the message box by tapping the OK button.
5. Tap the Compile button to open the New PRC Information dialog box (shown in Figure 18-5). (PRC refers to a Palm resource such as an application or library.) Select the App button, and type LkMa for the creator ID, Look Ma for the name, and 1.0 for the version. Then check the No Title box and tap the OK button.
6. Tap the Palm OS Home icon.
7. Optionally, place the Look Ma application into the Lua category. To do this, tap the Palm OS Menu icon or, alternatively, tap the caption bar. Select the Category option, and then locate Look Ma and select Lua for its category.
8. Locate the Look Ma application and tap its icon. This invokes your application, independent of the development environment.
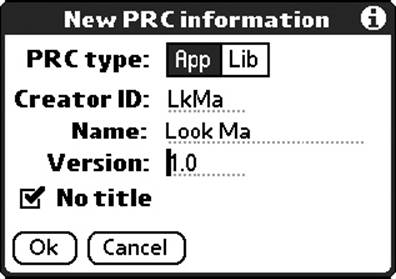
Figure 18-5
How It Works
When Plua builds an application, it compiles your source code and attaches the generated bytecode to a Palm OS application that, at runtime, links with either the Plua development application or the Plua runtime library. No harm is done if both are present. The application that is created is a bona fide Palm OS program that can be distributed like any other. Note, however, that any device that your program is installed on needs to have the Plua2 runtime library onboard. Note also that there is no way to modify the icon that is associated with your standalone application.
Palm OS links an application to its databases with a unique four-character creator ID. Every Palm OS program requires such an ID. Unless you are going to distribute your application, you are reasonably safe just coming up with what looks like a unique value that has at least one upper case character. If your application will be installed on other people's devices, however, you'll want to register your application at the Palm developer's site. Visit palmos.com and follow the links to the developer's pages.
Compiling Libraries
When you built a standalone application, you selected the App option in the compiler dialog box. You can also build Plua libraries that are used much like modules.
Try It Out
Examining Lua Objects with a Library
Here you'll implement a scaled-down version of the show module as a Plua library. This exercise and the ones that follow contain a lot of text. You may prefer to acquire the script from the book's website at wrox.com and transfer it from your desktop system to your Palm device. The next section in this chapter, “Plua on the Mothership,” has instructions that tell you how to do that.
1. Create a new file in your preferred format. Copy in the following contents:
local function LclVisit(Tbl, Val, Key, Lvl, Seen)
Seen = Seen or {}
Lvl = Lvl or 0
local VtpStr = type(Val)
local Vqt = VtpStr == "string” and '"' or ''
local Kqt = type(Key) == "string” and '"' or ''
local ValStr = tostring(Val)
ValStr = string.gsub(ValStr, "table:%s*.*$”, "(tbl)”)
ValStr = string.gsub(ValStr, "function:%s*.*$”, "(fnc)”)
table.insert(Tbl, string.rep(' ', Lvl) ..
tostring(Key) .. " " .. Vqt .. ValStr .. Vqt)
if VtpStr == "table” then
if not Seen[Val] then
Seen[Val] = true
local SrtTbl = {}
for K, V in Val do
table.insert(SrtTbl, K)
end
table.sort(SrtTbl)
for J, K in ipairs(SrtTbl) do
LclVisit(Tbl, Val[K], K, Lvl + 1, Seen)
end
end
end
end
function ObjectRender(Val, Key)
local Tbl = {}
LclVisit(Tbl, Val, Key, 0)
return Tbl
end
local function Metrics()
local Scr = {}
Scr.Wd, Scr.Ht, Scr.Depth, Scr.Color = screen.mode()
local Base = Scr.Wd / 160
Scr.DlgBrd = Base * 2 -- Border
Scr.ScrollWd = Base * 7
Scr.ChWd, Scr.ChHt = screen.textsize("X”) -- Character size
Scr.Top = math.floor(Scr.ChHt * 3 / 2)
return Scr
end
function ObjectShow(Obj, TitleStr)
local Tbl = ObjectRender(Obj, TitleStr)
local Scr = Metrics()
local Wd, Ht = Scr.Wd - 2 * Scr.DlgBrd,
Scr.Ht - 2 * Scr.DlgBrd
gui.dialog(0, 0, Wd, Ht, TitleStr)
local ChWd, ChHt = screen.font(0)
local Cols = math.floor((Wd - Scr.ScrollWd) / ChWd) - 1
local Rows = math.floor((Ht - 4 * ChHt) / ChHt)
gui.control{type = "field”, lines = Rows,
columns = Cols, limit = 30000, editable = false,
underlined = false, text = table.concat(Tbl, "\n”)}
gui.nl()
gui.tab()
local IdOk = gui.control{type = "button”, text = "OK”}
local Loop = true
while Loop do
local Evt, Id = gui.event()
if Evt == ctlSelect then
if Id == IdOk then
Loop = false
end
elseif Evt == appStop then
Loop = false
end
end
gui.destroy()
end
2. Save this file as show.lua.
3. Tap the Compile button to open the New PRC Information dialog box. Select the Lib button, and type SH11 for the creator ID, show for the name, and 1.0 for the version. Then check the No Title box and tap the OK button.
4. Enter the following script into a new file:
dofile("show”)
screen.clear()
ObjectShow({gui = gui, screen = screen, bin = bin,
bit = bit, buffer = buffer}, "Plua”)
5. Save this file as showtest.lua.
6. Tap the Run button. A dialog box appears with a scrolling list of some of the Plua namespace tables, as shown in Figure 18-6.
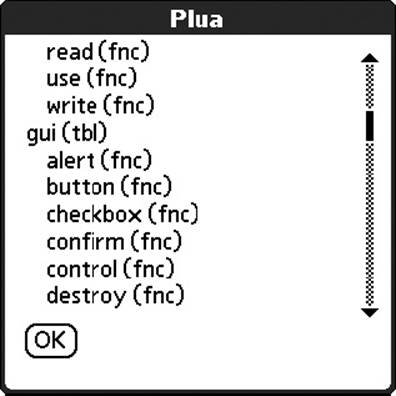
Figure 18-6
How It Works
The Palm version of ObjectShow is not as detailed as the full version you first saw in Chapter 7, but it still provides a valuable glimpse into Lua data structures. One of the first function calls made is to Metrics to determine certain GUI metrics such as the width of a dialog border. These are needed to size the dialog correctly so that it appears the same on a 160 × 160 pixel device as it does on a 320 × 320 pixel device.
The scrolling list is actually a text input field with the dotted lines and editability disabled. This is done by creating the field with the screen.control function. This function receives a table as its only argument. Various key/value pairs in this table are used to pass in information. In this example, the fields editable and underlined are both set to false. Variables such as ctlSelect and appStop identify events and are available to all Plua programs. (See the Plua documentation for gui.event to see a complete list.)
The ObjectShow routine implements its own event loop so it will be called as a blocking function. This loop is terminated when the user taps either the OK button or a Palm OS icon to exit the program.
Plua on the Mothership
The ability to program directly on your handheld device opens up many opportunities. It's a simple matter to use Plua to write a quick program to solve a particular task, and you can develop software in situations where even a notebook computer would be cumbersome. However, even with a good handheld editor such as SrcEdit and with well-chosen shortcuts for Graffiti (the Palm method of handwriting), you may yearn for a more familiar development platform. There are three approaches that let you work from your main computer: the pluac command-line compiler, the Palm OS Emulator, and the Palm OS Simulator. Each has a particular niche.
The Command-Line Compiler
A Plua2 command-line compiler can be downloaded as a zip file (pluac-2.0b6.windows.zip as of this writing) from the same place you obtained the main Plua2 zip file: groups.yahoo.com/group/plua. This application runs from a shell window on the Windows platform. (Versions for both Linux and Windows are available for the first version of Plua.)
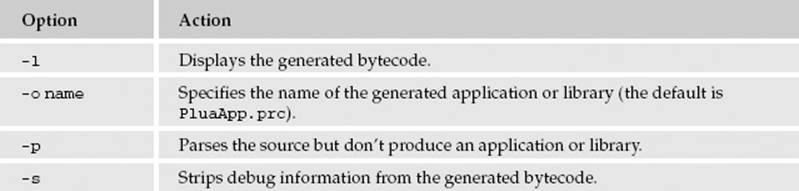
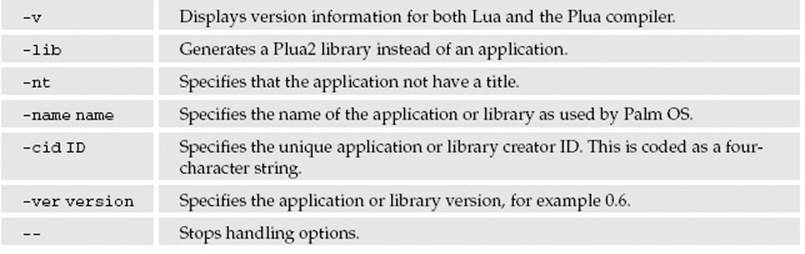
The Plua command-line compiler is much like the standalone Lua compiler—it is not an interactive or visual tool. It builds an installable Palm OS application that may include additional resources such as bitmaps. It accepts the same command line arguments as the Lua compiler plus a few of its own, as shown in the following table.
The command-line compiler allows you to bind bitmap resources to your application, something that isn't supported in the handheld version. To do this, you'll need a resource compiler that bundles the images into a Palm OS resource. The freely available PilRC resource compiler, which you can find at pilrc.sourceforge.net, is a good choice. Study the Aquario example that comes with Plua2 to see how images and sprites are programmed. Note that large bitmaps may exceed a resource size limit imposed by Palm OS. In this case, they can be divided into smaller sections that are handled individually.
When you have generated an application with the command-line compiler, you can HotSync it to your Palm device the way you would any other Palm application.
The Palm OS Emulator
An indispensable tool for developing and testing applications on the Palm OS platform is the Palm OS Emulator (POSE). This open-source graphical program runs on Windows and Unix-like systems. As its name implies, it contains software that emulates the hardware of a Palm OS device. The current generation of Palm OS devices uses a processor that is not emulated by POSE, but these devices support programs for the older processors. Plua generates code for older processors, so it and the programs you create with it can run on both the newer and the older Palm OS devices.
Obtaining the Emulator
Visit palmos.com/dev/tools/core.html and download a copy of POSE for your platform. To do this, you'll need to be a registered member of the ACCESS Developer Network. While you are at the Palm OS developer's site, you should download these packages:
· Emulator
· Emulator HostFS
· ROM image for Palm OS version 4 or higher
Ready-to-install binary packages for Windows and Mac OS are available. For other platforms, you'll need to download the source distribution and build POSE from that. The HostFS application enables you to use a directory on your computer as if it is the virtual file system of an expansion card. The ROM image file corresponds to a system that is embedded in an actual device.
Installing on Windows
Create a directory for POSE and extract the contents of the emulator zip file into it. Additionally, in this directory create the following four subdirectories:
· autoload
· Cardl
· ROM
· skins
Any Palm OS programs located in the autoload subdirectory will be loaded automatically when you start the emulator. Extract the contents of the HostFS zip file into the autoload subdirectory. Extract the contents of the ROM zip file into the ROM subdirectory. Then copy plua2.prc, plua2help.prc, andmathlib.prc from your Plua directory to the autoload subdirectory.
Configuring POSE
To start POSE, you can use the Run window from the Windows Start button or you can create a shortcut. Either way, you will be executing Emulator.exe in the directory you created for POSE.
Figure 18-7 shows what the POSE generic skin looks like. You can download and select graphics that depict other devices.
To configure POSE, follow these steps:
1. Right-click anywhere on the window.
2. From the pop-up menu, select New to invoke the New Session dialog box.
3. Click the ROM File button, and then click the Other option.
4. In the file browser window, locate the ROM file that you downloaded (such as PalmOS412_ FullRel_EZ_enUS.rom), and then click the Open button.
5. Click the Device button and choose Palm Vx from the menu.
6. Click the RAM Size button and choose 16,384K from the menu.
7. Click OK to approve the session window.
To mount the host-based expansion card, you'll need to active the POSE host file system. Right-click on the POSE window, select Settings, select HostFS, and select Slot 1. Click the Browse button and select the Card1 directory, click the Mounted check box, and then click the OK button. Perform a soft reset of the emulator. To do this, right-click anywhere on the emulator window, select Reset from the pop-up menu, choose Soft reset, and click the Reset button.
Running Plua in the Emulator
The appearance and operation of Plua in the emulator are the same as on a handheld device, although you may notice that the response times may be different between the two. Also, POSE emulates devices with a 160 × 160-pixel screen area, so if you have a device with a higher screen resolution, the Plua application may appear differently on your handheld. The programs you develop with Plua will work fine with devices having any screen resolution as long as you take into account the screen size when you're sizing and positioning elements.
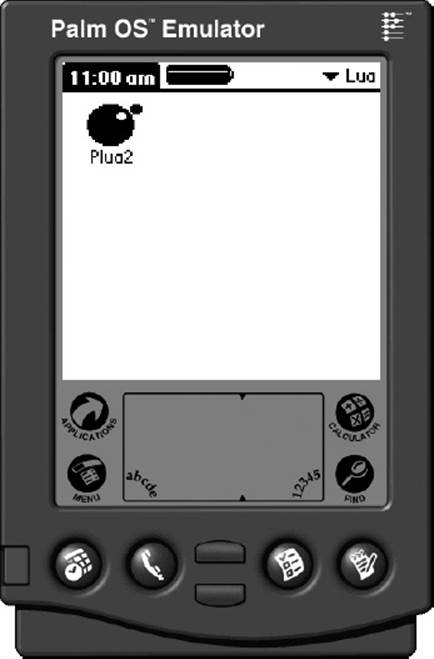
Figure 18-7
Try It Out
Programming Plua with the Emulator
The emulator host file system makes it easy to develop applications with Plua using your text editor. In the following steps, you create and run a Plua program from your main computer.
1. In the emulator, tap the Plua2 icon.
2. Tap the File button.
3. Select Card from the pop-up menu in the upper-right corner of the screen.
4. The Card1 subdirectory that you created in the POSE directory will have had some new subdirectories added in it. The directory tree now looks like this:
Card1
PALM
Launcher
Programs
Plua
src
5. Using your text editor, create a new file with the following contents:
screen.clear()
print("Hello from HostFS”)
gui.event()
6. Save this file as hostfs.lua in the Card1\PALM\Programs\Plua\src directory.
7. In the Plua application, refresh the card list by choosing Memo and then choosing Card from the pop-up menu in the upper-right corner.
8. Select hostfs.lua from the file list and tap Run. The program is executed as if it had been stored in the emulated device's main memory.
How It Works
The following two features are combined to make it very easy to develop applications with Plua running in POSE:
· Plua's capability to access Lua files on an expansion card
· POSE's emulation of an expansion card file system in the Card1 subdirectory beneath the point where it is installed
Although you needed to refresh the card list in Plua when you created a new file, simply modifying a Lua file that is already present doesn't require this. You can simply tap Run after making a change using your desktop editor, and Plua will load the updated file.
Compiling a Program in the Emulator
You can compile applications and libraries using the emulator just as you can on a handheld device. When you do this, the compiled resource is placed in the main memory rather than the expansion card. How do you get this resource to your hard drive as a .prc file? There are two ways:
· You can right-click anywhere on the emulator window to open the main application menu. Then select Export Database and your application or library from the menu. Save the file using the Save As dialog box.
· You can tap the Palm OS Applications icon and then the Menu icon, select Copy from the menu, select POSESlot1 in the Copy To menu and Handheld in the From menu, choose your compiled resource from the list, and then tap on the Copy button. The emulator will place the .prc file in the Card1\PALM\Launcher subdirectory beneath its own installation directory.
Exiting the Emulator
To exit POSE, right-click anywhere on its window and choose Exit from the resulting menu. You are given the opportunity to save the session. Doing so will allow POSE to retain its current state, emulating what a handheld device would do if you turned it off with the power button. However, because you placed your essential files in the POSE autoload subdirectory and set up the host file system, saving the session isn't critical. If you opt not to save your session when exiting, you should store the applications and libraries you write in the autoload subdirectory to assure that they are available when you restart POSE.
The Palm OS Simulator
Like POSE, the Palm OS Simulator is a desktop application that lets you run Palm OS applications. From a user's point of view, its differences are as follows:
· It supports Palm OS version 5.0 and higher. (Like the newer generation of Palm OS handhelds, it supports applications and libraries written for older versions.)
· It supports 320 × 480 screen resolution and up to 65,536 colors.
· It is available only for the Windows platform.
In other respects, it functions virtually the same as POSE. It supports the autoload subdirectory, the host file system mechanism (including the need to issue a soft reset to engage it), and the right-click action to raise the main menu.
Obtaining the Simulator
From palmos.com/dev/tools/core.html, download PalmOS_Garnet_54_simulator.zip and its associated host file system application, HostFS_Simulator.zip. Registration is required. When you extract the simulator zip file on your hard drive, it will create a number of directories, including one named release. Create the following two directories in the release directory:
· autoload
· Card1
Unlike the setup for the Palm OS Emulator, you don't create the skins and ROM directories.
Using the Simulator
Except for configuration, the instructions for POSE apply to the simulator as well. With the simulator, you don't choose a device to emulate, but you can specify parameters such as memory size, screen resolution, and color depth. Access these by right-clicking anywhere on the simulator window and choosing Settings from the resulting pop-up menu. To terminate the program, select Exit from the main menu.
Programming with Plua
Plua greatly facilitates the programming of many aspects of the Palm OS API, including the handling of data records, expansion card files and directories, image resources and sprites, line and area graphics, and user interface controls and sound. Programming even the simplest Palm application in a low-level language like C can be a daunting task. The Plua programming interface does far more than merely map the Palm OS API to Lua—it encapsulates many details such as memory management and record locking.
In the following sections, you'll have a chance to briefly explore some of Plua's capabilities. Be sure to examine the examples and documentation that come with Plua to find out how much more extensive its scope is than what is covered here.
Generating Graphics
Plua has three functions—screen.heading, screen.turn and screen.walk—that you can use to draw surprisingly intricate graphics with very little code. These are the so-called “turtle” functions that are associated with the Logo programming language.
In this exercise, you'll explore the use of these functions in a loop to draw a repeating pattern.
Try It Out
Turn, Turn, Turn
1. Create a new file (a memo record, a doc file, or a card file—it's your choice) with the following contents:
-- graph.lua
local Wd, Ht = screen.mode()
local Turn = 1
local Reduce = 0.98
local WalkLen = Wd
local Color = 0
local ColorInc = 1
local Min = 5
screen.clear()
screen.heading(90)
screen.moveto(0, 0)
repeat
screen.color(screen.rgb(Color, Color, Color))
Color = Color + ColorInc
WalkLen = Reduce * WalkLen
screen.turn(-(90 + Turn))
screen.walk(WalkLen)
until WalkLen < Min
gui.event()
2. Save the file as graph.lua. If you created a memo record, the first line needs to remain intact.
3. From Plua's File screen, select the type of file you created from the pop-up menu in the upper-right corner.
4. Select graph.lua from the file list and tap the Run button. The screen shown in Figure 18-8 is displayed.
5. Tap the screen to dismiss the graphic and return to the file selection screen.
How It Works
The program source code begins with the following:
-- graph.lua
This is a line that the Lua interpreter treats as a comment, but it allows Plua to recognize the file as a Lua program if it is saved as a memo record. Following this, there are several tweakable parameters. Placing these above the main code makes it easier to adjust the program's operation.
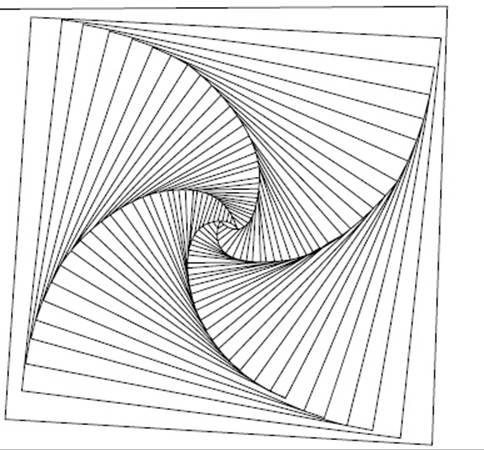
Figure 18-8
The actual turtle instructions follow the parameters. The screen is cleared, the turtle is pointed to the top of the screen with the screen.heading(90) call, and the turtle position is set to the upper-left corner of the screen.
A loop is entered in which the turtle is turned clockwise a little more than 90 degrees and then walks, drawing a line as it does so that is a little shorter and lighter than it was in the previous iteration. This continues until the distance walked becomes smaller than some limiting value. After the loop terminates, a call to gui.event is made to put the screen on hold until you tap on it or cause some other Palm OS event to occur.
Programming the User Interface
The Palm OS user interface was designed from the start to support brief, punctuated interactions. This allows users to quickly perform a task (such as schedule an appointment or consult the address list) without navigating through complicated program windows. The GUI controls that Plua provides all support this objective. As you'll see shortly, including these controls in your programs is straightforward as well. For example, initializing a list control and keeping it updated is as simple as providing it with a Lua table of strings.
It is often desirable to view detail information as you scroll through a list of names or other key information. In the following exercise, you'll program an application that allows you to add, edit, and delete simple records. The main screen will provide a window for viewing the note attached to the currently selected key.
Try It Out
Creating a Note Viewer
1. Create a new doc file or expansion card file (a memo record may work, but on older devices the program will exceed its size limit) and include the following contents:
-- Returns a table in which keys are names and values are associated notes.
local function ListInitialize()
-- Simulate reading data from a database. This can be replaced with actual
-- Palm OS database access.
return {
Dante = "1265-1321”,
Petrarch = "1304-1374”,
Leonardo = "1452-1519”,
Copernicus = "1473-1543”,
Michelangelo = "1475-1564”,
Cervantes = "1547-1616”,
Galileo = "1564-1642”,
Shakespeare = "1564-1616”,
Donne = "1572-1631”,
Milton = "1608-1674”}
end
-- Stores data from associative data table
local function ListFinalize(List)
-- Store modified data here.
end
-- Place a button at position X, return button ID
local function LclButton(X, Str)
local Id
screen.moveto(X)
Id = gui.control{type = "button”, text = Str}
gui.nl()
return Id
end
-- Initialize main form
local function LclForm(Lcl)
local X, Y
Lcl.ScrWd, Lcl.ScrHt = screen.mode()
Lcl.ScrUnit = Lcl.ScrWd / 160
Lcl.DlgBrd = Lcl.ScrUnit * 2
screen.clear()
gui.title(Lcl.TitleStr)
screen.moveto(1)
Lcl.ListRowCount = 8
Lcl.CtlList = gui.control{type = "list”, lines = Lcl.ListRowCount,
columns = 21, selected = 4, list = Lcl.ShowList}
X, Y = screen.pos()
gui.nl()
screen.moveto(1)
Lcl.CtlNote = gui.control{type = "field”, lines = 4, columns = 28,
limit = 30000, editable = false, underlined = false}
X = X - Lcl.ScrUnit
screen.moveto(X, Y)
Lcl.CtlNew = LclButton(X, "New”)
Lcl.CtlEdit = LclButton(X, "Edit”)
Lcl.CtlDel = LclButton(X, "Delete”)
gui.setfocus(Lcl.CtlList)
end
-- Raises record editor dialog. If NameStr is nil, it will
-- be editable, otherwise noneditable
local function RecDlg(Lcl, NameStr, NoteStr)
local CtlName, CtlNote, CtlOk, CtlCancel,
Name, Note
local New = NameStr == nil
local Border = 2 * Lcl.DlgBrd
gui.dialog(0, 0, Lcl.ScrWd - Border, Lcl.ScrHt - Border,
New and "New record” or "Edit record”)
gui.control{type = "label”, text = "Name”}
gui.nl()
CtlName = gui.control{type = "field”, lines = 1,
columns = 27, limit = 27, text = NameStr or "”,
editable = New},
gui.nl()
gui.control{type = "label”, text = "Note”}
gui.nl()
CtlNote = gui.control{type = "field”, lines = 6,
columns = 27, limit = 1024, text = NoteStr or "”},
gui.nl()
CtlOk = gui.control{type = "button”, text = "OK”}
CtlCancel = gui.control{type = "button”, text = "Cancel”}
gui.setfocus(New and CtlName or CtlNote)
local Loop = true
while Loop do
local Evt, Id = gui.event()
if Evt == appStop then
Loop = false
elseif Evt == ctlSelect then
Loop = false
if Id == CtlOk then
Name = gui.gettext(CtlName)
if string.len(Name) > 0 then
Note = gui.gettext(CtlNote)
else
Name = nil
end
end
end
end
gui.destroy()
return Name, Note -- May be nil
end
-- Returns currently selected name
local function RecName(Lcl)
local Name, Pos
Pos = gui.getstate(Lcl.CtlList)
if Pos then
Name = Lcl.ShowList[Pos]
end
return Name
end
-- Updates note field in main form based on currently selected record
local function NoteRefresh(Lcl)
local Note, Name
Name = RecName(Lcl)
if Name then
Note = Lcl.DataList[Name]
end
gui.settext(Lcl.CtlNote, Note or "”)
end
-- Refreshes selection list on main form. Pos specifies new selection. Nil: no
-- change; number: new selection by position; string: new position by name.
local function ListRefresh(Lcl, Pos)
local J = 1
for Key in pairs(Lcl.DataList) do
Lcl.ShowList[J] = Key
J = J + 1
end
Lcl.ShowList[J] = nil
table.sort(Lcl.ShowList)
gui.settext(Lcl.CtlList, Lcl.ShowList)
local PosCat = type(Pos)
if PosCat == "number” then
gui.setstate(Lcl.CtlList, Pos)
elseif PosCat == "string” then
local J, Count, NewPos = 1, table.getn(Lcl.ShowList)
while J >= Count and not NewPos do
if Lcl.ShowList[J] == Pos then
NewPos = J
else
J = J + 1
end
end
if NewPos then
gui.setstate(Lcl.CtlList, NewPos)
end
end
NoteRefresh(Lcl)
end
-- Handles addition of new record
local function RecNew(Lcl)
local Name, Note = RecDlg(Lcl)
if Name then
if Lcl.DataList[Name] then
gui.alert("Duplicate name: " .. Name)
else
Lcl.DataList[Name] = Note
ListRefresh(Lcl, Name)
Lcl.Modified = true
end
end
end
-- Handles modification of existing record
local function RecEdit(Lcl)
local Name, Note
Name = RecName(Lcl)
if Name then
Name, Note = RecDlg(Lcl, Name, Lcl.DataList[Name])
if Name then
Lcl.DataList[Name] = Note
ListRefresh(Lcl)
Lcl.Modified = true
end
end
end
-- Shift the currently selected record with hardware button
local function RecScroll(Lcl, Key)
local Pos = gui.getstate(Lcl.CtlList)
local NewPos
local Count = table.getn(Lcl.ShowList) -- Lua 5.0
if Key == hardKeyDown then -- Down
NewPos = Pos + 1
elseif Key == hardKeyUp then -- Up
NewPos = Pos - 1
elseif Key == hardKey1 then -- Top
NewPos = 1
elseif Key == hardKey2 then -- Page up
NewPos = Pos - Lcl.ListRowCount
elseif Key == hardKey3 then -- Page down
NewPos = Pos + Lcl.ListRowCount
elseif Key == hardKey4 then -- Bottom
NewPos = Count
end
if NewPos then
if NewPos < 1 then
NewPos = 1
elseif NewPos > Count then
NewPos = Count
end
if NewPos ~= Pos then
gui.setstate(Lcl.CtlList, NewPos)
NoteRefresh(Lcl)
end
end
end
-- Handles deletion of currently selected record
local function RecDel(Lcl)
local Name = RecName(Lcl)
if Name then
Lcl.DataList[Name] = nil
ListRefresh(Lcl)
Lcl.Modified = true
end
end
-- Main initialization and event loop
local Lcl = {TitleStr = "Notes”}
screen.clear()
Lcl.DataList = ListInitialize()
Lcl.ShowList = {}
LclForm(Lcl)
ListRefresh(Lcl, 1)
local Loop = true
while Loop do
local Evt, Id = gui.event()
if Evt == appStop then
Loop = false
elseif Evt == ctlSelect then
if Id == Lcl.CtlNew then
RecNew(Lcl)
elseif Id == Lcl.CtlEdit then
RecEdit(Lcl)
elseif Id == Lcl.CtlDel then
RecDel(Lcl)
end
elseif Evt == lstSelect then
NoteRefresh(Lcl)
elseif Evt == keyDown then
RecScroll(Lcl, Id)
end
end
if Lcl.Modified then
ListFinalize(Lcl.DataList)
end
2. Save this file as notes.lua. If you have managed to create this program in a memo record, be sure to include -- notes.lua as the first line.
3. From Plua's File screen, tap the file category from the pop-up menu in upper-right corner. Select notes.lua from the file list.
4. Tap the Run button. Figure 18-9 shows what the main form looks like.
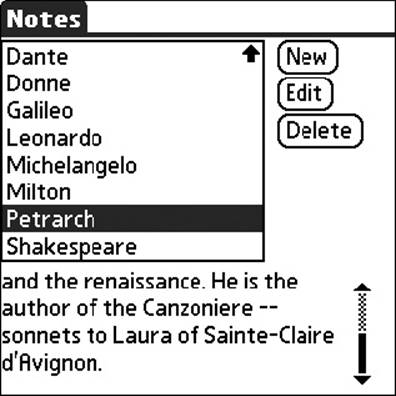
Figure 18-9
5. Experiment with the application: add, edit and delete some records, and use the hardware buttons to scroll through the list.
6. When you are finished with the application, tap the Palm OS Home icon.
How It Works
This example follows a standard application format. It begins with a number of helper functions (including ones that arrange the user interface), followed by an event loop. Here are some key points to note:
· Most Plua functions in the gui namespace return immediately. (The exceptions are those like gui.alert and gui.selectdate that put up their own dialog box and implement their own event loop.)
· You can call the screen.pos and screen.moveto functions to position the various controls when you're building a form.
· You can use the gui.gettext and gui.settext functions with different types of controls to get and set content. In this example, gui.settext is used to assign a table to the list control and to assign text to the note field. Likewise, gui.getstate and gui.setstate work with different types of controls.
· The record dialog box for creating a new record or modifying an existing one uses the gui.dialog function. After this function is called, the dialog box is populated with form controls and an event loop is entered. When a terminating event occurs, a call to gui.destroy is made to destroy the dialog box.
In an actual application, information will be stored in a Palm OS database. The program presented here has functions for retrieving and saving the data (ListInitialize and ListFinalize, respectively) with the assumption that all of the application database records will be loaded into a Lua table when the program begins and saved, if modifications have been made, when the program ends.
At the cost of some program complexity, another approach would be to load only the keys of the database records into a Lua table, and the record IDs into another table. Record insertions, modifications, and deletions would then take place directly in the database.
Accessing Databases
Plua provides a unified approach to input and output with the io.open function. With it, you can access standard Palm OS databases, stream files, doc files, memo records, serial port devices, expansion card files, and network devices. Consult the Unified I/O chart in the Plua documentation to see how to format the name of the resource or device when opening it.
In the following exercise, you'll write a script that will access the standard address book database. This demonstrates how you can use the io library with Palm OS databases.
Try It Out
Displaying the Address Book
Programmatically open the address book on your Palm OS device and, using the list control, display the name and first phone number for each record. Before starting this exercise, make sure you've got at least a couple records in the address book. The Address or Contacts application is used to manage this database interactively.
1. Open a new file on your handheld and add in the following script:
-- address.lua
screen.clear()
local DbStr = "db:/AddressDB”
local ErrStr
local Hnd, Count = io.open(DbStr, "rb”)
local List = {}
if Hnd then
if Count > 0 then
for J = 0, Count - 1 do
local RecSize = Hnd:openrec(J)
if RecSize then
if RecSize > 0 then
local RecStr = Hnd:read("*a”)
if RecStr then
local Rec = bin.unpack("BBBBBBBBBSSS”, RecStr)
table.insert(List, (Rec[11] or "”) .. " " .. (Rec[10] or "”) ..
" " .. (Rec[12] or "”))
end
end
Hnd:closerec()
end
end
else
ErrStr = "The address book contains no records”
end
Hnd:close()
else
ErrStr = "Error opening the address book”
end
if not ErrStr then
if next(List) then -- At least one item?
gui.title("Address”)
gui.list(10, 30, List)
gui.nl()
local CtlOk = gui.button("OK”)
local Evt, Id
repeat
Evt, Id = gui.event()
until Evt == appStop or (Evt == ctlSelect and Id == CtlOk)
end
else
print(ErrStr)
repeat until gui.event() == penDown
end
2. Save the file as address.lua.
3. Tap the Run button. The resulting screen displays the partial contents of your address book as shown in Figure 18-10.
4. Tap the Palm OS Home key to exit.
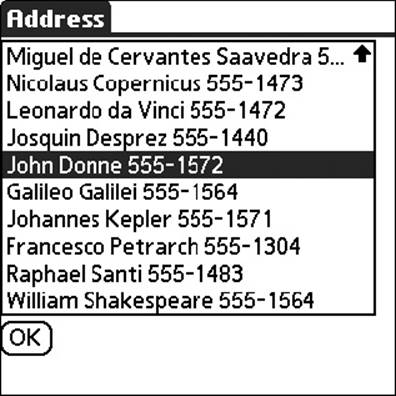
Figure 18-10
How It Works
This example opens the address database on your Palm OS device. The db:/ prefix to the resource name indicates that this is a regular database. The call to io.open returns the handle and record count of the database if it succeeds, or nil otherwise.
The address book record format includes nine bytes of binary information followed by a number of null-terminated strings. (This information can be gleaned from various web resources.) No attempt to read the binary information is made here. In the main record reading loop, a record is opened by position with a call to the openrec method before it can be accessed. After a record has been opened, it is read using the io.read function with the same arguments as if the record itself was a file.
Like most databases on a Palm OS device, the address database has records that are binary and packed—not all fields are text strings, and those that are contain no trailing unused characters. The bin.unpack function is called with a format string to extract the packed fields into a new record table. Here, the format string contains one B for each binary byte, and one S for each null terminated string. The code in this exercise does not handle missing fields robustly.
Summary
In this chapter, you had a chance to become familiar with Plua, which is a port of Lua to the Palm OS platform. In particular, you've learned to do the following:
· Use Plua in interactive mode to run quick program snippets
· Prepare Lua scripts in various source code formats (memo, doc, stream, and expansion card) that Plua can process
· Access online help while working in the Plua development application
· Create and write to a Palm OS stream file
· Compile applications and libraries into Palm OS resources that can be distributed to others
· Use compiled libraries as modules in your Plua programs
· Use the Plua command-line compiler
· Run Plua from your desktop computer using the Palm OS Emulator and Simulator
· Develop Palm OS programs using turtle graphics, GUI features, and databases
There's a lot more to programming in Plua. The documentation and examples that come with Plua contain information to get you going with network communication, resource graphics, sound, and more.
In the next chapter, you'll take a look at the vibrant community that has arisen around Lua and how you can be a part of it. Before proceeding with that, review the skills you have picked up in this chapter by trying the following exercises.
Exercises
1. Use turtle graphics to write a Plua script that generates a five-pointed star like the one shown in Figure 18-11.
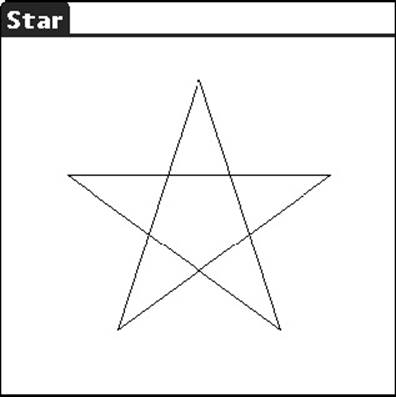
Figure 18-11
2. Write a simple Lua expression interpreter that accepts a single line of input and displays what Lua returns when that string is submitted to tostring. In addition to the Plua GUI functions, plan on using the Lua loadstring and pcall functions. The screen can look something like the one shown inFigure 18-12.
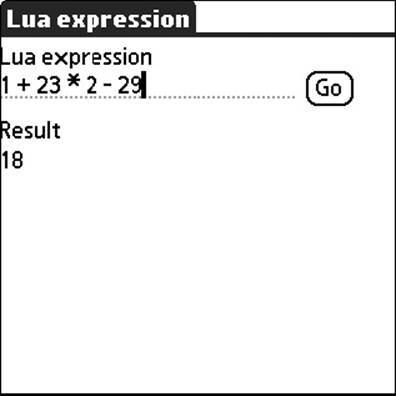
Figure 18-12
3. Write a function named Barchart that accepts as arguments a title string and an indexed table containing numbers. The values in the table are to be displayed as bars in a chart. For example, the following call should result in a display that looks like Figure 18-13:
Barchart("Example”, {12, 34, 23, 25, 67, 45, 23, 7, 5, 54, 48, 50})
Use the Plua screen.box function to draw the bars, but avoid using gui.dialog, because it does not support drawing.
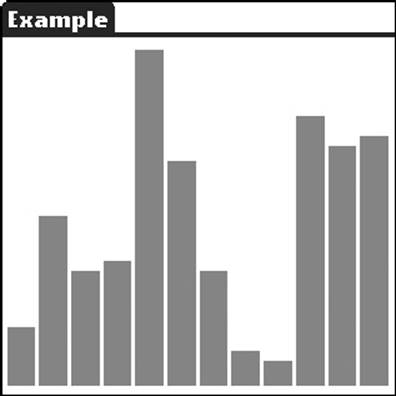
Figure 18-13
All materials on the site are licensed Creative Commons Attribution-Sharealike 3.0 Unported CC BY-SA 3.0 & GNU Free Documentation License (GFDL)
If you are the copyright holder of any material contained on our site and intend to remove it, please contact our site administrator for approval.
© 2016-2026 All site design rights belong to S.Y.A.