Creating E-Learning Games with Unity (2014)
Chapter 10. An Extensible Game Framework Pattern in Unity
In the final chapter of the book, we will take all of the pieces we have developed so far and assemble them into our final game! To do this, we will need to complete a framework for loading and unloading individual scene files, connect that system into level transition logic, and restructure a number of classes and Prefabs in our scene files so that they work together using this pattern. We will also develop the code necessary to ensure that the references that were created inside the editor can be reconnected as necessary when scenes are streamed in. Having a consistent pattern with which we can organize our scripts based on when they are needed gives us a reusable and extendible pattern we can use to quickly add new levels to our game. Not only this, but it can be used as a framework for future games that you develop!
In this chapter, we will cover the following topics:
· Load additively
· Using delete/load patterns
· Refactoring our work
Load additively
Recall from Chapter 4, Mission One – Future Proofing the Code, that Unity3D supports the development of games that span multiple scene files. One benefit of splitting a game up into multiple scene files is that we (as programmers) can assign different lifespans to objects based on the scene file they belong to.
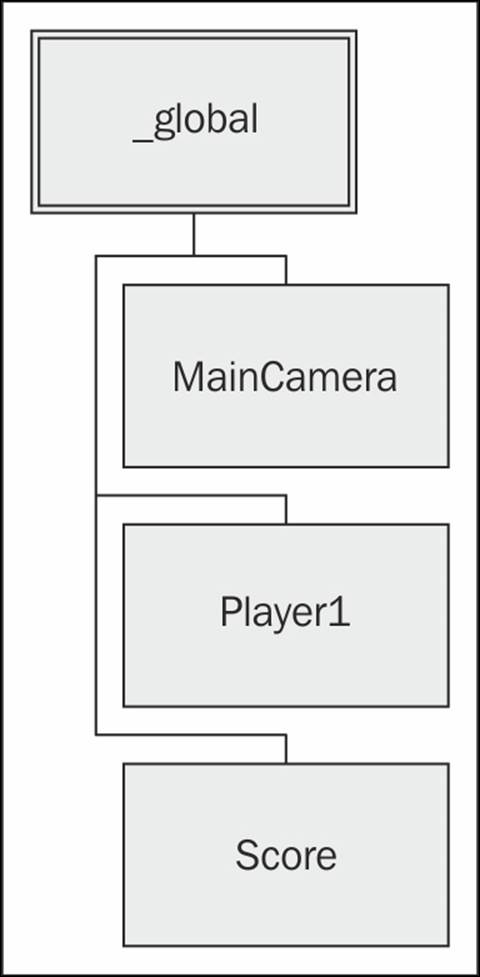
The MAIN scene file is designed to not only be the entry point of our game, but it also contains the _global GameObject. This GameObject acts as the parent of a hierarchy of objects that have persistent scope throughout the game. The following GameObjects should have global scope:
· MainCamera: This is the camera to which the scene will be rendered
· Player1: This is the name of the GameObject that is the playable character or the hero of the game
· Score: This is a GUIText element that displays the number of points the player has acquired so far
Every other GameObject will exist in one of the three scene files for the game—LEVEL1, LEVEL2, or LEVEL3. Using the Application.LoadLevelAdditive() method, we can make sure each playable level has both the objects from the persistent _global scene file and the level-specific objects from the scene. This is because Application.LoadLevelAdditive() combines the GameObjects from the loaded scene with the GameObjects that are already loaded. Contrast this with Application.LoadLevel(), which will destroy the previously instantiated scene file and all of its GameObjects before loading the new scene, and the reason for loading additively is clear; we want both sets of GameObjects to be loaded so we use the additive load!
Of course, we need to be absolutely sure that there are no duplicate objects in the _global scene file and the level-specific scene, or else logical errors will ensue. Let's ensure we can do this now by updating the GameMgr script as follows:
1. In GameMgr.cs, ensure that the eGameState enumeration has entries for Invalid, MainMenu, Level1, Level2, and Level3. We will delegate responsibility for switching levels to this class instance. Each of these enumerated values will correspond to the scene file with the same name. Through this enumeration, we will inform the GameMgr script which scene file to load:
2. public enum eGameState
3. {
4. eGS_Invalid = -1, //enum for error case
5. eGS_MainMenu = 0,
6. eGS_Level1 = 1,
7. eGS_Level2 = 2,
8. eGS_Level3 = 3
};
9. In the Update() loop, we ensure that there is no longer any auto state-changing code. This method should be empty at this point. For the most prompt level, change the signal rather than letting this system update the level when it detects a change. We will callChangeLevel() directly from the level complete pop ups when a change is required.
Using delete/load patterns
Having planned how to organize our GameObjects into globally persistent and level-specific lifespans, we must further update GameMgr.cs to ensure that only the current level is loaded at any time. To do this, perform the following steps:
1. In GameMgr.cs, inside the ChangeState() method, the first thing we do is tell the game to delete any potential level-specific GameObject hierarchies that may be loaded:
2. if (GameObject.Find("_level1")
3. Destroy (GameObject.Find ("_level1"));
4. if (GameObject.Find("_level2")
5. Destroy (GameObject.Find ("_level2"));
6. if (GameObject.Find("_level3")
Destroy (GameObject.Find ("_level3"));
7. Inside the switch statement that ChangeState() implements, we signal a LoadLevelAdditive() call when changing to LEVEL1, LEVEL2, or LEVEL3. However, when switching to MAIN, we simply need to destroy the _level1, _level2, and _level3 GameObjects since _globalremains persistent throughout.
8. Recall that each level-specific scene file must be constructed according to the pattern _leveln (where n is 1 for LEVEL1, 2 for LEVEL2, and 3 for LEVEL3). This is because while Unity does provide a function for loading a scene file additively, it does not provide a way to unload a scene file once the objects have been loaded. To accomplish this, we perform the following steps:
1. Ensure that we construct our levels with a single parent GameObject at the root.
2. Name the root GameObject so that it follows a consistent pattern. We use _level1, _level2, and _level3 for our scene files.
9. This permits us to implement an unload scene file functionality by simply destroying the root object. Doing this will destroy the object and all the objects that are children of its hierarchy.
Congratulations! You have now finished updating the GameMgr system to handle loading and unloading scene files. This system of loading additively and naming the scene files consistently may be extended to other gameplay levels.
Refactoring our work
Now that we have a fully functional system for loading and unloading scene files, we will dedicate our attention to the integration and refactoring of the remaining GameObjects, hierarchies, and scripts.
The pop-up system
To refactor our pop-up system, perform the following steps to complete the moving of our game content from the testbed scene file to the MAIN scene file.
Updating level 3 pop ups
Let's begin by refactoring the pop-up panel system:
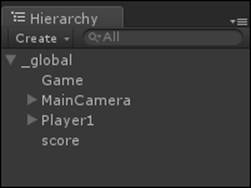
1. Under _global, ensure that the player (named Player1), camera (named MainCamera), and game (named Game) child objects can be found. Also make sure that a GameObject of type GUITexture named score is present as shown in the following screenshot:
2. We will change the behavior of the pop ups that are shown at the start and completion of each level. Rather than instantiating them from a Prefab, we will add them at design time in the editor and selectively activate and deactivate them as necessary. This will make the task of refactoring the pop-up system more straightforward.
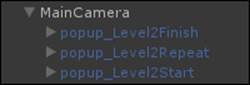
3. Load the TESTBED3 scene file. Find the MainCamera GameObject, and open the Hierarchy tab to display the UI pop up's child objects.
4. Press the Shift key, select all of the pop ups, and copy them with Ctrl + C.
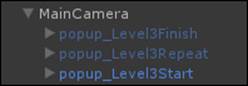
5. Load the MAIN scene file. Select the MainCamera GameObject, and paste the level 3 pop ups with Ctrl + V. This will paste the pop ups that we copied from step 4.
6. Now, we need to change the behavior of the buttons. Starting with the pop up named popup_Level3Start, select this panel, and open the Button1 hierarchy.
7. Change the actions of this button to CameraLookPlayer() so that the camera looks down on the start of the level, and call DisableObject(popup_Level3Start) so that this panel disappears but remains attached to the MainCamera GameObject persistent in _global.
8. Next, select the popup_Level3Finish panel, and open the Button1 hierarchy.
9. Change the first action of this button to LoadLevelMainMenu (to tell GameMgr to unload Level3, leaving just _global).
10. Change the next action to HideGameObject(popup_Level3Finish) to disable update and rendering of this panel, while still leaving it attached to the MainCamera GameObject persistent in _global.
11. Change the last action to EnableObject(popup_MainMenu) to make the main menu show up again.
12. Lastly, click on the popup_Level3Repeat panel, and open the Button1 hierarchy.
13. Change the first action to CameraLookUp() to point the camera towards the sky (which makes the pop ups show up in a visually appealing way).
14. Change the next action to LoadLevel3. This will tell the GameMgr script to destroy the _level3 GameObject (and all of its children), and then reload the _level3 GameObject, thereby resetting its state.
15. Change the final action to DisableObject(popup_Level3Repeat) to hide this panel while still leaving it attached to the MainCamera GameObject persistent in _global.
Congratulations! You have finished updating the pop ups for Level3. Let's move on to pop ups of Level2.
Updating level 2 pop ups
Now that pop ups of level 3 are updated, let's follow the same procedure to update the pop ups for the second level.
1. Load the TESTBED2 scene file. Find the MainCamera GameObject, and open hierarchy to display the UI pop up's child objects.
2. Press Shift, select all of the pop ups, and copy them with Ctrl + C.
3. Load the MAIN scene file. Select the MainCamera GameObject, and paste the level 3 pop ups with Ctrl + V.
4. Now we need to change the behavior of the buttons. Starting with popup_Level2Start, select this panel, and open the Button1 hierarchy.
5. Change the first action of this button to EnableObject(raceStarterPrefab). Set the reference to raceStarterPrefab by dragging-and-dropping it from the Project tab directly into the data field of the button's action. This way, the button will instance a GameObject from this Prefab on click.
6. Change the second action of this button to EnableObject(setupLevel2Prefab). In a similar fashion as earlier, set the reference to setupLevel2Prefab by dragging-and-dropping it from the Project tab directly in to the data field of the button's action. This way, the button will instance a GameObject from the Prefab on click.
7. Change the third action to CameraLookPlayer() so that the view will track the hero as the character moves in the world.
8. Change the last action of this button to HideGameObject(popup_Level2Start) to hide this panel while still leaving it attached to the MainCamera GameObject persistent in _global.
9. Next, select the popup_Level2Finished button, and open up the Button1 hierarchy.
10. Change the first action of this button to CameraLookUp(). This will orient the camera to a point above the player so that the subsequent pop ups will display in a visually appealing way.
11. Change the next action of this button to LoadLevel3 (to tell GameMgr to unload Level2 by destroying the root GameObject instance, and then load Level3). Throughout this process, _global and all of its child objects will be preserved.
12. Change the last action of this button to HideGameObject(popup_Level2Finish). This will disable the rendering of this panel while still leaving it attached to the MainCamera GameObject persistent in _global.
13. Lastly, select the popup_Level2Repeat panel, and open the Button1 hierarchy.
14. Change the first action to CameraLookUp() to point the camera towards the sky (which makes the pop ups show up in a visually appealing way).
15. Change the next action to LoadLevel2. This will tell the GameMgr script to destroy the _level2 GameObject (and all of its children), and then reload the _level2 GameObject, thereby resetting its state.
Congratulations! You have finished updating the pop ups for level 2. Let's move on to the pop ups of level 1.
Updating level 1 pop ups
Now that pop ups of level 2 are finished, let's update and modify the pop ups for level 1.
1. We need to create a start pop up for level 1 that matches the pattern of the other two levels.
2. Copy popup_Level2Start from MainCamera, and paste it on MainCamera as well.
3. Rename the copy as popup_Level1Start.
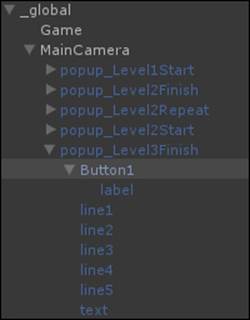
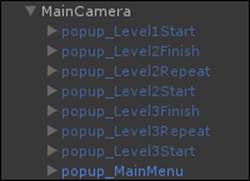
4. At this point in time, your MainCamera hierarchy should look similar to the following screenshot:
5. Set the first action on Button1 to CameraLookPlayer() so that when the level starts, the camera will track the hero.
6. Set the second action on Button1 to DisableObject(popup_Level1Start). This will hide this panel while still leaving it attached to the MainCamera GameObject persistent in _global.
7. We will not need to allow the user to repeat level 1. Since there is no fail condition, we will not need a repeat pop up for level 1. The level complete pop up will be dynamically allocated as a reward for finishing the level 1 mission of returning flags to the monument as originally designed.
8. To support easy programmatic access to these pop ups, we will write a PopupMgr script to store references to these pop-up objects. This class will then be used to access these pop ups for easy enabling and disabling.
9. Create a new script with the C# script wizard named PopupMgr, and attach it to the MainCamera instance in the _global hierarchy.
10. Give this script eight public references to the following GameObject pop ups:
· public GameObject MainMenu;
· public GameObject Level1Start;
· public GameObject Level2Start;
· public GameObject Level2Finish;
· public GameObject Level2Repeat;
· public GameObject Level3Start;
· public GameObject Level3Finish;
· public GameObject Level3Repeat;
These are references to the actual pop-up objects that the PopupMgr script will enable and disable as the game moves from level to level.
11. Make sure to assign the actual instances of these GameObjects to these variables in the PopupMgr script by either dragging-and-dropping them in or selecting them from the selection panel.
Congratulations! The pop-up system has been fully refactored for our game. As level 1 is now fully functional, let's turn our attention to integrating the rest of TESTBED2 and TESTBED3 into our game.
Refactoring level 2
At this point, our project is composed of two scene files; a main scene file that contains the persistent _global GameObject hierarchy, and the LEVEL1 scene file that contains the _level1 hierarchy for all of the level 1 scripts and objects. While TESTBED2 and TESTBED3were designed to be played as standalone levels, our final game framework is not. Hence, we now need to port and integrate the remaining game content into this pattern.
1. Open the TESTBED2 scene file into the editor. Locate the _global and _level2 GameObjects in the Hierarchy tab.
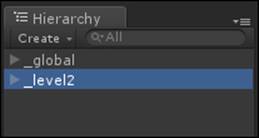
2. Copy the _level2 GameObject with Ctrl + C.
3. Create a new scene file named LEVEL2.
4. Paste the _level2 object hierarchy into this scene with Ctrl + V.
5. You now have an appropriate scene file package for level 2. Let's repeat the process for level 3.
6. Open the TESTBED3 scene file into the editor. Locate the _global and _level3 GameObject in the Hierarchy tab.
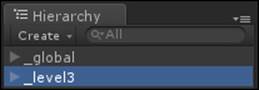
7. Copy the _level3 GameObject with Ctrl + C.
8. Create a new scene file named LEVEL3.
9. Paste the _level3 object hierarchy into this scene with Ctrl + V.
You now have an appropriate scene file package for level 3.
Implementing a system to connect object references
Level 1 signals level 2 to load when the Level 1 completes pop up's Next button is pressed; it signals for the _level1 GameObject to be destroyed and the _level2 GameObject to be loaded from the LEVEL2 scene file. We must refactor the start-up logic of _level2 so that we can find and connect some object references to GameObjects in the _global hierarchy.
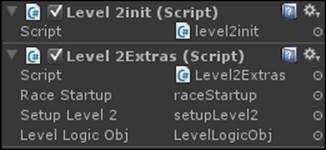
1. Create a new script named Level2Extras, and attach an instance of it to the _level2 GameObject. This script will be used to directly access certain GameObjects inside _level2 for enabling and disabling.
2. Give the Level2Extras script the following three public GameObject references; these are the assorted GameObjects that this script will be in charge of activating:
3. public GameObject raceStartup;
4. public GameObject setupLevel2;
5. public GameObject LevelLogicObj;
6. Drag-and-drop the LevelLogicObj object from the _level2 GameObject hierarchy into the LevelLogicObj reference of the Level2Extras script.
7. Drag-and-drop the setupLevel2 GameObject from the _level2 GameObject hierarchy into the setupLevel2 reference of the Level2Extras script.
8. Drag-and-drop the raceStartup GameObject from the _level2 GameObject hierarchy into the raceStartup reference of the Level2Extras script.
9. At this point your Level2Extras script should look something like the following:
10. Observe that as you click on the populated references inside Level2Extras, Unity highlights the GameObject instances with a unique yellow border so that you can quickly find the actual object instances that are connected in the hierarchy.

11. Now that Level2Extras has been properly configured, create another script named Level2Init, and add an instance of it to the _level2 GameObject.
12. The level2Init script will use the Level2Extras script as an interface to find specific GameObjects and connect them into the appropriate level 2 pop ups. This needs to happen since the pop ups are global; they cannot preserve references to objects that are dynamically loaded from later levels.
13. In the start() method of Level2Init, the script attempts to locate the Player GameObject, named as either Player or Player1:
14.GameObject playerObj = GameObject.Find ("Player1");
15.if (playerObj == null)
playerObj = GameObject.Find ("Player");
16. If a suitable player object is found, the code sets the initial position and the orientation for the player. This is so that when level 2 starts, the player begins at the starting line of the race:
17.if (playerObj != null)
18.{
19. playerObj.transform.position =
20. new Vector3(-110.0f, 3.0f, 166.0f);
21. p.GetComponent<playerControls>().moveDirection =
22. new Vector3(1.0f, 0.0f, 0.0f);
}
23. In the Update() method of Level2Init, the class attempts to find the MainCamera GameObject. If it can be found, the PopupMgr script component is stored:
24.GameObject camObj = GameObject.Find ("MainCamera");
25.if (camObj)
26.{
PopupMgr ppm = camObj.GetComponent<PopupMgr>();
27. If an instance of the PopupMgr script can be found on this GameObject, we activate popup_Level2Start and deactivate popup_Level2Finish and popup_Level2Repeat. By setting these objects to active, we tell Unity that these scripts should be allowed to call their internal Update() methods. Conversely, when setting SetActive(false), we can tell Unity to suspend scripts as needed:
28.// set up the level2 popups initial state
29.ppm.Level2Finish.SetActive(false);
30.ppm.Level2Repeat.SetActive (false);
ppm.Level2Start.SetActive(true);
31. Then we store a reference to the PopupMgrScript on the popup_Level2Start GameObject for later use:
32.PopupButtonScript pbs =
33. ppm.Level2Start.transform.FindChild
("Button1").gameObject.GetComponent<PopupButtonScript>();
34. We also store a reference to the Level2Extras script for easy access later in the method:
Level2Extras l2x = GetComponent<Level2Extras>();
35. If the Level2Extras component can be found, we need to associate setupLevel2 to the popup_Level2Start instance on its first button action. Then, we associate raceStartup to the popup_Level2Start instance on its second button action:
36.pbs.actions[0].data.obj = l2x.setupLevel2;
pbs.actions[1].data.obj = l2x.raceStartup;
37. Next, we try to cache a reference to the response_ShowRaceResultsPopup component that is attached to LevelLogicObj inside Level2Extras:
response_ShowRaceResultsPopup rrp = l2x.LevelLogicObj.GetComponent<response_ShowRaceResultsPopup>();
38. If the race results pop-up component can be found, we connect the player, GameMgr, PassPopup, and FailPopup to this script. This will allow this response script to operate correctly during the race:
39.rrp.player = GameObject.Find ("Player1");
40.rrp.gm = GameObject.Find ("Game").GetComponent<gameMgr>();
41.rrp.passPopup = ppm.Level2Finish;
rrp.retryPopup = ppm.Level2Repeat;
42. After this, the Level2Init script will destroy itself. This stops the init logic from running more than once when _level2 is loaded. If _level2 is ever reloaded (during a restart perhaps), this script will be re-instanced when _level2 is loaded again.
Congratulations! The logic for configuring the missing references of level 2 on startup has been completed. Let's move our attention to how the mission 2 logic is actually set up.
Updating the SetupMission2 script
Prior to integrating the missions together, we developed our game so that mission 1, mission 2, and mission 3 individually selected five states from a bank of 50. While this is fine for playing them in isolation, we need to add continuity of the state selections across all three levels. We will do this by storing the selections when they are made in level 1, and then by restoring them as level 2 and level 3 are loaded.
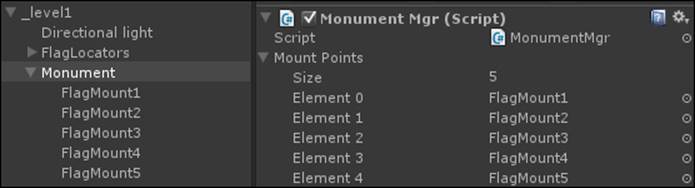
1. To begin, load the LEVEL1 scene file. Find the Monument GameObject, and open the SetupMissionOne script.
2. In the SetupMission() method, on line 65, we find the player GameObject named either Player or Player1:
3. GameObject playerObj = GameObject.Find ("Player1");
4. if (playerObj == null)
p = GameObject.Find ("Player");
5. If a player can be found, we cache a reference to the PlayerData component attached to it:
pd = p.GetComponent<playerData>();
6. If there are any flag choices in PlayerData at this point, we clear them. This is a reasonable assumption to make in level 1 as it is the first gameplay level that we encounter. The subsequent levels will access these values when populating their scenes. Clearing the flagChoices array before use is a good defensive practice so that we don't accidentally end up with more flag instances in the level than intended:
7. if (pd.flagChoices.Count > 0)
pd.flagChoices.Clear();
8. In the SetupMission() method, on line 92, as the initial set of flags are chosen, we store the flag index in the playerData component. Here, they will be carried with the player through level 2 and level 3:
9. if (pd != null)
pd.flagChoices.Add (index);
10. Now that the first mission has been successfully updated to store flag choices in PlayerData, we shall now move our attention towards refactoring level 2 and level 3 to use this data.
11. In the Start() method of the SetupMissionTwo script, while we are iterating over the flags, we check if there is a PlayerData component on the player. If one can be found, we assign the flag index from the list in PlayerData to the variable index rather than a randomly assigned one:
12.if (pd != null)
index = pd.flagChoices[k];
Congratulations! This completes the required updates for level 2. Now, when starting the game and selecting NEW, level 1 will be shown initially, and upon completion, the game will dynamically load level 2. Let's continue updating the code in the same light as we integrate and refactor level 3.
Refactoring level 3
When level 2 signals level 3 to load (when the player pressed the level 3 pop up's Continue button), it signals for the _level2 Gameobject to be destroyed and the _level3 GameObject to be loaded from the LEVEL3 scene file. We must refactor the start up logic of_level3 so that we can find and connect some object references to GameObjects in the _global hierarchy. To accomplish this, perform the following steps:
1. Create a new script named Level3Extras, and attach an instance of it to the _level3 GameObject. This script will be used to directly access certain GameObjects inside _level3 for enabling and disabling.
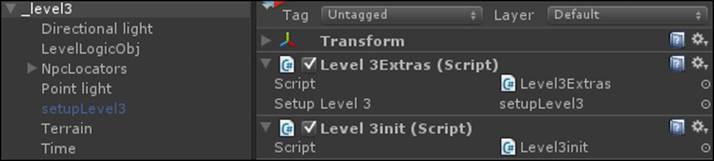
2. Give the Level3Extras script the following single public GameObject reference. The Level3Extras script needs a reference to the setupLevel3 object so that it can connect this reference to the appropriate pop-up button later on in the script:
public GameObject setupLevel3;
3. Drag-and-drop the SetupLevel3 GameObject from the _level3 GameObject hierarchy into the SetupLevel3 reference of the Level3Extras script.
4. Now that Level3Extras has been properly configured, create another script named Level3Init, and add an instance of it to the _level3 GameObject.
5. The level3Init script will use the Level3Extras as an interface to find specific GameObjects and connect them into the appropriate level 3 pop ups. This needs to happen since the pop ups are global; they cannot preserve references to objects that are dynamically loaded from subsequent levels in the game.
6. In Level3Init, we first try to find a reference to a GameObject named MainCamera:
GameObject go = GameObject.Find ("MainCamera");
7. If the MainCamera GameObject can be found, we try to cache a reference to the PopupMgr script component attached to it:
8. if (go)
9. {
PopupMgr ppm = go.GetComponent<PopupMgr>();
10. If the PopupMgr script can be found, we set the initial state of the UI pop ups for level 3. As before, we use SetActive(false) to suspend the Update() loop of some scripts and SetActive(true) to enable others. Namely, we deactivate popup_Level3Finish andpopup_Level3Restart. We then activate popup_Level3Start so that the level starts with the relevant UI displayed. Note that at this point, the camera is looking up from popup_Level2Finish:
11.if (ppm)
12.{
13. ppm.Level3Finish.SetActive (false);
14. ppm.Level3Repeat.SetActive(false);
ppm.Level3Start.SetActive(true);
15. Next, we try to cache a reference to PopupButtonScript, which is attached to button1 child of popup_Level3Start. We use transform.FindChild() to search for an object in a hierarchy by name. Once we find it, we can get the component for PopupButtonScript itself using GetComponent():
16.PopupButtonScript pbs =
17. ppm.Level3Start.transform.FindChild
("Button1").gameObject.GetComponent<PopupButtonScript>();
18. Now that we have PopupButtonScript, we assign a reference to the Level3Extras script (attached to this object) to the data field of the first action of PopupButtonScript. This way, when the button is clicked, the EnableObject action will operate on the SetupLevel3GameObject (accessed from Level3Extras):
19.Level3Extras l3x = GetComponent<Level3Extras>();
20.if (l3x)
21.{
22. pbs.actions[0].data.obj = l3x.setupLevel3;
}
23. Next, we connect the popup_Level3Finish pop up to the response_ShowLevel3Results component. This will allow LevelLogicObj to display the level complete UI:
24.GameObject llo = GameObject.Find ("LevelLogicObj");
25.if (llo != null)
26.{
27. llo.GetComponent<response_ShowLevel3Results>().passPopup = ppm.Level3Finish;
}
28. In _level3, the fail condition is triggered from the Timer GameObject, when the time remaining reaches zero. To enable this component to display the popup_Level3Repeat UI, we must connect them together via the PopupMgr script:
29.GameObject TimeObj = GameObject.Find ("Time");
30.if (TimeObj != null)
31.{
32. TimeObj.GetComponent<TimeScript>().failPopup =
33. ppm.Level3Repeat;
}
34. Congratulations! The initial setup for _level3 is now complete. Let's turn our attention to updating the SetupMissionThree() script. To begin, locate this script instance attached to the setupLevel3 object. As with the previous two examples, this script is responsible for connecting the missing references between pop ups that have global persistence and the GameObjects that they refer to inside of specific level scene files—inside _level3 in this instance.
35. At the beginning of Start(), we search for the Player GameObject (named either Player or Player1). If it is found, we store a reference to the PlayerData component for later use:
36.playerData pd = null;
37.GameObject go = GameObject.Find ("Player1");
38.if (go == null)
39. go = GameObject.Find ("Player");
40.if (go != null)
41.{
42. pd = go.GetComponent<playerData>();
}
43. Still in the start method, in the block where five random cards are chosen, we check for the presence of the PlayerData component on the player. If there is no data, it means we are playing this mission in standalone mode, and so we should use five randomly chosen indices. If, however, PlayerData has information contained therein, it means that we should use those indices to populate our world to ensure the flag choices are consistent with the previous level:
44.if (pd != null)
index = pd.flagChoices[k];
Congratulations! Mission 3 has been updated now to use the flag choices that were randomly chosen in LEVEL1 and reused in LEVEL2. With that, your e-learning game is complete! Please take a moment to pause, look at how far we have come since Chapter 1,Introduction to E-Learning and the Three Cs of 3D Games, and give yourself a pat on the back for a job well done!
Playing and distributing your game
Now that your game is done, we need to package it so that others can play it outside of the Unity development environment. Unity is a cross platform engine, and while that does mean that you can design once and build a game that runs on many types of hardware, let's build a version that works for Windows (the preferred development hardware for this text).
1. Open up the MAIN scene from the completed project.
2. Select Build Settings from the File drop-down menu.
3. On the Build Settings screen, make sure that the four scene files for our game have been added to the build. Namely, ensure that MAIN, LEVEL1, LEVEL2, and LEVEL3 are present.

4. To add a scene file to the build, open each scene file in the main Unity application, and then under this Build Settings screen, click on AddCurrent.
5. Simply select the platform you wish to build for from the options on the bottom-left corner of the Build Settings panel, and then click the Build button. A dialog box will pop up asking you where to save your .exe file and with what name. Our game is called Geography Quest.
6. Once the build is complete, navigate to that folder, and you have a game you can run with a double-click of the mouse! Don't forget to distribute the GeographyQuest_Data folder along with the GeographyQuest.exe program.
Reflecting on e-learning and game design
Let's review what we have implemented so far with this game in terms of e-learning strategy and technique. Our game has four scene files (MAIN, LEVEL1, LEVEL2, and LEVEL3). In the MAIN scene file lives the _global object hierarchy that holds the singleton class instances in the game: systems such as the Player, Camera, Game, and Light. Not only is this scene file the entry point to our game, but these objects persist as other level-specific scenes are loaded and unloaded.
Level 1 is the Find the Flags mission, wherein the user is taught about state names, state flags, and state trivia. As each flag is picked up, a trivia card is presented and placed in the inventory. The user can then click on these cards and review the trivia card throughout the game.
Level 2 is the Zombie Race level, wherein the user is quizzed on their retention of the material from Level 1. Adding an element of pressure to the game is the fact that zombies are chasing the player (they want to win the race before you do). Along the race, the player must interact with NPCs who quiz them on state flags. We explore the concept of cognitive flow and how to encourage the player to achieve this state of total engagement. We determine that to maximize flow, we need to design testing scenarios with tasks that are moderately challenging and that contain an element of tension or pressure.
Level 3 is the Park Ranger level, where the player has to race against a clock, find park visitors, and apply their knowledge to help each one with their question. Manipulating learned material at a level higher than memorization is an activity known to support long-term learning.
While this three-stage loop is used in the traditional classroom as well as in e-learning games to teach facts, it is also a great structure to teach game mechanics or other types of skills to the learner.
Summary
We have taken the components from mission1, testbed2, and testbed3, and integrated them together into one seamless game. The final game is composed of four scene files, each of which contains a single GameObject hierarchy. The top object in the hierarchy is given a name consistent with the scene filename. Some refactoring of existing systems was then required to fix up the classes at initialization time so that no missing or dangling references would be incurred.
Congratulations! We have now finished our e-learning game framework. Not only did we develop a game that exercises good teaching and learning pedagogy, we also implemented a number of core gameplay systems for the interactive elements in the game. While we proved the technology with a geography trivia game, the framework could be adapted and re-skinned for other topics. Logical potential directions for future work could include adding levels beyond the initial three. This could be done by developing more interactive objects for your game by fleshing out your library of condition-and-response classes for the decision manager, optimizing your code so that it can run efficiently on resource constrained platforms such as smartphones, or adding more polish to the game such as through audio or particles. No matter what, make sure you have fun in the process!