Activiti 5.x Business Process Management Beginner's Guide (2014)
Chapter 4. Management and Monitoring Using the Activiti Explorer
In the previous chapter, we learned about the Activiti Designer and how we can use it to develop business workflows. In this chapter, we will learn about the Activiti Explorer. The Activiti Explorer is a web-based application used to deploy, start, and manage the process instance. The end user can easily start the process, manage, and monitor it. The Activiti Explorer uses the H2 database by default, but we can easily change our database for the production environment.
This chapter covers the following topics:
· Overview of the Activiti Explorer
· Deployment of the process
· Process management
· Reporting
· Administration using the Activiti Explorer
The Activiti Explorer provides an end user application for technical and non-technical people.
An overview of the Activiti Explorer
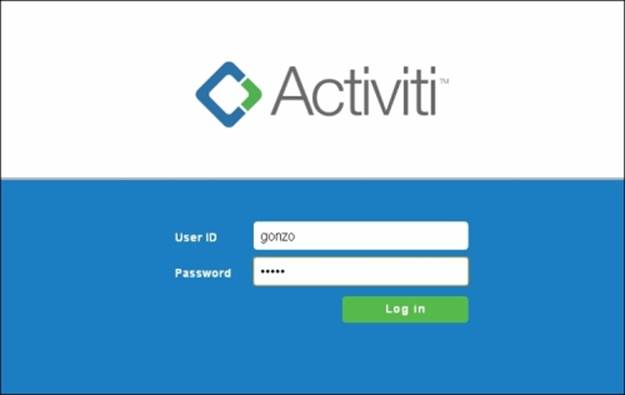
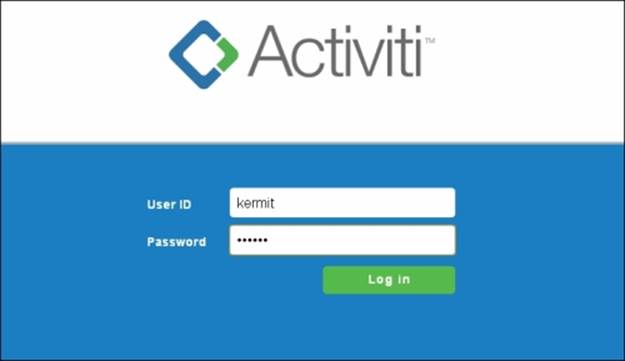
Here, we will just recall Chapter 1, Installing Activiti, in which we deployed the activiti-explorer.war file into Tomcat. We can access the Activiti Explorer by browsing to localhost:8080/Activiti-Explorer; upon doing this, we will get the following login screen:

You can log in using the following default user IDs and passwords:
· kermit/kermit is the admin with type security-role
· gonzo/gonzo is a simple user with type assignment
· fozzie/fozzie is a simple user with type assignment
After logging in successfully, we will get the following screen:

The features of the Activiti Explorer are as follows:
· Tasks: This tab manages all the task-related functionalities. The inbox will contain all the tasks assigned to the user. Tasks assigned to a group will be available in the Queued option. From this tab, we can start and complete the task.
· Processes: This tab manages the processes. We can view the processes that are in execution and those that are deployed into the engine as well as design and deploy business processes.
· Reports: This tab generates reports of the process that has been executed with information such as execution time, and saves those reports for future reference.
· Manage: This is a tab that offers complete administration functionalities and can be used to manage databases, process deployment, jobs, users, and so on.
A process with the Activiti Explorer
The Explorer provides the functionality to deploy a process. So, the process we have developed using the Eclipse tool can be deployed into the Explorer. We can view a process graphically if a process image is available. We can deploy the process using a .bar file, which can be generated using the Eclipse tool.
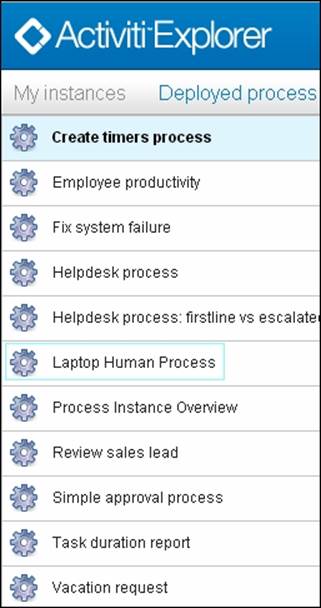
We have already deployed various processes into the Activiti Explorer. You can see Laptop Human Process under the Deployed process definitions tab in the following screenshot:
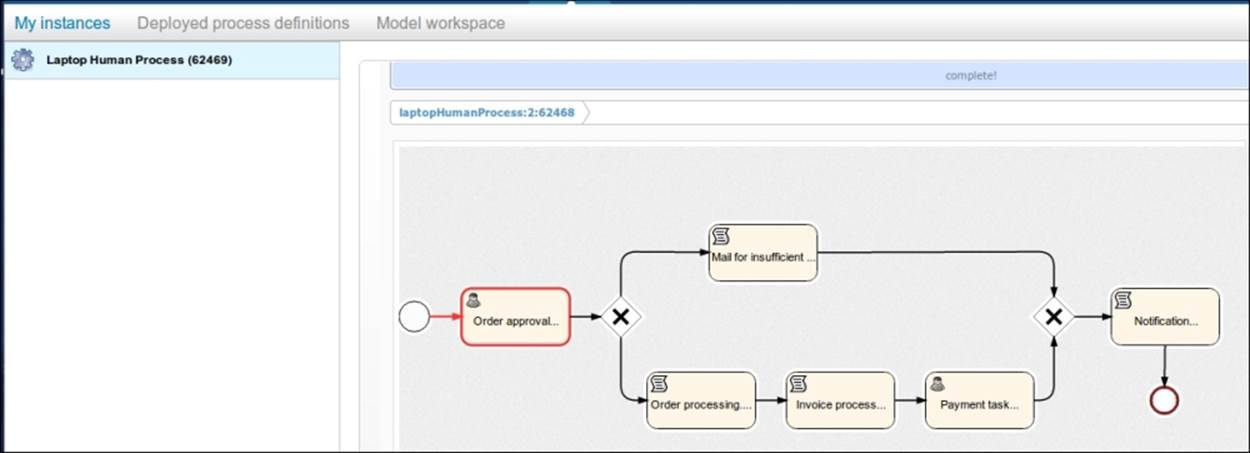
When we click on Laptop Human Process, we get the process diagram shown in the following diagram:
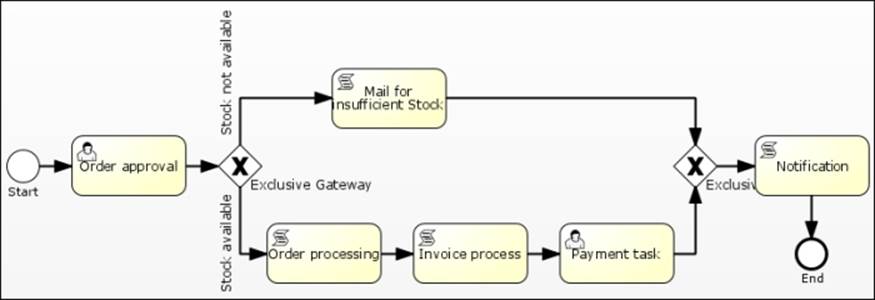
We can understand the process with the help of the preceding diagram. When a user places an order for a laptop, kermit will get an order-approval task. Then, if kermit rejects the order, the user will get a notification saying the product is out of stock. If the order is approved by kermit, the user will get a payment task, and after the payment is made, the user will get a notification.
Time for action – starting a process instance
We will now start an instance of the laptop order process. To start an instance, we have to perform the following steps:
1. The user who placed the order for the laptop should be the gonzo user. So, log in with the user ID and password as gonzo as shown in the following screenshot:
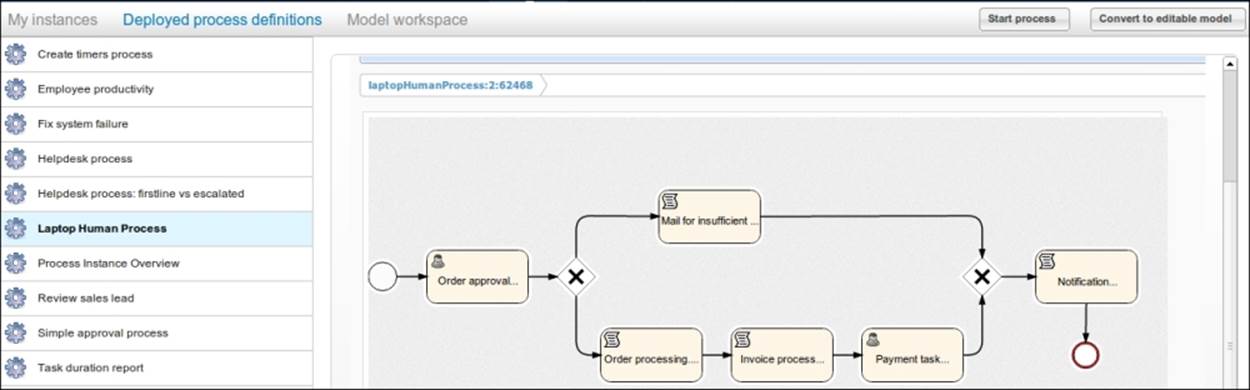
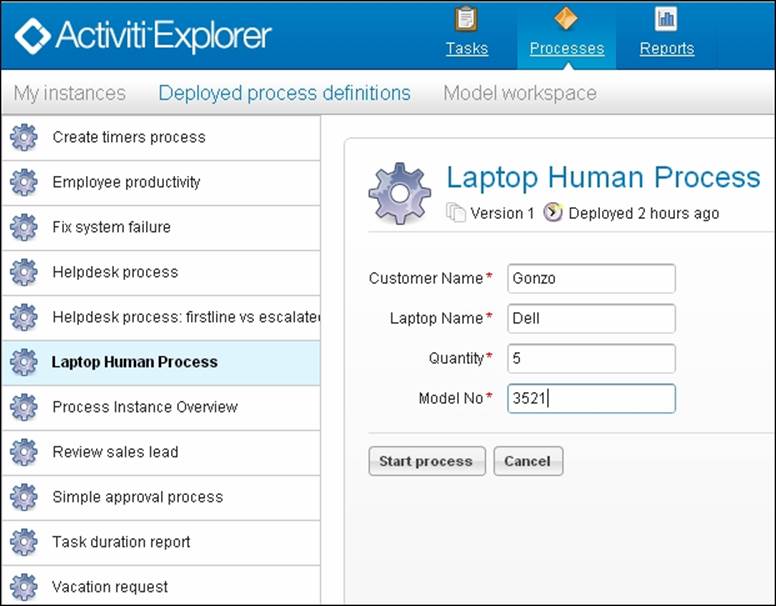
2. Now, start the process instance of the laptop order process. After logging in, browse to the Process tab, select the Laptop Human Process tab, and then click on Start process, as shown in the following screenshot:
3. We will now provide the details regarding the laptop to be ordered. So, at the start of the process, a form will be displayed with some fields. Fill in the required information and click on Start process as shown in the following screenshot:
4. When the process starts, you can view its status within the My instances tab, as shown in the following screenshot. This tab will provide information regarding the current task in execution.
What just happened?
In this section, we started an instance of the laptop order process through the gonzo user. So, the approval task is assigned to kermit.
Managing tasks with the Activiti Explorer
In the previous section, we started a process. Now, in this section, we will have a look at how to manage a task using the Activiti Explorer.

In the Tasks tab, we have all the information related to a task. As you can see in the previous screenshot, there are various menus within the Tasks tab. The menus are explained as follows:
· Inbox: This menu represents the list of tasks assigned to the user.
· MyTasks: This menu shows the tasks created by the user.
· Queued: This menu displays the list of tasks assigned to a group that the user belongs to. In order to execute a task, the user will have to claim the task from the Queued list.
· Involved: This menu displays the list of available tasks in which the user is involved.
· Archived: This menu represents the list of tasks completed by the user.
Time for action – working with user tasks
We have started the instance of the laptop order process as a gonzo user. Now, the approval task is assigned to the kermit user. So, let's complete that task by performing the following steps:
1. To complete the laptop order process, we will log in with the user ID and password as kermit, as shown in the following screenshot:
2. Once you log in as kermit, you will be redirected to the Inbox menu; if not, select the Tasks tab and then select the Inbox menu. The Inbox menu will have the number of tasks assigned to the user, as shown in the following screenshot:
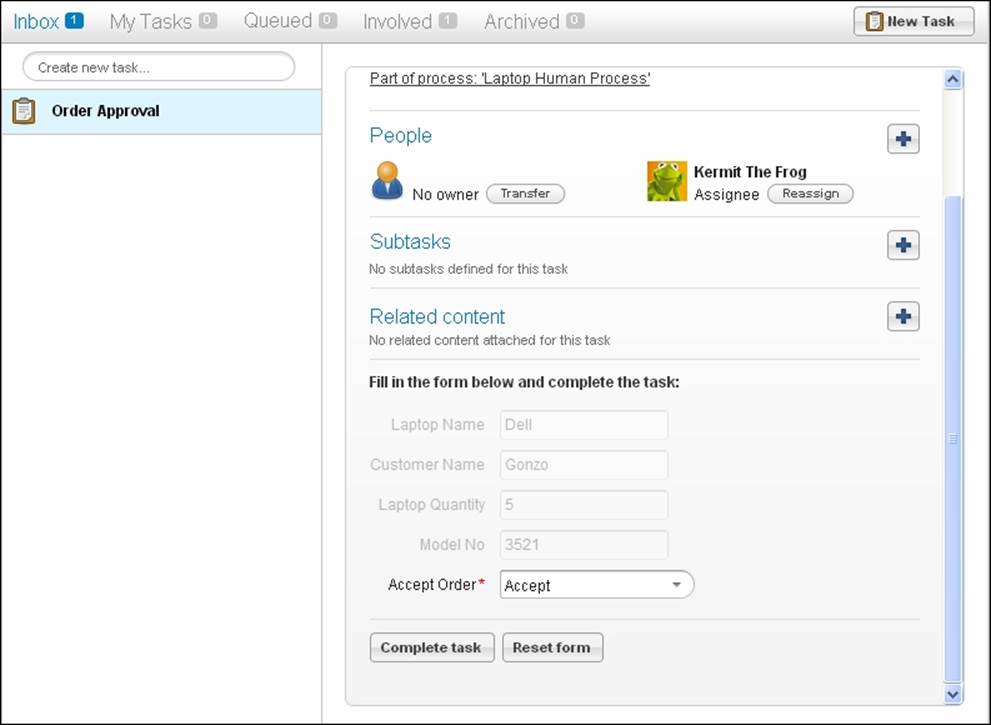
3. kermit can either accept or reject the order as per the information provided. If the order is accepted, gonzo will get the payment task in his inbox.
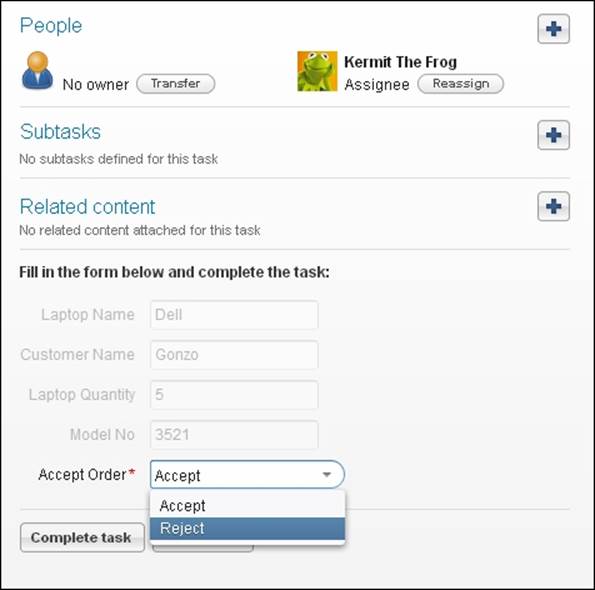
4. We will choose the Accept option for the order task. Therefore, gonzo will have his inbox populated with the payment task.
5. We will log in with gonzo to execute the payment task.
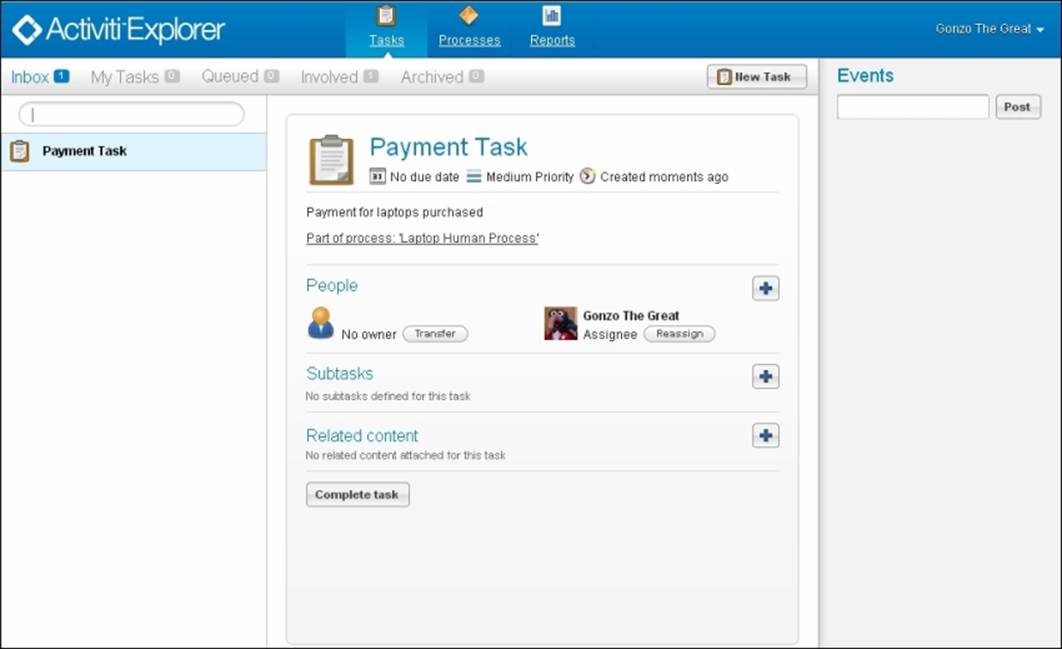
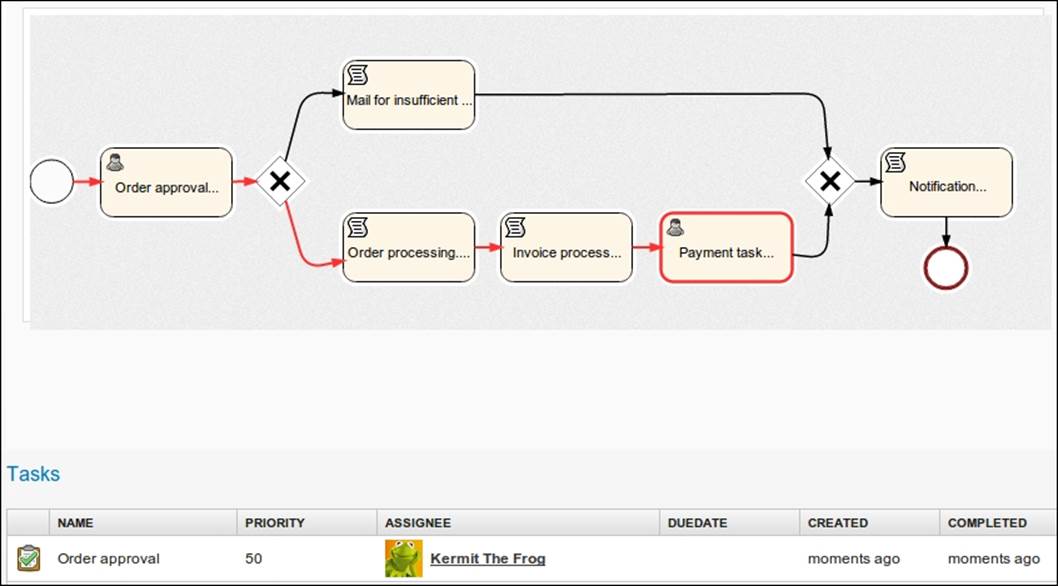
6. Before executing the payment task, we will view the state of our business process. Select the Processes tab and open the My instances view so that we can see the current status of the process highlighted with a red line.
7. Now, complete the payment task. The whole process is now completed.
What just happened?
We have completed the approval task that was assigned to kermit. We have also seen how we can see the current status of the process using the My Instance tab. At the end, we completed the payment task as a gonzo user.
Managing processes with the Activiti Explorer
We can easily manage processes using the Activiti Explorer. We can deploy a process that we have developed and we can also create new processes using the Activiti Modeler within the Activiti Explorer. It is also possible to change the business workflow after the deployment of a process using the Activiti Modeler. So, let's see how we can manage processes in the Activiti Explorer.
Time for action – process management
Here, we will show you the various different ways you can manage your process:
1. Log in as the admin user. Here, the admin user is kermit.
2. Click on the Processes tab. We will get a list of processes that are available by default and that we have deployed previously, as shown in the following screenshot:
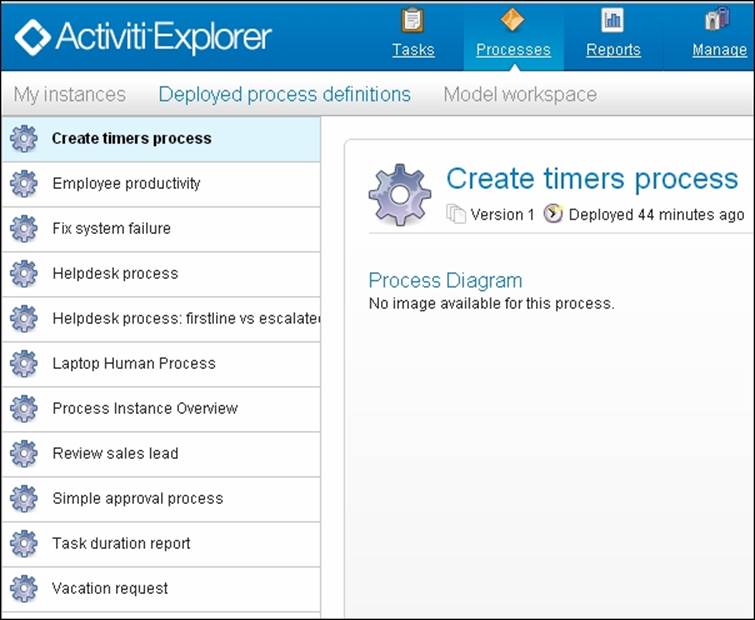
3. If we want to start any process, we have to select that particular process from the process list and click on the Start process button.
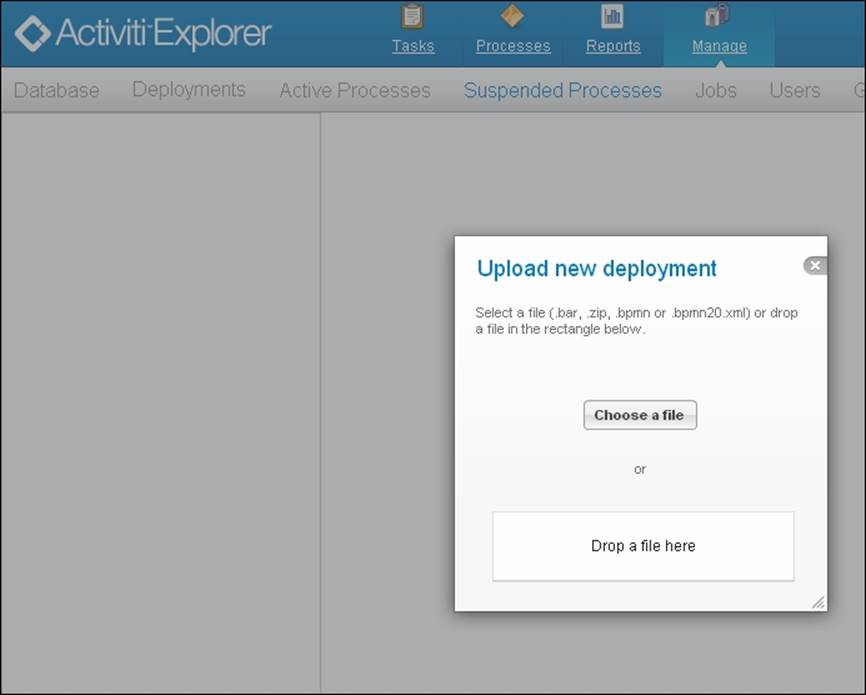
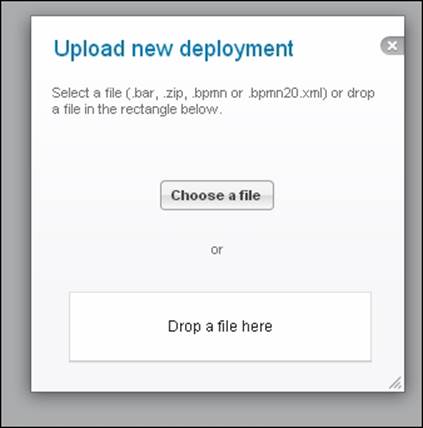
4. To deploy a process on the Explorer, we have to click on the upload new option by navigating to Manage | Deployments. It will ask for a .bar, .zip, .bpmn, or bpmn20.xml file as shown in the following screenshot:
5. If we want to suspend a particular process at a particular time or date, we have to carry out the following steps:
1. First go to the Active Processes tab and, select the process that is to be suspended. Here, we will select the laptop order process.
2. Now click on the Suspend button. It will ask you when you wish to suspend the process, as shown in the following screenshot:
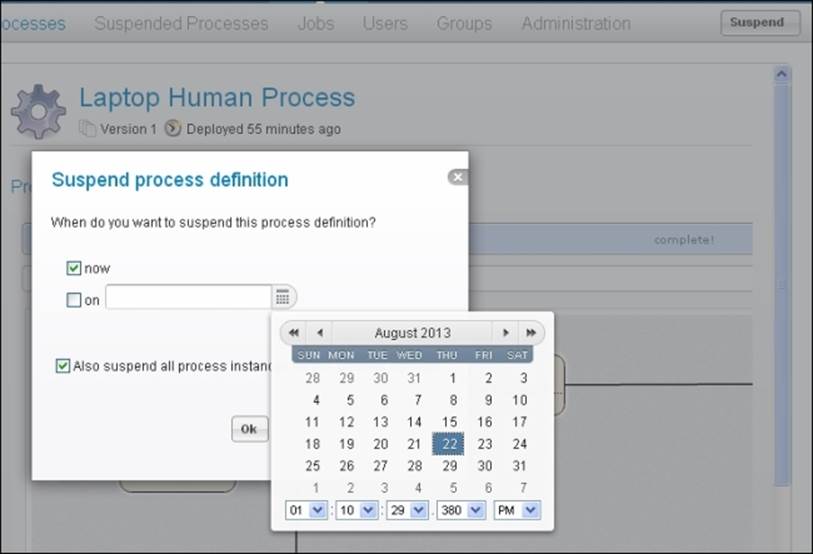
3. We can select a date from the calendar that is displayed. Choose now so no user can start the process for the laptop order approval.
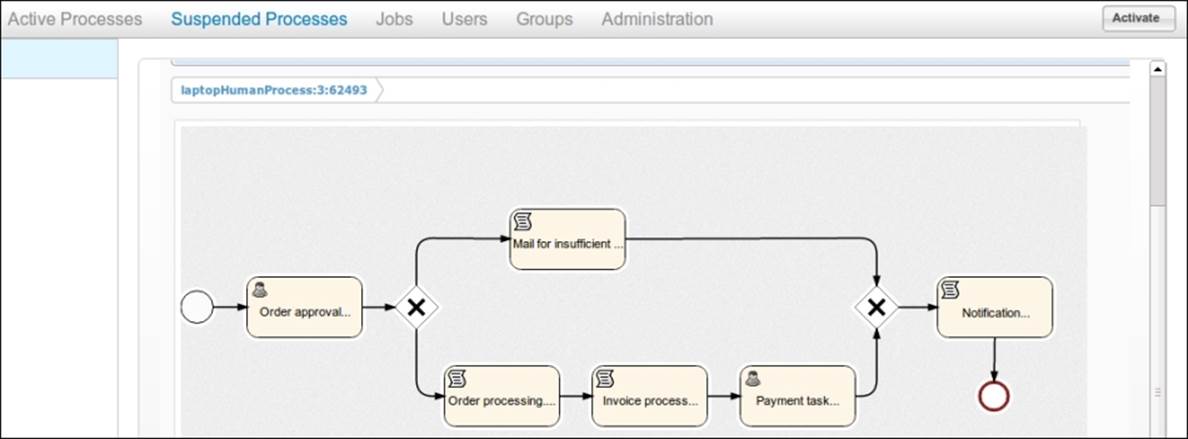
4. Now, we can see the laptop approval process in Suspended Processes. You can also activate that process by clicking on the Activate button, as shown in the following screenshot:
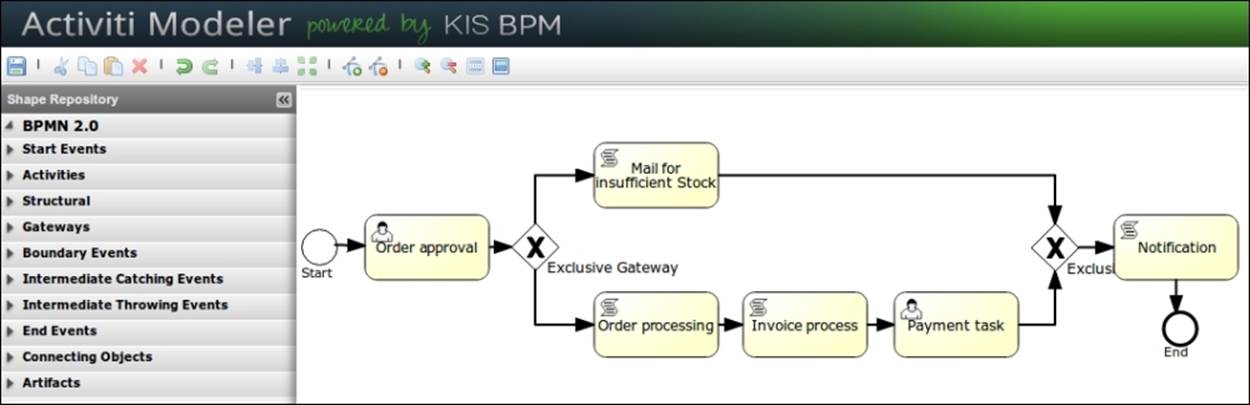
6. We can make changes to deployed processes using the Activiti Modeler. For that, we have to select the process from Deployed Process Definitions and click on the Convert to editable model button in the top-left corner.
7. We can use the Activiti Modeler to make changes to the current process, as you can see in the following screenshot:
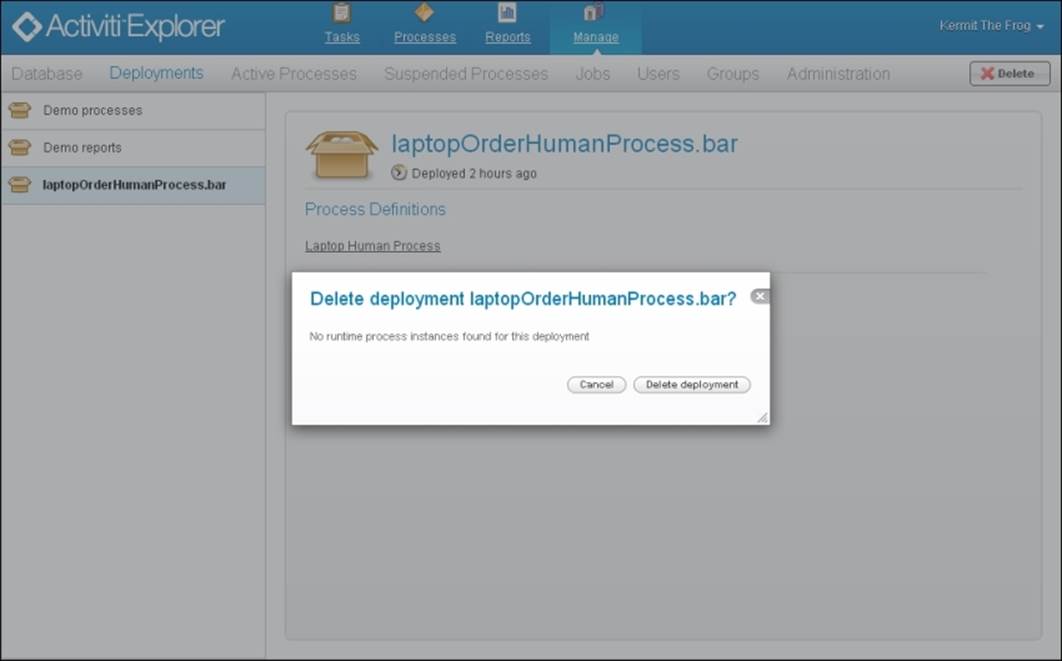
8. If we want to delete the deployed process, we have to select the process from the Deployments tab. Then, click on the Delete button, as shown in the following screenshot:
What just happened?
In this section, we have seen how we can start a process. Also, we have seen how we can suspend a particular process using a calendar for a specific date. Finally, we saw how to delete a deployed process.
Reporting with the Activiti Explorer
The Activiti Explorer has the functionality of reporting. It has a separate tab for reporting and comes with some examples for the purposes of demonstration.
When we click on the Reports tab, we get the following two subtabs:
· Generate reports: This generates the reports known to the system
· Saved reports: This shows a list of previously saved reports
The Activiti Explorer also contains some example reports, which are as follows:
· Task duration report: This report uses a start form and variables to build a SQL query dynamically.
· Employee productivity: This demonstrates the use of a line chart and a start form. In this report, the data is fetched and interpreted by the script stored in the report data.
· Process instance overview: This is an example of a report where multiple datasets are used. The report contains a pie chart and a list view of the same data, thereby showing how multiple datasets can be used to generate a page with various charts.
Time for action – reporting using the Activiti Explorer
Using the reporting functionality, we can generate reports for a particular process. We can also generate reports for employee productivity using a user ID. We will generate reports for the laptop order approval process by performing the following steps:
1. To have access to reports, we have to log in with the admin user. Here, we will log in as the kermit user.
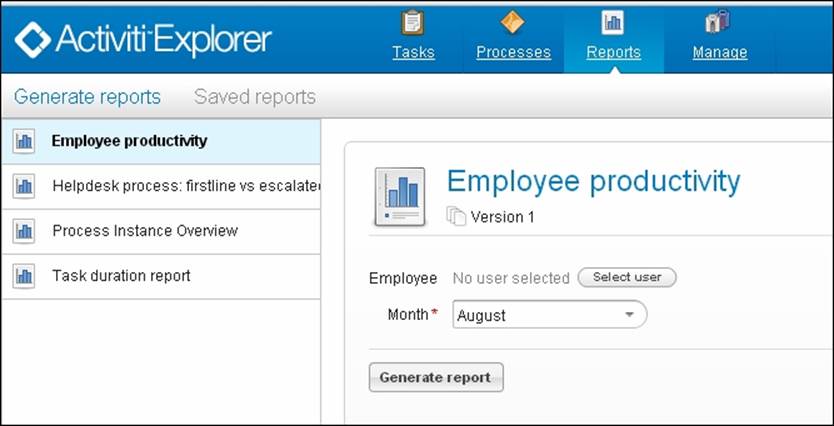
2. There is a Reports tab available for generating reports. Within this tab, there are various categories of reports that can be generated, such as Employee productivity and Process Instance Overview, as you can see in the following screenshot:
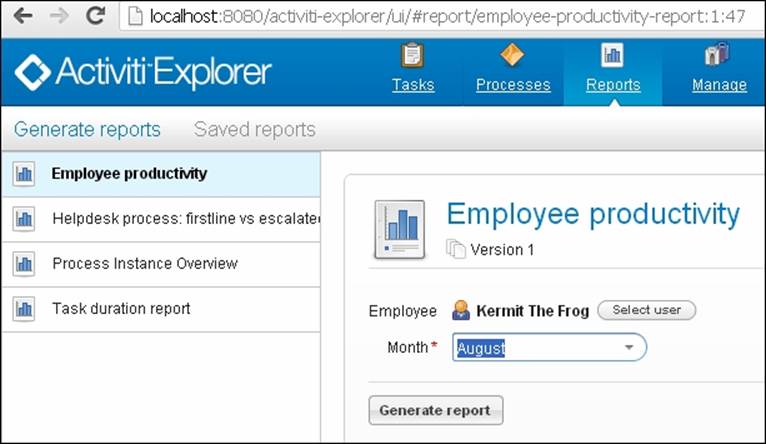
3. We will start with the Employee productivity report. We will generate a report for the kermit user. Select Kermit The Frog as Employee and the month for which the report is to be generated as shown in the following screenshot:
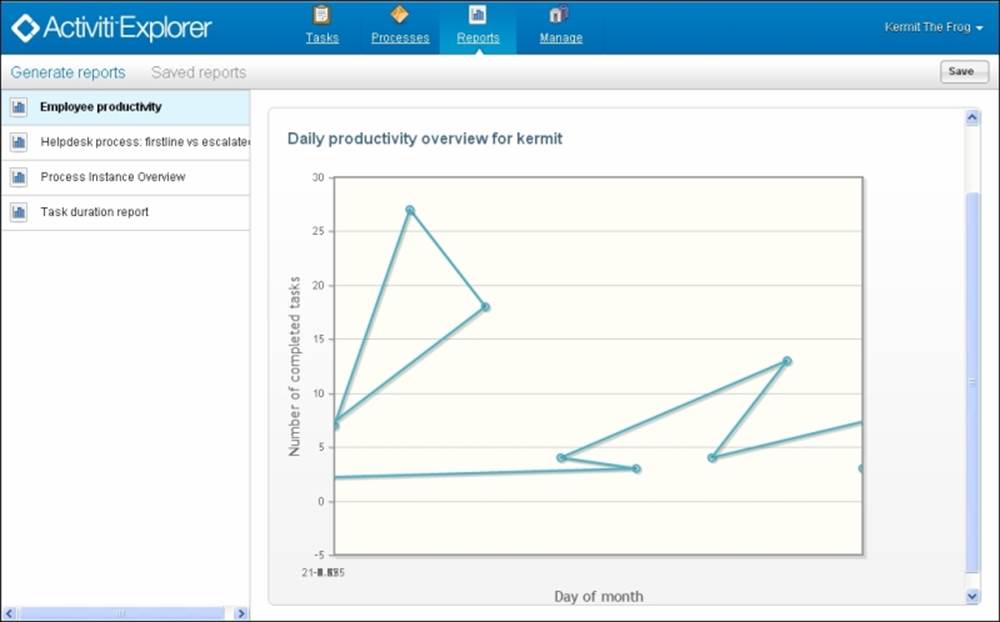
4. Now, when we click on Generate report, we will get a graph for the entire completed task, as shown in the following screenshot:
5. To generate a task-related report, select Task duration report and then the name of the process used to generate the task report.
6. First, we will start the instance of the laptop order process.
7. Select Task duration report and then the Laptop Human Process(v1) definition. From the chart type drop-down list, select Pie chart or Bar chart, as seen in the following screenshot:
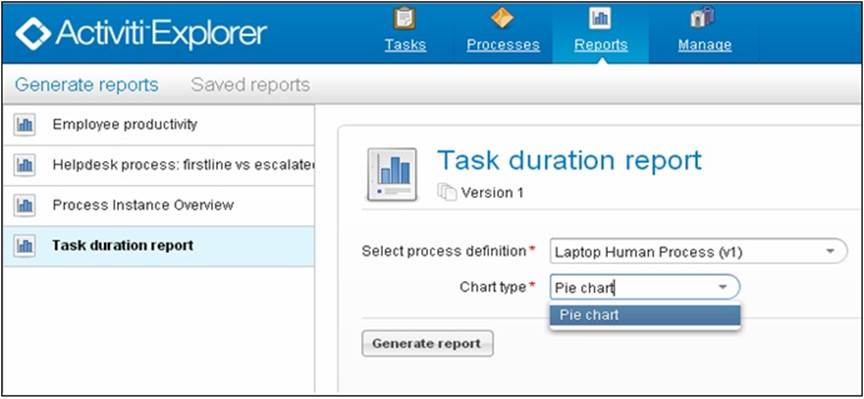
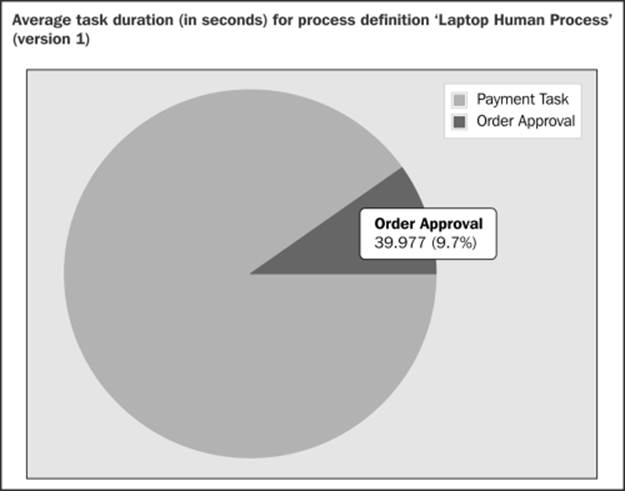
8. This will generate a chart for the business process based on the execution of the process.
What just happened?
We have now covered the functionality of reporting. We have generated a report for employee productivity based on the user and the month. We have also seen how we can generate a task duration report for a particular process.
Administration using the Activiti Explorer
The Activiti Explorer also provides the functionality of administration. kermit is part of the security group admin. So, he can access Administration from the Explorer.
For the admin, there is a Manage tab that contains submenus, as shown in the following screenshot:

The following are the different submenus in the Manage tab:
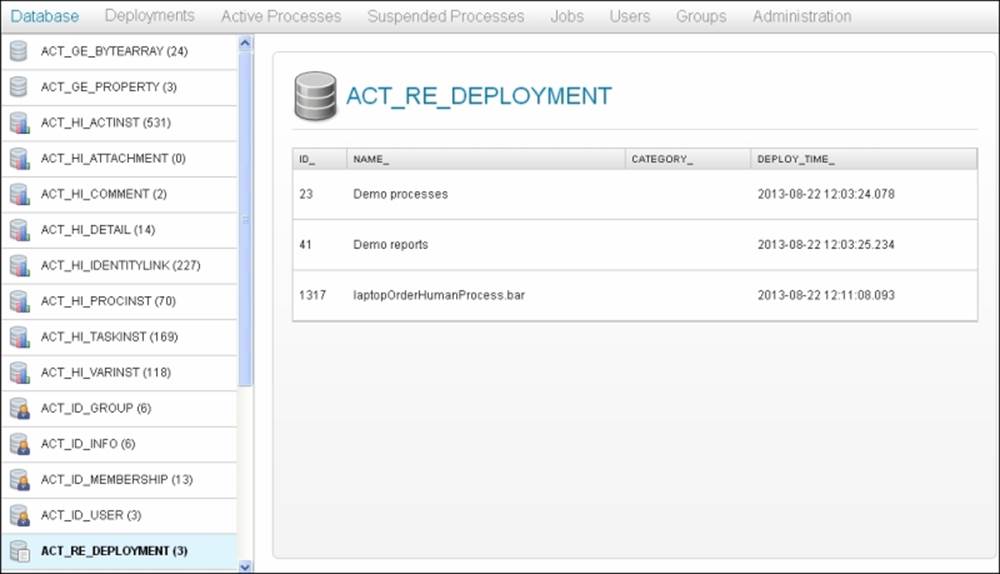
· Database: This tab is used to display the database tables and the content of the database. It is very useful for troubleshooting problems.
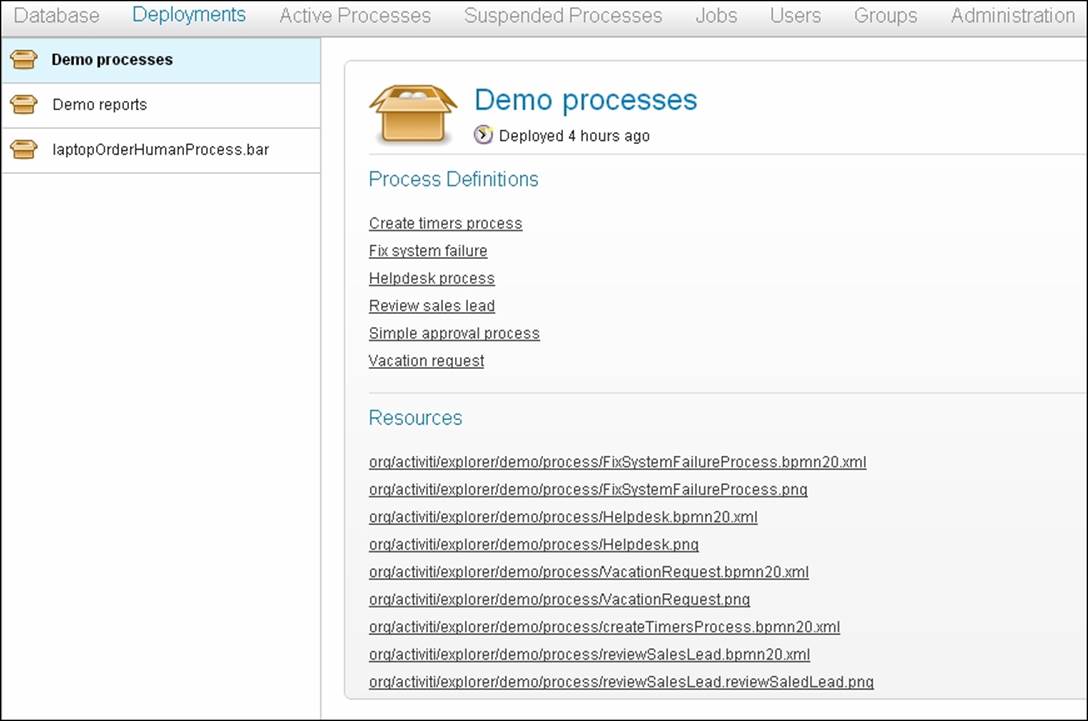
· Deployments: This tab is used to display the deployments of the engine. We can also see the process definitions and the resources. Additionally, we can upload a new process definition by uploading a .bar file of the process.
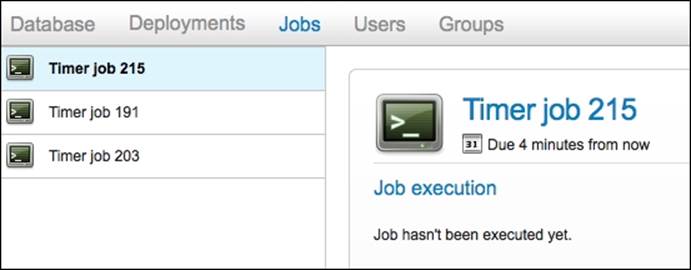
· Jobs: This tab is used to display the asynchronous tasks and allows us to manually execute them.
· Users: This tab is used for the user management functionality. We can create a new user, edit the existing details of a user, and also delete users. Furthermore, we can also assign a particular group to a user.
· Groups: This tab manages the functionalities of a group; that is, we can add, edit, and delete groups and assign members to them as well.
Time for action – administration using the Activiti Explorer
User management is an easy task using the Activiti Explorer. We can create a new user from the Users tab. Let's create a new user and assign it to the admin group using the following steps:
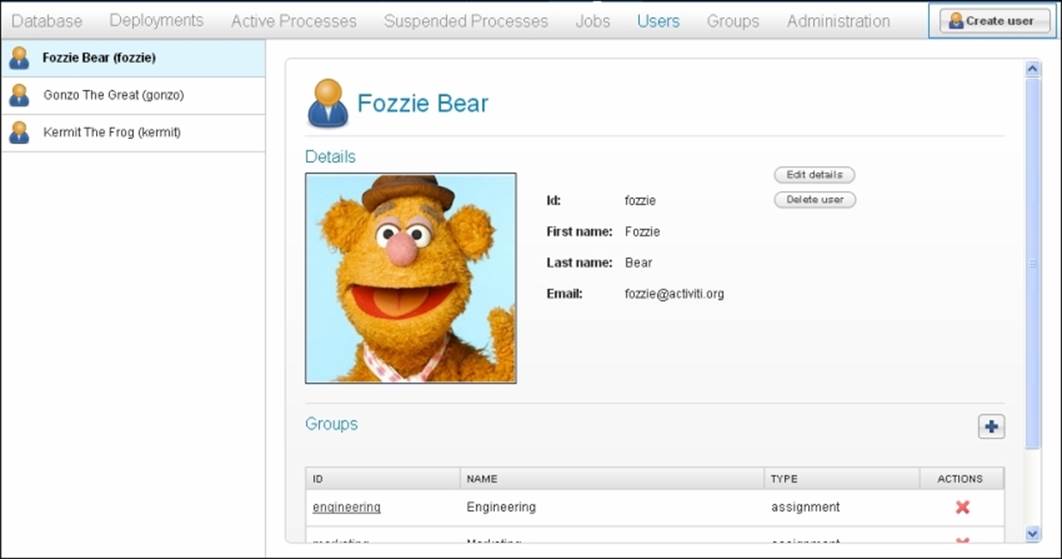
1. We will now create some new users in the Activiti Engine. In order to do this, click on the Users tab and then on the Create user button as shown in the following screenshot:
2. This button will pop up a form to be filled to create a new user; provide the information as mentioned in the following screenshot:
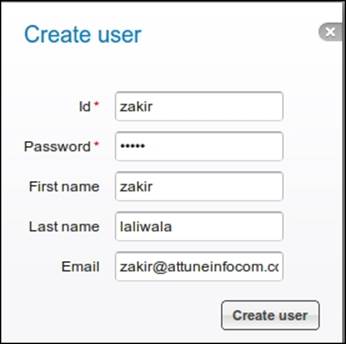
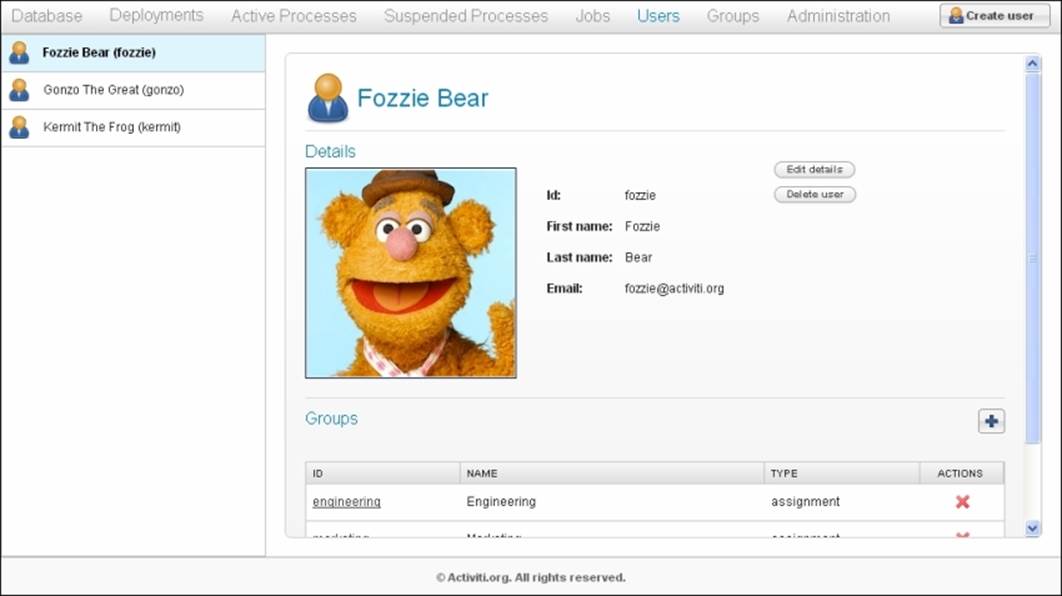
3. After filling in the information, click on the Create user button. Now, the new user will be available in the users menu as shown in the following screenshot:
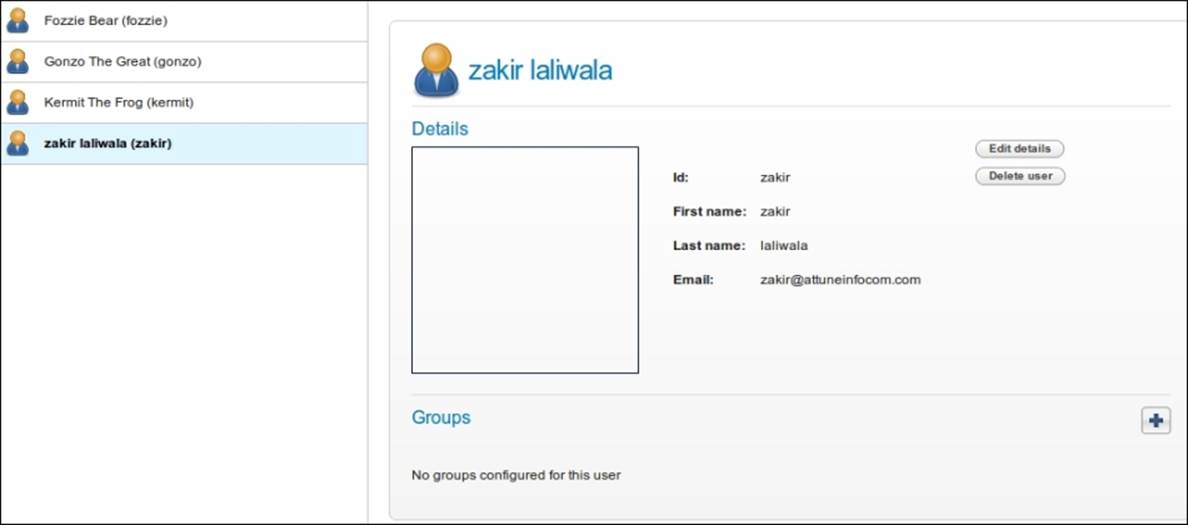
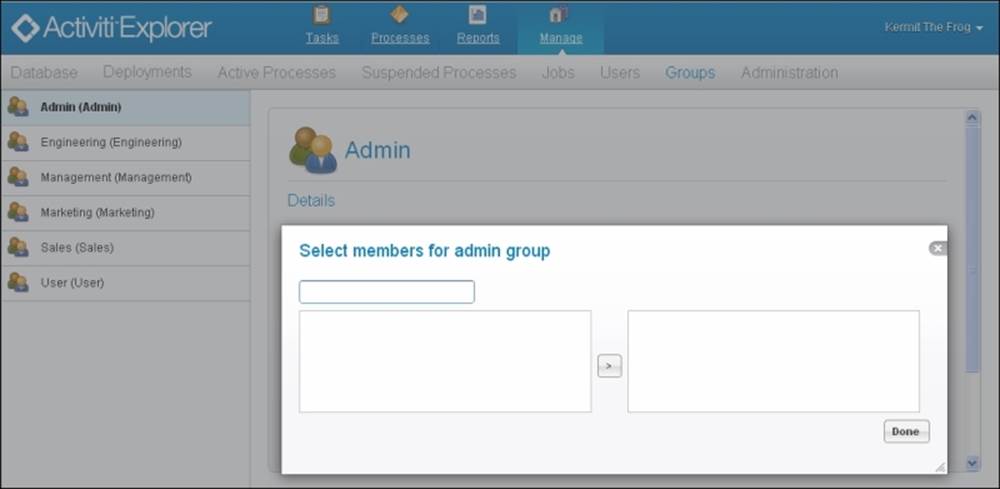
4. As you can see in the preceding screenshot, the user is not part of any of the groups. So, we will assign this user to a group. Click on the + sign under the Groups section and a list of groups will be available, as you can see in the following screenshot:
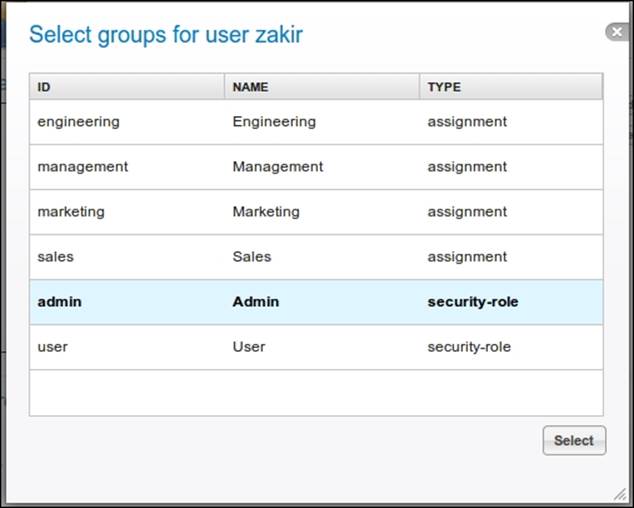
5. We can select any of the groups from this list for the user; here, we will select the Admin group. The user is now part of the Admin group.
What just happened?
We have created a new user and also seen how we can assign the user to a particular group.
Time for action – changing to a production-ready database
Activiti comes with a default database, H2. This database is only used for the purposes of demonstration. For production, we have to change the database. So, let's see how we can configure the database:
1. To configure Activiti with a database, we have to create a schema named MySQL.
2. We will also create another schema named activitiin mysql.
3. Now, we have to configure Activiti with MySQL. In order to do this, we have to browse to apache-tomcat-7.0.27/webapps/activiti-Explorer/WEB-INF/classes/db.properties.
4. Make the following changes in db.properties:
5. db=activiti
6.
7. jdbc.driver=com.mysql.jdbc.Driver
8.
9. jdbc.url=jdbc:mysql://localhost:3306/activiti
10.
11.jdbc.username=root
12.
jdbc.password=root
13. Also, we have to place mysql-connector-java-5.1.18-bin.jar into apache-tomcat-7.0.27/webapps/activiti-Explorer/WEB-INF/lib.
14. After performing these steps, we have to restart the Tomcat server if it is already running. If not, just start the Tomcat server.
15. Once the Tomcat server has started successfully, the Activiti schema will be populated with the default tables of Activiti.
What just happened?
In this section, we saw how to set up a production database in Activiti. We have also seen how to make changes in db.properties and learned how to populate all the tables into the MySQL database.
Time for action – deploying a process using the Activiti Explorer
The Activiti Explorer provides a tab for deploying processes. To deploy a process into the Activiti Explorer, we have to generate a .bar file for the process from Eclipse. In order to do this, perform the following steps:
1. To generate a .bar file, open the laptop human process example in Eclipse.
2. Your project should be opened in the Package Explorer view; only then will you be able to create a .bar file.
3. In Package Explorer, right-click on the project and select the Create deployment artifacts option.
4. There should now be a .bar file in the deployment folder (it is named laptopOrderHumanProcess.bar in the following example screenshot):
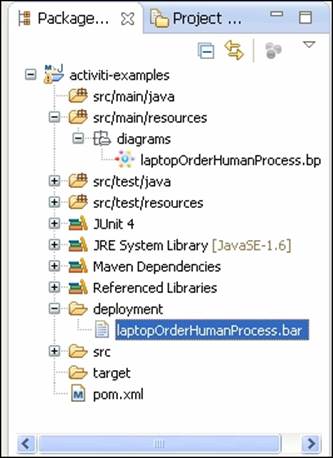
5. Now, to upload the .bar file in the Activiti Explorer, log in as the admin user, browse to the Manage tab, and select upload new under the Deployments menu.
6. The upload new option will pop up a window in which we can upload the .bar file by using either the Choose a file or Drop a file here option, as shown in the following screenshot:
7. Once the process file is successfully uploaded, it will be deployed into the Activiti Explorer and we can start the process from the Deployed process menu in the Processes tab.
What just happened?
In this section, we saw how to generate a .bar file from Eclipse and have also deployed a .bar file into the Activiti Explorer. So, now we can deploy the process into the Explorer.
Have a go hero
Having gone through the chapter, feel free to attempt the following tasks:
· Configure Activiti with any other database that you are using
· Assign a task to a particular group instead of only one user
· Execute a process and check each table in the Activiti database
Pop quiz – the Activiti Explorer
Q1. Which user can access the Admin tab?
1. A guest user
2. A normal user
3. Whoever is part of the admin user group
Q2. How can you monitor the current process graphically?
1. Using the Model workspace tab
2. Using the My instances tab
3. Using the Active processes tab
Q3. What is the extension of the file that is used for deployment?
1. .jar
2. .bar
3. .zip
Q4. Which file is used to configure the database in Activiti?
1. Web.xml
2. db.properties
3. activiti-standalone-context.xml
Q5. Where is the Historical task available?
1. The Inbox tab
2. The My Tasks tab
3. The Archived tab
Summary
We have played with the Activiti Explorer in this chapter. We have seen the various functionalities of the Activiti Explorer and know how we can deploy a process and start an instance. We have seen the functionalities that Activiti Explorer provides for the management of users and groups. We have also seen how we can set up a production database with Activiti. In the next chapter, we will learn how to set up a development environment for Activiti. We will also learn how to configure the mail server settings for the mail tasks in Activiti.
All materials on the site are licensed Creative Commons Attribution-Sharealike 3.0 Unported CC BY-SA 3.0 & GNU Free Documentation License (GFDL)
If you are the copyright holder of any material contained on our site and intend to remove it, please contact our site administrator for approval.
© 2016-2025 All site design rights belong to S.Y.A.