Learning Web Application Development (2014)
Chapter 2. The Structure
Over the course of the next two chapters, we’re going to get an overview of two relatively important client-side topics: HTML and CSS. Because there’s no way that we can cover both of these in detail, these two chapters will be written primarily as a series of hands-on tutorials that will help you learn enough HTML and CSS to support the code examples in the remainder of the book. More Practice and Further Reading will encourage you to explore other resources.
If you’re already familiar with HTML and CSS, it’s likely that you can comfortably move on to Chapter 4, which starts with client-side JavaScript. You may want to scan the chapters and read the summary at the end before doing so.
Hello, HTML!
HTML, which stands for HyperText Markup Language, is a technology that allows us to specify the structure of the visual elements (sometimes referred to as the user interface) of a web application. What do I mean when I say structure? Let’s take a look at a simple example.
To get started, we’ll use the command line to create a directory called Chapter2 in our Projects directory. Recall that we’ll use the mkdir command for that. Next, let’s open that directory in Sublime Text using either the File menu or the shortcut keys. Create a new file called hello.html inside that directory. Type in the contents exactly as you see here:
<!doctype html>
<html>
<head>
<title>My First Web App</title>
</head>
<body>
<h1>Hello, World!</h1>
</body>
</html>
Tags Versus Content
As you’re typing, one of the things you may notice is that the document consists of two types of content. One type of content is normal text content like “My First Web App” and “Hello, World!” The other type of content, like <html> and <head>, is surrounded by angle brackets, and we refer to these elements as tags. Tags are a form of metadata, and this metadata is used to apply structure to the content of the page.
Fire up Chrome and open the file in your web browser using the Open File option in the File menu. You’ll see something that looks similar to Figure 2-1.
TIP
It’s a good idea to get the hang of keyboard shortcuts because it will make your workflow more efficient. The keyboard shortcut for opening a file in Chrome is Command-O if you’re in Mac OS. In Linux or Windows, it’s Ctrl-O.
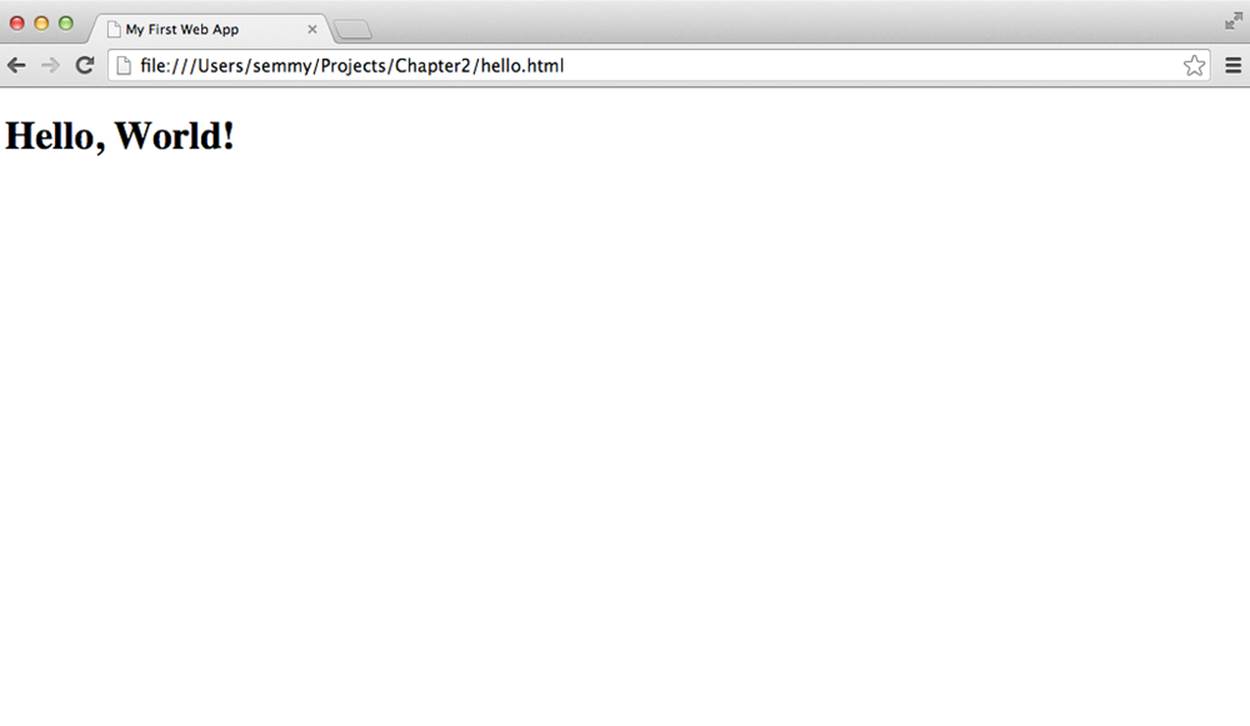
Figure 2-1. hello.html opened in Chrome
Notice that the tags don’t appear, but the other content does. The “My First Web App” content appears as the title of the tab, while the “Hello, World” content appears in the body of the window.
<p> Is for Paragraph
Now, we’ll make a minor modification by adding a paragraph with some lorem ipsum text, which is simply filler text that we can replace with actual copy later. You can cut and paste the text from the Wikipedia page for lorem ipsum:
<!doctype html>
<html>
<head>
<title>My First Web App</title>
</head>
<body>
<h1>Hello, World!</h1>
<p>Lorem ipsum dolor sit amet, consectetur adipisicing elit, sed do eiusmod
tempor incididunt ut labore et dolore magna aliqua. Ut enim ad minim
veniam, quis nostrud exercitation ullamco laboris nisi ut aliquip ex ea
commodo consequat. Duis aute irure dolor in reprehenderit in voluptate
velit esse cillum dolore eu fugiat nulla pariatur. Excepteur sint
occaecat cupidatat non proident, sunt in culpa qui officia deserunt
mollit anim id est laborum.</p>
</body>
</html>
Once we make the changes, we can save the changes to the document. Now we can go back to our browser and reload the page by clicking the circular arrow next to the address bar in Chrome. You should see the body of the browser update with the content, as illustrated in Figure 2-2.
TIP
You can refresh this page with Ctrl-R in Windows and Command-R in Mac OS.
This will be our typical workflow when editing web pages. We’ll open the file in our text editor, make some minor changes, and reload the web browser to see the changes.
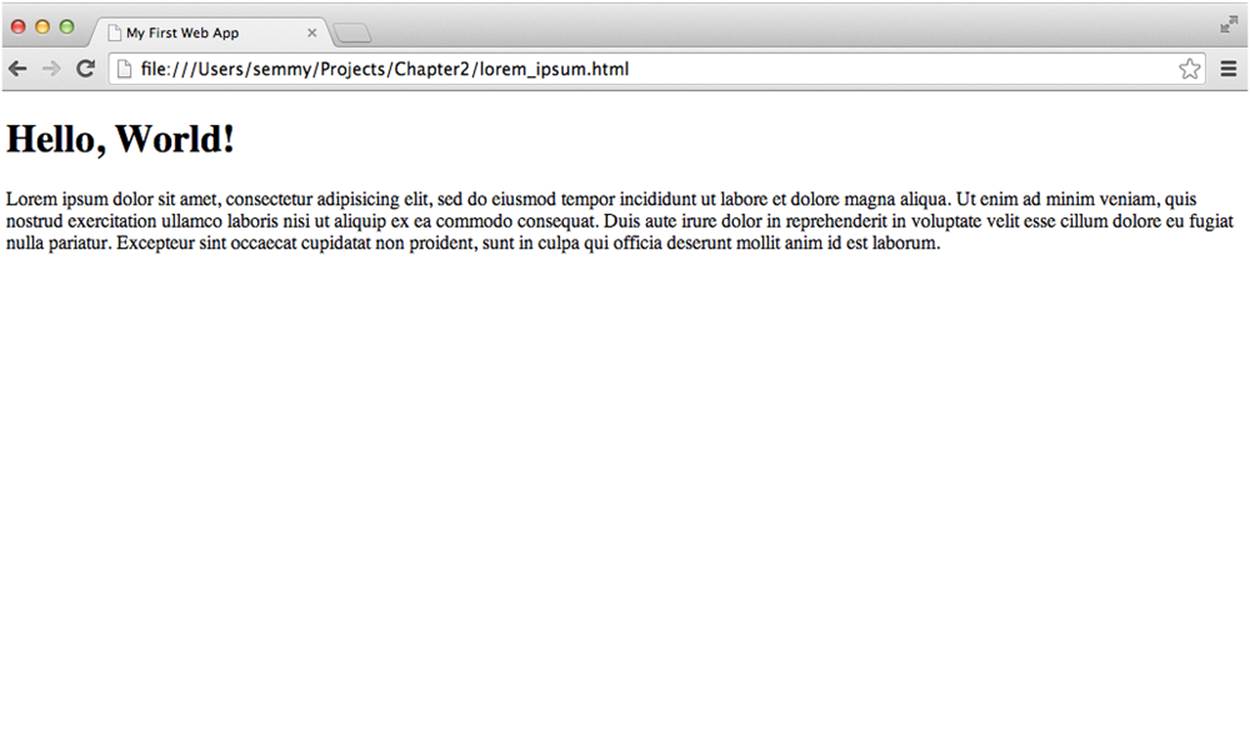
Figure 2-2. Modified example1.html opened in Chrome
Comments
Comments are a convenient way to annotate our HTML. We start an HTML comment with <!-- and end a comment with -->. Here’s a simple example that’s built on the one in the previous section:
<!doctype html>
<html>
<head>
<title>Comment Example</title>
</head>
<body>
<!-- This is the main heading -->
<h1>Hello World!</h1>
<!-- This is the main paragraph -->
<p>I'm a main paragraph, most likely associated with the h1 tag since
I'm so close to it!</p>
</body>
</html>
Because computer programs are written for humans to read, it’s always a good idea to annotate some of the more complicated code. You’ll see examples of HTML comments peppered throughout the book and you’ll likely run into commented HTML on the Web.
Headings and Anchors and Lists, Oh My!
Now that we’ve seen some examples of basic tags and comments, what other kinds of tags can we include in our markup?
First, we can generalize the <h1> tag by creating <h2>, <h3>, <h4>, <h5>, and <h6> tags. They represent different heading levels, and are usually reserved for important content on the page. The most important heading content should be contained in an <h1> tag, whereas heading content of lesser importance should appear in the others:
<!doctype html>
<html>
<head>
<title>Heading Tag Examples</title>
</head>
<body>
<!-- This is the main header -->
<h1>This is very important!</h1>
<!--
This is some content that might be associated with the
important stuff
-->
<p>Important paragraph</p>
<h2>This is a less important header</h2>
<p>And here is some less important content</p>
</body>
</html>
Another important tag in an HTML document is the <a> tag, which stands for anchor and is used to create links. The anchor tags are a unique characteristic of hypertext because they can link to other information, either on the current page or another web page altogether. To use anchor tags, we have to also include an HTML href attribute, which tells the browser where to go when a link is clicked. The href attribute goes inside the opening tag:
<!doctype html>
<html>
<head>
<title>Link Examples</title>
</head>
<body>
<!--
the href attribute tells us where to go when the anchor element
is clicked
-->
<p>Here is a <a href="http://www.google.com">link</a> to Google!</p>
<p>
<a href="http://www.example.com">
And this is a link that is a little longer
</a>
</p>
<p>
And here is a link to
<a href="http://www.facebook.com">www.facebook.com</a>
</p>
</body>
</html>
When we open this page in the web browser, we’ll get something that looks like Figure 2-3.
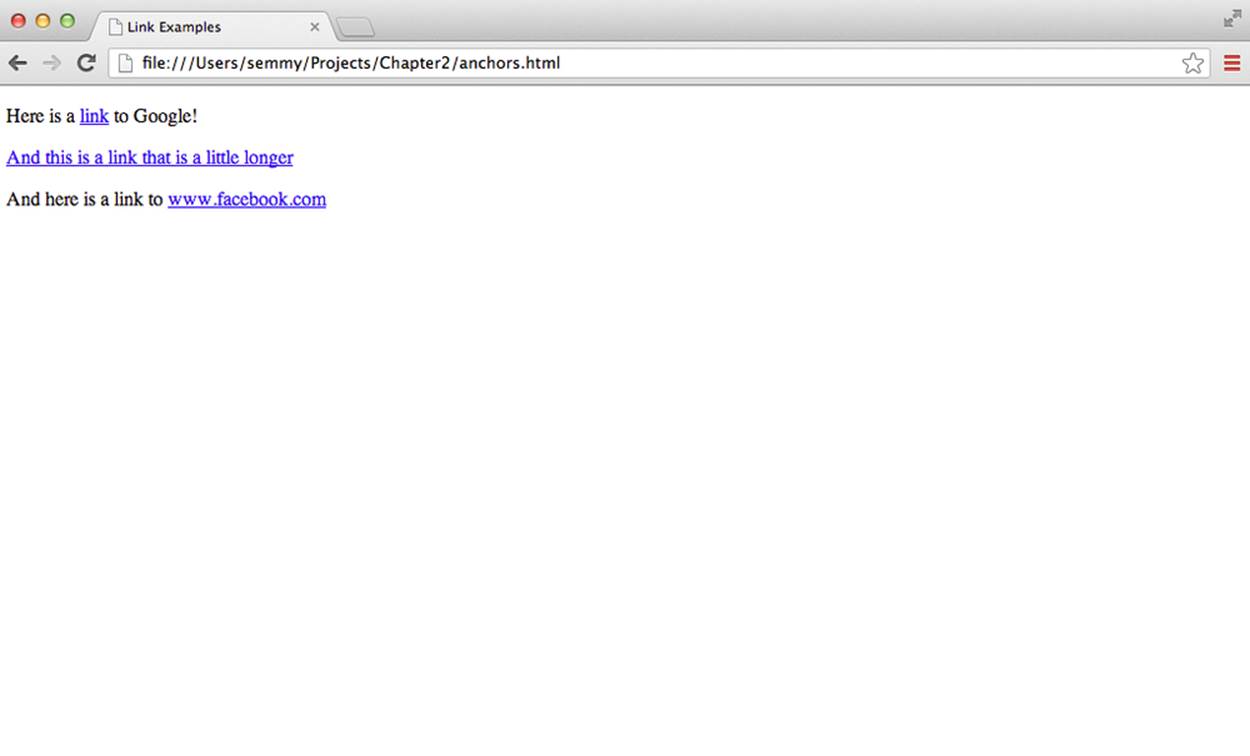
Figure 2-3. A page with links using anchor tags
All of the blue underlined text on the page is clickable, and when clicked it will take you to the page specified in the href attribute.
One problem with this example is that it’s using paragraph elements to list content. Wouldn’t it be better if we had a specific tag that represented a list? It turns out that we have two of them! The <ol> tag and the <ul> tag represent ordered lists and unordered lists, respectively. Inside these lists, we have <li> tags that represent list items. In the previous example, it doesn’t look like the order of the links matters much, so perhaps an unordered list would be best:
<!doctype html>
<html>
<head>
<title>List Examples</title>
</head>
<body>
<h1>List Examples!</h1>
<!-- We'll wrap the links in an ul tag -->
<ul>
<li>
Here is a <a href="http://www.google.com">link</a> to Google!
</li>
<li>
<a href="http://www.example.com">
And this is a link that is a little longer
</a>
</li>
<li>
And here is a link to
<a href="http://www.facebook.com">
www.facebook.com
</a>
</li>
</ul>
<!-- We can also create an ordered list tag -->
<h3>How to make an ordered list</h3>
<ol>
<li>Start by opening your ol tag</li>
<li>Then add several list items in li tags</li>
<li>Close your ol tag</li>
</ol>
</body>
</html>
When we refresh our browser, it should look similar to Figure 2-4.
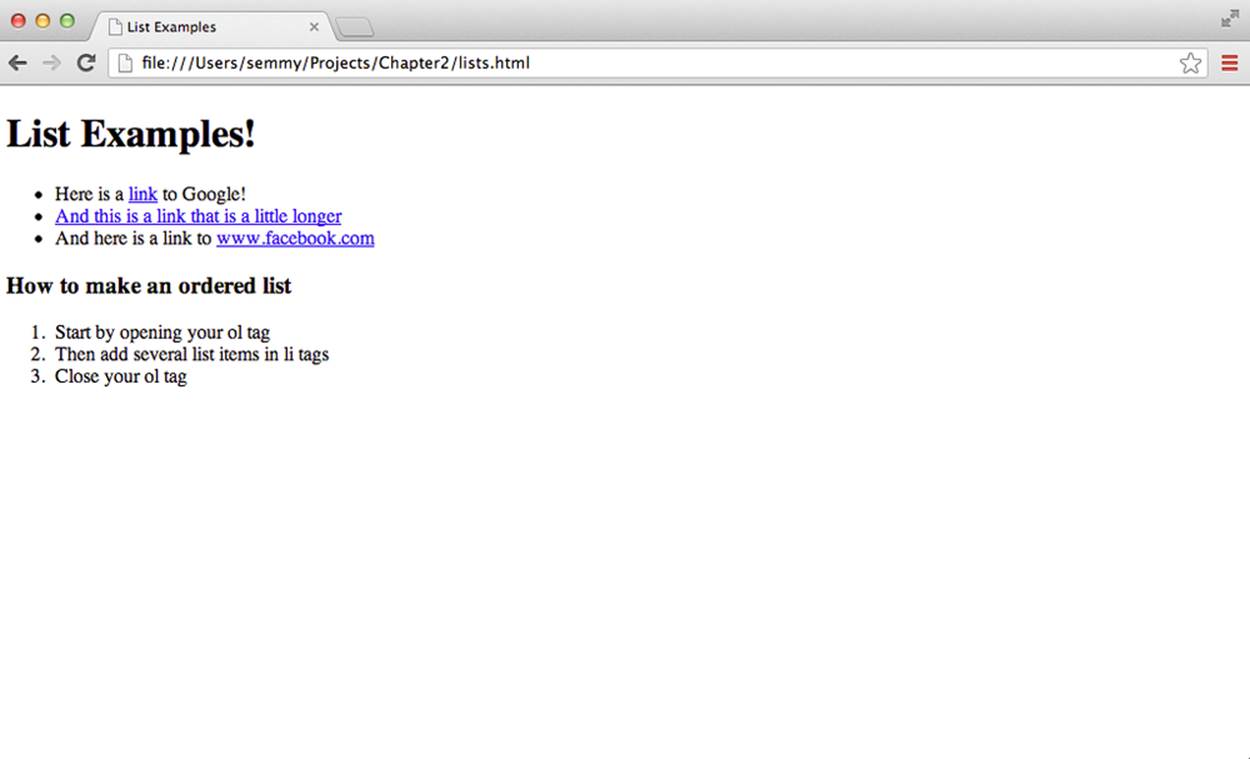
Figure 2-4. A page with an unordered and ordered list
Notice how both lists have bullets at the front of each list item, but the bullets for the ordered list are numeric.
Generalizations
We can generalize a few things from the first few examples that we’ve seen. The first is that all normal text content is wrapped in HTML tags.
Second, you’ll probably notice that we’ve indented HTML tags that are contained in other HTML tags. The reason is that HTML is a hierarchical method of structuring documents. We use indentation as a visual cue to remind us where we are in the hierarchy. That’s why the <head> tag and the <body> tag are indented within the <html> tag, and the <h1> tag and the <p> tags are also indented relative to the <body> tag. We’ve occasionally kept the links on the same line as the content, while other times we’ve broken the line. In HTML, white space doesn’t matter in most cases.
Last, but not least, you’ll see that as we are building an HTML document, we will add or modify a small amount of content, save our progress, then switch to the browser window and reload the page. Because you’ll be doing this so often, it’s a good idea to practice it a few times. To get started, add another few paragraphs of lorem ipsum text to the body of the document, and switch to the browser to reload the page.
TIP
Because you do it so often, it’s helpful to learn the keyboard shortcuts to reload the page and switch between active windows in your environment. In Windows and most Linux environments, you can use Ctrl-Tab to switch between active windows and Ctrl-R to reload the page. In Mac OS, you use Command-Tab and Command-R.
The Document Object Model and Trees
HTML tags define a hierarchical structure called the Document Object Model, or DOM for short. The DOM is a way of representing objects that can be defined via HTML and then later interacted with via a scripting language like JavaScript. HTML tags define DOM elements, which are entities that live in the DOM.
We’ve already been writing our HTML in a way that helps us visualize the DOM. That’s why we’ve been indenting our tags that are contained in other tags, because it gives us a sense of the hierarchy. Although that’s helpful for our code, it doesn’t always work as clearly as we might hope. For instance, consider the following HTML:
<!doctype html>
<html>
<head>
<title>Hello World!</title>
</head>
<body>
<h1>Hello World!</h1>
<div>
<ol>
<li>List Item</li>
<li>List Item</li>
<li>List Item</li>
</ol>
<p>This is a paragraph.</p>
<p>This is a <span>second</span> paragraph.</p>
</div>
<ul>
<li>List Item <span>1</span></li>
<li>List Item <span>2</span></li>
<li>List Item <span>3</span></li>
</ul>
</body>
</html>
This code includes several tags that we haven’t seen, but it’s not essential that you understand their function yet. What is important is that you notice that even though this code is clearly indented, there are a few tags that are still not separated out on a different line. For example, the spanelements are contained on the same line as the li elements. This is actually fine because the <span> tag contains a single character, but it doesn’t illustrate the relationship as clearly as the indented structure does. So we need another way to think about this example.
In the previous chapter, we discussed using tree diagrams to create mental models of our computer’s filesystem. It turns out that we can also use tree diagrams to create mental models of the DOM. This mental model will come in handy later when we’re interacting with the DOM via JavaScript. As an example, we can use a tree diagram to represent the preceding code, as shown in Figure 2-5.
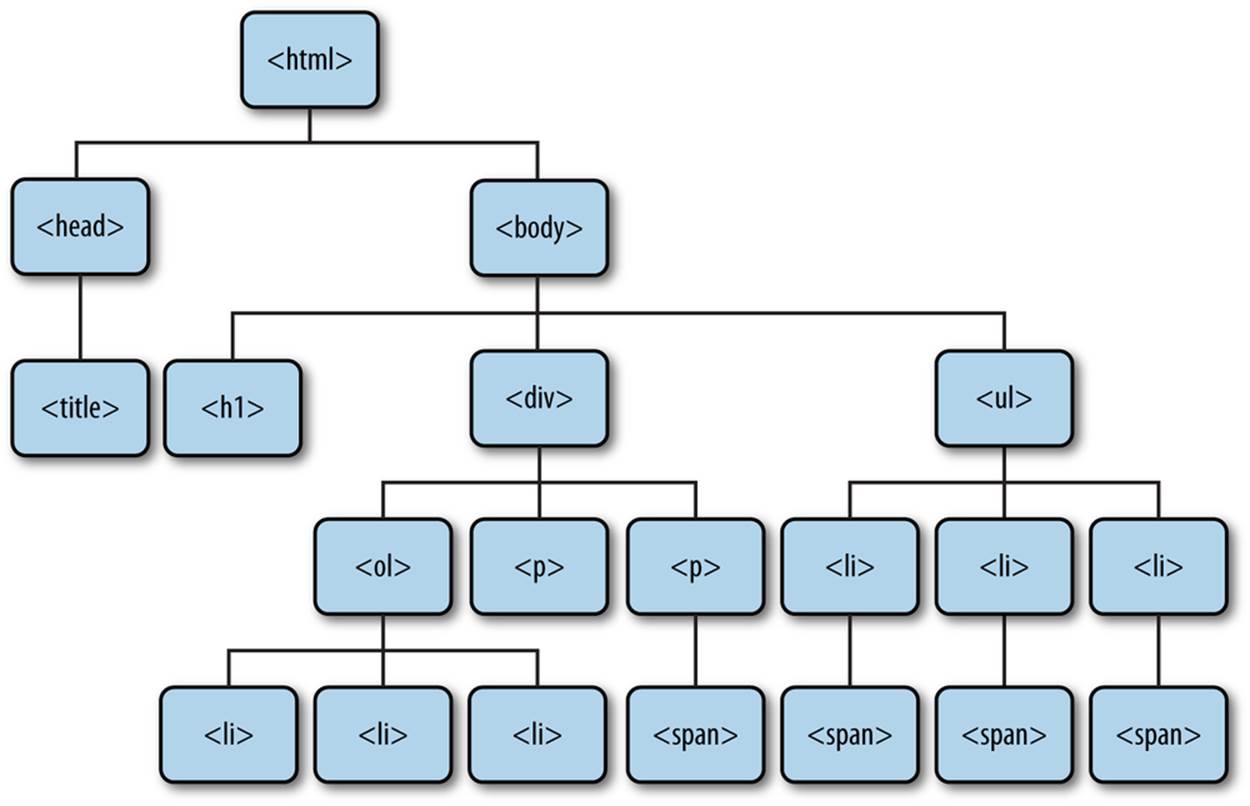
Figure 2-5. A tree representation of the preceding DOM
Note that this diagram creates a clear representation of the contents of the DOM. It also clarifies some of the relationships: we refer to DOM elements that are lower in the tree as descendants of DOM elements that are higher in the tree if there is a path that connects them. Immediate descendants are called child elements, and the element above a child element is referred to as its parent element.
In this example, all elements are descendants of the html element and the ul element is a descendant of the body element. The ul element is not a descendant of the the head element because there is no path starting at the head element and ending at the ul element without moving up in the hierarchy. The ul element has three children (each of the li elements) and each li element has a span element as a child.
We’ll learn more about these relationships as we move forward, but for now it’s good to get some practice thinking about the DOM in this way.
Using HTML Validation to Identify Problems
Like I said in the previous section, text content in our HTML document is typically enclosed by a pair of tags. An opening tag looks like <html> and a closing tag looks like </html>. The actual name of the tag is what specifies the type of the DOM element that it represents.
This can cause problems once our document gets very long. For instance, consider the following HTML document, which is a slight generalization of our previous example with some new tags:
<!doctype html>
<html>
<head>
<title>My First Web App</title>
</head>
<body>
<h1>Hello, World!</h1>
<nav>
<div>Login</div>
<div>FAQ</div>
<div>About Us</div>
</nav>
<p>Lorem ipsum dolor sit amet, consectetur adipisicing elit, sed do eiusmod
tempor incididunt ut labore et dolore magna aliqua. Ut enim ad minim
veniam, <span>quis nostrud exercitation</span> ullamco laboris nisi ut
aliquip ex ea commodo consequat.</p>
<p>Lorem ipsum dolor sit amet, consectetur adipisicing elit, sed do eiusmod
tempor incididunt ut labore et dolore magna aliqua. Ut enim <span>ad
minim veniam, quis nostrud exercitation ullamco laboris nisi ut aliquip
ex ea commodo consequat. Duis aute irure dolor in reprehenderit in
voluptate <span>velit esse cillum dolore eu fugiat</span> nulla
pariatur.</p>
<p>Lorem ipsum dolor sit amet, consectetur adipisicing elit, sed do eiusmod
tempor incididunt ut labore et dolore magna aliqua.</p>
</body>
</html>
This HTML document has an error, but if you open it in your browser you won’t notice it. Spend a few moments looking and see if you can find it.
If you found it, congratulations—you have a great eye! If you didn’t find it, don’t feel bad. It’s in the second paragraph. There’s an opening <span> tag inside the second sentence, but it’s never closed. Most people have a hard time finding such errors when they are first starting out. Fortunately, it turns out that there’s a very nice automated way to find errors in HTML documents.
A validation program is a program that automatically checks to see if your code conforms to certain basic standards. If you’ve used a programming language like Java or C++ in the past, you may have worked with a compiler. If your code has an error, the compiler will tell you about it when you run your code through it. Languages like HTML are a bit looser in the sense that a browser will let you get away with a small number of errors. A validation program will catch these errors even when a browser won’t.
But if the browser displays the page in exactly the same way with or without a closing <span> tag, why do we care? It turns out that the only way we can guarantee that it will always look the same in every browser is if our HTML is correct. That’s why an HTML validator is a very handy tool.
We don’t have to install any software to use an HTML validator. For now, we’ll get started by visiting the W3C’s Markup Validation Service home page. At the time of this writing it looks something like Figure 2-6.
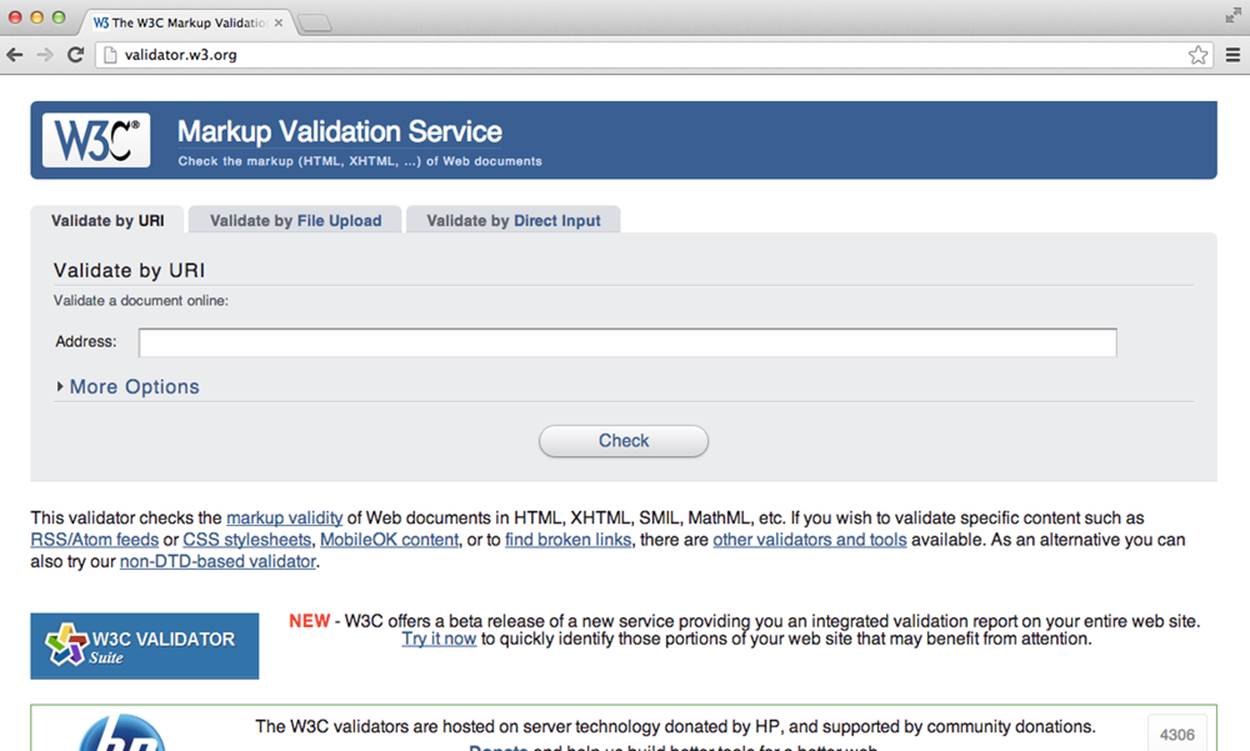
Figure 2-6. The W3C’s Markup Validation Service home page
Notice that there’s a tab that says “Validate by Direct Input.” When we click it, we can cut and paste some of our HTML code into the text field that appears. Once we have some code pasted, we click the big Check button. We’ll start by running our lorem ipsum example from earlier. If our HTML doesn’t have any errors, we’ll see something similar to Figure 2-7.
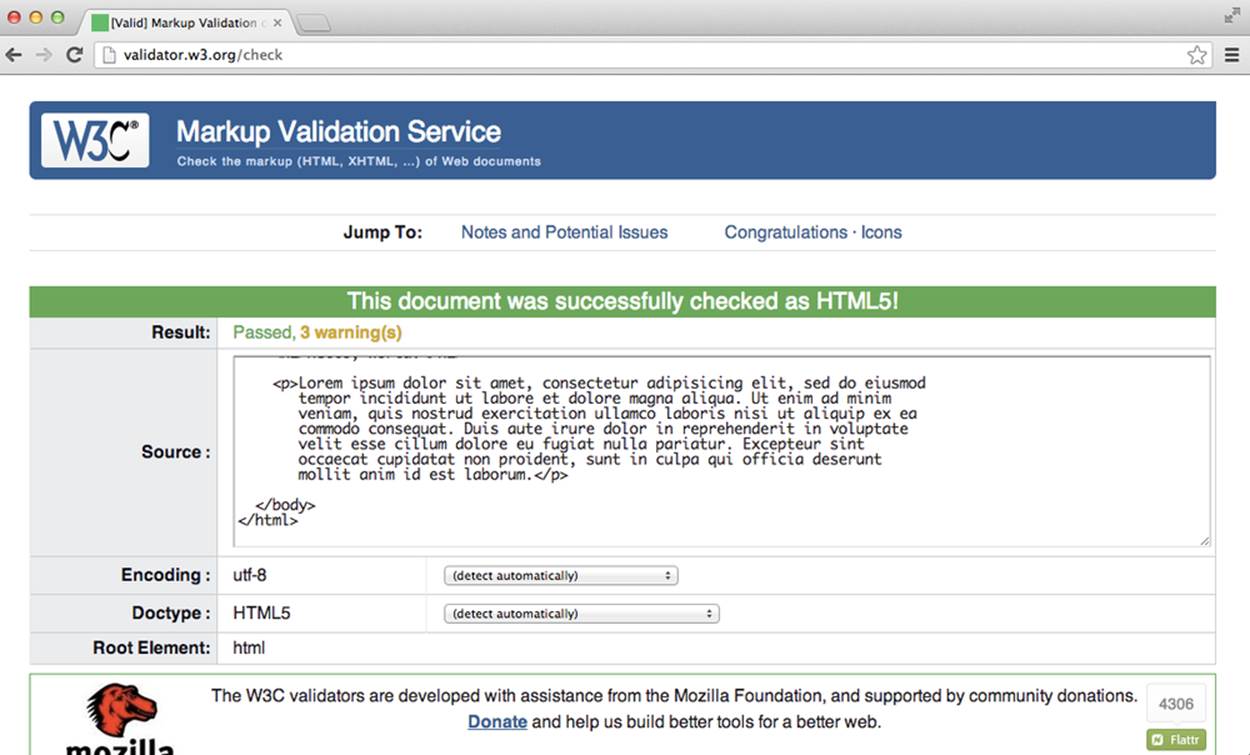
Figure 2-7. The W3C’s HTML validator after being run on our lorem ipsum example
WARNING
When validating your HTML, you’ll most likely get three warnings even when you have no errors. The first of those warnings tells you that the validator is using the HTML5 conformance checker. Even though the HTML5 standard is relatively stable, there could be changes and this warning is just letting you know that.
The other two relate to character encoding, and can be ignored for now. If you’re interested, one of the warnings links to a brief tutorial on character encoding that will show you how to specify a character encoding in your HTML document.
If the code does not pass validation, we’ll see specific errors listed. For example, if we run the code that is missing a closing tag for the span element in the second paragraph, we’ll see something similar to Figure 2-8.
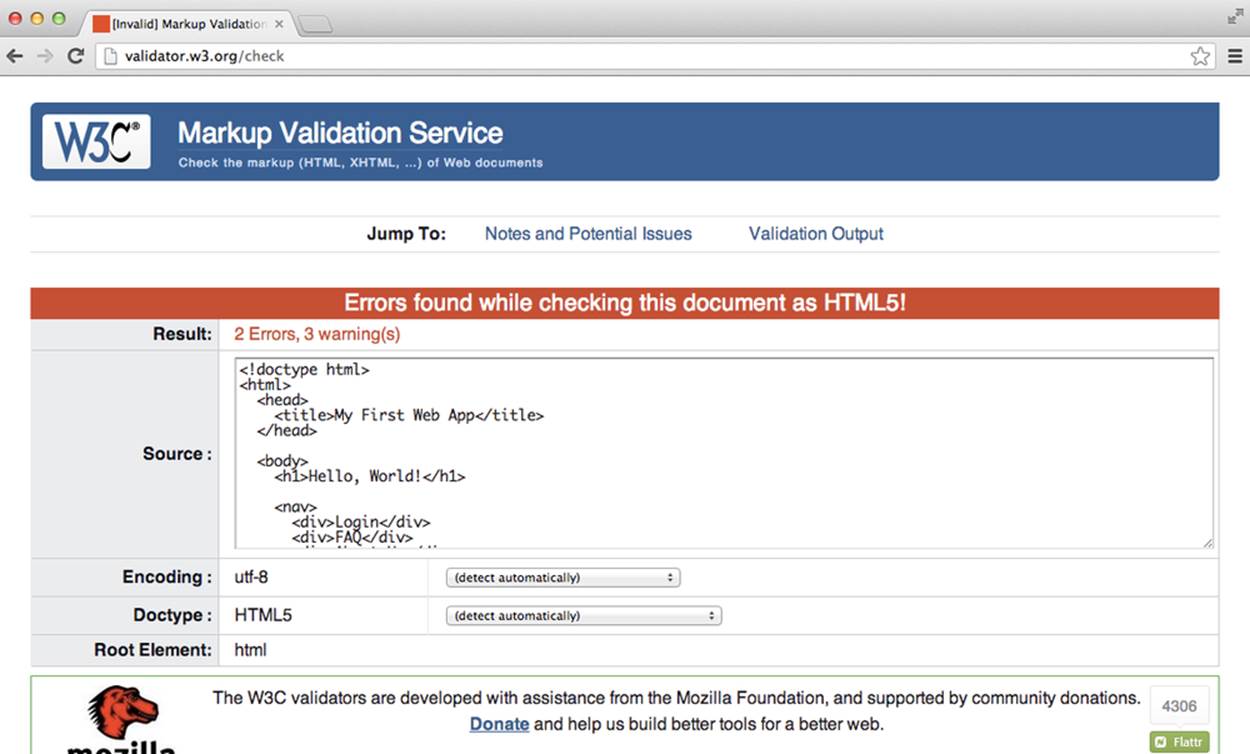
Figure 2-8. The W3C’s HTML validator after being run on our example with a mistake
If we scroll down a bit we can see the errors specifically listed. The validator isn’t smart enough to tell us exactly where the problem is, but if we understand our code enough we should be able to find it. Figure 2-9 shows the validator’s description of our errors.
It’s always a good idea to periodically run our HTML code through the validator program to see if it is correct. Throughout the rest of this chapter, I’ll periodically tell you to double-check your HTML with the validator, and you should probably do so.
Amazeriffic
For the rest of this section, we’ll build an HTML splash page for a fake web app. We have a few goals in doing this. First, we’ll practice the workflow that we learned in the previous chapter on an actual project. Second, we’ll learn a few more important HTML tags and what they represent.
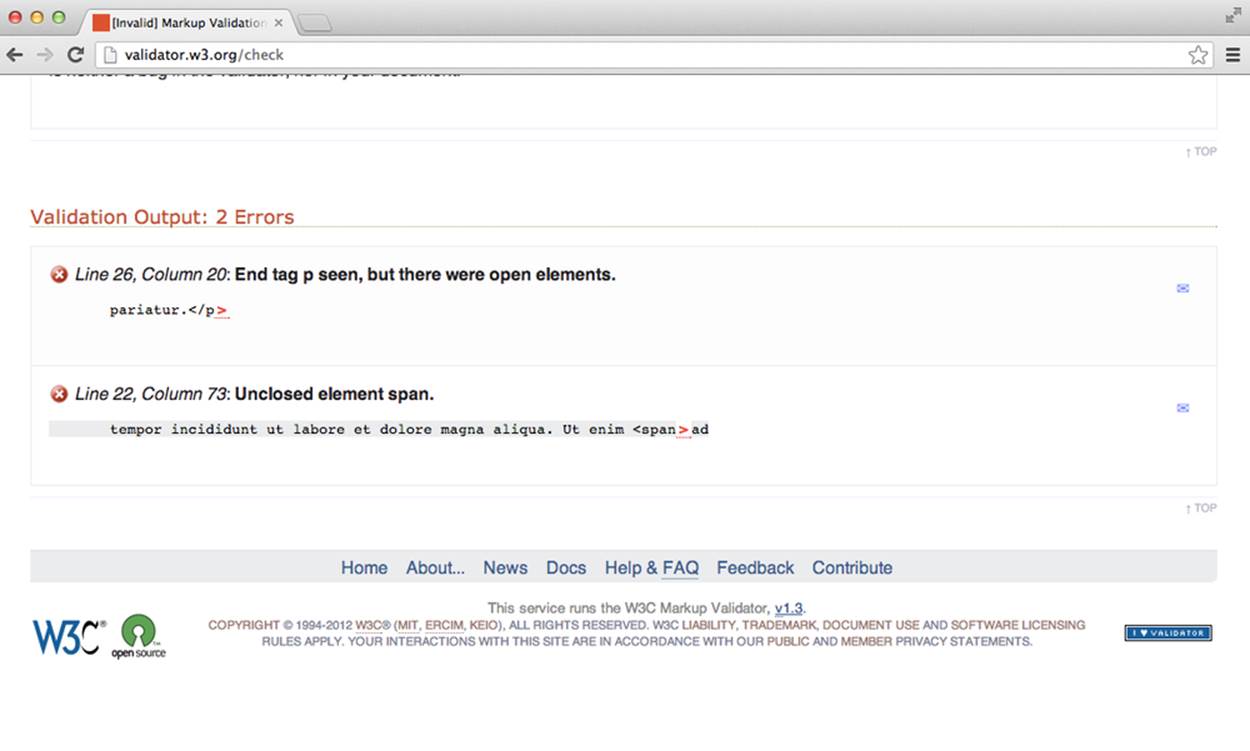
Figure 2-9. The W3C’s HTML validator showing our errors
Identifying Structure
Our fake web app is called Amazeriffic, which is a portmanteau of the words amazing and terrific, and despite its silliness, it’s no less ridiculous than many of the company names coming out of Silicon Valley these days. As a product, Amazerrific tracks and categorizes a set of tasks (you can think of it as a to-do list organizer). Later in the book, we’ll actually work on implementing a project like this, but for now we’re going to focus on the front page of the product until we get the hang of HTML. The page that we’ll build looks something like Figure 2-10.

Figure 2-10. The Amazeriffic splash page that we’ll build in this chapter and the next
Remember that HTML is all about the structure of a document. This means that even though we see numerous stylistic elements here (like the various fonts, the colors, and even the layout), it’s best to ignore them for now because, for the most part, it should have no bearing on the HTML. For now we’ll focus exclusively on the structure of the document.
Before we even sit down to code, it’s helpful to see if we can identify the various parts of the structure. Using a pencil and some scratch paper, sketch this layout and label the structural elements as best as you can. If you have no idea what I’m talking about, then draw light boxes around bigger and smaller elements of the page and give them a descriptive name that describes their role in the document.
In Figure 2-11, we see an annotated version of the previous mockup with dashed lines drawn around the elements. We can easily see that some elements are contained inside other elements. This creates a relationship that specifies which elements will be descendants of other elements in the DOM, and this helps us roughly see what the HTML should look like.
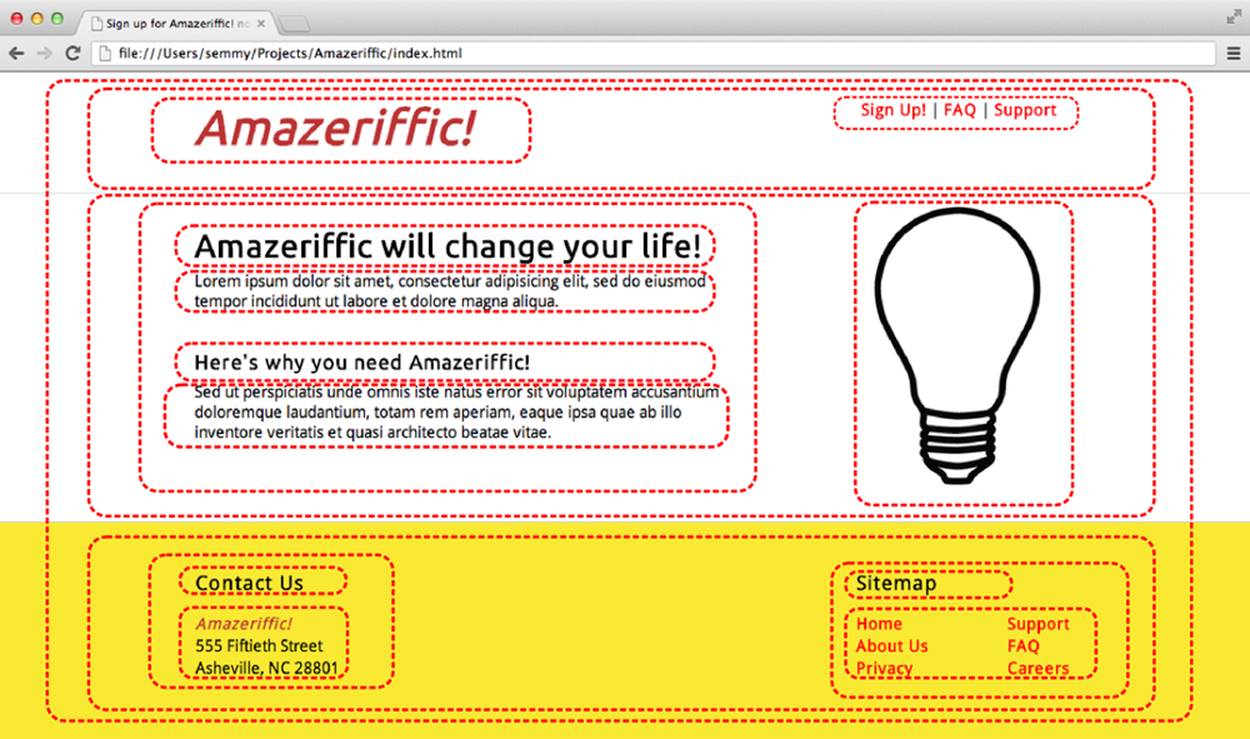
Figure 2-11. The Amazeriffic mockup, annotated to illustrate structure
Notice that I could go even further and label the circled parts. For example, it’s relatively obvious where the header, the logo, the navigation links, the footer, the contact information, the sitemap, the main content, the subcontent, and the image are located. These all represent some structural element of the page.
Visualizing Structure with a Tree
Once we have identified all the structural elements, we’ll need to examine how they fit together. To do this, we can create a tree diagram for the structure that will specify the contents of all the various elements. Figure 2-12 shows what a tree representation of this structure might look like.
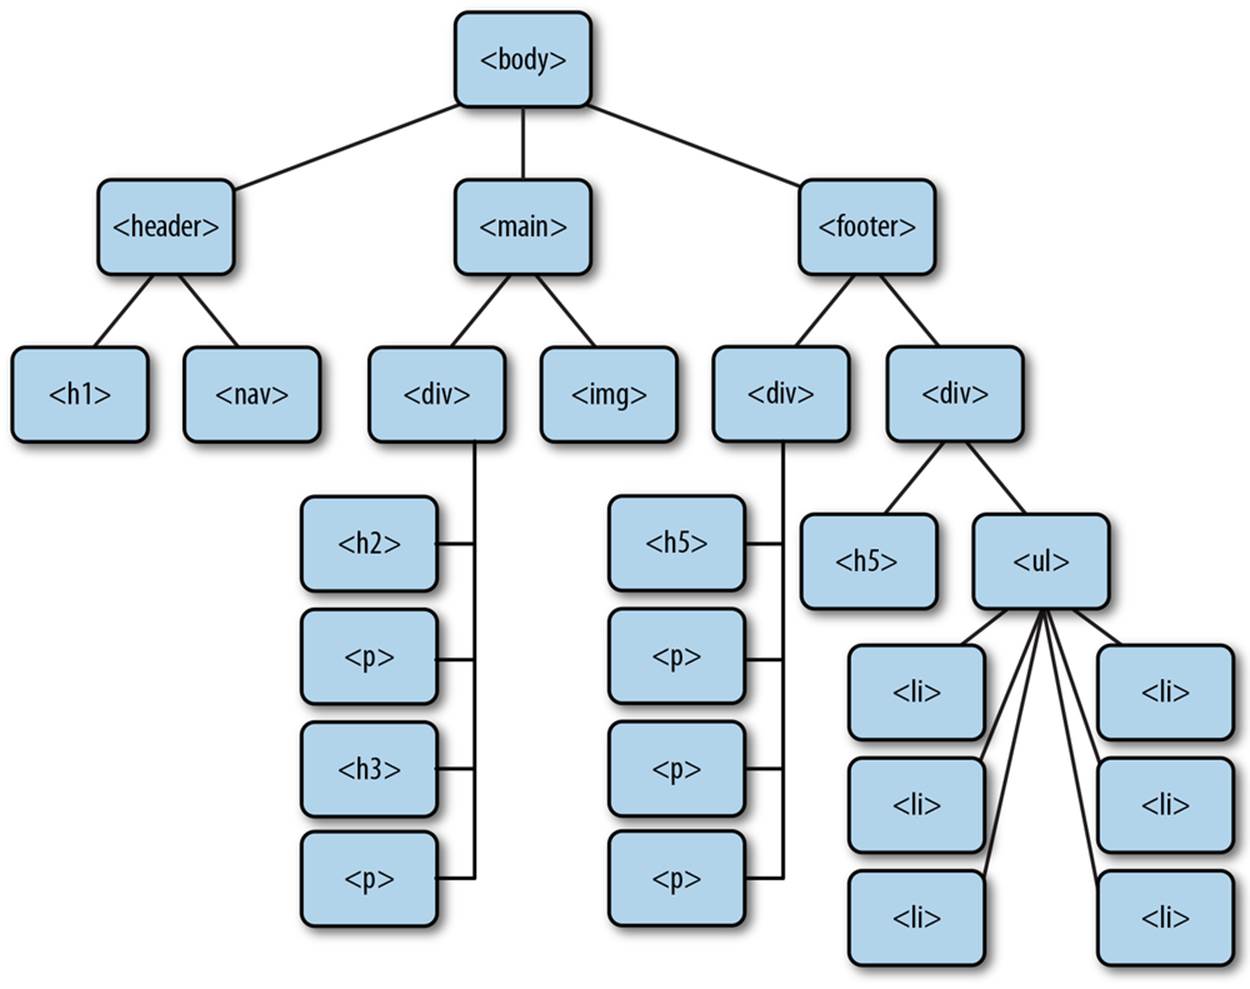
Figure 2-12. The Amazeriffic structure in the form of a tree diagram
Implementing the Structure with Our Workflow
Once we have a tree representation (either on paper or in our head), it’s pretty easy to code up the HTML if we know the tags that represent these structural content elements. Because we haven’t seen all the tags we’ll need, I’ll introduce them as we go along.
First, before we do anything, we’re going to create a directory to store our project. If you followed the instructions in the first chapter, you already have a Projects directory in your home directory (if you’re in Mac OS or Linux) or your Documents folder (if you’re in Windows). We’ll want to start by navigating to that directory from the Terminal application in Mac OS or from Git Bash in Windows. We’ll use the cd command:
hostname $ cd Projects
Once we’re in that directory, we’ll create a directory for our Amazeriffic project. Which command do we use for that? You’re right! We use the mkdir command:
hostname $ pwd
/Users/semmy/Projects
hostname $ mkdir Amazeriffic
Then we can get some visual feedback that the directory has actually been made by using the ls command, and finally, navigate to that directory with the cd command:
hostname $ ls
Amazeriffic
hostname $ cd Amazeriffic
At this point, we should be in our new project directory (we can confirm that by using the pwd command). The next major thing that we want to do is to put this directory under version control. We use git init to create a Git project:
hostname $ git init
Initialized empty Git repository in /Users/semmy/Projects/Amazeriffic/.git/
Now that we’ve created a directory and put it under version control, we’re ready to start coding! Open up Sublime, and then open the Amazeriffic directory using the keyboard shortcuts described in the previous chapter.
Next, we can create a new HTML document by right-clicking the directory in the navigation pane and selecting New File. This will create an unnamed file that we can rename by simply typing index.html. After it is created and given a name, we can open the file by double-clicking it. Let’s add “Hello World” to the document in order to get some content in it that we can view in the browser.
After having a basic document set up, we can fire up Chrome and open the page. If all goes well, we should see “Hello World” in the browser.
Next, we’ll build a skeleton HTML document to get started. Replace the “Hello World” in your index.html file with the following:
<!doctype html>
<html>
<head>
<title>Amazeriffic</title>
</head>
<body>
<h1>Amazeriffic</h1>
</body>
</html>
Save the file and reload the browser. Once we do that, we should see something that looks similar to Figure 2-13.
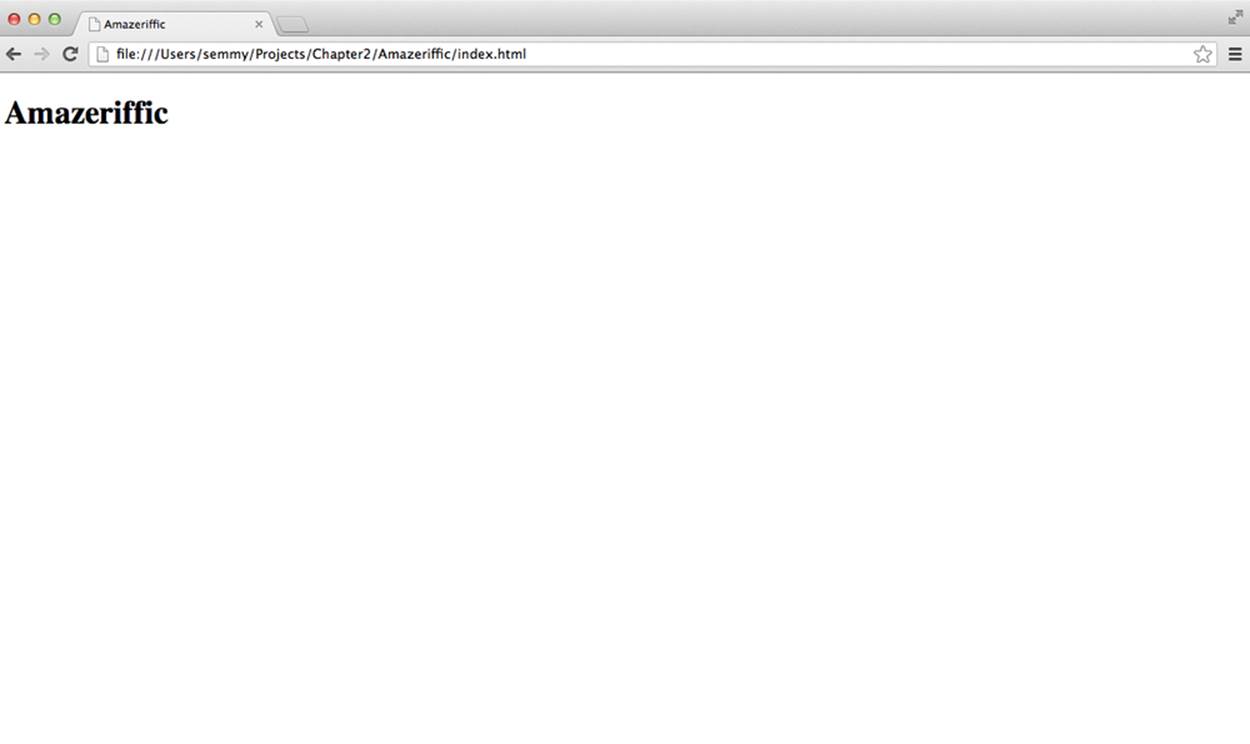
Figure 2-13. Amazeriffic, after we add a few basic elements to the page
Once that’s done, we’ll make our first commit. Drop to the command line. First, we’ll check the status of our working directory and then add and commit the index.html file:
hostname $ git status
# On branch master
#
# Initial commit
#
# Untracked files:
# (use "git add <file>..." to include in what will be committed)
#
# index.html
hostname $ git add index.html
hostname $ git status
# On branch master
#
# Initial commit
#
# Changes to be committed:
# (use "git rm --cached <file>..." to unstage)
#
# new file: index.html
hostname $ git commit -m "Add default index.html to repository."
[master (root-commit) fd60796] Add default index.html to the repository.
1 file changed, 10 insertions(+)
create mode 100644 index.html
You’ll see that we start by checking the status. That’s a good habit to get into, because visual feedback is always helpful. Among other things, this will tell us if we have inadvertently changed a file that we didn’t intend to change. For now, though, we see that the only file there is index.html.
Add index.html and follow up with another call to git status. That shows us which files will be committed when we run git commit. Finally, we do a git commit along with our message.
Now we’re ready to actually build the structure for the page. If we take a look at the tree, we’ll see that we have a header, a main content section, and a footer. Each of these are children of the body element. It turns out that HTML has a tag representing all three of these sections of a document. The <header> and <footer> tags represent elements that appear at the top and the bottom of a document, and the <main> tag represents the main content area of a document:
<!doctype html>
<html>
<head>
<title>Amazeriffic</title>
</head>
<body>
<header>
<h1>Amazeriffic</h1>
</header>
<main>
</main>
<footer>
</footer>
</body>
</html>
Note that we’ve also moved the <h1> tag containing the Amazeriffic logo inside the header tag. That’s because the logo is a child of the header in our tree diagram.
Next, we’ll see that the upper-right corner of the page has a small navigation section with links to a Sign Up page, a FAQ page, and a Support page. Sure enough, HTML has a tag that supports a navigation element, and it’s called nav. So we’ll add that section to our <header> tag:
<header>
<h1>Amazeriffic</h1>
<nav>
<a href="#">Sign Up!</a> |
<a href="#">FAQ</a> |
<a href="#">Support</a>
</nav>
</header>
TIP
Note that the nav element contains several links that are separated by the | symbol. That symbol is right above the Enter key on your keyboard, co-located with the backslash. You’ll have to press Shift to print the | symbol.
The links in the nav element are contained in <a> tags. As mentioned previously, <a> tags contain href attributes, which usually contain a link to the page we should be directed to when we click. Because we’re not actually linking anywhere in this example, we’ve used the # symbol as a temporary placeholder for the link.
Because we’ve completed the <header> section, it’s probably a good idea to commit to our Git repository. It might be helpful to do a git status first to see the changed files in our repository. Then we’ll do a git add and a git commit with a meaningful commit message.
Structuring the Main Content
Now that we’ve completed the <header> section, we can move on to the <main> section. We’ll see that, like the header, there are two main parts to the structure of the main section. There’s the content on the left side, and then there’s the image that is on the right side. The content on the left side is divided up into two separate sections, so we’ll need to make sure to account for that.
To build out the structure of the content on the left side, we’ll use four new tags. We’ll use two heading tags (<h2> and <h3>), which represent heading text that is less important than an <h1> tag. We’ll also use the <p> tag, which represents paragraph content. In addition, we’ll use the <ul>tag, which represents an unordered list, along with its related <li> tags, which are list items.
And last but not least, we’ll use the <img> tag to include the lightbulb image in our layout. Notice that the <img> tag doesn’t have a closing tag associated with it. That’s because HTML5 includes a set of elements referred to as void elements. Void elements typically do not have content and do not require a closing tag.
We’ll also see that the <img> tag has a required attribute called the alt attribute. This attribute contains a textual description of the image. This is important to make our page accessible by the visually impaired, who often use screen readers when browsing the Internet.
TIP
You can download the lightbulb image from http://www.learningwebappdev.com/lightbulb.png. To get it to appear on your page, you’ll need to save it in the same directory as your index.html file.
Once we add the structured content to the <main> tag, it will look something like this:
<h2>Amazeriffic will change your life!</h2>
<p>Lorem ipsum dolor sit amet, consectetur adipisicing elit, sed do
eiusmod tempor incididunt ut labore et dolore magna aliqua.</p>
<h3>Here's why you need Amazeriffic</h3>
<ul>
<li>It fits your lifestyle</li>
<li>It's awesome</li>
<li>It rocks your world</li>
</ul>
<img src="lightbulb.png" alt="an image of a lightbulb">
When we reload the page in our browser, it should look similar to Figure 2-14.
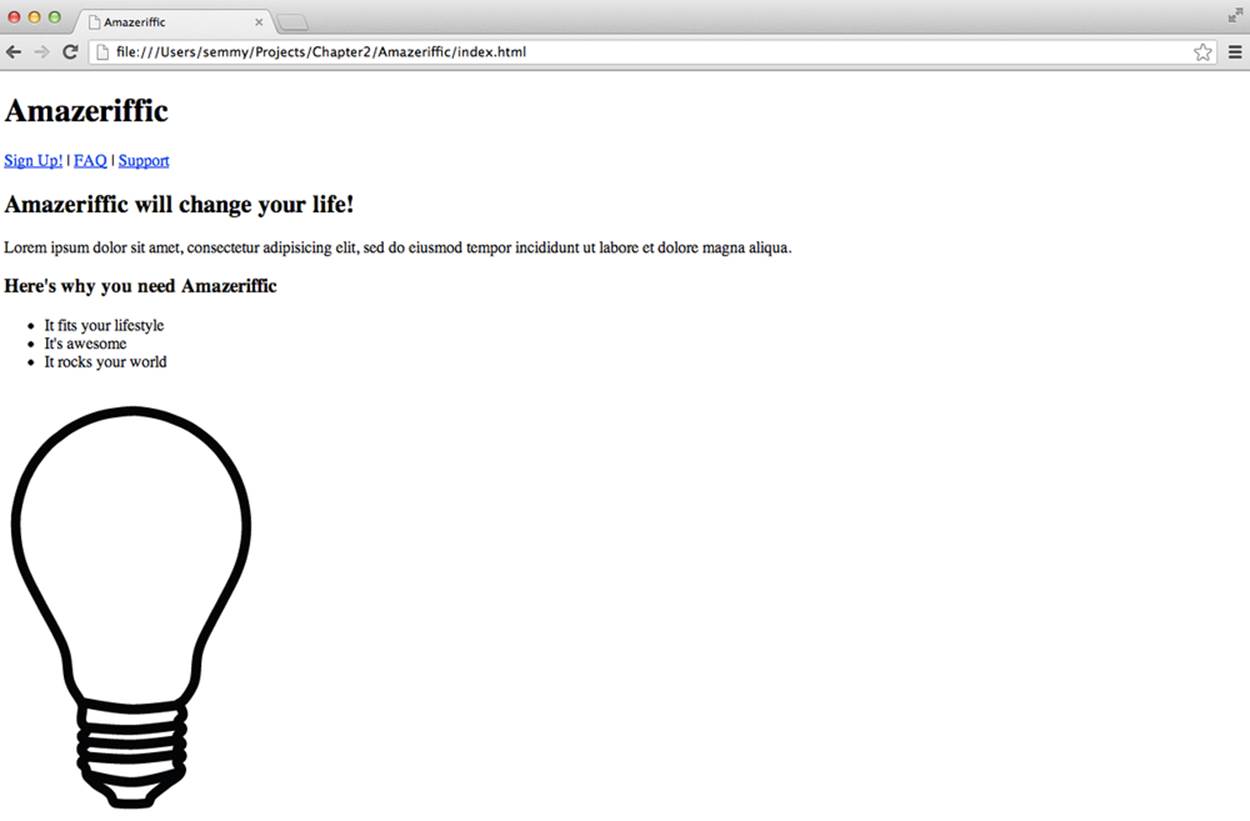
Figure 2-14. Amazeriffic, after structuring the main element
At this point, it would be a good idea to run your code through the validator and make sure you haven’t inadvertently omitted anything. Once you’re happy with it, make another commit to the Git repository, and we’ll move on to the footer.
Structuring the Footer
The footer contains two main sections just like the other sections. One of the sections includes contact information for the company, and the other section is a set of links that we’ll refer to as a sitemap. Furthermore, the sitemap itself is divided up into two columns.
First of all, there’s no HTML element that represents contact information. That’s okay, because HTML gives us two generic tags called <div> and <span> that allow us to create elements that represent some structure that we define ourselves. We’ll learn the difference between the div andspan elements in the next chapter.
In this case, we have two separate structures in the footer: the “Contact” information and the “Sitemap.” Therefore, we’ll create two <div> elements, each of which has a class attribute that specifies the type of the element. At this point, you can think of a class attribute as an attribute that you use to add meaning to the generic <div> and <span> tags.
In addition, we’ll use another <ul> tag to create an unordered list element for the sitemap. The resulting HTML that creates the structure of our footer is as follows:
<footer>
<div class="contact">
<h5>Contact Us</h5>
<p>Amazeriffic!</p>
<p>555 Fiftieth Street</p>
<p>Asheville, NC 28801</p>
</div>
<div class="sitemap">
<h5>Sitemap</h5>
<ul>
<li><a href="#">Home</a></li>
<li><a href="#">About Us</a></li>
<li><a href="#">Privacy</a></li>
<li><a href="#">Support</a></li>
<li><a href="#">FAQ</a></li>
<li><a href="#">Careers</a></li>
</ul>
</div>
</footer>
Add the footer content to your HTML document, run it through the HTML validator to make sure you haven’t made any mistakes, and commit it to your Git repository.
We’ll revisit this example in Chapter 3, where we’ll style it.
Summary
In this chapter, we’ve learned to structure the user interface of our application using HTML. HTML is a markup language that lets us use tags to define a structure referred to as the DOM. The browser uses the DOM to create a visual rendering of the page.
The DOM is a hierarchical structure and can be easily represented using a tree diagram. It’s sometimes helpful to think about the DOM in the form of a tree because it more clearly represents the descendant, child, and parent relationships between elements.
Validation is a useful tool that helps us avoid simple errors and HTML-related pitfalls.
We learned about several tags in this chapter, which are listed in Table 2-1. They all represent specific structural elements with the exception of the <div> tag. We typically attach a class attribute to a <div> tag to give it some kind of semantic meaning.
Table 2-1. HTML tags
|
Tag |
Description |
|
<html> |
The main container for an HTML document |
|
<head> |
Contains meta-information about the document |
|
<body> |
Contains the content that will be rendered in the browser |
|
<header> |
The header of the page |
|
<h1> |
Most important heading (only one per document) |
|
<h2> |
Second most important heading |
|
<h3> |
Third most important heading |
|
<main> |
The main content area of your document |
|
<footer> |
The footer content of your document |
|
<a> |
Anchor, a link to another document or a clickable element |
|
<ul> |
A list of things where order doesn’t matter |
|
<ol> |
A list of things where order matters |
|
<li> |
An element of a list |
|
<div> |
A container for a substructure |
More Practice and Further Reading
I’ve left a few open issues with Amazeriffic. I encourage you to fix them and get them working as well as you can. Remember, if you’re having trouble you can see the finished HTML on our GitHub page.
Memorization
Now that we’ve learned the basics of HTML, we can add a few more steps to our memorization goal. In addition to the five steps mentioned in the previous chapter, you should add the following to your practice:
1. Open the file in Chrome using keyboard shortcuts.
2. Modify index.html to include <!doctype>, <html>, <head>, and <body> tags.
3. Add a <p> tag that simply contains the words “Hello World.”
4. Reload the file in Chrome and make sure it renders correctly (if it doesn’t, fix it).
5. Commit the changes to your Git repository from the command line.
6. Add <header>, <main>, and <footer> tags to your <body> tag.
7. Confirm that it renders correctly in Chrome.
8. Validate it with the HTML validator.
9. Commit the style.css changes to your Git repository.
Tree Diagrams
Draw a tree diagram for the following HTML document. We’ll also use this HTML document for practice problems at the end of Chapter 3 and Chapter 4:
<!doctype html>
<html>
<head>
</head>
<body>
<h1>Hi</h1>
<h2 class="important">Hi again</h2>
<p class="a">Random unattached paragraph</p>
<div class="relevant">
<p class="a">first</p>
<p class="a">second</p>
<p>third</p>
<p>fourth</p>
<p class="a">fifth</p>
<p class="a">sixth</p>
<p>seventh</p>
</div>
</body>
</html>
Build the FAQ Page for Amazeriffic
In Amazeriffic’s navigation bar, there is a dead link for a Frequently Asked Questions page. Create a page that follows exactly the same style for the header and footer, but has a list of questions and answers as its main content. Use lorem ipsum text as a placeholder (unless you actually want to come up with questions and answers).
Save the file as faq.html. You can link to the page by filling out the href attribute in its associated <a> tag—set it to faq.html. If you include the two pages in the same directory, you should be able to click from the main splash page to get to the FAQ page. Similarly, you can link back toindex.html from faq.html.
In Chapter 3 we’ll style this page.
More About HTML
Throughout this book, I’ll point you to the Mozilla Developer Network documentation for more information on certain topics. Its site includes a wonderful overview of HTML. I encourage you to take a look for more in-depth documentation and advanced features.
All materials on the site are licensed Creative Commons Attribution-Sharealike 3.0 Unported CC BY-SA 3.0 & GNU Free Documentation License (GFDL)
If you are the copyright holder of any material contained on our site and intend to remove it, please contact our site administrator for approval.
© 2016-2026 All site design rights belong to S.Y.A.