Teach Yourself VISUALLY Search Engine Optimization (2013)
Chapter 3. Building an SEO Friendly Website
The SEO process starts with building your website as it should be optimized, so the search spiders can crawl it and index its content once it is published on the Internet. The SEO preparation steps include creating the website structure, ensuring easy crawling, establishing the correct links hierarchy, and avoiding any errors that might prevent search engine indexing.
Plan for an Optimized Website
Create a Website Sitemap
Create a Robots.txt File
Using the Nofollow Attribute
Build an .htaccess File
Protect Website Images with .htaccess
Redirect Non-WWW Traffic to WWW
Work with 301 Redirects
Scan Errors with W3C Markup Validation
Plan for an Optimized Website
You have to consider your SEO methods even before you start to build your website, because optimization affects every part of your website, including its design, development, functions, and structure. If you do not take the methods for optimizing website content and files, known as On-page SEO, into consideration early on, it may be difficult to optimize your website in the future because many of the On-page SEO relates to the website infrastructure itself.
User-Friendly Functions

It sounds strange to talk about usability as the term is more related to the design side of the site developing, but actually, it is very important because once visitors locate what they need on a website, they remain on the website for a longer time. If users are satisfied with the website, they will save it as a Favorite and return to it again. If they find your website hard to use and they cannot find information easily, you will never be able to keep them on the site, even if you use every possible SEO tactic.
URL Structure
When you build a website, you should name your HTML files so it is easy for the search engine to identify the keywords and the file categories. For example, if you have a page that talks about photography basic tips, you can name the HTML file basic-photography-tips.html, and visitors can reach it through www.sitename.com/basic-photography-tips.html. This can help search engines index the web page and display it for users when they type photography tips in the search field.
Website Design Structure
One of the important things to consider is the website design. The clean design with optimized images can load fast and search engines can crawl it faster than a website with large-sized images, which take a long time to load. Also, a flexible design that can be modified easily allows you to customize your website based on the SEO recommendations.
Website Navigation

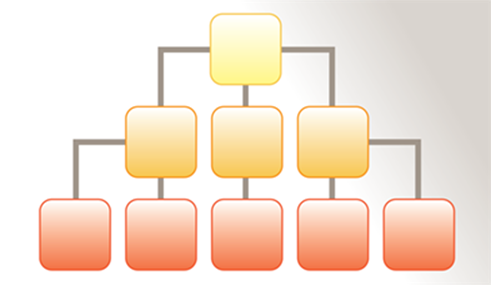
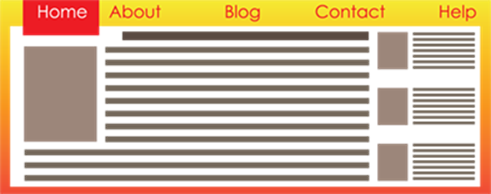
Navigation is very important to search engines, and website pages should be linked to each other so users can easily reach any page on a website from the other pages on the site. A web page that does not allow you to navigate to other pages on the website is called a dead link, and dead links are a bad practice in the SEO industry. The best way to unify your website pages is to create a menu that is located on each web page that visitors can use to link to other pages within the website.
SEO Website Functions
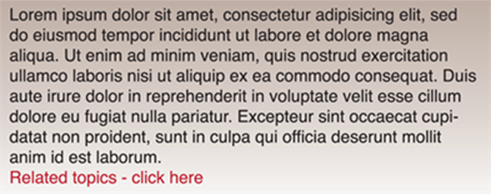
When you build your website, you have to consider functions that help the SEO process. For example, you can add a section under each post or content area that tells users about related topics on the website. Then they can visit the content for the related topics and get more information. This can help increase your website page views and the time users spend on your website.
Create a Website Sitemap
The sitemap is an XML-based file that indexes the website’s links, images, and files. It should follow the same structure as the website. The sitemap file is usually named Sitemap.xml, Sitemap.html, or Sitemap.php and it is placed in the website server so the search engines can reach it directly by following the website link; for example, it can be www.sitename.com/sitemap.xml, where sitename.com can be your own website name. While you can create the sitemap manually, there are tools you can use to create a sitemap for your website without needing to learn how to write XML code, such as the free sitemap generator at www.xml-sitemaps.com.
Create a Website Sitemap
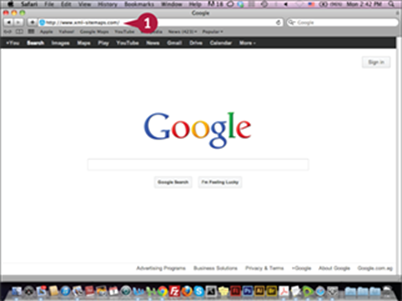
![]() Type www.xml-sitemaps.com in your web browser and press
Type www.xml-sitemaps.com in your web browser and press ![]() .
.
The XML Sitemaps website appears.
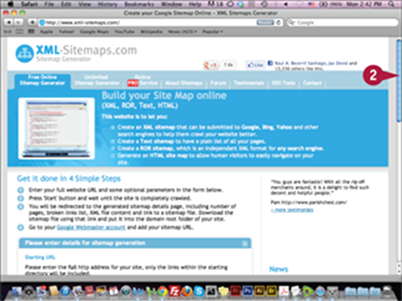
![]() Scroll down to the form.
Scroll down to the form.
The XML sitemap form appears.
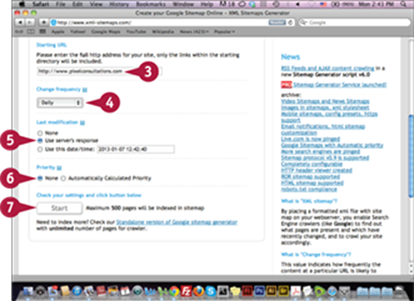
![]() Type the website URL.
Type the website URL.
![]() Click the Change frequency pop-up menu and select the website update frequency.
Click the Change frequency pop-up menu and select the website update frequency.
![]() Click the Last modification date option (
Click the Last modification date option (![]() changes to
changes to ![]() ).
).
![]() Click the Priority option to select how the XML sitemap calculates the URL’s indexing (
Click the Priority option to select how the XML sitemap calculates the URL’s indexing (![]() changes to
changes to ![]() ).
).
![]() Click Start.
Click Start.
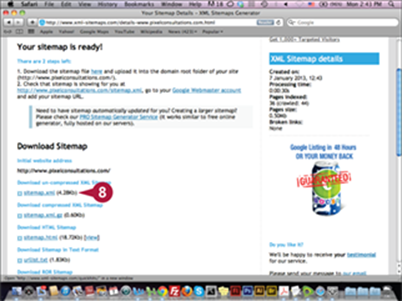
The website XML sitemap is created.
![]() Click the link to download it.
Click the link to download it.
After downloading, you can upload the sitemap to your website server root folder.
TIP
What are the different types of sitemaps?
There are different types of sitemaps that you can create and upload to the website server. Each of these XML sitemaps can contain specific types of links. The XML sitemap can include an image sitemap, which contains links for the images in the website and its information. Also, there are video sitemaps, news sitemaps, and mobile sitemaps. You can upload multiple XML sitemap files to the same website and submit these sitemaps to search engines to ping the search engines to crawl and index them. When you add new content to the website, you have to update the sitemap with the new added content.
Create a Robots.txt File
The Robots.txt file is a text document that informs the search engine spiders which parts of your website you would like to be crawled and which parts you do not want the search engines crawling. For example, if you have large source files, crawling them may overload the server and consume the search engine crawlers’ time indexing website files. You can create the Robots.txt file using text editors, such as TextEdit for the Mac and Notepad for Windows.
Create a Robots.txt File
Create a File
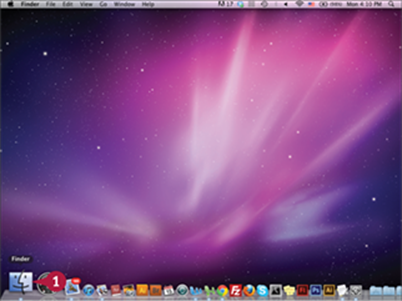
![]() Click the Finder icon (
Click the Finder icon (![]() ).
).
The Finder window opens.
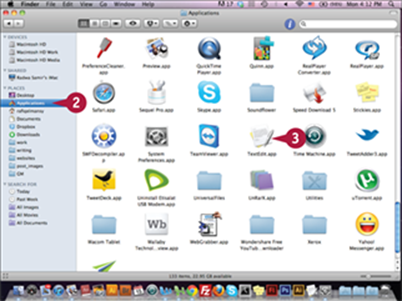
![]() Click Applications.
Click Applications.
The installed applications appear.
![]() Click TextEdit.app.
Click TextEdit.app.
Note: For Windows users, you can click Start, click All Programs, click Accessories, and then click Notepad.
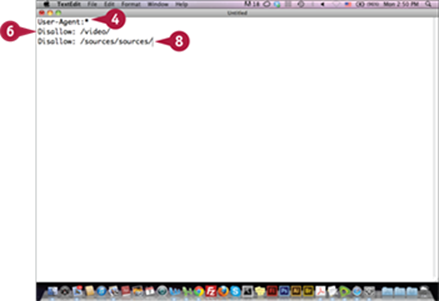
The text editor opens.
![]() Type User-Agent:*.
Type User-Agent:*.
![]() Press
Press ![]() .
.
![]() Type Disallow: /video/.
Type Disallow: /video/.
![]() Press
Press ![]() .
.
![]() Type Disallow: /sources/sources/.
Type Disallow: /sources/sources/.
![]() Press
Press ![]() .
.
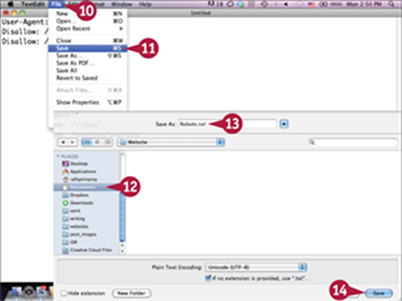
![]() Click File.
Click File.
![]() Click Save.
Click Save.
The Save As dialog box appears.
![]() Navigate to the location where you want to save the file.
Navigate to the location where you want to save the file.
![]() Type a name for your file in the Save As field, or in the File name field if you are using Microsoft Notepad.
Type a name for your file in the Save As field, or in the File name field if you are using Microsoft Notepad.
![]() Click Save.
Click Save.
The file saves.
TIPS
What does User-Agent reference?
The User-Agent describes which search engine should follow the rules after it. When you set it to *, this means it is applied to all the search engine robots.
What are the Allow and Disallow rules?
Allow and Disallow set the rules for the search engine spiders to crawl specific folders on the server or exclude others. Usually, you use Disallow to prevent the search engine spiders from crawling specific folders on the server; all other folders will be crawled by default.
After you create the Robots.txt file, you need to upload the file to the server. Usually, the Robots file is uploaded to the main folder on the server using a technology called File Transfer Protocol (FTP). FTP applications upload files to the website server using the username and password the server administrator or hosting company provides. There are many FTP clients such as FireFTP and FileZilla along with the FTP URL.
Upload the File to a Server
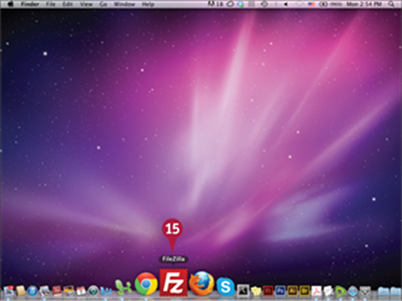
![]() Click the FileZilla icon (
Click the FileZilla icon (![]() ).
).
Note: If you do not have FileZilla on your computer, you can download or install it from http://filezilla-project.org.
The FileZilla client appears.
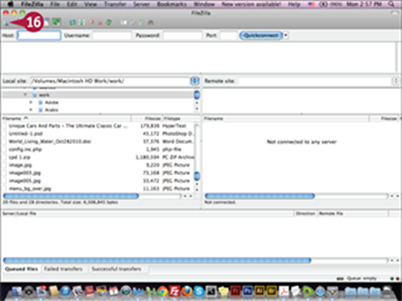
![]() Click the Site Manager icon (
Click the Site Manager icon (![]() ).
).
The Site Manager appears.
A If your new site form is unavailable, you can click New Site to display it.
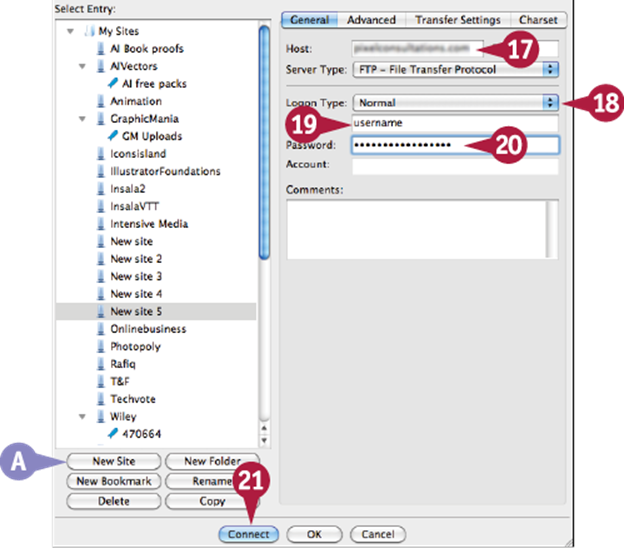
![]() Type the FTP URL in the Host field.
Type the FTP URL in the Host field.
![]() Click the Logon Type pop-up menu and select Normal.
Click the Logon Type pop-up menu and select Normal.
![]() Type a username.
Type a username.
![]() Type a password.
Type a password.
![]() Click Connect.
Click Connect.
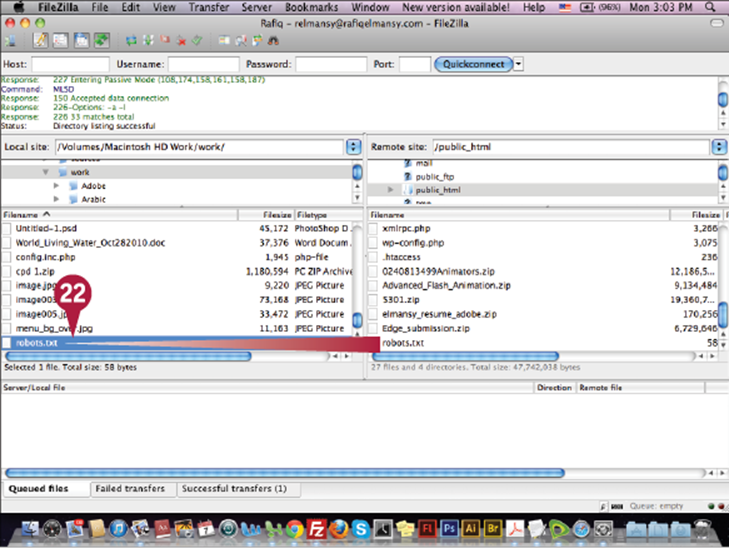
The FTP folder on the server appears.
![]() Click and drag the robots.txt file to the FTP side to upload it.
Click and drag the robots.txt file to the FTP side to upload it.
TIP
Are there Robots.txt generators?
Creating the Robots.txt file may be a little confusing for beginners and any errors in it may accidently prevent search engine spiders from crawling specific parts from your site. There are comprehensive free tools that generate Robots.txt, with different customization options based on your website needs, such as www.mcanerin.com/EN/search-engine/robots-txt.asp. Also, there is the Robots Text Generator, which you can find at www.internetmarketingninjas.com/seo-tools/robots-txt-generator/. This tool is much simpler to use than the Robot Control Code Generation Tool from McAnerin.
Using the Nofollow Attribute
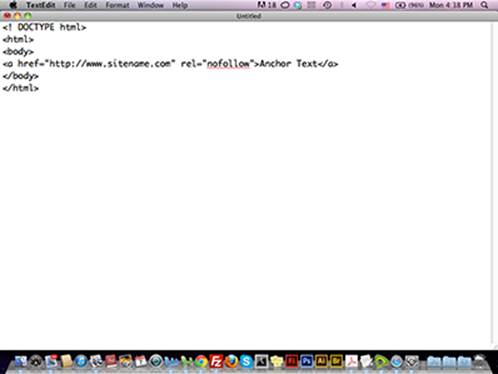
The Nofollow attribute is an HTML snippet that is added to the hyperlink code that creates links in websites. The Nofollow attribute plays an important rule in SEO, especially in building links that impact the website rank. Usually, the links to external websites can reduce the rank of the website. Therefore, you use the attribute rel="nofollow" in your HTML code to tell the search engine not to follow this link and discard it when evaluating the website. You can type this code in any text editor, such as TextEdit or Notepad, and save it as an HTML file.
Using the Nofollow Attribute

![]() In your TextEdit file, type <a href="www.sitename.com" rel="nofollow">Anchor Text</a> on the line following the <body> tags.
In your TextEdit file, type <a href="www.sitename.com" rel="nofollow">Anchor Text</a> on the line following the <body> tags.
Note: For Windows users, you can write the code in Notepad.
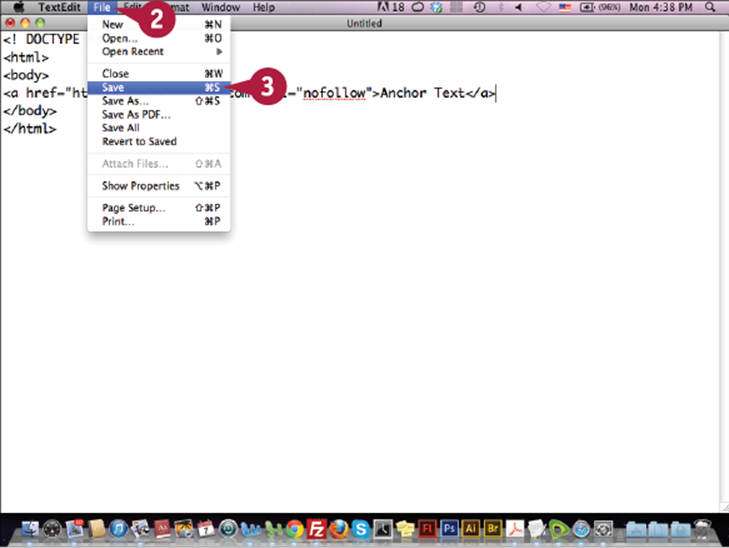
![]() Click File.
Click File.
![]() Click Save.
Click Save.
The Save As dialog box appears.
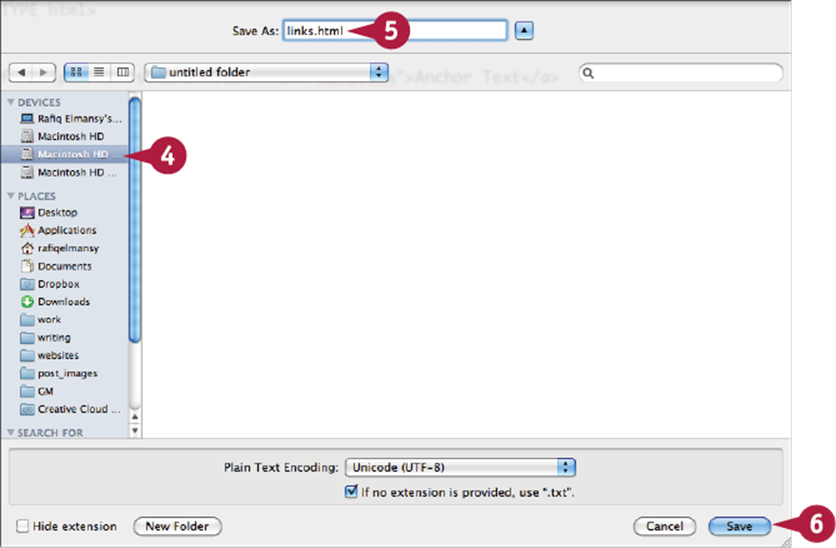
![]() Navigate to the location where you want to save the file.
Navigate to the location where you want to save the file.
![]() Type the name of the file in the Save As field, or in the File name field if you are using Microsoft Notepad.
Type the name of the file in the Save As field, or in the File name field if you are using Microsoft Notepad.
![]() Click Save.
Click Save.
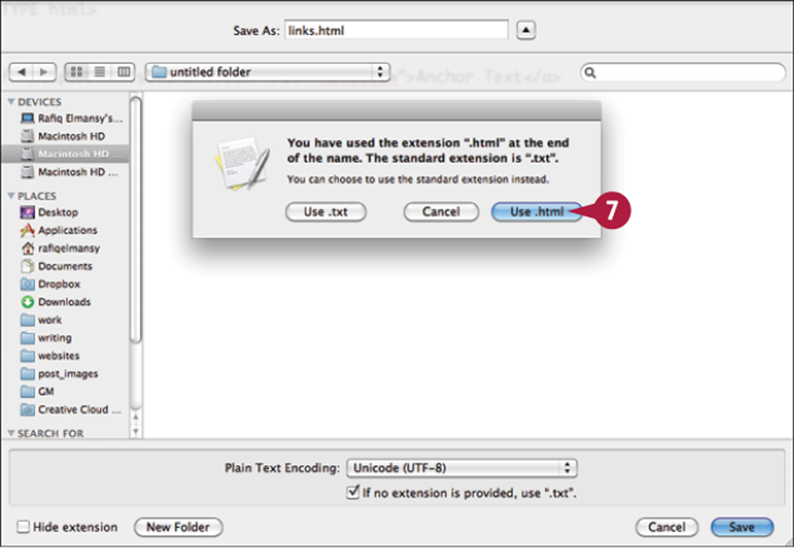
An alert message appears.
![]() Click Use .html.
Click Use .html.
The file is saved as an HTML file. You can view the file using your web browser.
TIPS
Does the Nofollow attribute violate Google rules?
There are rumors that Google does not allow the Nofollow attribute because it prevents passing the website rank from one site to another. This is wrong. Google introduced the Nofollow attribute in 2005. Then the Yahoo and Bing search engines started to use it in their algorithms.
How do I use the Nofollow attribute in SEO?
In many cases, you will want to add external links to your website as part of the information you provide to visitors. While this data is helpful, the reader does not care about the search engine crawler and how it follows the links. So, you can use the Nofollow attribute with these links to avoid a drop in your website rank.
Build an .htaccess File
The .htaccess file is uploaded to the website server to help you control the web server’s behavior. It can help protect your website from specific issues, such as accessing secured directories on the server and banning unwanted visitors from specific sources. You can upload the .htaccess file to the website’s main folder on the server or any other folder that you would like to apply .htaccess rules to. While the file has a strange extension name, .htaccess, you can create it by using any text-editing application.
Build an htaccess File
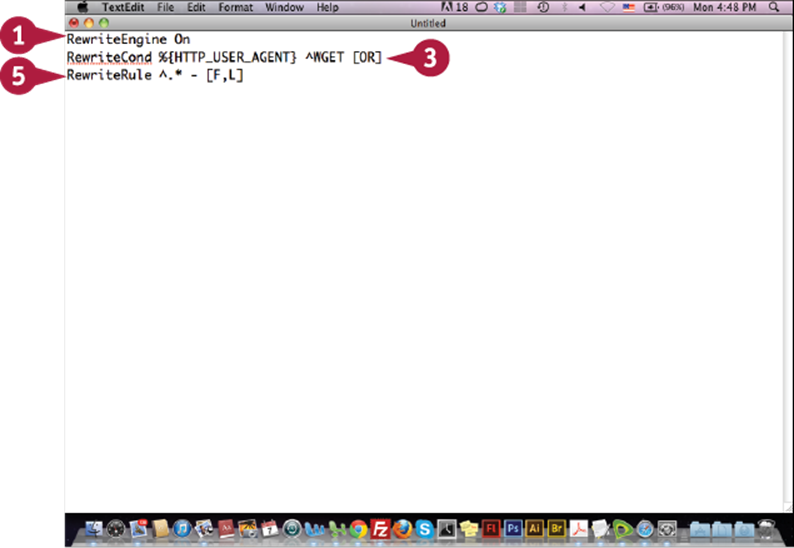
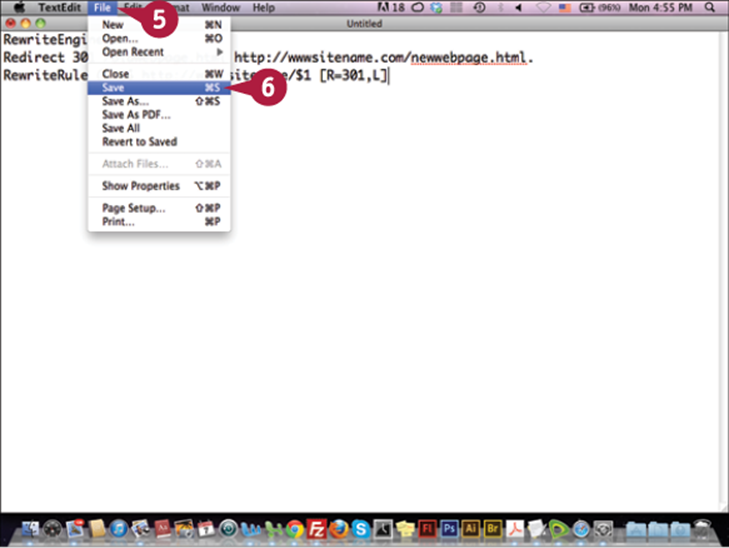
![]() In your TextEdit or Notepad editor, type RewriteEngine On to enable rewrite of the search engine rules.
In your TextEdit or Notepad editor, type RewriteEngine On to enable rewrite of the search engine rules.
![]() Press
Press ![]() .
.
![]() Type RewriteCond %{HTTP_USER_AGENT} ^WGET [OR] to prevent retrieving information from your server.
Type RewriteCond %{HTTP_USER_AGENT} ^WGET [OR] to prevent retrieving information from your server.
![]() Press
Press ![]() .
.
![]() Type RewriteRule ^.* - [F,L] to rewrite the access rules.
Type RewriteRule ^.* - [F,L] to rewrite the access rules.
The basic htaccess file is created.
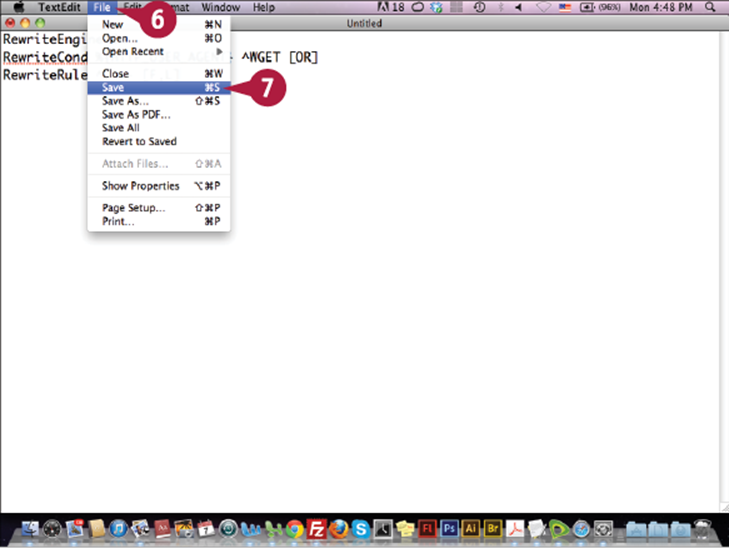
![]() Click File.
Click File.
![]() Click Save.
Click Save.
The Save As dialog box appears.
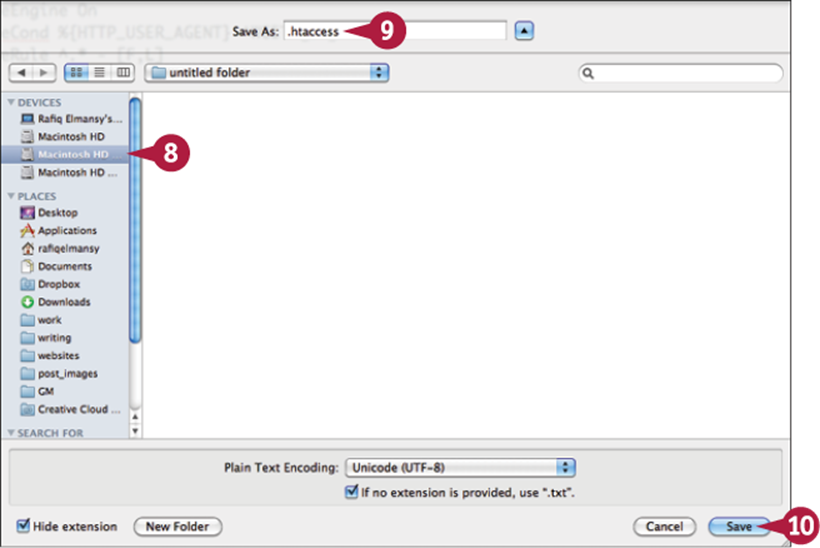
![]() Navigate to the location where you want to save the file.
Navigate to the location where you want to save the file.
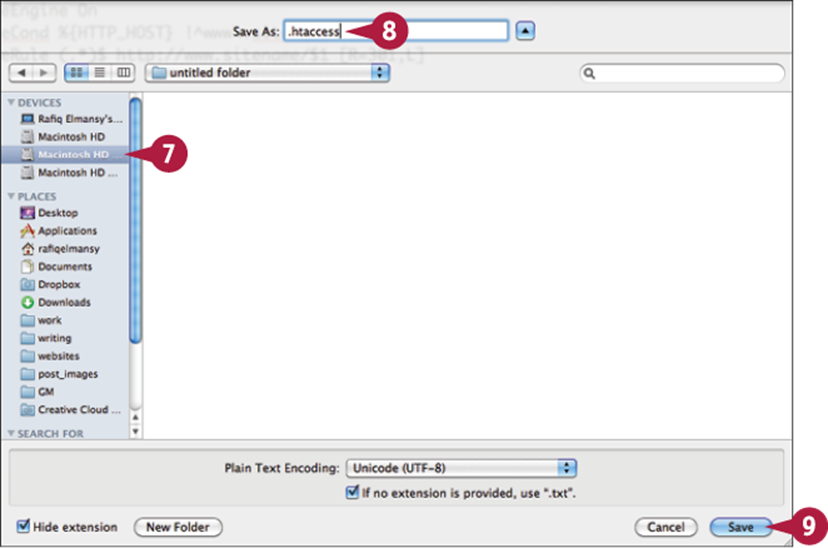
![]() Type .htaccess in the Save As field, or in the File name field if you are using Microsoft Notepad.
Type .htaccess in the Save As field, or in the File name field if you are using Microsoft Notepad.
![]() Click Save.
Click Save.
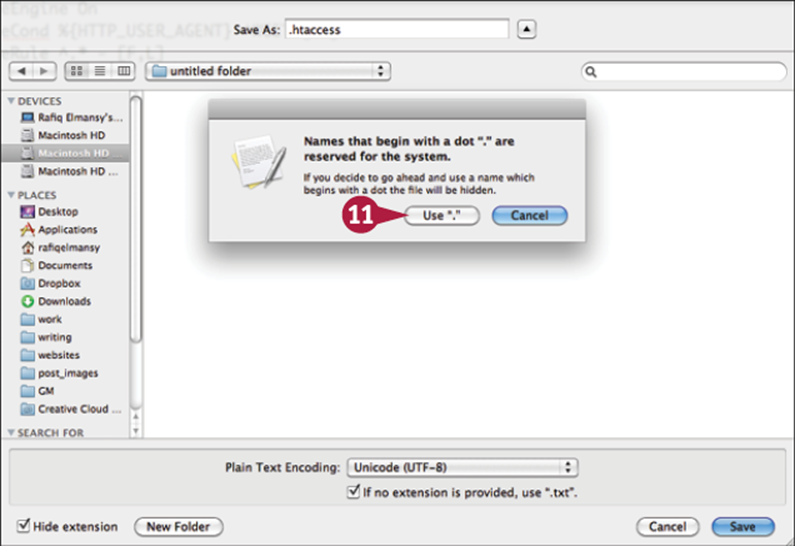
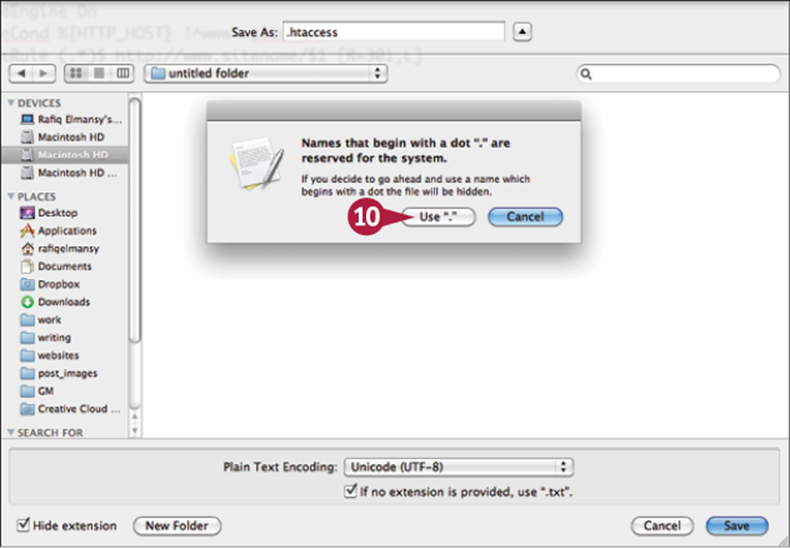
An alert message appears.
![]() Click Use ".".
Click Use ".".
After you save the file, you can upload the .htaccess to your server root.
TIP
Is there a tool to help me to create the .htaccess file?
Yes, if you find writing the .htaccess complex, you can use tools to help you build the .htaccess file at www.htaccesstools.com. The www.htaccesseditor.com/en.shtml site enables you to choose from different rules. The http://www.yellowpipe.com/yis/tools/htaccess_generator/index.phpsite enables you to create .htaccess and .htpasswd that are used to protect special directories on your server.
Protect Website Images with .htaccess
You can use the .htaccess file to prevent others from linking to your website’s images. To do this, you add code to the .htaccess file, which allows images to link only from your own website. This code is RewriteCond %{HTTP_REFERER}!^http(s)?://(www\.)?yourwebsite.com [NC], which allows only your website to link to the images with specific formats. These format are defined in the next code line: RewriteRule \.(jpg|jpeg|png|gif|flv|swf)$ - [NC,F,L].
Protect Website Images with .htaccess
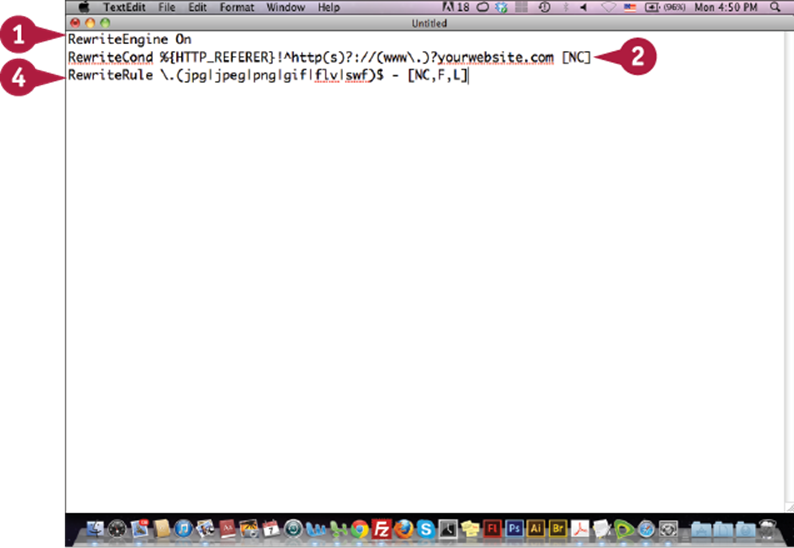
![]() In the .htaccess file, press
In the .htaccess file, press ![]() after the RewriteEngine On line.
after the RewriteEngine On line.
![]() Type RewriteCond %{HTTP_REFERER}!^http(s)?://(www\.)?yourwebsite.com [NC], replacing yourwebsite.com with your website name.
Type RewriteCond %{HTTP_REFERER}!^http(s)?://(www\.)?yourwebsite.com [NC], replacing yourwebsite.com with your website name.
![]() Press
Press ![]() .
.
![]() Type RewriteRule \.(jpg|jpeg|png|gif|flv|swf)$ - [NC,F,L].
Type RewriteRule \.(jpg|jpeg|png|gif|flv|swf)$ - [NC,F,L].
The new rules are added.
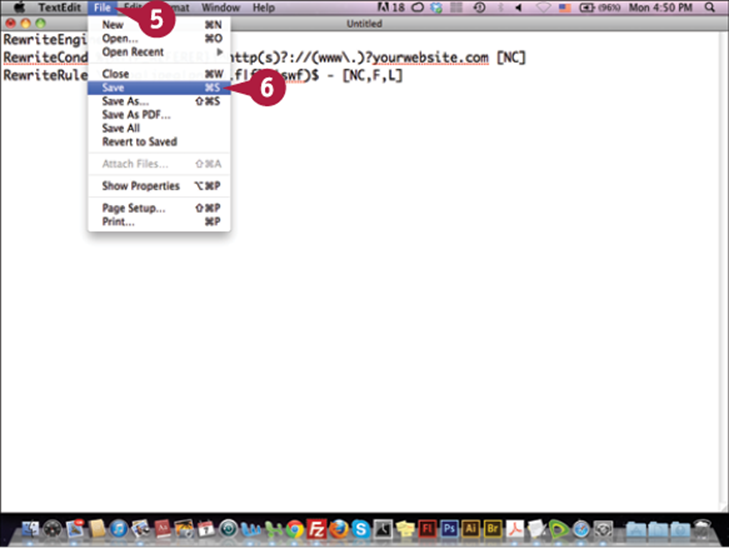
![]() Click File.
Click File.
![]() Click Save.
Click Save.
The Save As dialog box appears.
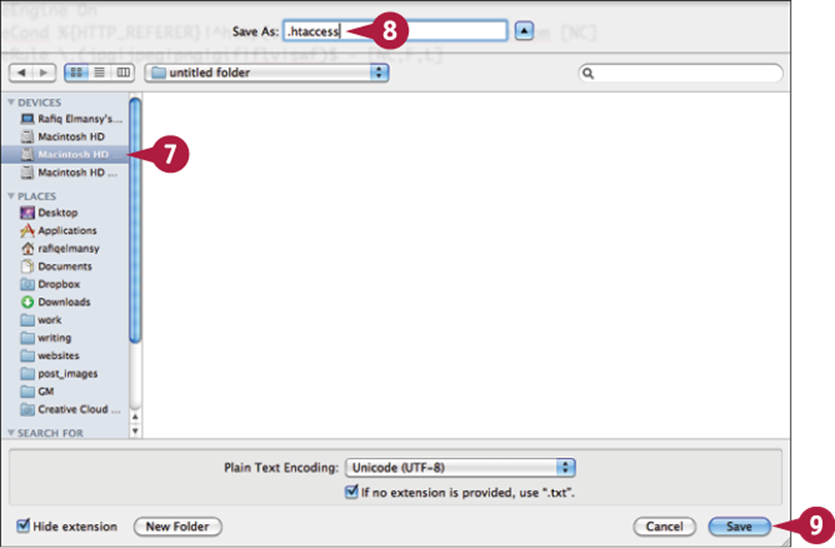
![]() Navigate to the location where you want to save the file.
Navigate to the location where you want to save the file.
![]() Type .htaccess in the Save As field, or in the File name field if you are using Microsoft Notepad.
Type .htaccess in the Save As field, or in the File name field if you are using Microsoft Notepad.
![]() Click Save.
Click Save.
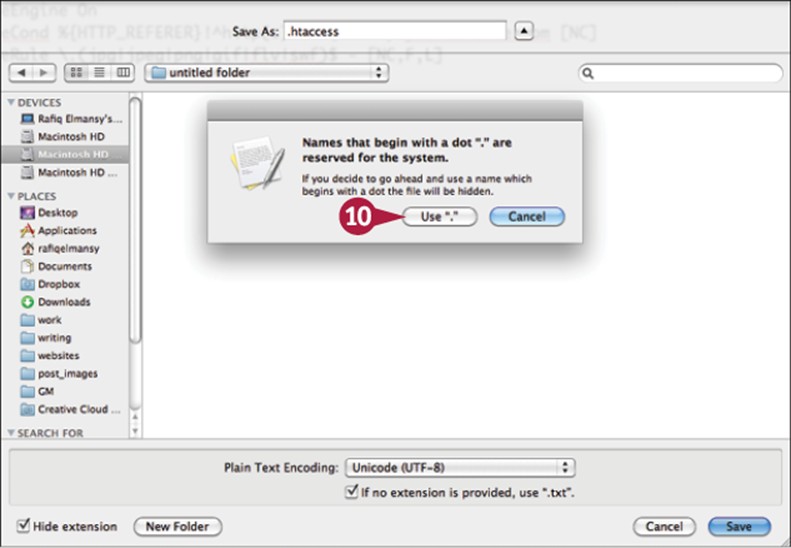
An alert message appears.
![]() Click Use ".".
Click Use ".".
TIPS
What is image hotlinking?
An image hotlink refer to sites that link to images on your website without uploading the images directly on their servers. This can consume bandwidth and cause server load. The .htaccess protection code can help you avoid this problem.
How do I prevent unwanted traffic?
You can use the www.htaccesstool.com website to generate an .htaccess code that allows you to block incoming traffic from certain IP addresses. Monitor your website statistics to make sure that you do not have excessive traffic from a specific IP or website.
Redirect Non-WWW Traffic to WWW
You may notice that some websites can be accessed by typing the website URL with the WWW or without it. For example, both http://www.sitename.com and http://sitename.com point to the same website. While this is true, search engines still deal with both in a different ways and give both URLs different ranking. This is why you need to redirect the traffic from the non-WWW to the standard WWW URL. This is known as a 301 Redirect, or permanent redirect. You can apply this 301 Redirect in the .htaccess file.
Redirect Non-WWW Traffic to WWW
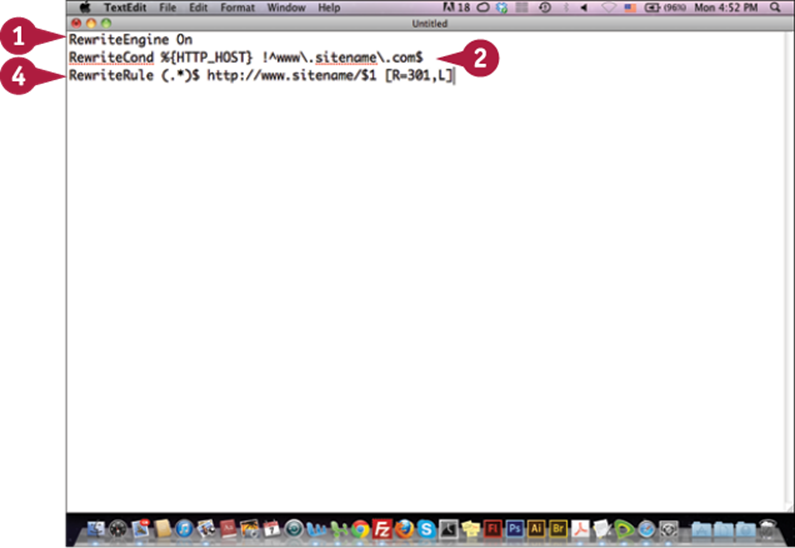
![]() In the .htaccess file, press
In the .htaccess file, press ![]() after the RewriteEngine On line.
after the RewriteEngine On line.
![]() Type RewriteCond %{HTTP_HOST} !^www\.sitename\.com14, replacing sitename.com with your website URL.
Type RewriteCond %{HTTP_HOST} !^www\.sitename\.com14, replacing sitename.com with your website URL.
![]() Press
Press ![]() .
.
![]() Type RewriteRule (.*)$ http://www.sitename/$1 [R=301,L].
Type RewriteRule (.*)$ http://www.sitename/$1 [R=301,L].

The new rules are added.
![]() Click File.
Click File.
![]() Click Save.
Click Save.
The Save As dialog box appears.
![]() Navigate to the location where you want to save the file.
Navigate to the location where you want to save the file.
![]() Type .htaccess in the Save As field, or in the File name field if you are using Microsoft Notepad.
Type .htaccess in the Save As field, or in the File name field if you are using Microsoft Notepad.
![]() Click Save.
Click Save.
An alert message appears.
![]() Click Use ".".
Click Use ".".
TIPS
What is the 301 Redirect’s impact on SEO?
When you redirect your website traffic from a non-WWW URL to WWW URL, the web browsers and search engine crawlers redirect the traffic to the new URL. This can help you focus your SEO campaign on one URL and get more traffic and a higher ranking.
How do I figure out my website’s indexing status?
You can check whether your website pages are indexed with or without the WWW. Go to www.google.com and type Site: sitename.com in the search field, replacing sitename.com with your website URL. Then, you can check whether the indexed page includes WWW.
Work with 301 Redirects
Websites are updated regularly and website pages may change based on updates. When a web page’s location or name changes, search engines may not update this change and may still see the old name or path, which they interpret as website errors. In order to fix this, you need to manually use the 301 Redirect to redirect any traffic or search engine to the new web page’s URL. It is also important to do this when you want to move the website from one domain to another without losing any traffic or affecting your ranking. You can apply the 301 Redirect from the .htaccess file.
Work with 301 Redirects

![]() In the .htaccess file, press
In the .htaccess file, press ![]() after the RewriteEngine On line.
after the RewriteEngine On line.
![]() Type Redirect 301 /oldwebpage.html http://www.sitename.com/newwebpage.html, replacing oldwebpage.html with your web page’s old name, and replacing the sitename.com/newwebpage.html with the new web page URL.
Type Redirect 301 /oldwebpage.html http://www.sitename.com/newwebpage.html, replacing oldwebpage.html with your web page’s old name, and replacing the sitename.com/newwebpage.html with the new web page URL.
![]() Press
Press ![]() .
.
![]() Type RewriteRule (.*)$ http://www.sitename/$1 [R=301,L]. The new rules are added.
Type RewriteRule (.*)$ http://www.sitename/$1 [R=301,L]. The new rules are added.
![]() Click File.
Click File.
![]() Click Save.
Click Save.

The Save As dialog box appears.
![]() Navigate to the location where you want to save the file.
Navigate to the location where you want to save the file.
![]() Type .htaccess in the Save As field, or in the File name field if you are using Microsoft Notepad.
Type .htaccess in the Save As field, or in the File name field if you are using Microsoft Notepad.
![]() Click Save.
Click Save.
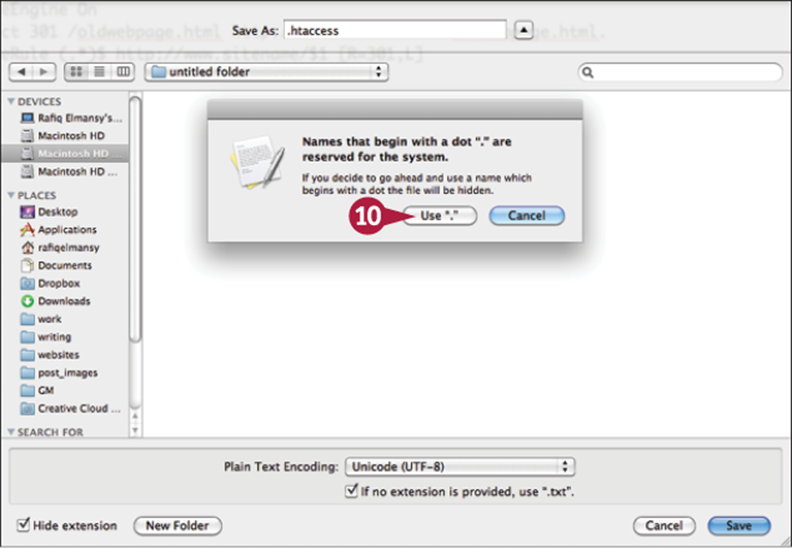
An alert message appears.
![]() Click Use ".".
Click Use ".".
TIP
When do I use the 301 Redirect?
When you update your website, you have to consider the 301 Redirect to ensure that new web page links are updated in the different search engines and that no errors appear after you rename web pages or remove them from the server. Sometimes, it takes time to learn about the page errors for which these pages do not have replacements. In this case, you can simply redirect these pages to the website home page to avoid errors. If you own the .com, .net, or .org version of your URL, you can use the 301 Redirect to move all the traffic from these domains to the website’s current active domain.
Scan Errors with W3C Markup Validation
When you build your website and update it, your code may include errors or it may not follow web standards. Although these errors are not obvious when you test your website, it is important to check for them and try to have as few of them as possible. Clean code that follows web standards helps the search engine spiders crawl your website quickly and index its pages more efficiently compared to code that is not compatible with the web standards. There are many ways you can check website code compatibility; one is the W3C Markup Validation website.
Scan Errors with W3C Markup Validation
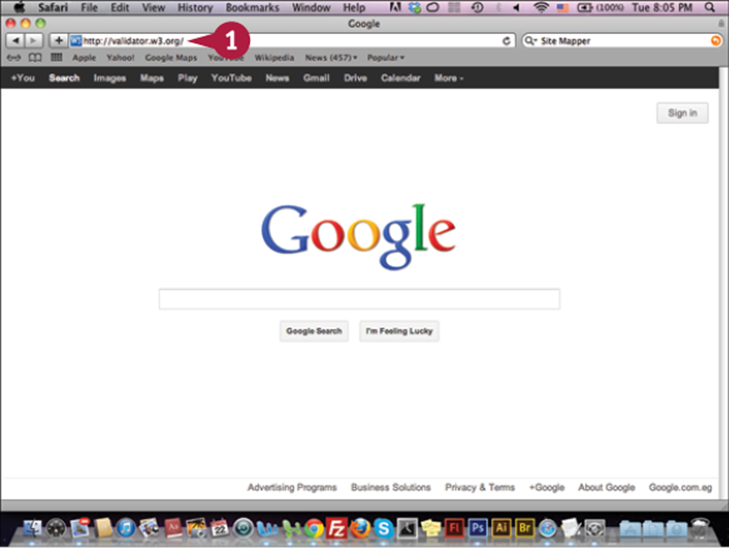
![]() Type http://validator.w3.org in your web browser.
Type http://validator.w3.org in your web browser.
![]() Press
Press ![]() .
.
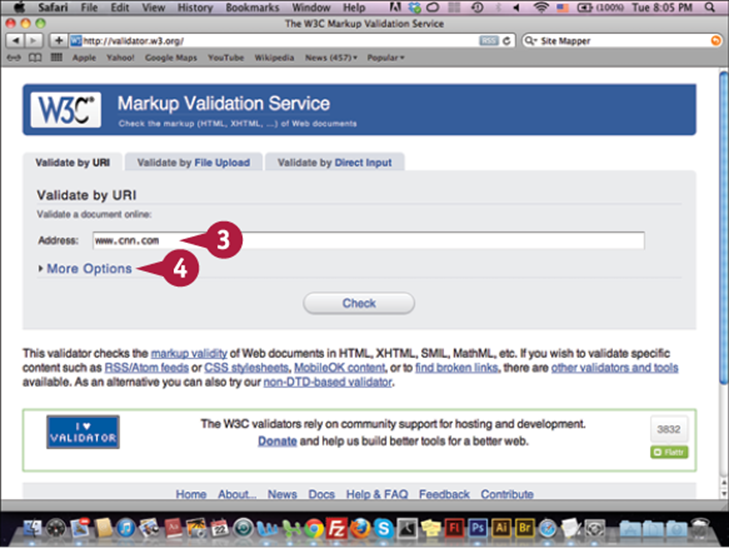
The W3C Markup Validation Service home page appears.
![]() Type the website URL.
Type the website URL.
![]() Click More Options.
Click More Options.
The More Options section expands.
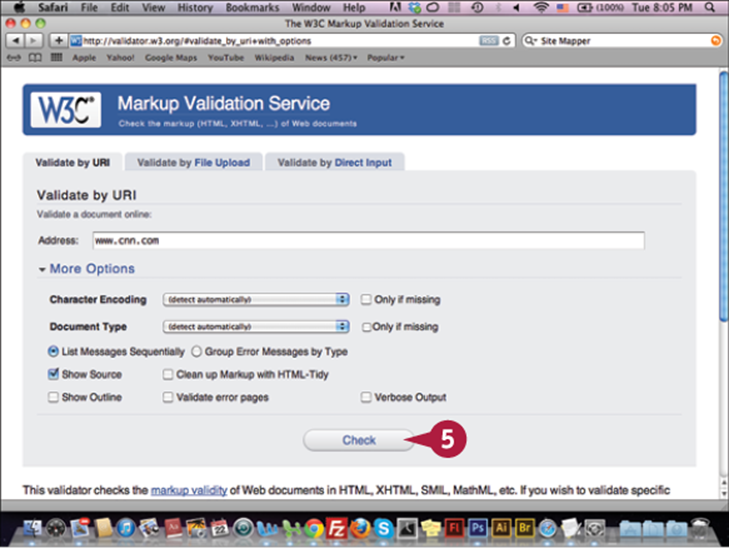
In this section, you can select options to run a more detailed check.
![]() Click Check.
Click Check.
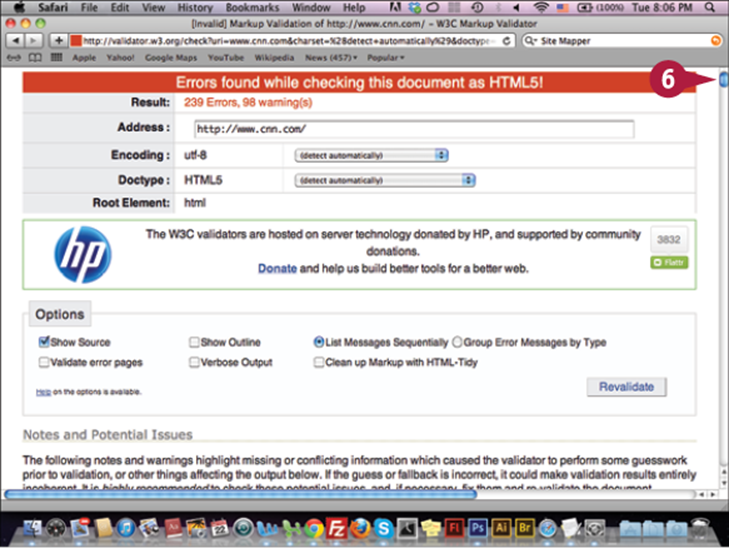
The website error results appear.
![]() Scroll down to see the errors.
Scroll down to see the errors.
TIPS
How do I fix website errors?
After you check the website and review the errors, you can click and choose the number of the lines to include for each result to display its place in the code. Then, you can go to the website code and fix the error to reduce the number of incompatibility issues on your website.
What is the validation icon?
When you check your website and get it validated, you can add the validation icon to your website. This icon shows that your website has a professional, validated code. You can use the code on this page to add the icon to your website http://validator.w3.org/docs/help.html#icon.
All materials on the site are licensed Creative Commons Attribution-Sharealike 3.0 Unported CC BY-SA 3.0 & GNU Free Documentation License (GFDL)
If you are the copyright holder of any material contained on our site and intend to remove it, please contact our site administrator for approval.
© 2016-2026 All site design rights belong to S.Y.A.