Digital Sharing for Apple Users: A Take Control Crash Course (2014)
Share Your iOS Device’s Internet Connection
If you have an iPhone, or an iPad with a cellular connection, it can access the Internet even when there’s no Wi-Fi. But what if your Mac (or a Wi-Fi–only iPad, or some other Wi-Fi-only device) also needs access to the Internet? No problem—you can tether your iOS device to your Mac, which means sharing your Internet connection over Wi-Fi. (It’s also possible to use tethering over Bluetooth or USB, but I don’t cover those options in this book.)
I’ve used tethering many times with excellent results. For example, I’m a member of a community planning group that meets in a location without Wi-Fi, but I need to take notes using my MacBook Pro and access files in my Dropbox. So I share my iPhone’s Internet connection over Wi-Fi and connect to that with my laptop. It’s just like any other Wi-Fi connection, only a bit slower.
And, as of iOS 8 and Yosemite, the process is even simpler than before.
Personal Hotspot
First, on your iPhone or cellular-enabled iPad:
1. Go to Settings > Personal Hotspot and turn Personal Hotspot on ①.
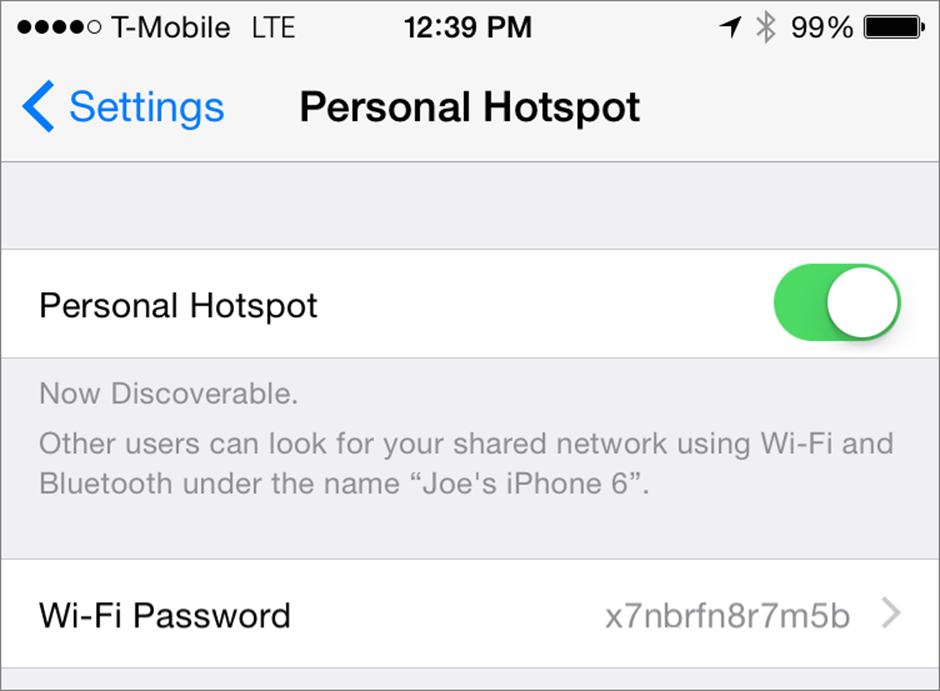
① Turn on Personal Hotspot here.
2. Make note of the Wi-Fi Password.
Then proceed with the following steps.
Connect from a Mac using Personal Hotspot
1. From the Wi-Fi ![]() menu, choose the device you just set up. The Wi-Fi
menu, choose the device you just set up. The Wi-Fi ![]() icon then changes ②.
icon then changes ②.
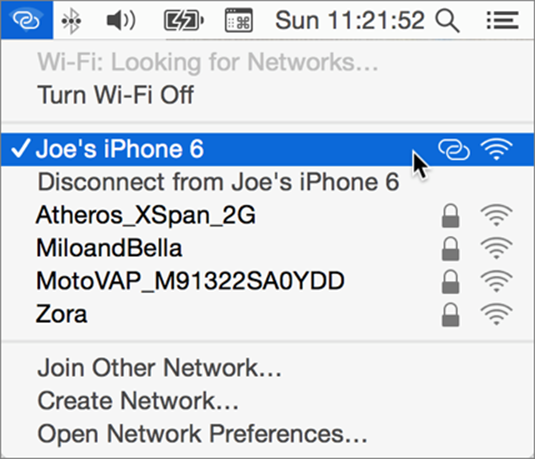
② Personal Hotspot devices appear on this menu along with other Wi-Fi networks.
2. If prompted, enter the password shown on your iOS device (per Step 2 above). To avoid having to enter it again, select Remember This Password in My Keychain.
To disconnect, choose a different network or Disconnect from Device-Name from the Wi-Fi ![]() menu.
menu.
Connect from a Wi-Fi iOS Device using Personal Hotspot
1. Go to Settings > Wi-Fi.
2. Select the device you just set up.
3. Enter the password if prompted.
Instant Hotspot
As long as you’re using iOS 8 on a device with a Lightning connector (and Yosemite, if connecting from a Mac), you can use Instant Hotspot to skip all the setup steps and password entry. The only prerequisite is that both devices are already signed in to the same iCloud account. Assuming that is the case…
Connect from a Mac using Instant Hotspot
1. From the Wi-Fi ![]() menu, choose the device you just set up (which should be listed, counterintuitively, under Personal Hotspot ③).
menu, choose the device you just set up (which should be listed, counterintuitively, under Personal Hotspot ③).

③ Devices using Instant Hotspot appear, oddly, under Personal Hotspot.
That’s it. There’s no Step 2!
Note: Personal Hotspot does not have to be enabled on your iOS device for this to work—but connecting from a Mac or iOS device turns it on automatically.
Connect from a Wi-Fi iOS Device using Instant Hotspot
1. Go to Settings > Wi-Fi.
2. Select the device you just set up.
Internet Sharing Caveats
I should warn you about a few potential issues:
· Carrier support: Your mobile carrier must support tethering, and you must have a compatible data plan.
· Data caps: With rare exceptions, carriers put strict limits on how much data you can transfer while tethered, and as a rule, your Mac eats up that data faster than your iPhone. Once you reach your limit, the carrier may cut off further data access, charge you for overages, or reduce your data speed.
· Battery usage: Tethering drains your iOS device’s battery in a hurry.
All the major U.S. carriers offer data plans that support tethering, but they’re sometimes more expensive than regular plans, and may include other qualifications. Check with your carrier to see if it permits tethering and if so, what the limitations are.
Share this tip and chapter on ![]()
![]()
![]()
![]()
![]()
“Watch your cell data usage carefully when using Instant Hotspot—Macs can suck down a lot of data in the background.”
Discuss “Share Your iOS Device’s Internet Connection” via ![]()
All materials on the site are licensed Creative Commons Attribution-Sharealike 3.0 Unported CC BY-SA 3.0 & GNU Free Documentation License (GFDL)
If you are the copyright holder of any material contained on our site and intend to remove it, please contact our site administrator for approval.
© 2016-2026 All site design rights belong to S.Y.A.