Digital Sharing for Apple Users: A Take Control Crash Course (2014)
Share Your Mac’s Internet Connection
If your Mac connects to the Internet via an Ethernet cable, it can create its own Wi-Fi hotspot to share that connection with another Mac, an iOS device, or any other device with Wi-Fi. In other words, it acts as a software base station.
However, note the following qualifications:
· Your Mac can’t re-share an existing Wi-Fi connection. But if you happen to have an Internet connection through another hardware port (a Thunderbolt or FireWire port, for example, or a USB-to-Ethernet adapter), it can share that connection.
· The range and throughput of your Mac-created Wi-Fi network won’t be as good as what you would get from a stand-alone Wi-Fi router, such as an AirPort Express.
Enable Internet Sharing
1. Go to System Preferences > Sharing.
2. Select Internet Sharing in the list on the left ①. (You can’t select the checkbox itself until you’ve completed a few more steps.)
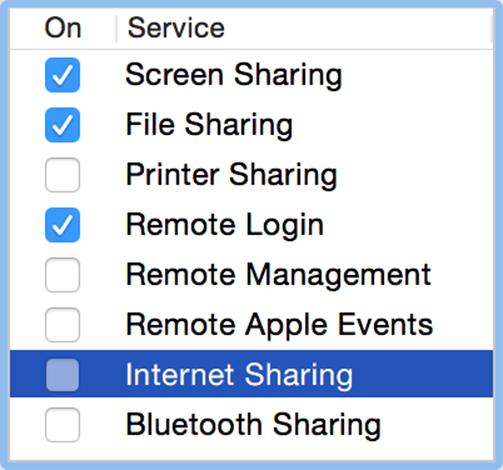
① Select Internet Sharing to start—but you can’t check the box (yet).
3. On the right, from the Share Your Connection From pop-up menu, choose Ethernet (or whichever other hard-wired connection your Mac uses for Internet access).
4. In the To Computers Using box, select the Wi-Fi checkbox ②.
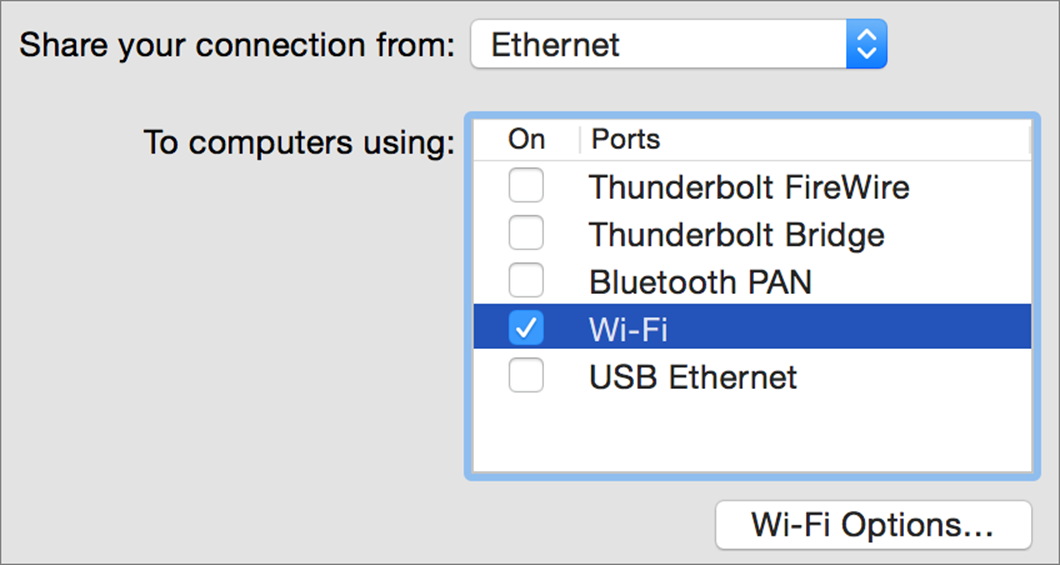
② Share an Ethernet connection over Wi-Fi.
5. Click Wi-Fi Options, choose a network name and channel (or just keep the defaults), choose WPA2 Personal from the Security pop-up menu, and enter (and confirm) a password. Click OK.
6. Select the checkbox next to Internet Sharing on the left.
Your Mac’s Internet connection is now shared via Wi-Fi.
Note: You can use the same method to share an Internet connection on another interface—for example, you could share a Wi-Fi connection over Thunderbolt—but I cover only Ethernet-to-Wi-Fi here because it’s the most common scenario.
Tip: For vastly more detail about Wi-Fi networks of all sorts, including software base stations and ad hoc networks, see Glenn Fleishman’s Take Control of Your Apple Wi-Fi Network.
Connect from Another Device
Once your Mac is sharing its Internet connection over Wi-Fi, the network name you chose in Step 5, previously, should appear in the Wi-Fi menus of all nearby devices.
On a Mac, choose the network name from the Wi-Fi ![]() menu to connect. Enter the password when prompted.
menu to connect. Enter the password when prompted.
On an iOS device, tap Settings > Wi-Fi, tap the network name, and enter the password when prompted.
Ad Hoc Wi-Fi Networks
You may be aware of another way to create a Wi-Fi network with your Mac: choose Create Network from the Wi-Fi ![]() menu. Doing this sets up what’s called an ad hoc, or computer-to-computer network. It’s a handy way for two or more devices to communicate with each other when there’s not a central Wi-Fi network they can all connect to. But ad hoc networks created this way don’t let a Mac with an Internet connection (via Ethernet, say) share that connection with other devices over Wi-Fi.
menu. Doing this sets up what’s called an ad hoc, or computer-to-computer network. It’s a handy way for two or more devices to communicate with each other when there’s not a central Wi-Fi network they can all connect to. But ad hoc networks created this way don’t let a Mac with an Internet connection (via Ethernet, say) share that connection with other devices over Wi-Fi.
Also of note: prior to Yosemite, ad hoc networks supported only the older, insecure WEP encryption standard as an option. In Yosemite, instead of increasing encryption, Apple removed it altogether—ad hoc networks in Yosemite are always completely open.
Share this tip and chapter on ![]()
![]()
![]()
![]()
![]()
“To keep random strangers from sniffing your traffic, turn on WPA2 encryption when using OS X’s Internet Sharing.”
Discuss “Share Your Mac’s Internet Connection” via ![]()