Swift For Dummies (2015)
Part IV. Using Components and Subcomponents
Chapter 14. Managing Access Control for Your Objects
In This Chapter
![]() Understanding access control levels
Understanding access control levels
![]() Defining access control terminology
Defining access control terminology
![]() Working with access control modules, files, and entities
Working with access control modules, files, and entities
Access control isn't new with Swift: It’s found in many languages. The idea has been around for a long time — for as long as developers have confronted the need to reuse code in a variety of environments. If you’re writing code that’s meant to be shared among a number of projects (whether the code is a framework or a library), you need to think about the access you’ll grant to users of your code. (Users, in this sense, are developers who use your code rather than the end users who run the apps.) Often you can handle this issue by making everything open and public. This works if you’re within a firewall and in a secure environment, but it also works if you are working on a project that’s public and open.
For environments that aren’t totally open (either globally or within a secure organizational environment), remember to consider setting access controls when you develop your code.
Even if none of these circumstances apply to you, you still may not be off the hook for access control issues. If you use shared code, you have to respect the access controls that are in place. Because it’s hard to conceive of any iOS or OS X apps that don’t use the Cocoa or Cocoa Touch frameworks, you’re probably a client of access controlled code.
This chapter shows you both sides of the picture and helps you create and use access controlled code.
Introducing Access Control Levels
Access control can be implemented in a very crude way by managing permissions on files: You set permissions so that people can either read the files, write them, or execute them. This approach is often sufficient for files, but when it comes to code, these permissions are unwieldy.
Creating well-structured code often involves dividing the code into separate files. This facilitates reuse and modularity; it also makes multi-person projects more manageable and productive. In a multi-file project, relying simply on operating system permissions for files just won't do the job. That's where access control comes in as part of the development environment. It is designed to work with code and code files. It has the flexibility that you need for code development, and, at least with Xcode and OS X, it works well along with the built-in file permission structures of the operating system.
Access control with Swift has three levels: public, private, and internal. Their meaning is simple, but there are some implementation issues about which you need to be concerned:
· Public: Entities whose access level is public can be used within any file in that Xcode project. The Cocoa and Cocoa Touch frameworks are typically imported into your code, and their entities are declared as public. If you build your own frameworks, you usually set them to public.
· Internal: This level is used for entities that can be used within any file inside the Xcode project you’re working in. This is the default access level, so, whether you know it or not, it’s the level you’re probably using for the code that you write.
· Private: This level is used for entities that can only be used within the source file in which they are defined.
Because you’re a developer, and therefore a consumer of shared code such as frameworks, you typically use code specified as public by the framework developer (Apple, in most cases). And because you develop the code for your own projects, your own code is given internal access control by default.
On the other hand, if you are a developer who is a provider of shared frameworks for yourself and others, you usually set the interfaces of the frameworks to public and the implementation details (functions, properties, types, and so forth) to private.
 This means that you can safely ignore most access control issues in the code that you’re writing for your own apps, particularly if you're developing apps the way you and others developed them for Objective-C (that is to say, accepting the default access levels that make interface files — .h Objective-C files — public and implementation files — .m Objective-C files — internal. With Swift, more and more developers are creating frameworks for shared code, so you may become a framework provider — even if it’s only to yourself for other projects. In that case, you need to worry about access control both as the provider and consumer of your own frameworks. This takes a little more effort, but it makes your life as a developer easier.
Using Swift Access Control Terminology
Swift documentation discusses the three levels of access control using the three modifiers you use (public, private, and internal), but it also covers three other access-control–related terms you should be aware of. These terms may be new to you, or you may know them from other contexts, but either way, they refer to concepts that you already have dealt with. They are described in the following sections.
Modules
In the context of access control, a module is a product of an Xcode build target. Mostly, it is an app or a framework. If you allow other people (or other projects of your own) to use a module by using an import statement, you must set access control for the module to allow that use (public is the least restrictive and may be a good place to start). A module can consist of a number of files.
Files
Files in the context of access control are just plain everyday files — there's nothing special about them. You manage them with the Finder just as you manage spreadsheets, PDF files, and other documents. If you need to modify their titles, permissions, or other attributes, you do it with Get Info in the Finder ( ⇒ File ⇒ Get Info). Titles can be modified directly in the Finder.
 If you're developing iOS apps, you may be tempted to skip over the references to OS X in this section: Don't. Remember that you use Xcode on a Mac to build apps for both iOS and OS X.
Working with Xcode project files and folders
When you create a project with Xcode, it places all of the files it creates for that project in a folder. You can specify the location for the project folder, but be careful about moving or renaming files inside a project. If you want to rename a file, select it in the Xcode project navigator and choose Edit ⇒ Refactor ⇒ Rename. By doing it this way, Xcode makes the necessary changes to keep all of the project files consistent.
When moving files around on a disk, it’s best to move the entire project folder around so that the internal project links are properly preserved. If you have any issues with files in the project (perhaps after moving individual files around), remember that you can always select a file in the project navigator and fix its behavior.
Follow these steps to fix a file that is missing or that fails to appear in the project when you can see it on disk.
1. Select the file in the project navigator as you see in Figure 14-1.
2. Choose the File inspector from the utilities area at the right of the workspace window.
3. Check the file’s location.
When you do this, you can change files or view which file is being used, as follows:
· Click the right-pointing arrow next to Full Path to see which file is being pointed to.
· Change the file by using Full Path to see the file and then navigating in the Finder to the new file and double-clicking the new file.
4. To prevent future problems, use the Location pop-up menu to choose how the location is interpreted.
See the following section for details.
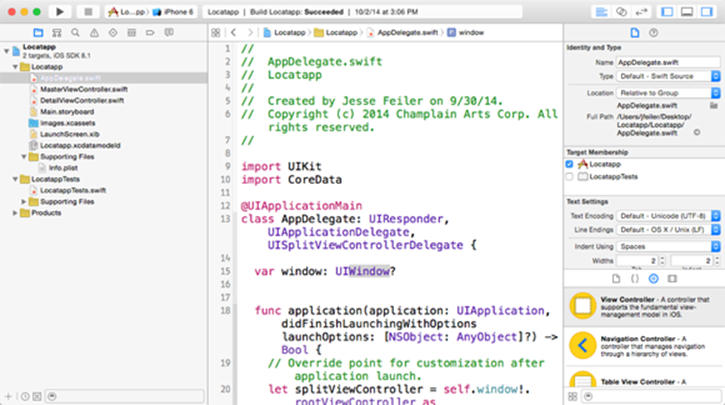
Figure 14-1: Using the File inspector to fix a missing file.
Choosing location behavior
Xcode allows you to specify the location for each file in the project, and you can also choose how that location is managed as you move files around. This becomes important as you move project folders around — maybe even from one Mac to another. You use the Location pop-up menu at the top of the File inspector (shown in Figure 14-1) to change these settings.
Here are the common location behavior settings:
· Absolute Path: The path to this file is exactly as shown in Full Path. If you move the project to another Mac that doesn't have access to this path, you can’t build your project. Use this setting to point to some file that you want to use in all cases — such as a corporate copyright notice file that must be included in every project on every Mac in an organization.
· Relative to Group: This is one of the most common settings for a project. Files are located relative to the group they’re in within a project. Normally, however, the group itself is set to Relative to Project (see the next topic).
· Relative to Project: The project as a whole is used as the reference point. If you use this setting and move the entire Xcode project folder somewhere else, all the files inside the folder will move, and if the individual files are set to Relative to Project, all links and locations will be fine.
There are three additional settings — Relative to Developer Directory; Relative to Build Products; and Relative to SDK — but they aren’t often used by most developers. As such, they’re beyond the scope of this book.
Deleting derived data files
There are other files beyond those in your project folder. These files are generated by Xcode as you build your project (they are referred to as derived files). They contain data that the compiler has assembled as part of its processing; it reuses that derived data the next time you build your app.
If you want to change the locations of these files, you can do so with Xcode⇒Preferences You can see your projects in the Xcode Organizer (Window ⇒Organizer), as shown in Figure 14-2. You normally don’t need to worry about these files. If you move your project to another computer, the derived files will be created on that computer in accordance with the Xcode preferences on that computer.

Figure 14-2: Managing the files in your project.
You can delete the derived files using the Delete button shown in Figure 14-2. If you have made significant changes to a project, clean it; if you have mysterious build errors, delete the derived data files because you may be picking up old versions of the derived data. Normally this doesn't matter, but if you think it may be a problem, just use the Delete button in the Organizer for the project you’re working on.
Often, people want to see where their app is placed after they build it. Most of the time, you don't have to worry about that: If you want to run it, run it using the Run button at the left of the Xcode toolbar. If you want to share it with someone else (or with the App Store), you must have built it for an actual device (not iOS Simulator). If you have an actual device chosen in the Scheme pop-up menu at the left of the Xcode toolbar, you can choose Product ⇒ Archive to start the process of creating an app to share. There is more on this atdeveloper.apple.com.
Entities
Entities are the smallest units that can be managed with access control. In terms of access control, types (classes, structures, and enumerations), functions, properties, and the like are all entities.
You set the access level for an entity by using public, internal, or private in the entry's declaration. Remember that the default level is internal. When you are declaring types, the access control of the type itself interacts with its members. Here are the rules:
· If the type is public, its members are still internal unless otherwise specified as public or private.
· If the type (class, structure, or enumeration) is internal (or is not specified), its members are internal unless you specify that one or more is private. You cannot make a member of an internal or private class public because public access is impossible for a member of aninternal or private class. How could people get to the public member if the class is not public?
· If the type is private, its members are automatically private.