Swift For Dummies (2015)
Part IV. Using Components and Subcomponents
Chapter 15. Building Classes, Structures, and Enumerations
In This Chapter
![]() Exploring a simple class, structure, or enumeration in Locatapp
Exploring a simple class, structure, or enumeration in Locatapp
![]() Declaring methods and functions
Declaring methods and functions
![]() Considering modifiers
Considering modifiers
Swift classes are very much like classes in other object-oriented languages. However, in Swift, classes aren’t the only elements that exhibit so-called class behaviors. This is one of the things that makes Swift different from those other languages. Swift’s structures and enumerations, for example, can contain properties and methods, just as classes do. This means that when you’re structuring a Swift app, you may need to revisit some of your decisions about what should constitute the class objects. Sometimes a structure or enumeration may be more appropriate.
This chapter shows you the basics of how to build classes, structures, and enumerations. I’ve combined these together because they have more in common in Swift than they do in many other object-oriented languages.
Exploring Classes, Structures, and Enumerations
You've already seen a number of examples of classes, structures, and enumerations, but the emphasis has been on how you use them in specific parts of Locatapp and other templates. In this chapter, the focus is on those objects and how you (or the Xcode template builders) create them.
Putting classes, structures, and enumerations together reflects their common features in Swift, but there’s one very important distinction: Enumerations and structures are value types. Instances of enumerations and structures are copied when they are passed to a function or assigned to a variable or constant. This means that you can have multiple copies of a structure or enumeration instance, each with its own values that are independent of the others.
On the other hands classes are reference types. When they are assigned to a variable or constant or when they are passed to a function, a reference to the instance is what is passed. Because there is a single instance underlying the references passed to functions or assigned to variables or constants, a change to the values of that underlying instance is reflected in all of the copies.
Take a look at Table 15-1, which shows you the features available in classes, structures, and enumerations. Most of these features are common to most object-oriented programming languages in one way or another, but if you need a refresher, I describe them in the text that follows the table.
Table 15-1 Features in Classes, Structures, and Enumerations
|
Feature |
Classes |
Structures |
Enumerations |
|
Instances |
X |
X |
X |
|
Properties |
X |
X |
computed properties only |
|
Methods |
X |
X |
X |
|
Subscripts |
X |
X |
X |
|
Initializers |
X |
X |
X |
|
Extensions |
X |
X |
X |
|
Protocols |
X |
X |
X |
|
Inheritance |
X |
||
|
Type casting |
X |
||
|
Deinitializers |
X |
||
|
ARC |
X |
A few of them are slightly redefined for Swift. They are shown at the left of Table 15-1, and are briefly described here.
· Instances: An object which is an actual representation of a class in most object-oriented languages is called an instance. In some object-oriented languages, you can also use a class itself as an object (for example, this is true of Objective-C). For many languages, variables declared asstruct or enum, are referred to by the struct or enum name. In Swift, it is an instance of a struct or enum, but people still often use the type name (as in “myVar is a MyStruct”) rather than as an instance of a particular struct (“myVar is an instance of MyStruct”). Don't lose sleep over this.
· Properties: You can declare properties that may either be stored or computed as they are needed. (Enumerations only support computed properties.)
· Methods: You can declare methods that can be accessed through any instance of these objects.
· Subscripts: You can declare subscripts that let you access elements of a type instance based on the logic in the subscript. Examples include providing multiple indexing schemes for multi-dimensional objects that may sometimes be accessed as if they were one-dimensional arrays and sometimes using multiple dimensions. They also are useful in managing non-integer indexes.
· Initializers: Initializers let you set up the properties for a new instance. See Chapter 12.
· Extensions: Extensions let you add methods and properties without necessarily having the code for the object to which you are adding them. (Only computed properties can be used with enumerations.) See Chapter 13.
· Protocols: You can define methods in a protocol that must be implemented by any object that conforms to that protocol. See Chapter 18.
· Inheritance: Classes can inherit from one another forming a subclass/superclass structure. A class can have any number of subclasses but only one (or no) superclass.
· Type casting: You can treat one class as its sub- or superclass if conditions permit. This is basically a standard exercise in logic. UILabel is a subclass of UIView; therefore, all instances of UILabel are also instances of UIView. Not all instances of UIView are instances of UILabel.
· Deinitializers: Deinitializers let you clean up just before a class instance is about to be deallocated.
· ARC: Automatic reference counting (ARC) allows you to have multiple instances of a class. When you pass them around, they are passed by reference, so that, for example, if you have two instances of UILabel, setting the text for one UILabel doesn’t have anything to do with setting the text for the other label.
Declaring a Simple Class
In previous chapters, you’ve seen classes, structures, and enumerations in several contexts, but I hadn’t yet revealed the details of their syntax and structure. In this section, then, I finally explore the inner workings of Swift classes, structures, and enumerations (at least the inner workings that are common to all of them — refer to Table 15-1).
In Locatapp (actually the Master-Detail Application template) you can see two views at the same time when you run the app on an iPhone 6 Plus or any of the iPad models. When held horizontally (in landscape orientation), any iPad or an iPhone 6 Plus shows two views side by side as you see in Figure 15-1. (Note that this figure shows Locatapp as it is at the end of Chapter 9.)
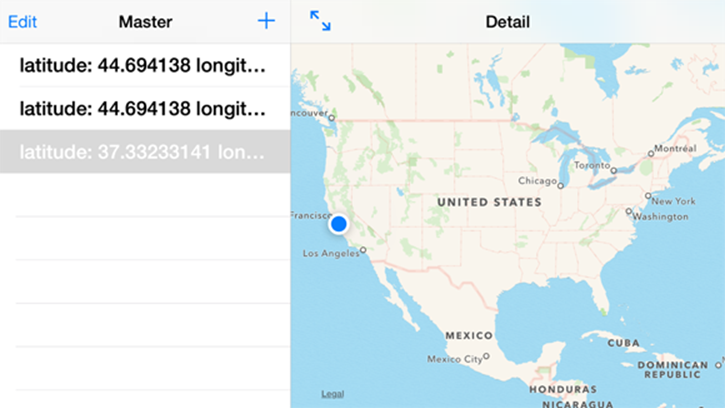
Figure 15-1: You can see the master and detail views side-by-side on an iPhone 6 Plus.
On older iPhone models, however, you have a navigation interface: One view appears at a time. You navigate from view to view but only one view is visible at all times.
In the template, most of the code is in the master view controller (this is the view at the left in Figure 15-1). It’s the view that lets you create events and delete events. The master view controller tells the detail view controller (shown at the right in Figure 15-1) the specific data to display — in fact, this is why it’s called a detail view controller.
The detail view controller is implemented with a relatively simple class called DetailViewController. The simplicity of this class is why it’s a good class to examine to get an idea of how classes work.
 Listing 15-1 shows the code for DetailViewController. As you can see, there’s not much code involved, so it’s easy to explore the entire class. The comments in Listing 15-1 show the before and after syntax for the lines of code changed in Chapter 9 to implement the map.
Listing 15-1: DetailViewController from Master-Detail Application Template with Modifications
//
// DetailViewController.swift
// Locatapp
//
// Created by Jesse Feiler on 10/23/14.
// Copyright (c) 2014 Jesse Feiler. All rights reserved.
//
import UIKit
import MapKit
class DetailViewController: UIViewController {
//@IBOutlet weak var detailDescriptionLabel: UILabel!
@IBOutlet var mapView: MKMapView!
var detailItem: AnyObject? {
didSet {
// Update the view.
self.configureView()
}
}
func configureView() {
// Update the user interface for the detail item.
/*if let detail: AnyObject = self.detailItem {
if let label = self.detailDescriptionLabel {
label.text =
detail.valueForKey("timeStamp")!.description
}
}*/
}
override func viewDidLoad() {
super.viewDidLoad()
// Do any additional setup after loading the view, typically from a nib.
self.configureView()
}
override func didReceiveMemoryWarning() {
super.didReceiveMemoryWarning()
// Dispose of any resources that can be recreated.
}
}
The following sections break down the code in Listing 15-1 into chunks from the top to the bottom of the file. Most Swift classes look like this one (except that many of them are bigger), so this discussion should give you an idea of class structure and syntax.
 For more on the links between code and user interface elements in code or in storyboards, see Chapter 16.
Exploring a Swift Class, Structure, or Enumeration File
A Swift file typically contains the following elements. They can be in any order in most cases, but the comments and copyright notices and import declarations usually are at the top. Everything listed in this section is optional although some are interdependent. For example, if you have a class declaration like this
class DetailViewController: UIViewController {
you must have the matching } at the end of the class declaration.
Comments and copyrights
This section, generated by Xcode automatically, consists of comments. It picks up information from the environment (such as the date and your name) as well as the name of the file and the name of the class, structure, or enumeration. Most of this information comes from the options you set for creating a new class or file in Xcode.
· Because it consists of comments, you can modify this section as you see fit. You can add your own notes or even standard comment information for your employer, if that is the policy standard.
This section contains information from your environment, so yours will look different from the code in this example, but its format and structure will probably be the same. (If the format and structure for your code is different, it may be because Xcode changes from time to time. However, this structure has been pretty consistent over the years.)
//
// DetailViewController.swift
// Locatapp
//
// Created by Jesse Feiler on 10/23/14.
// Copyright (c) 2014 Jesse Feiler. All rights
// reserved.
//
You don’t need any comment information at the top of a file, but most developers provide some standard information so that you don’t just see a bunch of code when you open an unfamiliar file. Because this is a comment, you could actually delete it from the template file.
Import declarations
Next in a class file comes a section of import declarations, which import frameworks. When you create an Xcode class file for Swift, the following import declaration is included in your file by default for Cocoa:
import UIKit
For Cocoa Touch and Swift, this is what you get:
import Cocoa
If you’re working on an Objective-C app, on the other hand, this statement is inserted in your file for OS X:
#import <Foundation/Foundation.h>
Notice that the syntax is different from Objective C: In Swift, import is a declaration, whereas in Objective-C it’s a compiler directive. Also, with Swift you import the framework by its name; in OS X you import the framework by its name and interface file. In practice, you don’t have to worry about details like these because the import statement is usually set up for you (in Swift); even if it isn’t, you have a model or template you can use.
For ios, you always need UIKit. Depending on what you’re building, you may need other frameworks as well. It’s typically the case that you add frameworks as you add code to your app that relies on a specific framework. For example, in Chapter 9, when you needed to add a map, you had to add this line of code:
import MapKit
Thus, in the import statement, you’d have this code:
import UIKit
import MapKit
The first declaration was put there by Xcode when you created the class file, and the second one represents your input.
Class declaration
The class declaration takes up most of a class declaration file. (This is the case for all class declaration files.) Locate the first and last lines of the class declaration shown in Listing 15-1; they are shown in this code:
class DetailViewController: UIViewController {
}
Declaring a subclass
A class declaration begins with the keyword class, which is followed by the name of the class you are creating, then a colon, and then the name of the superclass. In this code, DetailViewController is the name of your class; it is a subclass of UIViewController. Remember, you can only have one superclass (or none).
Declaring a base class
If you are declaring a base class — that is, a class that doesn’t have a superclass —, omit the colon and the superclass name. If DetailViewController were to be a base class, the class declaration would look like this:
class DetailViewController
Adopting a protocol
If your class adopts one or more protocols, they are listed following the superclass (if it exists). Otherwise, they just follow the colon.
Declaring a subclass and adopting a protocol
Here is a class and a superclass where the class adopts a protocol:
class DetailViewController: UIViewController, MyProtocol
Declaring a base class and adopting a protocol
Here is a base class that adopts the same protocol:
class DetailViewController: MyProtocol
You need the colon only if you have a superclass or a protocol. A base class with no protocol doesn’t need a colon.
After the declaration of the class, the body of the class is placed in brackets. The class body is discussed in the next section.
Structure declaration
At this point, structure declarations are very simple: They are the same as class declarations except that they cannot have superclasses, so all that you specify are the protocols (if any) that the structure adopts.
Enumeration declaration
As with a class, an enumeration starts with a keyword — in this case, enum. That is followed by the name, a colon, and any adopted protocols. (So far, it’s the same as for a class, except that there is no possibility of a superclass because enumerations don’t inherit from one another.) Here is the beginning of a typical enumeration declaration:
enum MyEnum {
As is the case with classes and structures, by convention enumeration names begin with a capital letter.
The body of an enumeration consists of cases separated by commas. Each case has a name that is unique. It may also specify the type of values it stores.
enum MyAnimals {
case dog, cat, horse, cow
}
Perhaps the most common use of Swift enumerations is with a switch statement. Both enumerations and switch statements are much more powerful in Swift than in other languages, and they work well together. Here's an example of a switch that uses the previous enumeration:
enum MyAnimal {
case dog, cat, horse, cow
}
var myPet = MyAnimal.cat
switch myPet {
case .cow:
println ("moo")
case .cat :
println ("meow")
case .dog:
println ("woof")
case .horse:
println ("neigh")
default:
println ("silence")
}
You can experiment with this code to see how the result changes when you modify the var statement. You’ll notice that there’s a default statement because Swift switch cases must be exhaustive. As an experiment, delete it: You'll see there's no error because you've covered all the possibilities.
Try adding donkey to the list of cases. This generates an error message because the cases are no longer exhaustive. You must either add .donkey (don't forget the dot) or a default case.
You can add raw integer values to the enumeration so that it looks a bit more like a traditional enumeration. Here’s another way of writing the previous enumeration:
enum MyAnimal2:Int {
case dog = 1, cat, horse = 3, cow
}
If you declare the type of the enumeration to be Int, you can access the raw values by using the rawValue function as in the following:
var myPet2 = MyAnimal2.cat.rawValue
Notice in these snippets that you don't have to have all of the values specified. Swift can infer that the value for cat would be 2.
For enumeration functions and methods, see the section later in this chapter.
Body
Inside the body of a class, structure, or enumeration, you typically have functions (called methods in this context), properties, and, sometimes instance variables. Functions, properties, and instance variables are defined in the same way for classes, structures, and enumerations.
In addition to functions, properties, and instance variables, classes often contain actions and outlets. These are properties that are designed to be linked to storyboard elements: The process of linking actions and outlets to storyboard elements is the glue that connects your code to the visible user interface objects. That is a topic for app development, but it’s touched on in Chapter 16.
UI actions and outlets (classes only)
If they exist, they have this general format:
@IBOutlet var mapView: MKMapView!
This code was added in Chapter 9; it is a reference to the map that you added to the storyboard in that chapter. As is frequently the case with user interface objects, it is optional (hence the ! after the type).
As a comparison, the code you replaced in Chapter 9 is left here as a comment. This is a reference to the label that shows the timestamp in the Master-Detail Application template. If you’re modifying that template for your own app, this is the line you change or remove:
//@IBOutlet weak var detailDescriptionLabel: UILabel!
Variables and properties
Variables and properties are discussed in Chapter 16.
Functions and methods
Classes, structures, and enumerations can contain functions. There are three in DetailViewController. They are discussed from simplest to more complex (which happens to be the way they appear in the template):
Declaring a function with no parameters and no return value:
At its simplest, a function has no parameters and no return value. The configureView function is a good example of this. Here is the code:
func configureView() {
// Update the user interface for the detail
// item.
/* if let detail: AnyObject = self.detailItem {
if let label = self.detailDescriptionLabel {
label.text =
detail.valueForKey("timeStamp")!.description
}
}*/
}
This code includes the commented-out code that is replaced when you put the map in place in Chapter 9. With that code removed, here is the simplest bare-bones function:
func configureView() {
// Update the user interface for the detail item.
}
Declaring an overridden function (classes only)
A function can override a function in its superclass (or in a superclass of its superclass — the override can go as far up the class hierarchy as necessary to find a function that is the basis of the overridden function).
An override function matches its base function in name, return value (if any), and parameters (if any). Very often, an override function calls its superclass’s function as in the code in DetailViewController shown here:
override func viewDidLoad() {
super.viewDidLoad()
// Do any additional setup after loading the
// view, typically from a nib.
self.configureView()
}
This function calls its superclass and then it does its own processing. Calls to super are typically the first or last line of an override function.
Note that super doesn’t need to be called at all. If a subclass relies on some processing of its superclass, then the superclass usually is called to do that processing. The subclass then performs its own processing after the superclass is finished (this process is reversed for deinitialization.) However, in the case where there is no superclass processing involved, the subclass typically does its own processing without regard to calling the function in the superclass. Sometimes, a function in a superclass is declared with a single assert statement or error message. This is used to ensure that subclasses always override the superclass method.
Special types of methods
In addition to the method modifier described in the previous section, there are two other modifiers commonly used with methods. These apply only to enumerations and structures:
· mutating: This modifies a method and indicates that it will modify self. Enumerations and methods are value types rather than reference types, so that means that mutating methods are written back to the original structure or enumeration. Mutating methods can reassign self — that is, they can change the instance to which an enumeration or structure refers.
· class: This modifier identifies methods of a class rather than instances of that class. In the case of enumerations and structures, the modifier static is used.
All materials on the site are licensed Creative Commons Attribution-Sharealike 3.0 Unported CC BY-SA 3.0 & GNU Free Documentation License (GFDL)
If you are the copyright holder of any material contained on our site and intend to remove it, please contact our site administrator for approval.
© 2016-2026 All site design rights belong to S.Y.A.