Make: Basic Arduino Projects - 26 Experiments with Microcontrollers and Electronics (2014)
Chapter 22. Electronic Cricket
Temperature Sensing
Did you know that you can tell the temperature from crickets? Crickets chirp faster when the temperature is warmer, and they chirp more slowly when the air is cooler. Let’s use our Arduino microcontroller skills and our knowledge about thermistors (Chapter 21) to build an electronic cricket.It won’t look much like an insect, but the Arduino cricket will respond to temperature much the same way a real cricket does—its chirp will speed up as the air temperature warms up, and slow down as the air gets cooler. And unlike real crickets (which stop chirping when the temperature gets below about 60°F), your Arduino will continue to chirp almost to freezing!
The components to build this electronic cricket are shown in the Parts List. The Electronic Cricket is shown in Figure 22-1.
Parts List
§ Arduino microcontroller
§ MakerShield kit
§ R1: negative temperature coefficient (NTC) thermistor (green or black candy drop; part number 503)
§ R2: 10KΩ resistor (brown, black, orange stripes)
§ R3: 1KΩ resistor (brown, black, red stripes)
§ R4: 10K potentiometer
§ SPKR1: 8Ω mini speaker
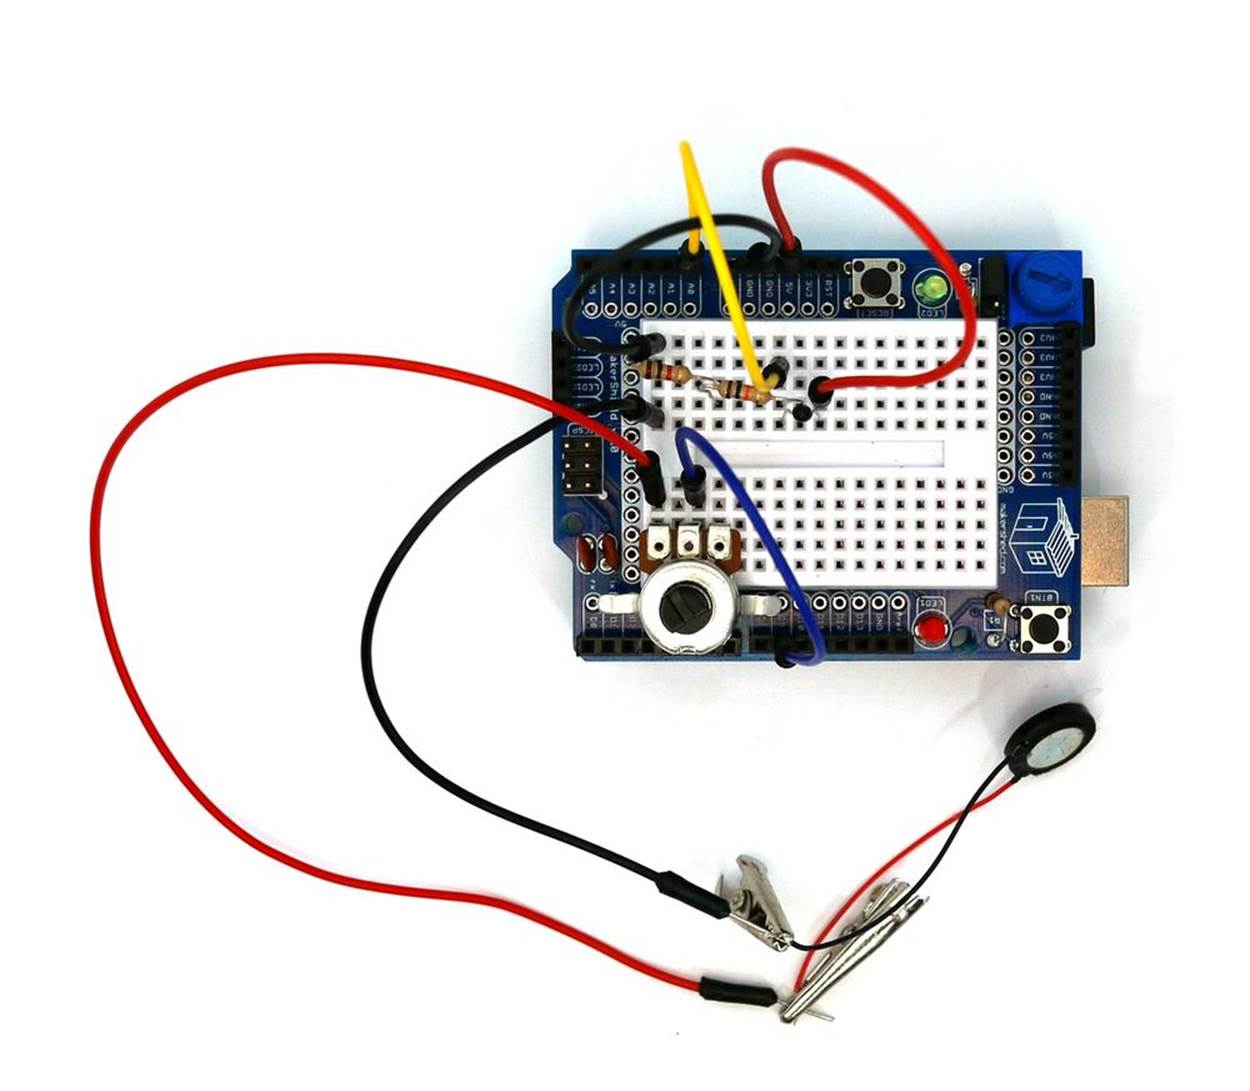
Figure 22-1. The assembled Electronic Cricket
Let’s Build an Electronic Cricket
The Electronic Cricket is a creative, interactive device that produces electronic sounds using an Arduino microcontroller, a temperature sensor, two fixed resistors, a potentiometer, and a mini speaker. The values for these electronic components are in the Parts List. Follow the Fritzing wiring diagram shown in Figure 22-2 to construct the cricket.
When the project is built, you can immediately test the cricket by holding the temperature sensor between your fingers. The pitch of the sound coming out of the speaker, as well as the frequency of the chirping, will increase as the temperature rises. You can control the volume of the chirping with the potentiometer.
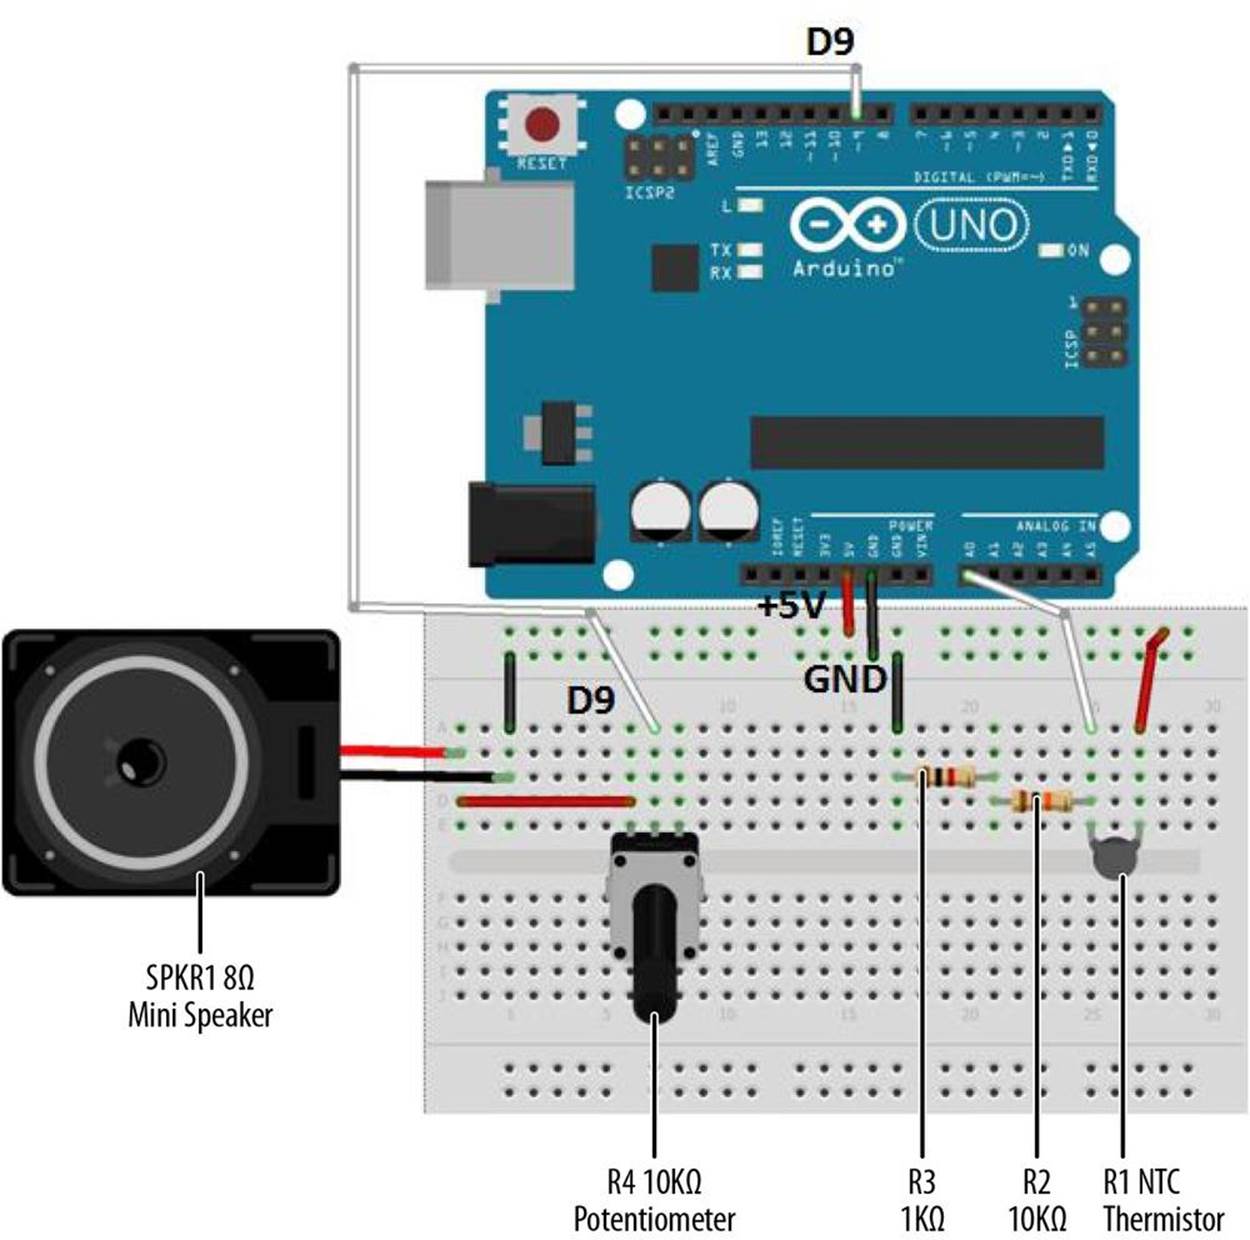
Figure 22-2. Electronic Cricket Fritzing wiring diagram.
TECH NOTE
To convert cricket chirps to degrees Fahrenheit, you simply count the number of chirps in 14 seconds, then add a constant of 40 to get the temperature.
Example: 40 chirps per 14 seconds + 40 = 80°F
Upload the Electronic Cricket Sketch
With the Electronic Cricket wired on the breadboard, now it’s time to upload the Arduino sketch. Before uploading the sketch, check for wiring errors on the breadboard. Example 22-1 sends a series of electrical pulses from the digital pin D9 on the Arduino microcontroller to the 8Ω mini speaker. Here are the steps you’ll need to follow:
1. Attach the Arduino microcontroller to your computer using a USB cable.
2. Open the Arduino software and type Example 22-1 into the software’s text editor.
3. Upload the sketch to the Arduino microcontroller.
The Arduino microcontroller is now programmed with the Electronic Cricket sketch. If everything is wired correctly, the 8Ω mini speaker should start to chirp somewhat like a real cricket. Touch the temperature sensor with your finger, and the chirping should speed up and get higher in pitch. Remove your finger from the temperature sensor and the chirping will decrease in speed and pitch.
The speed of the chirping per minute is approximately equal to the degrees in Fahrenheit. If you hear 80 chirps in one minute, the temperature is approximately 80° F. (If you don’t want to wait a whole minute, simply count the chirps for 15 seconds and multiply by 4.)
TECH NOTE
For additional information about the tone() instruction, go to the reference website for the Arduino.
Example 22-1. Electronic Cricket sketch
/*
Electronic Cricket
Plays a pitch that changes based on a changing analog (temperature) input
*/
int expectedMax = 859;
int expectedMin = 330;
float fahrenheit = 0.0;
void setup() {
// initialize serial communications (for debugging only):
Serial.begin(9600);
}
void loop() {
// read the sensor:
int sensorReading = analogRead(A0);
// print the sensor reading so you know its range
Serial.println(sensorReading);
// map the sensor analog input range
// to the output pitch range (10 - 100Hz)
// change the minimum and maximum input numbers below
// depending on the range your sensor's giving:
int thisPitch = map(sensorReading, expectedMin, expectedMax, 10, 100);
int thisTemperature =
map(sensorReading, expectedMin, expectedMax, -10, 40);
fahrenheit = (5.0/9.0) * (thisTemperature + 32);
Serial.println(fahrenheit);
// play the pitch twice, to imitate a cricket:
tone(9, thisPitch, 10);
// the delay is proportional to the temperature
// (faster chirps mean higher temperatures)
delay(60000/(fahrenheit * 1000));
tone(9, thisPitch, 10);
delay(1); // delay in between reads for stability
}
As shown in the sketch, the Electronic Cricket’s pitch range can create fun electronic sounds easily by changing the first two numbers in the map() instruction. Play with the pitch to see how many cool electronic sounds you can create from your Electronic Cricket!
TECH NOTE
To understand how the potentiometer operates the mini speaker, here’s a cool experiment you can try with the Ultimate Microcontroller Pack.
The block diagram in Figure 22-3 shows the electronic component blocks and the data flow for the Electronic Cricket. Also, the equivalent Fritzing electronic circuit schematic diagram of the Electonic Cricket is shown in Figure 22-4. Circuit schematic diagrams are used by electrical/electronic engineers and technicians to design, build, and test cool interactive electronic products for games, testing equipment, robots, and automobiles.

Figure 22-3. The Electronic Cricket block diagram

Figure 22-4. The Electronic Cricket Fritzing circuit schematic diagram
Something to Think About
How can the mini speaker be replaced with an LED for a visual pitch indicator?
All materials on the site are licensed Creative Commons Attribution-Sharealike 3.0 Unported CC BY-SA 3.0 & GNU Free Documentation License (GFDL)
If you are the copyright holder of any material contained on our site and intend to remove it, please contact our site administrator for approval.
© 2016-2026 All site design rights belong to S.Y.A.