HTML5, JavaScript and jQuery (Programmer to Programmer) - 2015
Part II Dynamic HTML5 Web Applications with JavaScript and jQuery
Lesson 17 jQuery Selection
In this lesson, you will start gaining an understanding of jQuery and the way in which it can simplify interaction with the DOM.
jQuery is an open-source library written entirely in JavaScript. Although it is intended to simplify interaction with the DOM, it does not do anything that could not be achieved with the DOM API. In fact, it uses the DOM API to perform its operations.
The following are the main reasons why jQuery is used in so many web applications:
· It provides an intuitive and easy-to-learn API for performing the most common tasks in website development. For instance, the selection API you will use in this lesson is based on CSS selectors.
· It provides genuine cross-browser support and hides some of the quirks that exist in the DOM API implementations of certain browsers (most notably, older versions of IE).
· It is very easy to write plugins to enhance the capabilities of jQuery, and there are extensive libraries of freely available plugins on the Internet.
· The jQuery website contains extremely good documentation, and there is a wide variety of help available on the Internet if you encounter problems.
jQuery is not the only library designed to assist with DOM interaction, but it has become the de facto standard, and has a higher market share than all its competitors combined. Therefore, if you are going to learn one JavaScript library, it makes sense for it to be jQuery.
Loading jQuery
Before using jQuery, you need to import it into your web pages. There are two ways you can do this:
· You can download the relevant version of jQuery, store it on your server, and link to it via a relative URL in a source tag. This is generally the best approach while developing a web application.
· Link to a version hosted by an external party. Many Content Distribution Networks (CDNs), such as Google, provide hosted versions of popular JavaScript libraries, including jQuery. This is generally the best option for production websites because CDN delivery tends to be faster.
In this section, you look at how you can use both approaches.
The jQuery library used in this book is available from the book's website, but these instructions show you how to download your own version of the library. In order to download a version of jQuery, first navigate to www.jquery.com. Find the Download link on the homepage and click it.
In this book, you will use the 2.x release of jQuery. This does not support some older browsers, such as IE8. Therefore, if you are developing a website that must support older browsers, you can use the 1.x release of jQuery, which provides most of the same functionality.
Click to download the development version of the latest 2.x release of jQuery. The version used in this book is 2.1.1, but the latest 2.x release can be used. jQuery offers both a production and a development version. The only difference between these is that the production version is “minimized,” which essentially means the code has been compressed. The code in both versions is, however, functionally equivalent; it is just very hard to debug the minimized version.
Once it is downloaded, store it in the CRM directory along with contacts.html.
Now, simply import it into the web page using a source tag in the head of the document:
<script src="jquery-2.1.1.js"></script>
If you now load the page, you can test if jQuery is installed. In order to confirm this, type jQuery in the console. It should produce the output shown in Figure 17.1.

Figure 17.1
If you choose to load jQuery via a CDN, you do not need to download jQuery; you can simply add the following source tag to the head section of the web page:
<script src=http://ajax.googleapis.com/ajax/libs/jquery/2.1.1/jquery.min.js ></script>
If you now load the page, you can test if jQuery is installed. In order to confirm this, type jQuery in the console. It should produce the output shown in Figure 17.2 (notice that this is a minimized version of the library so the output is different):
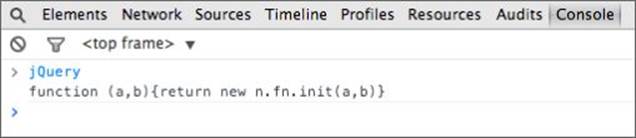
Figure 17.2
Selecting Elements
You are now ready to start selecting elements with jQuery. Selecting elements has no inherent value; it is simply the first step in a sequence of operations. Typically, once you have selected a set of elements, you will manipulate them in some way, but that is the subject of future lessons.
In this lesson, you will select elements from the contacts.html web page using the Chrome console.
If you remember back to the lesson on the DOM API, elements were selected using methods on the document object. With jQuery, you select elements by placing a selection string inside the following structure:
$('selection string')
The dollar sign is an alias to the jQuery function and is intended to save on typing. It is also possible to use the following construct:
jQuery('selection string')
The great thing about selection strings in jQuery is that they mostly use the same syntax as CSS. Therefore, to select all the td elements from the document, simply type the following:
> $('td');
This is an element selector, and like all jQuery selections, will return a jQuery object that provides access to the underlying elements selected.
It is also possible to select elements using their ID, as you can see in this example:
> $('#contactList');
and by class name, as you can see in the following example:
> $('.controls');
Notice that in all these cases, the selection syntax is identical to the syntax used with CSS.
My discussion of CSS selectors skipped over one additional type of selection: selecting elements based on their attributes. In order to select all elements with a particular attribute, simply add the attribute name between square brackets:
> $('[datetime]');
It is also possible to state the element that the attribute is relevant to by prepending it to the selection; this is useful when several different element types share the same attribute:
> $('time[datetime]');
And it is possible to specify that the attribute should have a specific value:
$('time[datetime="2014-10-21"]');
or not equal a certain value:
$('time[datetime!="2014-10-21"]');
Notice that in both of these cases, the value is provided in double quotes. Because you are providing a string inside a string, you mix and match double and single quoted strings. You could have also used the following syntax:
$("time[datetime!='2014-10-21']");
Pseudo-selectors
You can also use pseudo-selectors to select elements, just as with CSS pseudo-classes. This particular example will select all the even numbered tr elements in the tbody element:
> $('tbody tr:even');
Pseudo-selectors are always prepended with a colon.
Notice also that the space between tbody and tr implies that the tr elements must be children of a tbody element, just as it did in CSS.
The following are some of the most useful pseudo-selectors:
· :even finds all even numbered elements in a selection.
· :odd finds all odd numbered elements in a selection.
· :not(selection) finds all elements that do not match the selection.
· :gt(selection) finds all elements with an index greater than the supplied number.
· :checked finds radio buttons or check boxes that are checked.
· :selected finds options in select boxes that are selected.
· :contains(text) finds elements that contain a given piece of text.
· :empty finds all elements that have no children.
· :focus finds the element that currently has focus.
· :first finds the first element in a set.
· :last finds the last element in a set.
For instance, the following finds the first section in the web page:
> $('section:first');
while this finds all the tr elements, except the first one, in the page:
> $('tr:gt(0)');
The pseudo-selectors are not identical to the pseudo-classes in CSS, and in many cases they are used to provide shorthand for a selection that could still be performed with conventional selectors. For instance, this selection returns all the form input fields, including fields that do not use the input element such as select and textarea:
> $(':input');
This same selection could have been performed as follows:
> $('input,select,textarea');
The other great thing about jQuery pseudo-selectors is that it is possible to write your own. For instance, you may find that you are constantly writing the following selector to find input fields:
> $('input[type="email"]');
You can therefore add the following code to your web page (making sure jQuery has been loaded before this is executed) to add your own special pseudo-selector called email.
> $.expr[':'].email = function(elem) {
return $(elem).is("input") && $(elem).attr("type") === "email";
}
Don't worry too much about the first line of this example; it is simply the mechanism used for adding a new pseudo-selector to jQuery. Once this has been loaded, it can be used as follows:
> $(':email');
and it can be combined with other selectors:
> $('form :email');
jQuery will automatically pass the pseudo-selector every element in the web page (unless filtered out by one of the other selectors in the selection string), and the pseudo-selector will check:
· Is the element a type of input field? $(elem).is(”input”)
· Does it have an attribute with the name email? $(elem).attr(”type”) === “email”;
If it meets these criteria, the selector returns true.
Selection Within a Context
You have already seen how it is possible to select elements that are children of other elements. For instance, the following finds all the tr elements that are children of tbody elements:
> $('tbody tr:even');
Selecting elements within the context of a specific sub-tree of the DOM is very common. For instance, in your CRM web application you may want to always select elements in the context of the main tag for the page. This will ensure that even if your contacts web page is embedded in a larger web application, it will only select elements that are relevant to it.
Note
It is very common to write single page web applications. In a single web page application, the entire web application is loaded as a single page, even though it contains many logical pages. When the user navigates around the application, they appear to be loading new pages from the server, but instead the DOM is being manipulated in real time to hide and show the relevant portions of the DOM. Single page web applications tend to provide a much faster experience to the user because traditional navigation requires a whole set of resources to be retrieved from the server whenever a navigation event occurs.
Because selecting elements in the context of other elements is so common, jQuery provides two additional mechanisms for achieving it. The first mechanism uses the find method:
> $('#contactScreen').find('tr');
This will first find the element with the ID contactsScreen and then will look inside the result for any tr elements.
The other way of achieving exactly the same result is to use the optional second parameter to jQuery after the selection string:
> $('tr', '#contactScreen')
The second parameter provides the context within which the selection should occur.
Wrapped Objects
If you consider the following line of jQuery again:
> $('#contactScreen').find('tr');
you will see that jQuery is not simply returning a DOM object because DOM objects do not support a find method.
In this particular case, jQuery has returned its own type of object wrapped over the DOM objects, and it is the jQuery object that find is executed against.
As it happens, every jQuery selection returns a jQuery-specific object, not the underlying DOM objects. The object returned is capable of masquerading as an array, however, and accessing specific indexes returns the native DOM objects.
The following code assigns a native DOM object to the domObject variable:
> var domObject = $('td')[0];
It is always possible to convert a native DOM object into a jQuery object by embedding it in the selection structure:
> $(domObject);
This then gives you access to all the additional features provided by jQuery. For instance, the following returns the text of the element:
> $(domObject).text()
while this call queries whether the text of the element contains the word “contacts”:
> $(domObject).is(':contains("contacts")');
You will typically work with jQuery objects rather than native DOM objects in the remainder of this book, but you can always use this technique if you need to convert native DOM objects to jQuery objects.
Try It
In this Try It, you will try out a number of the selection techniques discussed in the lesson. If you want, you can follow along with these examples in the screencast.
Lesson Requirements
You will need the CRM web application, and you will need to have loaded the jQuery library using one of the techniques outlined earlier in this lesson. Once the web page is loaded, you can perform jQuery selections against the web page using the Chrome Console.
Step-by-Step
1. Select all the elements from the web page that have the class overlay.
2. Select all the input elements that have a name attribute on them. This will involve first selecting the input elements using an element selector, and limiting this with an attribute selector.
3. Find the element in the form that has a name attribute with the value companyName. Assign the result to a variable called companySelector.
4. Invoke the find method on companySelector and have it return all the option elements within it, except for the first one. You can achieve this with the gt pseudo-selector discussed earlier in this lesson.
5. Find the label for the phoneNumber field (using an attribute selector with a value), and print out its text.
6. Find the odd numbered tr elements in either the tbody or the tfoot elements (but not the thead).
Reference
Please go to the book's website at www.wrox.com/go/html5jsjquery24hr to view the video for Lesson 17, as well as download the code and resources for this lesson.
All materials on the site are licensed Creative Commons Attribution-Sharealike 3.0 Unported CC BY-SA 3.0 & GNU Free Documentation License (GFDL)
If you are the copyright holder of any material contained on our site and intend to remove it, please contact our site administrator for approval.
© 2016-2026 All site design rights belong to S.Y.A.