HTML5, JavaScript and jQuery (Programmer to Programmer) - 2015
Part I HTML and CSS
Lesson 7 Semantic Tags
Most of the tags you have encountered up until this point will be familiar to anyone who has worked with earlier versions of HTML. In this lesson, you will explore a new set of tags defined in HTML5 called semantic tags.
If you consider the lessons you have looked at so far, thanks to the power of CSS, it is possible to create the body of even complex web pages entirely from span and div tags. In fact, many web pages are created exactly like this.
Each element that appears on a page—from a header banner, to a table cell, to an image—is responsible for providing the presentation for a rectangular area of the screen, and therefore a div or span can fulfill this role.
Although this approach works from a presentation perspective, the individual tags do not contain any meaning about their purpose in the web page: They are therefore said to lack semantic meaning. Not only that, it would be very difficult to deduce from the markup what role each element played in the web page.
Note
The “semantic web” was a term coined by the inventor of the World Wide Web, Tim Berners-Lee. He envisaged a web of data that could be processed by machines as well as people. Although Tim's vision remains largely unfulfilled, the tags you will look at in this chapter are one step along the line to achieving this.
Let's look at a concrete example. A header section for a web page could be defined as follows:
<div class="header">This is the header</div>
You will notice that the class name does describe the purpose of the div, but is just an arbitrary name: I could just as easily have called this class headSection or head.
In many ways, it would be better if there were a semantic tag called header, and everyone used this to indicate the header of their pages.
The rationale for semantic tags comes from the observation that if the browser knows this is a header, it may be able to provide additional services or features to the reader based on this fact:
· It may decide to render the information differently on different devices. For instance, on a small screen device such as a phone, it may only show the header when the user taps near the top of the page.
· It may support different modes. For instance, a user may indicate that he or she wants to read the content of the page without any distractions (similar to the Reader mode in Safari); therefore, the header could be temporarily removed.
· It may provide support for alternative browsers, such as screen readers for the visually impaired. For instance, it would help the screen reader understand that this is the title section of the page and should be read first.
In addition to these benefits, there are clear benefits to the web page developer. Pages consisting of heavily nested div tags can become very difficult to maintain. Not only is it easy to miss an ending tag, but it becomes difficult to determine which tag needs which style applied to it.
In order to support these benefits, there needs to be a way to definitively mark an element as the header. Therefore, the HTML5 specification defines a set of semantic tags, including the following:
<header>This is the header</ header >
This lesson will walk you through the most important semantic tags and look at how you can structure a web page with these tags.
As it happens, few of these tags do currently provide any of the potential benefits outlined. Still, I recommend that you take advantage of these tags because they will make your code easier to read and comprehend, and they may offer advantages in the future.
Grouping and Segmenting Content
Many of the semantic tags are used for building the core structure of a web page—for instance, the header, the footer, sections of content, and asides. The example that follows contains a number of semantic tags: Start by reading through this example. you will then look at the meaning of each tag:
<body>
<header>This is the header</header>
<main>
<aside>This is where the advertising goes</aside>
<section>This is the first section in the page</section>
<section>This is the second section in the page</section>
</main>
<footer>This is the footer</footer>
</body>
As you can see, this example is taking advantage of a number of tags that you have not encountered so far. The next sections will describe these tags and explain where they should be used. It will also cover a number of other tags not found in this example.
Header
The header tag is used to group introductory information such as the title of the page and any relevant header imagery. The header should also contain the main navigation links for the page.
There can, in fact, be more than one header on a page: Each section may have its own header element, while the page as a whole may have its own header element.
Footer
The footer tag is used to group information that should appear at the bottom of a web page or section. For instance, this may contain copyright information or contact information.
As with headers, it is possible to have multiple footers in a page, and footers do not need to be paired with headers.
Main
The main tag should surround the content that forms the central functionality or content of the web page. There should only be one main tag on a page, and it cannot be nested inside other elements such as header, section, or footer.
I have not placed the headers and footers inside the main element, but this is a choice I have made. The HTML5 specification leaves you a wide degree of discretion over how and where you use the tags, and how they interact with other tags. It would therefore also be perfectly valid to nest the header and footer inside the main element.
Section
Sections are used to capture discreet subdivisions of a document. For example, in the web page you have been developing, the editable portion of the screen may be considered a section, and the list of contacts may be considered another section.
In order to determine if a portion of the web page is a section, consider whether you could pick up this whole area of the page and reposition it elsewhere within the web page. If so, it is a good candidate to be tagged as a section.
Aside
Asides are used for content that is loosely associated with other content around it, but which could be considered separate. It may also be used for advertising material or other unrelated information. An aside will often be visually separated from the content around it with a border or font.
Article
An article is similar to a section in that it contains self-contained information, but it is generally used for segregating textual content, such as blog posts or reviews, rather than just generic sections of the document.
Some people prefer to see the article tag not as a magazine article, but instead like an article of clothing: something that exists in its own right, but can be mixed and matched with other articles.
I personally prefer to use article only for self-composed text blocks that could be extracted from one web page and embedded in another. For this reason, article is not appropriate for the contacts web page because this page does not contain self-contained text blocks.
Nav
A nav element provides a container for the main navigation links on the page. This allows them to be located by alternative browsers such as screen readers.
This is an easy element to overuse: The specification does not expect all navigation links to be encapsulated in a nav element, only the primary navigation options for the page.
Address
The address tag is not new at all, but it does fit in with the other semantic tags, and is part of the HTML5 specification. This element is used to define the address or contact details of the maintainer of the page.
Styling Semantic Tags with CSS
If you save the markup from the previous section in a file called semantic.html and then open it in Chrome, you may be disappointed with the results (see Figure 7.1).
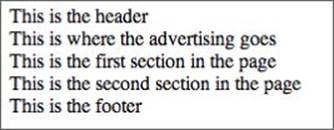
Figure 7.1
Although the semantic tags imply presentation information in their names, browsers typically do not style them differently from regular div elements: They are simple block components. For instance, the header tag tells the browser the content of the element contains header information; it does not tell it what to do with this.
Semantic elements need to be styled with CSS, just like regular elements. In addition, you can style these tags any way you like—there is nothing (except common sense) to stop you from placing the footer at the top of the page and the header at the bottom of the page.
In order to style these tags, place the following in a style section in the head of the page:
header, footer {
padding: 30px 0 30px 0;
width:100%;
background:#B3B2CF;
text-align:center;
}
header {
font-size:22px;
}
section {
float: left;
padding: 10px;
margin:20px;
width:70%;
border: 1px solid black;
}
aside {
position:relative;
float:right;
padding: 10px;
margin:20px;
width:150px;
height:200px;
border: 1px solid black;
}
footer {
clear: both;
margin-top: 50px;
font-size:18px;
}
If you now refresh the page the various elements will be displayed in an appropriate style for their names.
Microformats
So far you have examined the way semantic tags can be used for encapsulating a portion of a page, and labeling it according to its role in the page. Semantic tags can, however, also exist on a micro scale.
Consider the elements in the contacts web page displaying date information. Currently, these are placed in td elements, but HTML5 provides a new element called time for encapsulating date and time information in a more meaningful way. This element allows the date and time information to be provided in a human-readable and machine-readable manner simultaneously. For instance
<time datetime="2014-08-20">20th August 2014</time>
This could also have been written:
<time datetime="2014-08-20">August 2014</time>
Notice that in each case, the same information is provided twice. The first version of the date is presented in an attribute and conforms to the ISO standards for dates (and times if required). The second version appears between the tags and is the version that will be displayed to the user.
Although dates and times, in all their myriad of formats, are very easy for a human to read and comprehend, they can be notoriously difficult for a computer to process. By allowing tags to always provide an ISO-compliant version of the date, it suddenly becomes trivial for a computer to process the element and comprehend its meaning.
Features such as this are referred to as microformats and are widely used in computing to provide semantic meaning to search engines and other automated clients, while providing human-friendly versions of the same data to humans.
Microformats have not been officially included in the HTML5 specification at this point, although the time element is an example of a microformat. There are several standards for additional microformats, and it is likely that HTML5 will be expanded to support these in the future.
Summing Up
It would be overly optimistic to think that semantic tags are going to revolutionize your approach to web page development. They are, in many ways, one of the least interesting features of HTML5 because they do not provide any visual or functional capabilities that could not be achieved with HTML4.
They do, however, have an important role to play in enhancing the readability of your code, and may provide other benefits in the future once browsers begin incorporating features that rely on semantic tags. In many ways, it is not until web page developers start using these tags consistently, and en masse, that browser vendors will begin to provide functional support for them.
As a final note, it is also important not to overuse the semantic tags. There is still nothing wrong with using div and span elements for structuring sections of a page: Save the semantic tags for the main building blocks of the web page.
Try It
In this Try It, you will take the web application from Lesson 6 and add semantic tags in the appropriate places.
Lesson Requirements
You will need the files from the end of Lesson 6, a text editor, and a web browser.
Step-by-Step
1. Open the contacts.html page in your text editor.
2. Locate the div with the class header and convert this into a header element without a class.
3. Locate the div with the class footer and convert this into a footer element without a class.
4. Convert the div with the id= “contactDetails” into a section.
5. Convert the div with the id= “contactList” into a section.
6. Surround the two sections with a main element and give this an attribute id= “contactScreen”.
7. Find the td elements containing dates and convert these to time elements with both a human readable and machine-readable form.
8. Save contacts.html.
9. Open contacts.css and change the selector for the header class from an id selector to an element selector.
10.Also change the selector for the footer from an id selector to an element selector.
11.Save contacts.css.
12.Open contacts.html in Chrome. The page should not look any different.
13.Right-click the header element and choose “Inspect Element.”
14.Confirm that this has the element type header.
Reference
Please select the video for Lesson 7 online at www.wrox.com/go/html5jsjquery24hr. You will also be able to download the code and resources for this lesson from the website.
All materials on the site are licensed Creative Commons Attribution-Sharealike 3.0 Unported CC BY-SA 3.0 & GNU Free Documentation License (GFDL)
If you are the copyright holder of any material contained on our site and intend to remove it, please contact our site administrator for approval.
© 2016-2026 All site design rights belong to S.Y.A.