Running Linux, 5th Edition (2009)
Part I. Enjoying and Being Productive on Linux
Chapter 8. Office Suites and Personal Productivity
Linux has come a long way since the early days. When people started to use Linux not just for tinkering with the system, but rather in order to get actual work done, various kinds of servers such as email or web servers were the normally used applications. Typical desktop and personal productivity applications such as word processors, spreadsheets, or collaboration tools were mostly unknown on Linux.
This situation has changed fundamentally. A variety of office suites and other personal productivity applications are available, and this chapter describes some of the options. The focus is on OpenOffice, probably the most feature-complete office suite available for Linux today, but we also talk about other options, as well as collaboration tools.
Using OpenOffice
By now, OpenOffice has become the leading full-function free and open source office suite program for GNU/Linux and is included by default on most distributions, including SUSE, Red Hat, Debian, and others.
This should not take credit away from the other free and open source office suite development projects—KOffice and AbiWord come quickest to mind—but OpenOffice gains the stage here due to the relative maturity of its code base and the elegance of its native open XML file format (which even KOffice has) as well as the suite's ability to run on Windows and its compatibility with the popular proprietary file formats.
"OpenOffice" Versus "OpenOffice.org"
Certain conventions of language used in this chapter would be confusing if they are not highlighted. The term "OpenOffice," or its abbreviated form "OOo," typically refers to the software, the code, the product, the office suite itself. In referring to the development project, the terms "OpenOffice.org" or "OOo project" or "OpenOffice.org development project" apply exclusively. To make things even more confusing, there is also StarOffice, which is based on the same code base, but sold by Sun Microsystems as a commercial product.
The Modules of OpenOffice
One among several hallmarks of OOo is the tight integration of its word processor, spreadsheet, and all other modules , which leads to a strong consistency in features, menu placement, and ease of use. The OpenOffice modules are listed in Table 8-1.
Table 8-1. The modules of OpenOffice
|
Module name |
Function |
Label under File → New |
|
OOoWriter |
Word processor |
Text Document |
|
OOoCalc |
Spreadsheet program |
Spreadsheet |
|
OOoImpress |
Presentation editor |
Presentation |
|
OOoDraw |
Graphics editor |
Drawing |
|
OOoHTML |
Web (HTML) editor |
HTML Document |
|
OOoMath |
Math formulas editor |
Formula |
We cover OOoWriter, OOoCalc, and OOoImpress in this chapter, omitting the remaining modules because they are less frequently used and their features and functions are well supported in the leading reference texts and online documentation for the users who still depend upon them.
OpenDocument and OpenOffice 2
This section of the book was written for OpenOffice 1.1 and therefore will be most helpful to users of Versions 1.1.1 through 1.1.5. By the time of publication, however, the OpenOffice.org development project will have released OpenOffice Version 2 worldwide.
Generally, OpenOffice 2 looks and feels more like the modern versions of Microsoft Office. This should help smooth transitions to the open source office suite, on both Linux and other platforms.
The most significant development in Version 2 is the new native file format, called "OASIS OpenDocument." This has already been widely embraced by technologists and government IT organizations (a web search for "Massachusetts" and "OpenDocument" offers a revealing start).
OpenDocument is an open XML file format, represented in OpenOffice 2 by the new filename extensions .odt for a text file, .ods for a spreadsheet, and .odp for a presentation file, among others. (Version 1 uses the filename extensions .sxw, .sxc, and .sxi, respectively.) OpenDocument is an upgrade of the same OASIS-based open XML file format used in Version 1; however, OpenDocument has some additional capabilities that make it incompatible with the earlier iteration of the format.
Accordingly, OpenOffice software prior to 1.1.5 cannot open or create files in the OpenDocument file format, and therefore cannot handle files created by users of OpenOffice 2. However, OpenOffice.org put the OpenDocument filters into Version 1.1.5 so that users of the 1.1 version can easily upgrade to a version that works the way they are familiar with and still open the new OpenDocument files. Users of Version 1.1 or earlier will need to upgrade to OpenOffice 2 in order to gain all the latest functionality and be able to create OpenDocument files themselves.
OpenOffice Writer
OpenOffice Writer (also known as OOoWriter ) is the word processor module included as one of six key components of OpenOffice. By now, OOoWriter is designed to be familiar to users of Microsoft Word.
Launching OOoWriter
Configuration of the Launch or Start menu may vary across the Linux distributions. On the Java Desktop System, for example, starting OOoWriter from the Launch menu brings up the Templates and Documents — New Document window, where you can select the New Document icon in the left-hand index, then Text Document from the list in the central pane.
You can launch OOoWriter directly if you have created a dedicated Launcher icon on the desktop, taskbar panel, or both. Create a Launcher icon for any module of OpenOffice that you use frequently.
Keep in mind, you may launch any alternative module from within any open module of OpenOffice: on the main menu, select File → New → [module].
Opening files
To open an OOoWriter or MS Word file, either open the directory where the file is located and double-click on the file's icon or select File → Open on the main menu. Then, in the Open window, browse to the appropriate folder, highlight the filename and select the Open button.
Note that MS Office files—those in the .doc format—open in OpenOffice in the same way a native OpenOffice document opens. You can edit the MS Office document and save it either in its own format or in OpenOffice's native format. See Table 8-2 for a complete list of file formats available for saving.
Saving files
After editing a document, select File → Save. A new file will be saved to the user's /home/[user]/Documents directory by default. You can also save a file to its current directory or the default directory with one click of the Save Document icon on the function bar.
For information about the function bar, see "Identifying the toolbars" later in this chapter and Figure 8-2.
If you need to select a different target directory or change the filename or file type, select File → Save As. The Save As window then appears, and you can make the appropriate selections and click the Save button. This window is explored further in the following section.
Saving as different file types. If you open an existing document, it is saved by default in its original format. To save as a different file format, select File → Save As to open the Save As window. Here you can make the appropriate selections in the File Type drop-down menu , then click the Save button. The file types available in the File Type drop-down are listed in Table 8-2.
Table 8-2. Save files in many formats or file types
|
File format |
File extension (suffix) |
|
OpenOffice 6.0/7 Text Document |
.sxw |
|
OpenOffice 6.0/7 Text Document Template |
.stw |
|
MS Word 97/2000/XP |
.doc |
|
MS Word 95 |
.doc |
|
MS Word 6.0 |
.doc |
|
Adobe PDF |
|
|
Rich Text Format |
.rtf |
|
OOoWriter 5.0 |
.sdw |
|
OOoWriter 5.0 Template |
.vor |
|
OOoWriter 4.0 |
.sdw |
|
OOoWriter 4.0 Template |
.vor |
|
OOoWriter 3.0 |
.sdw |
|
OOoWriter 3.0 Template |
.vor |
|
Text |
.txt |
|
Text Encoded |
.txt |
|
HTML Document (OpenOffice Writer) |
.html;. htm |
|
AportisDoc (Palm) |
.pdb |
|
DocBook (simplified) |
.xml |
|
Pocket Word |
.psw |
Note that you can save a native OOo text document file (with the .sxw extension) as several different versions of the legacy MS Office file types as well as in other standard formats, including the web page format of HTML.
You will be warned about a possible loss of formatting when saving to a format other than the native file format. That is, of course, because OOoWriter may support features that other word processors (and therefore their file formats) do not support. So if you want to be absolutely sure that you do not lose any formatting, macros, or other aspects of your documents at all, always save in the native file format, or at least keep a copy in the native file format.
Saving or exporting to common file formats. OpenOffice facilitates saving files in several different file types, including some very useful document standards such as PDF. By choosing the format in which you save a document, you can ensure that your work is viewable and editable in different software environments, such as Windows, Mac, Solaris, and others.
Saving in the MS Word file formats. Chose File → Save As from the main menu. In the Save As window, open the File Type drop-down menu and select the desired MS Office file format version. Choices include the following:
§ Microsoft Word 97/2000/XP (.doc)
§ Microsoft Word 95 (.doc)
§ Microsoft Word 6.0 (.doc)
Exporting and sending files
There are occasions when it's convenient to quickly send a document in its current form to a colleague. OOo offers a few menu items to help you attach the current document to an email message in a choice of formats.
Export as Adobe PDF . In your current document, click the small, red Export to PDF icon on the menu, and the Export window will open with File Type preselected to Adobe PDF. Notice in Figure 8-1 that the Export window is similar to the Save As window.
Enter the filename, choose a folder in which to save the new PDF file, and press the Save button.
You can achieve the same result by selecting File → Export as PDF and filling out the Export window as instructed previously.
PDF is a great format for GNU/Linux users to get into the habit of using often. In a world of mixed computer systems, PDF is one of the most universally accepted file formats, and the security of locking down the content of your files as they get passed around your organization and supply chain can reduce the chances of unhappy, confusing or surprising content alterations.
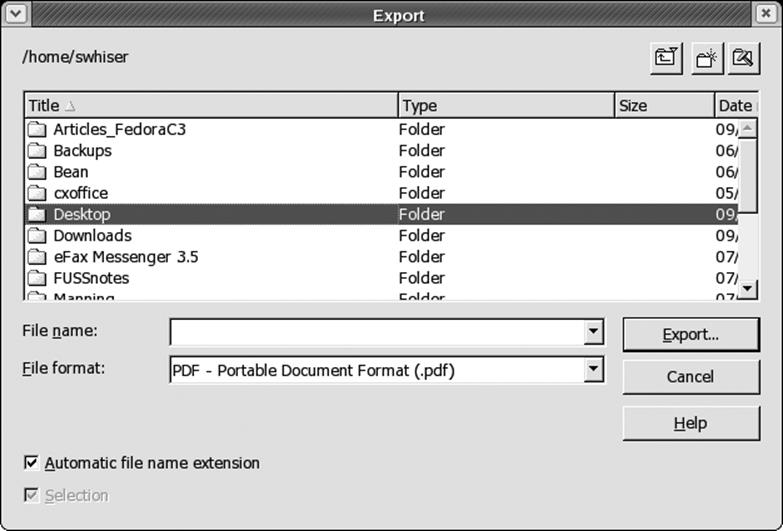
Figure 8-1. The Export window
Sending a document as an email file attachment. OOoWriter offers a host of facilities for exporting or sending the current document to others through one or two mouse-clicks. To send the current document as an attachment to an email, select File → Send → Document as Email. This will call up your email program along with a new Compose window with the current OOoWriter document already attached. Fill in the address and subject lines as fitting, perhaps add a few words in the message window, and press the Send button.
This feature automatically sends the attached file in the native or default OpenOffice open XML (.sxw) file format.
Sending a document as a PDF attachment to an email. To send the current document as an Adobe PDF attachment to an email, select File → Send → Document as PDF Attachment. The PDF Options window appears and lets you select a page range or the whole document, and the amount of file compression. The default compression setting, Print optimized, is fine for most purposes.
Identifying the toolbars
The default toolbars of OOoWriter—to which we refer often—are the main menu, the function bar, the object bar, and the main toolbar (see Figure 8-2).
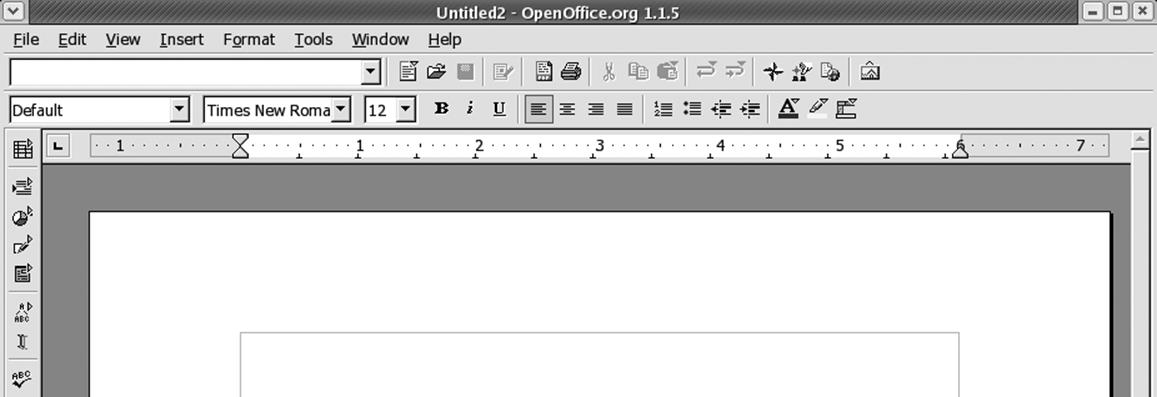
Figure 8-2. The toolbars of OOoWriter
These are merely the default toolbars available out of the box. Other toolbars can be invoked with customization. We cover toolbar customization in the section entitled "OOoWriter Customization," later in this chapter.
Basic formatting
This section covers basic formatting techniques for short and simple documents.
One-click character formatting. The text formatting buttons located on the object bar for bold, italic, and underline hardly need to be covered, because even beginning users know their purpose instinctively.
In addition to these one-click font-change object bar buttons, many people enjoy using the shortcut keystroke combinations Ctrl-B, Ctrl-I, or Ctrl-U to effect the same changes on any selected text. These changes affect any word in which the cursor sits, so text selection (using the Shift key and moving the cursor, or selecting text with the mouse) is not necessary unless you are changing multiple words of text.
Character, paragraph, and page formatting. For more customized or fine-grained formatting of textual characters, whole paragraphs, or entire pages, select Format on the main menu. The sequences Format → Character, Format → Paragraph, and Format → Page open the Character dialog, the Paragraph dialog, and the Page Style: Default dialog, respectively.
Inserting headers and footers. To insert a header, go to the main menu, select Insert → Header, and check Default in the drop-down menu. This opens a header frame in the current document where you can type or enter the appropriate content that will appear at the top of every page of the document.
Inserting a footer is similar to inserting a header, but select Insert → Footers, and check Default.
To change headers or footers in the middle of a document, see "Changing styles in mid-document," later in this chapter.
Page numbering . For most documents it's appropriate to place page numbers in a header or footer. To generate page numbers automatically, insert a header or footer (depending on where you intend the page number to go, at either the top or bottom of each page) and place the cursor inside the live header or footer frame by clicking once there. Then go to the main menu and select Insert → Fields. This invokes a drop-down menu with the following choices: Date, Time, Page Number, Page Count, Subject, Title, Author, and Other.
Selecting the Page Number choice inserts the page number automatically at the location of the cursor. If you wish the page number to be located flush right, simply click the Align Right justification icon on the object bar after inserting the page number.
To change or restart page numbering at a certain point in a document, see the section "Changing styles in mid-document."
Generating a table of contents. For a longer written work that is structured with chapters or headings, it is convenient to exploit OOoWriter's ability to autogenerate a table of contents. This feature is often used because manually generating tables and indexes is extremely time-consuming and repetitive—especially for larger documents.
To generate a table of contents that picks up the headings you've inserted into your document, choose Insert → Indexes and Tables and then, from the drop-down menu, Indexes and Tables once again. You can then insert a generic table of contents simply by pressing the OK button of the Insert Index/Tables window, as shown in Figure 8-3.
You can generate a number of different kinds of indexes and tables; the choices include Table of Contents, Alphabetical Index, Illustration Index, Index of Tables, User-Defined, Table of Objects, and Bibliography. Format these indexes and tables from the Insert Index/Table dialog, where you can designate the type of index or table, its layout, the number of heading levels, and other design characteristics.
Printing a document
Print the current document in one stroke by simply clicking the printer icon on the function bar.
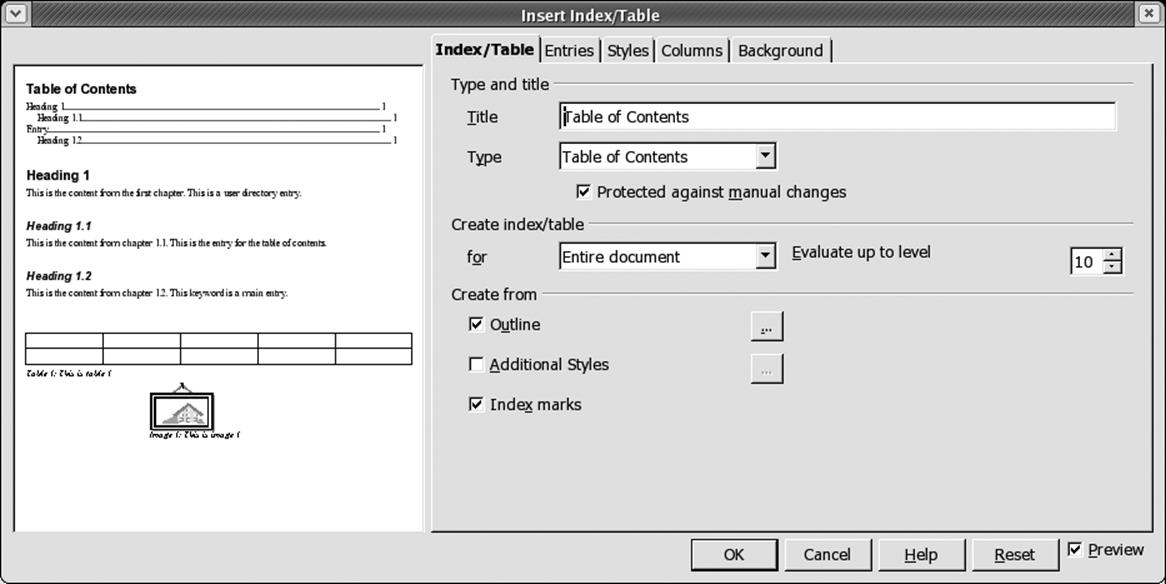
Figure 8-3. The Insert Index/Table window
More precise control is gained via the Print window: select File → Print from the main menu, or simply press Ctrl-P. Here, you can choose a nondefault printer (if one is set up), a limited page range, or a different number of copies (the default is 1) for the current print job. You can also elect to print to a file.
Advanced formatting
Although the following sections introduce the strong formatting features of templates and styles below, other advanced formatting features are outside the scope of this chapter. It may help just the same to mention some of the useful features we're unable to cover.
Long-form documents benefit from frames, borders, and sections. These facilities help you format sidebars, set apart quotations, or highlight elements you wish to distinguish from the running text. They provide opportunities for adding colored or shaded backgrounds, changing fonts, and using multiple columns. Text contained in frames can even be set to flow through multiple frames inserted throughout a document. This is especially useful in formatting newsletters, for example, and making them more visually engaging.
Templates
A variety of stock templates and a facility for creating, editing, importing, and managing templates are included with OOoWriter. You can access templates by clicking File → New → Templates and Documents to open the Templates and Documents window. Then highlight the Templates icon on the left-hand index, as shown in Figure 8-4.
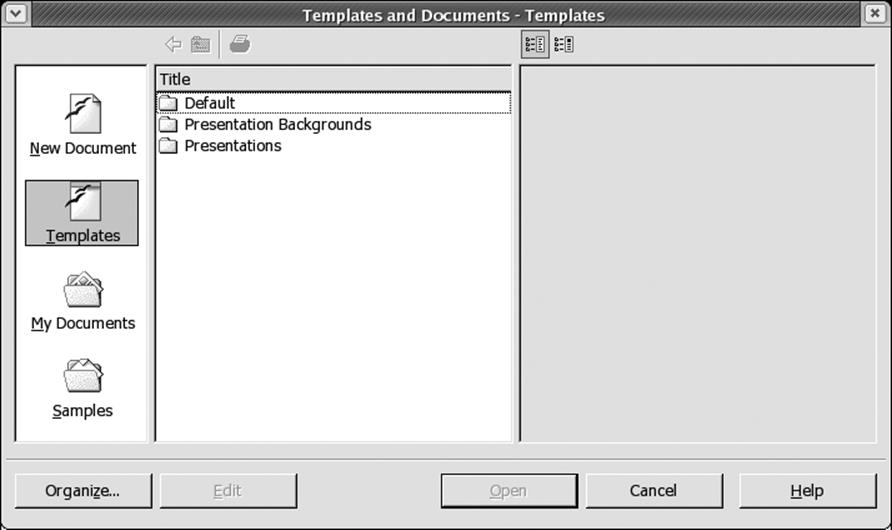
Figure 8-4. Templates and Documents—Templates
Here you can open one of the various stock templates and work away: edit and save it just as you would a normal document. Documents created this way, however, will not be linked to the template file from which they were derived. See "Template linkages," later in this chapter, for further detail.
Saving your own document as a template. Any of the documents you've created in your filesystem can perform as a template. Quite often users repurpose old files such as office memoranda, fax cover sheets, or business letters and use them to create new documents by simply replacing a few key words. This practice is fine and works well for many people; however, users could be more productive if they took full advantage of OOoWriter's template management facilities and particularly its linkage abilities.
Creating a new template. To create a new template, open a new text document (or use an existing document from your file store) and make the necessary formatting adjustments that you'd like to have in your template. Now, select File → Templates → Save from the main menu. This calls up the Templates window, which permits you to name the new template and select a template folder or category in which to store it. You can create any number of your own personal templates and store them this way.
Files saved as templates this way will automatically have the .stw file extension appended.
Editing templates . You can edit or generally treat a template file just like any other; however, we recommend editing a template with special care, because it can be easy to open a template file and then save it by mistake as a normal OOoWriter .sxw file, which would interfere with the template's linkages and storage location.
One direct way to edit a template is to select File → New → Templates and Documents. This opens up the Templates and Documents window directly in the Default folder. Click through the Templates folders to find the template you wish to edit. Click once to highlight it. This will light up the Edit button at the bottom of the window, second from the left. Clicking the Edit button will open your template, ready for edits. When you save via this route, the proper directory path and file format appear automatically in the Save dialog, so there's less opportunity to mishandle your template.
Managing templates. You can also save any of your own documents as a template or, later, move them into one of the Templates folders/categories using the Template Manager (Figure 8-5). Access the Template Manager from the main menu by selecting File → Templates → Organize.
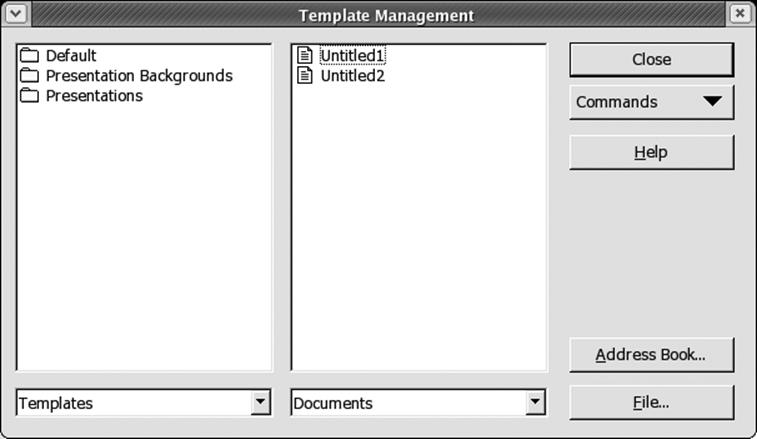
Figure 8-5. The Template Management window
You can browse documents in the right-hand pane of the Template Manager and drop them into folders in the templates pane on the left-hand side.
Template Manager also offers facilities for importing, updating, and adjusting the printer settings associated with templates.
Importing templates . The template files you encounter in the Template Management window's Default folder are actually stored in the /home/swhiser/OpenOffice. org/user/template directory on the system. The templates you encounter in all the other Template Management folders are actually stored in the /home/swhiser/OpenOffice.org/share/template/english directory. (This allows individual users in a multiuser installation of OpenOffice to change their own default master templates without affecting other users on the network.)
To import template files from MS Word or from any trusted outside sources (including useful ones you find on the Web), you can manually copy the templates into the directories just discussed, and they will show up in the folders you expect in the Template Management window. Templates copied in this way will also be available when you use the AutoPilot to create documents from templates.
You can also use the Import Templates feature in the Templates Management window to get external templates into the correct place and into the proper file format (.stw). This ensures that templates and the files derived from them maintain their linkages (see the following section).
A third way to import a template is to select File → Save As, choose "OpenOffice.org Text Document Template (.stw)" as the File Type, and set the path to the appropriate one of the two directories mentioned previously.
Template linkages. Template files are linked to the documents that are derived from those templates. It helps to imagine the template file, or the source file, as the "parent," and the derived document as the "child." Parent-to-child linkage is one of the principal benefits of using templates. When you have a large number of child documents in your Documents folder, for example, you have the ability to update the formatting of all those files in one stroke by altering the formatting of the parent template file. Each time you open a child document, you are prompted to accept or reject the formatting alterations that were previously made to the source template, as illustrated in Figure 8-6.
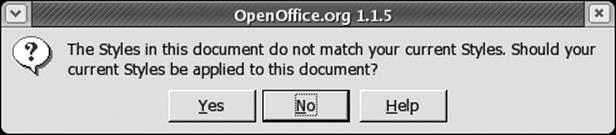
Figure 8-6. Accept the formatting changes to a subdocument
Linkage is broken, however, if you later save the source template file via File → Save As or via the Save icon on the object bar. Thus you should always save a template file via File → Templates → Save if you wish it to remain linked to its children or to keep using it as a template.
Change the default template for all new text documents. As mentioned earlier, the standard blank document that opens up when you select File → New → Text Document from the main menu is based on a default template file that is saved in the Templates and Documents — New Document window (Figure 8-7).

Figure 8-7. Templates and Documents—New Document window
To change the default template for all new text documents, first create a new template with the desired formatting (and add custom styles if desired) as described earlier in "Creating a new template." Save it by selecting File → Templates → Save, enter the filename (let's call it newdefault), and click once on Default in the Categories pane at the left to save it in that folder.
Then, go into the Template Management window by selecting File → Templates → Organize and double-click in the left pane to open up the Default folder, where you'll find your new template file, newdefault. Click once upon it to highlight newdefault, and click on the Command button at the far right to view the drop-down choices. Select "Set As Default Template" at the bottom of the list.
To restore the original text document default template, simply click the Command button once again and select Reset Default Template → Text Document.
AutoPilot : quick document creation. AutoPilot is like templates on steroids. It offers a way of creating customized documents that are much like templates, but it is a wizard that takes you through a few steps to customize the new document rapidly before launching it. AutoPilot is therefore a useful tool for first-time users who wish to get up and running in OOoWriter quickly.
Access AutoPilot via File → AutoPilot, where you'll see a drop-down menu, as shown in Figure 8-8.
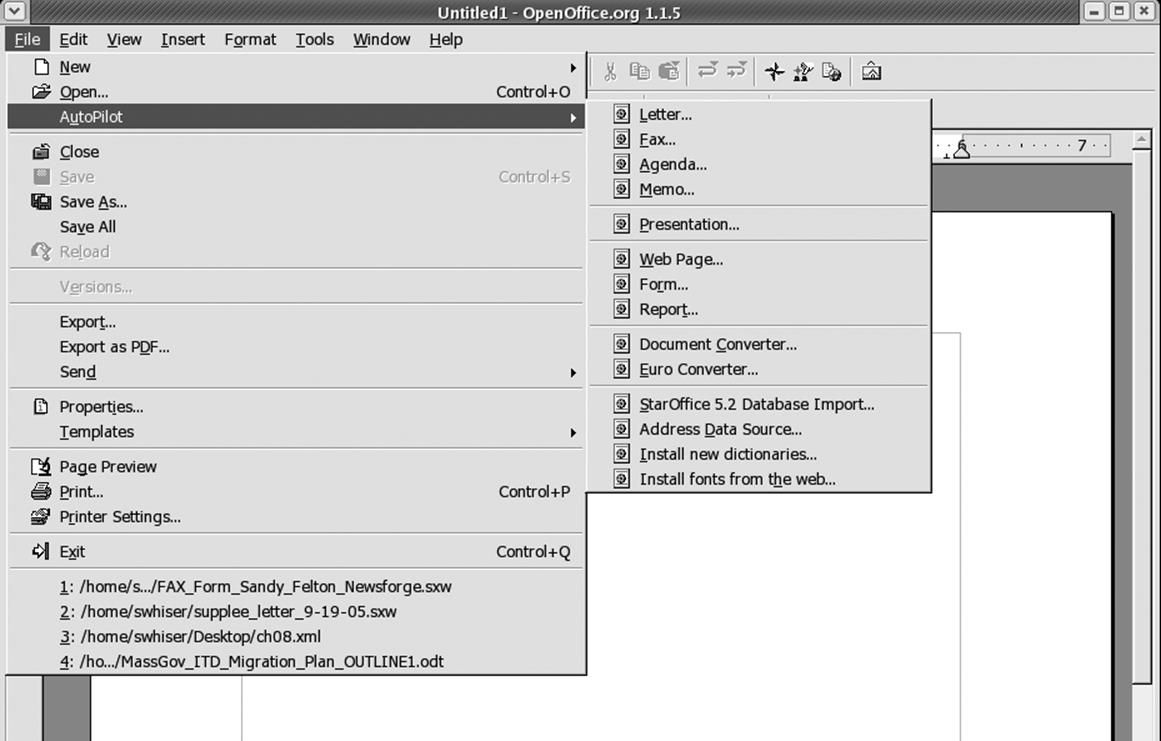
Figure 8-8. The AutoPilot
AutoPilot is a wizard that takes you through various steps to create an individual document from a generous list of different document types, including letters, faxes, agendas, memos, presentations, web pages, forms, and reports.
AutoPilot also contains several different utilities to manage document or content conversion: Document Converter, Euro Converter, StarOffice5.2 Database Import, and Address Data Source.
Styles
If you work with many people and want them all to make documents that look the same, you definitely need styles . Put another way, any formatting you can apply to text can be turned almost as quickly into a style, which you can then apply over and over through a couple of clicks.
Figure 8-9 shows the button on the function bar (third from right, highlighted) with which you can quickly open the Stylist in order to begin manipulating styles. Alternatively, open the Stylist by pressing the function key, F11.
Once open, the Stylist lets you toggle among the five different style types or style categories: paragraph styles, character styles, frame styles, page styles, and numbering styles. To switch from one style category to another, simply click the corresponding icon at the top left of the Stylist's toolbar.

Figure 8-9. The Stylist On/Off button
The Stylist. The interface to OOoWriter's Styles is a floating palette called the Stylist. It is invoked by pressing the function key F11 or the Stylist On/Off button on the function bar. The Stylist On/Off button looks like a page with a tiny hand on the lower-left corner. The default state of Stylist is to open in Paragraph Styles with the Automatic mode, as shown in Figure 8-10.
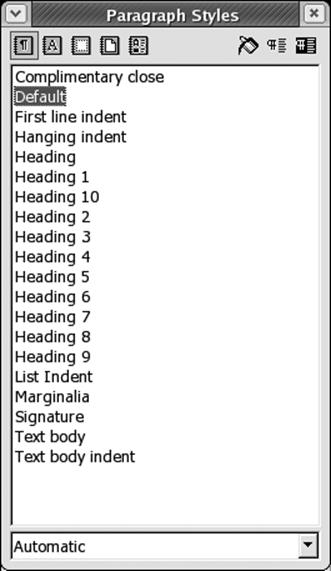
Figure 8-10. The Stylist opens to Paragraph Styles
Clicking through the icons on the Stylist's toolbar, you begin to get a feel for the different styles that come with OOoWriter out of the box.
Applying a character style. To apply character styles in the Stylist, click on the Character Styles icon (second from left, showing an A) at the top of the Stylist. This reveals all the default character styles available (the window is in All mode by default).
To apply an italics style, for example, highlight the "Emphasis" character style (fifth from the top of the list by default) with a single click and then click once on the paint can icon, which is third from right at the top of the Stylist (Figure 8-11).
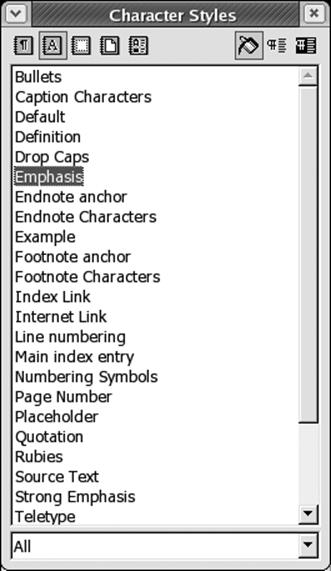
Figure 8-11. The Stylist, ready to paint italics
When you invoke the paint can, your cursor turns into a little paint can tool that makes it easy to apply your chosen style with precision. Click on a word you wish to italicize, or draw the paint can cursor across some text. The paint can now gives you a Midas touch that italicizes everything on which you click. You can turn off the style by pressing F11, clicking on the X icon at the top right of the Stylist box, or choosing a different style.
Modifying styles. To modify a style, press CtrlF11 to bring up the Style Catalog. The resulting window is shown in Figure 8-12. You can also invoke the Style Catalog from the main menu by selecting Format → Styles → Catalog.
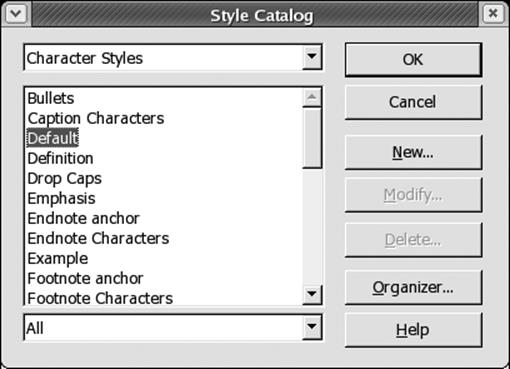
Figure 8-12. The Style Catalog
We've already shown you how to change a particular paragraph or set of characters. You can make similar changes to styles. For instance, if you want list items indented differently from the default indentation used in a list style, you can edit the list style and make it indent each list the way you want. When you modify a style, it immediately takes effect on all existing items in the document, as well as items you create afterward. This section shows you how to modify a style; a later section shows you how to create an entirely new style so you can do things the inventors of OOoWriter didn't anticipate.
Quick-flowing styles modification is one of the key productivity benefits for using styles rather than manual or direct formatting. It permits efficient formatting of large documents for work that is likely to be used by many different people or reused repeatedly.
The Style Catalog displays different styles depending on the style existing at the cursor's current location. This can be very convenient; if you wish to modify a certain style throughout an entire document, just place the cursor on one example of that style and proceed to modify it.
With the Style Catalog open, highlight the style you wish to alter and click the Modify button at the right of the Style Catalog window. This opens the Style Settings window for the highlighted style (in Figure 8-12 this is Default). The Style Settings window is shown in Figure 8-13: here you can change any characteristic that is available for modification.
An alternate way to modify a style is to right-click on the style in the Stylist and choose from New, Modify, or Delete. When you click Modify, the Style Settings window opens and you can make the desired changes.
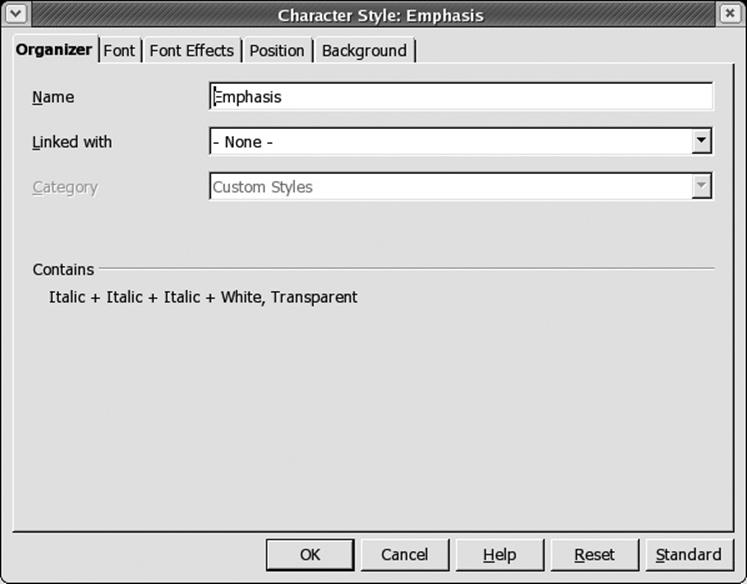
Figure 8-13. The Style Settings window
Updating styles . Short of creating a whole new style from scratch, you can quickly change an existing style by applying the format of a selected character, paragraph, or page.
To update a particular style, press the function key F11 to open the Stylist. Next, click the icon of the style type you want to update: paragraph, character, or page. Then, click once in the document in the place where you want to copy or update the style. For example, you may be "borrowing" paragraph formatting that you had previously applied manually. Next, in the Stylist, click on the style name you wish to update. Finally, click the Update Style icon at the far right of the Stylist toolbar.
Adding new styles (or creating styles). Although OOoWriter comes with many predefined styles, advanced situations will inevitably need new styles to be added. These styles are also known as custom styles, and they travel with the document with which they were created when it is saved.
To add a new style to the Stylist, first open the Stylist by pressing F11. Next, pick a style type and highlight an existing style in the Stylist that's similar to the new one you wish to create (if such a style exists). Right-click that style and select New. This opens the Style Settings window (shown in Figure 8-13). Here you can set all the characteristics you want for the new style, including its category.
There are two alternative ways to add a new style. One is by clicking the "New Style from Selection" button, which is the second button from the right at the top of the Stylist. This opens the Create Style window, where you can choose a new style from the given list and enter a name for the new style, as shown in Figure 8-14.
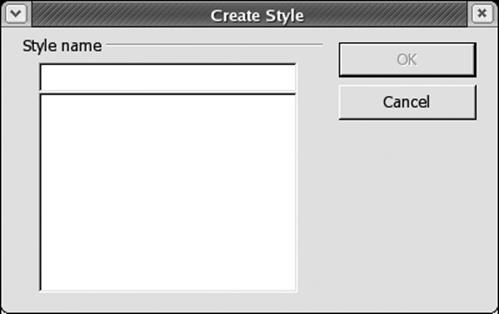
Figure 8-14. The Create Style window
Perhaps the best way to create a style that doesn't closely resemble any existing style is to press Ctrl-F11 to open the Style Catalog. Then click the New button on the right side. This opens the Style Settings window, where you can make all the desired selections to create your new style.
Changing styles in mid-document. To change page styles, headers, and footers, or to restart page numbering in mid-document, generally insert a manual break where the cursor sits by selecting Insert → Break from the main menu. The Insert Break dialog offers you the opportunity to select a new page style or to change the page number. Headers and footers can be changed at this point by creating new page styles with different header and footer content and invoking these new page styles when inserting the break.
Load (transfer) styles. You can transfer styles into the current document from another document or template by selecting Format → Styles → Load from the main menu. This calls up the Load Styles window, shown in Figure 8-15. Here you can specify a file containing the styles you want, and load any or all of these styles by checking the desired boxes along the bottom of the window.
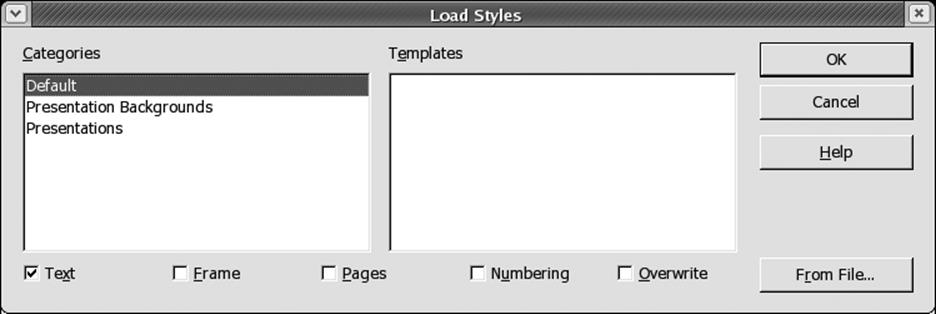
Figure 8-15. The Styles Load window
Collaboration with documents
When several people create and edit a document together by passing the draft around, it becomes useful to turn on changes tracking. This allows each person's changes and deletions to appear in a different color while the document circulates for drafting.
Changes tracking. To turn on Changes Tracking, select Edit → Changes from the main menu and single-click both Record and Show. Once turned on, these settings travel with the document when it is saved, and will stay on until someone un-checks them and saves the document again.
Comparing documents. To compare two different documents, open the first document and select Edit → Compare Document. This opens the Insert dialog, where you can select or type in the name of the second document. Click the Insert button at the bottom right of the window. The insert procedure merges the two documents and shows the results using the changes tracking feature, as if you had started with the second document and edited it to create the first. Typical results are shown in Figure 8-16.
Version control. OOoWriter's version control features allow you to keep track of numerous versions of a document from within a single file. This both saves disk storage space and provides ready and quick access to older versions of a document. Thus, if you make edits that you later regret, you can back them out. If somebody asks when a change was made, you can review earlier versions of the document.
Version control is accessed via the main menu under File → Versions. This launches the Versions window (see Figure 8-17).
To save a new version of a document on which you're working, choose File → Versions from the main menu and click the Save New Version button at the top left in the Versions window. The Insert Version Comment window (Figure 8-18) pops up, permitting you to enter a few phrases to remind yourself and your collaborators later what changes you made and why. Documenting what you've done here lets you also distinguish versions later without having to open each one.

Figure 8-16. Differences are displayed as redlined content
If you use File → Save As to save a version on which you are working, none of the version information is preserved; you have instead created a spanking new document. You could, of course, start again with this new document as a base, and use version control once again for future changes.
To open a specific version of a document listed in the Versions window, choose File → Versions, highlight the desired version, and click the Open button. This opens the indicated version of the document as a read-only file. You can, if you wish, save this version as a separate document, with no reference to other versions, past or future, by using the File → Save As menu option.
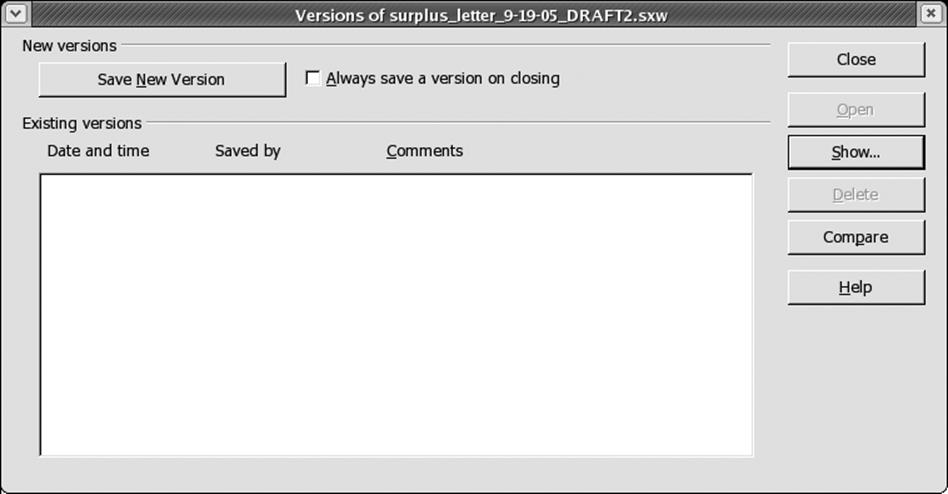
Figure 8-17. The Versions window
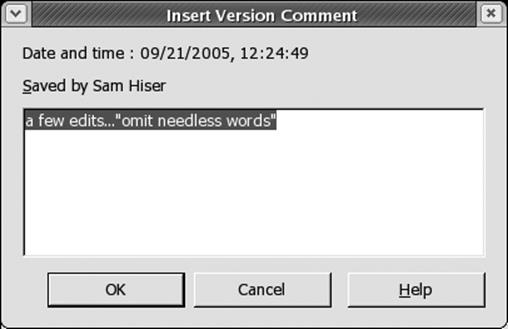
Figure 8-18. The Insert Version Comment window
To track and show changes from one version to another, click the Compare button in the Versions window. This highlights all version differences (just as when using the Edit → Compare Document feature) in a document and gives you the chance to accept and reject each change.
Navigator
The Navigator is a floating panel, like the Stylist, that adds horsepower to your ability to rapidly move throughout a document. The Navigator is turned on or invoked by clicking the Navigator button on the main menu, just to the left of the Stylist button, or by pressing the function key F5 at any time.
The Navigator panel displays an expandable outline of all the elements in your document to aid a rapid jump to any one of them. Such elements include headings, tables and text frames, graphics, OLE objects, bookmarks, sections, hyperlinks, references, indexes, notes, and draw objects. If you click on the plus sign in front of any of those object types in the Navigator, you can click on any of the elements listed to immediately scroll the document to that location.
Keyboard shortcuts
This section lists the most common keyboard shortcuts that users find valuable for speeding up document composition. The shortcuts are faster than using the mouse and drop-down menus because the keystrokes allow you to keep both hands on the keyboard. Some people in danger of developing repetitive stress syndrome through excessive use of the mouse can find these shortcuts of particular value.
Custom keyboard mappings. The key mappings reflected in Table 8-3 are merely default settings. Users and system administrators are free to change them to reflect their personal or organizational taste or habit by selecting Tools → Configure → Keyboard.
Table 8-3. Common keystrokes to avoid the mouse
|
Function |
Keystrokes |
|
Copy text |
Ctrl-C |
|
Cut text |
Ctrl-X |
|
Paste text |
Ctrl-V |
|
Bold text |
Ctrl-B |
|
Italic text |
Ctrl-I |
|
Underline text |
Ctrl-U |
Adjustments to the Function Key defaults can be helpful, too, in the desktop migration process. OpenOffice offers four modes—F[1-12], Shift-F[1-12], Ctrl-F[1-12], and Shift-Ctrl-F[1-12]--which creates many openings for custom function key mappings that can aid speed and productivity.
Searching a document with Find & Replace
To find and replace characters in a document, press Ctrl-F to open the Find & Replace dialog. Alternatively, you can access the Find & Replace dialog from the main menu by selecting Edit → Find & Replace.
Enter the term you're searching for in the "Search for" field (top left), and, if you want to change it, the term you'd like to replace it with in the "Replace with" field. Proceed by pressing the Find button at the top right of the window, and the search will locate the term you're searching for in the nearest location in the document after the placement of the cursor. Continue by pressing the Replace button whenever appropriate. If you come to a term that you don't wish to replace, just press the Find button again to advance to the next example of the search term.
Inserting hyperlinks
Inserting hyperlinks—textual references to URLs on the Web—into documents has become essential. To insert a link, choose Insert → Hyperlink from the main menu. This invokes the Hyperlink window, where you can enter the name of the link (compete with http://) in the Target field and the text for the link in the document in the Text field, second from the bottom of the window. Other options are also offered, as shown in Figure 8-19.
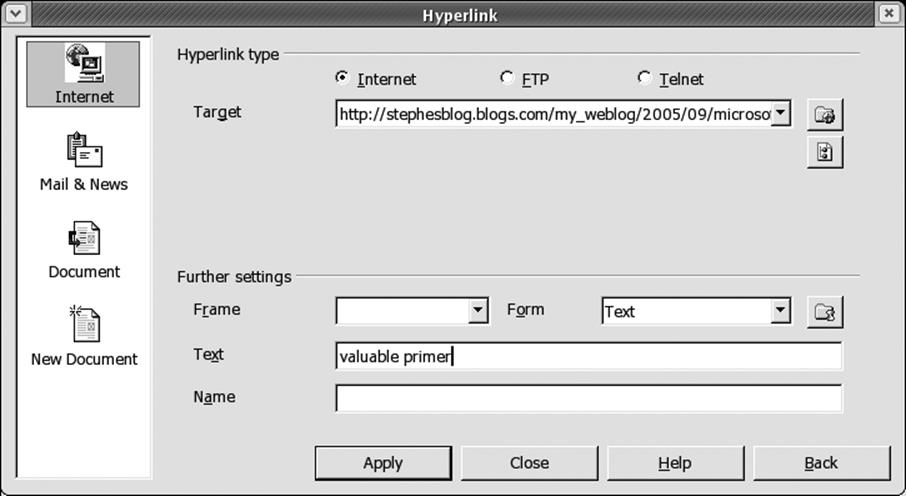
Figure 8-19. Inserting a hyperlink
Click the Apply button at the left of the series of buttons across the bottom of the window, and your text will appear highlighted and clickable in your document. Close the dialog by clicking the Close button. Test the link to see that it was spelled, punctuated, and typed correctly. If it is correct, clicking on the link in your document will wake up your browser with the target web page in it, and produce a little surge of joy in your heart.
Naming your hyperlinks is a good idea because that will enable you to move quickly among them with the Navigator, where the link names will be listed in outline form and clickable. To enter a name in the Hyperlink window, type a short but descriptive sequence in the Name field at the bottom of the dialog before you click the Apply button.
One may also make a hyperlink from existing text by highlighting the text sequence with the cursor, selecting Insert → Hyperlink, and filling out the dialog. Fill in at least the Target field and click the Apply button. Close the dialog by clicking the Close button.
Word count
Journalists, authors, and editors depend on this feature for their daily bread, so they can be forgiven anxiety at missing the word count feature. In fact, word count is present in OpenOffice, but it's in a surprising location. The feature is located in MS Word under Tools → Word Count, but in OOoWriter it's found under File → Properties → Statistics.
Password-protecting documents
You can secure OOoWriter documents from unwanted access by saving files with password protection turned on. When saving with File → Save As, simply check the "Save with password" box and enter and confirm your password when you are prompted to do so during the save.
To turn off whole document password protection at any time, simply choose File → Save As, uncheck the "Save with password" box, and complete the save.
OOoWriter offers a variety of ways to protect your documents against alterations to revision markings, sections, frames, graphics, objects, indexes, and tables. Consult the system Help under "passwords : protecting content."
OOoWriter Customization
OpenOffice offers many ways to customize its settings. A quick browse of the five tabs under OOoWriter's Tools → Configure (Menu, Keyboard, Status bar, Toolbars, Events) offers a good sense of the scope of OOoWriter's customization possibilities for the advanced user or system administrator.
OOoWriter toolbar customization
The workflow habits and nature of the business of each organization dictate the shape of its desktop toolset. So wide latitude in toolbar customization can help system administrators or power users bring the most frequently used toolbars or object elements to the top to increase productivity for themselves or all users in the workgroup.
In addition to the default toolbars available out of the box (main menu, function bar, object bar and main toolbar) the following additional toolbars are available through customization: table object bar, numbering object bar, frame object bar, draw object bar, control bar, text object bar/graphics, Bezier object bar, graphics object bar, objects, text object bar/Web, frame object bar/Web, graphics object bar/Web, object/Web, and user-defined no.1.
You can hide any of the toolbars (except main menu) by unchecking their names in the top half of the context menu that opens when you right-click in the empty space within any of the toolbars (Figure 8-20).
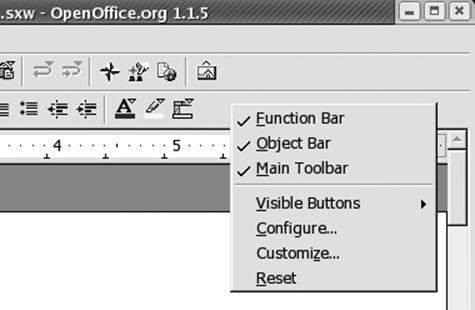
Figure 8-20. The context menu for configuring toolbars
You can further rearrange elements and redesign toolbars to your personal or workgroup preference by choosing any of the other four choices in the bottom half of the contextual menu: Visible Buttons, Configure, Customize, and Reset. Changes made using these commands apply to the specific toolbar on which you right-clicked to call the context menu.
Adding an OOoWriter icon on the desktop or taskbar panel
Launching OOoWriter with a quick double-click of an icon is usually faster and preferable to wading through a series of cascading menus. You can add separate Launchers to open each of the OpenOffice modules directly. Here's the easiest way to set up a launcher specifically for OOoWriter on both your desktop workspace or the edge panel across the top or bottom of your desktop. The example is given from the GNOME environment; KDE will be different.
Right-click on an open space on the edge panel and select Add to Panel → Launcher from menu → Office → OpenOffice Text Document (the path may vary across different Linux distributions). This will place a OOoWriter icon onto that location on your Taskbar Panel. To add either an OOoCalc or OOoImpress icon, simply choose OpenOffice Spreadsheet or OpenOffice Presentation in the last step.
To add the same Launcher icon to the desktop space, simply drag and drop the OOoWriter icon you've just created on your taskbar panel onto your desktop workspace. This places a duplicate Launcher icon on the desktop, if that location is useful to you, and you can remove the taskbar panel icon if you wish by right-clicking it and selecting Remove From Panel on the context menu. To remove a desktop icon, right-click it and select Move to Trash in the context menu.
Adjusting unpopular default settings
OpenOffice is set by default to automatically complete words, replace certain characters, and capitalize initial letters in a new sentence. If you feel autocorrection to be intrusive while you are typing, the autocorrect settings are easy to adjust to be less intrusive or to turn off completely.
Word Completion (turning off). OOoWriter's Word Completion feature comes turned on by default. Some users find it distracting or annoying to have the word processor program appending the ends of words before they finish typing them. Others are content to ignore the completion action and leave the default alone.
If you like OOoWriter to complete your words, simply press the Enter key when its recommendations are felicitous; otherwise, press the spacebar to reject the program's offering.
To turn Word Completion off, select Tools → AutoCorrect/AutoFormat → Word Completion and uncheck the box before the phrase "Enable word completion" near the top of the window. Then click the OK button.
Auto-Replace (turning off). If you find Auto-Replace to be invasive—such as when you attempt to type (c) and it keeps replacing your keystrokes with the copyright symbol—you have two options: edit the replacement list, or turn off Auto-Replace altogether.
Editing the replacement list is straightforward. Select Tools → AutoCorrect/AutoFormat and go to the Replace tab. There, highlight the offending element and either press the Delete key or enter a different target result in the With: field.
To turn off the Auto-Replace function, select Tools → AutoCorrect/AutoFormat and click on the Options tab. The topmost option is "Use replacement table," with two checkboxes in front. By unchecking both boxes in the [M] and the [T] columns, you can turn off the specific substitutions listed in the replacement table. You can turn off all the other specific automatic replacement actions, too, by unchecking the respective boxes under [M] or [T] as you go down this list in the Options tab.
Customizing Auto-Replace. Note that in the Tools → AutoCorrect/AutoFormat dialog, the leftmost Replace tab contains the list of default replacements. This list is based on the OpenOffice developers' extensive knowledge of common keystroke errors and frequently used symbols (such as the copyright symbol). Leaving Auto-Replace turned on can aid your compositional productivity, especially if you customize the replacement list to make your own most frequent word, character, or symbol replacements. Add your own simply by typing elements into the Replace and With fields and then press the New button. Delete an entry by highlighting it in the list pane and pressing the Delete button.
Auto-Capitalization (turning off). OOoWriter is set to automatically capitalize the next character you type after a period. It also decapitalizes a second uppercase character typed in a sequence. This is beneficial most of the time when we fail to strike the Shift key, which is surprisingly often; however, when we type abbreviations or when we type acronyms that demand two initial capitals, these AutoCorrect actions are unwanted.
If the Auto-Capitalization feature offends your sensibilities or disturbs your workflow, you can turn it off by selecting Tools → AutoCorrect/AutoFormat and clicking on the Options tab. Uncheck the two boxes under the [M] and [T] columns in front of the second option, "Correct Two Initial Capitals," and the third option, "Capitalize the first letter of every sentence."
Auto-Capitalization (making exceptions). Auto-Capitalization can be very helpful when you integrate it into your typing repertoire. Consider keeping the feature turned on, and just add exceptions to make the Auto-Capitalization work for you instead of against you. You can adjust Auto-Capitalization exceptions by selecting Tools → AutoCorrect/AutoFormat and proceeding to the Exceptions tab.
At the Exceptions tab, you can add abbreviations you repeatedly use to the "Abbreviations (no subsequent capitals)" list in the upper window. These entries permit Auto-Capitalization to automatically capitalize the first letter of a new sentence, while it will not make such an invasive adjustment after any of the abbreviations listed.
Also at the Exceptions tab, you can add to the list of words or acronyms that demand two initial capitals. The default entries already there provide a source of examples. Among our own favorite exceptions of this type are OOo, OOoWriter, and the many variations on that sequence.
OpenOffice Calc
OpenOffice Calc (also known as OOoCalc ) is the spreadsheet program included in the OpenOffice office suite. Users familiar with recent versions of Microsoft Excel will feel at home in OOoCalc.
Managing files
Opening, saving, sending, and exporting OOoCalc files is the same as with OOoWriter files. See the previously described details for OOoWriter.
Entering labels (text)
Entering a label—that is, a word rather than a number—into a cell is the same in OOoCalc as in MS Excel: begin the character sequence with a ' (single quote) character, finish typing the rest of the characters, and press Enter.
Autofill
Fill a row or column of numbers quickly with a simple drag-and-drop motion. After entering the number 1, for example, in the cell A1, simply highlight the cell by clicking on it once; then, grab the small black square at the bottom right corner of the cell with a left-click and drag the square down or across to fill in numbers. Consecutive numbers fill in the cells upon release of the mouse button.
Entering simple formulas
This is basic stuff to experienced spreadsheet users. Formulas always begin with an equals sign (=). For example, to calculate the result of 1 + 1, you would type = 1 + 1 and press Enter.
To calculate a result based on other cells, type = in the cell where you want the result to appear, then click on the first cell in the formula. This will highlight the cell in a red outline. Type an operator such as + and click on the second cell. This will highlight that cell in a red outline. You can keep entering as many operators followed by cells or other values as you like. Finally, press Enter; the result will appear in the target cell.
Note that the formula field, just above the cell area of the spreadsheet, contains the formula just created. The alternative way of creating the same formula would be to simply type it directly into the formula field. First, click once on the desired cell. Then click once on the empty formula bar and type your formula directly in it and then press the Enter key.
Summing a column of numbers
To quickly sum an existing column of numbers, highlight the empty target result cell with a single click. Then, click the sigma icon on the formula bar. This automatically highlights in blue the most likely nearby column of numbers to be summed. If the highlighted group is appropriate, press the Enter key, and the result will appear in the target cell. If the appropriate group of numbers is not highlighted, you can grab the small blue square at the bottom right of the highlighted column and adjust the grouping to the precise numbers you wish to sum. Then, press the Enter key.
Moving cell contents
It's easier to move a range of cells in OOoCalc than it is to move a single cell entry. This task is the one that gives the most people trouble when they are adjusting to the new environment of OOoCalc, but it is quite simple once you've done it once or twice.
To move a range of cells, simply highlight the range by clicking in one cell at an extreme corner of the range and, while holding the left mouse key down, drag the mouse pointer across the rest of the cells in the range. When the whole range is blackened, release the left mouse key. Now, go back with the mouse pointer and make a single mouse click anywhere in the blackened range (while holding down the button) to grab the range and move it to its new location. Drop the range of cells in its new location by simply releasing the mouse button.
Moving a single cell entry requires the same procedure, but highlighting a single cell usually proves troublesome for new users. That's because the highlight motion with the left mouse button requires the user to left-click on the cell, move the mouse pointer outside the cell and back, release the mouse button, and then go back to grab and move the highlighted cell.
MS Office offers a single motion to move a single cell, while OOoCalc requires a double motion involving first a highlight and then a move. The OOoCalc process is annoying because it's more complicated, but in the end it's effective and not that difficult to master and remember (because the old method is soon forgotten).
Adjusting column widths and row heights
To change the width of a column, bring the mouse pointer up into the grid's column headings, labeled A, B, C, and so on. Note how the mouse pointer changes to a double horizontal arrow when it rolls over any column divider. While the arrow is visible, simply move it to the right or left to increase or decrease the width of the column immediately to the left of the divider. To put a column back to its default width, right-click on the column heading to call up the Column Width dialog. Check the empty box labeled "Default value" and press the OK button. The column will now snap back to its default width (0.89 inches).
To adjust the height of a row, apply the procedure just shown for adjusting column width, but with the mouse cursor on the top or bottom of a row heading at the left edge of the page. To restore a row's default height, apply the procedure just shown for restoring the default column width, but at the left edge of the page on the desired row heading.
Merging cells
To merge multiple cells, first highlight the group of cells you wish to merge, then select Format → Merge Cells → Define from the main menu. This will create one cell that contains the contents of the cells in the range you highlighted. OOoCalc's recognition of data can be quite sophisticated. For instance, if one column contains Jun and another contains 3, the date 06/03 followed by the current year appears in the merged cell.
Freezing and splitting windows
It's hard to navigate through larger spreadsheets because the column and row headings disappear from view. The Window → Freeze and Window → Split commands permit you to lock column and row headings into place while scrolling to view other sections of the spreadsheet.
To lock down your column and row headings, click on the cell where you want the freeze to take effect and select Window → Freeze from the main menu. This will put a check mark on the Freeze item on the drop-down menu and lock the columns to the left of the highlighted cell, as well as the rows above the cell. The spreadsheet initially shows just lines to outline the frozen cells, as can be seen in Figure 8-21.
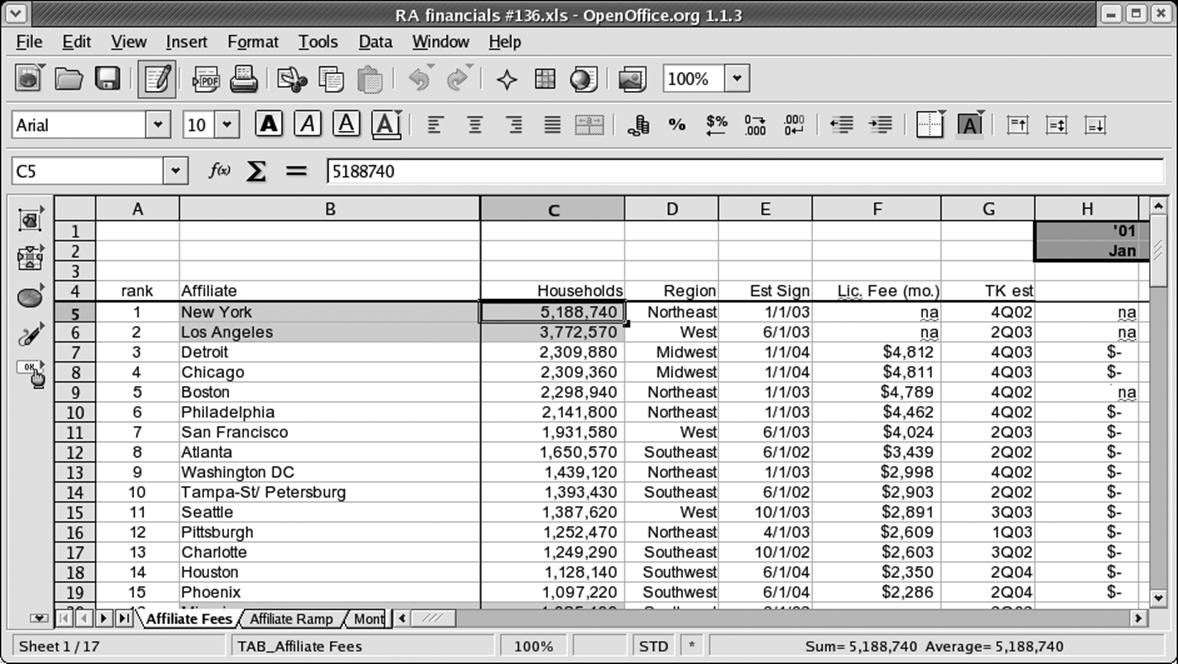
Figure 8-21. Freezing the column and row headings
Now you can move down and to the right. Note in Figure 8-22 how column headings stay fixed and visible as we move down the spreadsheet. A similar effect takes place with the column B row headings at the left if we scroll through the spreadsheet to the right.
Another interesting way to leave parts of your spreadsheet visible is to choose Windows → Split instead of Window → Freeze. Now you can click on any pane and scroll it. The pane you clicked on will move, along with one of the panes next to it depending on whether you scroll up and down or right and left. The other two panes will stay still.
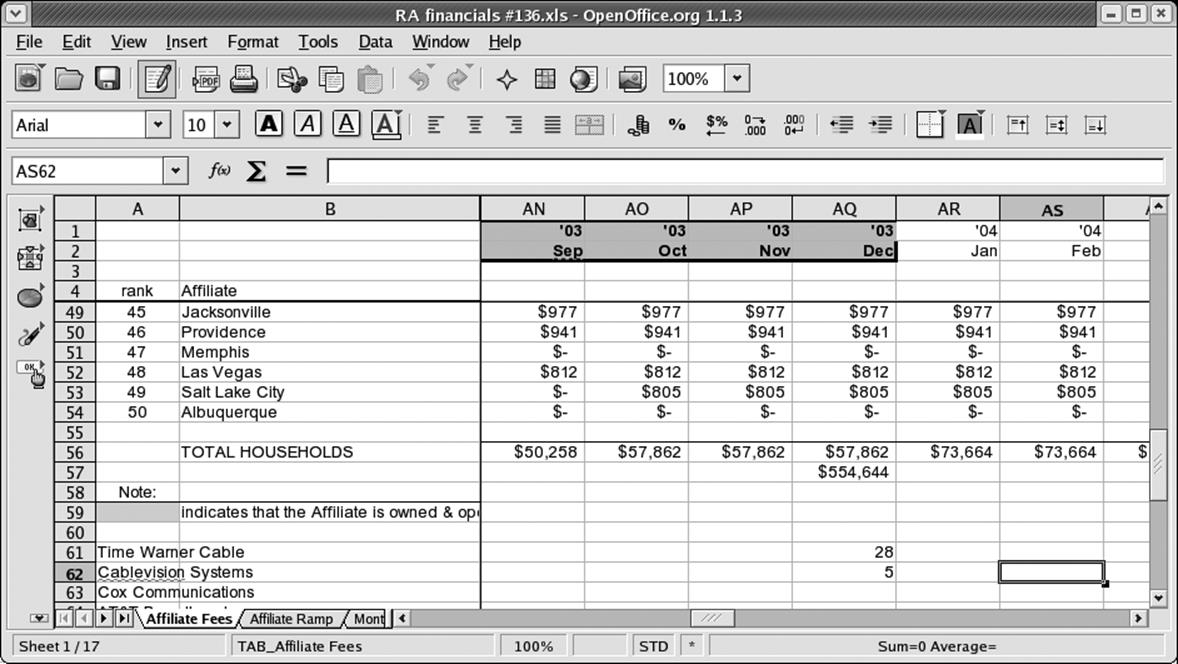
Figure 8-22. Column and row headings are frozen
To remove the Freeze or Split settings, simply click the checked selection on the drop-down menu, and the freeze or split lines will go away. Freeze and Split settings "travel" with a document when it is saved with either of the settings checked.
Page Break View
Page Break View offers a detailed view of the current spreadsheet's page breaks for printing. To turn on Page Break View, select View from the main menu and click on Page Break View in the drop-down menu. This sets a check mark at the selection. To turn off Page Break View, uncheck this selection on the drop-down menu.
You can quickly set or adjust page breaks by dragging the outside blue lines to cover the desired range, and just as easily move the page-dividing lines to include the desired columns and rows on the proper printed page. Page Break View also offers a way to view and navigate larger spreadsheets from a more distant perspective.
Setting the print range
When you create a new spreadsheet from scratch, it has no print range set. Such a spreadsheet appears gray when in Page Break View. To set a print range for your spreadsheet, make sure Page Break View is turned on, then highlight the full area you wish to print by clicking on the cell in one corner and dragging the mouse pointer across the entire range. Alternatively, select Format → Print Ranges → Define. Any spreadsheet content that's outside the range you set this way will not be printed.
If there is a print range already defined and you need to adjust it, simply grab the corner of the blue outline (or just grab a side) with the mouse and stretch it to include all the desired cells of your new print range.
To grab, first move the mouse pointer over the blue outline of the print range; you'll see the mouse pointer turn into a bidirectional arrow. The arrow permits you to drag the print range blue outline to a different place simply by clicking and dragging the line to the desired location.
Functions
OOoCalc has a full array of function types, including financial, database, temporal (date and time), array, statistical, informational, logical, mathematical, and textual.
OOoCalc's functions, their syntax, and their required formats are well documented in the Help drop-down menu of the main menu. Select Help → Contents, and the Help window will open up. Then, in the Index tab at the "Search term" field, type functions, and press the Enter key. Here, you can double-click on the name of a function in the left pane to view the information about that function. Figure 8-23 illustrates the Help Index and information on the financial function called PV, which calculates the present value of a stream of regular payments or cash flows. PV is a spreadsheet function that's understandably popular with MBAs and bankers.
When entering a function into a cell, remember always to precede the entry with an equals sign (=). The example offered in Figure 8-24 indicates what the PV function formula looks like in the formula field when it is correctly typed into a cell and the necessary information for the function is properly cell-referenced: =PV(B1;B2;B3).
The function in Figure 8-24 is a common mortgage problem. If you are guaranteed terms by your bank on a 30-year loan at 5% interest per annum, and you know that you have exactly $1,500 per month to spend on your new house, the question to answer is, "What is the purchase price that corresponds with my maximum monthly payment of $1,500?"
The PV function is perfect for solving such a problem. MBAs will fondly recall that mortgage payments made by you to the bank are outgoing and, therefore, negative. Make your payment input negative, or the resulting present value will be negative. The number of periods is 30 years times 12 months (360 periods), and the periodic interest rate is 5% per year divided by 12 months (0.42% per month), as indicated in Figure 8-24.
You could just as readily use the PMT (Payment) function to determine what the monthly payment is on your 10-million-Euro dream home.
It is possible also to enter numbers as well as cell references into the body of a function. In the Formula Field, this would look like the following:
=PV(.0042;360;-1500)
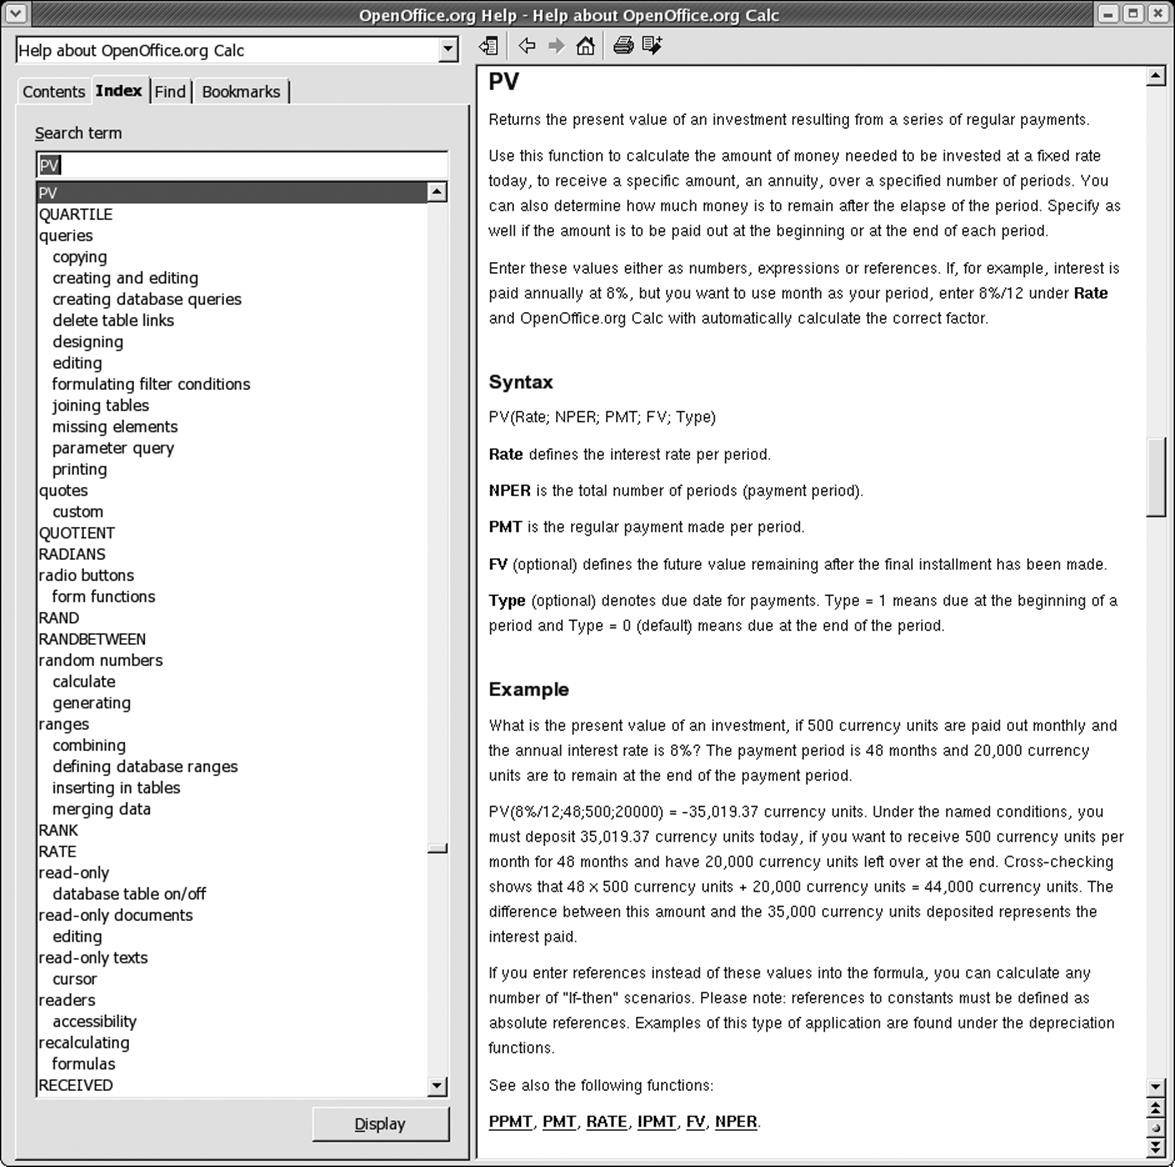
Figure 8-23. The PV (present value) function — Using Help
However, using cell references leaves room for easily trying alternative inputs or for generating a sensitivity analysis using a range of choices for one variable.
Worksheets, or sheets
One OOoCalc spreadsheet file (sometimes called a Workbook) contains three sheets by default, but can hold up to 256 sheets in total.
Figure 8-25 shows the three sheets of a standard, default spreadsheet file. In the figure, note from the white coloration of the sheet tab that sheet 1 is live or current. The gray coloration of sheets 2 and 3 indicate they are present but not visible.
To move among sheets, simply click on a sheet tab and it will become the live sheet.
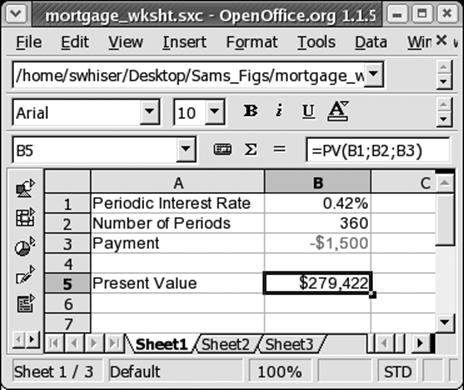
Figure 8-24. A common mortage problem, solved
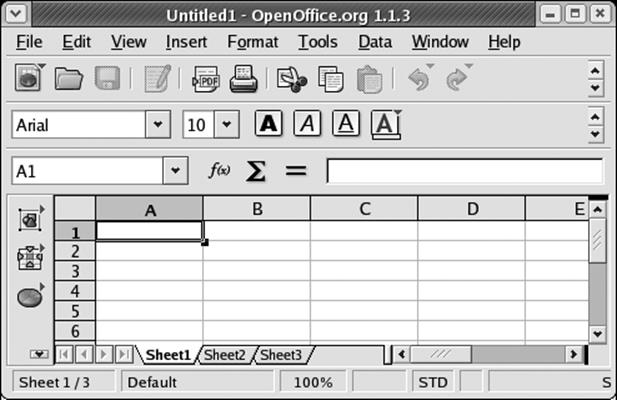
Figure 8-25. Three sheets to the wind
To add a new sheet, right-click on the sheet area or any one of the sheet tabs to call up the context menu. Then, select Insert Sheet from the menu and the Insert Sheet dialog box appears. Here, designate the names, positions, and number of the new sheets. Note that you can add multiple sheets. You can also bring in sheets from another file; after you browse and select a file, the names of its sheets are displayed for you to choose from.
To delete a sheet from a workbook, first select the sheet you wish to delete by clicking on its tab. Then right-click the sheet bar or live sheet tab and select Delete Sheet. Answer "Yes" in the confirmation dialog to delete the sheet.
To rename a live sheet, right-click the target sheet's tab and select Rename Sheet from the menu that appears. This activates the Rename Sheet dialog, where you can enter the new name for the sheet in the Name field.
To select more than one sheet at a time, hold down the Ctrl key while clicking on each sheet tab you wish to select.
Selecting concurrent sheets is useful when entering content, such as column headings or labels, that you wish to have on many sheets. It saves the repetition of setting up multiple sheets with the same information.
If you have a workbook with many sheets and wish to select a long range of contiguous sheets, click on the tab of the leftmost sheet in your target range. Then, while holding down the Shift key, click on the rightmost sheet tab of your target range. This selects all sheets included in that range.
To deselect that same group, hold down the Shift key while clicking on the tab of the first sheet (the leftmost sheet, in this case) you selected in that range.
To deselect a selected sheet (other than the live sheet, which always remains selected), hold down the Ctrl key while clicking on its sheet tab.
If you have a spreadsheet with many sheets, not all the tabs are visible at the bottom. To make a tab visible so you can select its sheet, you'll need to use the sheet navigation arrow buttons at the left of the sheet tabs.
Sorting data
To sort a list or chart of numerical or textual information, first highlight the full range to be sorted (including labels, but excluding unwanted data such as totals) and then select Data → Sort from the main menu. This launches the Sort dialog box, where you can designate the sorting order, among other parameters.
In the case illustrated in Figure 8-26, we want to reorder the data to put the largest responses at top. Therefore, in the Sort dialog we select to sort by the "Responses per Platform" column (where the numbers are) and set the radio button at the right to Descending. Then we press the OK button. Notice how rearranging the order of the source chart automatically registers the new order in the bar graph that was previously generated (see Figure 8-27).
Data sources
Instead of having its own database format, OOoCalc is designed to interact with many different varieties of external databases. Data Sources is the name for OOoCalc's strong feature set for interacting with databases and for linking spreadsheets, forms, and reports to information contained in databases. OOoCalc offers a variety of ways to link to a MySQL or Adabas D database, for example, or many other data sources, including MS Outlook, Outlook Express, Mozilla, and others.
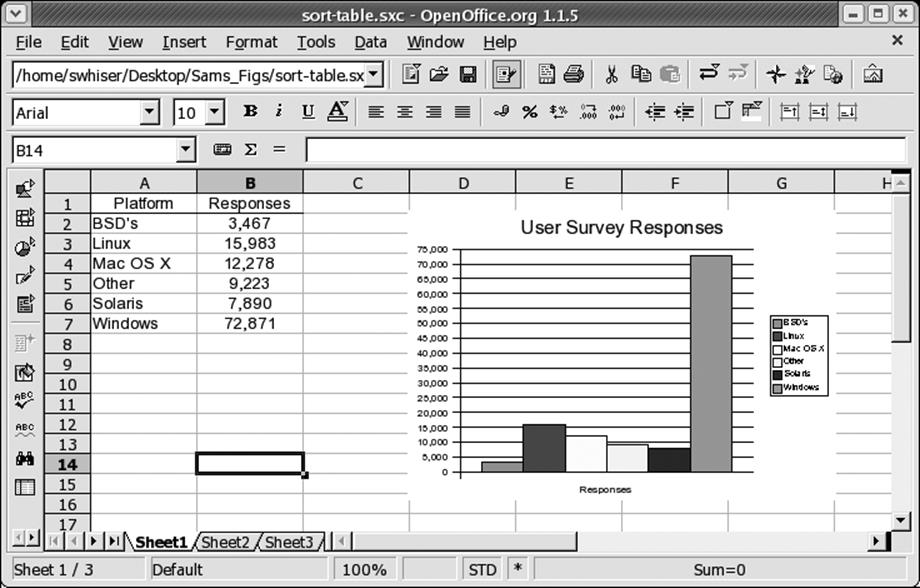
Figure 8-26. Sorting a simple table
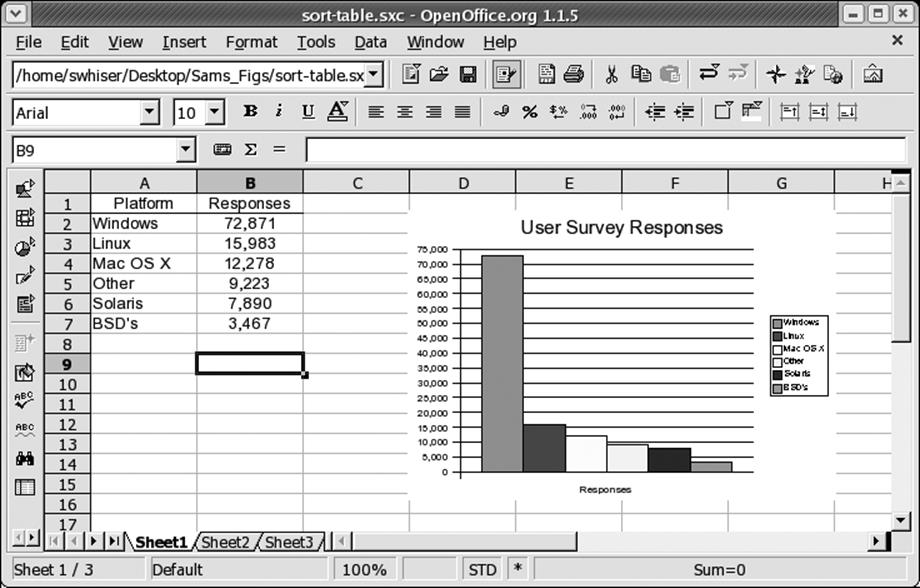
Figure 8-27. Table (and graph) successfully sorted
In OOoCalc , call up the Data Source View by choosing Tools → Data Sources from the main menu, or simply pressing the function key F4. Press F4 again to close the Data Source window.
Having made such a promising introduction, it's a shame to say that Data Sources is outside the scope of this section. It's a shame because interacting with databases is becoming more relevant to the web-enabled desktop user. Furthermore, OpenOffice's database interactivity is a hot focus of development activity and promises to get stronger as well as easier for the average user to handle with each progressive release of the OpenOffice software.
Macros
Creating or handling macros in OOoCalc is not within the scope of this book. However, we can offer some general information that may be useful to macro users. Macros could come into play for all the different modules of OpenOffice (and MS Office), but here we deal strictly with their relevance to OOoCalc (and MS Excel).
OOoCalc uses its own macro scripting language called OpenOffice Basic (or StarBasic). This is a different macro language from the one used by Microsoft in MS Office, which is called Visual Basic (or VBA).
VBA macros are not able to run in OOoCalc, creating a significant barrier for migration from MS Excel to OOoCalc for users with many large or significant VBA macros within their spreadsheets. VBA macros that come with MS Excel files currently must be rewritten in StarBasic for these files to be fully useful in OOoCalc.
Sun Microsystems has promised to release a Visual Basic-to-StarBasic macro conversion tool to facilitate the automatic conversion of VBA macros to StarBasic macros.
Meanwhile, OOoCalc is set by default to save VBA macros to be available and written back whenever a OOoCalc spreadsheet file is saved again in the MS Excel file format. This offers three options: (1) you can reimport a spreadsheet to Excel in order to run the stored VBA macros, (2) you can store the VBA macros in order to manually rewrite them in StarBasic, and (3) you can preserve them unused in OOoCalc, to be converted later to StarBasic when Sun's macro conversion tool becomes available.
Because VBA macros do not run in OOoCalc, the viruses associated with them pose no threat as long as you use OOoCalc. If you want to leave off the macros (for security reasons or because you just don't want them) when importing Excel files, turn off the default in Tools → Options →Load/Save → VBA Properties.
If you are interested in macros, feel free to consult the OpenOffice Basic Programmer's Guide at http://docs.sun.com/db/doc/817-1826?q=star+basic.
OpenOffice Impress
OpenOffice Impress (also known as OOoImpress ) is the presentation module included in the OpenOffice suite. Users who are familiar with most recent versions of Microsoft PowerPoint will feel at home in OOoImpress.
Creating a presentation from scratch with AutoPilot
When opening the OOoImpress module from an icon on the desktop or Taskbar Panel, or when opening it from another OOo module via File → New → Presentation, you are confronted by the AutoPilot wizard, which can lead you through the creation of a presentation from scratch. In the wizard you can also choose to open an existing presentation or a presentation template.
Less experienced users can feel free to let the wizard take them through the process of creating a presentation, but experienced users can simply select the Create button at the lower right in the wizard and get right to working in a blank presentation document.
Opening an existing presentation
To open a presentation you have created earlier or received from someone else, simply click once on a presentation file's icon in its folder. Your Linux system is likely set up to open MS PowerPoint files (which have a .ppt file suffix) automatically in OOoImpress. By default, each file is saved in the same format it had when you opened it (PowerPoint, OOoImpress, etc.).
Alternatively, you can select File → Open from the main menu and browse your file system to find the existing file with which you'd like to work.
Saving a presentation
To save your current presentation in its existing location and format, click the Save icon (the little floppy disk image) on the function bar, and the file will be saved into its present location in your file system. The same result occurs if you select File → Save from the main menu.
If you are saving the presentation for the first time, the Save dialog window opens to allow you to select a folder and fill in the filename field. Do so, then click the Save button. By default, the Save dialog window opens to the Documents directory (folder) in your file system. That is, userswhiser by default saves documents to /home/swhiser/Documents. This default also is consistent with other OpenOffice modules.
If you need to change the filename, folder, or format of the presentation file you are saving, save by selecting File → Save As and fill out the Save As dialog accordingly.
Export formats
One of the principal strengths of OOoImpress is the sheer number of file formats to which you may export your presentation. Table 8-4 lists the various export file formats available.
Table 8-4. OOoImpress file formats for export
|
Format |
Name |
File extension |
|
BMP |
Windows Bitmap |
.bmp |
|
EMF |
Enhanced Metafile |
.emf |
|
EPS |
Encapsulated Postscript |
.eps |
|
GIF |
Graphics Interchange Format |
.gif |
|
HTML |
Hypertext Markup Language |
.html, .htm |
|
JPEG |
Joint Photographic Experts Group |
.jpg, .jpeg, .jfif, .jif, .jpe |
|
MET |
OS/2 Metafile |
.met |
|
PBM |
Portable Bitmap |
.pbm |
|
PCT |
Mac Pict |
.pct |
|
|
Printable Document Format |
|
|
PGM |
Portable Greymap |
.pgm |
|
PNG |
Portable Network Graphic |
.png |
|
PPM |
Portable Pixel Map |
.ppm |
|
PWP |
Placeware |
.pwp |
|
RAS |
Sun Raster Image |
.ras |
|
SVG |
Scalable Vector Graphics |
.svg |
|
SVM |
StarView Metafile |
.svm |
|
SWF |
Macromedia Flash |
.swf |
|
SXI |
OOoImpress native file format |
.sxi |
|
TIFF |
Tagged Image File Format |
.tif, .tiff |
|
WMF |
Windows Metafile |
.wmf |
|
XPM |
X PixMap |
.xpm |
Export to HTML. Among the most useful facilities here is the ability to export a presentation to the HTML or web page format. This feature allows us to painlessly convert any presentation we've given to a format suitable to the Web so the audience—as well as those who were unable to attend—can visit the material from any Internet-enabled location on the planet at their own convenience.
Start by selecting File → Export from the main menu. This launches the Save As window. Here, change the File format drop-down box to HTML Document and designate the filename and directory of the resulting HTML files. Then click the Export button to kick off the HTML Export dialog series.
First, select a design. Leaving the default as is and clicking the Next button is fine for many situations. Now you can choose from a variety of publication types that affect how the presentation appears and can be manipulated once it's up on the Web. Among these types are standard HTML format, standard HTML with frames, automatic, and WebCast (requires a server).
The default works nicely. Click Next. Here you can alter the format of graphics in the output and the resolution of output, and turn sound effects on or off. Leaving the settings at their defaults works fine. Click Next. This screen permits you to enter information that appears on the title page of the new web presentation. Enter the desired information and click Next. Here you can set the look of the navigational elements you like, such as forward and backward arrows. Leaving the "Text only" box checked (the default setting) produces text links, but you also have a choice of four styles of colorful buttons.
Click Next. In this final screen of the export process, you can alter the default color scheme of the text. Leaving settings alone works fine for first-timers. Finally, click the Create button, and your presentation is ready to post to the Web.
Export to Macromedia Flash. Not to be overshadowed among the many output formats is Macromedia Flash. This is yet another universally acceptable file format (along with PDF and HTML, in particular), which guarantees that anyone with a web browser (that is, everyone with a desktop computer) can view your presentation. Many of the same benefits of converting a presentation to HTML web pages (described earlier) hold for the Flash format as well.
To export your presentation to Flash, proceed to the main menu and select File → Export. This opens the Export dialog box, where you should go to the File Format drop-down field and select "Macromedia Flash (SWF)(.swf)." In the Export dialog box, if you do not alter the folder or save path, the new Flash version of your presentation will automatically be placed in the same folder as the original .sxi presentation file. Now, click the Export button, and the Flash version of your presentation will be created.
OOoImpress workspace views
You can change the view setting from the main menu by selecting View → Workspace and checking the desired view setting in the drop-down menu. The five workspace views include Drawing View, Outline View, Slides View, Notes View and Handout View. Drawing View is the most commonly used view in which to work when building or editing a presentation.
The workspace views are easiest to change with a single click of the small icons arrayed vertically along the right edge of the OOoImpress window, toward the top, as shown in Figure 8-28.
Figure 8-28. Workspace View icons
OOoImpress modes
Modes are states in which only certain editing functions can be performed or orientations/views can be elicited.
The three modes are accessed and altered from the main menu under View → Slide, View → Master, or View → Layers, where the active mode is evidenced by the check mark.
It's a recurring point of confusion for OpenOffice users that modes are accessed and changed under Views from the main menu. It makes it worse that OOoImpress changes the View settings based on mode settings. And, unforgivably, the mode icons at the bottom-left corner of the workspace (see Figure 8-29) have been mislabeled: the mouse roll-over labels for the three Mode icons read Slide View, Master View, and Layer View. These labels should read Slide Mode, Master Mode, and Layer Mode, respectively.
Due to the complexity of changing views and modes from the main menu, we recommend using the Mode icons (at the bottom-left edge of the workspace) and View icons (along the upper-right edge of the workspace) to change and visually confirm the current view or mode. Passing the mouse pointer over each icon and pausing will reveal its roll-over label if you need to know which icon is which. Figure 8-28 introduces the View icons, and Figure 8-29 shows where both sets of View and Mode icons are located on the workspace.
Editing a presentation
Altering an existing presentation is quite straightforward.
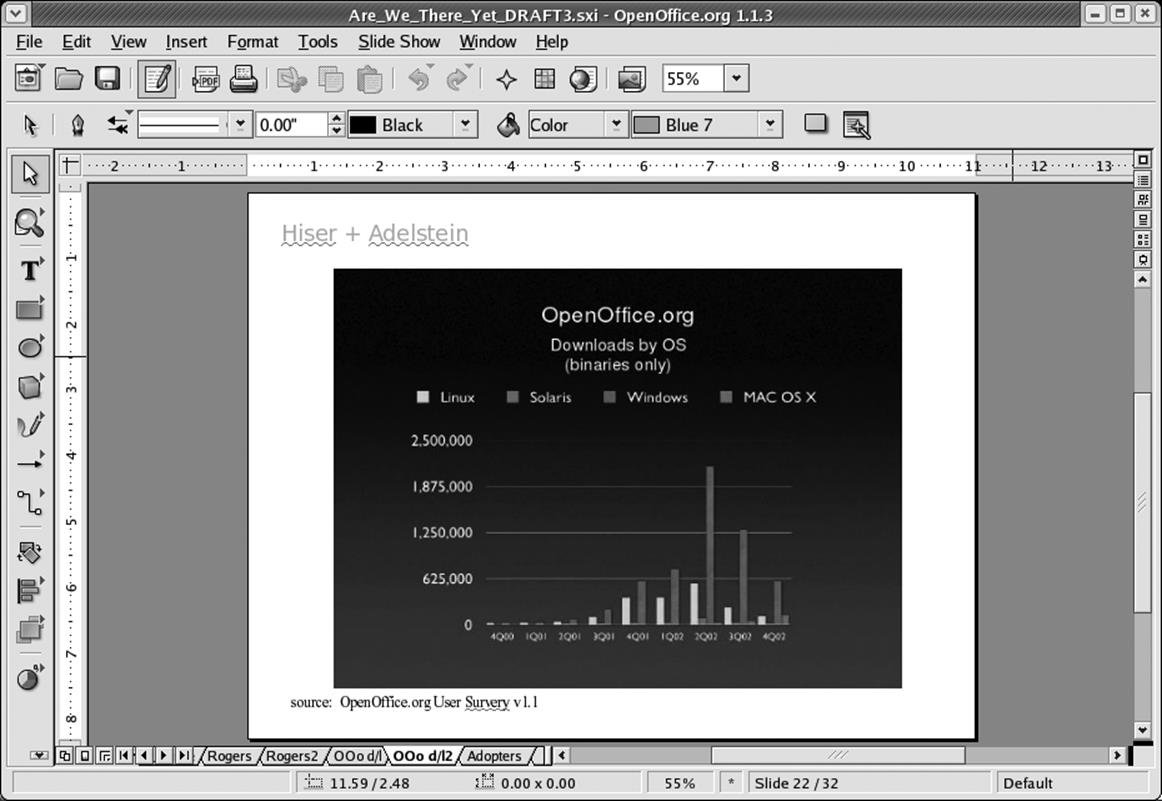
Figure 8-29. Control your modes and views
Entering text. To enter or edit an existing sequence of text, click once on the text. You will see a shaded block appear around the text with green squares at intervals around the box. Move the cursor to the appropriate place and enter changes. Clicking elsewhere in the slide will make the shaded block go away.
Using bullets. To introduce a bullet to a line of text, click once on the targeted text, then click the Bullets icon centrally located on the object bar. If you're not sure what to press, let the mouse hover over the icons and choose the one where the Bullets On/Off balloon appears.
To use advanced bullet formats, click the alternative Bullets icon at the extreme right of the object bar. This brings up a dialog box with a selection of bullet and numbering styles, and other formatting options.
Importing graphics , tables , and charts . To import a graphic, table, or chart from another program, web page, or module of OpenOffice, simple copy the element from its native source and paste it into your slide.
This, for example, might involve highlighting the item in its original application with a single click and pressing Ctrl-C to copy it (actually placing the element onto the desktop's clipboard), then clicking in your slide once and pressing Ctrl-V to paste in the element.
Adding slides . To add or insert a slide into your presentation, simply select Insert → Slide from the main menu, choose the desired AutoLayout format in the Insert Slide dialog that appears, and press the OK button.
Deleting slides. You can quickly delete a slide by right-clicking on its tab and selecting Delete from the contextual menu. Alternatively, from the main menu, select Edit → Delete Slide.
Moving slides around. The easiest way to move slides around within a presentation is to simply click, drag, and drop the tab of any slide into a new sequence among the tabs.
The presentation palette
Pressing the icon at the far right of the object bar opens the floating presentation palette, where you can execute functions quickly when building or editing your presentation. Functions include Insert Slide, Modify Slide Layout, Slide Design, Duplicate Slide, and Expand Slide. To turn off the presentation palette, click the icon again.
Putting on a slide show
Having created a presentation, putting on a slide show is a trivial undertaking. Press F9 to start the slide show and the Esc key to end.
Slides how transitions . To set the transition for a single slide, select Slide Show → Slide Transition from the main menu. Figure 8-30 shows the transition options available.
You can choose a slow, medium, or fast transition speed in the drop-down menu at the bottom of the Slide Transition window.
If you favor using a single kind of slide transition throughout your whole presentation, it's most efficient to set this up for all slides at the same time using AutoPilot when you first start building a presentation.
Custom slide shows . You can set up many different versions of the same presentation using only chosen slides and different settings. This is convenient for adapting different parts of one large presentation to specific audiences. You can also use it to pre-configure versions of a presentation that present increased detail, to which you can switch spontaneously during a presentation to cover some more intricate points that you would otherwise spare a general audience.
To define a new custom slide show, from the main menu of your live source presentation select Slide Show → Custom Slide Show, which opens the Custom Slide Shows dialog (Figure 8-31), where you should press the New button.

Figure 8-30. The Slide Transition window
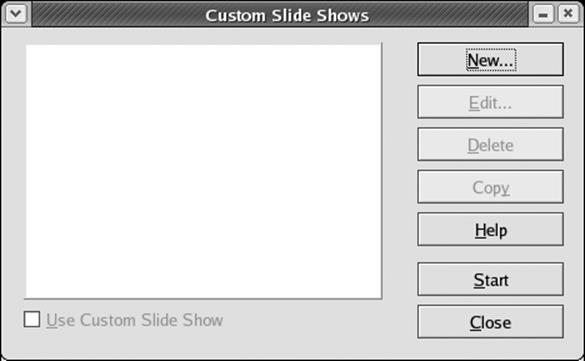
Figure 8-31. The Custom Slide Show dialog
This opens the Define Custom Slide Show dialog (Figure 8-32) where you can name the new version of your slide show and select which slides are to be included. To select a given slide for inclusion, highlight that slide in the "Existing slides" pane at the lefthand side of the dialog. Then, click the uppermost of the two arrow buttons and your chosen slide will be entered into the "Selected slides" pane at the righthand side of the dialog.

Figure 8-32. The Define Custom Slide Show dialog
Customizing OpenOffice
A couple of quick settings can save you a lot of time, depending on your needs.
Adding a Launcher icon
You can add an icon to launch either OpenOffice with no module or OpenOffice with any specific module ready to go.
We cover the procedure for adding an OOoWriter Launcher icon to the desktop or edge panel in the OOo Writer section "Adding an OOoWriter icon on the desktop or taskbar panel," earlier in this chapter. The procedure for adding OOoCalc or OOoImpress icons is analogous.
Defaulting to the MS Office file formats
To set OOoWriter to automatically save files in the MS Word .doc file format, select Tools → Options, then choose Load/Save in the left index of the Options dialog. In the index under Load/Save, click on General. This opens the Options-Load/Save-General dialog. Here, in the "Standard file format" section, your "Document type" drop-down is already set on "Text document." Leave that as is. In the "Always save as" drop-down at right, change the selection to one of the three available MS Word versions:
§ Microsoft Word 6.0
§ Microsoft Word 95
§ Microsoft Word 97/2000/XP
Click the OK button. Use your best discretion when choosing a version. Microsoft Word 97/2000/XP has the most users at large; however, if your environment or the people with whom you correspond use one of the earlier versions (6.0 or 95), then that reality would inform your choice.
KOffice
OpenOffice is not the only open source office suite available on Linux; the KDE project has also created a fully featured office suite called KOffice, which adheres to standards and fits very well into the KDE desktop.[*]
KOffice is a highly integrated office suite that builds directly on the KDE technology. This has many advantages in terms of integration, features, performance, familiar look and feel, and so on. KOffice can therefore benefit from all of KDE's advanced technologies such as DCOP, KIO, and KParts. The KParts technology, in particular, is extended for the KOffice components to allow very flexible embedding of documents inside other documents. KOffice components can integrate very well into each other. So basically a spreadsheet can contain anything from charts to presentations, reports and even text documents. Likewise, almost any component can contain almost any other. Components are fully embedded, allowing the user to perform any operations that the standalone application would allow.
Because much technology is already present inside KDE itself, KOffice is a very lightweight office suite, which results in fast application startup and low memory consumption. This makes KOffice a very suitable office suite for older hardware as well, which can save lots of money in some cases.
Still, KOffice is quite rich and extensive in features. It is not limited to word processing, spreadsheets, or presentations, but also has components for image manipulation, flowcharts, business report generation, database management, and project management. Because of KDE's flexible component integration, smaller utilities, such as the diagram and chart engine, as well as the formula editor, are available as standalone tools. The straightforward and KDE-like approach in look and feel, as well as its familiar usability, make KOffice quite useful for daily office work.
The KOffice office suite is too large to list every detail. General features include document location abstraction, DCOP scripting, parts, and plug-ins. Take a look at the KOffice web site (http://www.koffice.org) to check on the latest state of the application.
KOffice adheres to the OASIS OpenDocument file format, so documents can be exchanged with other standards-conforming utilities, such as OpenOffice.
It is important for an office suite to use standards where possible, especially for the file format. In this way, a business can be sure that it can still open documents many years into the future, regardless of what happens to current tools. The OASIS OpenDocument file format specification is an open standard for office applications. Both KOffice and OpenOffice use the format, which means that files can be exchanged seamlessly between the suites.
KOffice has more components to offer than what is covered by the OASIS specification. Still, all components covered by the specifications actually use the OASIS OpenDocument file format.
Here are the components of KOffice:
Text processing and desktop publishing: KWord
KWord is designed mainly for text processing, but includes many desktop publishing aspects. This creates a mixture of features that makes interesting layouts easily possible.
Spreadsheets: KSpread
KSpread is a pretty standard spreadsheet application. It offers many functions as well as formatting, multiple sheets, charts, diagrams and more. Of course it can easily integrate any other KOffice component to extend its abilities.
Presentations: KPresenter
KPresenter is a presentation component. It can be used to create on-screen presentations or to design and print transparencies.
Flowcharts and more: Kivio
Kivio can be used for any kind of flowchart or diagram. Additional stencil sets can be used for custom needs. Even UML diagrams are possible.
Vector graphics: Karbon14
Karbon14 is a vector drawing application.
Pixmap graphics: Krita
Krita is a tool for creating high-quality pixmap graphics. It offers many plug-ins for image manipulation and supports various formats.
Business reports: Kugar
Kugar can be used to create business-quality reports. A designer helps to easily design such reports.
Database management and forms: Kexi
Kexi is a full-blown database management application. You can design forms for working with data. Many backends, such as PostgreSQL or MySQL, are possible. It is even capable of importing MS Access mdb database files.
Each KOffice component comes with its own manual. These manuals offer all the latest information about the various components KOffice has to offer and should be read to learn more about KOffice. The web site is also a good place to find out more.
The primary site on the Internet is http://www.koffice.org. You will also find information there about the user and developer mailing lists, as well as additional developer resources.
The Kexi project has an additional web site, which can be found at http://www.kexi-project.org.
The following two sections, instead of giving you a rundown of the standard features, explore two interesting features in more depth, in the hope that this will be mouthwatering enough to interest you in exploring KOffice further.
Hands On: Getting to Know KOffice
Now we will work through some examples with KOffice to get to know the office suite. You are very welcome to actually create the documents yourself and play around with the different components as we go along. The purpose of these examples is to get a feeling for KOffice, without trying to be a complete walkthrough, which would fill a complete book on its own. Remember that the handbooks included in the KOffice installation hold much more information that allows you to learn a lot about all the available components.
Using tabulators in KWord
You can use tabulators (tabs) to align text horizontally. This is very useful for simple tables or listings, where text needs to be vertically aligned. Tabulators can also be very useful to simply place text at an exact horizontal location.
KWord has various options for tabulators. You can set different alignments, such as left, right, centered, or alignment on a certain character (such as a comma). In particular, the last type is useful for listing numbers and prices.
Tabulators are part of the paragraph format. So you can configure everything related to tabulators in the Paragraph Settings dialog (Figure 8-33). This dialog can be reached through the Format → Paragraph menu entry.
Now we will create a couple of tab stops. We start with a very intuitive way of editing tabs and later look at some configuration details.
Start up KWord, choose the text-oriented U.S. letter template, and click OK (see Figure 8-34).
Then take a look at the top ruler of your document (Figure 8-35). The white space in the top ruler is exactly the width of the editable area of the document. This space can also be used to enter tab stops. In the top left corner is a small icon that represents the currently selected tab stop type. As already mentioned, tabs can be left aligned, right aligned, centered, or aligned on a certain character. You can change the type by simply clicking on that icon. See how it changes between different types of tab stops. Next you should insert some tab stops by choosing the correct types and placing them at the correct horizontal positions in the top ruler (Figure 8-36).
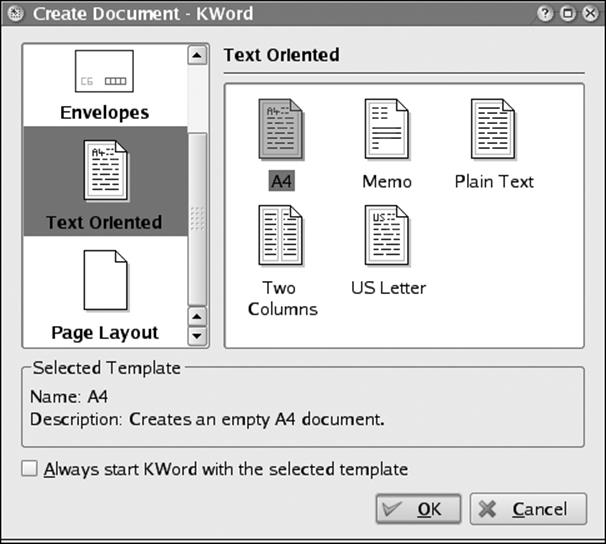
Figure 8-33. Configuring tabulators in KWord
To do so, first choose the correct type in the upper-left corner and then left-click on the position in the top ruler. Do so for all four tab stops until your upper ruler looks like the one shown in the figure.
To see how the tab stops can be used, simply write some text at each tab stop:
1. Press the Tab key once. You are now at the first tab stop.
2. Write a few characters, such as How. You can see that the text is aligned on the right side with the tab, indicating that the first tab stop is right aligned.
3. Press the Tab key again. You are now at the second tab stop.
4. Write another word, such as are. The text is aligned on the left side with the tab, indicating that the second tab stop is left aligned.
5. Press the Tab key again. You are now at the third tab stop.
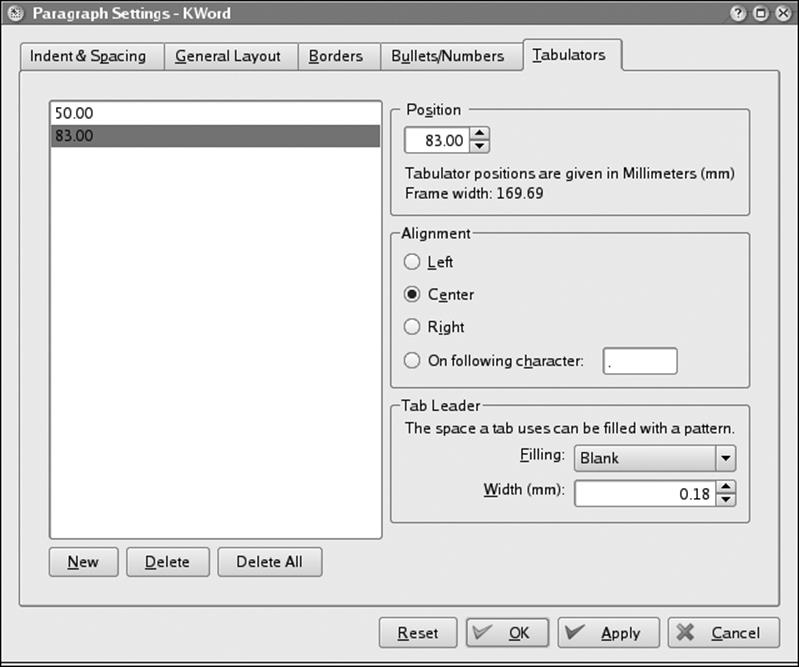
Figure 8-34. Selecting a text template

Figure 8-35. The KWord top ruler

Figure 8-36. Inserted tab stops
6. Write more text, such as you all?. The text is centered on the tab stop, indicating that the third tab stop is center aligned.
7. Press the Tab key again, to come to the fourth and last tab stop.
8. Write a number such as 1234.567. Notice how the number is aligned at the decimal point. This type of tab stop is useful for numbers.
The text now looks like Figure 8-37.

Figure 8-37. Inserted text at tab stops
To allow many more configuration options, use the paragraph format. A quick way to access these configuration options is to double-click on one of the tab stops in the top ruler. You can do this right away with the document you just created in the previous exercise. You will see the configuration dialog, just as at the beginning of this section. You can also get to the configuration options by choosing Paragraph from the Format menu, and then going to the Tabulators page. Play around with the options, which are pretty self-explanatory. You can also add or delete tab stops in this dialog.
If you need permanent tab stops for a specific style, use the Style Manager to edit the tabulators. You can find it in the Format menu as well.
Embedding charts into spreadsheets
KSpread is the spreadsheet component of KOffice. As such, it offers lots of calculation features as well as the ability to create charts to visualize data.
KSpread uses the KChart component for data visualization. KChart can also be used as a standalone charting application.
Now we will take a look at how simple charts can be created inside KSpread.
Assume that you are a company that deals with several products, and you want to see how much profit you can make with each product and compare the results. For this a nice chart is very useful.
Start KSpread with a blank worksheet. The application should look like Figure 8-38.
Entering data into the table is straightforward: simply go to the desired cell with the arrow keys or click on it with the mouse. Now enter data into the table, as shown in Figure 8-39. It does not matter much where you start. In this example, we have chosen cell B4 for the Expense text. After you have entered the data, select the area to create a chart from, as shown in Figure 8-40.
Now click on the Insert Chart toolbar icon, which you can see in Figure 8-40. The mouse cursor changes to a cross, indicating that you now have to select the area where you want to place your chart. Simply draw a rectangle below the table with the left mouse button. After you release the mouse button, a wizard asks you for the chart type you want to insert. Use the default (Bar) and click Finish (Figure 8-41).
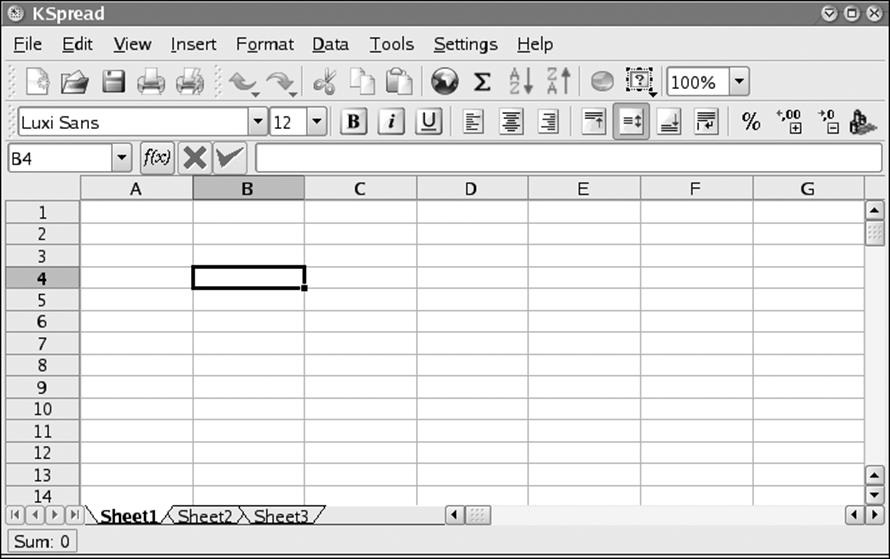
Figure 8-38. KSpread at startup

Figure 8-39. Entering data into a spreadsheet
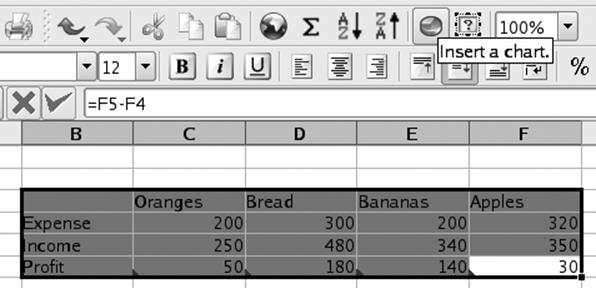
Figure 8-40. Selecting an area to be charted
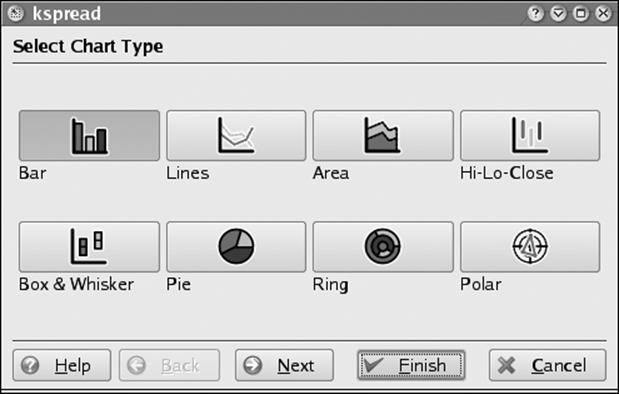
Figure 8-41. The chart wizard
The result will look like Figure 8-42. In this chart you see the expense (red on the screen, although it does not appear in color in the printed book), the income (green), and the profit (blue) for each product. If you would like the percentage shown for each of the products, simply double-click on the chart.
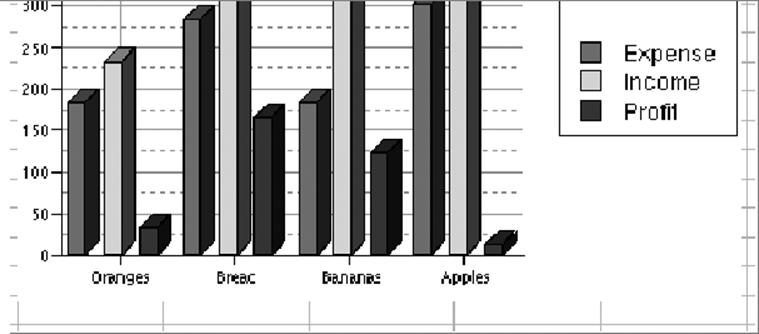
Figure 8-42. A generated chart
Note how the toolbars and the menu change. This is a good example of the tight integration in KOffice, which allows it to use components inside components very flexibly. The menu and the toolbar shown here are the ones that are relevant for the KChart component.
Now right-click on the chart and choose Configure Chart. This brings up a configuration dialog, where you should choose the Chart Subtype configuration page (Figure 8-43). On this page, you can select various subtypes of the current chart type. For this example, select Percent and click OK. The final result will be the nice chart in Figure 8-44. Every product is scaled to fit the 100% mark, and we see how much expenses we have and how much income we get for each product. Finally, the profit shows the difference between income and expense. We can conclude that bananas make the most profit, whereas apples have very little.
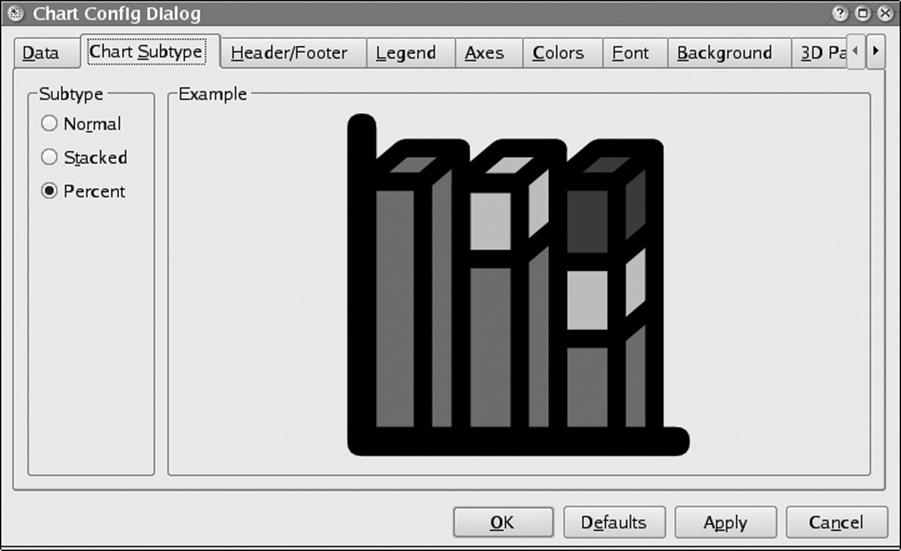
Figure 8-43. Selecting a chart subtype
Go ahead and try various configurations and see how the data is represented!
[*] This section was contributed by Raphael Langerhorst of the KOffice documentation team.
Other Word Processors
Although the word processors discussed so far are the most popular among Linux users, this book would not be fair to the rich environment in which Linux and free software thrive if it failed to mention some of the other alternatives.
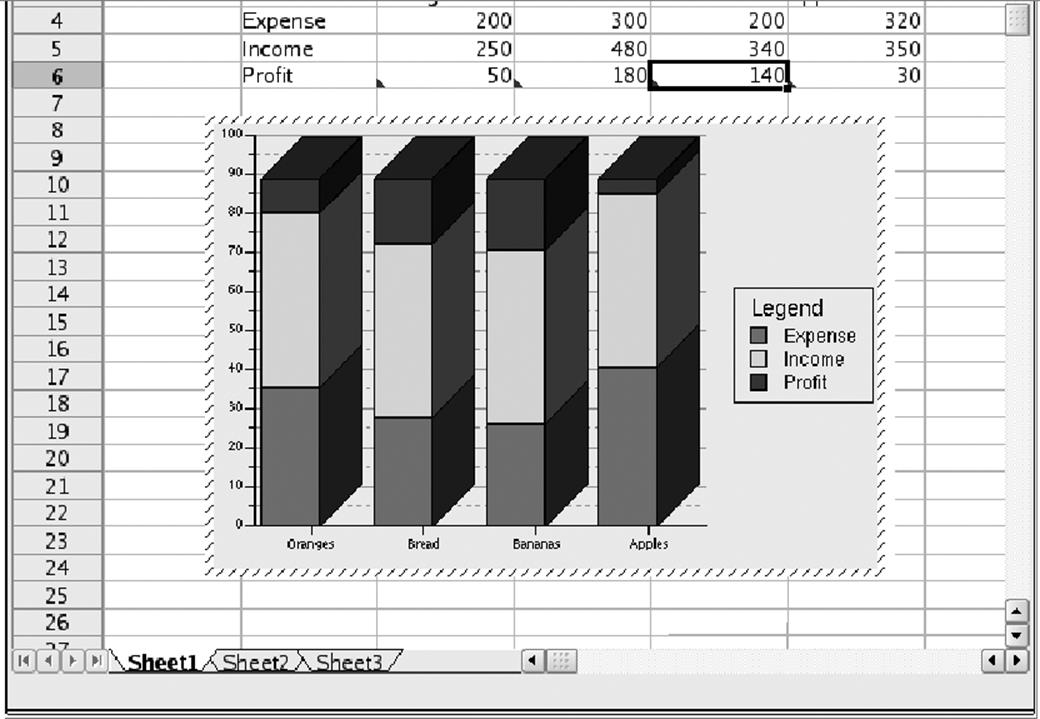
Figure 8-44. The final chart
Anyware Office, by VistaSource, Inc.
Anyware Office is an office suite that is commercially made but inexpensive for Linux. It includes not only a word processor but also a spreadsheet, a drawing program, a mail program, and other smaller tools. In some respects, Anyware Office behaves differently from word processorssuch as Microsoft Word or WordPerfect, but once you get used to it, it can be quite useful and handy. Especially noteworthy is its support for importing and exporting FrameMaker documents. The development seems to have stopped somewhat, though, and it is uncertain what will become of this product.
AbiWord
You can find information about this word processor at http://www.abiword.org.
LyX
The LyX package (also available as KLyX with a more modern user interface) provides a decent WYSIWYG X user interface that works with window managers from standard Linux distributions and uses the LATEX and TEX packages to format the text for printing. If you can live with the formatting limits of the package (most of us can), you may find that LyX/KLyX is an excellent solution. LyX/KLyX does not know how to display some of the powerful formatting features that TEX provides, so if you are a power TEX user, this isn't for you. LyX/KLyX isn't part of most Linux distributions; to try it, you will have to get it from a Linux archive.
Synching PDAs
Personal digital assistants (PDAs ) have become quite commonplace these days, and as Linux adepts, we want to use them with our favorite operating system. In this section, we explain how to synchronize PDAs with Linux desktops.
This section is not about running Linux on PDAs, even though this is possible as well. People have successfully run Linux and Linux application software on the HP/Compaq iPaq line. One PDA product line, the Sharp Zaurus series, even comes with Linux preinstalled, though it does not show up very obviously when using the device. http://www.handhelds.org has a lot of valuable information about running Linux on PDAs.
Using your PDA with your desktop means, for most intents and purposes, synchronizing the data on your PDA with the data on your desktop computer. For example, you will want to keep the same address book on both computers, and synchronization software will achieve this for you.
Do not expect PDA vendors to ship Linux synchronization software; even the Sharp Zaurus—which, as mentioned, runs Linux on the PDA—comes with only Windows desktop synchronization software. But as always, Linux people have been able to roll their own; a number of packages are available for this purpose.
Synchronizing your PDA with your desktop involves a number of steps:
§ Creating the actual hardware connection and making the hardware (the PDA and its cradle or other means of connection) known to Linux.
§ Installing software that handles special synchronization hardware such as HotSync buttons
§ Installing software that handles the actual synchronization of data objects
§ Using desktop software that ensures synchronization at the application level (e.g., between the PDA calendar and your desktop calendar software)
Checking the Connection
Let's have a look at the hardware first. PDAs are usually connected to the desktop by means of a so-called cradle, a small unit that is wired to the computer and accepts the PDA in order to connect it electrically. Sometimes, a direct sync cable is used, attached to both the desktop computer and the PDA. The connection on the desktop computer side is either a USB interface or—much less often these days—a serial interface.
The first step in getting the connection to work is to see whether your PDA is recognized by the kernel. So connect the cradle (or the direct cable) to your computer and your PDA. Take a look at the kernel log messages, which you can do by becoming root and typing tail -f /var/log/messages. (More information on kernel log messages is presented in "Managing System Logs" in Chapter 10.)
Now, while viewing the kernel log messages, force a synchronization attempt from the PDA, such as by pressing the HotSync button at the cradle or issuing a command in the user interface of the PDA that performs a synchronization. If the PDA is connected via USB, you should see something like the following (some lines were truncated to fit the book's page):
Jun 21 10:32:52 tigger kernel: ohci_hcd 0000:02:06.1: wakeup
Jun 21 10:32:52 tigger kernel: klogd 1.4.1, ---------- state change ----------
Jun 21 10:32:52 tigger kernel: usb 3-2: new full speed USB device using address
Jun 21 10:32:52 tigger kernel: usb 3-2: Product: Palm Handheld
Jun 21 10:32:52 tigger kernel: usb 3-2: Manufacturer: Palm, Inc.
Jun 21 10:32:52 tigger kernel: usb 3-2: SerialNumber: 3030063041944034303506909
Jun 21 10:32:52 tigger kernel: visor 3-2:1.0: Handspring Visor / Palm OS convert
Jun 21 10:32:52 tigger kernel: usb 3-2: Handspring Visor / Palm OS converter now
Jun 21 10:32:52 tigger kernel: usb 3-2: Handspring Visor / Palm OS converter now
In this case, a USB-connected Palm Tungsten T3 was found. If nothing shows up, several things could have gone wrong: the hardware connection could be broken, the synchronization request could not have been recognized, or the kernel could be missing the necessary driver modules.Chapter 18 has more information about locating and installing kernel driver modules, in case that's the problem.
KPilot Synchronization
Next, you need the software that synchronizes actual data over the wire. For the very common Palm family of PDA (which also includes the Sony Clié, the Handspring Visor, and many other look-alikes), this is the pilot-link package. The package is already included with many popular distributions; if you need to download it, you can find it at http://www.pilot-link.org. Usually, you are not going to use the programs contained in this package directly, but through other application software that builds on them. What this package contains, besides the building blocks for creating said application software, is conduits, small applications that support one particular type of data to be synchronized. There are conduits for the calendar, the address book, and so on.
Up to this point, the software and procedures we've described were dependent on the type of PDA you want to synchronize, and independent of your desktop software. The actual software that you are going to interact with, however, is different for different desktops. We look here at KPilot, a comprehensive package for the KDE desktop that synchronizes Palm-like PDAs with both KDE desktop applications such as KOrganizer and KAddressBook and GNOME desktop applications such as Evolution.
KPilot, at http://www.kpilot.org, consists of two programs, kpilotDaemon and kpilot. In theory, you need only kpilotDaemon, as this is the software that waits for the HotSync button to be pressed and then performs the synchronization. In practice, you will want to use the kpilot application at least initially, as it allows you to configure the daemon and check that everything works as expected.
Upon starting up KPilot (Figure 8-45), select Settings → Configure KPilot from the menu bar. The program offers to start the Configuration Wizard; click that button. On the first page, you need to provide two pieces of information: the username stored in the PDA (so that the data is synced with the right desktop data), and the desktop computer port to which the PDA is connected. KPilot offers to autodetect this, which you should always try. If it cannot autodetect your connection (and you have ensured that the actual hardware connection is working, as described in the previous section), try specifying either /dev/ttyUSB1 or /dev/ttyUSB2 (or even higher numbers) if you have a USB-connected PDA, and /dev/ttyS0 or /dev/ttyS1 if you have a serially connected PDA. On the next page, you will be asked which desktop application set you want to synchronize with; pick the right one for you here.
Once you are set up, you can give KPilot a try. It will have started kpilotDaemon automatically if it was not running yet.
During the following steps, keep an eye on the HotSync Log window in KPilot; there could be important information here that can help you troubleshoot problems. If you see the message "Pilot device /dev/ttyUSB2 does not exist. Probably it is a USB device and will appear during a HotSync" or something similar, that's nothing to worry about.
Now press the HotSync button on the cradle or force a synchronization in whichever way your PDA does this. If you see "Device link ready," plus many more progress messages about the various conduits, things should be going fine. Notice that if you have a lot of applications installed on your PDA, the synchronization progress can take quite a while.
What can you expect to work on Linux? Synchronizing the standard applications, such as calendar, address book, and notes, should work just fine. For many other commercially available PDA applications, there is no Linux software provided, but since KPilot is able to synchronize Palm databases without actually understanding their contents, you can at least back up and restore this data. You can also install the application packages themselves by means of KPilot's File Installer. Even the popular news channel synchronization software AvantGo works nicely on Linux.
Things that typically do not work (or are very difficult to get to work) are access to additional storage media such as CompactFlash cards, and applications that perform additional functionality for synchronization (such as downloading new databases from a web site as part of the synchronization process). A typical example of the latter category is airline timetable applications. So if you have a Windows computer available (or have configured your computer to be dual-boot for both Windows and Linux), it can be a good idea to still install the Windows desktop synchronization software. For day-to-day activities, Linux and your PDA (at least Palm-like PDAs) are an excellent combination.
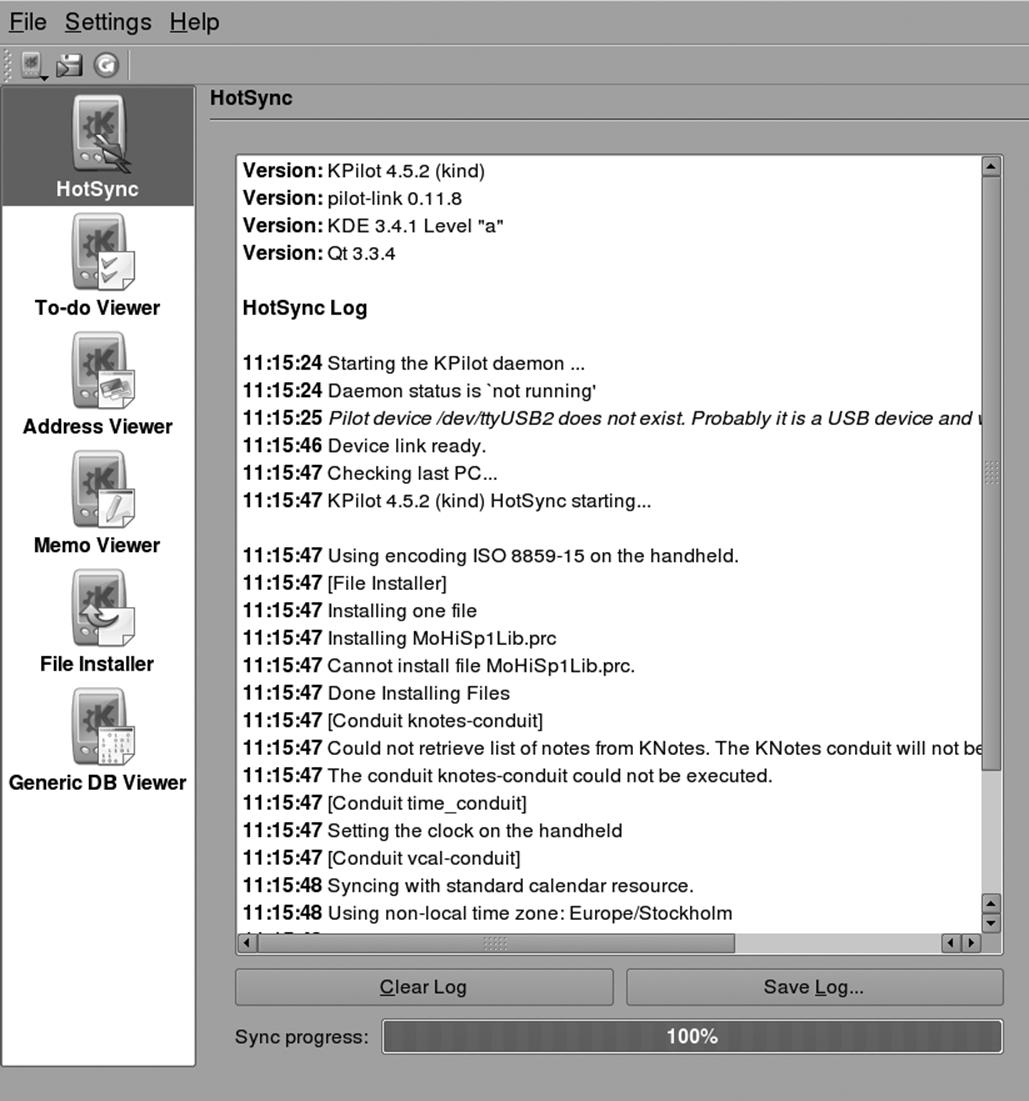
Figure 8-45. KPilot performs a synchronization
Work is currently being done on creating a unified synchronization application called KitchenSync. Once this is ready, the intention is to replace not only KPilot and other PDA synchronization packages but also the many smaller packages for synchronizing your Linux desktop computer with various types of cellular phones. KitchenSync is a work in progress, and you can find more information about it at http://www.handhelds.org/~zecke/kitchensync.html. Another program that aims in a similar direction is OpenSync.
Groupware
Helping a group of people coordinate their work or private lives—their calendars and task lists, their notes and address books, and so forth—presents one of the rare opportunities for computers to actually solve a real, everyday problem. Imagine being able to change a meeting by dragging a text box to a new time slot in the calendar application, and having the software system automatically inform all other attendees of the change, ask them whether they still want to attend, and update their own calendars automatically. Such software, which supports groups of people who are interacting, coordinating with each other, and cooperating, is commonly referred to as groupware .
For all but the simplest needs of very small groups, it is usually sensible to store the information that is to be shared or exchanged between the members at a central location on the network. Often a computer is dedicated to this purpose; it is then referred to as a groupware server. Access to this server is managed in different ways by different groupware projects. Most offer access via web browsers. Many also allow users to work with full-fledged client applications such as Kontact or Evolution, which then connect to the server using various protocols to read and manipulate the data stored there. In this context such applications are often referred to as groupware suites.
We first look at what is possible using only client capabilites, without access to a groupware server, and then examine the different server solutions that are available and what addtional benefits they bring.
Basic Group Organization
Thanks to a set of established Internet standards, groupware users can collaborate not only using a single groupware server—within a single organization, for example—but also to a certain extent with partners using different groupware clients and servers on Linux or Windows. This is done by sending email messages that contain the groupware information as attachments back and forth. All the available Linux groupware suites (Kontact, Evolution, and Mozilla) support this, as do proprietary clients on Windows and Mac OS such as MS Outlook or Lotus Notes.
As an example, let's look at what ensues when you invite your friendly neighbor, who happens to still be running Windows and using MS Outlook, to your barbecue garden party on Wednesday. To do that you open your calendar to the current week and create a new event on Wednesday afternoon. (See Figure 8-46. We use Kontact in this example.) Add your neighbor as an attendee of the event and, since without him the party would be no fun, set his participation to be required. Once you've entered all the relevant information and closed the dialog, an email is constructed and sent to the email address of your neighbor. This message consists of a text part with the description of the event and an additional messsage part containing the details of the event in a certain format, which is specified in RFC 2446 and referred to as iTip.
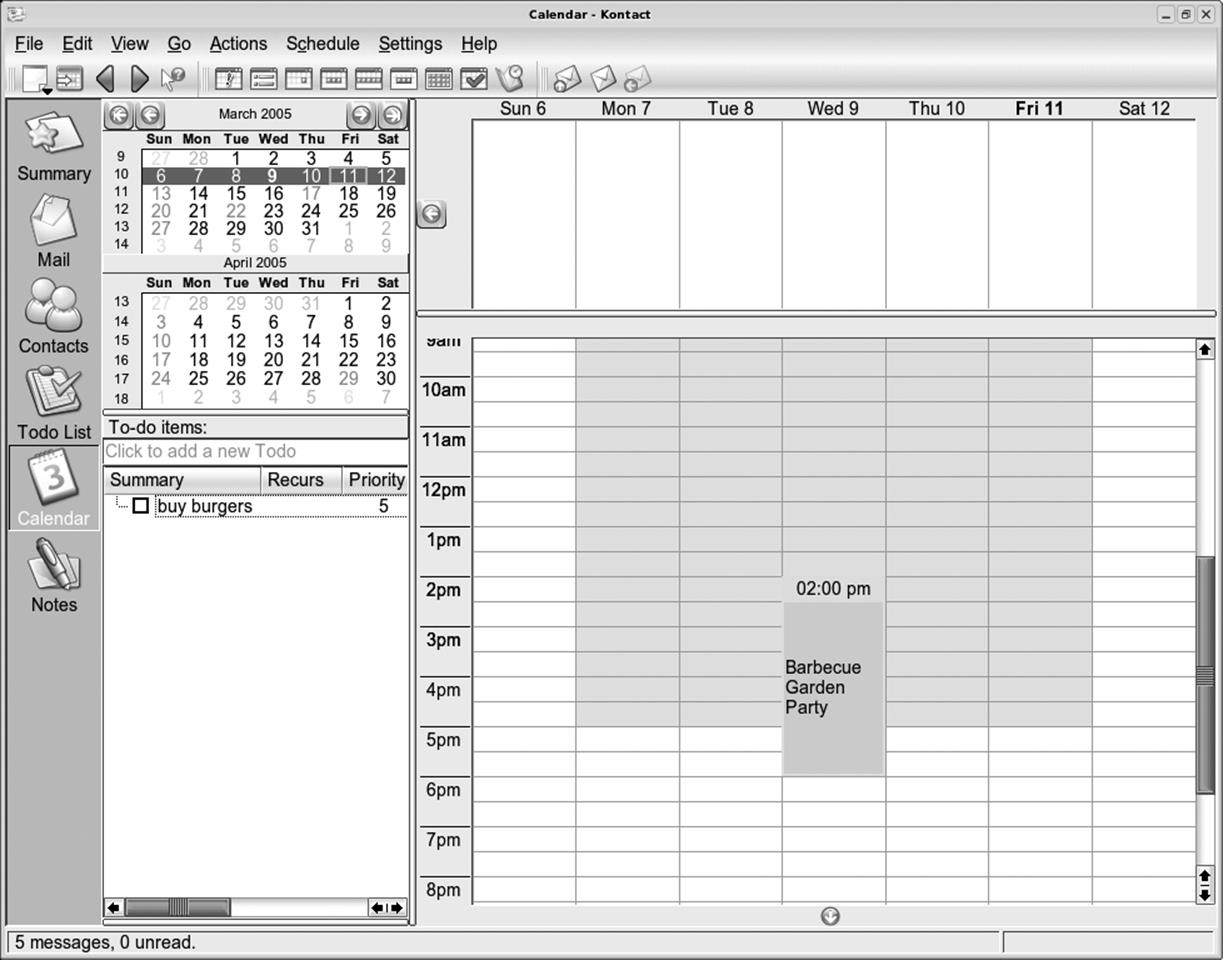
Figure 8-46. Creating a new event in Kontact
At the receiving end, your neighbor's Outlook mailer detects the incoming message as an invitation to an event and reads the relevant information from the attachments. One attachment asks your neighbor whether he'll be able to attend and whether the invitation should be accepted, declined, or accepted tentatively. Since he's not quite sure that Wednesday might be the night of a sports event he plans to watch, let's say he chooses to accept the event tentatively. The event is then added to his own calendar inside Outlook and a reply message is constructed and sent, again containing a special iTip attachment.
Once that message makes it back to you, Kontact will inform you that the person you invited has tentatively accepted the invitation, and will enter that information into your calendar. As soon as your neighbor decides to either decline or accept the invitation, an update message will be sent and the status updated accordingly in your calendar upon receipt of that message. Should you decide to delete the event from your calendar, such an update message would in turn be sent to all attendees automatically.
The described mechanisms work not only for events, but also for assigning and sending tasks to other people and being informed when those tasks have been completed. To do that, you can add participants to tasks in Kontact's Todo List view by right-clicking on a task, selecting Edit, and then opening the Attendees tab of the dialog that pops up. Of course, this functionality is also available in other clients, such as Evolution or Mozilla; the dialogs just look a bit different.
Similar to the iTip format (or iCal, which iTip is based on), there is an Internet standard for exchanging contact information called vCard. To communicate your new street address and phone number to your grandmother, who uses Mozilla on Windows for managing her many contacts, you could send her a message with your vCard attached (Figure 8-47). Using Kontact, this is as easy as right-clicking on your entry in the address book and selecting Send Contact. The resulting message should be easily understandable by most email programs on Windows, Linux, or the Mac. Most programs offer the user some convenient way to import the received vCard into his or her own address book. You can see how Kontact's mail component presents such a message in Figure 8-48.
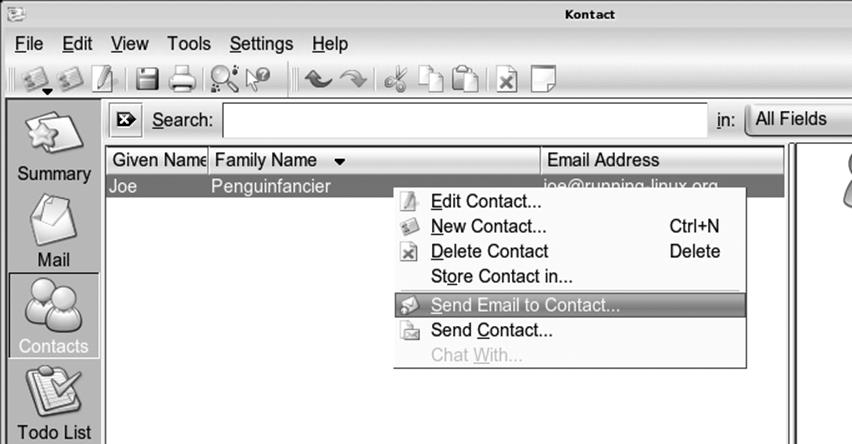
Figure 8-47. Sending your vCard

Figure 8-48. Receiving a vCard
As we have seen, it is quite possible to carry out basic group organization using only email mechanisms. This has two advantages: no groupware server is needed, and the operations work across different platforms and clients. On the other hand, things such as sharing a common calendar between several people or allowing read-only access to centrally managed information are not easily done with this scheme. This is where a groupware server starts to make sense.
Groupware Server Solutions
Linux is supported as a platform by a wide range of groupware server solutions, including both open source projects and proprietary products. They all offer a core set of functionality for email, calendaring, and address and task management, but also contain various extensions for things such as resource management, time tracking, and even project planning. In general, these systems can be extended with custom components to offer functionality that is not provided by the standard package. Such components are sometimes available from the creators themselves, but are also often developed by third-party developers or as part of individual consulting projects.
The following sections describe the most well-known solutions available as free software at the time of this writing, with their respective focus areas and peculiarities.
Kolab
The Kolab project grew out of a contract given by the German Federal Agency of IT Security to a group of companies to build a groupware solution accessible by both Outlook on Microsoft Windows and a KDE client on Linux. The developers created a sequence of concept documents and reference server implementations (called Kolab 1 and Kolab 2). They also built the abilitity to access these servers and operate on their data into the KDE Kontact suite client. Additionally, a closed-source plug-in for MS Outlook and a web-based client were developed.
The server implementation (Kolab 2) includes popular free software server components such as the Cyrus IMAP server for mail storage, the Postfix mail transfer agent, OpenLDAP as a directory service, and the Apache web server. It is a complete, standalone system that installs itself from scratch onto a basic Linux machine without any outside dependencies. The Kolab server is unique in that it does not store the groupware data in a relational database, like many of the others do, but instead uses mail folders inside the IMAP server for storage. Finally, it provides a unified management interface, written in PHP, to the components.
The Kolab server allows users to share calendars and contact folders with each other using fine-grained permissions for groups or individual people. It also offers management of distribution lists and resources such as rooms or cars, and the ability to check the free or busy state of people and resources. There is also a form of delegated authority, in which people can work on behalf of others, such as a secretary acting on behalf of his boss.
You can find more about Kolab at http://www.kolab.org.
OpenGroupware.org
The groupware server project (nicknamed OGo) came into being when Skyrix Software AG put its established commercial product under free software licenses and continued as the most significant contributor in the community to improve the product. This move worked out nicely for the company, as both its business and the groupware server project have been thriving ever since.
The OGo server provides a web-based interface to email, calendaring, contacts, and document and tasks management. In addition to the browser-based interface, all data can be accessed via several different standard protocols, so that access from Kontact or Evolution is also possible. Plug-ins that enable Windows users to connect to the server with Outlook exist as well, albeit as a commercial add-on product. Users can share calendars and address books as well as task lists, and can create arbitrary associations between individual entries.
To be fully functional, an OGo installation needs several additional components, such as an IMAP server, a PostgreSQL database, a working mail transfer agent, and a directory service such as OpenLDAP.
You can find more about OGo at http://www.opengroupware.org.
phpGroupWare and eGroupware
Coming from a common PHP codebase, phpGroupWare and eGroupware offer groupware functionality primarily through browser-based access. Users can manipulate and view their own and other people's calendars and contact information and manage files, notes, and news items. Several additional optional applications are available.
Both servers need to be installed on top of an existing web server and database and can make use of a mail server for sending and accessing mail via IMAP, if one is available.
More information about phpGroupware and eGroupware is available at the following URL: http://www.phpgroupware.org and http://www.egroupware.org.
OPEN-XCHANGE
The OPEN-XCHANGE server started out as a proprietary product, but has since been put under open source licenses. Like many other solutions, it builds on and works with other server components, such as the Apache web server and OpenLDAP. On top of those, it offers several standard modules, such as a calendar and contacts and tasks management, as well as document and project management, and discussion forum, knowledge base, and web mail components.
Technologically, OPEN-XCHANGE is different from many of the other solutions in that it is built using Java technologies. This makes it attractive if integration with existing Java-based applications is desired.
Read more about OPEN-XCHANGE at http://www.open-xchange.org.
Closed-source products
In addition to the free and open source solutions described in the previous sections, several commercial and nonfree alternatives are available as well. All of them are powerful and full-featured, and support Linux as a native platform either exclusively or along with other platforms. The most important ones include Novell Groupwise, Novell SUSE Linux Openexchange (based on OPEN-XCHANGE), Lotus Notes & Domino, Oracle Groupware, and Samsung Contact and Scalix (both based on HP Openmail). The web sites of the respective vendors and products have more information on each of them.
LDAP: Accessing Global Address Books
One of the benefits of having information centrally stored and maintained is that changes and updates need only be done in one place and are then available to everyone immediately. This is especially important for contact information, which is prone to change and become out of date. The ability to quickly search through large amounts of contacts flexibly is another requirement that becomes more important the larger the organization gets, with all its internal and external communication partners. To meet this need, so-called directory services have been developed, along with a standard protocol to access and query them. The protocol is Lightweight Directory Access Protocol (LDAP), shared by a number of implementations, including the open source implementation OpenLDAP and (with typical Microsoft extensions) Microsoft Active Directory. OpenLDAP can be integrated with many of the groupware systems described in the previous sections.
The address book components of all major groupware suites allow the administrator to tie them to one or several LDAP servers, which are then queried for contact information and will be used for email autocompletion when composing emails. In Kontact, the LDAP configuration dialog for adding a new LDAP query host looks like Figure 8-49.
Specify the hostname of the server to be used for queries, the port it listens on (the default should be fine), and a so-called base DN, which is the place in the LDAP hierarchy where searches should start. The choice of base DN can help tailor the LDAP queries to the needs of your users. If, for example, your company has a global address book with subtrees for each of its five continental branches, you might prefer to search only your local branch instead of the full directory. Your site's administrator should be able to tell you the values to be entered here. If the server only allows queries by authenticated users, enter your credentials as well.
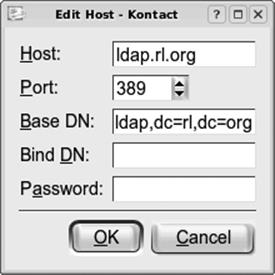
Figure 8-49. Adding a new LDAP host in Kontact
With LDAP access set up, you can try opening up a mail composer in Kontact, for example, and typing someone's name in the recipient field. After a second or so a list of possible matches that were found in the central LDAP addressbook should be shown. You can then simply select the one you were thinking of from the list. Additionally all groupware suites offer the ability to search for and display someone's contact information, if you just want to look it up. In Kontact, the query dialog can be shown by clicking the LDAP Lookup button on the toolbar or from the Tools menu.
Managing Your Finances
By now you may have noticed there is an open source application for just about anything you could want to do with a computer. Managing finances is one of the most common things people do with their computers, so it should not come as a surprise that an open source application exists to do just that — it's called GnuCash.
GnuCash is the open source world's answer to popular personal financial applications such as Microsoft Money and Intuit's Quicken. Although it doesn't have all the bells and whistles of those applications, GnuCash has everything you need for keeping track of your money. With GnuCash you can keep tabs on your income, expenses, checking and savings accounts, debts, investments, and assets such as cars and houses. You will be able to see into the past to figure out where all your money has been going, keep an eye on your balances in the present to make sure you don't suffer any nasty surprises, and forecast your financial well-being into the distant and not-so-distant future.
If you use an off-the-shelf application such as Money or Quicken, you're in for a few surprises when you try GnuCash. Compared with those applications, the interface is extremely simple and straightforward. There are no fancy embedded web pages or advisors. You won't find endless options dialogs and wizards, and you can't pay your bills electronically from inside GnuCash . Instead, when you start GnuCash you are presented with a simple list of accounts. Double-clicking on an account opens an account register (which looks exactly like the one in your checkbook). You enter transactions in the account register, and the balance of each account is shown in the accounts list. You can view several reports to get an at-a-glance view of your financial life. That's almost all there is to GnuCash.
This simplicity is an asset, not a liability. When it comes to finances, simpler is better. The other major difference between GnuCash and those other applications has to do with the way you keep track of your money. We cover that in detail in "The Account," later in this chapter.
Getting Started
Start GnuCash from the desktop menu, if GnuCash is present there, or from the command line by typing gnucash. The GnuCash splash screen appears, showing you which modules are loading. The splash screen is then replaced by the Tip of the Day screen and the Welcome to GnuCash! dialog box.
The Tip of the Day screen presents a different piece of information each time you start GnuCash. You can also peruse the tips one at a time by clicking either the Prev or Next buttons. I would keep this screen around for a while because the information can be useful, but if you prefer not to see it you can always disable the feature by unchecking the "Display this dialog next time" checkbox. You can close the window by clicking the Close button, but not until you answer the question in the Welcome dialog.
The Welcome dialog (Figure 8-50) is only displayed the first time you use GnuCash. It gives you the option to create a new set of accounts, import data from Quicken (via QIF files), or open the new user tutorial. In this exercise, you are going to create a new set of accounts, which should be the default option, so click the OK button.
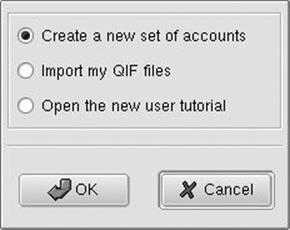
Figure 8-50. The GnuCash Welcome dialog
This launches the New Account Hierarchy Setup druid. A druid in Linux is analogous to a wizard in Windows; both are dialogs that take you click by click through a series of questions and setup screens to perform a complicated task. The first screen you see in the New Account Hierarchy Setup druid is an explanation of the druid. Click Next to go on to the important parts.
Choosing a currency
In Figure 8-51 you see the dialog for currency selection for new accounts. The default currency is USD (U.S. Dollar). If you use a different currency, select it by clicking the down arrow and choosing from the available options in the drop-down list. Click Next to continue.
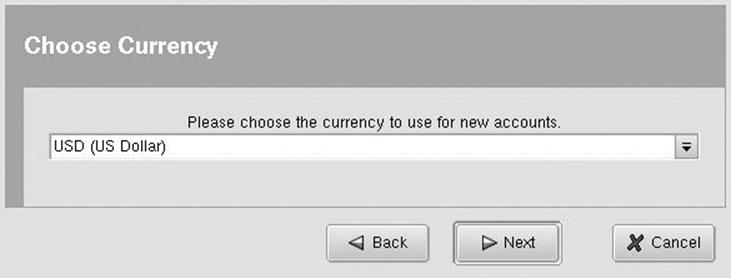
Figure 8-51. The Choose Currency page
Choosing accounts
Figure 8-52 shows you the list of preset account structures. Each of these options creates one or more accounts for you. You can select multiple options (for example, if you wanted both A Simple Checkbook and Car Loan), but for now just select A Simple Checkbook. Once you select that option, you see a description and a list of the accounts that will be created. Don't worry about the number of available accounts; it may look confusing, but it will become clear by the end of this chapter. Click Next to continue.
Entering opening balances
The dialog in Figure 8-53 gives you the opportunity to give each account an opening balance, that is, the amount of money in that account when you first begin tracking it in GnuCash . If you want to put an opening balance in your checking account, just click that account to select it and enter the opening balance in the text box to the right. Click Next to continue.
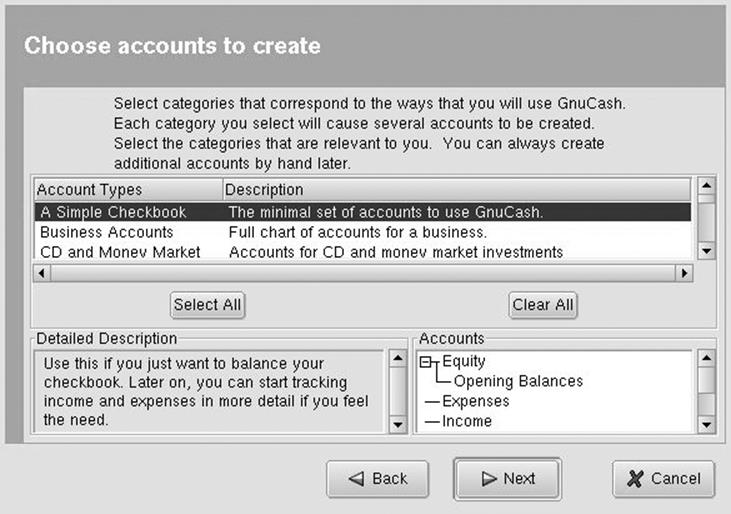
Figure 8-52. Account creation page
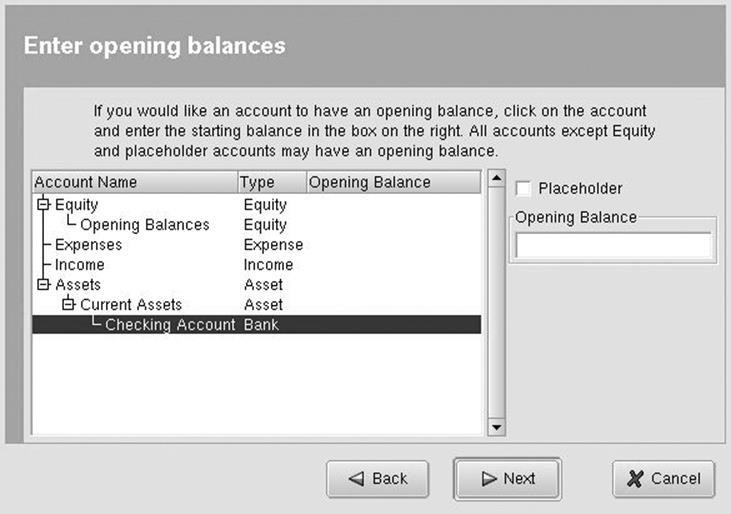
Figure 8-53. Opening balances page
Finishing your account setup
That's all there is to setting up an account hierarchy in GnuCash. Just click Finish, and the druid will close.
The Account
Fundamental to GnuCash is the account. An account is just what you think it is: a place where money comes in and money goes out. When most people think of accounts, they think of their bank accounts and credit card accounts. GnuCash treats these as accounts, but it treats everything else as an account too. You get a paycheck from work; where does the money come from? It comes from your Income account. You spend $30 at the grocery store; where does the money go? It goes to your Food account.
GnuCash uses the double-entry accounting method to keep track of your money. This is the same method that professional accountants and CPAs use to keep track of billions of dollars in corporate and government assets, and now you're going to use it too (don't you feel important?). In double-entry accounting, money always comes from one account and goes to another account. Always. The value of any account at a given time is either how much money is actually in that account or how much money has passed through it.
Not all accounts are treated equally in GnuCash. There are five types of accounts that will be covered in this introduction: assets, liabilities, income , expenses, and equity.
Asset accounts
Think of asset accounts as keeping track of things you own. Your checking account is an asset. If money is in this account, you own it. If you have a house, it is also an asset. It can also be treated as an account in GnuCash. The value of that account is the current value of the home. In general, you want asset accounts to increase.
Liability accounts
You can also think of liability accounts as keeping track of things you own. The only difference is that you don't want to own them! If you have a house, you probably have a mortgage. You "own" this promise to pay your lender a certain amount. The amount you have left to pay is the balance of your mortgage account. Credit card balances, car loans, and IOUs are examples of liabilities. In general, you really want liability accounts to decrease.
Income accounts
Unlike asset and liability accounts, income accounts don't represent money you own (at least not directly). Think of the income account as a window into someone else's (usually your employer's) check register. When your boss writes a check to you, it gets recorded on the withdrawals side of his register. If you can imagine those records also showing up in your income account (giving you a glimpse into the portion of his checkbook that concerns you), then you have some idea of how income accounts work. Money doesn't usually stay in these accounts; it immediately goes into one of your asset accounts (usually your checkbook). The value of this account at any time is the total amount you have been paid. It probably goes without saying that you always want these accounts to increase.
Expense accounts
Expense accounts also don't represent money you own. You can think of them as a glimpse into the deposit side of the checkbooks of whomever you are paying at the time. The value of each expense account is the total amount you have paid to that person, business, or activity so far. Although you can't decrease the value of expense accounts (except via refunds and rebates), you do want to manage them well.
Equity accounts
Equity accounts are the odd man out of this group. Although there is a formal definition of equity in the accounting world, it is beyond the scope of this introduction. The easiest way to think of the equity account is as the place where opening balances come from. Remember we said that, in GnuCash, money must always come from some account and go to some other account. What about opening balances — where do they come from? They don't come from income, since it's not like you got a paycheck for that opening balance. Instead, they come from the equity account.
The GnuCash Accounts Window
The main window of GnuCash, shown in Figure 8-54, is the accounts window. This window shows all of your accounts in the currently open file. The accounts are listed in tree form because accounts can contain subaccounts (more on this later). For now, all you need to know is that a plus sign to the left of an account name indicates that is a parent account of one or more subaccounts, and that clicking on the plus sign expands the listing so you can see all accounts under the parent.
The accounts listing shows the account name, a description, and the current account total by default. If an account is a parent to one or more subaccounts, the account total is the combined total of all its subaccounts as well as the parent account itself. Clicking once on an account selects it. Right-clicking on an account shows a context menu with the options to create a new account, delete an account, edit an account's properties, and perform numerous other tasks. Double-clicking an account brings up the associated account ledger, or register. You will learn more about ledgers later.
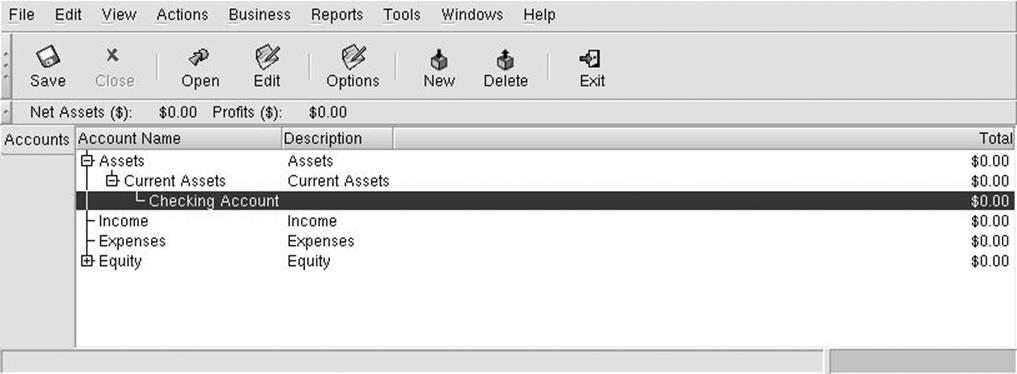
Figure 8-54. The GnuCash accounts window
Creating new accounts
There are several ways to create a new account. The easiest way is to right-click on an empty area in the accounts window. Another way is to select New Account under the File menu. Create a new account now by selecting the Income account and right-clicking. In the context menu that appears, select New Account to begin.
Figure 8-55 shows the New Account screen. The first thing you need to do is give the account a name. Because you're going to record all the money you get from your job in this account, type Paycheck in the Account Name field. The Account Code and Description fields are for your personal use if you need to record an account code (such as an account number from your bank) or a more descriptive description. You can set the commodity of this account just as you did for the main accounts file. By default it uses the commodity (USD, Euro, GBP, etc.) and commodity type (currency) of the main file, but you can change this to use other commodities (for example, if you're a spy and have a numbered bank account in Zurich) or other commodity types. This is useful for tracking stocks, bonds, and other financial instruments. The available commodity types are determined by the account type you select.
Next up is the Account Type. In this box you find the five account types introduced earlier as well as other types used for special purposes. The point of our Paycheck account is to keep track of income, so scroll down until you find the Income entry, and select that. After Account Type is the Parent Account box. Accounts can be nested, which means that one account can exist as part of another account. You already have an account called Income, so click on the plus sign next to New Top Level Account. This expands the tree to show your existing accounts. Scroll down until you see the Income account and select it. This puts your Paycheck account under the Income account.
If you don't see the Account Type and Parent Account fields, it is probably because you need to resize the window to be taller. If the window is already as tall as your screen allows, you probably need to adjust your screen resolution, which both KDE and GNOME allow through dialog boxes.
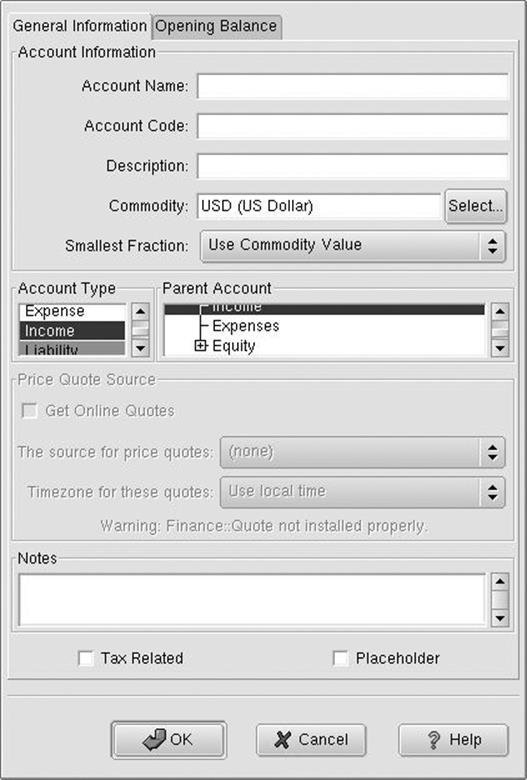
Figure 8-55. The New Account screen
If this account was for stocks and other special commodities, you could set up a way to get price quotes (say, to check the value of a stock) online. But explaining this is beyond the purpose of this chapter. The Notes field just lets you add notes to yourself, which you can see later if you go back to this screen.
Finally, there are two checkboxes near the bottom: Tax Related and Placeholder. The Tax Related checkbox links this account with tax information so that certain tax values are automatically calculated. Using this property is beyond the scope of this chapter.
The Placeholder account is used for accounts that only serve as organizers for other accounts. For example, you may have three sources of income: job, parents, and your weekend web design business. In this case, you would place all three accounts under the Income account. Now the Income account shouldn't have any activity directly inside of it, because all of your income comes from one of these three sources. To enforce this rule, you would check the Placeholder option in the Income account's settings window. This disallows entries in the Income ledger, so you can be sure that income is properly recorded in one of the three subaccounts. You don't want this option for your Paycheck account, so keep the box unchecked.
Click OK on the New Account window, and you are taken back to the main account window page. You can see that the newly created Paycheck account has been highlighted. Also notice that it has been placed under the Income account, just like you wanted.
If you want to edit the properties of an existing account, simply click on that account to select it, and then right-click on the account to bring up the context menu. Select Edit Account under the context menu to bring up the properties screen.
Deleting accounts
If you create an account erroneously, select that account with your mouse and then right-click on it. Select the Delete Account menu item to delete that account from your file. Beware that this affects all records pertaining to this account and may leave your accounts in an unbalanced state.
Do not delete an account just because you have closed it (for example, you paid off a credit card and cut it up or you closed an account at an old bank). Even though the account is closed, you do not want to lose all records of the transactions contained in that account, and deleting it may unbalance your other accounts.
Unfortunately, there is no real way to hide closed accounts so they no longer appear in your accounts window. There is a cheat, though: create a new top-level account called Closed as a placeholder account, and move all closed accounts under that account (by setting the new Closed account as the parent account). Since you can click the minus sign to collapse the closed accounts, all you see is the parent account and not all of your old accounts under it. This trick isn't perfect or particularly elegant, but it works.
Transactions
If the heart of GnuCash is the account, transactions are the blood. Without transactions, you simply have a bunch of accounts listed in a window. This isn't terribly useful; you probably want to do something with all these accounts. Recording transactions is exactly what makes GnuCash useful.
A transaction in GnuCash is a record of a specific event. This event is usually money being transferred from one place to another, but it could also be the equivalent value in stocks, bonds, or real estate. For a concrete example of a transaction, look no further than your own checkbook. If you keep a register, the individual entries in that register are records of transactions. When you use GnuCash, you simply record those transactions in the computer instead of in your checkbook (of course, a prudent person would do both).
Entering transactions
To enter transactions, you must open an account's register window, shown in Figure 8-56. You can access the register window for any account by double-clicking on the account in the accounts window. Let's start by recording a simple income transaction. You just mowed the lawn for Aunt Alice, and she paid you $25.00 for your troubles. Here's how to record the transaction in GnuCash.
Expand your Assets account, followed by the Current Assets account, and then double-click on Checking Account to bring up the register.
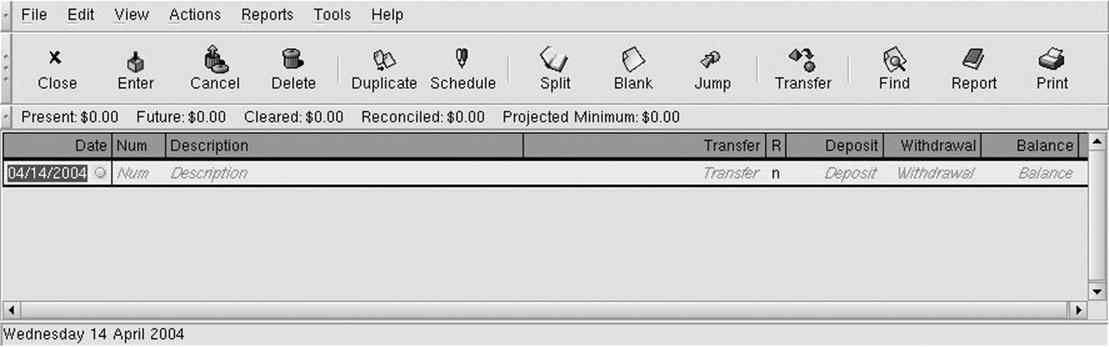
Figure 8-56. The account register
Today's date is already in the Date field. Hit the Tab key to move to the next field (Tab moves you forward through fields, and Shift-Tab moves you backward). The Num field lets you enter your check number or any other tracking number you need for this transaction. In this case, pretend that Aunt Alice gave you check number 100, so put 100 in the field.
Tab to the Description field and enter something, well, descriptive. Mowed Aunt Alice's Lawn is appropriate.
Tab to the Transfer field. This is one of the most important fields. Remember that in GnuCash, money always come from some account and goes to another. In this case you want money to come from your Income account and go into Checking Account. The good thing about this (and every other) field is that it autocompletes for you. Just enter In and it should display an account list and select the Income account automatically.
Since you are receiving money from Aunt Alice, tab to the Deposit field and enter 25.00.
When you press Enter, the transaction is recorded. When you close the register window and look at your accounts, you can see that both the Income account and the Checking Account have increased to $25.00. Notice also that the parent accounts of Checking Account also show $25.00. Parent accounts show the sum of all accounts below them. At a glance, you can see that you have made $25.00 in income so far and you have $25.00 in your checking account.
To delete a transaction, go to the register containing the transaction, right-click on the transaction, and select Delete. Doing this removes the transaction from all affected accounts. In the case of the check from Aunt Alice, the transaction is removed from the Income and Checking accounts.
Recording split transactions
Let's say you have a paycheck in hand, ready to enter into GnuCash. If you're like most people, the amount you get paid is different from the amount you earned. The rest of the money goes to federal, state, and local taxes. You could just enter the amount for which the check was written, but what if you wanted to keep track of total income and expenses, including gross income and taxes? The way to do this in GnuCash is to use the split transaction.
Split transactions provide a way to record multiple sources and destinations of money as a single transaction. In this example, one single transaction can record that you earned $500 and $100 went to federal tax, $50 went to state tax, and $50 went to local tax, leaving you with a $300 deposit to your checking account. Split transactions work by balancing money in versus money out among multiple sources and/or destinations. GnuCash allows you to have an unbalanced split, but it will complain loudly.
To enter a split transaction, follow these steps:
1. Open an account register. Split transactions are usually recorded at the logical source or destination. For a paycheck, it is common to record the transaction inside your checking account.
2. Enter the date and description as you would for any transaction.
3. Click the Split button on the Account Register's toolbar.
4. Press Tab to advance to the first subtransaction.
5. Enter each part of the transaction as you would a normal transaction. Here's the tricky part: Deposit and Withdrawal apply to the account you're transferring money to or from at the time. For our example transaction, you are withdrawing $500 from your Income:Paycheck account in the form of wages, and splitting that into several deposits in your Expenses and Assests:Current Assests:Checking Account. At first it may seem counterintuitive that taxes are a deposit in an account, but if you reread the earlier definition for an Expense account it should make sense. UseFigure 8-57 as a guide for filling out this transaction. When you finish with a subtransaction, press Tab to go to the next subtransaction. I find it convenient to perform transactions like this by making my first split the withdrawal from the Income account. This makes the balancing that GnuCash automatically performs on the splits that follow work better.
6. Press the Enter key to finish the split transaction. If the transaction is not balanced (money in does not equal money out), GnuCash warns you and offers several solutions. GnuCash realizes that you're not as good at math as the computer, so it displays the amount remaining on the last subtransaction line. Once everything balances correctly, the split transactions collapse into a single line.
7. To see an already recorded split, select that transaction with the mouse and click the Split button on the toolbar.
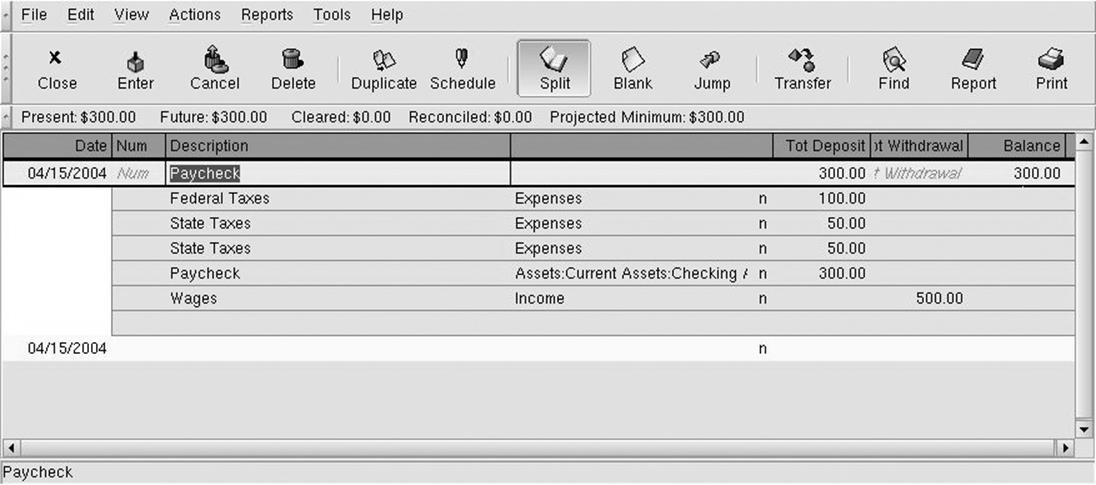
Figure 8-57. Example of a split transaction
The example in Figure 8-57 shows a good reason to create subaccounts under Expenses. If you create subaccounts called Federal, State, and Local, you can always see at a glance the amount you have paid so far in each respective category. This technique works just as well for categorizing other expenses and incomes.
Scheduling transactions
You probably pay certain bills every month at about the same time, and entering those transactions each time can become a chore. GnuCash's transaction scheduling feature allows you to create transactions that automatically recur at a certain interval. To schedule a transaction, follow these steps:
1. From the accounts window, select Actions → Scheduled Transactions → Scheduled Transaction Editor.
2. Click New.
3. Enter the name of the scheduled transaction (e.g., Electric Bill), the start date, frequency, and end date (if applicable).
4. There is a template transaction at the bottom of the window. This is where you tell GnuCash how much money to transfer at the specified intervals. Click in the Description field and create a transaction just like you would any other in your checking account. Remember, when you are paying a bill you are probably depositing money into an expense account and withdrawing money from your checking account. The template transaction needs to reflect both sides of the transaction. At the specified time interval, this transaction will occur in the accounts involved.
A quick way to make any transaction a scheduled transaction is by right-clicking on the transaction and selecting Schedule. If you are having trouble figuring out how to manually enter a template transaction, you can cheat by creating one this way, clicking the Advanced button, and seeing how GnuCash automatically creates the template transaction.
Reports
Once you have spent a few months entering your financial details into GnuCash, you will start to appreciate the power that comes from having detailed records of your money habits. It's one thing to have all this information available, and yet another to organize it in a form that can help you spot trends or solve problems. Fortunately, GnuCash has a wide selection of reports to give you a firm grasp on almost every aspect of your financial life. Table 8-5 lists some of the most common reports and what you can expect each to tell you. You can access any of these reports by navigating through the Reports menu in the accounts window.
Table 8-5. GnuCash reports
|
Report |
What it tells you |
|
Account Summary |
Gives you an at-a-glance view of the balances for each account. |
|
Asset Barchart/Piechart |
Lets you see how your net worth is divided. For most people, their net worth is primarily in their house, bank accounts, and retirement funds. |
|
Liability Barchart/Piechart |
Breaks down your liabilities by percentage. For most people, houses and cars are the greatest liabilities, followed by credit cards, and consumer and student loans. |
|
Net Worth Barchart |
Assets - Liabilities = Net Worth. This is a graphical representation of that formula. In general you want the blue and green bars to get higher, and the red bar to get lower. |
|
Expense Barcart/Piechart |
Shows you where your money is going. If you spend 80% of your money each month on clothes, this will let you know (assuming you have structured your expense accounts correctly). |
|
Income Barchart/Piechart |
Shows you where your money comes from. You may think that most of your money comes from your job, but this report may surprise you with how much of your money comes from other sources, such as Mom and Dad and contract work (once again, assuming you have set up your accounts correctly). |
Most of these reports require you to have an intricate account tree set up to be truly informative. For example, if you have one big Expenses account to which you send all of your money, then the Expense Report will show that 100% of your money goes to Expenses—not very helpful. To get the most out of the report, you must structure your account tree so that each category of expenses has an account under the main Expenses account, and ditto for Income, Liability, and Assets. The more structured your accounts, the more you will get out of GnuCash .
By default, GnuCash reports from the start of the current year to the current date. You can change this (e.g., to show expense allocations for April) by clicking on the Options button in the toolbar.
When you activate a report, it creates a tab to the far left of the window; above that tab you should also see Accounts. Use this to switch back and forth between the accounts window and your reports. Click the Close button on a toolbar to close a report.
Clicking Exit will exit GnuCash; it will not close the report window!
Real-Life Examples
Learning the basics of GnuCash is one thing — actually using it in day-to-day scenarios is quite another. You have already seen how to enter a paycheck so that total income and tax expenses are recorded. Here are several other real-life examples to get you started on the most common tasks.
Going to the grocery store
We mentioned the importance of setting up a sufficiently detailed account structure before, but what we didn't tell you is how easy it is to do. You don't have to set all those accounts up in advance. Knowing that you can create them as you go along gives you the motivation to do it right.
Here's what to do:
1. Open the Checking Account register.
2. Create a new transaction with today's date and Grocery Store as the description.
3. In the transfer field, enter Ex, and expenses will be selected automatically. Use the right arrow key to complete the auto entry. Now type :Food. The colon tells GnuCash to make Food a subaccount of Expenses.
4. Press Enter to accept your new category, and Tab to leave the transfer field. A dialog box will appear, asking you if you would like to create the Expenses:Food account. Click Yes.
5. The New Account window appears. The defaults should be fine, so click OK.
6. Skip the Deposit field, enter 50.00 in the Withdrawal field, and press Enter.
Congratulations! You have not only created a transaction recording your food purchase, but have also created the expense account for it. Future food transactions can now go into this account, and a quick glance at the accounts window will show you exactly how much you have spent on food.
GnuCash's autocomplete feature is very helpful. Once you have created subaccounts, typing a colon after an autocompleted account will jump directly to the end of that account and begin with a listing of its subaccounts.
Getting a tax refund
Most people think of tax refunds as income, but they aren't: they are rebates. If you keep track of your taxes from each paycheck, recording a tax refund is as simple as creating a rebate from your expense account to your checking account. Here's how it works:
1. Open the Checking Account register.
2. Create a new transaction with today's date and Tax Refund as the description.
3. Since we recorded federal taxes from our paycheck as going to the Expenses account, enter Expenses in the transfer field.
4. Enter 50.00 in the Deposit field.
5. Press Enter to complete the transaction.
You now have 50 more dollars in your checking account, but if you look at the accounts window, you will notice that your income has not increased. Instead, total assets have increased, and expenses have decreased. This is an accurate depiction of what happens when you get a tax refund. No longer can you fool yourself into thinking that a tax refund is extra money you make every year. You already earned it — you're just getting it back!
Buying a car
An automobile is a big expense. And if you're buying a vehicle on credit, it becomes an even more costly one. Luckily, GnuCash can keep track of every cent of the purchase, as well as what portion of your monthly payment goes toward principle and what portion is lost as interest. The process of setting up a car purchase is also a good example of how to handle a house purchase or other type of loan.
Here's the scenario: You've just bought a brand new car for $20,000. You put down $5000 and will be paying a $400 monthly payment for 60 months. You may have received an amortization table from your lender showing you how much money goes to principle and interest each month. If you didn't get an amortization table, you might want to ask your lender for one, or create one yourself using tools available at a web site such as http://www.bankrate.com. You will probably be surprised at how much money you spend on interest. To record a car payment transaction:
1. Begin by creating a new account. Call it Car Loan, set its Parent Account to New Top Level Account, and its account type to Liability.
2. Create a second new account called Car, set its Parent Account to Assets:Current Assets, and its account type to Asset.
3. Open the account register for the Car account.
4. Start a new transaction. Enter Buy Car as the description and then click the Split button on the toolbar.
5. The first subtransaction records the car's value. Enter Car Value as the description. The account will be Assets:Current Assets:Car, and the Increase value will be 20,000.
6. That 20 grand has to come from somewhere. The first place is your down payment. Enter Down Payment as the description and Assets:Current Assets:Checking Account as the account, and decrease the account by $5,000. (Yes, I know that in this example this makes your bank account negative. Don't try this at home!)
7. Unfortunately, tax, title, and license cost you another $1,500. Enter the description as TT&L and the account as Expenses, and increase the account by $1,500.
8. You now have a $16,500 balance for the transaction; this is your loan amount. Enter Loan Principle for the description and Car Loan for the account, and decrease the account by $16,500.
9. Complete the transaction. The accounts window should show the results of your hard work.
You've had the car for about a month and now it's time to pay the payment. A quick look at the lender's amortization table shows that $300 of your payment goes to interest and $100 goes to principle. Here's how to record that:
1. Open the Checking Account register.
2. Start a new transaction. Use today's date and enter Car Payment in the description field. Click the Split button to begin a split transaction.
3. Your payment is $400, so enter Payment as the description and Assets:Current Assets:Checking Account as the account, and withdraw $400.
4. $300 goes to interest, so enter Interest as the description and Expenses:Interest as the account (click Yes and OK after tabbing off the field to create the subaccount), and deposit $300 into the account.
5. The rest goes to principle. The $100 balance should already appear in the Deposit field, so just enter Principle in the description and Car Loan for the account. Press Enter to complete the transaction.
Looking at the accounts window, you see that the Car Loan account has decreased by $100 and the Expenses account has increased by $300, exactly as it should be. No longer will you have to consider all of your car payment as an expense, some of it goes to decreasing liability (and therefore increasing net worth), and now you can see it happening every month!
The preceding transaction is an excellent example of one that should be scheduled to recur every month, saving you the hassle of typing it in every time. With each payment, be sure to change the interest and principle amounts as the amortization table indicates.
All materials on the site are licensed Creative Commons Attribution-Sharealike 3.0 Unported CC BY-SA 3.0 & GNU Free Documentation License (GFDL)
If you are the copyright holder of any material contained on our site and intend to remove it, please contact our site administrator for approval.
© 2016-2026 All site design rights belong to S.Y.A.