Excel 2016 Power Programming with VBA (2016)
Part III. Working with UserForms
· Chapter 12
Leveraging Custom Dialog Boxes
· Chapter 13
Introducing UserForms
· Chapter 14
UserForm Examples
· Chapter 15
Advanced UserForm Techniques
Chapter 12. Leveraging Custom Dialog Boxes
In This Chapter
· Using an input box to get user input
· Using a message box to display messages or get a simple response
· Selecting a file from a dialog box
· Selecting a directory
· Displaying Excel’s built-in dialog boxes
Before You Create That UserForm . . .
Dialog boxes are a key user interface element in many Windows programs. Virtually every Windows program uses them, and most users have a good understanding of how they work. Excel developers implement custom dialog boxes by creating UserForms. However, VBA provides the means to display some built-in dialog boxes, with minimal programming required.
Before I get into the nitty-gritty of creating UserForms (beginning with Chapter 13), you might find it helpful to understand some of Excel’s built-in tools that display dialog boxes. The sections that follow describe various dialog boxes that you can display using VBA, and without creating a UserForm.
Using an Input Box
An input box is a simple dialog box that allows the user to make a single entry. For example, you can use an input box to let the user enter text or a number or even select a range. You can generate an input box in two ways: by using the VBA InputBox function and by using the InputBox method of the Application object. I explain each method in the sections that follow.
The VBA InputBox function
The syntax for VBA’s InputBox function is
InputBox(prompt[,title][,default][,xpos][,ypos][,helpfile, context])
· prompt: Required. The text displayed in the input box.
· title: Optional. The caption displayed in the title bar of the input box.
· default: Optional. The default value to be displayed in the input box.
· xpos, ypos: Optional. The screen coordinates of the upper-left corner of the input box.
· helpfile, context: Optional. The help file and help topic.
The InputBox function prompts the user for a single piece of information. The function always returns text, so your code may need to convert the results to a value.
The prompt can consist of up to 1,024 characters. In addition, you can provide a title for the dialog box, provide a default value, and even specify the dialog box’s display position on the screen. You can also specify a custom Help topic; if you do, the input box includes a Help button.
The following example, which generates the dialog box shown in Figure 12.1, uses the VBA InputBox function to ask the user for his or her full name. The code then extracts the first name and displays a greeting in a message box.
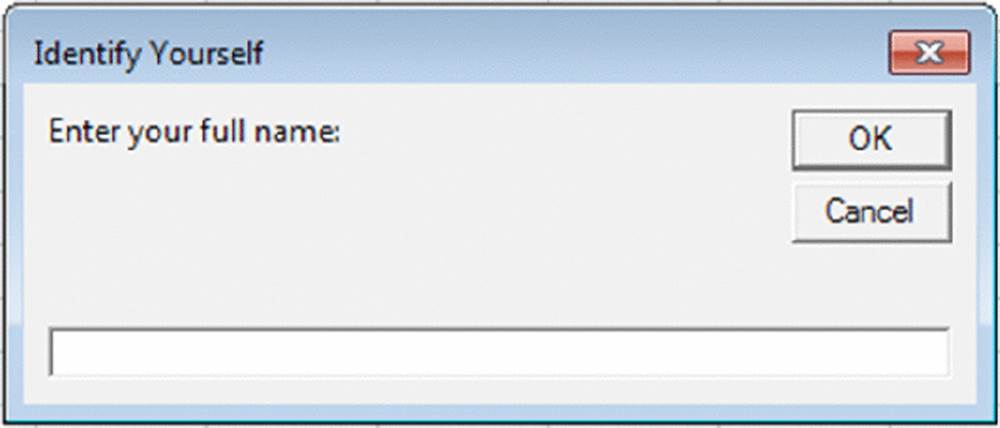
Figure 12.1 The VBA InputBox function at work.
Sub GetName()
Dim UserName As String
Dim FirstSpace As Long
Do Until Len(UserName) > 0
UserName = InputBox("Enter your full name:", _
"Identify Yourself")
Loop
FirstSpace = InStr(UserName, Space(1))
If FirstSpace > 0 Then
UserName = Left$(UserName, FirstSpace - 1)
End If
MsgBox"Hello" & UserName
End Sub Note that this InputBox function is written in a Do Until loop to ensure that something is entered when the input box appears. If the user clicks Cancel or doesn’t enter any text, UserName contains an empty string, and the input box reappears. The procedure then attempts to extract the first name by searching for the first space character (by using the InStr function) and then using the Left function to extract all characters before the first space. If a space character isn’t found, the entire name is used as entered.
Figure 12.2 shows another example of the VBA InputBox function. The user is asked to fill in the missing word. This example also illustrates the use of named arguments. The prompt text is retrieved from a worksheet cell and is assigned to a variable (Prompt).
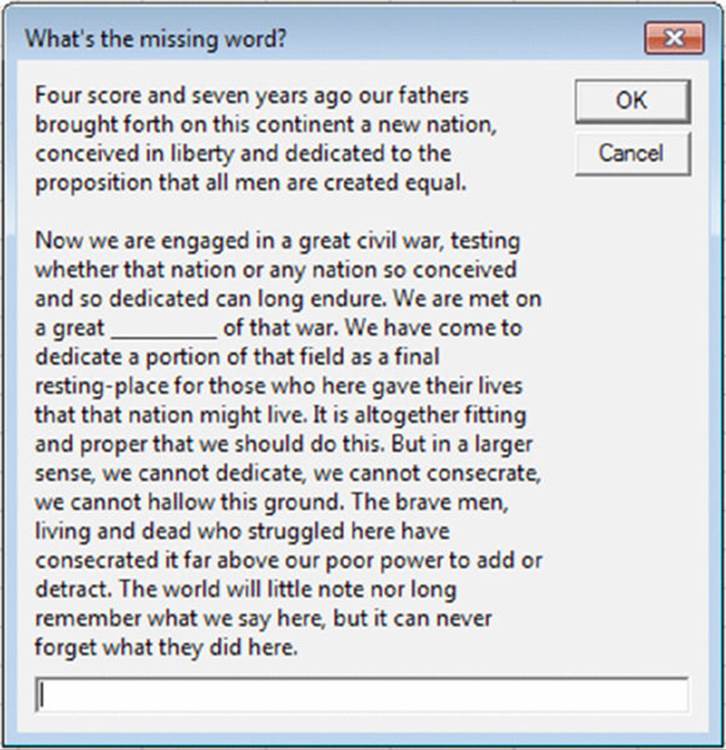
Figure 12.2 Using the VBA InputBox function with a long prompt.
Sub GetWord()
Dim TheWord As String
Dim Prompt As String
Dim Title As String
Prompt = Range("A1")
Title ="What's the missing word?"
TheWord = InputBox(Prompt:=Prompt, Title:=Title)
If UCase(TheWord) ="BATTLEFIELD" Then
MsgBox"Correct."
Else
MsgBox"That is incorrect."
End If
End Sub As I mentioned, the InputBox function always returns a string. If the string returned by the InputBox function looks like a number, you can convert it to a value by using the VBA Val function or just perform a mathematical operation on the string.
The following code uses the InputBox function to prompt for a numeric value. It uses the IsNumeric function to determine if the string can be interpreted as a number. If so, it displays the user’s input multiplied by 12.
Sub GetValue()
Dim Monthly As String
Monthly = InputBox("Enter your monthly salary:")
If Len(Monthly) > 0 And IsNumeric(Monthly) Then
MsgBox"Annualized:" & Monthly * 12
Else
MsgBox"Invalid input"
End If
End Sub
 On the Web
The three examples in this section are available on the book’s website in the VBA inputbox.xlsm file.
The Application.InputBox method
Using Excel’s InputBox method rather than the VBA InputBox function offers three advantages:
· You can specify the data type returned (it doesn’t have to be a String).
· The user can specify a worksheet range by dragging in the worksheet.
· Input validation is performed automatically.
The syntax for the InputBox method is:
InputBox(Prompt [,Title][,Default][,Left][,Top][,HelpFile, HelpContextID][,Type])
· Prompt: Required. The text displayed in the input box.
· Title: Optional. The caption in the title bar of the input box.
· Default: Optional. The value that is prefilled in the input box.
· Left, Top: Optional. The screen coordinates of the upper-left corner of the window.
· HelpFile, HelpContextID: Optional. The Help file and Help topic.
· Type: Optional. A code for the data type returned, as listed in Table 12.1.
 Note
Note
Apparently, the Left, Top, HelpFile, and HelpContextID arguments are no longer supported. You can specify these arguments, but they have no effect.
Table 12.1 Codes to Determine the Data Type Returned by Excel’s Inputbox Method
|
Code |
Meaning |
|
0 |
A formula |
|
1 |
A number |
|
2 |
A string (text) |
|
4 |
A logical value (True or False) |
|
8 |
A cell reference, as a range object |
|
16 |
An error value, such as #N/A |
|
64 |
An array of values |
The InputBox method is versatile. To allow more than one data type to be returned, use the sum of the pertinent codes. For example, to display an input box that can accept text or numbers, set type equal to 3 (that is, 1 + 2, or number plus text). If you use 8 for the typeargument, the user can enter a cell or range address (or a named cell or range) manually or point to a range in the worksheet.
The EraseRange procedure, which follows, uses the InputBox method to allow the user to select a range to erase (see Figure 12.3). The user can either type the range address manually or use the mouse to select the range in the sheet.
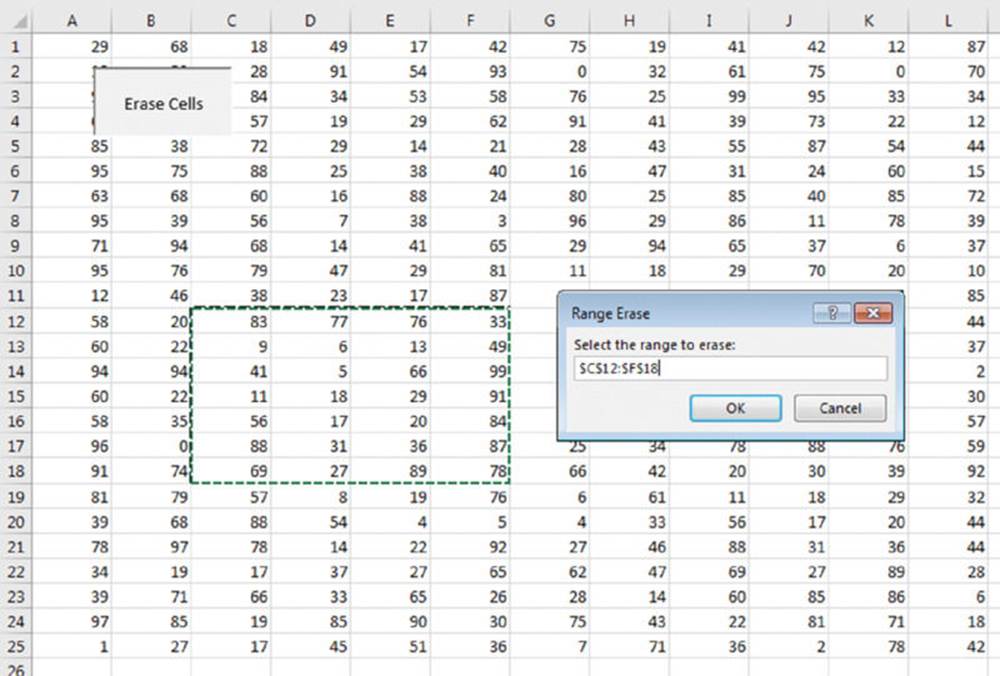
Figure 12.3 Using the InputBox method to specify a range.
The InputBox method with a type argument of 8 returns a Range object (note the Set keyword). This range is then erased (by using the ClearContents method). The default value displayed in the input box is the current selection’s address. If the user clicks Cancel instead of selecting a range, the InputBox method retuns the Boolean value False. A Boolean value can’t be assigned to a range, so On Error Resume Next is used to ignore the error. Finally, the contents are cleared and the range is selected only if a range was entered, that is theUserRange variable isn’t Nothing.
Sub EraseRange()
Dim UserRange As Range
On Error Resume Next
Set UserRange = Application.InputBox _
(Prompt:="Select the range to erase:", _
Title:="Range Erase", _
Default:=Selection.Address, _
Type:=8)
On Error GoTo 0
If Not UserRange Is Nothing Then
UserRange.ClearContents
UserRange.Select
End If
End Sub
Yet another advantage of using the InputBox method is that Excel performs input validation automatically. If you enter something other than a range address in the GetRange example, Excel displays a message and lets the user try again (see Figure 12.4).

Figure 12.4 Excel’s InputBox method performs validation automatically.
The following code is similar to the GetValue procedure in the preceding section, but this procedure uses the Inputbox method rather than the InputBox function. Although I specified the type argument to be 1 (a numeric value), I declare the Monthly variable to be a variant. That’s because clicking the Cancel button returns False. If the user makes a non-numeric entry, Excel displays a message and lets the user try again (see Figure 12.5).

Figure 12.5 Another example of validating an entry in Excel’s InputBox.
Sub GetValue2()
Dim Monthly As Variant
Monthly = Application.InputBox _
(Prompt:="Enter your monthly salary:", _
Type:=1)
If Monthly <> False Then
MsgBox"Annualized:" & Monthly * 12
End If
End Sub
Note
Note in Figure 12-12.5 that the user prefixed the number with USD for U.S. Dollars. Excel doesn’t recognize that as a number and correctly reported that it is not valid. However, because USD1024 is a valid range reference, that range is selected. Excel attempts to process the entry before it validates it against the Type argument.
On the Web
The two examples in this section are available on the book’s website in a file named inputbox method.xlsm.
The VBA MsgBox Function
VBA’s MsgBox function is an easy way to display a message to the user or to get a simple response (such as OK or Cancel). I use the MsgBox function in many of the examples in this book as a way to display a variable’s value.
Keep in mind that MsgBox is a function, and your code is halted until the message box is dismissed by the user.
 Tip
Tip
When a message box is displayed, you can press Ctrl+C to copy the contents of the message box to the Windows clipboard.
The official syntax for MsgBox is as follows:
MsgBox(prompt[,buttons][,title][,helpfile, context])
· prompt: Required. The text displayed in the message box.
· buttons: Optional. A numeric expression that determines which buttons and icon are displayed in the message box. See Table 12.2.
· title: Optional. The caption in the message box window.
· helpfile, context: Optional. The helpfile and Help topic.
You can easily customize your message boxes because of the flexibility of the buttons argument. (Table 12.2 lists some of the constants that you can use for this argument.) You can specify which buttons to display, whether an icon appears, and which button is the default.
Table 12.2 Constants Used for Buttons in the MsgBox Function
|
Constant |
Value |
Description |
|
vbOKOnly |
0 |
Display only an OK button. |
|
vbOKCancel |
1 |
Display OK and Cancel buttons. |
|
vbAbortRetryIgnore |
2 |
Display Abort, Retry, and Ignore buttons. |
|
vbYesNoCancel |
3 |
Display Yes, No, and Cancel buttons. |
|
vbYesNo |
4 |
Display Yes and No buttons. |
|
vbRetryCancel |
5 |
Display Retry and Cancel buttons. |
|
vbCritical |
16 |
Display Critical Message icon. |
|
vbQuestion |
32 |
Display Warning Query icon. |
|
vbExclamation |
48 |
Display Warning Message icon. |
|
vbInformation |
64 |
Display Information Message icon. |
|
vbDefaultButton1 |
0 |
First button is default. |
|
vbDefaultButton2 |
256 |
Second button is default. |
|
vbDefaultButton3 |
512 |
Third button is default. |
|
vbDefaultButton4 |
768 |
Fourth button is default. |
|
vbSystemModal |
4096 |
All applications are suspended until the user responds to the message box (might not work under all conditions). |
|
vbMsgBoxHelpButton |
16384 |
Display a Help button. To display help when this button is clicked, use the helpfile and context arguments. |
You can use the MsgBox function by itself (to simply display a message) or assign its result to a variable. When you use the MsgBox function to return a result, the value represents the button clicked by the user. The following example displays a message and an OK button but doesn’t return a result:
Sub MsgBoxDemo()
MsgBox"Macro finished with no errors."
End Sub
Note that the single argument is not enclosed in parentheses because the MsgBox result is not assigned to a variable.
To get a response from a message box, you can assign the results of the MsgBox function to a variable. In this situation, the arguments must be in parentheses. In the following code, I use some built-in constants (described in Table 12.3) to make it easier to work with the values returned by MsgBox:
Sub GetAnswer()
Dim Ans As Long
Ans = MsgBox("Continue?", vbYesNo)
Select Case Ans
Case vbYes
' ...[code if Ans is Yes]...
Case vbNo
' ...[code if Ans is No]...
End Select
End Sub
Table 12.3 Constants Used for MsgBox Return Value
|
Constant |
Value |
Button Clicked |
|
vbOK |
1 |
OK |
|
vbCancel |
2 |
Cancel |
|
vbAbort |
3 |
Abort |
|
vbRetry |
4 |
Retry |
|
vbIgnore |
5 |
Ignore |
|
vbYes |
6 |
Yes |
|
vbNo |
7 |
No |
The variable returned by the MsgBox function is a Long data type. Actually, you don’t even need to use a variable to use the result of a message box. The following procedure is another way of coding the GetAnswer procedure:
Sub GetAnswer2()
If MsgBox("Continue?", vbYesNo) = vbYes Then
' ...[code if Ans is Yes]...
Else
' ...[code if Ans is No]...
End If
End Sub
The following function example uses a combination of constants to display a message box with a Yes button, a No button, and a question mark icon; the second button is designated as the default button (see Figure 12.6). For simplicity, I assigned these constants to the Config variable.
Private Function ContinueProcedure() As Boolean
Dim Config As Long
Dim Ans As Long
Config = vbYesNo + vbQuestion + vbDefaultButton2
Ans = MsgBox("An error occurred. Continue?", Config)
If Ans = vbYes Then ContinueProcedure = True _
Else ContinueProcedure = False
End Function

Figure 12.6 The buttons argument of the MsgBox function determines which buttons appear.
You can call the ContinueProcedure function from another procedure. For example, the following statement calls the ContinueProcedure function (which displays the message box). If the function returns False (that is, the user selects No), the procedure ends. Otherwise, the next statement is executed.
If Not ContinueProcedure() Then Exit Sub
The width of the message box depends on your video resolution. Figure 12.7 shows a message box displaying lengthy text with no forced line breaks.
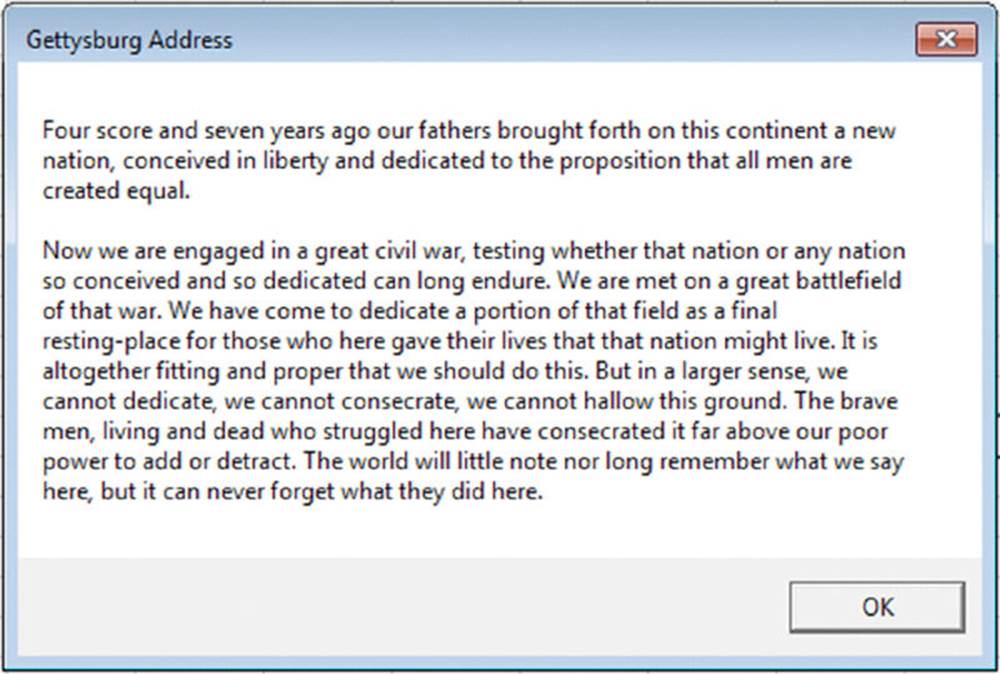
Figure 12.7 Displaying lengthy text in a message box.
If you’d like to force a line break in the message, use the vbNewLine constant in the text. The following example displays the message in three lines:
Sub MultiLine()
Dim Msg As String
Msg ="This is the first line." & vbNewLine & vbNewLine
Msg = Msg &"This is the second line." & vbNewLine
Msg = Msg &"And this is the last line."
MsgBox Msg
End Sub
You can also insert a tab character by using the vbTab constant. The following procedure uses a message box to display the values in a 12 x 3 range of cells in A1:C12 (see Figure 12.8). It separates the columns by using a vbTab constant and inserts a new line by using thevbNewLine constant. The MsgBox function accepts a maximum string length of 1,023 characters, which will limit the number of cells that you can display. Also, note that the tab stops are fixed, so if a cell contains more than 11 characters, the columns won’t be aligned.
Sub ShowRange()
Dim Msg As String
Dim r As Long, c As Long
Msg =""
For r = 1 To 12
For c = 1 To 3
Msg = Msg & Cells(r, c).Text
If c <> 3 Then Msg = Msg & vbTab
Next c
Msg = Msg & vbNewLine
Next r
MsgBox Msg
End Sub
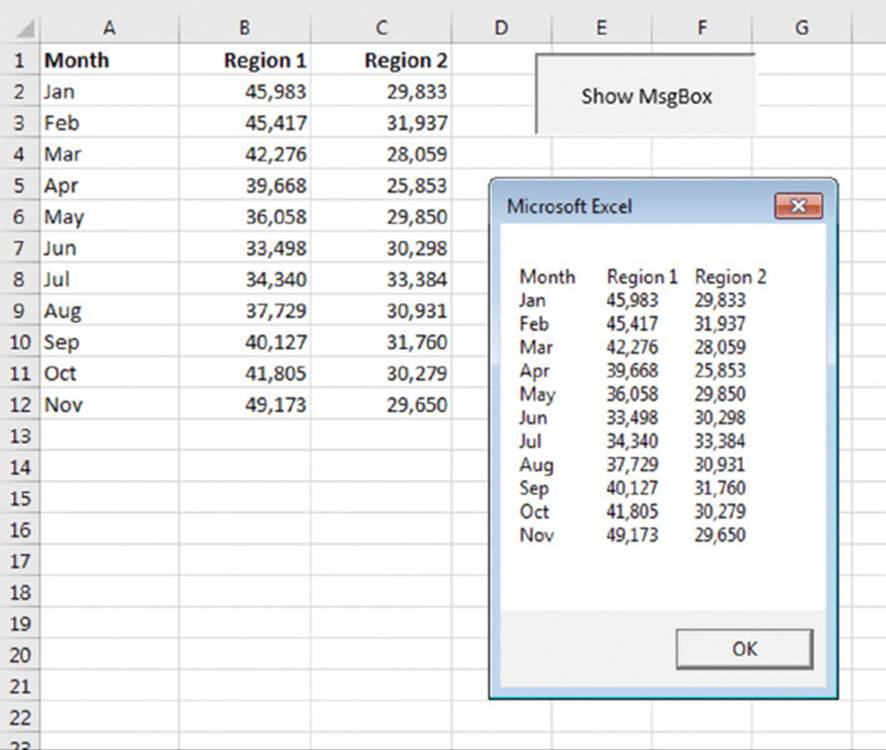
Figure 12.8 This message box displays text with tabs and line breaks.
On the Web
Examples from this section are available on the book’s website, in a file named message box examples.xlsm.
 Cross-Ref
Chapter 14 includes a UserForm example that emulates the MsgBox function.
The Excel GetOpenFilename Method
If your application needs to ask the user for a file name, you can use the InputBox function. But this approach is tedious and error-prone because the user must type the file name (with no browsing capability). A better approach is to use the Application.GetOpenFilenamemethod, which ensures that your application gets a valid file name (as well as its complete path).
This method displays the normal Open dialog box, but it does not actually open the file selected. Rather, the method returns a string that contains the file name and path selected by the user. Then you can write code to do whatever you want with the file name.
The syntax for the GetOpenFilename method is as follows:
Application.GetOpenFilename(FileFilter, FilterIndex, Title, ButtonText, MultiSelect)
· FileFilter: Optional. A string that limits what types of files are shown in the Open dialog.
· FilterIndex: Optional. The index number of the default file-filtering criteria.
· Title: Optional. The title of the dialog box. If omitted, the title is Open.
· ButtonText: For Macintosh only.
· MultiSelect: Optional. If True, you can select multiple files. The default value is False.
The FileFilter argument determines what file types appear in the dialog box’s Files of Type drop-down list. The argument consists of pairs of file filter strings followed by the wildcard file filter specification, with each part and each pair separated by commas. If omitted, this argument defaults to the following:
"All Files (*.*),*.*"
Note that the first part of this string (All Files (*.*)) is the text displayed in the Files of Type drop-down list. The second part (*.*) determines which files are displayed.
The following instruction assigns a string to a variable named Filt. You can then use this string as a FileFilter argument for the GetOpenFilename method. In this case, the dialog box will allow the user to select from four file types (plus an All Files option). Note that I used the VBA line continuation sequence to set up the Filt variable; doing so makes it much easier to work with this rather complicated argument.
Filt ="Text Files (*.txt),*.txt," & _
"Lotus Files (*.prn),*.prn," & _
"Comma Separated Files (*.csv),*.csv," & _
"ASCII Files (*.asc),*.asc," & _
"All Files (*.*),*.*"
The FilterIndex argument specifies which FileFilter is the default, and the Title argument is text that is displayed in the title bar. If the MultiSelect argument is True, the user can select multiple files, all of which are returned in an array.
The following example prompts the user for a file name. It defines five file filters.
Sub GetImportFileName()
Dim Filt As String
Dim FilterIndex As Long
Dim Title As String
Dim FileName As Variant
' Set up list of file filters
Filt ="Text Files (*.txt),*.txt," & _
"Lotus Files (*.prn),*.prn," & _
"Comma Separated Files (*.csv),*.csv," & _
"ASCII Files (*.asc),*.asc," & _
"All Files (*.*),*.*"
' Display *.* by default
FilterIndex = 5
' Set the dialog box caption
Title ="Select a File to Import"
' Get the file name
FileName = Application.GetOpenFilename _
(FileFilter:=Filt, _
FilterIndex:=FilterIndex, _
Title:=Title)
' Exit if dialog box canceled
If FileName <> False Then
' Display full path and name of the file
MsgBox"You selected" & FileName
Else
MsgBox"No file was selected."
End If End Sub
Figure 12.9 shows the dialog box that appears when this procedure is executed and the user selects the Text Files filter.
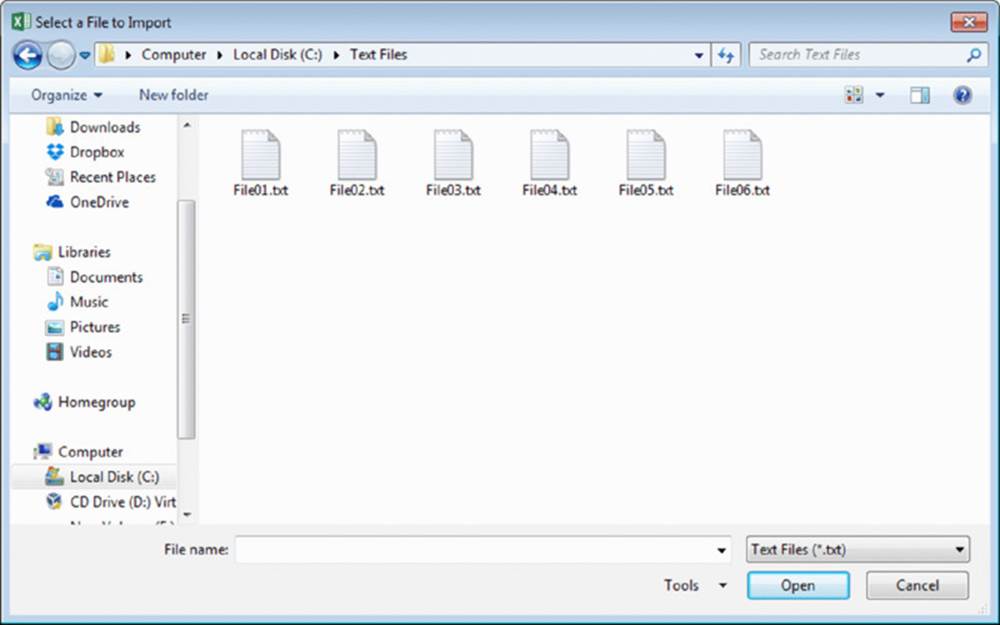
Figure 12.9 The GetOpenFilename method displays a dialog box used to specify a file.
The following example is similar to the preceding one. The difference is that the user can press Ctrl or Shift and select multiple files when the dialog box is displayed. I check for the Cancel button click by determining whether FileName is an array. If the user doesn’t click Cancel, the result is an array that consists of at least one element. In this example, a list of the selected files is displayed in a message box.
Sub GetImportFileName2()
Dim Filt As String
Dim FilterIndex As Long
Dim FileName As Variant
Dim Title As String
Dim i As Long
Dim Msg As String
' Set up list of file filters
Filt ="Text Files (*.txt),*.txt," & _
"Lotus Files (*.prn),*.prn," & _
"Comma Separated Files (*.csv),*.csv," & _
"ASCII Files (*.asc),*.asc," & _
"All Files (*.*),*.*"
' Display *.* by default
FilterIndex = 5
' Set the dialog box caption
Title ="Select a File to Import"
' Get the file name
FileName = Application.GetOpenFilename _
(FileFilter:=Filt, _
FilterIndex:=FilterIndex, _
Title:=Title, _
MultiSelect:=True)
If IsArray(FileName) Then
' Display full path and name of the files
For i = LBound(FileName) To UBound(FileName)
Msg = Msg & FileName(i) & vbNewLine
Next i
MsgBox"You selected:" & vbNewLine & Msg
Else
' Exit if dialog box canceled
MsgBox"No file was selected."
End If End Sub
When MultiSelect is True, the FileName variable will be an array, even if only one file was selected.
On the Web
The two examples in this section are available on the book’s website in the prompt for file.xlsm file.
The Excel GetSaveAsFilename Method
The GetSaveAsFilename method displays a Save As dialog box and lets the user select (or specify) a file. Like the GetOpenFilename method the GetSaveAsFilename method returns a file name and path but doesn’t take any action.
The syntax for this method is:
Application.GetSaveAsFilename(InitialFilename, FileFilter, FilterIndex, Title, ButtonText)
The arguments are:
· InitialFilename: Optional. A string that is prefilled in the File name box.
· FileFilter: Optional. A string that determines what shows in the Save as type dropdown.
· FilterIndex: Optional. The index number of the default file-filtering criteria.
· Title: Optional. The title of the dialog box.
· ButtonText: For Macintosh only.
Prompting for a Directory
If you need to get a file name, the simplest solution is to use the GetOpenFileName method, as I describe earlier. But if you need to get a directory name only (no file), you can use Excel’s FileDialog object.
The following procedure displays a dialog box that allows the user to select a directory. The selected directory name (or Canceled) is then displayed by using the MsgBox function.
Sub GetAFolder ()
With Application.FileDialog(msoFileDialogFolderPicker)
.InitialFileName = Application.DefaultFilePath &"\"
.Title ="Select a location for the backup"
.Show
If .SelectedItems.Count = 0 Then
MsgBox"Canceled"
Else
MsgBox .SelectedItems(1)
End If
End With
End Sub
The FileDialog object lets you specify the starting directory by providing a value for the InitialFileName property. In this example, the code uses Excel’s default file path as the starting directory.
Displaying Excel’s Built-In Dialog Boxes
Code that you write in VBA can execute many Excel Ribbon commands. And, if the command normally leads to a dialog box, your code can “make choices” in the dialog box (although the dialog box itself isn’t displayed). For example, the following VBA statement is equivalent to choosing the Home ➜ Editing ➜ Find & Select ➜ Go To command, specifying the range A1:C3, and clicking OK:
Application.Goto Reference:=Range("A1:C3")
But when you execute this statement, the Go To dialog box never appears (which is almost always what you want).
In some cases, however, you may want to display one of Excel’s built-in dialog boxes so that the user can make the choices. You can do so by writing code that executes a Ribbon command.
Note
Using the Dialogs collection of the Application object is another way to display an Excel dialog box. However, Microsoft has not kept this feature up-to-date, so I don’t even discuss it. The method I describe in this section is a much better solution.
In early versions of Excel, programmers created custom menus and toolbars by using the CommandBar object. In Excel 2007 and later versions, the CommandBar object is still available, but it doesn’t work like it has in the past.
The CommandBar object has also been enhanced, beginning with Excel 2007. You can use the CommandBar object to execute Ribbon commands using VBA. Many of the Ribbon commands display a dialog box. For example, the following statement displays the Unhide dialog box (see Figure 12.10):
Application.CommandBars.ExecuteMso("SheetUnhide")
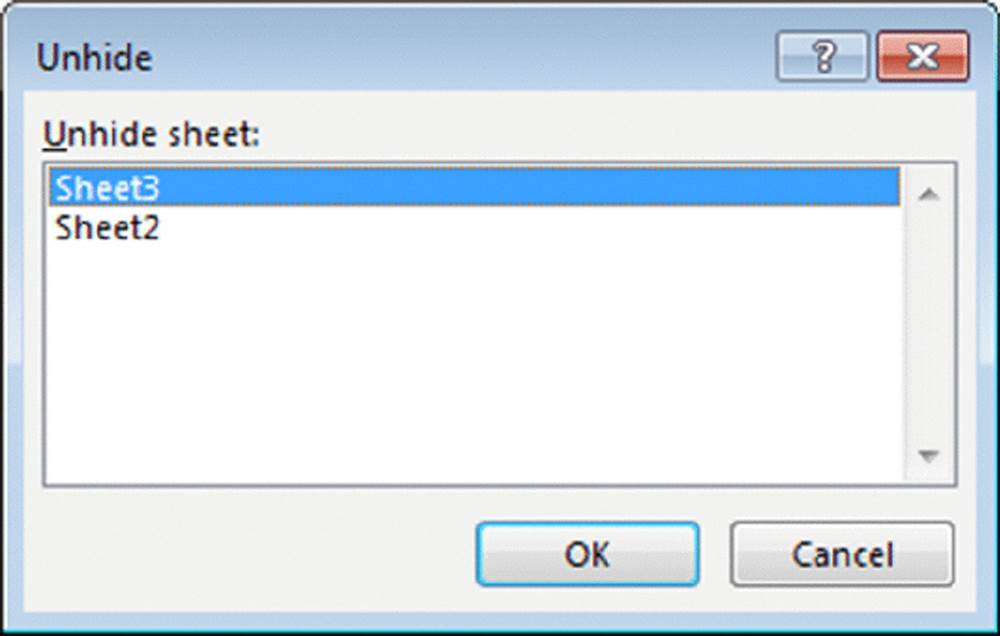
Figure 12.10 This dialog box was displayed with a VBA statement.
Keep in mind that your code cannot get any information about the user’s action. For example, when this statement is executed, there is no way to know which sheet was selected or whether the user clicked the Cancel button. And, of course, code that executes a Ribbon command is not compatible with versions prior to Excel 2007.
The ExecuteMso method accepts one argument: an idMso parameter, which represents a Ribbon control. Unfortunately, these parameters aren’t listed in the Help system.
If you try to display a built-in dialog box in an incorrect context, Excel displays an error message. For example, here’s a statement that displays the Format Number dialog box:
Application.CommandBars.ExecuteMso ("NumberFormatsDialog")
If you execute this statement when it’s not appropriate (for example, when a shape is selected), Excel displays an error message because that dialog box is appropriate only for worksheet cells.
Excel has thousands of commands. How can you find the name of the one you need? One way is to use the Customize Ribbon tab of the Excel Options dialog box (right-click any Ribbon control and choose Customize the Ribbon from the shortcut menu). Virtually every command available in Excel is listed in the left panel. Find the command you need, hover your mouse cursor over it, and you’ll see its command name in parentheses in the tooltip. Figure 12.11 shows an example. In this case, I learned how to display the Define Name dialog box:
Application.CommandBars.ExecuteMso ("NameDefine")
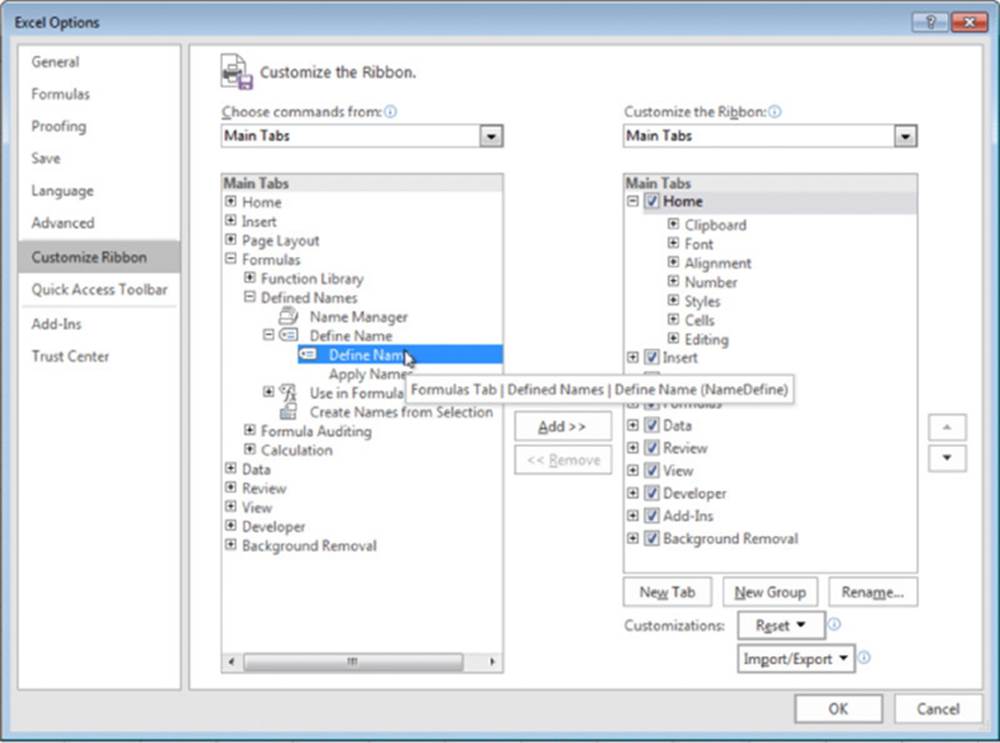
Figure 12.11 Using the Customize Ribbon panel to identify a command name.
 Executing an old menu item directly
You can display a built-in dialog box by using the ExecuteMso method. Another way to display a built-in dialog box requires knowledge of the pre-Excel 2007 toolbars, which are officially known as CommandBar objects. Although Excel no longer usesCommandBar objects, they’re still supported for compatibility.
The following statement, for example, is equivalent to selecting the Format ➜ Sheet ➜ Unhide command in the Excel 2003 menu:
Application.CommandBars("Worksheet Menu Bar"). _
Controls("Format").Controls("Sheet"). _
Controls("Unhide…").Execute
This statement, when executed, displays the Unhide dialog box. Note that the menu item captions must match exactly (including the three dots following Unhide).
Here’s another example. This statement displays the Format Cells dialog box:
Application.CommandBars("Worksheet Menu Bar"). _
Controls("Format").Controls("Cells...").Execute
It’s probably not a good idea to rely on CommandBar objects because they may be removed from a future version of Excel.
Displaying a Data Form
Many people use Excel to manage lists in which the information is arranged in tabular form. Excel offers a simple way to work with this type of data through the use of a built-in data entry form that Excel can create automatically. This data form works with either a normal range of data or a range that has been designated as a table (by choosing the Insert ➜ Tables ➜ Table command). Figure 12.12 shows an example of a data form in use.
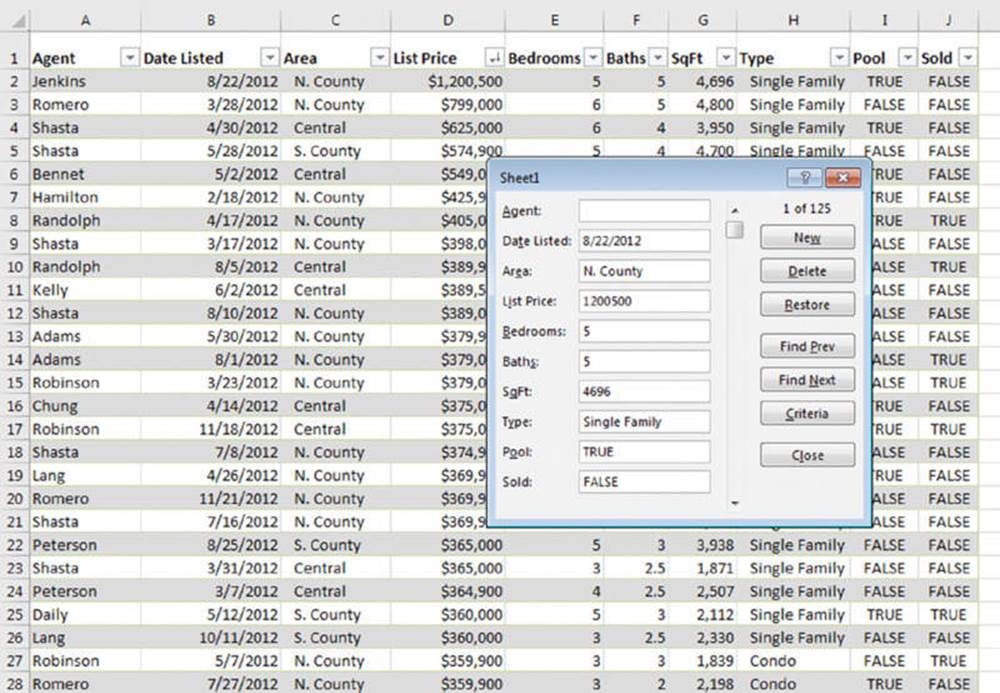
Figure 12.12 Some users prefer to use Excel’s built-in data form for data-entry tasks.
Making the data form accessible
For some reason, the command to access the data form isn’t on the Excel Ribbon. To access the data form from Excel’s user interface, you must add it to your Quick Access toolbar or to the Ribbon. Following are instructions to add this command to the Quick Access toolbar:
1. Right-click the Quick Access toolbar and choose Customize Quick Access Toolbar.
The Customize the Quick Access Toolbar panel of the Excel Options dialog box appears.
2. In the Choose Commands From drop-down list, select Commands Not in the Ribbon.
3. In the list box on the left, select Form.
4. Click the Add button to add the selected command to your Quick Access toolbar.
5. Click OK to close the Excel Options dialog box.
After performing these steps, a new icon will appear on your Quick Access toolbar.
To use a data entry form, you must arrange your data so that Excel can recognize it as a table. Start by entering headings for the columns in the first row of your data entry range. Select any cell in the table and click the Form button on your Quick Access toolbar. Excel then displays a dialog box customized to your data. You can use the Tab key to move between text boxes and supply information. If a cell contains a formula, the formula result appears as text (not as an edit box). In other words, you can’t modify formulas from the data entry form.
When you complete the data form, click the New button. Excel enters the data into a row in the worksheet and clears the dialog box for the next row of data.
Displaying a data form by using VBA
Use the ShowDataForm method to display Excel’s data form. The only requirement is that the data table must begin in cell A1. Alternatively, the data range can have a range name of Database.
The following code displays the data form:
Sub DisplayDataForm()
ActiveSheet.ShowDataForm
End Sub
This macro will work even if the Form command has not been added to the Ribbon or the Quick Access toolbar.
On the Web
A workbook with this example is available on the book’s website in the data form example.xlsm file.