Windows 10. Absolute Beginner’s Guide (2016)
Part II: Customizing Your Windows 10 Computer
10. Configuring Input Device Settings
In This Chapter
• Setting Up Your Mouse
• Setting Up Your Touchpad
• Setting Up Your Keyboard
• Adding a Language
Basic hardware setup is essential to getting the most out of Windows. Windows 10 does a very good job in sensing what hardware is attached and automatically configuring your settings based on common preferences. In this chapter, you learn about setting up your mouse, touchpad, keyboard, and language settings. Setting up some aspects of your hardware might require you to consult instructions from a manufacturer, especially where third-party drivers or software need to be installed.
The Control Panel or PC Settings?
Windows 10 uses two basic avenues to reach the settings you will work with. If you occasionally wonder which method of changing your settings is the correct one to use, just remember that both make changes to the same operating system settings. Many common configuration settings are able to be performed from the modern Settings app, and you will find it to be much easier to use with a touch device. Although some settings and configuration options are duplicated and can be accessed from either Settings or the Control Panel, the Control Panel, shown in Figure 10.1, often has a deeper set of configuration options to work with.
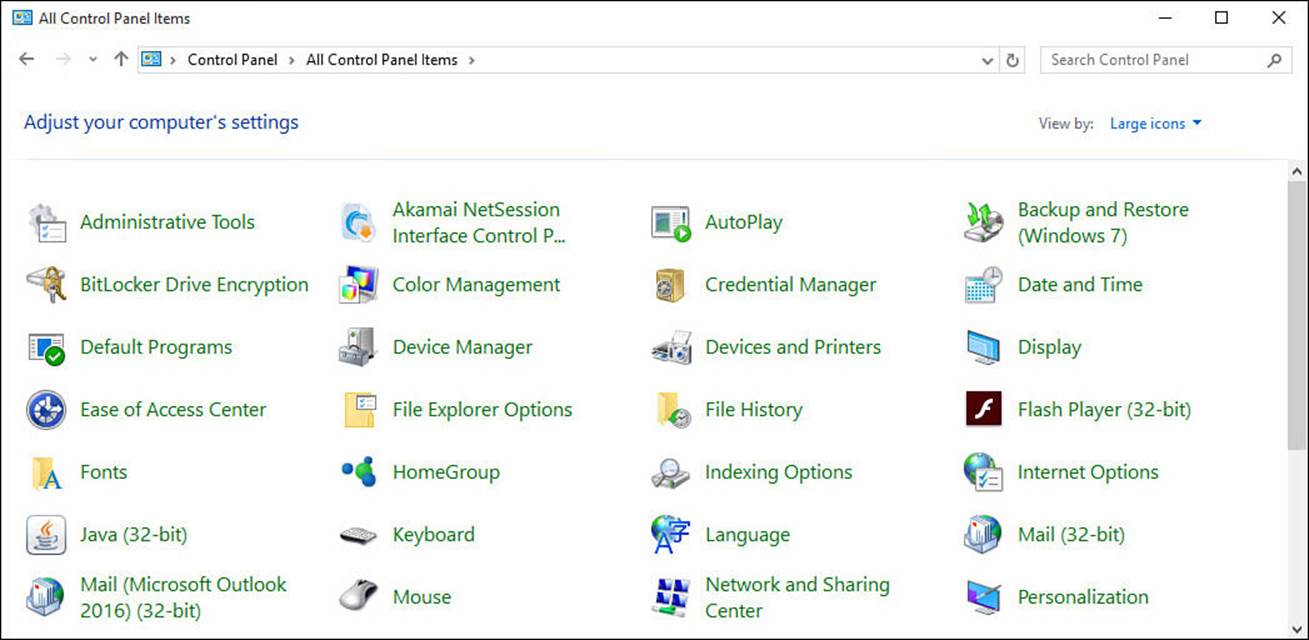
FIGURE 10.1 The Control Panel is the comprehensive center for changing how Windows and your devices operate.
The Control Panel is the Windows interface to all the settings for Windows and its many devices such as mouse and keyboard, display, language, and so on. You can make configuration changes by selecting icons in the Control Panel; these are often referred to as applets. Applets are small programs that open as small windows referred to as dialog boxes. These are designed to make specific changes to settings that Windows references so that it knows how to display information on the screen or how to make sense of input from connected devices. You will be referred to both the Settings app and the Control Panel often in this chapter as you explore the basic configuration choices available to you. The Control Panel on your device will have the same basic set of applets, and it will likely include applets unique to your device depending on the hardware or software your device uses.
To open the Control Panel follow these steps:
1. From the taskbar, select the search box. Enter the text Control in the search field, and select Control Panel from the results. This will open the Control Panel on the Desktop.
2. In the upper-right corner of the Control Panel, select the drop-down arrow to change View by from Category to Large Icons to get the view shown in Figure 10.1. This will make it easier to locate specific tools rather than trying to guess in which category they might be found.
 Tip
Tip
A faster way to locate a specific tool when you know its name is to simply use the Search tool. If you were to search for Date and Time, which is an applet in the Control Panel, you would see results that point to the Control Panel applet. Other searches for settings may point to the modern Settings app (which uses a gear as the icon in the search results). Changes in either the Settings app or the Control Panel applet will accomplish the same thing. You will find yourself using the Settings app more often; however, if you are hunting for a missing feature or looking for more detailed choices, the Control Panel applet is a good tool to know about.
Setting Up Your Mouse or Touchpad
A number of available settings enable you to customize exactly how your mouse operates. Some of these settings control basic functions, such as determining which of the buttons on the mouse is the primary button, and some permit you to express your personality with your mouse.
Although basic settings can be configured from the PC Settings pane using the Settings charm, we will focus primarily on the more robust settings available through the Desktop’s Control Panel.
Mouse Settings
Here is a list of the settings you can change for your mouse:
• Primary button—Mice are shipped typically with the left button configured as the primary button. You can change this configuration to make the right button the primary button.
• Double-click speed—Several Windows commands require you to double-click. You can slow the double-click speed to give you more time to make the second-click.
• ClickLock—If you have difficulty dragging items in Windows, the ClickLock option can help you. This option enables you to drag an item without holding down the mouse button while you drag the item. Instead, you click the item to be moved, hold down the mouse button over the item for a few seconds, and then release the button. To drop the object you’re dragging, just click again after you have positioned the item.
• Motion—You can configure your mouse pointer to keep pace with you, moving swiftly across the screen as you work. This setting is known as pointer speed. However, when you move the mouse, if you find that the pointer tends to fly out of control across the screen, forcing you to search for the pointer after you stopped moving the mouse, you might want to slow down the pointer.
• Snap to—Windows does a good job of asking you to confirm actions that have permanent consequences, such as deleting a file or saving a document with the same name as an existing file. Windows confirms your actions with a small window, usually with some text (Are You Sure?) and two buttons (OK and Cancel). Windows can move the pointer to the button it expects you to answer with, making it faster to either click it or select the other button.
• Visibility—You can add some excitement to your screen by using pointer trails. This option resembles a snake trailing behind the mouse pointer as you move it across the screen and enhances its visibility. Figure 10.2 shows you an example of pointer trails in use.

FIGURE 10.2 Mouse trails add pizzazz and serve a practical purpose by allowing you to more easily locate your mouse pointer.
• Hide pointer while typing—You might find you are distracted by the mouse pointer when you stop scrolling to type. Windows provides an option to hide the pointer while you type.
• Show location of pointer when I press the CTRL key—Some users have difficulty locating the mouse pointer on the screen, especially when they use large monitors. By enabling the Show Location of Pointer option, you can flash an easy-to-spot signal locating the pointer by pressing the Ctrl key, as shown in Figure 10.3.
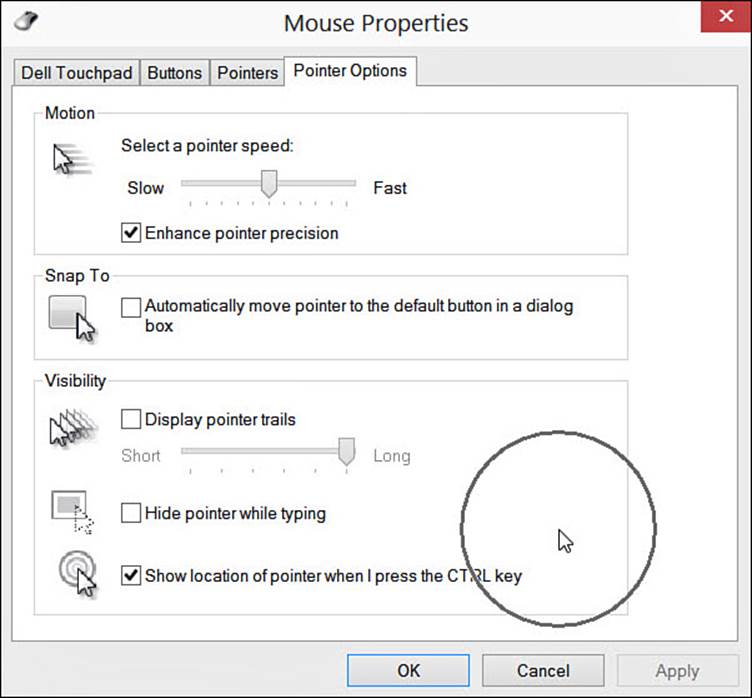
FIGURE 10.3 The Show Location of Pointer option helps you locate the pointer simply by pressing the Ctrl key.
• Scroll wheel—Most mice come with a scroll wheel or some form of touch-enabled strip that is positioned near the front of the mouse, enabling you to access it as easily as you can the mouse buttons. You turn the wheel (or drag your finger) when you need to scroll up or scroll down. The vertical scrolling setting controls the sensitivity of the wheel. The setting is measured in the number of lines scrolled for every notch you spin in the wheel. Some mice even provide a horizontal setting for the wheel, enabling you to move from left to right and vice versa simply by applying pressure to the side of the wheel.
Tip
Basic mouse settings can be taken care of from the Settings app. Search for Mouse & Touchpad to jump straight to the Mouse settings. Under Related Settings (refer to Figure 10.5) you will find a link labeled Additional Mouse Options, which will open the Mouse Properties applet.
To change any of the preceding settings, follow these steps:
1. Open the Control Panel and select Mouse. This opens the Mouse Properties window, as shown in Figure 10.4.
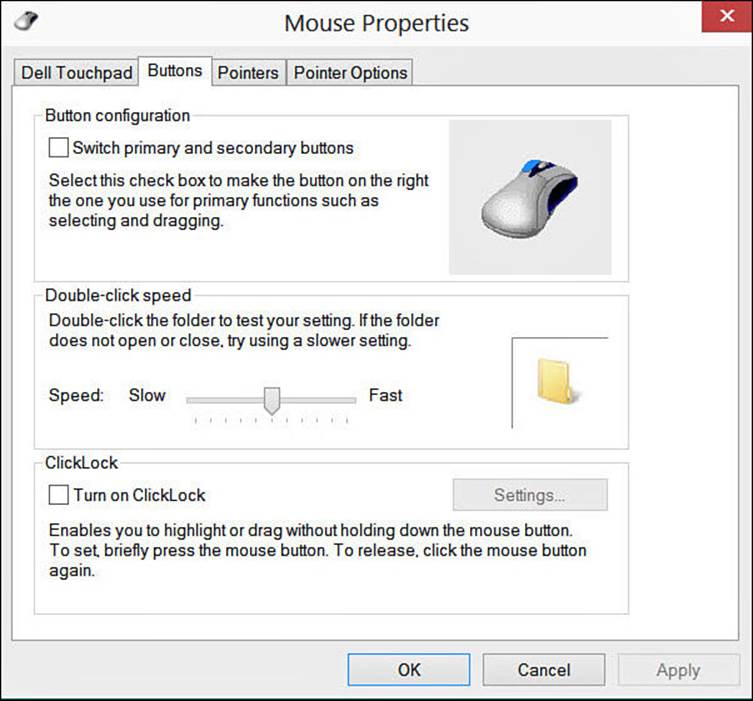
FIGURE 10.4 Change many settings controlling how your mouse works in the Mouse Properties dialog box.
2. Choose the mouse control you want to change. There are two tabs that include all the options just described: Buttons and Pointer Options. The tab Pointer Options includes settings related to how the pointer appears on the screen.
3. When you’re done making changes, click OK to close the dialog box and save the various changes you made to the mouse settings. Click Cancel to discard the changes, or click Apply to save the changes without closing the dialog box.
You might want to customize the mouse pointers you use in Windows. You can adjust the pointers to reflect your personality and taste, or you might need to switch to pointers that are larger than normal to make it easier to see them. See Chapter 8, “Tweaking Windows to Reflect Your Personality,” to learn how you can customize your mouse pointers.
Touchpad Settings
Your Windows device, especially if it’s a laptop, may have a touchpad. Touchpad settings are often configured using software provided by the hardware manufacturer; therefore, you might see software on your device that has been included for this purpose. Windows also includes some general settings for touchpads. These can be grayed out or missing if you have touchpad controls available to the Desktop that override these settings; in that case you should consult the instructions your device manufacturer provided. Often these settings are located in the Mouse applet of the Control Panel as a tab (refer to Figure 10.4).
To adjust these settings, follow these steps:
1. Select the Start button, and then select Settings to open the Settings app.
2. Select Devices.
3. Select Mouse & Touchpad, as shown in Figure 10.5.
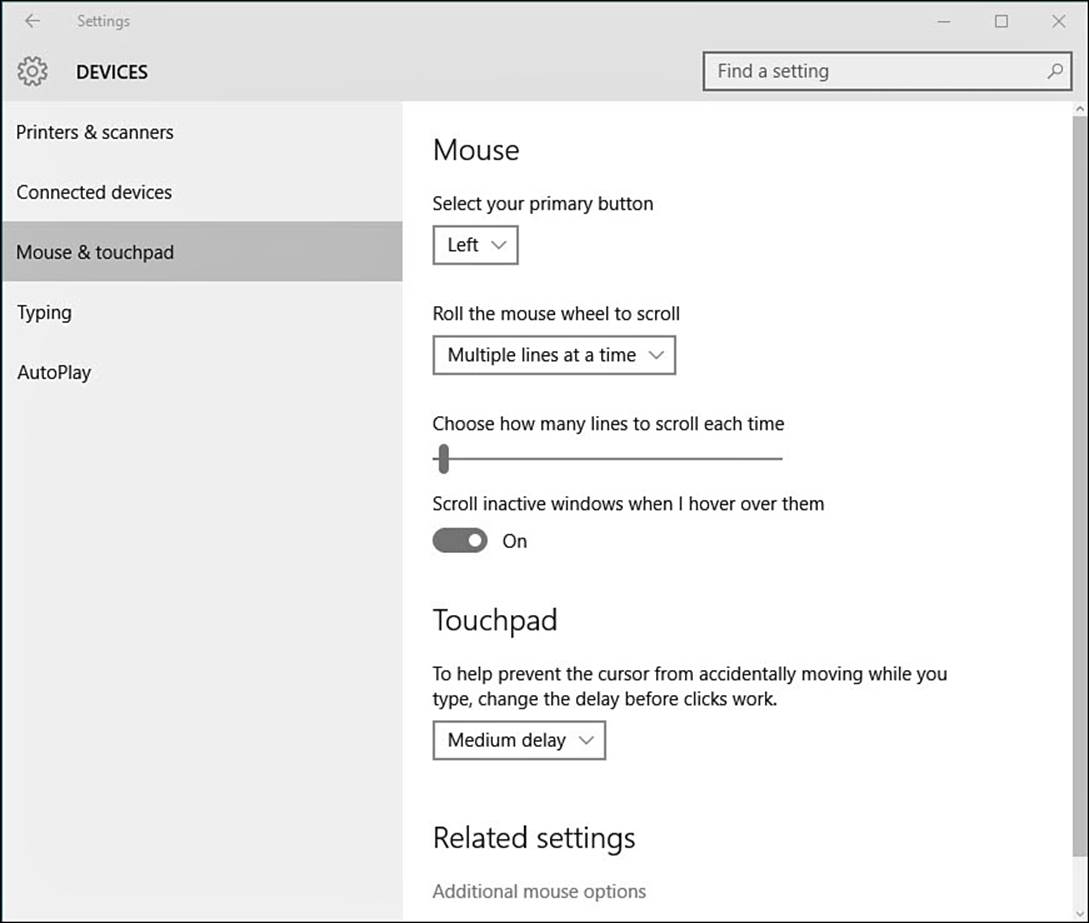
FIGURE 10.5 You can adjust basic settings for your mouse and touchpad from the Settings charm.
4. From the Touchpad settings, you may see settings related to adjusting tap sensitivity, swiping gestures, reverse scrolling, and even enabling or disabling the touchpad itself.
Setting Up Your Keyboard
Although the keyboard is an important part of your computer, there are only a few settings you can change:
• Setting how rapidly characters repeat across the screen
• Setting when a character starts repeating across the screen
• Setting the cursor blink rate
Two settings control what occurs when you depress a key on the keyboard to repeat the key’s character on the page. These settings might not be useful for your everyday work unless you design a form or document that includes underlines to enter information or characters to create a border. The settings are
• How long a key is depressed before the character begins repeating—If this setting is too short, the slightest delay in moving your finger off of a key causes the character to begin repeating across the screen (depending on the program you use).
• How rapidly the character repeats—This rate can span from a steady pulse to a staccato spray of the character across the screen.
Changing Keyboard Settings
To access the screens where the repeating character rates are set, do the following:
1. Use the Search tool to search for keyboard, as shown in Figure 10.6. Select Keyboard (Control Panel) to display the Keyboard Properties dialog box, as shown in Figure 10.7.
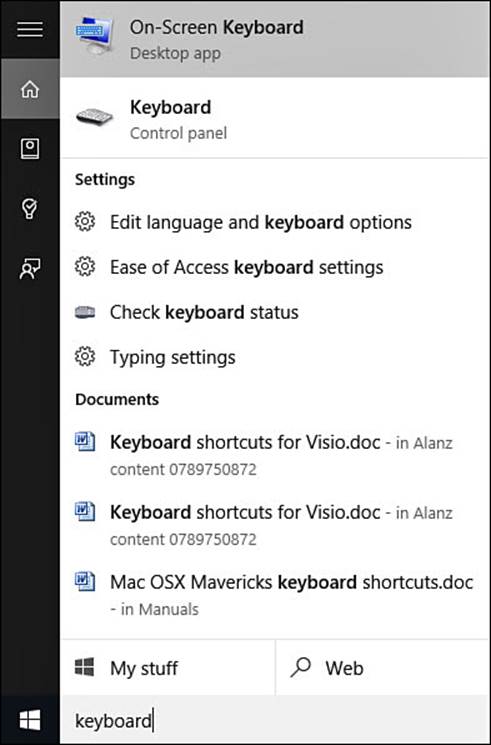
FIGURE 10.6 Use the Search tool to quickly locate specific settings for your devices.
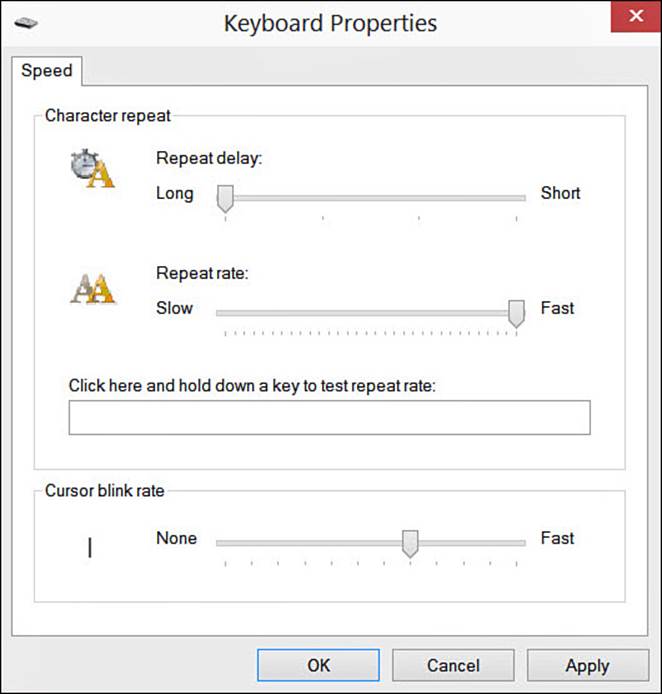
FIGURE 10.7 Set the character repeating rate in the Keyboard Properties dialog box.
2. Drag the pointer on each of the two sliders to the desired speed. Try your settings in the box in the middle of the dialog box.
3. You also can adjust the rate the cursor blinks across all Windows 10 apps in the Keyboard Properties dialog box. Drag the pointer along the Cursor Blink Rate slider to the desired speed.
4. Select OK to save your settings and close the dialog box.
Personalize Language, Keyboard, and Date Formats
One of the most personal aspects of Windows 10 is your language and other locale settings. You can customize the number, currency, time, and date formats to match your nationality and cultural preferences.
The first phase is to set your language in Windows:
1. Open the Settings app by selecting it from the Start menu. You also can open it by swiping in from the right on a touch screen device, selecting the All Settings button in the Notification Center.
2. Select Time & Language from the list of settings, and then select Region & Language. The languages currently added to this device are indicated, as shown in Figure 10.8.
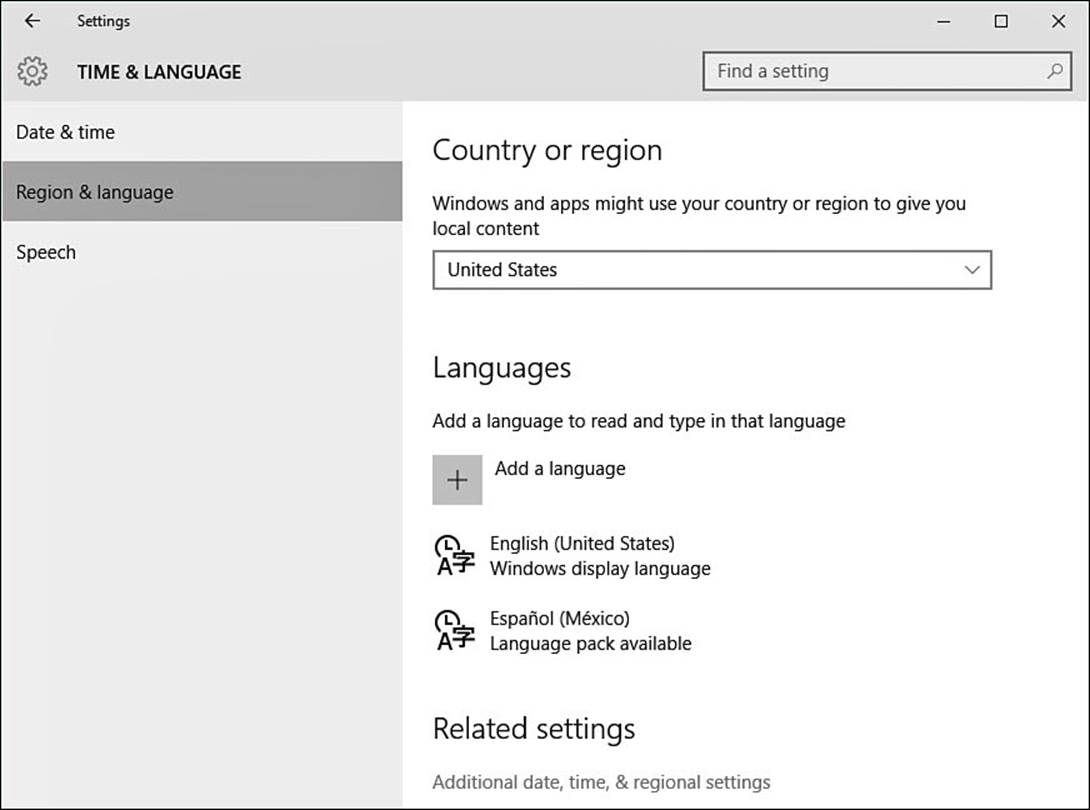
FIGURE 10.8 You can select language and other aspects of your locale from the Region and Language pane.
3. If the language you want to switch to is shown, skip to step 6. If not, select Add a Language. A pane like the one shown in Figure 10.9 should appear, displaying a list of languages.
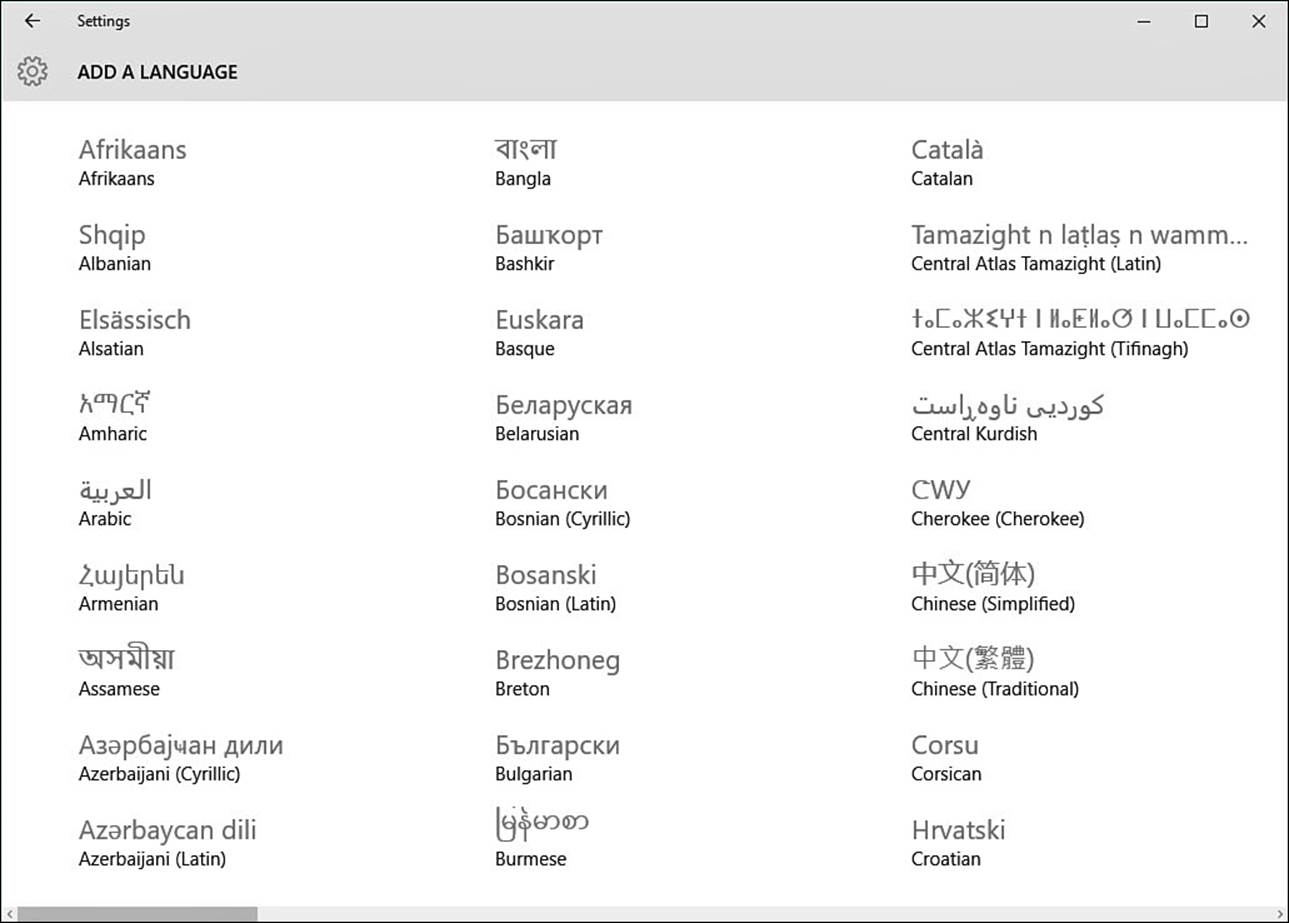
FIGURE 10.9 You can select from a long list of base languages, as well as select a dialect.
4. Scroll down the list and locate the base language you want to select. For example, if you want to select Mexican Spanish, for now, locate Spanish and select it.
5. A list of the regional variants of the language you chose should be on the screen. Select the dialect you want, and it will be added.
6. You should be back to the Time & Language pane, shown previously in Figure 10.8. If there is more than one language in the list, the first language in the list is the one used. Select the language you want to use to reveal additional buttons; then select Set as Primary. You also might see Options for a language. Select Options to review possible spell-checking and keyboard options.
If you need to adjust your locale’s time and date formats, follow these steps:
1. Open the Settings app by selecting it from the Start menu. You also can open it by swiping in from the right on a touch screen device, selecting the All Settings button in the Notification Center.
2. Select Time & Language from the list on the left side of the screen; then you will see your current Date & Time settings, as shown in Figure 10.10.
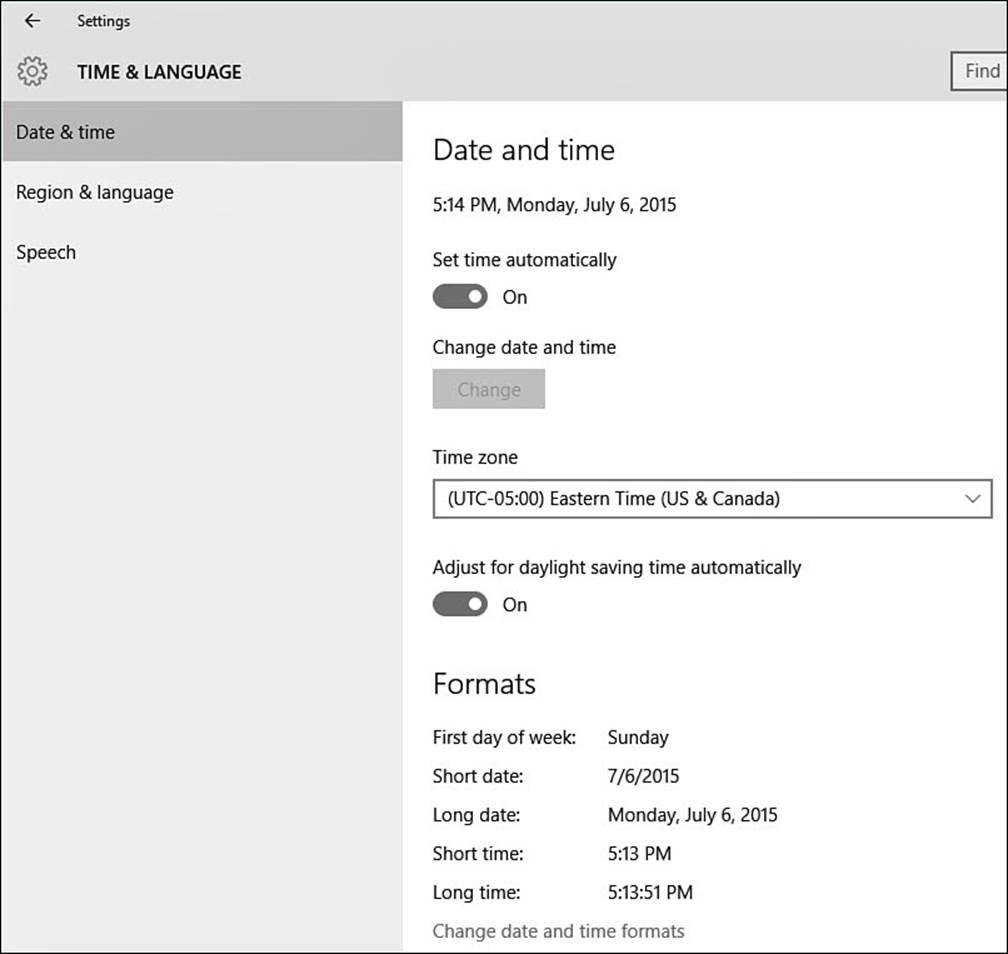
FIGURE 10.10 You can change time zone, set the time, and adjust for daylight saving time with a couple of quick selections.
3. Under Formats, you see examples that show you how the different date fields, such as long date, short date, and so on, will appear throughout Windows (based on the language you selected). If you want to change any of the fields, select Change Date and Time Formats. A new view opens that enables you to select from format choices any of the date and time fields listed using drop-down menus; just select the desired format from the list (see Figure 10.11).
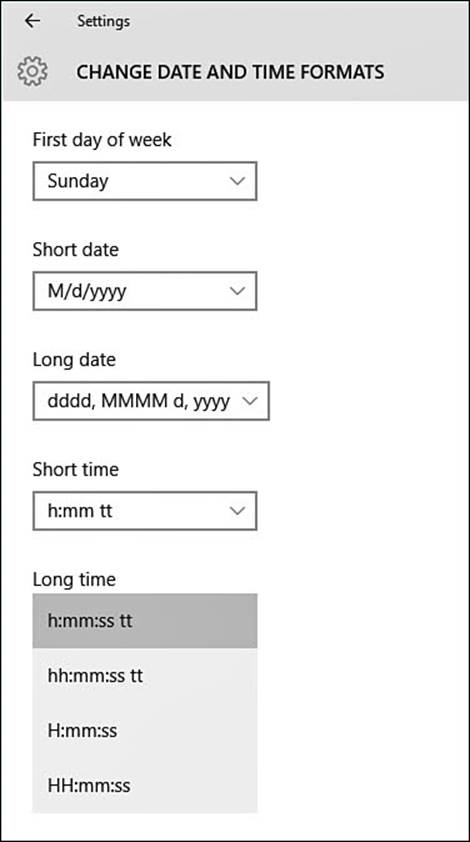
FIGURE 10.11 You can modify how dates and time appear in Windows by selecting from available formats.
4. Make your format changes, and then use the back arrow to return to Time & Language. The changes you made are now shown in the Formats summary below the Date & Time information.
The Absolute Minimum
• Use the Control Panel to access configuration settings that are not available in the PC settings app. Consider pinning the Control Panel to Start or even to your Desktop taskbar for easy access. (Chapter 3, “Optimizing the Start Menu,” considers pinning applications to the Start menu.)
• Use the Control Panel Mouse and Keyboard applets to find more options when configuring how these peripherals work with Windows.
• Use the Settings app to add languages or to change language and date settings.
All materials on the site are licensed Creative Commons Attribution-Sharealike 3.0 Unported CC BY-SA 3.0 & GNU Free Documentation License (GFDL)
If you are the copyright holder of any material contained on our site and intend to remove it, please contact our site administrator for approval.
© 2016-2026 All site design rights belong to S.Y.A.