Windows 10. Absolute Beginner’s Guide (2016)
Part I: Getting Started
7. Working with Windows Desktop Applications
In This Chapter
• Introductory Information About Windows Desktop Programs
• Running Windows Desktop Programs on the Desktop
• Arranging Open Windows on the Desktop
• Installing and Removing Windows Desktop Software
This chapter continues the teaching about how applications work in Windows first touched on in Chapter 1, “Meet Windows 10,” and then expanded on in Chapter 6, “Finding Your Way Around the Windows Desktop.” As you learned in Chapter 4, “Introducing Windows Apps,” modern Windows apps are distinct from Windows Desktop applications for a few reasons. Windows apps are acquired only through the Windows Store and are installed and can even be updated automatically in the background without the need to get your hands dirty picking directories and making decisions about install options.
This chapter will teach you how to work with and then manage Desktop applications. You’ll learn how to install and remove Desktop applications. If you are comfortable working with programs in Windows 7 or earlier versions of Windows, you might have less to learn in this chapter than others; however, it pays to review the steps in this chapter because Windows 10 has introduced a new way to manage Desktop applications.
Introducing Desktop Applications
For many Windows 10 users, the Desktop remains the core of their experience. Sure, there has been a host of new software applications built specifically for Windows 10, known as Windows apps, but applications specific to the Desktop—ranging from Microsoft Office to financial software such as Quicken, to iTunes, to a host of games—all install and run on Windows just as they always have. Windows 10 does not go out of its way to distinguish between the two application types, which contributes to a uniform experience overall, as shown in Figure 7.1.
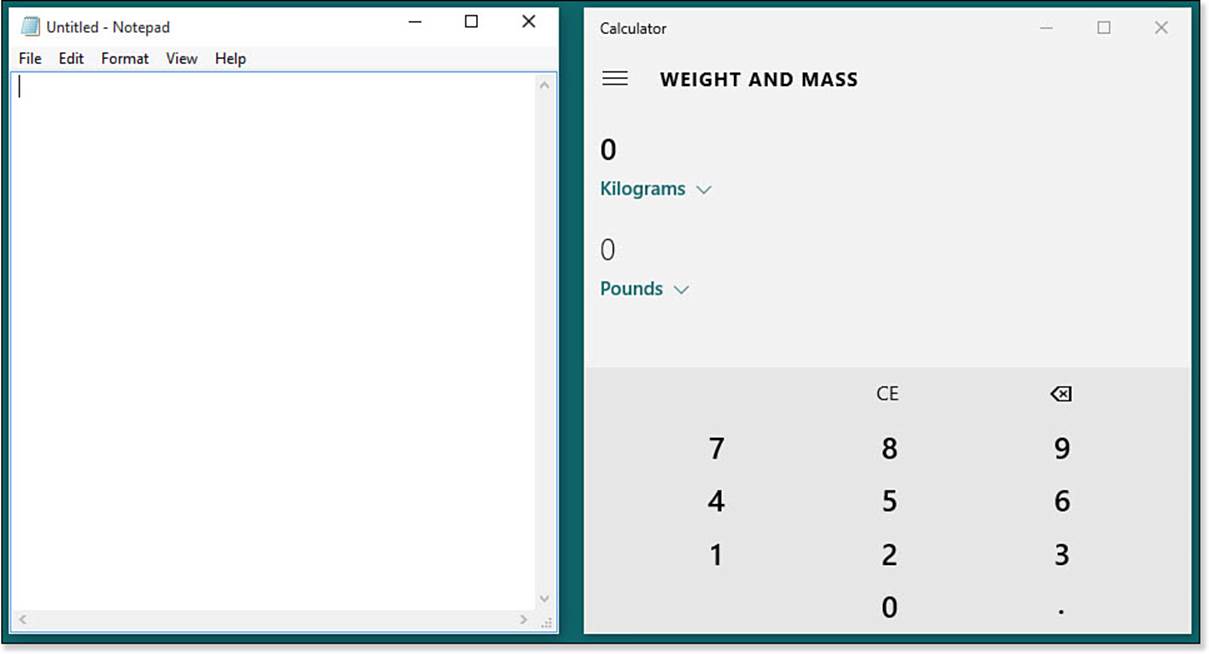
FIGURE 7.1 Notepad is a Desktop application, while the Calculator is a modern Windows app.
You do not need to lose sleep trying to keep track of which applications are which. However, understanding the differences can help you recognize why the experience varies a bit between the two types.
 Note
Note
In this book, the term applications is often used as a general description of any software designed to run on Windows, which includes modern apps as well as Desktop applications. Desktop applications refers to Win32 applications (as well as other code frameworks that developers have used over the years) that can be installed from discs or downloaded from a website. They require a traditional installer and lack some of the features that modern Windows apps bring to the table.
Note
Microsoft announced to developers early in 2015 that Desktop applications will be allowed into the Windows Store. This will make it possible for developers to offer existing games, productivity, and line-of-business software side-by-side with Windows apps all in one place. Developers will be required to prepare their Desktop applications using App-V to list them in the Windows Store as a “desktop app.” Although this means the developer will need to do some work, it is a lot less work than re-creating existing applications with a different code language. It also means that these Desktop apps will behave as Windows apps in most respects that matter: fast installs, clean uninstalls, secure apps, updates through the Windows Store, and easier resource management by Windows.
Working with Desktop Applications
Desktop applications are not going away anytime soon. You might have licenses for expensive applications purchased in the past that are compatible with Windows 10, or you might have favorites that have yet to make their way into the Windows Store as modern Windows apps. Whatever the reason, this section helps you understand how Desktop applications run in Windows 10.
A Desktop application might appear similar to a Windows app, but there are a few noteworthy differences:
• Tasks such as printing and sharing to other apps will be limited to what has been anticipated by the developer of that application. For example, printing will be handled within the application, as shown in Figure 7.2.
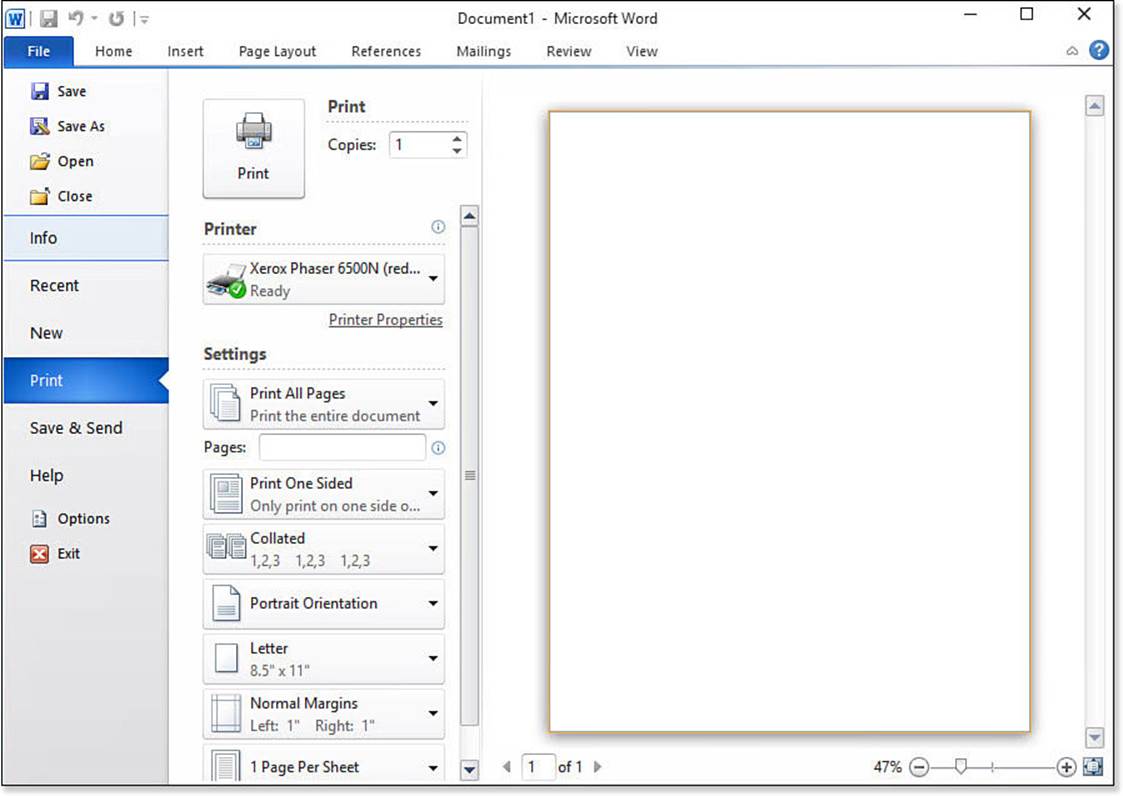
FIGURE 7.2 Desktop applications such as Word 2010 will not hand off tasks like printing to Windows the way a modern Windows app would.
• Menus and toolbars are not guided by Microsoft Design language, so they can appear anywhere, stay visible all the time, and have a hard time displaying on smaller screens.
• Desktop applications cannot automatically adjust the spacing for menus to provide a better touchscreen experience when using Tablet mode.
• Desktop applications can be installed for all users on a device, whereas a Windows app is installed only for the current user.
• Desktop applications will install multiple files—sometimes in multiple locations on a device—make changes to the registry, install drivers and toolbars, and make any other system changes to ensure they work as intended. Uninstalling a Desktop application seldom undoes and removes all of this, and this can negatively impact a device after many applications have been installed and uninstalled over time.
• Desktop applications often allow you to run multiple instances of the same application, whereas Windows apps will run only a single instance.
• A Desktop application can occasionally start to use more resources than it should, which will cause a computer to become less responsive or even seem to freeze up altogether. A reboot of the device can be necessary to recover. (Bonus Chapter 5, “Resolving Common Problems,” considers some troubleshooting steps.) On the other hand, a Windows app will simply crash without bringing the entire device to a halt.
This is not to say that everything about Desktop applications is bad; there are many well-written Desktop applications that run light, perform well, and never cause any issues. It is important to understand that by their nature the user experience relies on the developer and his ability to anticipate the wide range of devices and form factors that will run Windows 10. Windows can control an unruly Windows app, but an unruly Desktop application could disrupt Windows 10.
 Caution
Desktop applications should be downloaded and installed only from reputable sources because they can increase the exposure of Windows to viruses and exploitation. Generally a company will offer links on its intranet to trusted downloads that have been tested and are compatible with its systems. Reviews might be another tool to help you determine whether other users have had problems after downloading and installing an application.
Starting Desktop Applications
Desktop applications can be started just like a Windows app by selecting them. They appear in the Start menu in the alphabetical All Apps list. In some cases, you might find a folder containing several Desktop applications. Select the folder to reveal its contents, as shown in Figure 7.3; select it again to collapse the folder.
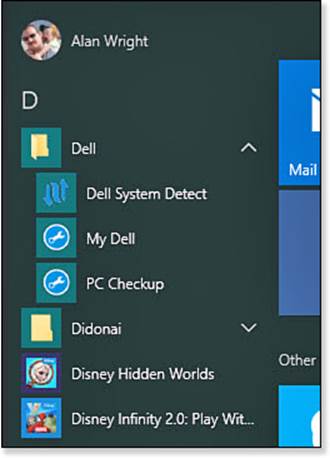
FIGURE 7.3 Desktop applications can appear within a folder in the Start menu.
Note
You might find that some Desktop applications that appear here are actually installers or trial versions that have been included on a device to encourage you to try an application or purchase a productivity suite or utility in order to use it.
By now you have noticed that after starting up an application, an icon representing the program appears on the taskbar. After starting a number of applications, the taskbar soon starts to fill up with an array of colorful icons. (If your device is working in Tablet mode, you might not see this happen because the taskbar is not set to show icons for open applications by default.) Hovering your cursor over an icon displays a small thumbnail or portrait of the open application.
It is not too unusual to have several instances of the same Desktop application running at the same time. For example, you can have one document open in Microsoft Word and then open another document, which will open a new instance of Microsoft Word. In this case, the taskbar will show only a single icon for the Desktop application; however, when you move the cursor over the application icon, a row of portraits—one for each document—appear above the main portrait (see Figure 7.4). To jump to a specific document, select the portrait with which you want to work.
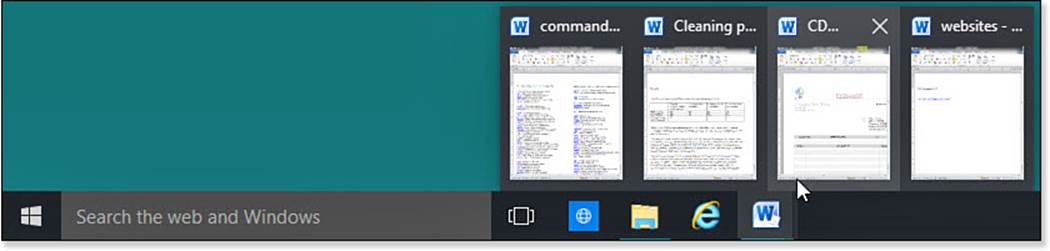
FIGURE 7.4 Use the Desktop taskbar to jump between several instances of a Desktop application running at the same time.
 Tip
Tip
A quick way to switch to a program or document without moving the cursor is to use a keyboard shortcut. Press and hold the Alt key, and then press the Tab key. A screen appears showing portraits of each program or app window open in Windows 10. While holding down the Alt key, tap the Tab key repeatedly to move the highlight to the next window on the screen. Release both keys when you have selected the window to which you want to switch.
Using Run as Administrator
Sometimes you might need to run a Desktop application with elevated privileges as an administrator for it to work correctly. This is because Windows might not allow certain actions to execute to protect your device. It is not recommended that you do this unless directed to do so by someone you trust.
To run a Desktop application with administrator privileges, follow these steps:
1. From the Start menu, locate a Desktop application. It can be a tile or could appear in the list of apps.
2. Right-click the application icon to view the context menu, as shown in Figure 7.5.
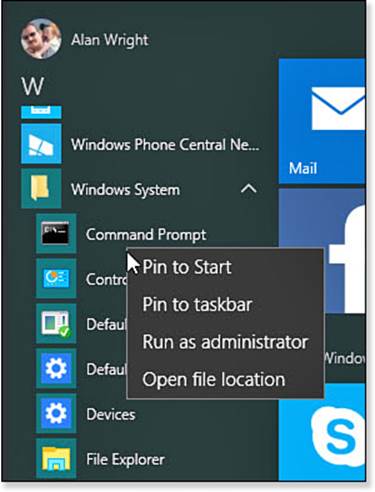
FIGURE 7.5 Desktop applications have slightly different context menus that include Run as Administrator.
3. Select Run as Administrator.
4. If you are not logged in with an administrator account, you will be prompted by User Account Control (UAC) to provide credentials from an account that is an administrator, as shown in Figure 7.6.
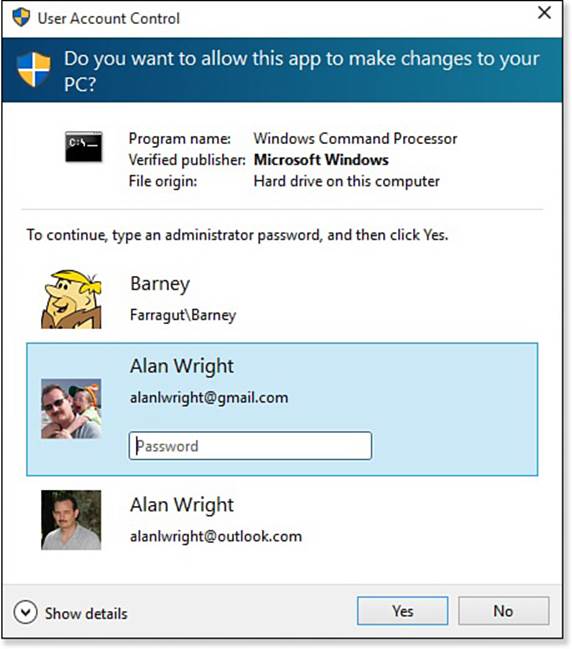
FIGURE 7.6 UAC will require administrator credentials when using Run as Administrator.
Pinning Desktop Applications to the Taskbar
You can save trips to the Start screen to start your favorite or most-used Desktop applications by pinning an icon of each of your favorite applications on the taskbar.
Chapter 6 includes steps for pinning an application to the taskbar. To start one of your pinned applications, select its icon on the taskbar.
Tip
A pinned application will also be able to show jump lists, which makes it a good way to jump straight into a recently used or pinned document.
Saving Shortcuts for Desktop Applications to the Desktop
The Desktop has long been a favorite place for saving documents and keeping shortcuts for applications. In Windows 10 you can still pin shortcuts for Desktop applications—this process also works for creating shortcuts to Windows apps.
Tip
Shortcuts for applications that have been saved to the Desktop are just that: shortcuts. If you delete the shortcut at a later time, this has no effect on the application.
Note
Items that are saved to the Desktop are not visible while your device is in Tablet mode.
To create a shortcut on the Desktop for a Desktop application, follow these steps:
1. From the Start menu, locate a Desktop application. It can be a tile or could appear in the list of apps.
2. Select the application and drag it to the desktop, as shown in Figure 7.7. The icon will change, and you will see the test Link indicating that it is prepared to create a link.
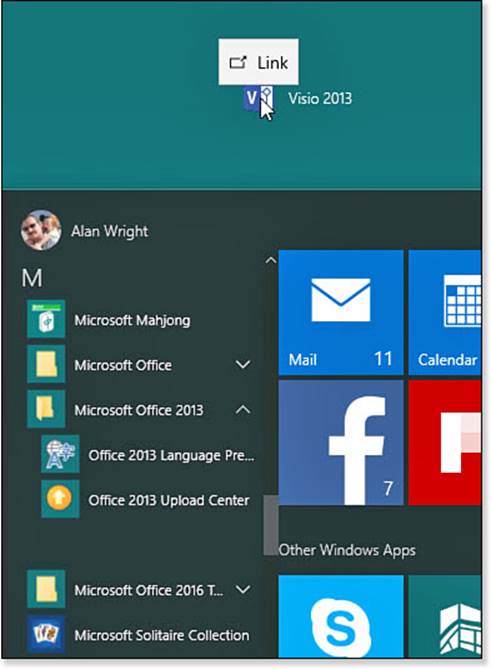
FIGURE 7.7 Drag applications from the Start menu to the Desktop to create shortcuts.
3. Position and release the application to create a shortcut on the Desktop in that spot.
The Desktop shortcut can be moved or renamed, and the original link will remain in the Start menu.
Exiting Desktop Programs
Windows does not require you to shut down a program when you finish working with it. But there are a few reasons you should consider routinely closing Desktop applications when you finish with them. If you have a number of applications running concurrently, your computer’s speed can be negatively impacted. If your computer seems to be running more slowly than normal, consider shutting down some applications—especially if you have several instances running.
To close a Desktop application, follow these steps. (Save any changes before closing an application.)
1. On the taskbar, locate the icon for the program you want to close.
2. Right-click the icon.
3. From the menu that appears, select Close Window (or Close All Windows if you have multiple windows open).
4. If you have unsaved work, you will be prompted to save your work, as shown in Figure 7.8.
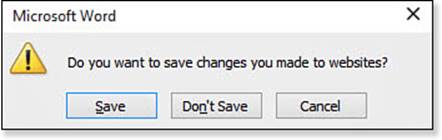
FIGURE 7.8 When closing a Desktop application, you will be prompted to act on any unsaved changes.
The application will close, and the application’s icon will disappear from the taskbar. Note that an application that you have pinned to the taskbar remains pinned even after you have closed all its document windows.
Working with Windows
You don’t necessarily need to be a Windows expert to work with multiple programs at once with several windows open on the Desktop. You might be working in an Office program, such as Microsoft Word or Excel; you might have Microsoft Edge open to check in at some of your favorite social media sites; and you might have a File Explorer window open to organize a folder. So, innocently, you can have three windows fighting for screen real estate. It’s easy, though, to arrange, move, and resize windows to leverage all the room on the Desktop. Figure 7.9 shows the basic controls at the top of a typical window with the important parts pointed out. When you select the icon from the title bar, you will reveal additional options from a system menu as shown.

FIGURE 7.9 These controls are common to virtually all Desktop app windows.
The following list summarizes the various methods available to manage windows on the Desktop:
• You can easily resize and reshape a window. You can’t change the window’s shape from rectangular to circular, but you can make the window short and wide, narrow and tall, perfectly square, or anything in between. To resize a window using a mouse, point to any border of the window you want to resize. When the pointer becomes a double-headed arrow, click-and-drag the pointer to move the border.
• You can enlarge a window so it fills up your entire screen space (known as maximize), obscuring every other window you have open. To do so, click the Maximize button on the window’s title bar.
• You can also remove a window from view without closing the program. Select the Minimize button (-) to hide the window.
• You can minimize all open windows simultaneously, exposing the Desktop. To do so, click the taskbar between the time and date and the edge of the screen. You can also right-click the taskbar and select Show the Desktop.
• To return a window to its most previous state, select the Restore button. You also can restore the window by choosing Restore from the Control menu on the upper-left corner of the window. The Restore command works only when the window is in a maximized state.
• You can move a window around your Desktop by dragging the window by its title bar.
• When you start multiple programs on the Desktop, or if you open several documents, it can become difficult to arrange and size the windows so that you can work efficiently. You can move and resize the windows manually, but Windows provides a few quick commands to arrange the windows on the Desktop. Right-click the taskbar to find these choices:
• Cascade Windows
• Show Windows Stacked
• Show Windows Side by Side
Installing and Removing Programs
Windows Desktop applications are not installed from the Windows Store, like Windows apps are. Desktop applications are often purchased and downloaded from reliable sources, and many people still like to purchase installation discs. Desktop applications that you choose to install come with their own installation utility. Desktop applications are removed the same way, although you kick off the uninstall process from a central location in Windows that was referred to earlier in Chapter 4.
Installing Programs
The installation process for new programs has lots of variations. Keep in mind that the setup process is designed by the company that developed the software you are installing, meaning anything can happen:
• For software installed from a CD or DVD, the installation program usually starts as soon as the disc is inserted into the drive. If a program does not start, you should navigate to the disc using File Explorer. Look for a program named install.exe, autoplay.exe, or setup.exe. Double-click the file to start the installation program.
• Setup programs are not perfect. You might need to uninstall a program if the setup stops unexpectedly so you can try to run the setup program again.
• Setup programs sometimes require that the person installing the software have administrator rights. To run the setup program as an administrator, locate the setup program (possible names are setup.exe and install.exe), right-click the program, and select Run as Administrator.
You will generally be prompted by User Account Control to confirm your intention to install an application. You might be prompted to accept license terms; provide an activation key, a serial number, or registration details; indicate an installation location; and indicate which components are installed. If you have trouble with the installation, you may need to do some investigating and contact the company that has created the software for support.
Caution
Watch for adware and toolbars that are often packaged with software. If you see the option to use a custom install, use this and carefully check what is being installed at each step before selecting Next. Many “free” applications gain revenue by including these extra nuisance applications and toolbars that at best are not likely to be used and can actually introduce malware at worst.
Removing Windows Programs
You might need to remove an installed program for a number of reasons, including the following:
• You are running out of free disk space.
• There seems to be a problem with the software, and you need to reinstall it.
• You no longer use or plan to use the software.
• The application is bloatware that was preloaded onto your system by the device manufacturer. You have no intention of using it, and it might actually slow down your system when starting up.
• You plan to install new software that is incompatible with an installed application.
There is no harm in leaving a program installed if you have enough free disk space and if the application does not interfere with another application. If you need to remove an application, however, follow these steps:
1. Save any unsaved work—some applications require a reboot to finish uninstalling.
2. From the Start menu, select Settings to open the Settings app.
3. Click System, and then select Apps & Features from the navigation menu of the Settings app. Windows will generate a list of all applications currently installed on the device. Scroll down to find the application you want to uninstall, and select it.
4. Select the Uninstall button. A warning will pop up letting you know that the app and its related info will be uninstalled, as shown in Figure 7.10. Select Uninstall to continue.
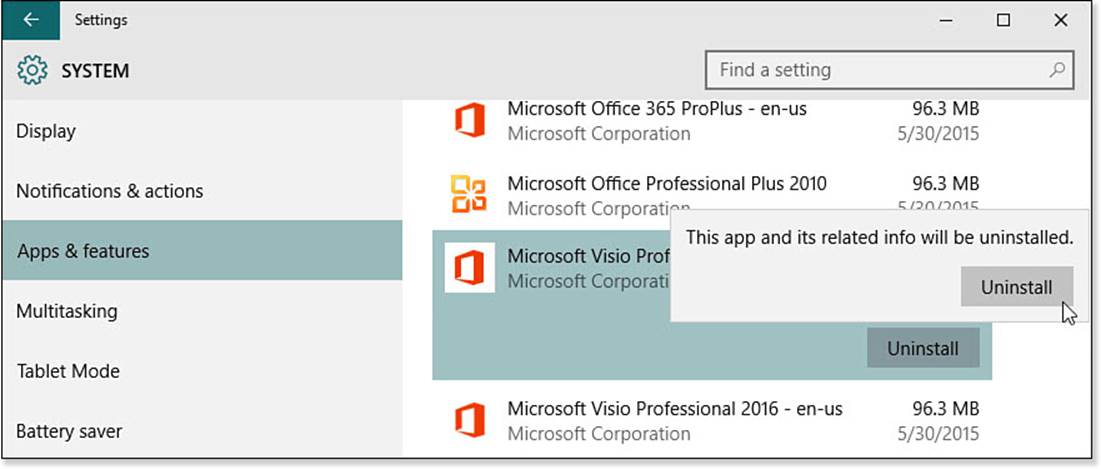
FIGURE 7.10 Uninstall a Windows Desktop application through the Settings app.
5. Windows will initiate the uninstall program that is associated with that Desktop application. Follow the steps indicated by the uninstaller. You might be prompted to restart Windows to complete the uninstall process.
Tip
Uninstall can also be selected when you right-click to view the context menu for a desktop application in the Start menu. Windows will guide you through the process for uninstalling the application.
Note
Some applications are part of Windows 10 and cannot be uninstalled. They will not appear in the list, and no uninstall option will be offered when looking at their context menu in the Start menu.
The Absolute Minimum
• Windows Desktop applications and Windows apps can run side-by-side and are often hard to distinguish from one another.
• Create desktop shortcuts by dragging applications from the Start menu to the Desktop.
• To switch to a different program, click the icon representing the program on the taskbar. Alternatively, press and hold the Alt key and then press the Tab key. A screen appears showing portraits of each program or app window open in Windows 10. While holding down the Alt key, tap the Tab key repeatedly to move the highlight to the next window on the screen. Release both keys when you have selected the window to which you want to switch.
• To arrange the open windows on the Desktop, right-click the taskbar to reveal a menu. Select Cascade Windows or one of the two Show Windows commands to arrange the open windows.
• Windows Desktop applications can be uninstalled in the Settings app or by using the context menu.
All materials on the site are licensed Creative Commons Attribution-Sharealike 3.0 Unported CC BY-SA 3.0 & GNU Free Documentation License (GFDL)
If you are the copyright holder of any material contained on our site and intend to remove it, please contact our site administrator for approval.
© 2016-2026 All site design rights belong to S.Y.A.