Creating E-Learning Games with Unity (2014)
Chapter 8. Adding Animations
Until this point, we have been successfully developing our game with the in-editor primitives provided by Unity3D. To add a professional layer of polish, we will learn how to add skinned models and various types of animations to our e-learning game. We will download skinned mesh models and animations from a popular site and learn how to integrate them into the game, as we develop a character motion system. We will also learn about the in-editor animation editor and how it can be used to animate static meshes (appropriate for in-game models such as buildings, cars, and statues that are not weighted to a 3D skeletal hierarchy).
In this chapter, we will discuss the following topics:
· Exploring 3D hierarchies
· Skinned meshes in Unity3D
· Exploring the Mechanim animation system
· Exploring the Unity Animation editor
Exploring 3D hierarchies
The ability to parent objects among one another is a versatile feature in Unity3D. So far, in this book, we have seen how hierarchies can be used as a means of associating objects with one another and organizing them into hierarchies. One example of this is the character Prefabs with their child hats we developed for the player Prefab and the racers. In this example, by dragging-and-dropping the hat object onto the player's body, we associated the hat with the object body by putting the child into the parent's coordinate system. After doing this, we saw that the rotations, translations, and scales of the body's transform component were propagated to the hat. In practice, this is how we attach objects to one another in 3D games, that is, by parenting them to different parents and thereby changing their coordinate systems or frames of reference.
Another example of using hierarchies as a data structure was for collections. Examples of this are the splineData collections we developed for the NPCs. These objects had a single game object at the head and a collection of data as child objects. We could then perform operations on the head, which lets us process all of the child objects in the collection (in our case, installing the way points).
A third use of hierarchies was for animation. Since rotations, translations, and scales that are applied to a parent transform are propagated to all of the children, we have a way of developing fine-tuned motion for a hierarchy of objects. It turns out that characters in games and animated objects alike use this hierarchy of transforms technique to implement their motion.
Skinned meshes in Unity3D
A skinned mesh is a set of polygons whose positions and rotations are computed based on the positions of the various transforms in a hierarchy. Instead of each GameObject in the hierarchy have its own mesh, a single set of polygons is shared across a number of transforms. This results in a single mesh that we call a skin because it envelops the transforms in a skin-like structure. It turns out that this type of mesh is great for in-game characters because it moves like skin.
Note
We will now use www.mixamo.com to download some free models and animations for our game.
Acquiring and importing models
Let's download a character model for the hero of our game.
1. Open your favorite Internet browser and go to www.mixamo.com.
2. Click on Characters and scroll through the list of skinned models. From the models that are listed free, choose the one that you want to use. At the time of writing this book, we chose Justin from the free models available, as shown in the following screenshot:
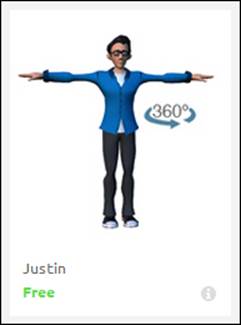
3. Click on Justin and you will be presented with a preview window of the character on the next page. Click on Download to prepare the model for download. Note, you may have to sign up for an account on the website to continue.
4. Once you have clicked on Download, the small downloads pop-up window at the bottom-right corner of the screen will contain your model. Open the tab and select the model. Make sure to set the download format to FBX for Unity (.fbx) and then click onDownload again. FBX (Filmbox)—originally created by a company of the same name and now owned by AutoDesk—is an industry standard format for models and animations. Congratulations! You have downloaded the model we will use for the main player character.
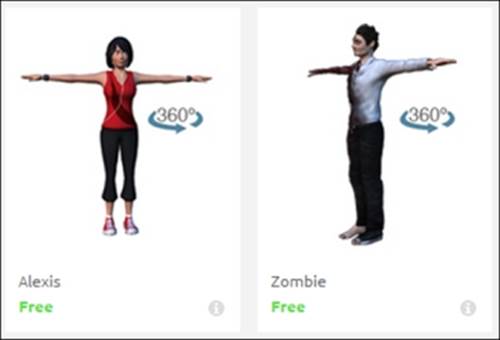
5. While this model will be downloaded and saved to the Downloads folder of your browser, go back to the character select page and choose two more models to use for other NPCs in the game. At the time of writing this book, we chose Alexis and Zombie from the selection of free models, as shown in the following screenshot:
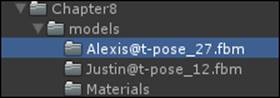
6. Go to Unity, create a folder in your Project tab named Chapter8, and inside this folder, create a folder named models. Right-click on this folder and select Open In Explorer. Once you have the folder opened, drag-and-drop the two character models from yourDownload folder into the models folder. This will trigger the process of importing a model into Unity, and you should then see your models in your Project view as shown in the following screenshot:
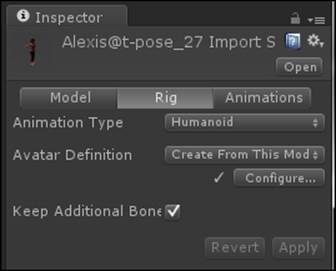
7. Click on each model in the models folder, and note that the Preview tab shows a t-pose of the model as well as some import options. In the Inspector pane, under the Rig tab, ensure that Animation Type is set to Humanoid instead of Generic. The various rig options tell Unity how to animate the skinned mesh on the model. While Generic would work, choosing Humanoid will give us more options when animating under Mechanim. Let Unity create the avatar definition file for you and you can simply click on Applyto change the Rig settings, as shown in the following screenshot:
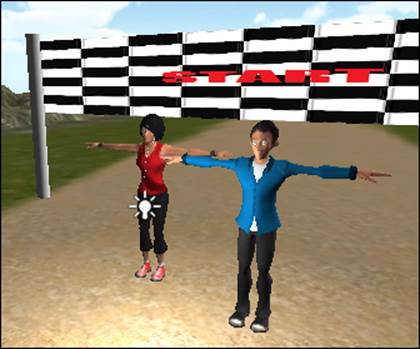
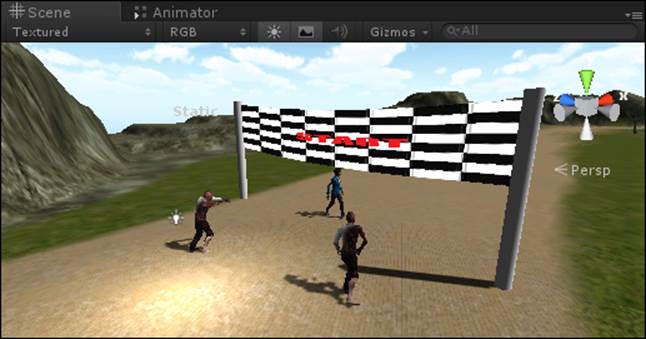
8. We can now drag-and-drop your characters to the game from the Project tab into the Scene view of the level, as shown in the following screenshot:
Congratulations! You have successfully downloaded, imported, and instantiated skinned mesh models. Now, let's learn how to animate them, and we will do this starting with the main player's character.
Exploring the Mechanim animation system
The Mechanim animation system allows the Unity3D user to integrate animations into complex state machines in an intuitive and visual way! It also has advanced features that allow the user to fine-tune the motion of their characters, right from the use of blend trees to mix, combine, and switch between animations as well as Inverse Kinematics (IK) to adjust the hands and feet of the character after animating. To develop an FSM for our main player, we need to consider the gameplay, moves, and features that the player represents in the game.
Choosing appropriate animations
In level one, our character needs to be able to walk around the world collecting flags and returning them to the flag monument. Let's go back to www.mixamo.com, click on Animations, and download the free Idle, Gangnam Style, and Zombie Running animations, as shown in the following screenshot:

Building a simple character animation FSM
Let's build an FSM that the main character will use. To start, let's develop the locomotion system.
1. Import the downloaded animations to a new folder named anims, in Chapter8. If you downloaded the animations attached to a skin, don't worry. We can remove it from the model, when it is imported, and apply it to the animation FSM that you will build.
2. Open the scene file from the first gameplay level TESTBED1.
3. Drag-and-drop the Justin model from the Projects tab into the Scene view and rename it Justin.
4. Click on Justin and add an Animator component. This is the component that drives a character with the Mechanim system. Once you have added this component, you will be able to animate the character with the Mechanim system.
5. Create a new animator controller and call it JustinController.
6. Drag-and-drop JustinController into the controller reference on the Animator component of the Justin instance. The animator controller is the file that will store the specific Mechanim FSM that the Animator component will use to drive the character. Think of it as a container for the FSM.
7. Click on the Justin@t-pose model from the Project tab, and drag-and-drop the avatar definition file from Model to the Avatar reference on the Animator component on the Justin instance.
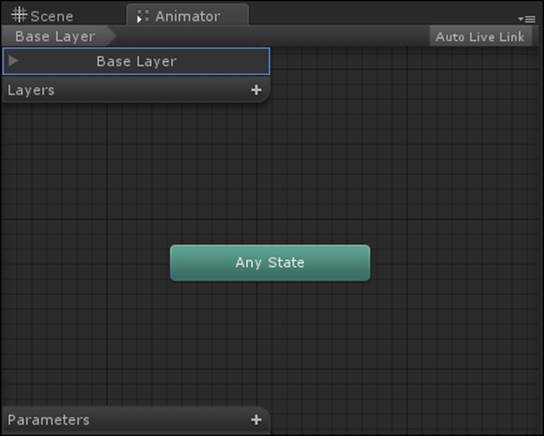
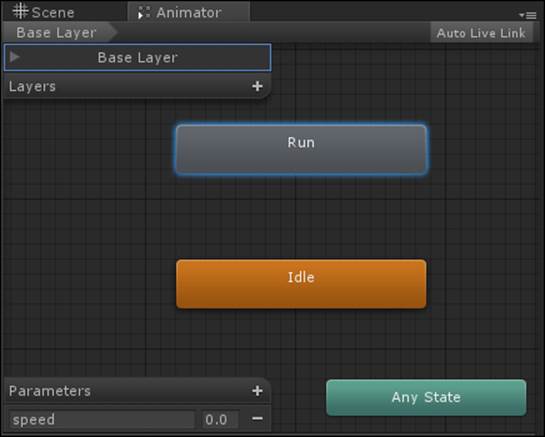
8. Go to the Window drop-down menu and select Animator. You will see a new tab open up beside the Scene view. With your Justin model selected, you should see an empty Animator panel inside the tab, as shown in the following screenshot:
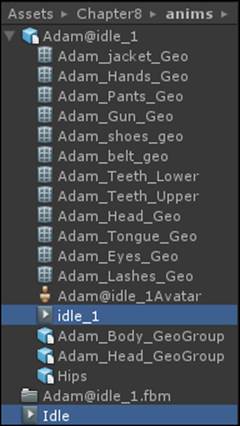
9. Right now our Justin model has no animations in his FSM. Let's add the idle animation (named Idle_1) from the Adam model we downloaded. You can drag-and-drop it from the Project view to any location inside this panel.
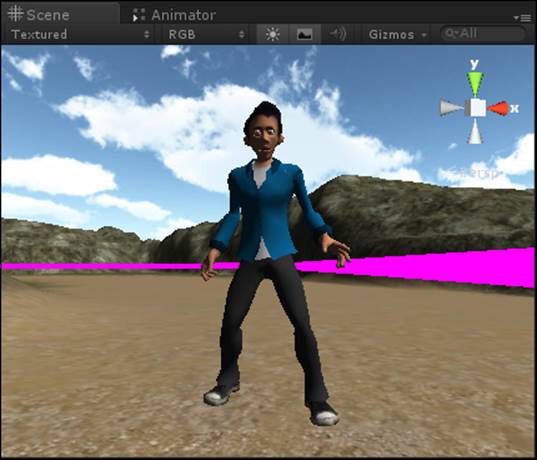
That's all there is to it! Now, we have a single anim FSM attached to our character. When you play the game now, it should show Justin playing the Idle animation. You may notice that the loop doesn't repeat or cycle repeatedly. To fix this, you need to duplicate the animation and then select the Loop Pose checkbox.
10. Highlight the animation child object idle_1 and press the Ctrl + D shortcut to duplicate it. The duplicate will appear outside of the hierarchy. You can then rename it to a name of your choice. Let's choose Idle as shown in the following screenshot:
11. Now, click on Idle, and in the Inspector window, make sure that Loop Pose is selected.
Congratulations! Using this Idle animation now results in a character who idles in a loop. Let's take a look at adding the walk animation.
12. Click on the Zombie Running animation, which is a child asset of the Zombie model, and duplicate it such that a new copy appears in the Project window. Rename this copy Run.
13. Click on this animation and make sure to check the Loop Pose checkbox so that the animation runs in cycles.
14. Drag-and-drop the Run animation into the Animator tab. You should now have two animations in your FSM, with the default animation still as Idle; if you run the game, Justin should still just be idle. To make him switch animations, we need to do the following:
1. Add some transitions to the Run animation from the Idle animation and vice versa.
2. Trigger the transitions from a script.
15. You will want to switch from the Idle to the Run animation when the player's speed (as determined from the script) is greater than a small number (let's say 0.1 f). Since the variable for speed only lives in the script, we will need a way for the script to communicate with the animation, and we will do this with parameters.
16. In your Animator tab, note that the FSM we are developing lives in the Base Layer screen. While it is possible to add multiple animation layers by clicking on the + sign under Base Layer, this would allow the programmer to design multiple concurrent animation FSMs that could be used to develop varying degrees/levels of complex animation.
17. Add a new parameter by clicking on the + sign beside the Parameters panel. Select float from the list of datatypes. You should now see a new parameter. Name this speed as shown in the following screenshot:
18. Right-click on the Idle Animation and select Make Transition. You will now see that a white arrow is visible, which extends from Idle, that tracks the position of your mouse pointer. If you now click on the Run animation, the transition from Idle to Run will lock into place.
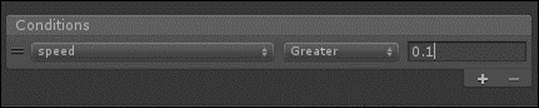
19. Left-click on the little white triangle of the transition and observe the inspector for the transition itself. Scroll down in the Inspector window to the very bottom and set the condition for the transition to speed greater than 0.1, as shown in the following screenshot:
20. Make the transition from the Run animation cycle back to the Idle cycle by following the same procedure. Right-click on the Run animation to start the transition. Then, left-click on Idle. After this, left-click on the transition once it is locked into place. Then, when the transition is activated in Conditions, set its speed to less than 0.09.
Congratulations! Our character will now transition from Idle to Run when the speed crosses the 0.1 threshold. The transition is a nice blend from the first animation to the second over a brief period of time, and this is indicated in the transition graph.
Exploring in-place versus root motion animation
There are two ways of moving a character in a 3D world: using the in-place animation and the root animation. Each technique has some benefits and drawbacks depending on the effect you want to achieve. In a complicated character system, you may use both of these in different places.
· With the in-place animation, the character hierarchy is animated by the animation, whereas the root note of the character is not. To move your character about an axis, you need to move the root node in your script. Rotations to the root node of the character model will result in rotations to the character (and all the child objects of the character's hierarchy in the skeleton).
· With the root motion animation, both the character's hierarchy and the root node are animated by the animation. This means that you (as a programmer) need not translate nor rotate the root node about an axis because your animator will be responsible for doing that. Hence, this is a popular choice for some games but not all.
· Since our Run animation does not have root motion in it, we will move our character around in the script.
Adding the character script
Let's build the second half of our character system—the script that communicates the speed value to the FSM. We need to do this so that our characters can respond to the user's input.
1. Open the PlayerControl.cs script we wrote earlier for character motion.
2. We will use the movespeed variable as an approximation of the speed for the speed parameter. Around line 65, after this is calculated, we will pass the calculated speed to the animator component in the speed parameter. Don't forget to drag-and-drop the animatorcomponent on the character to the animator variable of the script as shown in the following code:
3. if (_animator)
_animator.SetFloat("speed",movespeed);
Create a new, empty GameObject named rotNode. Assign it as a child to Player1 and give it a local position of (0, -1, 0) and a local rotation of (0, 180, 0).
4. Attach the Justin model instance to the player class that we have already developed so far. Set its relative position to (0, -2, 0). Also, disable the mesh renderer component of Player1 and its hat; we won't be needing these anymore since we will be using theJustin model.
5. Create a public animator reference inside PlayerControls.cs. Drag-and-drop the Justin instance to this variable so that it finds the animator component that has been attached there.
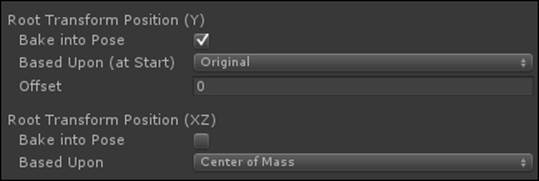
6. Make sure that the Idle animation has the XZ and Y rotation baked into the animation. This way, when the character is idle, its feet will not slide when the root motion is disabled.
7. Switch to Main Camera and set the desired distance from 4 to 10.
Congratulations! Our main character model now walks about or stays idle according to the user input. Feel free to experiment with scaling the size of the Justin model and the speed of the player's motion in PlayerControls.cs to fine tune the speed and to reduce feet sliding.
Building a zombie racer animation FSM
Let's build an FSM that the racers in mission 2 will use. To start, let's develop the locomotion system.
1. Load the TESTBED2 scene.
2. We will turn the racers into zombies for this level (this will motivate the player to run fast!). Drag-and-drop the Zombie model into the scene and scale it up to 3. Drag-and-drop the Zombie model on top of the RacerA GameObject. Do the same for another instance of Zombie but parent it to RacerB.
3. Create a new AnimationController object to drive the zombie's Mechanim FSM. Name the controller ZombieControllerA. Drag-and-drop the controller into the reference slot on the animator controller to associate it with Mechanim.
4. Click on RacerA, then click on the Animator tab to view the Mechanim preview panel.
5. Go back to www.mixamo.com to download and import the following two zombie movement animations. We will use different animations because each racer has a unique speed:
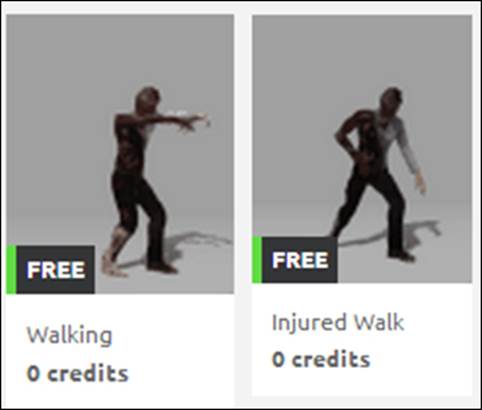
6. Create a single animation FSM by dragging-and-dropping the zombie walk animation into the main window.
7. Create a second AnimatorController object named ZombineController2.
8. Drag-and-drop the injured_walk zombie animation into this window and save the scene.
9. Make sure these two animator controllers are correctly bound to the animator controllers of the two racers.
Congratulations! Now, when the race starts, the player will be chased by zombies! Think about how you might extend the racer NPC class such that if a zombie ever caught the player, it would switch to a grabbing animation to slow down the player's progress.
Building a quiz racer animation FSM
Let's build an FSM that the QuizNpc Prefabs in mission 2 will use. Again, let's develop the locomotion system to start.
1. Drag-and-drop an instance of the QuizNpc Prefab from the project library window into the scene.
2. Drag-and-drop an instance of the Alexis model (already downloaded) and place it beside QuizNpc. Disable the mesh renderer on QuizNpc so that it no longer renders, and parent the Alexis model to the QuizNpc GameObject.
3. Set Alexis' local position to (0, -1, 0).
4. Create a new AnimatorController named QuizNpcController. Drag-and-drop this controller from the Project pane directly into the AnimatorController field on the QuizNpc instance.
5. Select QuizNpc and then open the Animator panel to preview the empty FSM.
6. Drag-and-drop the Idle animation from the anims folder into the the panel.
7. The idle animation will play by default. When the player approaches QuizNpc, a pop up will be displayed. If an incorrect answer is chosen, this will have no bearing on the NPC's animation (although ideally, if we had access to more free animations, we would look for the one that conveyed disappointment).
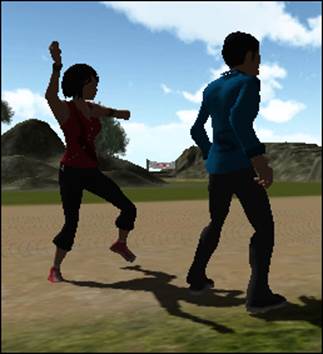
If a correct animation is chosen, QuizNpc will dance! To begin, drag-and-drop the Gangnam dance animation from the anims folder into the Animator window.
8. Create a transition from the Idle state to the Gangnam dance state by right-clicking on Idle, selecting Make Transition, and then left-clicking on Gangnam to complete the transition.
9. Click on the small + sign beside Parameters and create a new parameter named success of the type Boolean. We will use this to trigger the success animation from the script.
10. Left-click on the small white triangle of the transition and change the transition conditions to Success and True.
11. Drag-and-drop the QuizNpc GameObject back to the top of the QuizNpc Prefab in the Project tab. This will overwrite the pre-existing one with our new updates.
Note
Make sure not to drag-and-drop the QuizNpc GameObject to the top of a different Prefab or else you will lose your other work!
12. We are going to need a new PopupButton action. Add another entry to the popupAction enumeration in PopupButtonScript.cs:
MakeNpcDance = 13
13. Add the following implementation of this action in the dispatch method of PopupButtonScript. If this action is dispatched, then find the NPC that has an ID that matches the ID of this correct pop-up card (passed through the side data of the pop-up response r), and set the doSuccess parameter on that NPC to true.
14. We do this by searching for all QuizNpcHelpers and then comparing the ID with the one requested from this pop up.
15. Then, when that NPC ticks through the Update() loop on its QuizNpcHelper script, the true param will be passed into the animator as shown in the following code:
16.case(popupAction.MakeNpcDance):
17.{
18.Object[] QuizNpcHelperObjects = Object.FindObjectsOfType(typeof(QuizNpcHelper));
19.foreach (Object item in QuizNpcHelperObjects)
20.{
21. if ((item as QuizNpcHelper).GetQuizNpcId() == r.data. id)
22. {
23. (item as QuizNpcHelper).doSuccess = true;
24. }
}
25. Inside QuizNpcHelper, declare the Animator component public. Then drag-and-drop the Alexis child object on top of this method to set up the reference association, as shown in the following line of code:
_animator = this.gameObject.GetComponent<Animator>();
26. Inside the Update() loop of the QuizNpcHelper script, pass the doSuccess parameter into the Mechanim FSM (if there is an animator component):
27.if (_animator)
28.{
29. _animator.SetBool("success",doSuccess);
}
30. Now, go through the questions 1 to 5 of popup_QuizNpcQuestion from the Chapter7 folder and add a new action of the MakeNpcDance type. Make sure to add the IDs 1 through 5 to the ID field of the data parameter for each of these new actions.
31. In SetupMission2 present in the Start() method towards the end, add a line of code to pass the ID of the question, which this NPC will give the player, into the QuizNpcHelper. This way, when it's time to tell the NPC to change its animation, the pop-up card can find its NPC by searching for the one with the correct ID:
QuizNpcInstance.GetComponent<QuizNpcHelper>().SetQuizNpcId(k);
32. Inside InteractiveObject, we add a simple billboarding behavior to the script so that QuizNpc can always face the player. If the billboard checkbox is enabled, we use the Transform.lookat() built-in method to make sure the NPC's transform always faces the player. We also fix up the local angles to makes sure the NPC doesn't look up or down if the NPC itself is really close to the player:
33.if (billboard == true)
34.{
35. GameObject player = GameObject.Find("Player1");
36. if (player != null)
37. {
38. this.transform.lookat(player.transform.position);
39. this.transform.localEulerAngles = new Vector3(0.0f, this.transform.localEulerAngles.y, 0.0f);
40. }
}
Congratulations! QuizNpc now animates nicely and celebrates when the player responds correctly.
Exploring the Unity animation editor
While Mechanim is the preferred tool for character animations, it is not well suited to all of our animation needs. Unity provides a general-purpose animation tool that lets us script the position, orientation, and even the state of public variables on other scripts. This tool is well suited for simple animated objects and other in-game choreography. It uses a simpler non-visual animation system to play the animation but it still has many uses. Let's use this tool to add some animation to the starting banner.
1. Left-click on pole2 of the GiantFlagStart Prefab instance.
2. Go to the Window menu and select Animation.
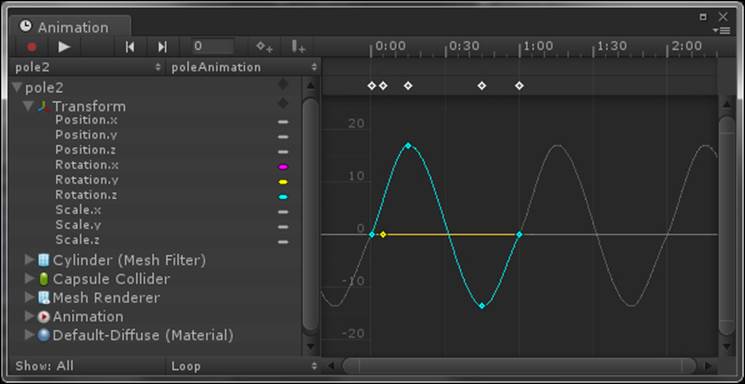
3. You will be presented with a timeline editor window, which will look similar to the following screenshot:
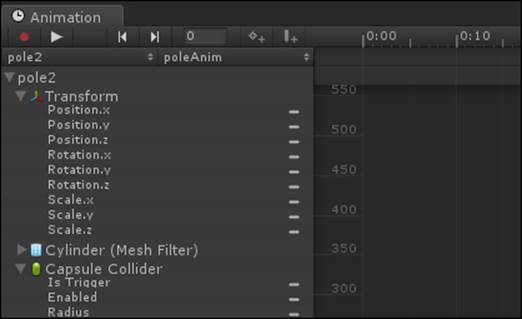
4. The animation editor window presents the user with a tool to author and preview custom animations inside of the Unity tool itself (rather than inside of a 3D modeling package). These animations can be applied to any GameObject that has public properties. All of the components, with the public variables on the GameObject that you have selected, will appear at the left-hand side of the screen. We can now apply the curve data to them over the timeline to build custom animations.
5. Click on the red record button in the upper-left corner of the animation editor to begin creating a custom animation.
6. The system will warn you that it needs to add the animation component (not animator) and that this will break your Prefab reference. Go ahead and allow the editor to add the component. We will update the Prefab once we are done.
7. The animation editor uses curves to modify data over time. Click on the x component of the transform and select Add Curve.
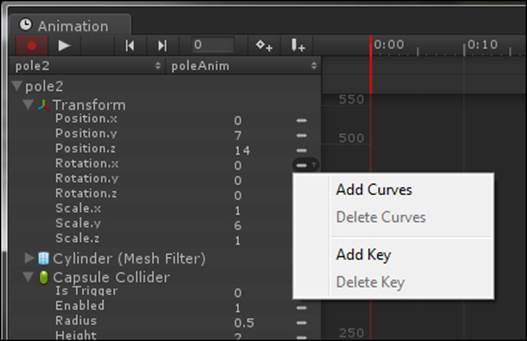
8. Now, by adding control points to these curves, we can animate the parameters of the object. Let's create a simple symmetric oscillation for the pole so that it shakes the banner in an interesting way.
9. Once you are happy with your animation, toggle the record button to stop the recording. You will notice a new animation in your assets folder with the name you provided when you first clicked on record.
10. Drag-and-drop this animation into the first Animation field of the animation component on the pole object. Note that while this component supports playing and blending between multiple animations, it must be driven through scripting.
11. Make sure the Play Automatically checkbox is enabled to see your animation, without having to tie it to any script.
Congratulations! You have now successfully created a custom animation with the in-editor animation tool. To take this to the next level, feel free to explore the different playback modes on the animation assets themselves as well as ways of firing off methods from an animation curve with events. Remember, even slight changes to the properties of GameObjects in the scene will be recorded as animations
Summary
In this chapter, we learned a lot about animation in Unity. We integrated skinned models and animations from a third party. Using Mechanim, we created visually designed animation FSMs as well as the scripting-side integration. We upgraded our player, racer, and NPC game objects such that they now use these animated characters rather than the placeholder Prefabs.
We also learned a bit about the legacy animation system and the in-editor animation editor. We gained experience with this by creating a custom hand-tuned animation for a banner's flag pole and applied it to the game object so that it would play automatically. The game is looking much more polished now; a little visual appeal goes a long way!
In the next chapter, we will develop the final mission of the game, where we present the user with novel situations where they must use higher-order reasoning around the subject matter. This approach of thinking about the material from a bottom-up and top-down approach promotes consolidation of the material and is an effective way to drive learning in the user.
All materials on the site are licensed Creative Commons Attribution-Sharealike 3.0 Unported CC BY-SA 3.0 & GNU Free Documentation License (GFDL)
If you are the copyright holder of any material contained on our site and intend to remove it, please contact our site administrator for approval.
© 2016-2026 All site design rights belong to S.Y.A.