Salesforce.com For Dummies, 5th Edition (2014)
Part III. Driving Sales with Sales Cloud
Chapter 12. Managing Your Partners
In This Chapter
![]() Understanding the partner life cycle
Understanding the partner life cycle
![]() Managing partners
Managing partners
![]() Using the Partner Community
Using the Partner Community
![]() Configuring the Partner Community
Configuring the Partner Community
Because Salesforce can get sales reps and managers on board to track all their opportunities and sales-related activities, the big pipeline picture should be getting clearer for everyone. Partners, which might also be known in your business as third-party companies, value-added resellers (VARs), original equipment manufacturers (OEMs), wholesalers, or distributors, can also be accurately managed in Salesforce almost as if they were full-time dedicated company sales reps. It used to be difficult to create and maintain unique messages and branding for specific groups of partners. Not any longer.
Salesforce Partner Communities extend the existing Salesforce product to partners and the leads and deals they bring in. Additionally, support managers and support reps within a company can more easily resolve issues for your partners.
A detailed discussion of Salesforce Partner Communities could take up a whole book on its own, so in this chapter, we provide a high-level overview of what life is like for partners and channel reps. We then discuss how a channel team manages its partners with Salesforce. For partners asked by their vendors to use this application, we discuss how to access and navigate Salesforce from the Partner Community. Finally, we give channel managers and administrators some pointers on how to set up a Partner Community and begin giving partners access.
Understanding the Partner Life Cycle
Using an indirect sales force of partners to help sell your products allows you to quickly and cost-effectively expand your company’s reach into markets that you might otherwise not have the resources to tackle. Some industries that are more partner-intensive include high-tech, insurance, and manufacturing. In this section, we set the stage for two types of business users and describe how Partner Communities can help.
Here are some helpful Partner terms:
· Vendor: The company that’s using Salesforce and for whom the channel managers work.
· Channel managers: The employees within your company that manage a set of partners.
· Channel conflict: What happens when your direct sales force and your indirect sales force find the same prospect to woo and start bickering about who’s entitled to that lead — a clear sign that your current system is ineffective.
· Deal registration: Minimizes channel conflict. These programs get your indirect sales channel registering deals with you (the vendor) to reduce the chances of other partners or the direct sales force competing for a deal.
· Partner Communities: Customizable web portals hosted by salesforce.com that allow partner users to access Salesforce. Your company can set up multiple communities for multiple partners, if you need to use different branding.
· Partner accounts: Account records that are used by channel managers to manage partner organizations, partner users, and partner activities.
· Partner users: Salesforce users with limited capabilities and visibility into your instance of Salesforce. They’re associated with a specific partner account and access Salesforce via a Partner Community.
Understanding a day in the life of a channel manager
Channel managers and their direct reports, channel reps, manage relationships with various types of partners and partners-in-waiting. The channel team does whatever it can to empower its indirect sales force with the right selling tools, sticks and carrots, to make sure that the relationship is win-win.
With Partner Communities, channel managers now have access to Salesforce dashboards, leads, opportunities, accounts, and content records. Dashboards provide a graphical snapshot of the channel’s performance so that you can see how much revenue the channel is bringing in. Leads are potential business that either come from a partner or that come to your company and are automatically or manually reassigned to the best partner for the job. Opportunities are the deals sourced or nurtured by your partners. Accounts can be resellers, distributors, agents — any type of partners that your business tracks. Channel managers can also use content to publish copies of sales tools, price lists, or product information for partners.
In addition to these standard tabs, you can also track partner budgets and fund claims if you run joint marketing programs, create and promote rebate programs with your partners, and more. Your administrator needs to set this up, so make sure that she reads the section “Setting Up Salesforce Communities for Your Channel Team,” later in this chapter.
Measuring partner performance
A major communication services company drove its channel sales strategy by partnering with leading wireless equipment manufacturers. Sometimes, the company was introduced to the end customer; other times, the company was involved in opportunities completely managed by the manufacturer. But in all circumstances, the company’s channel managers leveraged Partner Communities to track the partner sales performance, to improve mindshare with strategic partners, and to deepen its relationships with end customers.
Understanding a day in the life of a partner
A partner’s perspective is the flip side of the relationship managed by the channel manager. For example, one type of partner could be reselling your company’s products. That partner works in a territory that’s managed by a channel manager.
With Salesforce Communities, partner users can now access a limited view of your Salesforce information via a Partner Community. The Partner Community provides a centralized view of leads to pursue, opportunities in your pipeline, vendor documents to help with the sales cycle, and optional tabs to help with additional responsibilities, such as making fund requests. Partners get to see leads specifically assigned to them or grabbed from a general “shark tank” in which first come is first served. Additionally, partners can receive other key targeted messages on the website, update their company’s information for the vendor to see, and e-mail their channel rep, as needed. Figure 12-1 shows a sample Partner Community that you might set up for your partners.
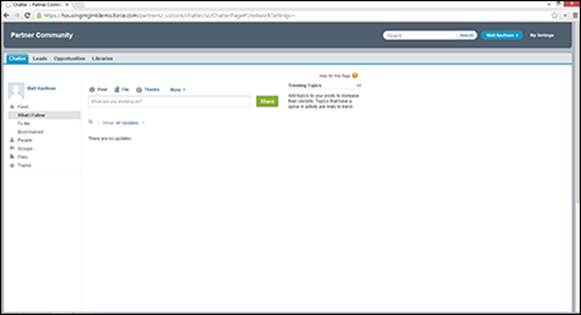
Figure 12-1: Accessing the Partner Community.
Managing Your Channel with Salesforce Communities
After your administrator has set up your organization with Salesforce Communities, the channel team can easily access it from the AppExchange app menu in the upper-right corner of your Salesforce window. This section provides a high-level overview of how the channel team can now use Salesforce Communities to gain better visibility into their partner relationships. We also recommend that you scan Chapters 4 and 9, which talk in more detail about navigating accounts and leads.
Enabling partner relationship management
To allow partners to take part in the benefits of communities while still providing certain privileges specific to partners (such as working leads assigned to them), you have to first turn it on. To enable partner relationship management, follow these steps:
1. Choose Setup⇒Build⇒Partners⇒Settings.
A page appears to enable partner relationship management (PRM). Note that this action is not reversible! We suggest you try out this feature in a Developer Edition instance first.
2. Click the Edit button and select the only check box on this page to enable PRM.
Again, you’re reminded that this action is not reversible.
3. Click the Save button.
The Introducing the Convert External User Access Wizard page appears. This wizard helps you adjust sharing settings that might allow certain records or folders to be otherwise shared with external users.
4. Click the Continue button.
The three-step wizard begins.
5. In Steps 1 to 3 of the wizard, see whether any existing sharing rules need to be updated.
Consider whether any records may contain information that you don’t want shared with partners.
6. Click Done when you’re finished, or click Cancel if you don’t have any rules to modify.
Creating partner accounts and contacts
First, you should make sure that all your partners are represented as accounts in Salesforce, with the respective channel managers owning the partner account records. This then allows channel managers to monitor and record all activities related to partners in their territory.
To create a new partner account, follow these steps:
1. Use the Create New drop-down list on the sidebar and select the Account option.
See Chapter 4 for more information on managing accounts.
2. Create the account record.
3. Click the Manage External Account button and select the Enable as Partner option from the resulting drop-down list.
4. Associate partner users to this partner account record by adding contacts.
See Chapter 5 for details on creating new contacts.
5. Create a new contact, click the Manage External User button on the contact record, and select Enable Partner User for your partner user to receive his or her login and password notification via e-mail.
A New User page appears, allowing you to confirm user details before saving the record and generating a password for the user.
Assigning leads to partners
By assigning leads to partners, channel managers ensure an organized way of seeing what potential business their partners are working on.
Leads may be assigned to partners by manually switching the record ownership, by assigning partner leads to a queue (also known lovingly as the “shark tank”), or by adopting a “round robin” method, in which leads are routed evenly to a number of queues. Partners then have access to the queue to grab leads. (You can keep them from getting too greedy by setting a ceiling on how many leads they can accept to work on at one time.) Additionally, lead assignment rules may be set up by your administrator to automatically assign leads to partner users or partner queues based on certain rules.
To reassign a lead to a partner user, follow these steps:
1. On the lead record, next to the Lead Owner field, click the Change link.
The link is in square brackets. The Change Lead Owner page appears.
2. From the Owner drop-down list, choose the Partner User option.
3. Select the partner user to whom you are assigning the lead.
This assumes the partner’s profile has been added as a member into the community you want him to join. The community has been published and can be viewable by others. And, the partner user is already activated and logged in at least once to the system. If the user is not active, his name will not show up when filtering for partner users.
4. (Optional) Select the Send Notification Email check box to notify the partner about the lead.
5. Click Save.
The lead record reappears with your ownership change. The new partner owner instantly receives a customizable e-mail if you selected the Send Notification check box, and the lead appears in his Lead Inbox the next time that he accesses the Partner Community.
You may also reassign leads in bulk. See Chapter 9 for more information.
Reducing channel conflict with deal registration
Without a well-thought-out Partner Relationship Management (PRM) process, companies often run into channel conflict when their direct sales and indirect sales forces butt heads over who found which lead first. As the channel manager, you often have to waste time arguing with a direct sales rep and her manager over who has dibs, while the prospect waits for the internal bickering to stop. This isn’t an efficient way to close a deal, and it’s frustrating for the customer to often hear multiple messages (or even price quotes!) from what’s supposed to be a united front. In addition, if the partner loses out on that opportunity, you’ve just lost some of her trust in how supportive you really are in her efforts — so why should she reveal her pipeline data early or adopt your processes?
By taking the time to design a deal registration process, concisely and consistently communicate the status of deal registrations to partners, efficiently carry out the approval for all submissions, and then be able to measure related conversion and close ratios, you can eliminate channel conflict. The deal registration capabilities of Salesforce Communities help provide clarity on what your deal registration processes are from start to finish, which can increase adoption of your partner program and help increase partner sales because the channel conflict inefficiencies disappear. However, this setup can be successful only if you invest the time to think out your deal registration process. If you have a hard time explaining it or whiteboarding it, how do you think your partners feel?
 Salesforce to Salesforce
Salesforce to Salesforce is an amazing alternative feature to Salesforce Communities that allows partners with their own instance of Salesforce to seamlessly share lead and opportunity records with vendors in real time. Traditionally, this sharing occurred through a hairy, expensive, and drawn-out integration process. If a lot of your partners also use Salesforce, think about what partner processes you want to track.
· If you have very specific custom processes that are more focused on a high volume of lead and opportunity management, you may lean toward using Salesforce to Salesforce.
· At the same time, if you send a lot of customized partner communications, including collateral and content distribution, and you deal with both a Salesforce-owning and non-Salesforce-owning indirect sales force, you may want to lean more toward the Partner Community.
We don’t have one correct answer to give you, so make sure that you run things by your Customer Success Manager. Salesforce.com charges extra for an organization that invites others to share information, but the invited organization can accept that invitation for free.
Here are some key questions to ask before establishing any deal registration program:
· How would you describe your deal registration process, from start to finish?
· What do partners get for registered deals? Exclusivity? A rebate? A different tier or status?
· What do you think would increase deal registrations?
· What information do you need when a deal is registered? Balance your quest for knowledge with the partner’s patience in filling out fields.
· What’s your process for approving deal registrations?
· What criteria do you evaluate to determine who officially owns a deal?
· Does this approval process work the same for all partners? For which categories would it be different?
· What metrics matter to you?
Accessing Salesforce Communities as a Partner
You can strengthen your vendor relationship by accessing your vendor’s instance of Salesforce from a web portal and getting first-hand access to leads, accounts, opportunities, and other tabs to manage your deals. You can get leads assigned to you in real time — no waiting forever after a trade show ends to see which leads to pursue. You can also provide your channel managers with real-time updates on the status of deals that you’re trying to bring in. That way, if you need some assistance, your channel manager can view all deal-related activity that occurred up to a certain point and provide you with the appropriate resources to close the deal. In the following sections, we give you a quick overview on accessing and navigating your Partner Community.
As a partner sales rep, you’ll receive an e-mail from your vendor’s Salesforce administrator after he is ready for you to start accessing the Partner Community. The e-mail welcomes you to the Salesforce Community and provides you with everything you need to log in.
In this e-mail, click the appropriate link to log in directly to your Partner Community and change your temporary password. Remember to bookmark the URL for easy access later. After logging in and changing your password, you’re brought to the home page for your Partner Community. Every time you log in to the Partner Community, you begin at your home page. You’ll see that the Partner Community is organized into a series of tabs, similar to the navigation of Amazon.com. Refer to Figure 12-1. The look of your portal may resemble your vendor’s branding or your own.
Viewing and updating your leads
At the top of the Partner Community is the Leads tab, which contains leads that have been assigned to you directly or a general queue. The queue allows channel managers to make leads available to their partners on a first-come-first-serve basis while also avoiding multiple partners working on the same lead: After you claim a lead from the queue, no other partner may claim it.
 Take note to play nicely. The Force.com platform is very customizable, and your vendor could set up rules for how many leads each partner may claim so that a partner with an itchy trigger finger doesn’t take away all the goodies.
The leads available to you are viewable from the Lead Views list and are displayed according to columns set by your vendor. Click any column heading to re-sort your list according to that column’s criteria. Click the same column header a second time to re-sort your list in reverse order.
If you see a record in your list, that’s a lead in a queue that you should claim if you think you’re the right partner to pursue it. You’ll see that the Action column displays Accept for these types of leads.
To claim a lead from a queue, follow these steps:
1. Click the Accept link for that record.
A link to the lead now appears in the Recent Items section in the sidebar. You can click it to review more information about your lead and update the lead status to begin pursuing this suspect.
2. Click Edit to update the lead.
After all, you want to be able to work on all the leads that you claimed so that your channel manager sees some results.
3. Click Save after you update the record.
The Lead page reappears.
Managing your opportunities
When a lead has progressed far enough in the sales process, you convert it into an opportunity. You can manage your existing opportunities and create new ones from the Opportunities tab. To update the deal information on an existing opportunity, following these steps:
1. Click the Opportunities tab at the top of your Partner Community.
2. Select the My Opportunities option from the List View drop-down menu to see a list of opportunities that you own, as shown in Figure 12-2.
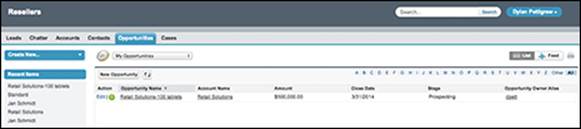
Figure 12-2: Viewing your opportunities.
3. Click the Edit link next to the opportunity that you want to update.
4. Update the fields to reflect the latest developments in the sales deal.
5. When finished, click Save.
You are returned to the List View page.
Setting Up Salesforce Communities for Your Channel Team
Before setting up Salesforce Communities, your Salesforce administrator should meet with a member of the channel sales team to confirm your PRM needs. Discuss the following questions:
· What percentage of your sales force is indirect versus direct?
· What types of partners do you work with?
· Do you message differently to each type of partner?
· What are the objectives, challenges, and participation benefits for each type of partner in your program?
· How are your channel territories broken out?
· How are channel managers tracking partners’ sales and marketing activities today?
· How do channel managers put together their channel forecasts? How long does it take, and how accurate is the information?
Armed with this information, make sure that you set an appointment with your salesforce.com Customer Success Manager for some free advice or a blessing to go forward with using Salesforce Communities. Chances are that if answers to these questions show that your business relies heavily on an indirect sales force, yet your visibility into the channel pipeline is as clear as mud, you probably need Salesforce Communities. Again, the information we give you is meant to prepare you to successfully implement Salesforce Communities. The details of all the cool features that you can activate are more thoroughly discussed on salesforce.com’s success site.
All materials on the site are licensed Creative Commons Attribution-Sharealike 3.0 Unported CC BY-SA 3.0 & GNU Free Documentation License (GFDL)
If you are the copyright holder of any material contained on our site and intend to remove it, please contact our site administrator for approval.
© 2016-2026 All site design rights belong to S.Y.A.